Tag: heroes

  • Heroes Actress Hayden Panettiere Passes Away at 36

    Heroes Actress Hayden Panettiere Passes Away at 36

    Digital Phablet – American actress Hayden Panettiere has passed away at 36, her father announced on Monday.

    The beloved star of the well-known TV series Heroes and Nashville died unexpectedly, with the cause of her death remaining unknown at this time.

    In a statement to the media, her father, Skip Panettiere, expressed, “It is with deep sorrow that we announce the tragic loss of our dear Hayden. She was a shining light—a powerful force of nature who filled everyone’s life with love and happiness, both those who knew her personally and the millions who watched her on screen.”

    The actress also authored a memoir titled This Is Me: A Reckoning where she shared her personal struggles as a child performer, her battles with addiction and abuse, and her journey toward recovery.

    Hayden Panettiere

    Who is Hayden Panettiere?

    Hayden Panettiere is an American actress who began her career at a very young age. According to the BBC, she joined the cast of the American soap opera One Life to Live when she was just four years old.

    She is also known for her role in the science fiction series Heroes, which aired from 2006 to 2010.

    Watch more about Hayden Panettiere

  • Top Dungeon Heroes in HoMM: The Olden Era of Completing and Solving

    Top Dungeon Heroes in HoMM: The Olden Era of Completing and Solving

    The Dungeon faction is considered one of the strongest in Heroes of Might and Magic: Olden Era. Its power varies greatly depending on the hero chosen at the start. Since a hero’s initial skills are locked in from the beginning and cannot be changed, a bad choice on day one can impact your entire game, even in the late stages.

    This ranking lists all 18 Dungeon heroes, split into two classes: nine Warlords (Might) and nine Warlocks (Magic). The ranking considers three main factors: the quality of their starting skills, how well their specializations support the faction’s main strategies, and whether their subclass paths enhance those strengths throughout the game.

    Note: Heroes of Might and Magic: Olden Era is currently in Early Access, so updates could change these rankings.


    How These Tiers Are Decided

    Heroes are grouped into tiers based on their overall usefulness:

    • S-Tier: The top choices that influence every game stage; nearly always the best pick.
    • A-Tier: Strong heroes with clear roles, excellent as main heroes or secondary supports.
    • B-Tier: Useful but slower to become effective or more niche in their strengths.
    • C-Tier: Situational heroes heavily dependent on map conditions, luck, or specific builds.
    • D-Tier: Weaker primary choices; better as late-game secondary heroes in certain modes but not recommended for primary roles in competitive play.

    S-Tier Heroes

    • Motley (Warlock) specializes in Onyx Dancer growth and buffs. She begins with a full army of Dancers, crucial early units, and abilities that suppress enemy ranged units while maximizing her own damage. Her Twilight spell gives her an early edge. Although her Attack stat is zero initially, her army size and scaling make her a top early-game contender.

    • Stinger (Warlord) excels in Heroic Strike damage. Starting without a pre-built army, her poison stacks grow stronger as the game progresses, making her a powerful late-game fighter, especially on larger maps where combat extends into mid and late stages.

    Motley is widely seen as the best Dungeon opener—possibly one of the best Day 1 choices across all factions—due to her fast map clearing and effective early units. Stinger offers a longer-term, scalable damage strategy, with her poison stacking becoming decisive in large battles.


    A-Tier Heroes

    • Zakron the Great (Warlock) specializes in spell damage and defense. His mastery of the Arcane school provides a narrow but powerful spell advantage. His kit is more conditional but can be quite effective with the right build.

    • Kieran (Warlord) uses Troglodytes effectively. His triple Troglodyte army gives early board presence, though his specialization diminishes as the game advances since Troglodytes are not Dancers.

    • Kelarr, Son of Navarr (Warlock) grows stronger over time with a focus on hero attributes. His early weeks are slow, but his stats accelerate on large maps, making him more viable later in the game.

    • Sister Deira (Warlock) has an unremovable upgrade to the Early Start spell, providing a consistent tempo advantage as her spell power scales with hero level, though her reliance on mana limits her in prolonged battles.


    B-Tier Heroes

    • Gleard the Grey (Warlord) is a secondary hero with a focus on Arcane spells, but his effectiveness is more limited due to the narrower spell selection available in Dungeon’s context.

    • Kieran (Warlord) as previously mentioned, offers early units but his specialisation loses relevance as the game progresses.

    • Kelarr, Son of Navarr (Warlock) is a slow starter but improves over time, especially on larger maps, making him more suitable for late-game.

    • Rhea (Warlord) can trigger Lucky Strikes, but RNG reliance makes her inconsistent. She’s more suitable for casual play rather than competitive.

    • Sunny Rauktol (Warlock) specializes in Daylight spells, which are less versatile for Dungeon compared to Nightshade or Arcane schools.

    • Typhona (Warlock) commands Hydras late in the game, but her early army is small, making the first weeks challenging.


    C-Tier Heroes

    • Enatee (Warlord) has late-unit specialization, like Medusae, which come online slowly and make early weeks fragile.

    • Mouaren (Warlord) focuses on Infiltrators, which are weak early units. His specialisation offers limited benefit outside niche scenarios.

    • Rhea (Warlord) relies on luck-based triggers, making her unreliable for consistent results.

    • Sunny Rauktol (Warlock) is a niche caster with limited flexibility in Dungeon.

    • Typhona (Warlock) has powerful units but starts with only Hydras, posing early-game difficulty.


    D-Tier Heroes

    • Glastor (Warlock) can be useful for economic boosts on long maps or resource-spotted games, but lacks combat scaling as a primary hero.

    • Ylwari (Warlock) focuses on Diplomacy and fleeing, valuable in specific scenarios but not suited as a primary hero.

    • Creta, Daughter of Navarr (Warlord) accelerates gem resources, which helps late-game but offers little in direct combat.

    • Enatee (Warlord) and Typhona (Warlock) both have late-unit strengths but are hindered by fragile early weeks.

    • Mouaren (Warlord) mainly supports niche strategies with a weak early army.

    • Rhea (Warlord) is RNG-dependent and unreliable for key battles.

    • Sunny Rauktol (Warlock) focuses on Daylight spells and does not significantly benefit Dungeon strategies.

    • Gleard the Grey (Warlord) reinforces economy but lacks combat power.

    • Kieran (Warlord), while strong early, loses its edge, making him less favorable as a primary hero.

    • Kelarr, Son of Navarr (Warlock) and Ylwari (Warlock) offer marginal benefits that seldom outweigh dedicated combat heroes.

    • Creta (Warlord) provides resource advantages but doesn’t impact combat directly.


    Many heroes are best used as secondary figures. Glastor and Creta excel in resource gathering and early economy but are not optimal as front-line leaders. Motley and Stinger remain top choices for early and late-game strength, respectively, with Motley leading the pack in overall potential.

  • Top Necropolis Heroes in HoMM: The Olden Era of Completing & Solving

    In Heroes of Might and Magic: Olden Era, Necropolis is a faction that grows stronger through stacking advantages. Necromancy turns enemy deaths into reinforcements after each battle, while the Undead Transformer converts neutrals or recruited allies gained through Diplomacy into faction units. The hero you choose impacts which of these systems activates first, how quickly they improve, and how safely you can get through the early, risky parts of the game before the faction’s momentum becomes self-sustaining.

    The faction features 18 heroes divided into two classes—Death Knight (Might) and Necromancer (Magic). All heroes start with Necromancy as a skill; choosing a different second skill is the main way heroes differ.

    Note: Heroes of Might and Magic: Olden Era is currently in Early Access, so details may change with future updates.


    How the Tier List Works

    The rankings consider three main factors: the effect of the hero’s second starting skill on Necropolis’s core mechanics (like Necromancy scaling, army pace, spell control, or economic growth); the hero’s strategic value across the entire game, not just at the start; and access to subclass paths, since heroes with prerequisites can have an advantage in a system with random skill rolls.

    A hero who speeds up Necromancy’s snowball or shores up the faction’s early weaknesses ranks higher than one whose benefits only kick in later or depend on conditions.

    Tier Definitions:

    • S Tier: Heroes with initial skills that directly boost Necropolis’s main engines or provide early combat options the faction needs.
    • A Tier: Heroes who identify strong, reliable strategies suited to specific playstyles or goals.
    • B Tier: Heroes with clear roles and viable paths, but without the immediate, game-changing advantages of higher tiers.
    • C Tier: Heroes with situational or secondary strengths, often less effective as primary choices.

    S-Tier Heroes

    Necropolis city in Heroes of Might and Magic Olden Era

    Hero Class Starting Skill Why They’re Top Tier
    Funerella Necromancer Advanced Necromancy Starts with her Necromancy at a higher tier from Day 1, rapidly accelerating her ability to raise armies and snowball her strength. Her main weakness is early fights, where her advantage isn’t yet realized.
    Kel’Ghul Death Knight Tactics Begins with Dread Knights in his army, units usually impossible to get early without weeks of effort. This allows him to start expanding immediately and handle fights that other heroes can’t.
    Artorius Veritas Death Knight Resistance Has a starting spell, Masterful Berserk, which neutralizes high-initiative enemies early on, giving his melee army a fighting chance against threats that normally would be dangerous for early skeleton squads.

    Funerella is the default choice for most Necropolis builds focused on Necromancy. Her early advantage in reaching higher Necromancy tiers speeds up army growth, giving her a decisive edge as the game progresses. Her vulnerability is early combat, but once the snowball is rolling, she’s very powerful.

    Kel’Ghul’s immediate access to Dread Knights makes him unique. Typically a late-game unit, getting them from Day 1 transforms his early game. His ability to handle early fights well and gain momentum sets him apart.

    Artorius Veritas addresses a critical problem: weak early combat due to lack of ranged units. His starting spell, Masterful Berserk, allows him to neutralize threats efficiently, making his army safer in the initial battles.


    A-Tier Heroes

    Necropolis recruitment screen

    Hero Class Starting Skill Why They’re Valuable
    Mag Necromancer Arcane Magic Turns Necropolis into a spellcasting faction, adding levels to all Arcane spells from the start and locking out opponents from that magic school.
    King-of-Kings Death Knight Diplomacy Focuses on converting neutral units into undead via Diplomacy, creating a high-output economic engine that can surpass Necromancy growth if map conditions are right.
    Marl Death Knight Logistics Uses Web to slow enemies from the start, while Logistics improves map efficiency every day. She’s versatile and reliable for broad strategies.

    While S-tier heroes have early-game dominance, A-tier heroes lead different strategic paths—whether spellcasting, diplomacy-based economy, or map control. The choice of hero often depends on playstyle rather than raw power.


    B-Tier Heroes

    Necropolis army fighting

    Hero Class Starting Skill Why They’re Useful
    Ethric Necromancer Wisdom Starts as a lich specialist with Liches in his opening army — addresses early weakness with ranged AoE.
    Lord Rufus Necromancer Thaumaturgy His Rewind Life skill revives units beyond their original size, fostering late-game stack growth.
    Bulwark Death Knight Defense Has passive damage reduction across his army, making him a durable frontline hero early on.
    Onkos Death Knight Offense Supports Necropolis’s primary scaling unit, Skeletons, directly supporting early army growth.
    Tarius Death Knight Advanced Necromancy Similar Necromancy start as Funerella but with a Might focus, providing a good early boost, just with a lower ceiling.

    B-tier heroes have specific strengths but don’t drastically alter early game or become game-changers on their own.


    C-Tier Heroes

    Levelling up Necropolis hero

    Hero Class Starting Skill Why They’re Less Impactful
    Shadespinner Oona Necromancer Nightshade Magic Useful against certain tough opponents with sleep control, but limited in broad application.
    Milossa the Golden Necromancer Battle Magic Boosts crits and subclass paths, but less influential overall.
    Laura Necromancer Sorcery A DoT-focused hero whose power is situational, not game-changing.
    Adahn Necromancer Recruitment Helps with town growth but doesn’t significantly impact early combat strength.
    Zam Death Knight Battlecraft Provides resource management but minimal combat benefit.
    Guildmaster Klastor Death Knight Luck Aiming for early-unit boosts but limited overall potential.
    Natalida Death Knight Scouting Useful for reconnaissance but less relevant as a primary hero.

    C-tier heroes are helpful in niche situations or secondary roles but don’t offer the direct, game-changing advantages of higher tiers. They may serve well in specific strategies but are typically not primary picks.


    Summary:
    Heroes like Funerella, Kel’Ghul, and Artorius Veritas stand out for their powerful early-game advantages or addressing core faction weaknesses, making them top choices. Other heroes excel in distinct strategic directions or support roles but lack the immediate impact to challenge them at the top.

  • Heroes of Might and Magic: Olden Era – Completing and Solving

    | Spell | School | Justification |
    |——————-|———–|—————————————————————————————————|
    | Healing Water | Daylight | The healing isn’t very strong without high Spellpower, but being able to heal everyone at once is very helpful. |
    | Riposte | Daylight | Better than Masterful Parry at Tier 2. It counters before the attack hits and adds 20% damage at Tier 2, plus more counterattacks per round at Tier 3, and works on multiple enemies at Tier 4. It can’t affect Magic Creatures, which is a small downside. The mass version is especially dangerous. |
    | Arina’s Touch | Daylight | Not as immediate as Arina’s Hymn, but the extra HP adds up over a long fight. At Tier 4, the doubled Initiative can change the turn order for your whole army. |
    | Shorten Shadow | Daylight | A dependable debuff with good scaling. It removes Enlarge Shadow, making it useful against Nightshade’s Tier 1 buffs. Best used on high-Attack units to reduce their immediate damage output. |
    | Inner Light | Daylight | Continuously lowers all negative effect durations, depending on Spellpower, especially at Tier 4. It doesn’t remove effects but shortens them, making debuffs less effective over time. |
    | Taunt | Daylight | A control spell that redirects enemy attacks to a chosen target. Great for protecting ranged units: put a tough front-line unit in front of your shooters and cast Taunt to keep threats away. |
    | Heavenly Blades | Daylight | The offesive Tier 4 option. It deals pure damage that ignores most damage reductions and heals the damage dealt, helping units stay in the fight longer. |
    | Enlarge Shadow | Nightshade| Nightshade’s Tier 1 buff makes it versatile. Its mass version at Tier 4 is similar to a mass Shorten Shadow in fighting power. It’s especially good for Might heroes focused on offense. |
    | Summon Starchild | Nightshade| Unlocking Tier 3 allows the stack to use active abilities, providing more tactical options. With high Spellpower (20+ SP), a single stack can become a big combat force—over 40 units. |
    | Despair | Nightshade| Stackable pure damage per turn that scales with Spellpower and hits neighboring enemies at Tier 4. It’s very effective against living armies, but not effective against Magic Creatures, Undead, or Constructs. Heavy damage against enemies that don’t kill it quickly. |
    | Unnatural Calm | Nightshade| Affordable and early, it becomes a mass debuff at Tier 3, with duration based on Spellpower. It reduces damage from enemies over a long fight, especially when used on frontline melee units. |
    | Twilight | Nightshade| At Tier 1, it disables enemy ranged stacks completely. At Tier 4, it becomes a mass effect that weakens all enemies at once. |
    | Fatal Decay | Nightshade| At high levels, it reduces maximum HP, adding continuous damage. It stays active after the target dies, which is useful against Necromancy-focused enemies. |
    | Wean | Primal | Strong mass dispel that removes all positive effects from a group of units at once. It’s powerful because it comes from Primal rather than a dedicated dispel school, making it a surprise option. |
    | Hksmilla’s Rampage| Primal | A risky but powerful offensive boost. It increases damage received but doubles strike output over five rounds, especially useful for tanky units like Cavaliers, Waurms, or Swordsmen. Best used on units that can handle the extra damage. |
    | Stone Fangs | Primal | An AoE attack that hits multiple targets. On a high-Spellpower hero, it can damage four units for about 100 plus 10 times Spellpower each, making it a good tier-appropriate offensive spell. |
    | Anti-Magic | Primal | A counter-magic spell that can protect a key unit from spells or remove copies, remnants, or duplicates from enemies. Useful in specific matchups but less so generally. |
    | Fireball | Primal | Reliable AoE damage for mid-game. It scales with Spellpower, hits groups of enemies, and doesn’t require setup like Armageddon. Fits well on dedicated Primal mages or mixed builds. |
    | Cave-In | Primal | Creates terrain to control movement, encasing a unit in obstacles, blocking escape, or forcing enemies into certain paths. Adds true tactical depth to combat. |
    | Summon Primal Remnant | Primal | The size of the summon depends on Spellpower, making it very useful for magic-focused heroes. It’s less effective for Might heroes with low Spellpower. |
    | Shackles | Arcane | Allows attacking a unit without counterattacks, providing extra damage each round. Especially useful for protecting fragile ranged units that need to hit dangerous frontline enemies. |
    | Black Hole | Arcane | Deals AoE damage and pulls enemies together. It can cluster foes for follow-up attacks, pull ranged units out of safe spots, or break up defenses. Requires smart play but offers big tactical benefits. |
    | Mirror Copy | Arcane | Gains a second use of powerful abilities, which can turn the tide of battle. The copy usually can’t survive long but often doesn’t need to. Best on factions with transformative units abilities. |
    | Early Start | Arcane | Adds +3 to +6 Initiative, significantly affecting turn order. Useful for glass cannon ranged units to fire before enemies close in. It’s more focused than Haste, which also increases movement and map presence. |
    | Energy Explosion | Arcane | Damage remains unaffected by Spellpower but can reach high levels, especially against factions that gather Focus Charges, like Hive. Less effective if the opponent rarely uses Focus. |

  • Gathering of Heroes Main Quest Walkthrough in Where Winds Meet: Completing and Solving

    Gathering of Heroes Main Quest Walkthrough in Where Winds Meet: Completing and Solving

    The second part of Where Winds Meet starts with the quest called Gathering of Heroes. After arriving in Kaifeng and seeing what the city is really like, the young traveler and their new friend, Big Zhao, try to sneak into the Heroes Assembly.

    If you need help with Where Winds Meet story quests, here’s a detailed guide on how to complete each step of this quest.

    Gathering of Heroes Quest Walkthrough

    Begin by going to Velvet Shade in Kaifeng and talking to Big Zhao. Then, sneak onto the boat heading to the Heroes Assembly. Once on the ship, enter the hall and change into the outfit that Zhao has provided.

    After changing clothes, go into Revelry Hall with Zhao to the third floor, where the Ember of East is located. After a cutscene, you’ll have to fight three waves of enemies, with three enemies in each wave.

    Once that’s done, you’ll be forced to take the poison pill. Afterward, find Big Zhao and listen in on his conversation with the Prefect of Kaifeng. Talk to Zhao again, then head upstairs to the third floor to start investigating the incident.

    In the room where the Ember of East was, examine the ruins to the left of his seat and report what you discover to Zhao. Then, go to where the Ember of East is being kept and leave Revelry Hall.

    Next, travel to the theater on the other side of town and show Master Pu the mask you found. After watching a cutscene, the quest is finished. The following quest, Reunion, will begin once it’s Chen Hour—you can either wait for the time to pass naturally or change the clock to this time to start immediately.

  • Top Heroes in Dungeon Rampage: Completing and Solving Strategies

    Top Heroes in Dungeon Rampage: Completing and Solving Strategies

    There are currently eight hero classes in Dungeon Rampage, each designed for different play styles and with varying levels of strength and skill. When starting out, you’ll try each class, leveling them up and earning gems to recruit more heroes. As you become familiar with each one, you’ll likely want to stick with a favorite hero. Here are some tips to help you decide which hero to buy next based on your skills and preferred gameplay style.

    How to Unlock Heroes in Dungeon Rampage

    You can purchase additional heroes at the Tavern or the Shop on the main screen. Tap the Tavern building to see all available heroes for purchase, or visit the Shop at the bottom of the lobby to browse all items, weapons, and heroes on sale. Hero classes cost Gems, and the price goes up as you unlock more. Some heroes are locked until you have bought the previous ones, but you’ll have the chance to purchase them all eventually. You can earn Gems by leveling up heroes you already own and defeating bosses during dungeon runs. Additionally, daily login rewards provide bonus Gems for logging in every day.

    Dungeon Rampage Hero Tier List

    Although it might seem that only the most powerful heroes are locked until later in the game, this isn’t always the case. The best hero depends on your use, experience with that class, and whether you’re playing solo or with a team. This tier list evaluates each hero based on their individual strength and performance whether alone or in a group.

    Tier Guide
    S Tier Great all-around heroes who are powerful and skilled enough to succeed solo or with random groups.
    A Tier Good heroes with particular strengths, best suited for well-organized teams.
    B Tier Slightly weaker heroes that are generally fine but may struggle during tougher stages or against bosses alone.

    S Tier Heroes

    • Berserker: This hero acts as a tank, wielding a hammer. He can take damage and protect other heroes. Build him with high Power, Fury, and Health stats.
    • Vampire Hunter: A mix between a Berserker and Ranger, quick to attack with her crossbow and capable of setting traps for enemies. Focus on Power, Mana, and Health.
    • Dragon Knight: Fast and powerful with high attack, but less defense. He performs best with support. Maximize Power, Speed, and Health.
    • Ghost Samurai: High attack and speed but low defense. A good backup hero for skilled players. Prioritize Melee Power, Spirit Power, and Max Health.

    A Tier Heroes

    • Sorcerer: Uses lightning magic and scrolls to buff teammates. Boost Power, Mana Regen, and Max Mana.
    • Battle Chef: Has lower attack and Speed but high defense, making him valuable in organized team play. Focus on Cooking, Health, and Mana Regen.
    • Ranger: Near S Tier, needs a tank to be effective in melee. Increase Shooting Power, Shooting Speed, and Max Mana.
    • Dragon Knight: Quick and strong but requires team support. Max out Power, Speed, and Health.
    • Ghost Samurai: High attack and Speed; best with team backup. Focus on Melee Power, Spirit Power, and Max Health.

    B Tier Heroes

    • Pyromancer: Uses fire magic and sets traps, similar to the Vampire Hunter but less fast and weak. Focus on Burning Damage, Regain, and Health. He is best with ample backup, as his damage output is lower.

    This ranking helps you understand which heroes perform best individually or in groups, helping you build a stronger team suited to your style.

  • Every Epic Boon in D&D Forgotten Realms: Heroes of Faerûn – Completing & Solving Ranked

    Every Epic Boon in D&D Forgotten Realms: Heroes of Faerûn – Completing & Solving Ranked

    When your party has finished all the basic Dungeons & Dragons content and is ready for a challenge, consider offering them Epic Boons as rewards. These powerful enhancements are available once characters reach level 19 or higher and can significantly boost their abilities. They serve as some of the strongest character upgrades besides legendary weapons, often earned through completing epic quests or achieving major milestones in a campaign, such as fulfilling a personal storyline. The Forgotten Realms: Heroes of Faerûn supplement introduces even more Epic Boons to explore.

    Tier List Explanation

    Epic Boons are ranked based on their usefulness and versatility at high levels. Only the top-tier boons are considered truly outstanding for gameplay.

    • S-tier boons can be selected without any prerequisites other than reaching the necessary level. These options are the best for any character, regardless of class or build.
    • A-tier boons are more specialized but still very strong. They might require certain conditions or character choices, making them less universally applicable.
    • B-tier boons tend to be more general and less impactful, often offering options readily available through other magic items or spells, making them less desirable.

    S-Tier

    These Epic Boons stand out as the most powerful and flexible options at high levels:

    • Boon of Communication: Grants telepathy with a range of 120 feet and removes disadvantage when influencing hostile creatures. Additionally, understanding all written or spoken languages without spells makes this boon invaluable.
    • Boon of Desperate Resilience: Offers resistance to all damage types except Force while bloodied, greatly increasing survivability.
    • Boon of Fluid Forms: Allows any class to gain the shapeshifting abilities typically exclusive to druids. This boon provides a unique, class-defining power applicable in combat and roleplaying situations alike.

    Though druids won’t benefit much from Fluid Forms, this boon is fantastic for any other class that hasn’t multiclassed into druid and opens up numerous strategic options.

    A-Tier

    These boons are powerful but more situational:

    • Boon of Bountiful Health: Lets you maximize the roll of hit point dice during healing, providing significant sustain.
    • Boon of Exquisite Radiance: Enhances radiant damage output by allowing high damage dice rolls once per long rest, ideal for damage-focused characters.
    • Boon of Furious Storm: Grants resistance to Lightning and Thunder damage, plus immunity when bloodied, with the added ability to hinder opponents through spell resistance.
    • Boon of the Soul Drinker: Provides resistance to Cold and Necrotic damage, with the ability to regain hit points after reducing enemies to zero, usable after every short or long rest.
    • Boon of Bloodshed: Adds extra damage and advantage on the next attack when finishing off bloodied enemies, useful for aggressive combatants.

    These boons are tailored toward specific playstyles or classes but remain effective overall.

    B-Tier

    While still useful, these Epic Boons tend to be less impactful or more easily replaced:

    • Boon of Fortune’s Favor: Allows rerolling a failed saving throw at the start of each turn; useful but redundant with other luck-based features.
    • Boon of Poison Mastery: Boosts poison damage, but many monsters are resistant or immune to poison, limiting its effectiveness.
    • Boon of Revelry: Grants the ability to cast Otto’s Irresistible Dance without spell slots, but many creatures are immune or resistant to charm effects.
    • Boon of Terror: Can make frightened creatures move away, but only if they are already frightened; also, immunity to being frightened is common.
    • Boon of the Bright Sun: Provides temporary hit points and a bright light aura, but these effects are less impactful at high levels when darkness can often be dispelled easily.

    Many of these boons focus on niche or situational effects and are more easily substituted by spells or magic items.


    Choosing the right Epic Boon depends heavily on your character’s class and the campaign. While some boons, such as the Boon of Furious Storm, offer impressive immunity or damage boosts, others may be less compelling given the availability of comparable magic items or spells. Assess your party’s needs and what would complement your playstyle when selecting these high-level rewards.

  • Complete List of Origin Feats in D&D Forgotten Realms: Heroes of Faerûn, Ranked

    Complete List of Origin Feats in D&D Forgotten Realms: Heroes of Faerûn, Ranked

    Forgotten Realms: Heroes of Faerun adds several new origin feats for players to select in their Dungeons & Dragons games. Origin feats are granted at the start of your character’s adventure and give a small boost that makes sense based on their background and origin before they become an adventurer.

    These feats don’t increase ability scores like typical feats but offer various benefits to help your character explore Faerun and the wider Forgotten Realms. Heroes of Faerun introduces even more origin feat options, which we rank to highlight the most useful choices.

    Each origin feat is assigned to a tier based on how practical it is. This depends on whether the feat can stand alone, if it requires pairing with a specific class, or if it’s worth considering at all.

    S-Tier origin feats are the best options; they function well without prerequisites and are overall very useful.

    A-Tier feats are good but require some effort to maximize. They may have strengths but also some drawbacks.

    B-Tier feats are mediocre and usually not worth investing in unless in a particular situation; better options are often available.

    S-Tier

    These are excellent options regardless of your character or background. They work well with any build and provide strong starting benefits.

    • Purple Dragon Rook: If you select this feat and don’t already have proficiency in Insight or Persuasion, gaining it is a big plus. Plus, you get a free Heroic Inspiration after each initiative roll, which can give your party a free reroll during combat depending on your proficiency bonus.

    • Tyro of the Gauntlet: The ready action is often overlooked. With this feat, even without a trigger, attacks against you have disadvantage, and you can prevent an ally within 5 feet from being pushed or pulled. This can be lifesaving, and there are no negative aspects to this feat.

    A-Tier

    While these feats are generally good, they work better in certain scenarios. Some have minor unnecessary features but are still worthwhile overall.

    • Emerald Enclave Fledgling: Speaking with animals is useful but can be achieved through other means. However, the ability to switch places with an ally using the Help action — without provoking opportunity attacks — is very valuable. This movement ability is limited to an ally within 5 feet and only activated when needed most.

    • Lord’s Alliance Agency: Gifting Heroic Inspiration to an ally within 30 feet is helpful, but you only do so if you land a critical hit, which can be a drawback. Additionally, you gain advantage against an enemy if they have dealt damage to an ally within 5 feet, which is easier to trigger and is especially useful for melee characters.

    • Zhentarim Ruffian: The ability to roll damage twice and pick the better result is powerful, particularly during opportunity attacks. Giving allies advantage on initiative rolls is also nice but requires Heroic Inspiration, and the prerequisites make this feat slightly less accessible.

    B-Tier

    These feats are modest and are generally less useful than other options in Faerun. They have some niche application but often are outperformed by better feats.

    • Cult of the Dragon Initiate: Learning Draconic or another language is convenient but easily replaced. The ability to use a magic action to potentially frighten an enemy lasts only until the end of your next turn, and if the target succeeds on a saving throw, they are immune for 24 hours. Gaining Heroic Inspiration is a nice perk, but the feat itself isn’t particularly compelling.

    • Harper Agent: Knowing Thieves’ Cant is interesting but redundant if your party already has a rogue. Instrument proficiency can be obtained elsewhere. The ability to use the Help action from up to 30 feet away, as opposed to 5 feet, is useful but not a huge advantage since it’s a common feature available at shorter ranges.

    These rankings help players decide which origin feats best suit their characters, enabling more strategic choices when creating their adventurers in the Forgotten Realms.

  • Top Stadium Heroes for Completing Every Role in Overwatch 2

    Top Stadium Heroes for Completing Every Role in Overwatch 2

    In Overwatch 2’s Stadium mode, heroes are played in a more intense way, where every build and choice can change the outcome. Building the right team with tanks that can hold the line, damage dealers who can wipe out enemies quickly, and supports that keep everyone alive becomes even more important.

    We base our recommendations on how often heroes are picked and our own experience. Think of it as a way to get better without having to find out everything the hard way.

    How Our Stadium Tiers Work

    Stadium mode depends on hero setups that focus on earning money, scaling abilities, and staying alive. The heroes are ranked into tiers:

    • S Tier: Heroes who dominate almost every match.
    • A Tier: Strong heroes with reliable performance but not quite as dominant.
    • B Tier: Situational heroes; require careful play.
    • C Tier: Underperforming heroes in this mode; often outshined by others.

    S Tier Stadium Heroes

    Heroes in S Tier are known for their strong offense, versatility, or survivability. They are dependable picks no matter the situation.

    • Sigma: A very flexible tank with powerful skills that help both attack and defense.
    • Cassidy: High damage output, capable of quickly taking out enemy tanks.
    • Soldier: Excellent in tracking-based aim builds, very powerful here.
    • Moira: Great survivability combined with damage, life steal, and high money generation.
    • Reinhardt: His charge is both fun and effective; his shield lasts longer than most.
    • Juno: Maxing out her torpedoes and ability power makes her a big threat.
    • Kiriko: A fun healer with ninja damage builds; her teleportation ability is highly useful.
    Hero Role Why They’re Here
    Sigma Tank Very flexible with strong abilities for offense and defense.
    Cassidy Damage Can quickly eliminate main targets.
    Soldier Damage Tracking builds make him very consistent.
    Moira Support Survives well and deals damage while generating income.
    Reinhardt Tank His shield and charge help control the fight.
    Juno Support Her torpedoes and abilities make her dangerous in battles.
    Kiriko Support Versatile healing and teleportation boost her value for offense and defense.

    A Tier Stadium Heroes

    Heroes in A Tier are still solid, but they might need specific setups or favorable matchups to shine.

    • Genji: Very mobile, dangerous with weapon power and melee builds.
    • Zarya: Flexible and reliable in many matchups.
    • Mercy: A dependable healer to keep teammates alive.
    • Pharah: High damage and aerial control, but vulnerable to counters.
    • Brigitte: Strong tank or support with multiple build options.
    • Reaper: High kill potential with teleport and special attacks.
    • Ana: Good in niche scenarios but less consistent overall.
    • Winston: Struggles a bit here due to lower damage and scaling.
    Hero Role Why They’re Here
    Junker Queen Tank High-impact hero with pull abilities and anti-heal tools.
    Genji Damage Highly mobile with weapon and melee power.
    Mei Damage Niche hero; powerful in specific situations.
    Mercy Support Reliable for consistent healing.
    Pharah Damage Strong in aerial positions; vulnerable to certain counters.
    Brigitte Support Can build into a tough tank or a solid healer.
    Zarya Tank Very adaptable and dependable across matches.
    Reaper Damage Excels at multiple kills, teleporting, and using Death Blossom repeatedly.

    B Tier Stadium Heroes

    Heroes here work but are often overshadowed or need perfect conditions.

    • Ana: Can be useful but easily countered.
    • Winston: Low damage output and scaling make him less effective.
    • D.Va: Lacks the durability and damage compared to others.
    • Orisa: Less impactful in this mode.
    • Zenyatta: Power split across weapons and abilities makes cohesive setup harder.
    • Lucio: Can be overwhelmed by hero damage output.
    Hero Role Why They’re Here
    Ana Support Limited by counters and weaker healing compared to others.
    Winston Tank Struggles due to poor scaling and damage.
    D.Va Tank Less effective for survivability and damage.
    Orisa Tank Less impactful than other tanks here.
    Lucio Support Easily overwhelmed by damage-heavy heroes.
    Junkrat Damage Good at spam and area denial but easily countered.
    Zenyatta Support Distributes power among skills, making cohesive builds difficult.

    C Tier Stadium Heroes

    Heroes in this tier often fail to make an impact.

    • Ashe: Slow mobility and easily countered damage builds.
    • D.Va: Lack of survivability and damage.
    • Orisa: Less threatening and impactful.
    • Winston: Poor scaling and damage output.
    • Ana: Weaker healing in this mode.
    • Lucio: Not enough survivability.
    • Junkrat: Situational, easily shut down.
    • Zenyatta: Difficult to use effectively here.
    Hero Role Why They’re Here
    Ashe Damage Low mobility; damage builds are easily countered.
    D.Va Tank Lacks durability and damage to compete.
    Orisa Tank Less effective than other tanks.
    Winston Tank Scaling and damage issues limit effectiveness.
    Ana Support Weaker healing compared to better options.
    Winston Tank Lacks the damage to stand out.
    Junkrat Damage Easy to counter; less consistent performance.
    Zenyatta Support Cohesive use is hard, and output is limited.

    Who To Pick for Each Role: Tank, Damage, and Support

    In Stadium mode, the best tanks are Sigma and Reinhardt. Sigma’s versatility and strong abilities help in many situations, while Reinhardt’s shield and charge make him perfect for space control and protecting teammates.

    For damage, Cassidy and Soldier shine. Cassidy can quickly eliminate key targets, and Soldier’s tracking skills make him reliable.

    On the support side, Moira, Juno, and Kiriko are top choices. Moira offers healing combined with survivability and damage, while Kiriko’s healing and teleportation make her valuable for both attack and defense. Juno’s torpedoes and ability power let her excel when played aggressively.

  • Top Beginner-Friendly Heroes in Warriors: Abyss

    Top Beginner-Friendly Heroes in Warriors: Abyss

    Warriors: Abyss is an action-packed roguelike that captures the essence of games like Hades and Vampire Survivors. It features thrilling boss battles, rewarding gameplay, and a surprisingly intricate system that will keep you engaged as you explore various Heroes. With a whopping 100 Heroes to choose from, there’s plenty to keep you entertained.

    If the idea of 100 Heroes feels overwhelming, don’t worry! Many characters are beginner-friendly, making it easy to jump in and start learning. These characters will help you master the basics of combat while providing enough variety for different builds, encouraging experimentation as you improve your skills.

    The Best Beginner Heroes to Try

    When selecting the best beginner-friendly Heroes in Warriors: Abyss, it’s essential to consider that some characters come with unique actions and complex moves that might overwhelm new players, especially during intense moments of battle.

    For instance, certain Heroes deal more damage after performing a Charge Attack by rotating the analog stick. While this is an exciting mechanic, it might not be suitable for those new to this genre, especially when facing waves of foes in an arena setting.

    Additionally, some Heroes require Karma Embers to be accessed via the Hall of Bonded Souls. Therefore, this guide will be divided into two sections: one covering Heroes available at the start and another highlighting the beginner-friendly options you should focus on unlocking first!

    All Heroes can become formidable in the late game, though some may require adherence to specific builds, which can be more challenging if luck is not on your side. Still, if you find a Hero that resonates with you, don’t hesitate to stick with them!

    Top Beginner-Friendly Starter Heroes

    Starter Heroes in Warriors: Abyss are fantastic for easing you into the game. They not only allow you to gather Karma Embers and unlock additional Heroes but also teach you essential systems and mechanics.

    Just because they are labeled as Starter Heroes doesn’t mean they lack strength. Many of them can stand as powerhouses in late-game scenarios, so if you enjoy a specific character, you’re free to keep using them throughout your journey.

    Kunoichi

    Kunoichi stands out as one of the best choices for beginners, capable of delivering significant damage and primarily relying on Speed to succeed. Additional stats will only enhance her abilities.

    Working alongside Allied Heroes who have Speed Emblems will be beneficial, allowing her to branch into Skill and elemental Emblems like Flame or Slay for increased damage. The more Speed she accumulates, the higher her Attack will rise, making her especially potent in the early zones.

    Cao Cao

    Cao Cao operates a bit differently, as he thrives when paired with Allied Heroes who carry the Wei Emblem, like Xiahou Dun and Yue Jin. Each Allied Hero with this Emblem boosts his Attack by 5%, which is a nice perk.

    Although he excels with Wisdom, Charm, and Ice Emblems, they aren’t strictly necessary as long as he has enough Allies sporting Wei Emblems. He’s a solid pick capable of inflicting substantial damage with straightforward combos.

    Xiahou Dun

    Xiahou Dun is another excellent beginner Hero, sharing similar traits with Cao Cao, making it important that he has several Wei Emblem Heroes in his Formation for maximum benefit.

    His primary focus will be Vigor and Slay Emblems, allowing for impressive damage output if you can get started on them early. Combining these with Attack boosts from Allied Heroes can create a powerful force.

    Kenshin Uesugi

    Kenshin Uesugi shines by enhancing the Summoning Skills of his Allies, granting them an extra 20% Attack and amplifying his own Vigor Emblems by 50%.

    Focusing on Vigor, Skill, and Bolt Emblems will allow you to execute more Attack Strings and utilize all six Allied Heroes in your Formation. If you want to be hands-on with your gameplay, Kenshin is a fantastic choice.

    Guan Yu

    Rounding out our top-tier Starter Heroes is Guan Yu, who possesses high Defense, making him tough to eliminate with an optimal build. For every Allied Hero equipped with the Brave General Emblem, he gains 5% additional Attack, which can ramp up tremendously.

    Emphasizing Vigor, Strength, and Flame Emblems will enhance Guan Yu’s combat capabilities. While he may lack the speed of other Heroes, his potential makes him incredibly fun to play and nearly unstoppable under the right circumstances.

    Best Unlockable Beginner-Friendly Heroes

    Once you’re familiar with some Starter Heroes, you’ll want to unlock more through Karma Embers. Pay attention to synergies and aim for Heroes with similar unique Emblems to enhance your team composition.

    Here are some of the best Heroes for beginners that you can unlock with Karma Embers, offering engaging Attack Strings and decent build variety while remaining easy to use.

    Nene

    Nene is akin to Kunoichi in playstyle, focusing on building Speed Emblems quickly, while also passively developing Defense through Allies with the Toyotomi Emblem.

    At only 300 Karma Embers, she’s a budget-friendly option for beginners. Speed and Bolt should be her primary focus, but she can perform well with other Element Emblems, provided she secures her Speed first.

    No

    No brings unique and dynamic gameplay that feels more involved than other Heroes. Her Hero Trait allows her to charge her Musou Gauge by 10% for every Hero with an Oda Emblem in your team composition, which can be hugely advantageous.

    With a focus on Charm and Slay Emblems, No can mix in Speed and Skill Emblems for added versatility. Once her ideal build is established, she emerges as one of the strongest picks, although she does require a more substantial investment of 1000 Karma Embers.

    Yue Jin

    For those in search of a hyper-aggressive Hero, Yue Jin is a top pick, gaining 10% more Attack Speed for 15 seconds after every 1000th hit. Combining Skill and Speed Emblems with any Element-based Emblems can significantly ramp up his damage output.

    He’s only priced at 500 Karma Embers, making him one of the most enticing early options available.

    Renmaru Mori

    Renmaru Mori offers an enjoyable and straightforward playstyle. Her true potential shines when combined with Nobunaga Oda in your Formation, which isn’t possible until later stages, but she’s still formidable regardless.

    She has an Ice Emblem that provides flexibility in pairing. A combination of Skill and Speed is recommended to maximize her utility, and at just 100 Karma Embers, she’s an excellent choice for newcomers.

    Zhou Tai

    Finally, Zhou Tai utilizes the Slay Emblem to generate one-hit kills, temporarily enhancing his Speed for a burst of aggression.

    He can focus on both Skill and Slay Emblems along with one additional emblem, such as Vigor, making him a very balanced character. With the ability to rack up one-hit kills as you advance your Slay Emblem, he makes for an ideal pick at just 500 Karma Embers.

    Overall, no matter your choice of Hero, Warriors: Abyss offers a diverse and rewarding experience that can cater to both new and experienced players.

  • Which Hero Class Is Right for You in Hammerwatch II?

    Which Hero Class Is Right for You in Hammerwatch II?

    In Heroes of Hammerwatch 2, players can choose from seven distinct classes, each offering unique playstyles, builds, and customization options. At the game’s outset, you can select from four classes: Warrior, Wizard, Paladin, and Ranger. The additional three classes—Rogue, Warlock, and Sorcerer—must be unlocked through gameplay.

    The Guild Title system provides permanent stat improvements for all your characters based on their level, making it beneficial to level up at least one character from each class. If you’re looking to choose a main character, you’re in the right place. Below, we’ll explore each of the seven classes, highlighting their starting skills, mastery options, and play styles.

    Warrior

    The Warrior is a melee-centric brawler with significant health and physical damage capabilities. Proficient in various strength-based weapons, this class allows for a broad range of playstyles. The Warrior excels at getting up close to enemies, dealing damage, and absorbing hits.

    Starting Skills:

    • Whirling Axes: Hurl two axes that cause physical damage to enemies in their path.
    • War Cry: Boosts Weapon Speed and Movement Speed for you and allies within range.
    • Warrior’s Constitution: Enhances your health and poisons resistance.
    • Killing Spree: Gain stacking damage boosts for every enemy you defeat; all stacks vanish when the effect ends.

    The Warrior’s three Class Masteries are Berserker, Primalist, and Tyrant.

    Wizard

    The Wizard is a ranged spellcaster known for its diverse elemental attacks and decent survivability due to the ability to generate barriers. With options to specialize in Fire, Lightning, or Ice damage through specific staves and wands, the Wizard offers plenty of build customization.

    Starting Skills:

    • Magic Missiles: Launch several missiles that home in on enemies.
    • Fireball: Send out a fireball that detonates, causing Fire damage.
    • Arcane Intellect: Increases Mana and Intelligence.
    • Barrier: Generates a protective barrier over time that reduces damage taken from the next attack.

    The Wizard’s Class Mastery options include Conjuration, Transmutation, and Evocation.

    Paladin

    The Paladin is a melee fighter that emphasizes defense. With skills like Lay on Hands, the Paladin can heal both itself and nearby allies, offering the only dedicated AoE healing capability in the game. This makes the Paladin a strong character choice for beginners due to its survival aspect, whether playing solo or in multiplayer.

    Starting Skills:

    • Blessed Strike: Inflicts physical damage in a circular area.
    • Lay on Hands: Heals you and your nearby allies.
    • Armored Knight: Boosts Armor and block chance.
    • Conviction: When using melee attacks, it has a chance to restore Mana.

    The Paladin’s Class Masteries are Divine, Justice, and Radiance.

    Ranger

    As a ranged specialist, the Ranger excels at engaging enemies from a distance. Capable of kiting foes while dealing damage, the Ranger is ideal for players who enjoy a mobile combat style.

    Starting Skills:

    • Marked Shot: Fire an arrow that deals physical damage and marks enemies, increasing damage from your attacks on them.
    • Trap: Deploy a trap that damages and slows enemies that activate it.
    • Rhythm: Enhances Weapon Crit Chance; critical hits accumulate stacks that further boost crit chances and damage.
    • Survivalist: Provides a damage reduction buff when you take hits.

    The Ranger’s Class Masteries are Beastmaster, Warden, and Marksman.

    Rogue

    The Rogue is a fast-paced melee attacker capable of dashing in and out of close-range combat. With both melee strikes and ranged knife throws, the Rogue suits players who enjoy quick, aggressive gameplay.

    Starting Skills:

    • Fan of Knives: Release several knives that cause physical damage.
    • Flurry of Blades: Launch melee attacks against surrounding enemies.
    • Slice and Dice: Attacks build stacks that increase Weapon Speed temporarily.
    • Sidestep: Grants evasion and a chance for guaranteed evasion after cooldown.

    The Rogue’s Class Masteries are Poison, Demolitions, and Blades.

    Warlock

    The Warlock blends spellcasting and melee combat. With abilities like Drain Essence for sustainability and Aura of Atrophy for enhanced survivability, they are versatile in offensive and defensive capabilities.

    Starting Skills:

    • Demon’s Tail: Inflicts physical damage along a line while slowing foes.
    • Dark Ritual: Channel a damaging ritual that hits enemies in the area with a follow-up strike once completed.
    • Drain Essence: Inflicts damage while stacking Essence for increased health and mana.
    • Aura of Atrophy: Reduces damage taken from nearby enemies.

    The Warlock’s Class Mastery choices are Summoning, Souls, and Chaos.

    Sorcerer

    Similar to the Wizard, the Sorcerer is heavily reliant on high damage output with little in the way of defensive skills, making it a glass cannon character. It favors a high-risk, high-reward strategy for players eager to obliterate enemies quickly.

    Starting Skills:

    • Discharge: Release a cone of lightning that strikes enemies.
    • Elemental Orb: Deploy a slow-moving orb that deals continuous elemental damage.
    • Innate Power: Enhances spell critical strike chance.
    • Elemental Affinity: Grants increased damage for a chosen elemental type based on the last spell cast.

    The Sorcerer’s Class Mastery options include Lightning, Fire, and Ice.

    Ultimately, each class brings something unique to the table, allowing players to tailor their experience based on their preferred style of play. Whether you prefer frontline combat, spellcasting, or ranged attacks, there’s a fitting option in Heroes of Hammerwatch 2.

  • Essential Tips for New Players of Heroes of Hammerwatch 2

    Essential Tips for New Players of Heroes of Hammerwatch 2

    Heroes of Hammerwatch 2 is an action RPG with roguelike elements that lets you choose from seven unique classes. Your adventure involves discovering new gear, gathering resources, advancing your character, and upgrading your town. Although it’s classified as a roguelike, there are many permanent progression features, which means that each character’s journey strengthens your overall capabilities for future runs.

    Heroes of Hammerwatch 2 has a lot to offer beneath the surface, so getting accustomed to its mechanics can be a bit challenging. Thankfully, here’s a selection of handy tips to help you start your adventure.

    Experiment With Each Class

    In Heroes of Hammerwatch 2, you can select from seven classes. The first four classes – Paladin, Warrior, Wizard, and Ranger – are available from the start, while the remaining three – Rogue, Warlock, and Sorcerer – can be unlocked as you progress through your runs.

    Each class brings a distinct style of play, so it’s a smart move to create characters for each class and give them a test run. Since your town’s progression is shared across all characters, resources you gather with one character will benefit others. This means trying out every class will only enhance your gameplay experience without any downside.

    Level Up All Your Classes

    As you gain levels, every class provides permanent bonuses to your other characters. Therefore, it’s crucial to invest in leveling each class not just for the immediate benefits, but to enhance your main character too.

    Here’s a summary of the bonuses each class offers:

    Class Stat Bonus
    Paladin +3 Armor per level
    Warrior +3 Health per level
    Wizard +3 Spell Power per level
    Ranger +3 Attack Power per level
    Rogue +0.75% reduced trap damage per level
    Warlock +3 Resistance per level
    Sorcerer +0.1 Mana Regen per level

    Try Different Weapons

    Once you’ve settled on a class, it’s time to explore various weapon combinations. Each class has a selection of weapons that influence their skills. For example, two-handed weapons like staves or shortbows offer two skills, while one-handed weapons typically provide one.

    Feel free to mix and match your weapon choices to find what complements your gameplay style. You might discover that certain combinations, like a fire wand with fire-enhancing gear, can lead to devastating tactics.

    Prioritize Important Buildings

    Upgrading your town is essential, starting with the Guild Hall, which unlocks additional buildings for construction. Certain upgrades yield significant benefits, so it’s best to focus on them first.

    Key upgrades to pursue early include the Hunters Cabin, which causes enemies in the Forest to drop materials convertible into gold, and the Chapel, which lowers the resurrection cost. These upgrades significantly enhance your resource-gathering and enable further town advancements.

    Enhance Your Potions

    During your runs, potions are crucial for survival, as they restore both health and mana. The only exception is the Paladin, who can heal using their ability called Lay on Hands. However, it remains vital to bolster your potion supply and their effectiveness for all characters, as this can be the difference between success and failure during challenging encounters.

    Explore Side Paths

    Maps often have main routes that are easy to follow, but relying solely on them can limit your strength. Valuable resources, gold, skill gems, and events are usually found off the beaten path. For better chances of success, take the time to explore every corner of the map.

    Activate the Minimap

    To aid in your exploration, consider turning on the minimap, which is disabled by default. You can find this option in the game settings under the ‘Game’ tab. By enabling it, you gain a helpful tool for navigating, allowing you to see your surroundings more effectively.

    Utilize Shortcuts

    As you progress, various shortcuts will become accessible, allowing you to skip to later stages of the game with some resource compensation. The first shortcut unlocks after defeating the initial boss, making it easier to reach new areas.

    Keep in mind that shortcuts are tied to the character that unlocked them. If you want another character to access these shortcuts, you’ll have to complete the same objectives again.

    These strategies aim to give you an edge in Heroes of Hammerwatch 2 and help you make the most of your adventures!

  • 7 Most Comforting Heroes to Play in Marvel Rivals

    7 Most Comforting Heroes to Play in Marvel Rivals

    One of the most enjoyable aspects of a game like Marvel Rivals is that it caters to all kinds of gamers, even though it falls into the FPS category. Whether you’re someone who thrives on the excitement of speedy characters or someone who prefers a more laid-back role while supporting the team, there’s a spot for you here.

    If you’re just getting started, it’s wise to pick some beginner-friendly characters to help you learn the game mechanics. Fortunately, there are plenty of options!

    7
    Scarlet Witch

    Difficulty Rating: One Star

    If you’re new to first-person shooters, a challenging aspect is getting used to stabilizing your aim. Luckily, Scarlet Witch can help you out; she has the ability to drain enemy health without needing to be precise with your crosshair.

    She comes equipped with two stacks of the Mystic Protection skill, allowing her to become invisible and avoid damage for a short time, making her a great choice when venturing deep into enemy lines. Overall, she’s a terrific pick for beginners wanting to try out Duelist roles.

    6
    Hela

    Difficulty Rating: Three Stars

    Marvel Rivals Hela character description screen.

    Hela is among the most powerful characters at launch and is also easy to pick up and understand. Her primary damage comes from her basic attack, which is a straightforward hit scan with eight bullets; if you aim for the head, you can eliminate enemy squishy characters with just two shots.

    Additionally, Hela can enter an invulnerable state, giving her a chance to escape when under attack, while also having the ability to stun foes. She’s a strong choice if you aim to progress quickly while having an easier time in matches.

    5
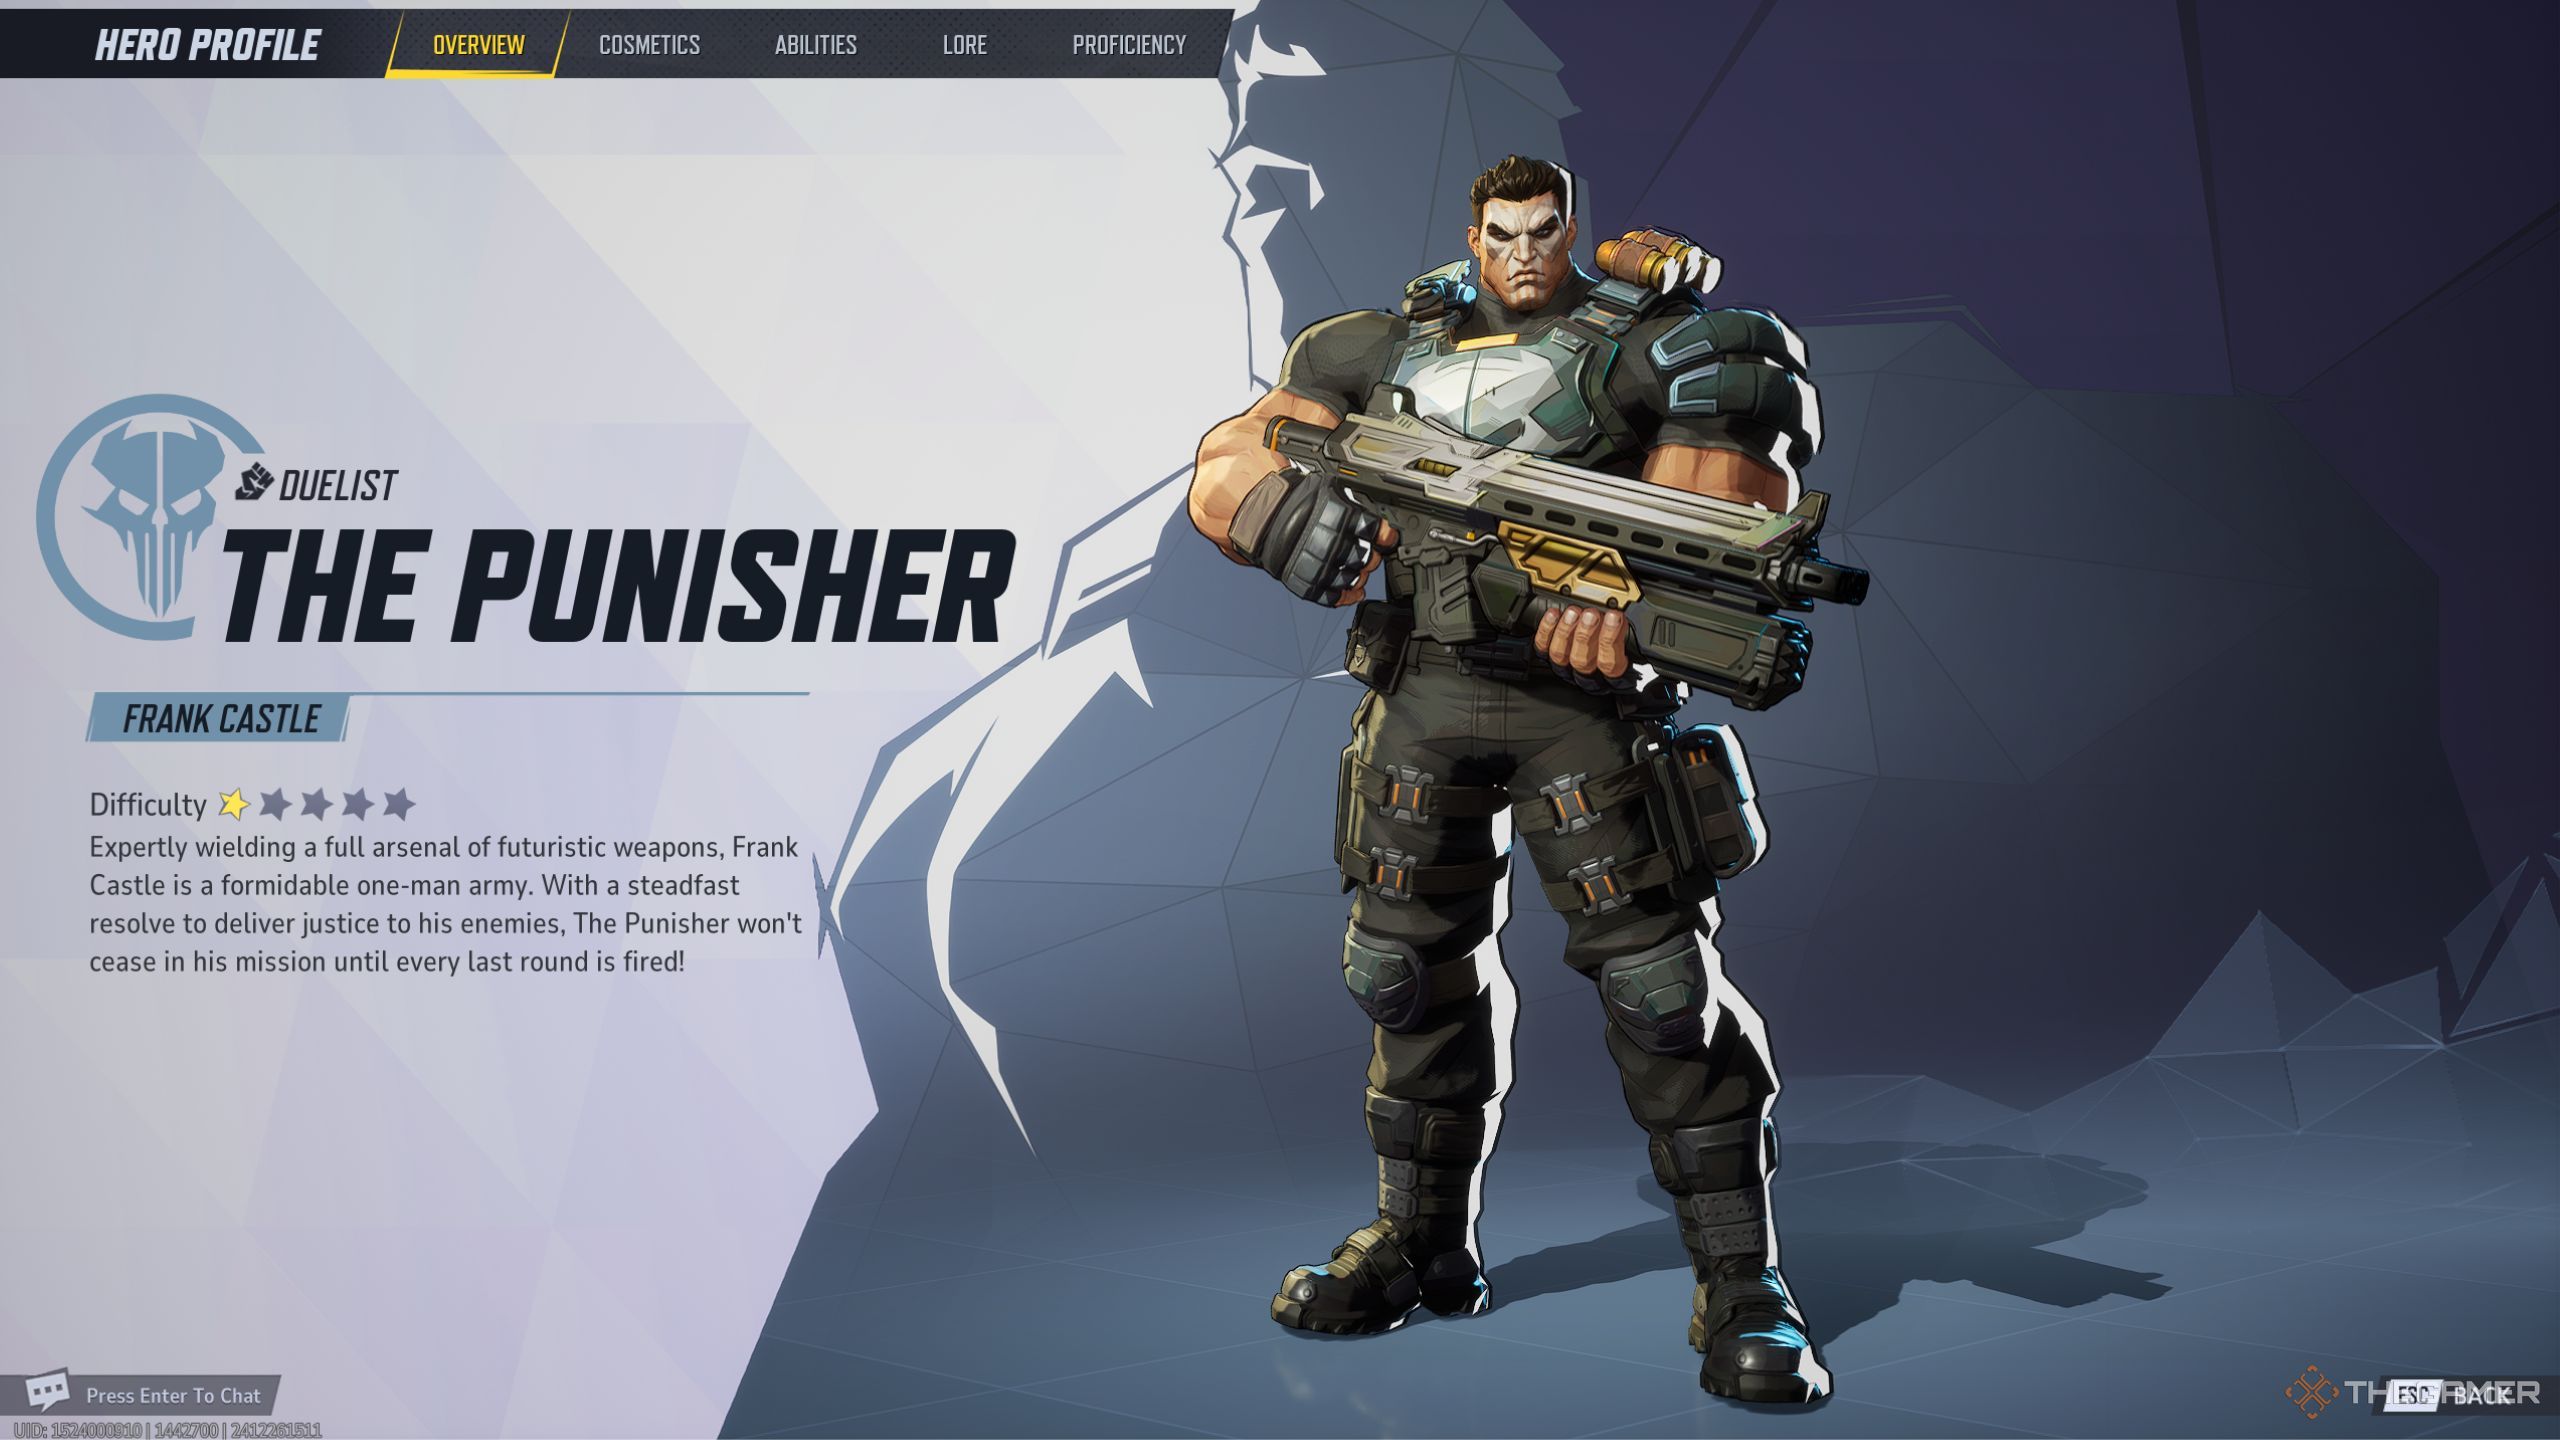
    The Punisher

    Difficulty Rating: One Star

    Marvel Rivals The Punisher character description screen.

    Beginning your journey in Marvel Rivals is easiest with The Punisher. He wields various firearms for both close- and long-range encounters, and has a zipline that helps you navigate quickly, which is invaluable for dodging pursuers.

    While there is a slight skill element with him because finding good turret placements is essential, once you do, you can effectively suppress enemies and control areas with constant fire.

    4
    Jeff The Land Shark

    Difficulty Rating: One Star

    Marvel Rivals Jeff The Land Shark character description screen.

    We can’t overlook the charm of Jeff, one of the cutest characters you can choose. His adorable movements make enemies think twice before attacking him. Additionally, he serves as a straightforward support character, as his basic attack releases a wave of water that heals allies who come in contact with it.

    While Jeff can use his secondary fire against foes, his ultimate ability is the highlight. Once activated, he can swallow all enemies and allies in a designated area, creating some hilarious moments during gameplay.

    3
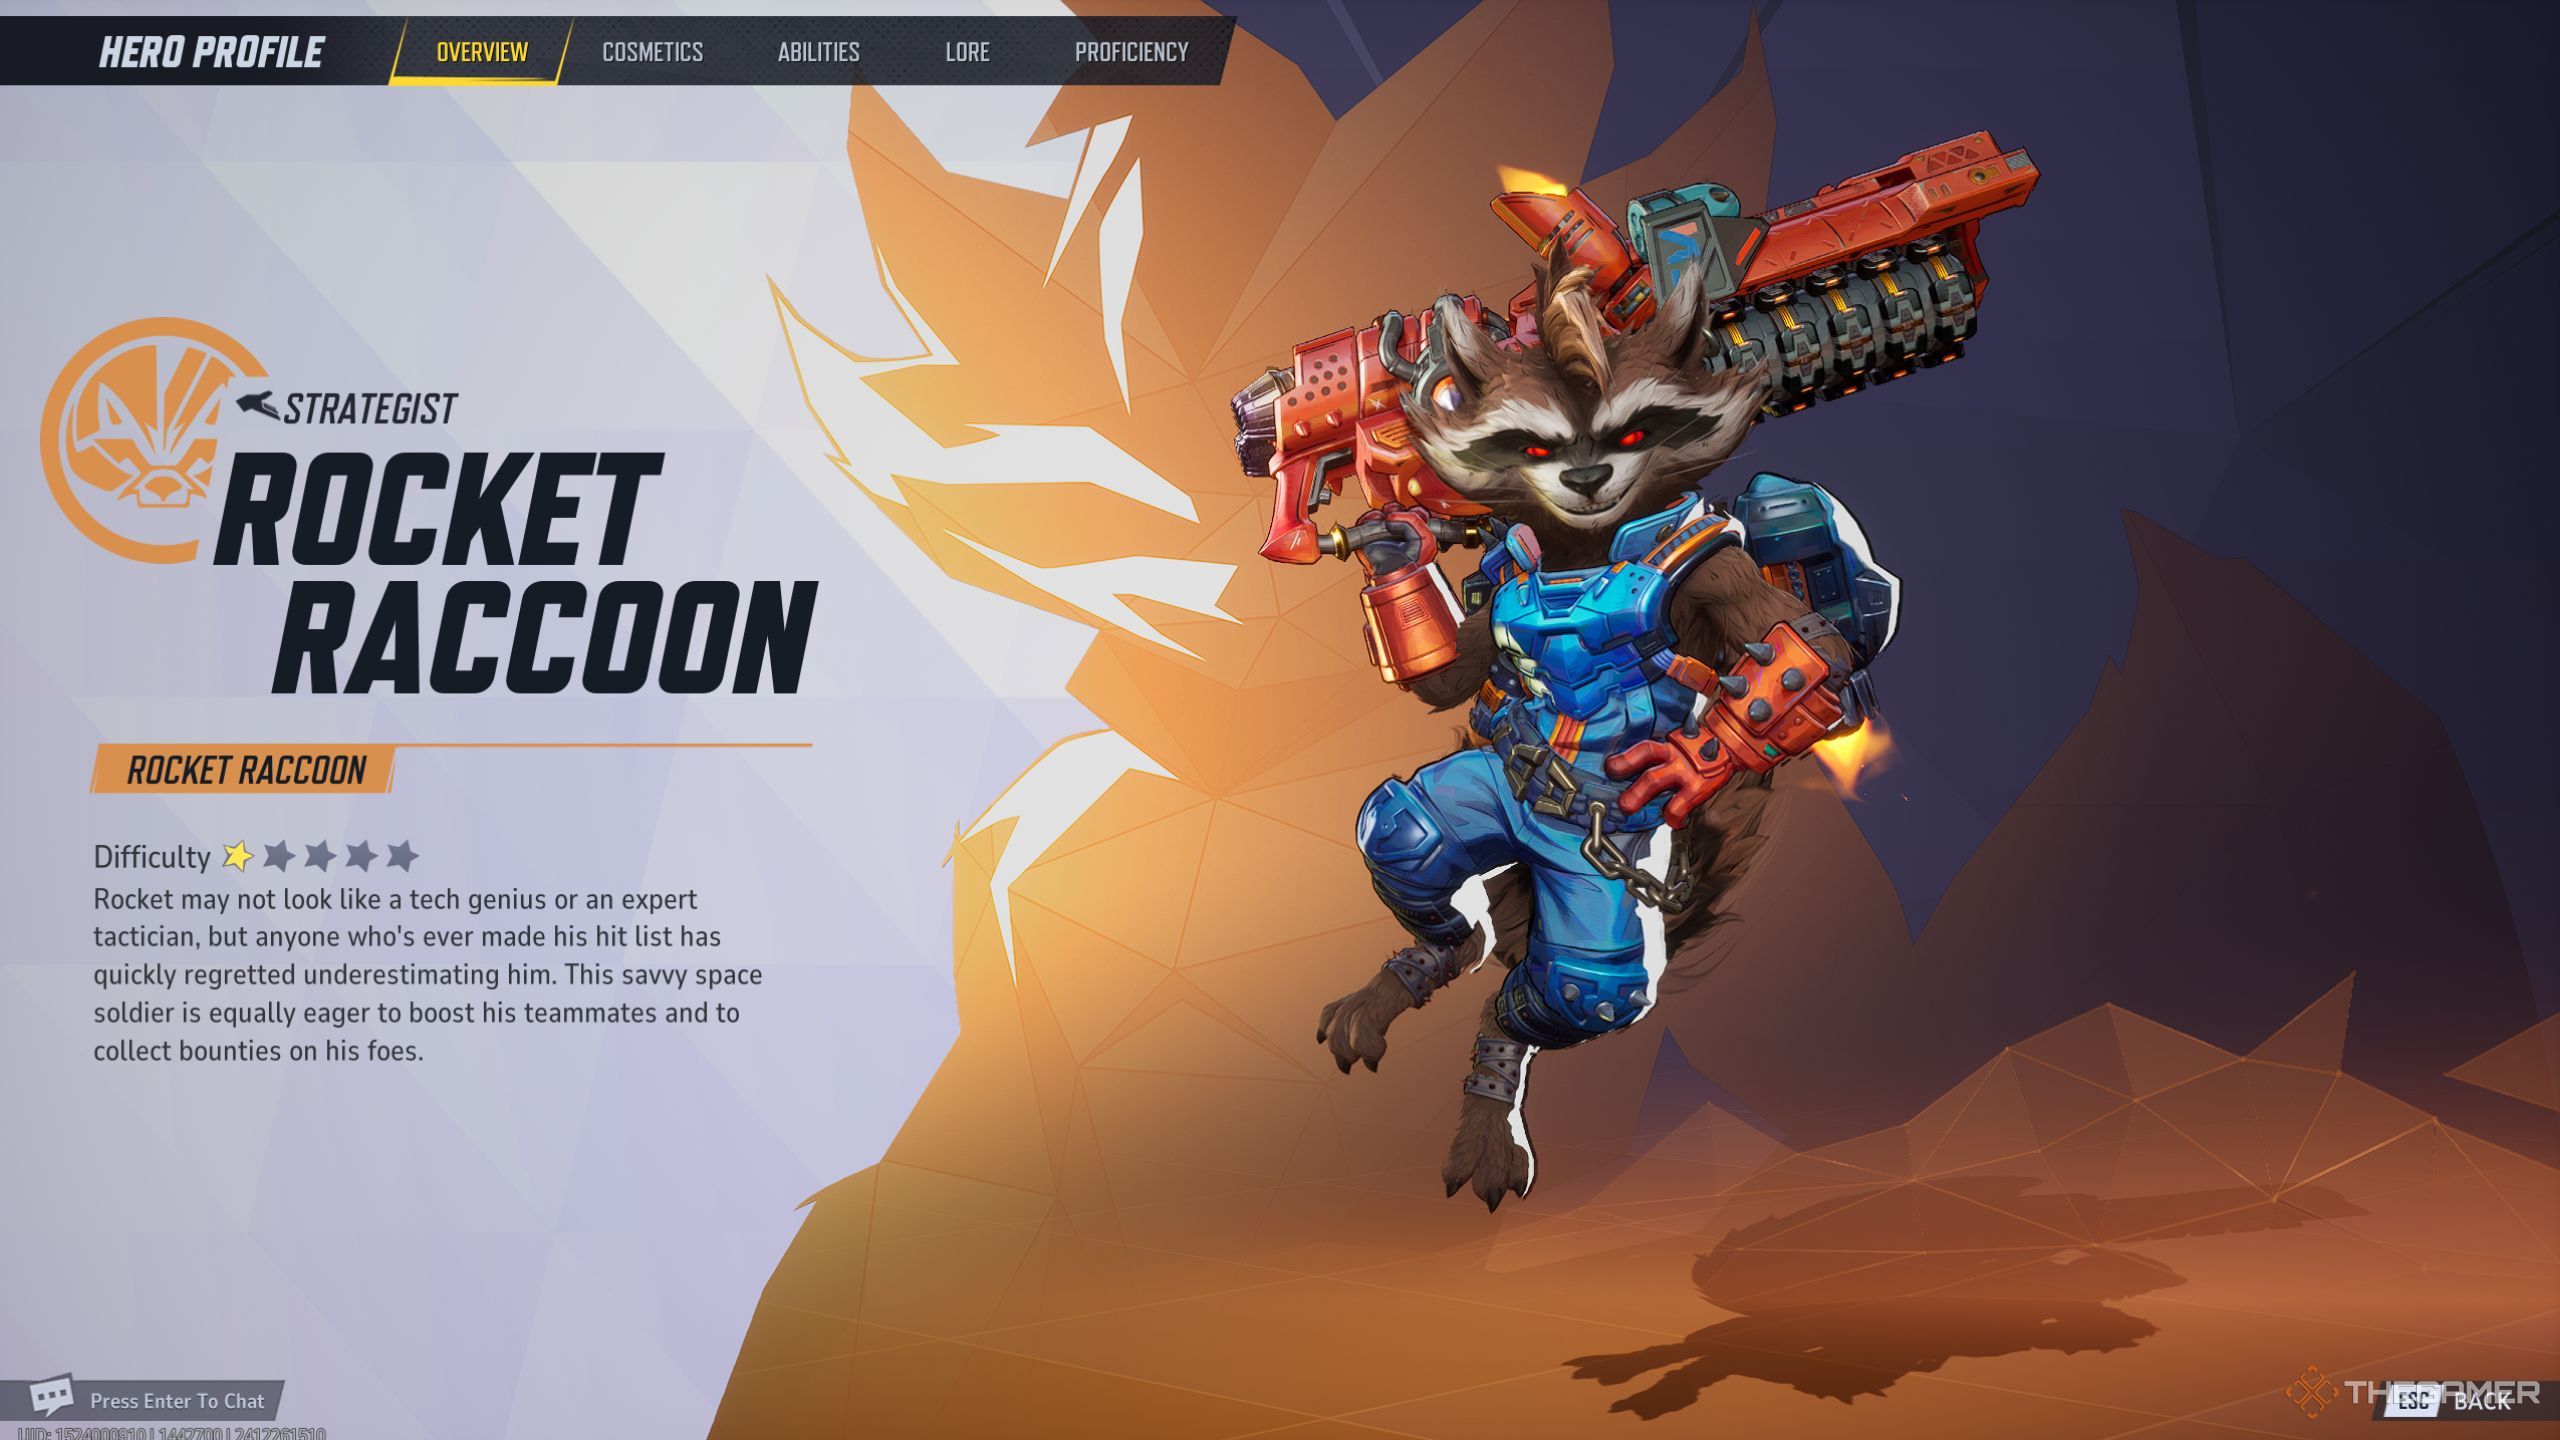
    Rocket Raccoon

    Difficulty Rating: One Star

    Marvel Rivals Rocket Raccoon character description screen.

    Just like Jeff, Rocket is also a charming character with great support abilities. If you have Groot on your team, both Rocket and Jeff can ride on his back, making gameplay seamless since you won’t need to move unless you’re fleeing.

    With the ability to place a revival portal for instant ally respawns, Rocket also boasts an ultimate that can enhance all nearby allies’ damage, facilitating team pushes.

    2
    Thor

    Difficulty Rating: Three Stars

    Marvel Rivals Thor character description screen.

    In Marvel Rivals, you’ll often find yourself needing to fill the tank role, and Thor is a fantastic choice for those moments. Not only does he provide extra health on demand, but he’s also capable of decent damage output thanks to his Awakening Rune ability.

    Your primary task with Thor is to charge into enemies and make the most of his buffed state to take out as many opponents as possible. Always focus on enemy support characters first and rely on your teammates to heal you.

    1
    Venom

    Difficulty Rating: One Star

    Marvel Rivals Venom character description screen.

    If you find yourself in tank mode and prefer not to play Thor, Venom is another reliable option. If you choose this character, make sure to disable the automatic swing in the settings to allow for better aiming.

    Venom excels at diving into groups of enemies and utilizing his slowing attacks to catch less durable characters. However, he’s more dependent on his team since his damage output is lower, and he will need healing fast when engaging multiple foes.