الوسم: Get To

  • How To Reach and Complete the Church in Dying Light: The Beast

    How To Reach and Complete the Church in Dying Light: The Beast

    What makes Dying Light: The Beast such an engaging game is its high level of immersion. Everything that happens feels more significant—fights with zombies are more satisfying, and the fear of being chased at night by Volatiles feels very real.

    This immersion encourages better gameplay. However, if you’re on the Beast Within mission, that same immersion can slow you down. Some parts of this mission can be tricky because there’s little guidance on what to do or where to go next.

    ### How to Start the Beast Within Quest

    To begin this mission, you need to complete both the Safe Haven and Life After Life story missions. After finishing those, head to the Town Hall in Old Town, which is located in the middle of Castor Woods.

    When you arrive at the Town Hall, go to the second floor, where you’ll meet a character named Jacob. Talking to him reveals that a new type of Volatile has been attacking both the town’s people and the Baron’s men.

    Next, go to the southern corner of the Town Hall and use the ladder to go outside. As you step outside, it will be nighttime, so use your flashlight to see better—but use it sparingly, as it can attract more zombies.

    ### Investigating the Body

    Once outside, look to your left for a body on the rooftop of a building opposite you. Jump over to investigate it. During this process, a cutscene will trigger showing that a Volatile is nearby.

    ### Following the Beast’s Tracks

    After examining the body, your next goal is to track where the Volatile is heading. Use your Survivor Sense to see the creature’s footprints, marked in yellow on the ground. Follow these marks until you reach inside a building.

    ### Dealing with the Explosion

    Before going in, handle a few zombies in the area—fighting at night is optional but recommended, as it provides experience points and makes climbing easier. If the area’s clear, move to the opposite side of the room to find the exit on the right. Use your Survivor Sense to locate the exit. When you exit, an explosion will happen in the distance on your left.

    ### Investigating the Explosion

    Head north from the rooftop. You’ll come across burning cars and Zombies feeding on fallen Barons’ men. You don’t have to fight them if you prefer not to. Instead, look for a truck with purple lights inside; this will be your next destination.

    After entering the truck, interact with the bodies on the floor—specifically the one on your left. A cutscene will play, showing you grabbing a walkie-talkie and being told about a church. This will be your next location.

    ### Approaching the Church

    The church is to the north and is fairly easy to reach. Staying on the roof is safest because you’ll arrive faster and be less visible to Volatiles. Once you get close, move towards the marked entry, which is covered with purple light.

    ### Entering the Church

    At the church, you’ll see a door also covered in purple light. You won’t be able to go in this way, so turn around and go down the stairs directly in front of those doors. When inside the basement, follow the corridor to an open area with many zombies and a large zombie wandering around. Deal with all the zombies to open up your path.

    Find the hole in the wall in the lower level and crawl through it. On the other side, an exit covered with a plank awaits you.

    ### Climbing the Church

    Carefully navigate from your position to the wooden platform next to a large angel statue. Jump onto the platform, then move left along the wall until you find a break in it. Climb through the gap to reach the roof of the church.

    After climbing, look for a small wooden platform to proceed to the main roof. Turn left and jump across the gap to hang onto the other side, then move along the wall. Reach the balcony, then proceed to the middle and jump onto the round platform in front.

    On the other side of the balcony, drop a ladder for quick access later. From there, run and jump onto a hanging rope. Use the momentum to swing and land on the opposite platform. If your swing isn’t fast enough, back and forth on the rope to gain speed.

    ### Reaching the Top

    After landing, look to your right and jump onto another wooden platform. From there, climb and scale along the wall, moving upward until you can’t go higher.

    Next, find a smaller wooden platform on the roof of the church. Carefully jump onto it and then turn right; you should be able to climb from there and along the wall. Continue upward to the roof of the church, which will be your final ascent before daylight.

    ### Getting to the Train Tunnel

    Once daytime starts, head south of the church to find the train tunnels. Surface access is blocked, so go underneath the area. Look for the train tracks next to the POI. Follow the tracks into a cave-like structure, where the path leads to a door with a body lying in front. Interact with the body to open the door and proceed inside.

    Inside, follow the path into a more open area with zombies and a large roaming zombie. Take care of the zombies, then open the crate to continue.

    ### Entering the Cave and Facing the Final Challenge

    Follow the trail into the cave until you see a door with blood around it. Interact with it for a cutscene involving a fallen soldier. During this event, the beast will attack and cause a grenade to explode, throwing you out of the area.

    You will then use the walkie-talkie to report to Jacob that the beast is still missing. Your main goal now is to escape—follow the same routes you used before, navigating the hallways and avoiding zombies as you run back to the surface.

  • Achieving the Third Sea in Roblox Blox Fruits: A Solving Guide

    Achieving the Third Sea in Roblox Blox Fruits: A Solving Guide

    Blox Fruits is an engaging game within the Roblox platform, inspired by the well-known One Piece anime. Players can choose to navigate the seas as either a Pirate or a Marine, embarking on adventures across various islands. When you first dive into Blox Fruits, you start in the First Sea. As you conquer PvE quests on different islands, you can unlock access to the Second and Third Seas.

    Once you’ve mastered the Second Sea and are ready for new challenges, including Race Awakenings, it’s time to venture into the Third Sea. This guide will walk you through the steps necessary to reach the Third Sea in Blox Fruits.

    How to Unlock the Third Sea

    To gain access to the Third Sea, you must:

    • Achieve Level 1500.
    • Complete the Colosseum Quest.
    • Defeat Don Swan.
    • Assist King Red Head in battling the rip_Indra NPC.

    Only after finishing these tasks and reaching Level 1500 will you be able to unlock the Third Sea.

    If you haven’t hit Level 1500 yet, focus on gaining experience points by defeating NPCs and completing quests. After achieving the required level, continue with the rest of this guide to unlock the Third Sea.

    Completing the Colosseum Quest

    The Colosseum Quest consists of three parts and is essential for accessing the Third Sea.

    To kick things off, head to the Cafe in the Kingdom of Rose and speak with Bartilo. He will request that you defeat 50 Swan Pirates. You can find these adversaries just behind a large orange building in the Swan Pirates area.

    Once you’ve taken down 50 Swan Pirates, return to the Cafe and talk to Bartilo again. You’ll receive 50,000 Beli, 3,500,000 EXP, and your next task: eliminate Jeremy. He can be found in the mountainous region of the Kingdom of Rose.

    After defeating Jeremy, visit Bartilo yet again to start the final part of the Colosseum quest, which involves rescuing the Gladiators trapped beneath the Colosseum. This part requires solving a puzzle.

    Go to Don Swan’s Mansion and enter the room on the left. Approach the table, where you’ll see eight symbols drawn on its surface. Make sure to remember the order of these symbols or take a screenshot for reference.

    Next, head to the secret room beneath the Colosseum. You will find those same symbols on the walls and pillars of this area. Press them in the sequence you observed on the table to rescue the Gladiators and gain access to King Red Head.

    Defeating Don Swan

    Once you complete the Colosseum Quest, return to Don Swan’s Mansion to meet Trevor, and give him a Blox Fruit valued at 1,000,000 Beli or more. After that, you’ll be allowed to enter Don Swan’s room in the right wing of the Mansion and take him on in battle.

    Helping King Red Head

    After defeating Don Swan, talk to King Red Head in the secret room underneath the Colosseum. He’ll ask you to “disrespect” rip_Indra. If you respond with “Let us begin!” in the next dialogue, you’ll be transported to Indra Island, where a cut scene featuring a battle between King Red Head and rip_Indra will unfold.

    When the cut scene concludes and King Red Head is defeated, rip_Indra will take him away, and you’ll find yourself back at the Cafe in the Kingdom of Rose Island.

    With all quests completed, you can now travel to the Third Sea.

    How to Travel to the Third Sea in Blox Fruits

    From the Cafe, make your way to the Green Zone docks, also known as Docks 3, and speak to the Mr. Captain NPC. He will ask, “I can take you to the Third Sea. Do you want to go?” Select “Yes,” and you’ll be teleported to the Third Sea in Blox Fruits.

  • Navigating to Elden Ring’s First Church of Marika: A Guide

    Navigating to Elden Ring’s First Church of Marika: A Guide

    The First Church of Marika in Elden Ring represents the triumph of new deities over the old. After their defeat, the fire giants submitted to the golden order, permitting the establishment of the Church of Marika on their sacred ground.

    In this guide, we’ll embark on a treacherous expedition through the icy plains of the Lands Between to find the First Church of Marika and unearth its hidden mysteries.

    Where to Find the First Church of Marika

    You can discover the First Church of Marika in the eastern section of the Mountaintop of the Giants, located along the southern edge of the Frozen Lake.

    To reach the Mountaintop of the Giants, you need to complete Leyndell and then utilize the Grand Lift of Rold in the Forbidden Lands.

    This region is hard to overlook since it’s part of the main storyline that leads you to the Fire Giant. However, the church might be easy to miss due to the freezing fog cast by the ice dragon, Borealis.

    Items and Activities at the First Church of Marika

    The First Church of Marika is significant as it holds essential items that you’ll need.

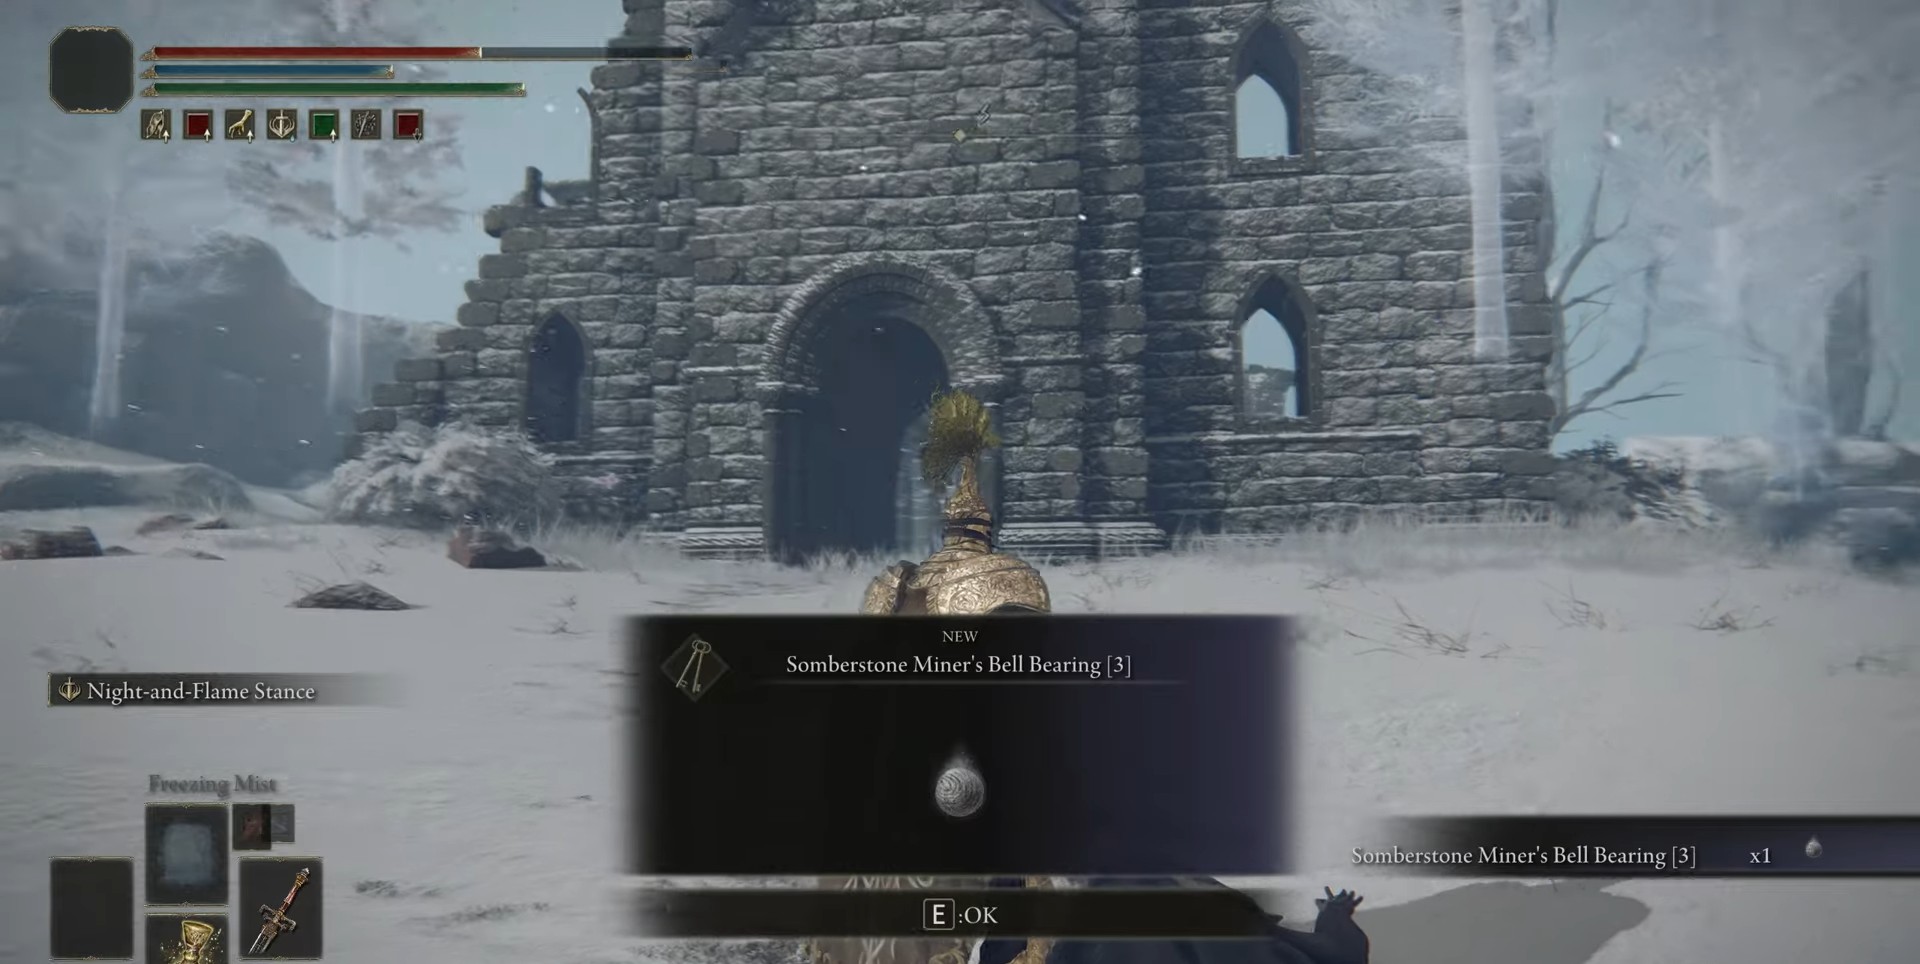
    Right near the entrance of the church, you can obtain a key item known as the Somberstone Miner’s Bell Bearing [3], which unlocks Somber Smithing Stone 5 and 6 at the Roundtable Hold.

    You’ll also find a Sacred Tear at the base of Marika’s Statue, which can be used to enhance the Flask of Crimson Tears.

    Additionally, here are some other items available at the church:

    • 1x Arteria Leaf
    • 1x Smithing Stone 7
  • Finding the Second Church of Marika in Elden Ring: A Guide

    Finding the Second Church of Marika in Elden Ring: A Guide

    The Second Church of Marika, originally built to honor their deity, once served as a sacred site on the Altus Plateau in Elden Ring. Nowadays, however, it has fallen into chaos, with ruthless hunters determined to desecrate its sanctity.

    This guide will assist you in finding the Second Church of Marika and provide tips on how to defeat the intruder awaiting you there for valuable loot.

    Finding the Second Church of Marika

    To locate the Second Church of Marika, head to the western part of the Altus Plateau.

    You will find it situated to the north of the Grand Lift of Dectus and west of the Altus Tunnel. This area, suited for mid-game, requires both halves of the Dectus Medallion to activate the Grand Lift of Dectus.

    If you’re looking to access this area sooner, consider using the Ruin-Strewn Precipice, which allows you to bypass the Grand Lift entirely and enter the Altus Plateau via an alternate path.

    Upon reaching the Altus Plateau, make your way to the Altus Highway Junction Site of Grace. From there, proceed north, and you’ll discover the Second Church of Marika tucked away in a small ruin.

    Items and Activities at the Second Church of Marika

    The Second Church of Marika is filled with valuable items, including:

    Additionally, near the statue of Marika, you can find a Sacred Tear, which can be used to enhance the Flask of Crimson Tears.

    The church also features a unique questline. If you’ve been following Yura’s storyline, you will find him here.

    Keep in mind that Yura won’t appear if you’ve missed any of his previous encounters.

    As you step inside the Second Church of Marika, be prepared for an invasion by Eleonora, Violent Bloody Finger. This invasion occurs regardless of your interactions with Yura.

    Defeating Eleonora grants you the chance to obtain Eleonora’s Poleblade weapon and the Purifying Crystal Tear as rewards.

  • A Guide to Reaching Bellum Church in Elden Ring

    A Guide to Reaching Bellum Church in Elden Ring

    The story behind Elden Ring is heavily influenced by themes of religion, making churches integral to your exploration of the Lands Between. One significant place you’ll encounter is the Bellum Church, which is closely associated with the Three Fingers and their aim to spread insanity.

    In this guide, we’ll show you how to locate Bellum Church and highlight the various items you can discover within its walls. We’ll also discuss an important side quest that unfolds in this secluded spot.

    Where to Find Bellum Church

    Bellum Church is situated in the northeastern part of the Liurnia of the Lakes region. To get there, make your way out of Limgrave after finishing up at Stormveil Castle.

    Proceed towards the gate of the Raya Lucaria Academy, then turn right and ascend the slope leading to the eastern region of Liurnia.

    On your journey to Bellum Church, you can also visit Miriel, Pastor of Vows, at the Church of Vows.

    Continue heading north until you finally arrive at Bellum Church, which lies west of the Church of Inhibition.

    Items and Activities at Bellum Church

    Bellum Church is pivotal to a significant questline, and you can find Hyetta here, marking her fourth location during her journey.

    Another notable item in the vicinity is the Nightrider Glaive, which you can obtain by defeating the Night Cavalry mini-boss during nighttime.

    Inside Bellum Church, you’ll also find several important items, including Ash of War: Giant Hunt and Golden Centipede. Like most churches throughout the game, this one also contains a Sacred Tear.

    Sacred Tears are used to enhance the Flask of Crimson Tears, making your visit to Bellum Church essential for your adventure.

  • Navigating to the Roads of Avalon in Albion Online

    Navigating to the Roads of Avalon in Albion Online

    In Albion Online, taking risks can lead to fame, and the bigger the risk, the greater the potential rewards. If you’re the kind of player who isn’t afraid to jump into the unknown with a group of friends, then the Roads of Avalon await you, offering treasures that most players can only dream of.

    Introduced in 2020, the Roads of Avalon provide a dangerous yet rewarding environment for solo players and groups of up to twenty. This guide will walk you through how to reach these roads, what awaits you, and offer some helpful tips along the way.

    What Are the Roads of Avalon?

    The Roads of Avalon are a distinct area located in the center of the Outlands—the larger of the two continents in Albion, featuring only Black Zones.

    Similar to the Outlands, the Roads of Avalon exclusively have Black Zones. When you face defeat at the hands of another player, you lose everything you were carrying.

    Each location in Avalon serves a unique purpose, and access points change frequently. No spot stays in the same place forever, and ways to reach areas vary constantly.

    How to Reach the Roads of Avalon

    Throughout Albion, you can discover Avalonian Portals that transport you directly to Avalon. These portals are located in all areas above tier 4 in both the Royal Continent and the Outlands.

    Every portal has a specific timer for its disappearance and a limited number of uses. Entering a portal consumes one charge, and charges regenerate every five minutes.

    There are three types of portals:

    • Blue portals – The most common type, featuring seven charges.
    • Yellow portals – Less frequent and containing twenty charges.
    • Unstable portals – Found only in Brecilien and the Mists; the Brecilien portal leads randomly to a Road, while Mist portals take you to varied areas on either continent.

    The tier of the area with the Avalonian portal determines the tier of the Road you will enter, so T4 zones will connect to T4 Roads of Avalon.

    How to Read Portals in Avalon

    Once you arrive in Avalon, you’ll find other portals leading to new areas. These can either take you back to the main continents or transport you to another Road of Avalon.

    Portals display podiums with three sliding circles that indicate what’s on the other side. To interpret these symbols, you can use the Avalonian Codex:

    The outer circle specifies the type of area you will visit. The symbols around the circle represent the following:

    Icon Designation Description
    Hollow circle Blue Zone A Blue Zone located somewhere on the Royal Continent.
    Two hollow circles Yellow Zone A Yellow Zone located somewhere on the Royal Continent.
    Full circle within a hollow circle Red Zone A Red Zone located somewhere on the Royal Continent.
    Full circle Black Zone A Black Zone located somewhere in the Outlands.
    Crossroads Avalonian Carrefour A Road of Avalon with multiple other portals.
    Straight path Avalonian Corridor A Road of Avalon with only one portal.
    Straight path into a dead end Avalonian Sanctuary A rare dead end that generally contains unique content such as Aspects.
    Straight path into a wall Avalonian Rest A Road of Avalon suitable for placing hideouts, otherwise a dead end.
    Straight path into a dead end with spikes Avalonian Raid A Road of Avalon leading to a Raid boss, requiring large groups of up to twenty players.

    The middle circle indicates the tier of the area, counting the dots: four dots represent a T4 Zone, five dots signify a T5 Zone, and so on.

    Lastly, the inner circle suggests the party size intended for the area.

    Icon Designation Description
    One character Solo/Duo This area is aimed at one or two players.
    Two characters Small group This area is designed for up to seven players.
    Four characters Large group This area accommodates up to twenty players.

    What Can You Discover in Avalon?

    Avalon is the ultimate location for gathering loot, whether for small or large groups, and solo players will find an efficient way to collect resources. There’s plenty for everyone, and it’s a hotspot for some of the game’s best combat Fame rewards.

    What Loot Can You Find in Avalon?

    In Avalon, you can partake in most activities available in the regular Black Zones, including Corrupted Dungeons, Solo and Group Dungeons, and world events like Crystal Spiderlings and various Treasure Chests.

    However, there are Avalon-exclusive experiences to uncover, such as:

    • Chests secured by camps that must be cleared.
    • Avalonian Raids aimed at large groups, offering massive silver rewards.

    Avalonian Raids demand that you locate the special portals associated with them and then plan your route so you can notify your Guild to join in.

    Chests, meanwhile, appear in nearly every Road you explore and come with associated quests.

    How to Locate and Clear Chest Camps

    Chests that are locked behind camps represent the main attraction in Avalon for many players. They necessitate clearing mobs from the area.

    It’s not required to defeat every single enemy; the chest will unlock as long as a sufficient number of mobs are defeated.

    Each large chest icon visible on the minimap or local map is surrounded by a camp of enemies. The chest’s color indicates its difficulty level and recommended audience:

    • Green Chests are suited for solo or duo players.
    • Blue Chests are intended for small groups of up to five players.
    • Yellow Chests are designed for larger groups of up to twenty players.

    These camps can be challenging, so it’s advisable to have some healing abilities in your arsenal for clearing them.

    They have a rarity system ranging from Common to Legendary, and the rarity of the chest applies to the entire group clearing the camp.

    The quality of loot you gather primarily depends on the tier of the zone you enter; a quick way to assess this is to check the tier of any mobs that aren’t resource mobs, as they will always match the zone’s tier.

    What Resources Can You Find in Avalon?

    Apart from the loot, Avalon serves as the top spot for gathering resources. All five resource types are available here, ranging from tier 4 to tier 8, according to the tier of the Road you are on.

    Avalon’s appeal lies in the presence of special resource mobs such as The Old Elementals and The Aspects.

    While standard resource nodes and mobs only provide five resources, Old mobs yield significantly more—often up to a few hundred at lower tiers. These tough opponents require a strong setup or a partner to heal you through the fight.

    The Aspect resource mobs are rare boss enemies, manageable by small groups or exceptionally strong duo teams, and they offer even more resources than Old mobs.

    Enchanted resources can also be found in Avalon, though they are slightly less common than in the open world.