الوسم: Gate

  • How to Complete All Jade Gate Pass Cat Play & Solve Locations in Where Winds Meet

    How to Complete All Jade Gate Pass Cat Play & Solve Locations in Where Winds Meet

    Where Winds Meet is full of charming and interesting encounters, some of which take the shape of cats. Cat Plays are small cats that wait for you to approach and pet them. When you do, they give you affection and rewards. These tiny cats are scattered throughout the Jade Gate Pass region of Hexi and act the same as in other areas of the game.

    Although Cat Plays aren’t connected to the main story, they encourage players to explore carefully. For those who want to complete everything, discovering all the cats becomes a fun collection challenge.

    How to Find the Sentient Beings Collection

    There are many collections in Where Winds Meet — plants, animals, and cats. Like in other parts of the game, Cat Plays appear in different sections of the map. You can search for ‘Sentient Being’ in the menu to track your progress and see which areas you’ve already checked.

    Where are the Cat Play Locations?

    The Cat Plays are grouped into different regions. In Hexi, the Jade Gate Pass area has four spots to find cats. Here are the locations and how to find each one:

    Kitty: Lu

    • Location: Travel to the Camel Station Boundary Stone and head south. The cat sits on a wooden balcony facing the Boundary Stone. It’s very close to a Momo Kitty puzzle.

    Pawsie

    • Location: South of the Squarewall Hold Ruins Boundary Stone and north of the Gift of Gab Debate. The cat is sitting on the roof of a stone building under a tall tower.

    Nannan

    • Location: In the Ayisu region, west of the Squarewall Hold Ruins Boundary Stone, and northeast of the Momo Kitty. The cat is sitting on an open roof.

    Beibei

    • Location: Southeast of the Squarewall Hold Ruins Boundary Stone, on a point of the stone ruins.

    Immortal Cat

    • Location: Between Nannan and Pawsie. This cat appears after completing the Feline Fixation quest.

    Yiyi

    • Location: Near the Jade Gate Pass Wayfarer and the Karez Boundary Stone, inside a small wooden house next to some camels. It sits inside the house.

    Sooty

    • Location: East of the Karez Boundary Stone, near a wrestling area and a broken ship. The cat stays nearby.

    Moon

    • Location: Directly south of the Poplar Bazaar Boundary Stone, on a rooftop under a glowing tree.

    Jasmine

    • Location: East of the Karez Boundary Stone. Enter through the shipwreck or the wooden shack with red banners. Jasmine is in the corner of the room with NPC Wei Ziya.

    Dumpling

    • Location: West of the Poplar Bazaar Boundary Stone, on a rooftop near broken wooden wreckage.

    Tung-Tung

    • Location: North of the Peaceward Camp Boundary Stone, close to the “An Unsung Name” quest and Rainbone Flower. It’s sitting near a stone hut.

    Cece

    • Location: North of Peaceward Camp Boundary Stone, near the Battleboard game. Close to Tung-Tung.

    Bunbun

    • Location: South of the Horsehelm Village Boundary Stone, under a wooden awning outside a stone house decorated with hanging corn.

    Note: Many of these cats can be found on rooftops, inside homes, or on stone structures. Pay attention for faint meows if you’re having trouble locating them. Approach and pet each one to earn Hexi Exploration Points, Jade Fish, and Elegance.

  • How to Complete the Battery Puzzle on Blue Gate in Arc Raiders

    How to Complete the Battery Puzzle on Blue Gate in Arc Raiders

    The quest to find earthquake-resistant housing details in Arc Raiders remains unresolved, as it appears the project was abruptly shut down without explanation, despite its significance and usefulness. This situation is confusing and frustrating.

    Shani and the other key members of Speranza are determined to uncover what happened to the project. The townspeople need this knowledge to build safer underground homes, since the surface remains too dangerous for the last survivors. Your next clue takes you to the Blue Gate, where you’ll investigate MANTIKOR’s involvement in the project’s cancellation.

    ### Where To Find The MANTIKOR Facilities

    To continue Shani’s investigation, go to the Blue Gate. Every step in this quest must be completed in one run; otherwise, it won’t count. You need to visit the underground facilities marked with the orange MANTIKOR logo. There are two ways to reach the Security Wing where the mission objective is: First, enter through the Outer Gates at the Checkpoint POI and go up the stairs; second, go to the Reinforced Reception located at the north end of the map and descend via ziplines and stairs.

    Getting close to the MANTIKOR facilities will trigger the quest objective. Keep in mind, the room you need to access differs from the Blue Gate Confiscation Room. Instead, it resembles the fuel-cell doors found in Stella Montis. To find it, head to the center of the Security Wing, where two ziplines lead up to Reinforced Reception, and look for the blue line painted on the floor.

    > There’s a room in the Security Wing that stays locked with a Door Blocker unless looted. Inside, you’ll find valuable items like a weapons crate, metal lockers, and possibly two security breach lockers, without requiring a key.

    Follow the painted line past several rooms, clearing out fireballs and pop rollers that approach from the long, broken-down hallway lined with arches and remnants of robots. Stop in a small, open space featuring a large shuttered door with an attached electrical box and a desk with multiple computers.

    This shutdown door is what the quest specifies. The remaining objectives are inside, but the door won’t open until you solve a puzzle in the surrounding area.

    ### How To Get Into The Locked Room

    To open the door, find three white, medium-sized batteries hidden at specific spots around the room—these are placed on battery holders. Collect them and carry each one back to the electrical box on the wall, then insert them to unlock the door.

    > Some players report issues with the batteries spawning or the electrical components not responding, even in confirmed locations. However, another player can open the door for you, and you can still access the rest of the quest without problems.

    There are a few known spawn points for the batteries:
    – One may appear in an alcove near the stairs leading down to the lowest underground floor, next to a wall marked with yellow graffiti and arrows pointing to machinery.
    – Another might be beneath the staircase that leads to the ziplines, on the wall with red graffiti indicating direction.

    Batteries are carried like fuel cells, so you’ll need to make multiple trips unless a teammate assists. Once all three are placed, the door opens, allowing you to proceed.

    > If the electrical box by the door isn’t highlighted in blue, the step might be bugged. This indicates a glitch, but another player can open the door for you, allowing you to complete your objective.

    ### Where To Get The Dusty Film Reel

    Inside the room, you’ll find various loot, but the next step involves the tape player located in the corner downstairs. Interact with it to play the tape and advance the quest.

    Next, move to the left side of the monitor wall, where you’ll find a film reel container that looks like a washing machine. Completing this puzzle is optional — you can do it any time you visit The Blue Gate while looting the area, which includes crates, drawers, and a weapons crate.

    Once you do this, you’ll receive the Dusty Film Reel, the item needed for the final step. Return to Speranza, speak with Shani, and complete the quest. As rewards, you’ll earn experience points, unlock the Warden color for the Patchwork Outfit, and gain 2,000 credits, in addition to the loot from the locked room.

  • Where To Find Bilguun’s Hideout at Blue Gate in Arc Raiders

    Where To Find Bilguun’s Hideout at Blue Gate in Arc Raiders

    Speranza is home to many residents in Arc Raiders, and a large number of them are Raiders who venture outside the city to gather supplies. Due to how risky their trips can be, the residents of Speranza look out for each other whenever possible.

    If someone acts strangely or goes missing, everyone pitches in to find them quickly. They want to make sure no one is in trouble, whether from ARC or other threats. This time, Celeste is searching for a lone Raider named Bilguun. He’s not very social, but nobody has seen him around Speranza in a while, so it’s important to check on him and see if he’s okay.

    Where to Find Bilguun’s Hideout

    Keeping An Eye Out is a short quest, but reaching the main goal can be challenging. The first step is to head to The Blue Gate. Make sure to bring either a Snap Hook or at least two Ziplines; they make completing the quest much easier.

    If you can’t craft Ziplines or don’t have any in your inventory, you can buy three Ziplines from Apollo’s shop every 24 hours for just 3,000 Credits.

    Your first task is to find the collapsed highway at the southwestern end of the Barren Clearing. The specific wreckage you need is located west of the Forest Airshaft, near the map’s edge. Simply walking up to this wreckage will automatically complete this part of the quest.

    Next, locate Bilguun’s hideout, which is at the end of the broken highway just a little southeast of your first objective. Find the remaining standing section of the highway, then look upward toward where it’s broken. You’ll notice a stop sign near a gap at the top, which marks the entrance.

    A note of caution: Be careful when moving through the Barren Clearing. A Leaper often patrols the area around the Deforesters, and a Bombardier can also spawn there, although less frequently.

    Reaching Bilguun’s Hideout

    There are three ways to reach it:

    1. Use a Zipline or Snap Hook to reach just above the crevice, which will send you directly inside.
    2. Position your Zipline or Snap Hook so it takes you to the top of the highway, then drop backwards off the edge. Use vaulting to grab onto the ledge of the crevice and pull yourself in.
    3. If you don’t have Ziplines or Snap Hooks, head to the Highway Collapse south of the Checkpoint POI. Climb up and follow the highway west until you reach the edge near the hideout. Drop down and catch the ledge to enter.

    Tip: A good spot to place your Zipline is on the ground debris of the highway’s edge. This way, you can easily reach either the top of the highway or the crevice, depending on where you position it.

    Once inside Bilguun’s hideout, walk a few steps in. A prompt will appear for you to take a photo of the area. Doing so completes the final step of the quest, and then you can return to Speranza.

    Rewards

    Talk to Celeste at her shop after completing the quest. As a reward, you’ll gain experience points (based on your level), receive five Pulse Mines, and obtain the Flame Spray—a rare quick-use item that functions like a makeshift flamethrower, similar to Fireballs.

  • Should You Break Wyll’s Contract in Baldur’s Gate 3? A Complete Guide

    Should You Break Wyll’s Contract in Baldur’s Gate 3? A Complete Guide

    Completing Wyll’s personal questline in Baldur’s Gate 3 can take a lot of time, often almost the entire game. Wyll’s story includes small plot points in the first two acts that lead up to a major choice in Act 3.

    When you reach the outskirts of Baldur’s Gate, Wyll will be given the chance to break his pact with Mizora permanently. However, this choice comes with a significant sacrifice that some players might find too steep. This guide explains how to start this scene for Wyll, the advantages and disadvantages of each option, and how to get the best possible outcome for Wyll and the city.

    This guide contains spoilers for Act 3 and Wyll’s story. Specific quest details are saved for the last section.

    Updated December 26, 2025 by Ryan Thompson-Bamsey: We’ve revised this guide to better explain the steps for breaking the contract and saving a certain character!

    —

    ### How to Break Wyll’s Contract

    An option to end Wyll’s deal with Mizora will appear early in Act 3. Three conditions need to be met for this scene to trigger:
    1. Talk to Gortash during his Archduke ceremony in Wyrm’s Crossing.
    2. After the ceremony, talk to Duke Ravengard while Wyll is in your party. Wyll will comment that something’s wrong with his father. Talk to him again back at camp.
    3. Enter the lower city of Baldur’s Gate.

    If you meet these conditions, Mizora will visit your camp during your next long rest. Make sure you camp inside Baldur’s Gate to see her appear.

    Mizora will reveal that Duke Ravengard is being held captive somewhere you cannot access. She offers to help in exchange for ownership of Wyll’s soul, despite what you may have told her earlier in the game. If you sign her contract, she will reveal where the Duke is held, allowing you to rescue him. If you break Wyll’s contract instead, Duke Ravengard will die before your eyes. However, the actual results can be avoided with careful planning.

    —

    ### What Happens if You Sign the Contract

    If Wyll signs the new pact with Mizora, she will disclose Duke Ravengard’s location (see the “Should You Break Wyll’s Contract?” section for details). The map will mark the prison, and most party members will agree with this choice—including Wyll, despite his past relationship with Mizora.

    There are no gameplay changes from this decision, but it’s not a very good choice for Wyll. His combat skills stay the same, and your party won’t get extra rewards for accepting Mizora’s deal.

    —

    ### What Happens if You Break the Contract

    Choosing to break the pact frees Wyll from Mizora’s control, but this doesn’t happen until the very end of the game. Mizora will say that Ulder’s life is forfeit, but it’s just a bluff. Wyll will actually be free, and Duke Ravengard will not die immediately. Finding the Duke afterward may be tricky, but it’s possible.

    Party members’ reactions are mixed. Some will praise Wyll for standing up to Mizora, while others may feel conflicted about losing Duke Ravengard. Breaking the pact doesn’t cause Wyll to lose his powers, so he can still serve as a Warlock for the rest of your game.

    —

    ### Should You Break Wyll’s Contract?

    Breaking the contract is recommended in every playthrough. It’s possible to do this while also saving Duke Ravengard in the same game, but the quest will be slightly different if Wyll breaks his pact. For help locating the Duke, explore the docks of Baldur’s Gate, often with a spellcaster in your party.

    —

    ### Finding Duke Ravengard Without Witnessing Mizora

    Since Mizora won’t tell you where the Duke is, you must search on your own at the Iron Throne—a submerged prison. Start at the warehouse east of the Dock’s area, inside the Flymm Cargo Warehouse (coordinates: X: -161, Y: -141). Use the basement hatch there to reach a hidden dock with a submarine.

    Persuade or fight the owner of the submarine to use it, then travel to the Iron Throne prison. Keep in mind, entering this location can harm your standing with Gortash and block some diplomatic options.

    In the underwater prison, you’ll have five turns to rescue as many inmates as possible before it blows up. To save Duke Ravengard, head to the eastern wing, unlock his cell, and heal him. Do not let him leave the cell immediately; position some party members nearby before he escapes.

    Once Ulder leaves his cell, Mizora will show up and attempt to kill him. Six explosive spiders will spawn next to the Duke. You can teleport him away with spells like Dimension Door or kill the spiders with your party. Escort Ulder to the submarine, healing him along the way.

    After rescuing the Duke, talk to him at your camp to advance Wyll’s story. Mizora will have new dialogue, which isn’t essential. Wyll will no longer be Mizora’s pawn, and the Duke will be safe. This is considered the best ending for this quest and has no significant long-term effects.

  • Blue Prince: Completing the West Gate Solving Challenge

    Blue Prince: Unlocking the West Gate

    In the game "Blue Prince," opening the West Gate can be an exciting challenge. Here’s a straightforward guide to help you navigate this task.

    1. Gather Resources: Start by collecting all necessary items you might need. This includes tools, keys, or any specific objects that are essential for opening the gate.

    2. Locate the West Gate: Make your way to the West Gate area. Pay attention to your surroundings, as there may be clues or interactions that can assist you.

    3. Solve Puzzles: Often, gates in games are guarded by puzzles or challenges. Look for any clues that might hint at the solution. Take your time to analyze the situation.

    4. Interact with Characters: Talk to any non-playable characters (NPCs) nearby. They may offer valuable information or items that could help you in your quest.

    5. Use the Right Key or Item: Once you have everything you need, try using the key or item you’ve collected on the West Gate. If the gate does not open right away, make sure you’re using the correct item and are in the right spot.

    6. Check for Hidden Areas: If the gate remains locked, explore around the area. Sometimes, there are hidden passages or mechanisms that must be activated to unlock the gate.

    7. Patience is Key: Don’t rush through this process. Take your time to explore and interact with your environment, as this often leads to solutions.

    By following these steps, you should be able to successfully open the West Gate in "Blue Prince." Enjoy your adventure!

  • Completing the Circle of Stars Druid Build in Baldur’s Gate 3

    Completing the Circle of Stars Druid Build in Baldur’s Gate 3

    Playing a Circle of the Stars Druid in Baldur’s Gate 3

    The Circle of the Stars Druid class in Baldur’s Gate 3 offers an exciting blend of healing and damage-dealing capabilities. This subclass stands out for its exceptional efficiency, maximizing every available resource to eliminate enemies and keep teammates healthy.

    In this guide, we’ll explore strategies for playing a Circle of the Stars Druid, including which forms to prioritize and what to expect at various levels of the game. Get your spells ready, select your constellation, and prepare to excel as one of the most versatile Druids available.

    Overview of the Circle of Stars Druid

    All Druids can both heal allies and deal damage, but the Circle of the Stars Druid particularly shines in transitioning between these two roles. With only a bonus action and one Wild Shape charge, you can adapt quickly to whatever the situation demands.

    By harnessing one of three Starry Forms, linked to different constellations, you can tailor your approach to combat. The Archer provides a bonus action ranged attack, the Dragon offers a short-range area attack and improved concentration, while the Chalice enhances your healing capabilities.

    Recommended Starting Stats, Species, and Spells for a Circle of Stars Druid

    Species

    Your choice of species won’t significantly affect your stats, so feel free to choose any. That said, Halflings are particularly advantageous for maintaining concentration spells, and the Lightfoot variant offers extra sneaking benefits.

    Cantrips

    For cantrips, Shillelagh is a solid offensive option during the early game, while Produce Flame gives you a source of fire for creating traps. Normally, you’d select Guidance as a cantrip, but as a Circle of the Stars Druid, you’ll automatically receive it at level two.

    Spells are plentiful, as you have access to them all. Experimentation is encouraged, but valuable spells include Cure Wounds, Healing Word, and Thunderwave.

    Background

    Druids are seen as protectors of both communities and nature, so backgrounds like Folk Hero or Outlander are fitting. The Folk Hero option is particularly beneficial due to its focus on Animal Handling.

    Stats and Skills

    Assuming you will always choose the Ability Score Improvement option, here’s what we suggest for your stats:

    • Strength: 8
    • Dexterity: 14
    • Constitution: 16
    • Intelligence: 10
    • Wisdom: 16
    • Charisma: 10

    For skills, Animal Handling is critical, and if you selected the Folk Hero background, then consider Perception and Insight as additional choices.

    Tips for Mastering a Circle of Stars Druid

    You have only two Wild Shape charges, which recharge after a short rest, so it’s wise to utilize your constellations before exhausting your spell slots. You can also use Star Maps to cast Guiding Bolt without consuming a spell slot, making it a perfect tool for minor encounters.

    Starry Form: Archer

    This form is your go-to since it provides a bonus action attack to complement your other combat strategies. The radiant damage it inflicts is particularly effective against many foes in Act Two, who are vulnerable to this type of attack.

    Starry Form: Chalice

    In this form, whenever you cast a healing spell, you can use Chalice Healing for free, allowing for additional healing on yourself or others. This flexibility makes the Circle of the Stars Druid an exceptional main healer, as you can easily switch between offensive and supportive roles.

    Starry Form: Dragon

    The Dragon form is advantageous for its area radiant damage and for improving the concentration of your spells. At level ten, it also grants the user the ability to fly, although most advanced players will leverage the Astral-Touched Tadpole for flight access.

    The Best Spells for a Circle of Stars Druid

    Druids have access to a wide variety of spells, so explore them carefully and see how each complements your playstyle and party dynamics. Here’s a suggested spell list by level:

    Level Spells
    Cantrip Guidance, Shillelagh, Produce Flame
    1 Cure Wounds, Healing Word, Thunderwave
    2 Moonbeam, Hold Person, Spike Growth
    3 Call Lightning, Sleet Storm
    4 Wall of Fire, Conjure Woodland Beings
    5 Insect Plague, Mass Cure Wounds
    6 Heal, Sunbeam

    Best Equipment for a Circle of Stars Druid

    Weapons

    As a spellcaster, prioritize magical implements over traditional weapons. Quarterstaves are particularly beneficial, especially since you can use Shillelagh on them early in the game. The top quarterstaff is Markoheshkir, found in Ramazith’s Tower, and it’s available early enough in Act Three to tackle major enemies.

    Armor and Accessories

    Choose equipment that enhances your strengths. For Circle of the Stars Druids, items like Boots of Striding and Barkskin Armor can help you concentrate better, ensuring your strong spells are more reliable.

    Every Level-Up Choice for a Circle of Stars Druid

    Your most significant choices will be made when preparing spells for battles, but here are some optional cantrip choices and useful feats to consider:

    Level Unlock Choice
    1 Cantrip Choose Shillelagh and Produce Flame; Guidance is free at level 2.
    4 Feat, Cantrip Select War Caster for maintaining powerful spells and Thorn Whip.
    8 Feat Consider the Resilient feat for better Constitutions if you haven’t done so already.
    10 Cantrip Resistance is another option, although it competes with other spells needing concentration.
    12 Feat Opt for the Lucky feat if you are satisfied with your current stats.

    This comprehensive approach should place you well on your journey as a Circle of the Stars Druid in Baldur’s Gate 3. Enjoy the flexibility and depth this class offers!

  • Chapter Four Guide: The Gate of Saint Jerome in Stone of Madness

    Chapter Four Guide: The Gate of Saint Jerome in Stone of Madness

    In the last chapter of The Stone of Madness campaign, The Gate of Saint Jerome, you encountered Shadow and learned about her tragic history. After Mother Superior found out about her love, Shadow was locked away in a cell with her infant until she passed away.

    You said goodbye to Shadow by either killing Mother Superior or giving her baby’s toy. In return, she handed you the emblem. However, it was damaged, and now you must find a great fire to fix it. This chapter marks the start of your quest for that fire. If you’re ready, the final part of the campaign lies ahead.

    How to Repair the Emblem

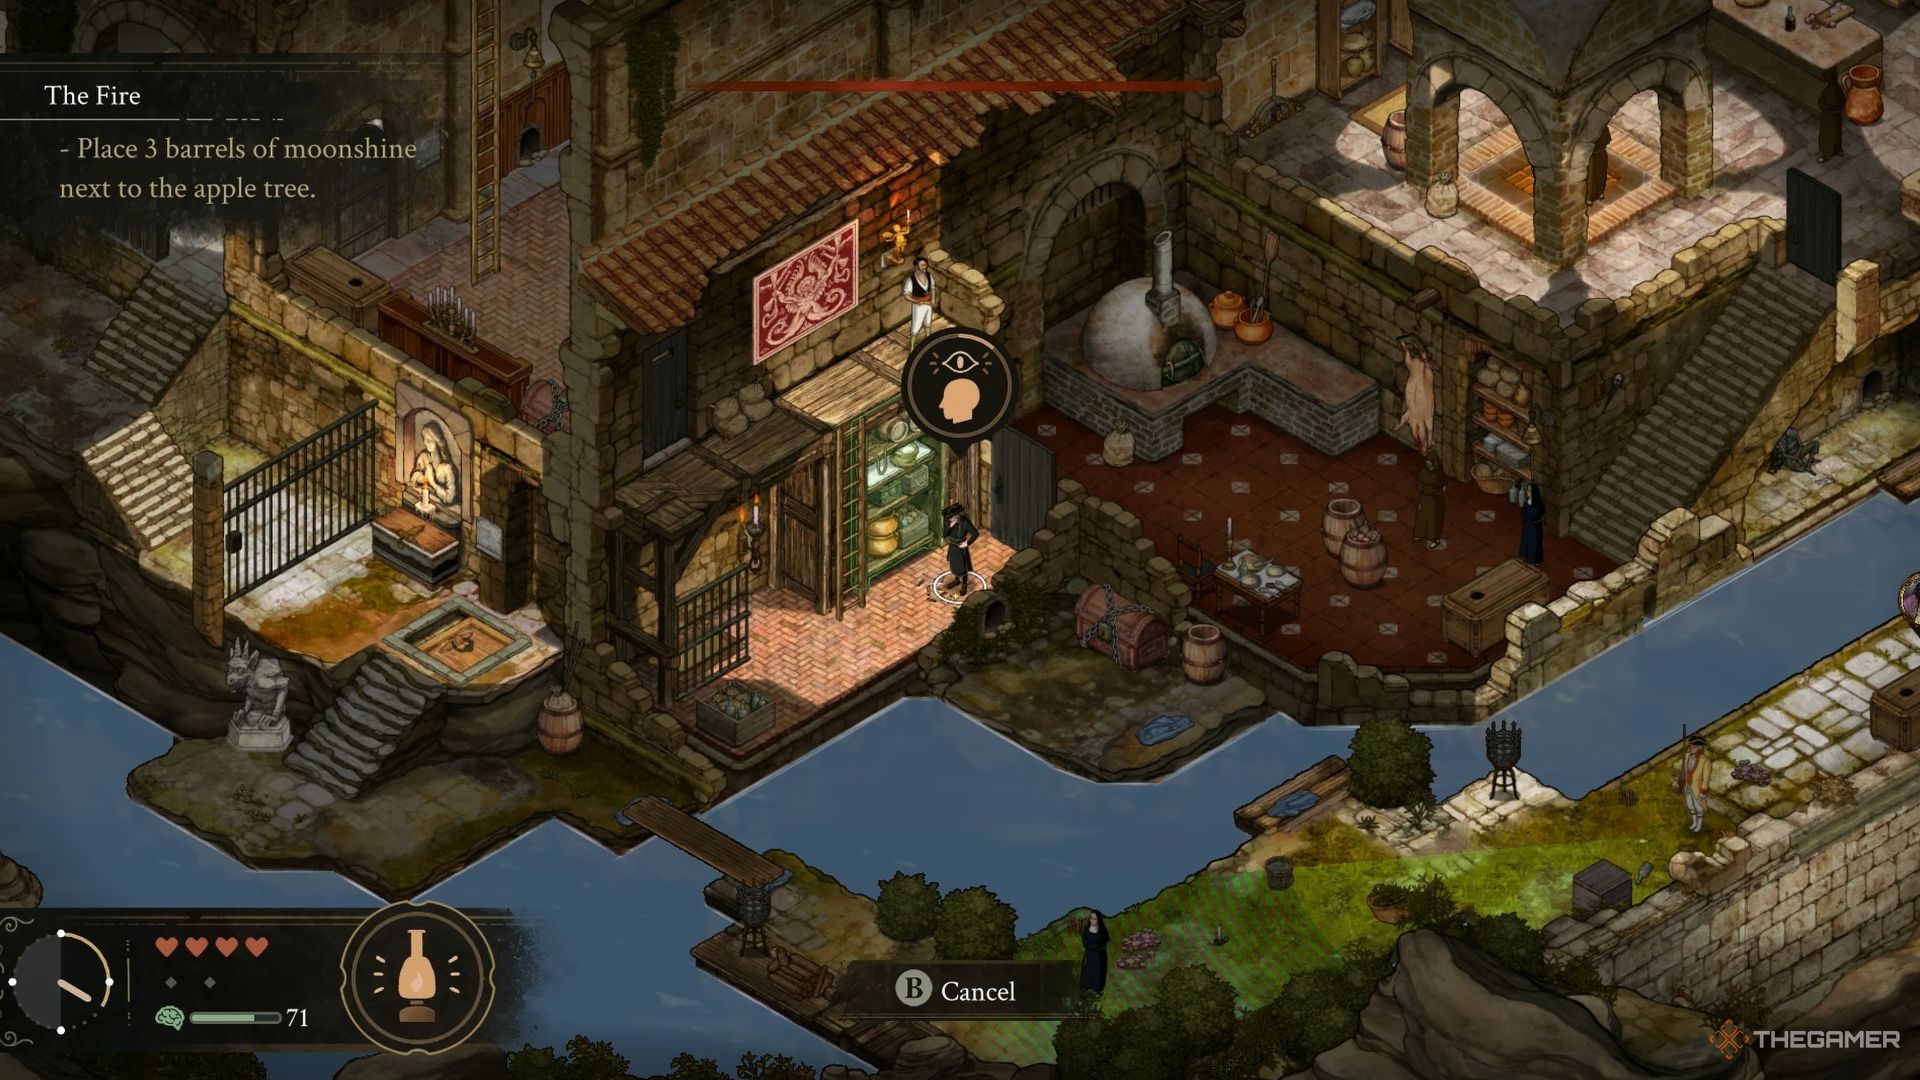
    Your first task in this chapter is to repair the emblem given to you by Shadow. To do this, you’ll need a strong fire. There are two potential fire sources: the central fire in The Cells or the kitchen oven in the Refectory. If you choose the fire in The Cells, a cutscene will trigger when you approach it, revealing that the fire has extinguished and an inmate is trapped there.

    First, talk to the Doctor about the situation. To free the inmate, use Alfredo’s Investigate skill to follow the tracks next to the jailed inmate. The tracks will lead you to a first-floor cell in the north, ending near a mirror. Interact with these tracks to unlock the barred door where the inmate is held.


    Once the inmate is free, press the button again to close the door. Next, go up to the second floor of the western section of The Cells and activate the switch. This will reignite the fire that the inmate was previously held near.

    Finally, activate the fire area, then hand over the emblem to either Eduardo or Agnes, and interact with the fire to finish your objective and trigger a cutscene.

    Alternatively, you can utilize the oven in the Refectory. However, to do this, you first need to secure a key from the friar working in The Great Wall area.

    Where to Find Three Moonshine Barrels

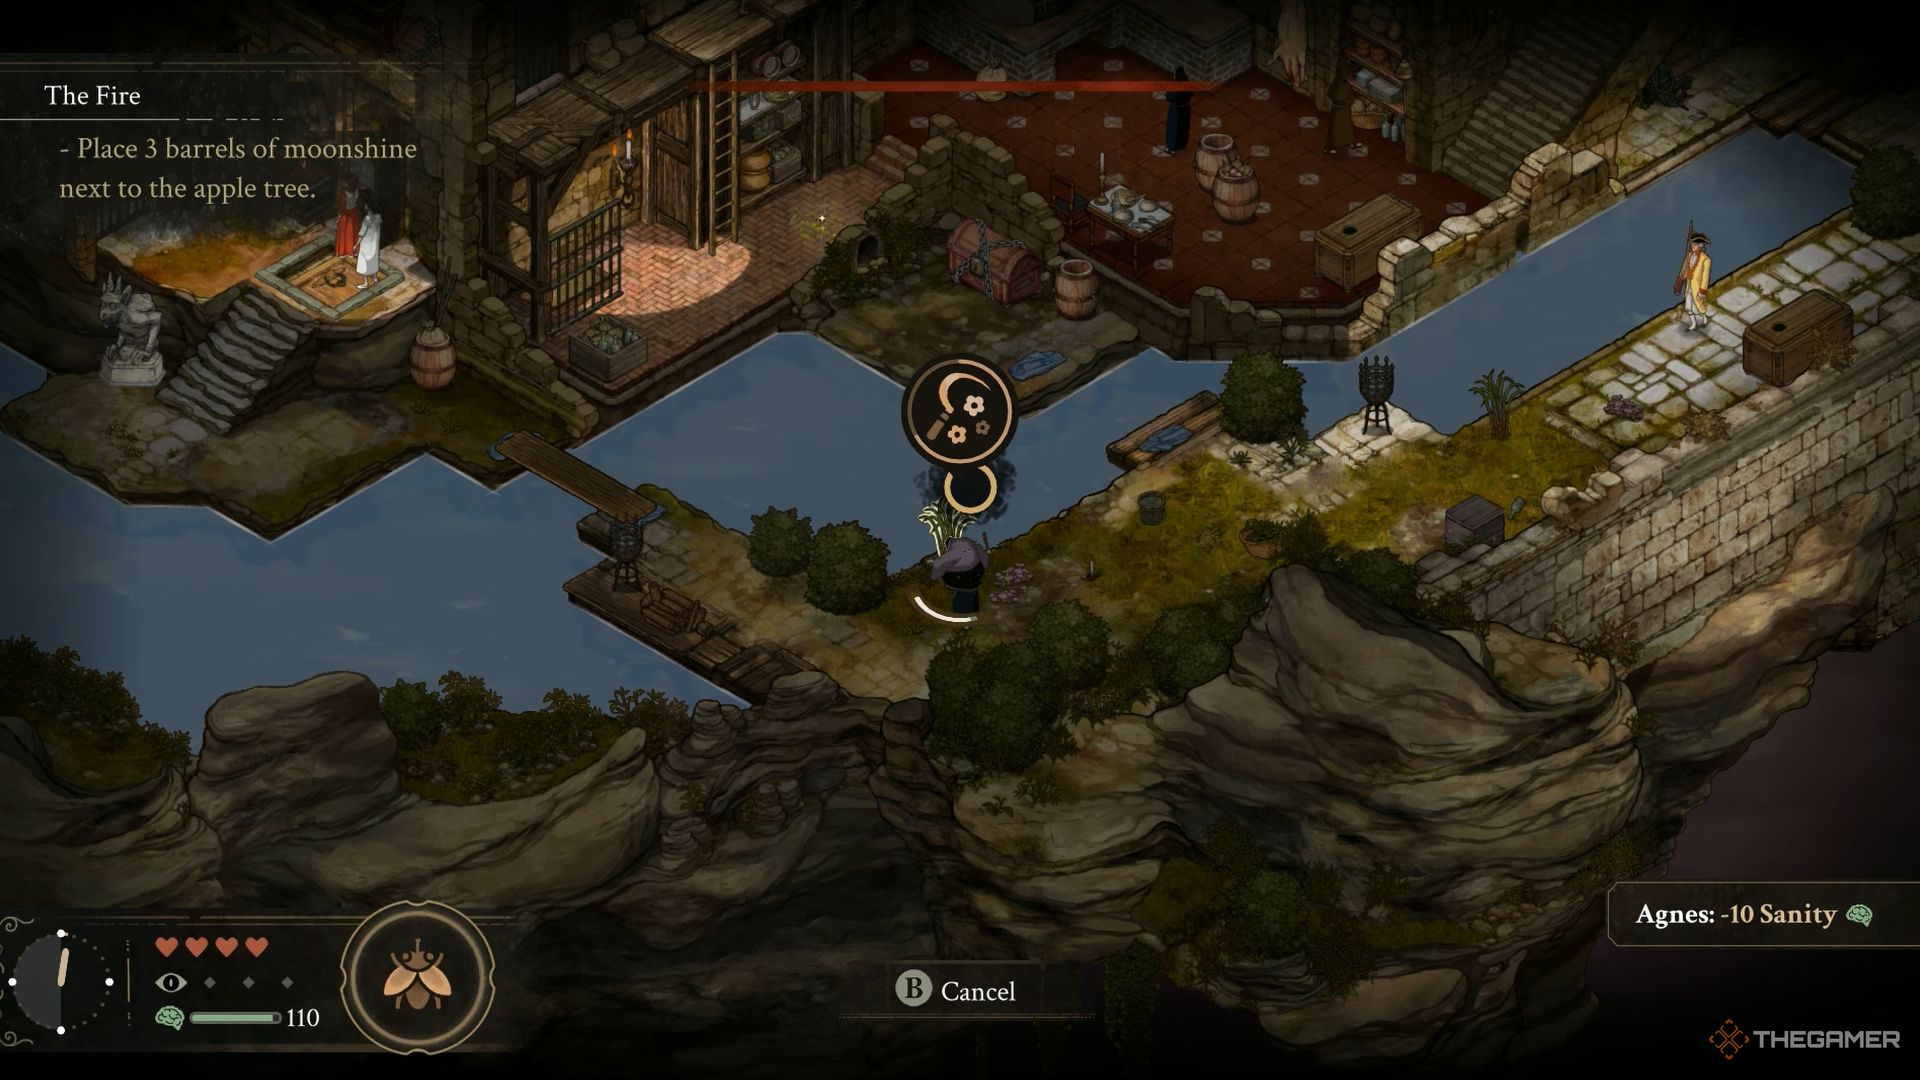
    Your next goal is to create a distraction for your escape by lighting the large apple tree in The Great Wall area. To accomplish this, you need to collect three Moonshine Barrels and bring them to the apple tree. You can either hunt for barrels or gather sugar cane to make moonshine.

    You can craft Moonshine Barrels at night in your cell using Agnes’s Witches Cauldron skill combined with the sugar canes you’ve collected.


    Agnes collects sugar canes next to the river in The Stone of Madness.

    To gather sugar cane, look for it near the river east of the Refectory. There are two sugar canes here—use Agnes to collect them while avoiding the Nun and the soldier. After that, go to the Shed cellar door in The Great Wall, descend the stairs, and find two more sugar canes near the river.

    Across the river, you’ll see another sugar cane, but Eduardo will need to place a plank across the water to reach it. You can also find sugar cane in The Cells’ Apothecary area, specifically in the room on the west side with vases.


    Alfredo investigates the tracks next to the river in The Stone of Madness.

    One Moonshine Barrel is located in the Pianist’s room, and another can be found in the Refectory’s kitchen. To locate the one in the kitchen, employ Alfredo’s Investigate skill to follow the tracks on the lower floor. They will lead you to a hidden barrel behind a wall crack.

    Once you gather all three Moonshine Barrels at the apple tree, your mission will be complete.

    How to Rescue Alfredo

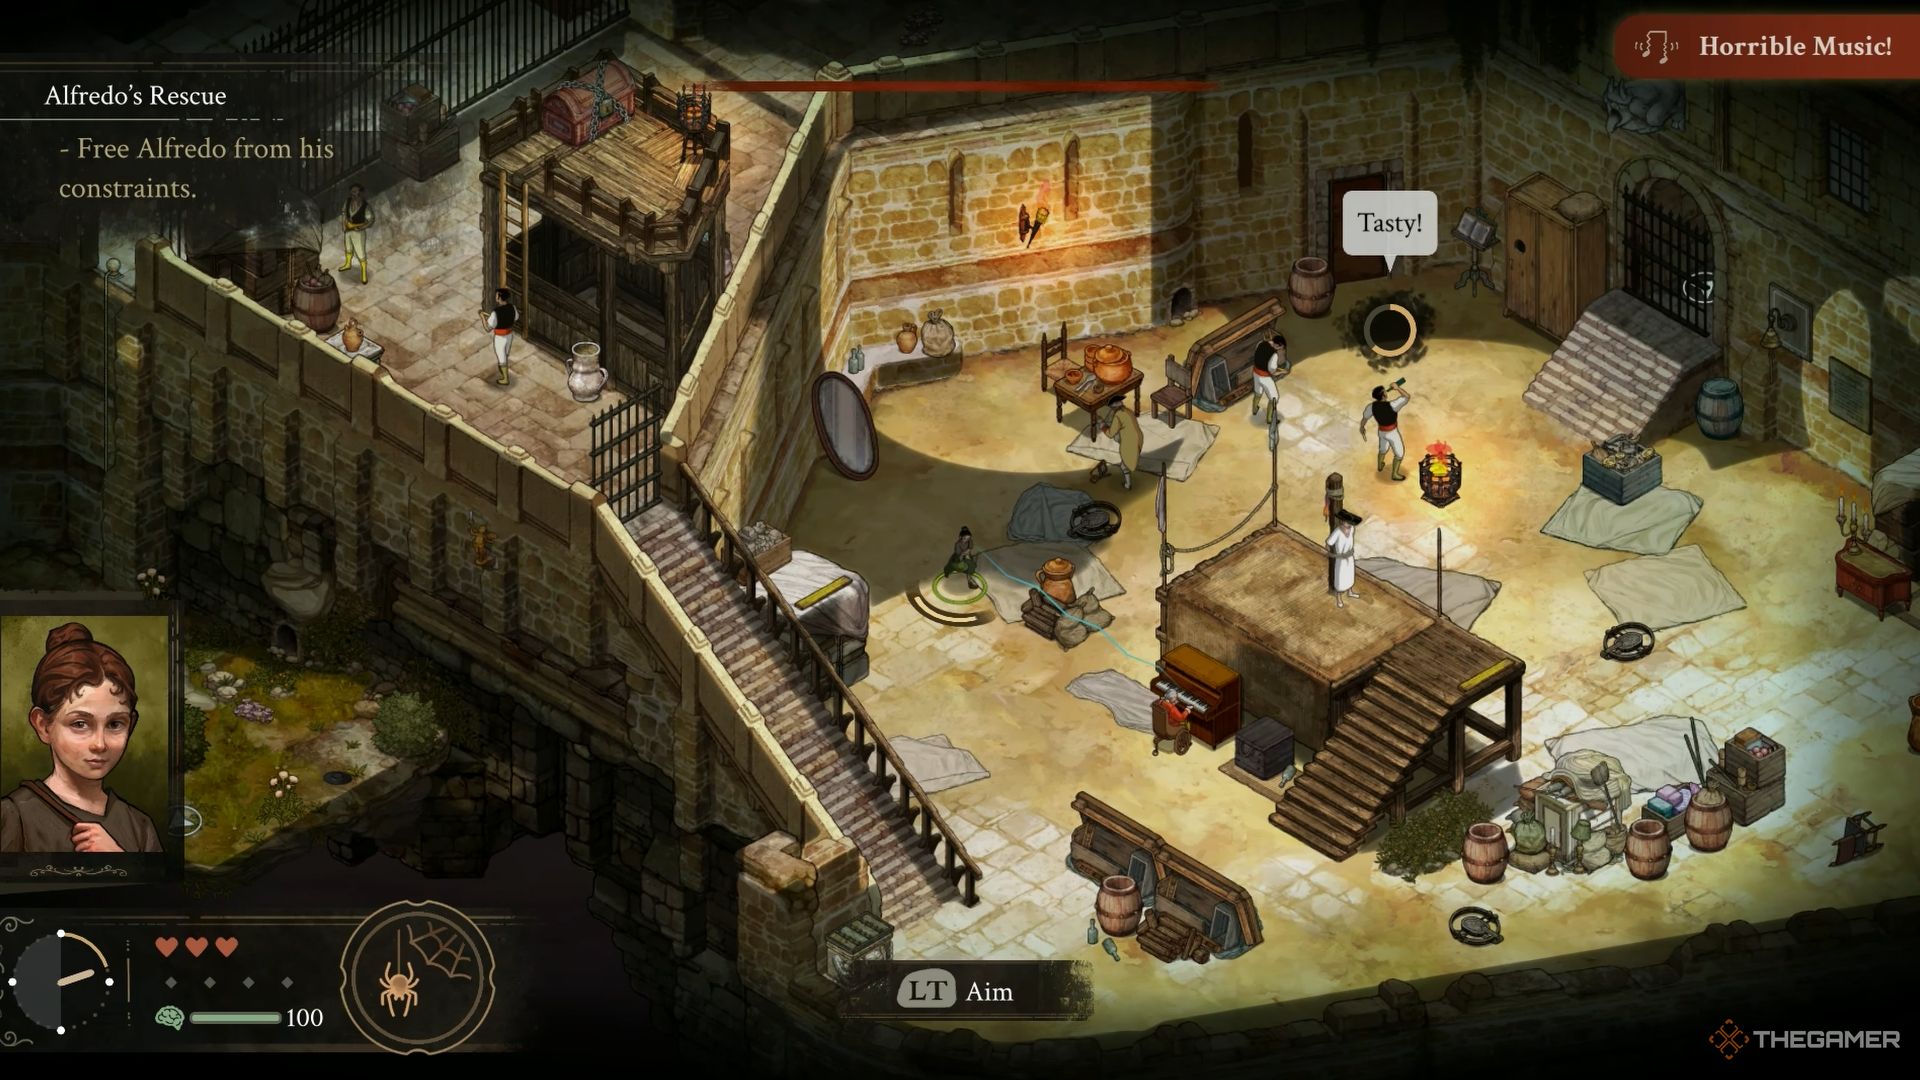
    While attempting to ignite the fire, Alfredo was captured, and your current mission is to rescue him. He’s imprisoned in the Inmate Courtyard, where a cutscene plays when you arrive.

    First, buy the Silver Key from Panecillo for 50 coins. You can find him near the stairs in the northern section of The Cells.

    Next, ascend the stairs and unlock the large wooden door to gain easy access to Mother Superior’s office.

    Alternatively, you can skip getting the key from Panecillo by starting from the cellar door in the Old Storeroom. This method lets you reach Alfredo directly without needing the key.


    Guards capture Alfredo inside the inmate courtyard area in The Stone of Madness.

    In the garden outside Mother Superior’s office, look for a place to tie a rope. Lower Amelia down using the rope, then help her navigate through the hole to Alfredo’s location. Use shadows and barrels strategically to guide Amelia towards Alfredo.

    A guard will periodically patrol the wooden platform where Alfredo is being held. Hide behind the barrel near the bear trap when the guard moves down. Use Sleeping Chocolate to put regular guards to sleep and distract the soldier with a Mousetrap. While they’re occupied, free Alfredo. Once you rescue him, this task will be accomplished.

    How to Escape the Monastery

    Your ultimate mission is to escape the monastery. To do this, all three characters must exit through the large gate at The Great Wall. First, eliminate the guard positioned at the top of the stairs with Leonora. Next, take care of the armed soldier and the other guard near the metal gates—if you can, use Agnes’ Goetia skill to eliminate them.

    Once the patrolling guards are dealt with, climb the ledges on the wall using Leonora and take down the soldier posted there. After interacting with the switch on the wall, guide Leonora and Agnes to the gate. Finally, escort Alfredo, disguised as a priest, to the gate without alerting Mother Superior.

    Alternatively, access the gate via the area where you previously interacted with Shadow. For this, have Eduardo break the planks in the dark passage, then use the switch inside to lift the bars. This will allow you to guide each character to the gate one by one.

  • Saint Jerome’s Gate Campaign: Chapter Three Stone of Madness Guide

    Saint Jerome’s Gate Campaign: Chapter Three Stone of Madness Guide

    In the last segment of the Stone of Madness campaign, titled "The Gate of Saint Jerome," you encountered Brother Pedro, a quirky character with an unusual obsession with chickens. He assigned you the task of locating three brown chickens but subsequently lashed out at the guards. True to his word, he rewarded you with the emblem of Santa Ana.

    Now, in this chapter, your mission is to delve deeper into the monastery to find the missing emblem. During your journey, expect to meet enigmatic figures, experience eerie occurrences, and uncover a heartbreaking narrative. The atmosphere darkens as events unfold—are you prepared for what’s to come?

    Finding the Crack in the Wall

    Your first challenge in this chapter is to reach the inmate courtyards, situated south of the spot where Brother Pedro confronted the guards in the last chapter. You have two options for getting there:

    1. With Leonora, exit through the cellar door in the cells and drop a rope to climb down.
    2. Alternatively, descend the stairs, pick up a plank with Eduardo, and place it to bridge your way to the southern inmate courtyards.

    Once you’re in the courtyards, you’ll encounter Grimore. Keep your distance, as getting too close will affect your sanity. Climb the ladder located to the north and unlock the cellar door to open a shortcut. In the northwest corner, you’ll observe some inmates circling a column, leading into a cutscene.

    On the wooden platform above, look for a crack where Brother Pedro tossed the emblem. Ascend the stairs south of where Grimore is situated, and head toward the wooden platform with a chest. Right next to it, you will find an iron gate. Use Eduardo or Leonora to open it, granting you access to Panecillo.

    On the left side of Panecillo, press the button on the wall to clear the obstruction on the staircase leading down. Bring Alfredo here, ensuring he wears the priest outfit. Use his Investigate skill to trace the tracks and ascend the ledge. A button will appear above, and a hole will open below for Amelia to traverse.

    Send Amelia through the hole and press the button above. This action will unlock the iron gate blocking access to the inmates moving around the northwest column. With a doctor among the inmates, you can safely explore and climb the wooden platform.

    Once you’re on top, interact with the eerie blue eyes in the crack. This will introduce you to the Shadow, also known as Maria, updating your objectives.

    Where to Find Shadow’s Gifts

    The Shadow will request that you locate two gifts: a music box and earrings. After gathering these items, you’ll need to return to Shadow.

    Finding the Earrings

    The earrings can be found in the refectory. In the northern section of the dining hall, look for a rose window adorned with mosaics above. You can reach it with Leonora by either climbing the vines outside or using an already positioned ladder inside the building.

    Additionally, to see the wooden platform appear in front of the mosaic window, you must press the button in the area where the soldiers are playing cards on the upper floor.

    Once you’re set, break the window with Eduardo or Leonora, causing the earrings to tumble down along with shards of glass. Then, with Alfredo dressed as a priest, retrieve the earrings from below.

    Finding the Music Box

    To locate the music box, head to the Cells area and approach the western cells marked with a gargoyle. Your character will notice that the music box is broken. If the door remains locked, use Eduardo or Leonora to unlock it while distracting the guards outside. After acquiring the broken music box, make your way to the Inmate Courtyards.

    Head to Panecillo in the southwestern section of the area where you previously pressed the button with Amelia. You’ll need to purchase Music Box Parts for 150 coins. If you’re short on funds, sell some valuables at night using Leonora’s Black Market skill before returning to Panecillo.

    Once you obtain the parts, wait until nighttime and use Eduardo to repair the music box. Eduardo will also require 20 units of Wood for the repair. If you lack enough wood, search the area or buy some from Panecillo.

    Returning the Gifts

    Now, travel to The Great Wall area, where Shadow will be waiting for you in the dark section beneath the wall. A cutscene will guide you to your destination. Use either Eduardo or Amelia to enter Shadow’s area.

    To conserve resources, have Amelia crawl through the hole outside the wall to reach Shadow. Keep in mind, Shadow only appears after sunset. Hand over the gifts to Shadow to complete this task.

    Confronting Mother Superior

    Your next goal is to face Mother Superior. She is located in the Cells area, moving about the central hub where the inmates gather. What happens next is entirely up to you. Remember, Shadow is waiting in the basement of the building where Brother Pedro confronted the guards previously.

    To access this area, retrace your steps to Brother Pedro’s location in the last chapter and activate the switch on the roof. Then, enter through the iron gates on the right side of the map and locate the key to Shadow’s area.

    If you opt to eliminate Mother Superior, you’ll need to be patient for the ideal moment and take out the guards stationed nearby first. Once she is taken care of, you must bring her to Shadow. However, be aware that there are many guards in your path, making this method quite challenging.

    An alternative strategy is to dress Alfredo in the priest outfit and have him converse with Shadow. Wait for sunset, and then ask Shadow to forgive her sins. Following this, enter Mother Superior’s office, which is near Panecillo.

    If you haven’t already obtained the key, it’s located in the Inmate Courtyards, where the inmates are circling a pillar. The key is suspended above the pillar, but obtaining it will likely require dealing with the guards first, so be prepared for that.

    Once you have the key, enter Mother Superior’s office and handle the guard inside. Proceed to the second floor of the office, unlock the door with a lockpick or crowbar, and you will find the Evidence of Immurement beneath one of the floor stones in Mother Superior’s office.

    Return to The Cells and present this evidence to her. Doing so will prompt Mother Superior to mention the Old Storehouse. Return to Panecillo’s location and press the button on the wall next to him; this will remove the iron barriers leading to the Old Storehouse beneath the garden. Then, distract the guard in front of the Old Storehouse and unlock the door using a lockpick or crowbar.

    After unlocking the storehouse, have Eduardo break through the wall using a crowbar, leading you to the Immurement Cell. Inside, you’ll find the corpse with Baby’s Toy. Wait until midnight, then present this toy to Shadow. In either scenario, Shadow will vanish, leaving behind an engraving. Interact with it to accomplish your objective and wrap up this chapter.

  • Guide to Chapter One: The Gate of Saint Jerome in Stone of Madness

    Guide to Chapter One: The Gate of Saint Jerome in Stone of Madness

    The Gate of Saint Jerome campaign in The Stone of Madness kicks off with you delivering the Stone of Madness to Panecillo. Panecillo is quite an eccentric figure, yet he hands you a key. As you try to determine what this key unlocks, you stumble across a series of engravings.

    These engravings tell the story of an engineer who once lived in this area, detailing his escape attempts and sharing his experiences. Could this engineer be Panecillo or someone close to him? Regardless of the truths you uncover, your main goal is to escape this strange environment.

    Finding Tia Del Nido

    The first step in the Gate of Saint Jerome campaign is to hand the Stone of Madness to Panecillo. He will give you a uniquely designed key. You start the journey in a place called ‘Cells’ with your teammates, Eduardo and Alfredo. Begin by heading north to where Agnes is sitting. Nearby, you’ll also find an Oil Lamp, essential for Alfredo’s investigative abilities.

    When you talk to Agnes, she will request you to fetch her glasses, which are located just outside her sitting area, to the right of the iron fence. If you follow the footprints near where Agnes was sitting using Alfredo’s investigation skill, you will find a room that contains a key hidden behind a painting.

    This key is known as the Garden Key, which you can then use to retrieve Agnes’ glasses. After collecting the glasses, your character will need to hide behind some hanging laundry as someone approaches. Next, head north from your current spot. Use the key given by Panecillo to unlock the stable, leading you to your next encounter with Tia del Nido.

    Locating the First Engraving

    If you haven’t yet done so, take Eduardo to Tia del Nido and have him move a large crate in the stable. Then, with Alfredo, follow the golden trails in the stable using his investigative skill. By checking the area where the crate was located, Alfredo will uncover a crack in the door. Behind it lies an engraving that you should read with Alfredo.

    Once you’ve examined the first engraving, Agnes will arrive, and you can return her glasses. This concludes your day, but make sure to gather any supplies before wrapping it up, as a challenging campaign awaits you.

    Finding the Three Mechanisms

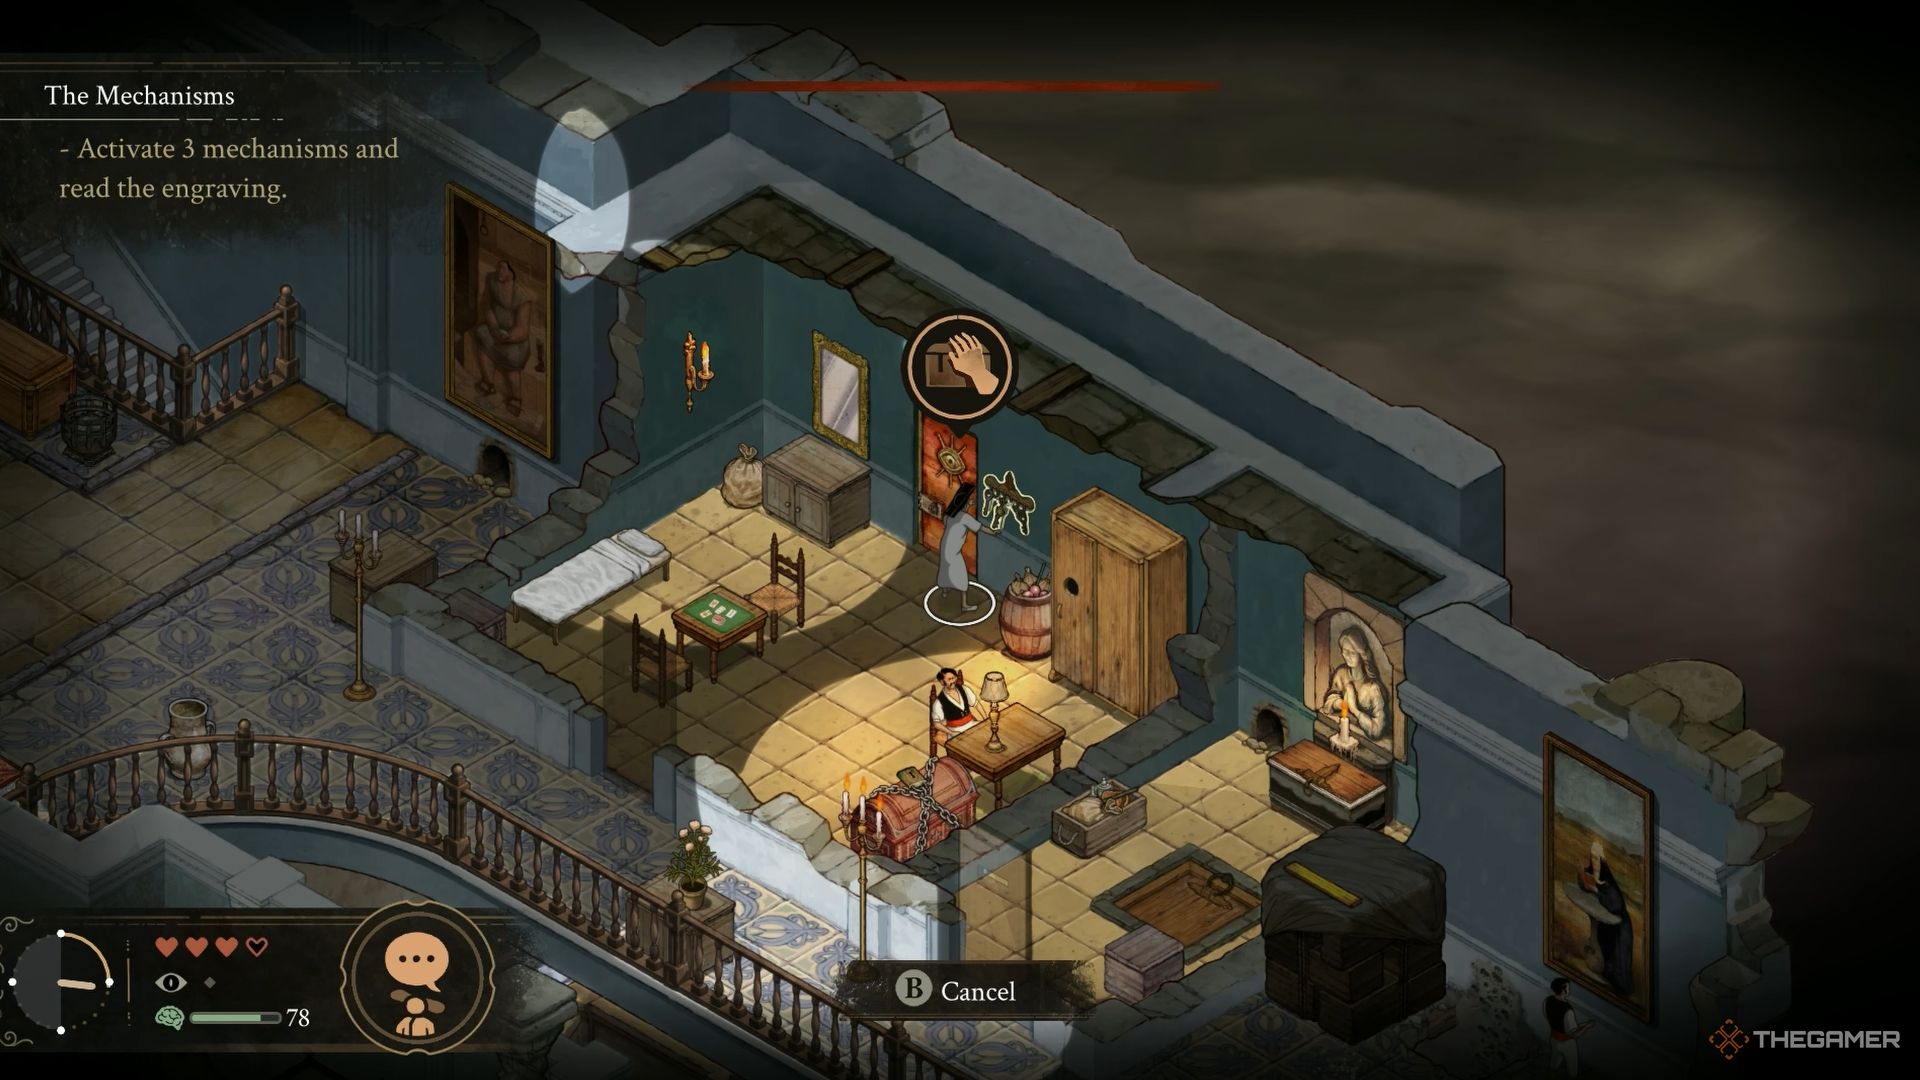
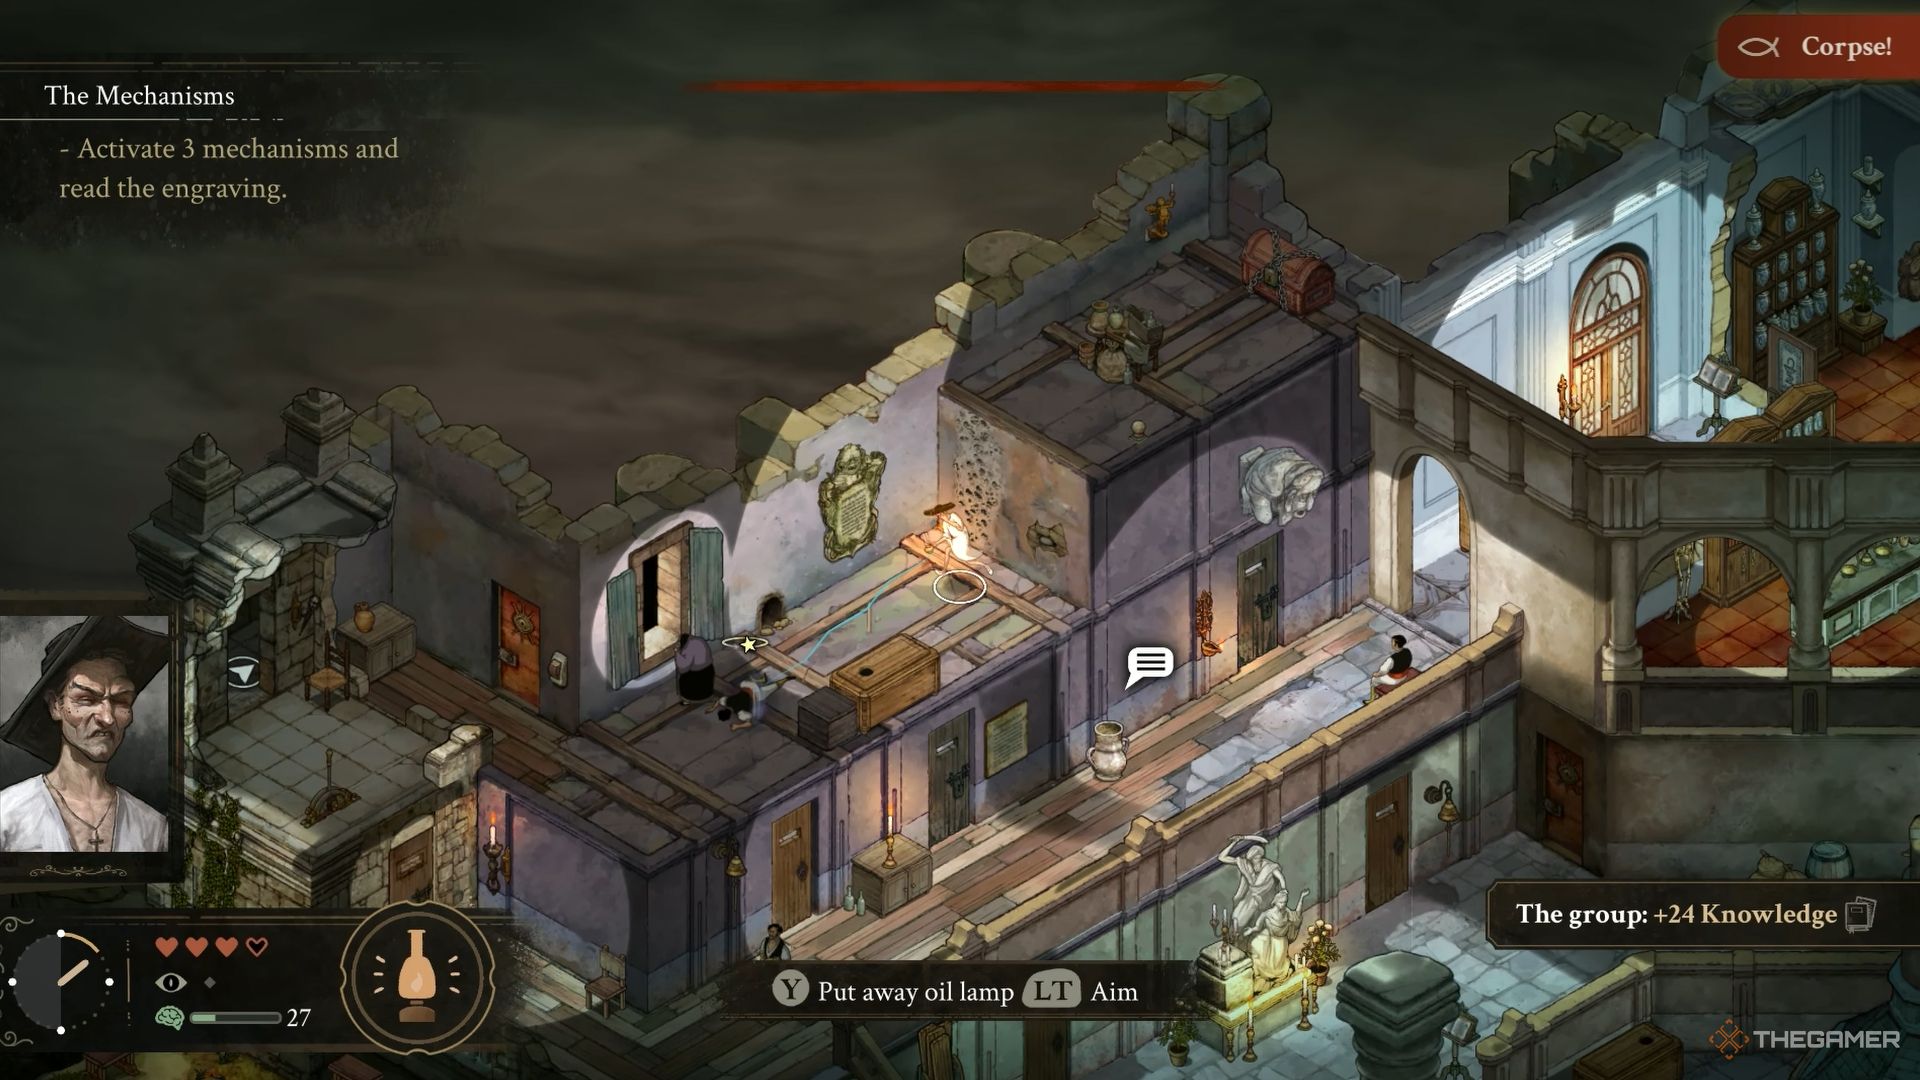
    The next day, you need to activate three mechanisms to discover another engraving. Start by going to the second floor via the stairs located south of the Martyr statue. Check the cabinet with the candles to find an old crowbar. Hand this crowbar over to Eduardo. Then, use Eduardo to open the Scroll Archive door while Alfredo distracts the guards with his Sermon skill.

    In the room with the monk, steal the key hanging on the wall to obtain the Apothecary Key. You can then use this key on the second floor to unlock a room where you can interact with the statue next to a large wardrobe. You still have two mechanisms to activate.

    If you head north and go up the stairs, a cutscene about the Pianist will be triggered. Afterward, you’ll notice another mechanism on the wall, but beware: guards are patrolling this area. Utilize Agnes’s Evil Eye skill to distract them, and have Eduardo push a large crate toward this wall mechanism.

    The Doctor will visit this location in the evening, which could work to your advantage.


    In a mirrored area to the west on this floor, you will find the Luxury Cell Key and the Cell Tower Key. The Cell Tower, located on the western side of the map, leads you to the third floor, but be cautious—the area is guarded. Use Agnes’s Evil Eye skill to incapacitate the guard.

    Additionally, there is a cellar door in the easternmost room on the second floor; be sure to unlock it if you want a shortcut.


    Alfredo steals two keys while the guard is resting on the chair in The Stone Of Madness.

    Directly across from the room where you found the Luxury Cell Key and Cell Tower Key is a room guarded by an armed soldier—a room belonging to the Pianist. Tread carefully to avoid detection. Next to the Pianist’s bed lies the final mechanism. Interacting with it will cause a new engraving to appear on the upper floor of the Cell Tower.

    If you trace the footprints in the Pianist’s room using Alfredo’s investigation skill, you can discover a door that leads to the inmates’ cell outside. Check the basket in front of the statue in this area to find Priest Robes, which are crucial for Alfredo’s key skill. You’ll also discover an egg in the inmates’ cell.


    Alfredo finds the second engraving on the cell tower in The Stone Of Madness.

    Next, head to the Cell Tower. With Alfredo leading the way, follow the trails on this floor to find a crack in the wall where a magnifying glass awaits. This item enhances Alfredo’s investigation speed. Again, use Agnes’s Evil Eye skill on the guard, close the window with Agnes, illuminate Alfredo’s oil lamp from below, and have him read the engraving on the wall.

    After reading, Amelia will approach, and the day will end automatically, unlocking her as a character.

    Locating the Final Engraving


    Eduardo uses a crowbar to reach the cellar door in River Bank area in The Stone Of Madness.

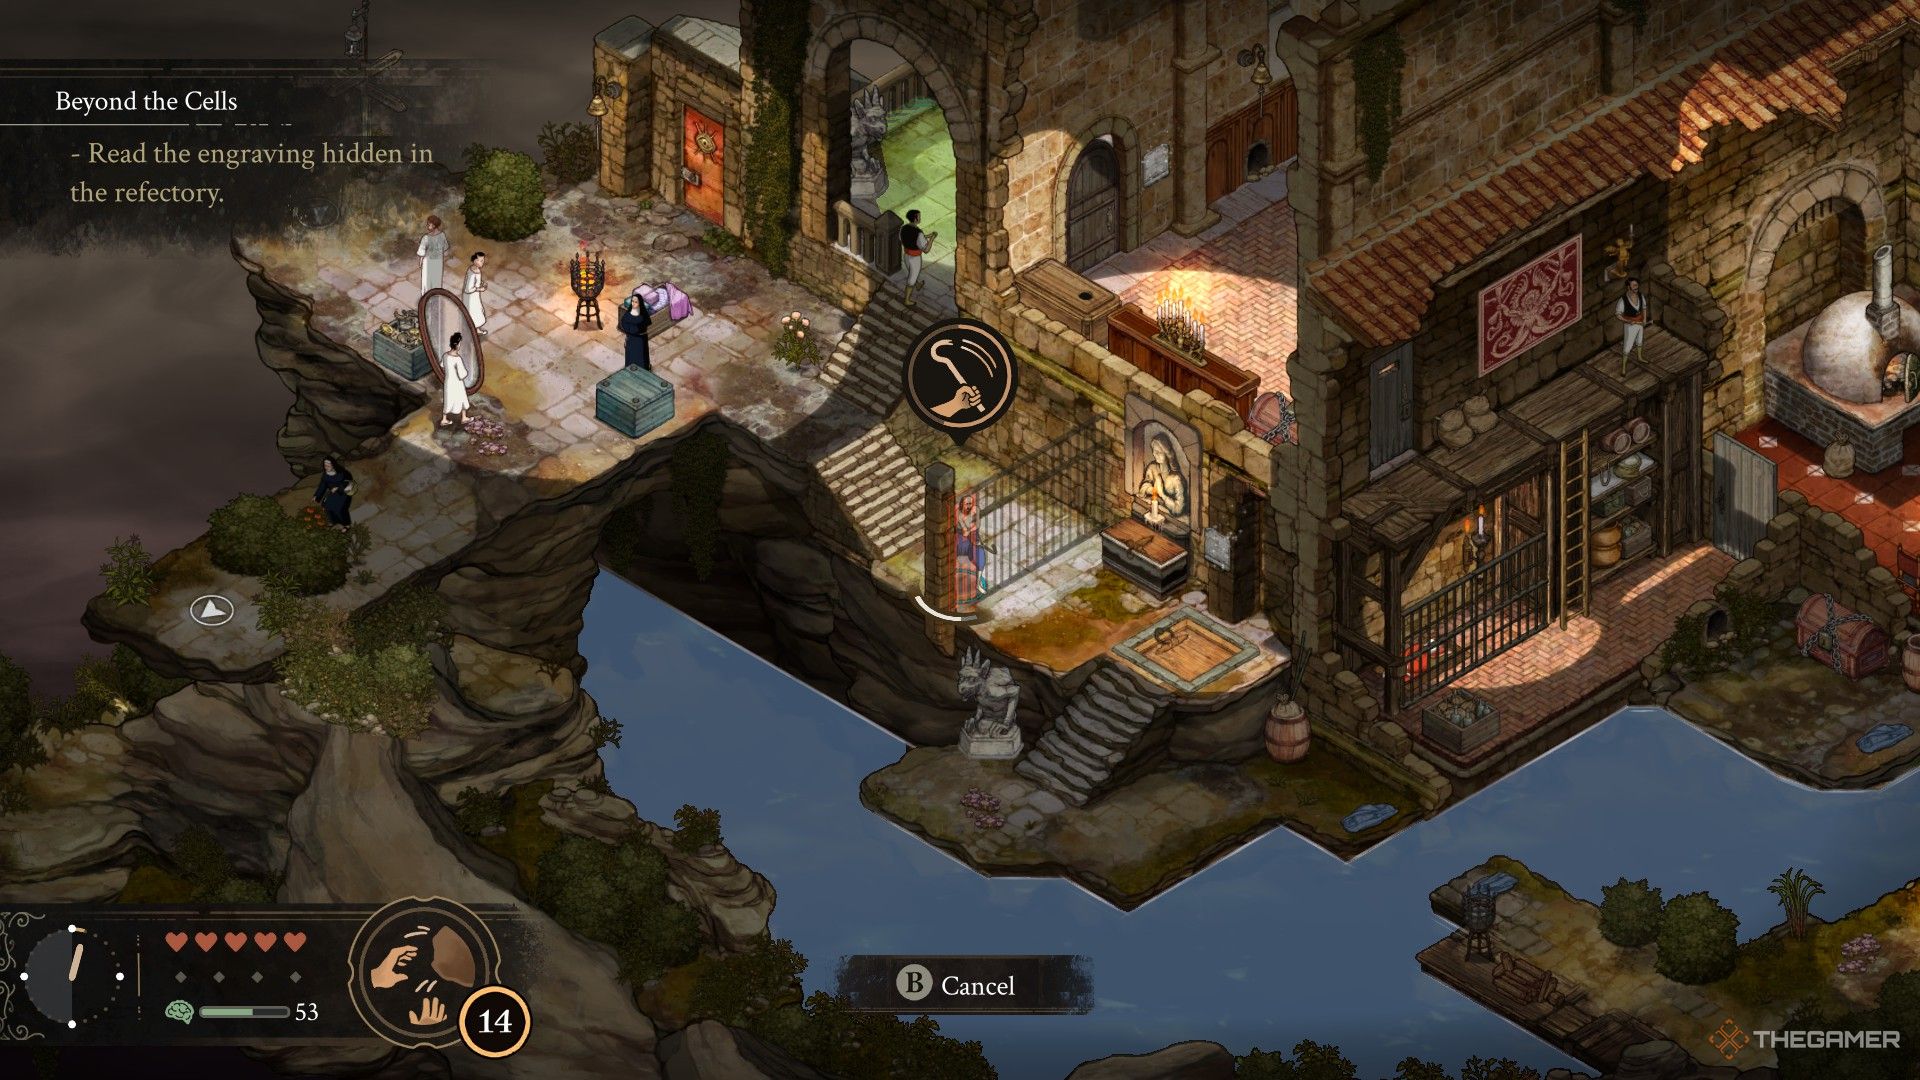
    You can now access the Refectory located in the western part of the Cells, close to the large door near where you discovered the first mechanism. Begin your exploration by unlocking the cellar door at the entrance—use a crowbar with Eduardo. Your top priority in this new area is to rescue Leonora. Wait until nightfall and enter the dining hall with Eduardo.

    Don’t forget, there’s an egg hidden inside the locked chest to the south of the dining hall.

    Use the crowbar to pry open the door above Leonora’s holding room. Then, apply Agnes’s Evil Eye skill on the guard stationed outside and lure him away. After incapacitating the guard, head down to free Leonora. You will need to ignite the angel statue on the wooden platform above her cell, where the guard used to be standing, in order to unlock the bars trapped around her.

    Next, take Eduardo to the River Bank cellar door you just unlocked. Grab one of the planks outside the dining hall and carry it to reach Tia del Nido. If you offer her two eggs, she will disclose that the engraving is concealed beneath a red rug. Read it with either Leonora or Alfredo to wrap up the first chapter.

    If you don’t have any eggs, go to the northernmost part of the dining hall. You can easily access it by dressing Alfredo in priest robes. Afterward, retrieve the Kitchen Key from the upper left section. Follow the tracks on the second floor of the kitchen and descend to the lower level.

    In the final clues, a book will reveal that the last engraving is hidden under the red rug on the left side of the dining area.

  • All No Return Points in Baldur’s Gate 3 Explained

    All No Return Points in Baldur’s Gate 3 Explained

    After immersing yourself in the enchanting landscapes, enigmatic caves, and darker regions of Baldur’s Gate 3 for hours, these areas can begin to feel familiar. However, it can be surprising and frustrating to discover that progressing too far in the story can leave you locked out of certain locations forever.

    Unfortunately, this is an inevitable part of the game. Once you cross specific boundaries in the narrative, certain areas will no longer be accessible unless you revert to older save files. The good news is that we can guide you on where these critical points of no return are, ensuring you’re well-prepared and not taken by surprise.

    Act One: The First Point of No Return

    This first instance isn’t strictly a "point of no return," as you’ll still have the ability to return to earlier areas before reaching it. However, it’s significant because advancing beyond this point will prevent you from accessing specific content if you haven’t experienced it yet.

    You reach this point of no return as you enter the shadow-cursed lands, which can be done via two routes: either through the Mountain Pass or by taking the elevator in Grymforge.

    Important Warning: If you haven’t saved NPCs in Waukeen’s Rest, they will die if you venture into the Mountain Pass, regardless of whether you go further into the shadow-cursed lands.

    Mountain Pass

    To access the Mountain Pass, head to the western edge of the map, beyond Waukeen’s Rest (X:-79, Y:572). You’ll encounter a cutscene featuring a group of githyanki attacking Flaming Fist soldiers. You’ll need to handle this githyanki patrol—whether through combat or negotiation—before you can proceed further east into the Mountain Pass.

    Within the Mountain Pass, you have the option to continue Lae’zel’s personal quest by locating Crech Y’llek or to advance into the shadow-cursed lands.

    Grymforge

    Grymforge is a duergar outpost located in the Underdark. You can reach it by traveling to the Decrepit Village in the Underdark, accessible from the Underdark Beach (X:19, Y:208) waypoint, where you’ll need to commandeer a duergar boat.

    During your initial trip to Grymforge, expect to confront hostile duergar. Once you arrive, you’ll find yourself involved in a situation where Nere, a True Soul, is trapped due to a cave-in. You can choose to aid him in attacking the outpost or save several deep gnome slaves, the latter earning you Barcus Wroot’s loyalty and his valuable gloves.

    After this encounter, you can use the outpost’s elevator to reach the shadow-cursed lands.

    Pro Tip: Grymforge is vast and packed with secrets like the Adamantine Forge and the Sentient Amulet. Take your time exploring before moving on!

    Act Two: Another Critical Point of No Return

    This stage definitely locks you out of all locations from Act One, including the Mountain Pass and Underdark, once you move past it.

    Important Note: This progression also prohibits you from completing or will automatically fail certain side quests, like saving Wulbren and the tieflings. Ensure you accomplish everything you wish to do before passing this threshold.

    This moment occurs in the Gauntlet of Shar, located deep beneath the Grand Mausoleum (X:-174, Y:79) in the shadow-cursed lands of Act Two. After completing all trials in Shar’s Gauntlet, you’ll come across a pool of water that teleports you to the Shadowfell, leading you to confront Balthazar and the Nightsong. Entering this portal will represent your second point of no return.

    Act Three: The Final Point of No Return

    The last point of no return marks the transition from Act Two to Act Three and occurs when you decide to advance to Baldur’s Gate. Progressing here will prevent access to all previous areas, including everything from Act One and Act Two.

    To reach this point, journey to the far western area of the shadow-cursed lands in Act Two, situated north of the Moonrise Towers (X:-151, Y:-96) and southwest of the Grand Mausoleum (X:-174, Y:79).

    Caution: If you’ve angered Vlaakith during your time at the Githyanki Creche, prepare to fight an Avatar of Vlaakith along your route just before the waypoint.

    It’s essential to deal with Ketheric Thorm and the Nightsong before heading to this point, as neglecting this will lead you into battle against the Absolute’s armies.

    Boarding the Skiff in the Baldur’s Gate Sewers

    The ultimate point of no return occurs when you board the skiff destined to confront the Netherbrain, hidden within Baldur’s Gate’s intricate sewer system. Once you’ve gathered all three Netherstones, you can embark on your final challenge, which will consist of more than just one battle.

    Note: You cannot change your party after boarding the skiff.

    Taking the skiff will mean leaving Baldur’s Gate behind and abandoning any ongoing quests there. Thus, it’s crucial to wrap up any remaining tasks in the city, as these quests can provide invaluable assistance in your final showdown against either the Absolute’s forces or the formidable Brain itself.