الوسم: furniture

  • How to Buy a House and Complete Anomaly Furniture in NTE

    How to Buy a House and Complete Anomaly Furniture in NTE

    Neverness To Everness aims to deliver a city vibe within a gacha game — something not seen before in this genre. It includes a special system that allows you to experience city life, such as owning cars and houses. This setup might feel a bit complicated at first, but once you get the hang of it, it becomes easier. You’ll have your own house to sleep in and can explore new aspects of gameplay, like boosting your characters, inviting different characters to hang out, and decorating your house however you like.

    How to Unlock Properties

    To start buying homes, you need to unlock the property feature by reaching level five as a City Tycoon. This involves earning a good amount of Fons and completing various tutorial quests, like fishing and anomaly commissions. After hitting the required level, you’ll see a dedicated section for properties on the main screen. There, you can browse available homes and view their prices.

    All Properties and How to Get Them

    You can purchase properties at any Leon Estate Group location marked by a yellow icon on the map, as long as you have enough Fons. Here’s a quick overview of available properties:

    Name Price (Fons) Size Max Invitable Characters Anomaly Furniture
    Wiener Apartments 200,000 Small (L) 1 7
    Eden Apartments 1,000,000 Medium (LL) 2 9
    Skyview Halls 1,400,000 Medium (LL) 2 9
    Golden Capital 2,000,000 Large (LLL) 3 9
    Fenglin Villa 8,000,000 Large (LLL) 5 11

    Once you buy a property, you can decorate it with any furniture you like. You can purchase furniture from various stores or receive some for free through quests and gameplay. You are free to decorate your house as much as you want.

    Unique Anomaly Furniture

    Every house has special pieces of furniture called Anomaly Furniture, which can give different buffs. To get these, you need to complete specific quests. Once unlocked, they offer various benefits — some allow fast travel to the house, while others give permanent boosts like increased Attack (ATK) or Critical Damage (Crit DMG) for your characters. Collecting all of these furniture pieces is considered important because of their unique advantages.

  • Best Forestpell Furniture and Cosmetics in Heartopia: Completing & Solving

    Best Forestpell Furniture and Cosmetics in Heartopia: Completing & Solving

    If you’ve spent any time in Heartopia, you already know the main goal isn’t just farming strawberries or rushing through your crafting list. It’s about looking unbelievably adorable while doing all of it. The Forestbell Spell gacha set embraces that cozy fantasy style fully.

    Everything in this set is surrounded by woodland charm, with princess-like romance and just a hint of goblin silliness. The furniture and cosmetics look straight out of an enchanted forest, giving your space a sweet, fairy-tale feel. I couldn’t resist spending my saved currency immediately once this set dropped, so I have plenty of opinions. Here are the top Forestbell Spell items that instantly made my cottage feel like a storybook escape.

    ### Forestbell Cloud Loft Bed

    Thanks to Heartopia, we finally have a bed that looks like it belongs in a princess tower, not a basic cabin. The Forestbell Cloud Loft Bed is layered with plush blankets, carved wood details, and soft pastel accents, making it look like it belongs in a castle from a fairy tale.

    It’s whimsical—maybe even a little overdone—but it quickly becomes the centerpiece of any bedroom. I built a whole room around it, adding curtains and warm lights to match its fairy-tale vibe. If you’re going for a dreamy, elevated fantasy look, this bed is the highlight of the set.

    ### Forestbell Spiral Stairs

    The Forestbell Spiral Stairs are the only spiral staircase available in the game right now, making them a must-have. What makes them even more special? They also serve as a bookshelf, complete with tiny glowing lights along the railing. I doubt I’ll ever get over how cute they are.

    Ideal for a wizard-themed space or a cozy reading corner in your cottage, these stairs bring a touch of magic and drama without feeling bulky. I ended up redesigning my second floor just to make space for them—they give any home an instant enchanted vibe.

    ### Forestbell Floral Vine Bay Window

    If romance could be translated into furniture, it would look like this. The Floral Vine Bay Window features a heart-shaped design wrapped in greenery, with interactive seating included. Yes, you can sit in it.

    This piece turns any wall into a sweet fairy-tale scene. It’s perfect for pretending you’re the heroine waiting for a mysterious woodland lover. If you want to add charm easily, this is one of the simplest options.

    ### Spectral Weeping Pagoda Tree

    Every cozy space needs a statement piece, and this enormous willow-like tree fits the bill perfectly. The Spectral Weeping Pagoda Tree has cascading leaves that hang in a dreamy, whimsical way. It looks wonderful outdoors, serving as a garden centerpiece, but it works indoors too, especially in a treehouse or enchanted forest setting.

    I placed one near my pond, and suddenly everything felt more magical. It’s the kind of dreamy addition that elevates any area, making it feel like part of a woodland fairy tale.

    ### Forestbell Tiered Storage Rack

    Ever seen that elf-style bookshelf that seems to belong to a potion master? That’s exactly what the Tiered Storage Rack is. It’s a ladder-style bookshelf wrapped in ivy, decorated with tiny knickknacks. It has a lived-in, charming look without feeling cluttered. I love how it adds texture and personality to a space without overwhelming it.

    Perfect for filling awkward corners or giving a study room some character. Combine it with the spiral stairs to create a full-on wizard library scene.

    ### Forestbell Magic Brook

    This might look like just a broom, but it’s also a statement piece. Decorated with lace, bells, and greenery, the Magic Brook exudes elf-warlock vibes. It appears as if your character would ride it through glowing treetops at dusk.

    I used it purely for aesthetic reasons, but now I can’t go back to a regular broom—it’s just too charming. If you’re creating a fairy witch or woodland mage look, this is the perfect finishing touch.

    ### Firefly Serenade Suit

    Let’s talk fashion. The Firefly Serenade Suit is inspired by rococo styles, layered with fabric, and features a romantic silhouette that’s almost Renaissance in spirit. It’s both delicate and dramatic—hard to pull off but stunning when done right.

    Pair it with softer hairstyles and subtle accessories for the ultimate fairy-tale outfit. If you want to look like you just stepped out of a candlelit enchanted forest ballroom, this suit is your go-to.

    ### Layered Bow Twin Tails Hair

    This hairstyle is utterly adorable. The Layered Bow Twin Tails feature soft pigtails tied with ribbons, instantly giving your character a fairy witch look. It’s playful, yet mature enough to go with dresses or casual outfits alike.

    When I paired it with the Serenade Suit, I genuinely felt like I unlocked my final fantasy form—a perfect look for anyone aiming for that magical girl or storybook sorceress vibe.

    ### Starry Goblin Ears

    Sometimes small accessories make the biggest difference. The Starry Goblin Ears are cute elf-like earrings that instantly change your character’s silhouette. They’re a simple way to lean into a whimsical fantasy aesthetic without a full costume.

    They add just enough sparkle to make your look feel special. When combined with the right hairstyle, they give off a gentle woodland creature vibe, fitting perfectly into the Forestbell theme. Simple, yet elevating almost any outfit.

    ### Goblin Plushie Ornament

    Every cozy home needs at least one adorable item, and this is it. The Goblin Plushie Ornament features two cute little figures—one with a hat, the other with a tiny flower sprout. They’re silly but add a lot of personality to any space.

    I placed mine on a shelf near my bed, and instantly it made the room feel cuter and more personal. It’s not flashy, but it’s full of charm. Among larger statement pieces in the gacha set, these tiny plushies stand out because they’re just so adorable.

  • Everything You Need to Know About Completing Furniture in Mewgenics

    Everything You Need to Know About Completing Furniture in Mewgenics

    Mewgenics features many systems and mechanics that, once understood, can significantly boost your gameplay. Mastering these elements will not only improve your combat skills but also enhance your cats’ lives back at home. This is key to raising more powerful and unique cats for future adventures, which feeds back into the core gameplay loop.

    One important system is Furniture. These items impact the overall vibe of your house, making it more likely for stronger cats to reproduce and for better stray cats to be attracted. This simplifies future runs, especially once you understand the basics. Managing furniture is especially important as you expand your house and get more cats.

    What Is Furniture?
    Furniture in Mewgenics allows you to decorate your house with various items like strange decorations, useful utilities, and more. These can increase specific house stats that directly boost your cats’ mood, fighting ability, and other traits. The feature unlocks after clearing the Cave region and meeting Baby Jack, who will sell furniture to help you create your ideal home.

    Every Sunday in-game, Baby Jack refreshes his inventory, giving you time to gather more funds for new purchases. Some furniture pieces are expensive, so be ready to spend big if you want your cats to be at their best.

    Certain furniture items also have properties that increase the amount of Food you can carry. This helps keep your cats fed longer during the week, which is especially helpful as your group grows or if you go on some failed expeditions. Running out of Food harms your cats’ health and mental state, so managing food supplies is vital.

    All House Stats Explained:

    • Appeal: Attracts higher-tier stray cats with special abilities and mutations.
    • Comfort: Increases the likelihood of your cats mating and reduces fighting risks.
    • Health: Helps injured cats recover overnight after long expeditions, fights, or arrivals.
    • Mutation: Boosts the chances of cats being born with mutations, which can benefit combat but sometimes cause negative effects.
    • Stimulation: When cats reproduce, their kittens are more likely to inherit active and passive abilities from their parents, making breeding more predictable.

    As you donate more cats to NPCs, your house will expand, allowing multiple rooms and a wider variety of furniture. Each room has its own stats to manage, and placing many cats in a single room will influence those stats, so balancing your layout is essential.

    All Pieces of Furniture
    There are over 750 unique furniture items in Mewgenics. We’ve only seen a small number so far, but every piece offers buffs or debuffs, so choosing where to place them is critical. While you don’t need to collect all items, acquiring many is necessary to keep your cats happy and healthy.

    Every week, new furniture becomes available from Baby Jack, giving you opportunities to enhance your home. Below are some of the items we’ve encountered and their effects:

    Furniture Item Stats & Effects
    Daruma Statue +1 Appeal, +1 Stimulation, -1 Comfort
    Food Storage Increases food capacity
    Framed Frida Decor item, effects vary
    Iron Utility, effects vary
    Junk Chair +1 Comfort, +1 Stimulation
    Lucky Cat Bobble +1 Appeal, +1 Comfort, -1 Stimulation
    Microwave Utility, effects vary
    Newspapers A Decor, effects vary
    Sewn Stool B Comfort boost
    Soda Cans Decor, effects vary
    Squash Decor, effects vary
    Taxidermy Pigeon +1 Mutation, -2 Health, -1 Appeal
    Touched Toxic Waste Barrel +8 Stimulation, -2 Comfort
    Toxic Waste Barrel Utility, effects vary
    Wooden Boards B Utility, effects vary

    In total, there’s a vast variety of furniture items, each influencing your house’s stats differently. Proper placement and management of these pieces are crucial for keeping your cats in good condition and making your house a safe, effective space for breeding and adventure.

  • Where To Find All Furniture Recipe Bubbles in Heartopia for Completing and Solving

    Where To Find All Furniture Recipe Bubbles in Heartopia for Completing and Solving

    Players in Heartopia can earn some free furniture to decorate their homes by finding all the furniture bubbles scattered across the map. There are six pieces to discover, each hiding a recipe inside a bubble somewhere in the game world.

    Once you’ve collected a furniture bubble, you can craft the piece you like most and place it in your home. Here’s everything you need to know about locating all the furniture recipe bubbles in Heartopia.

    All Furniture Recipe Bubble Locations

    There are six furniture bubbles hidden throughout Heartopia. Each one provides a recipe for a specific piece of furniture, provided you have all the necessary crafting ingredients:

    | Furniture | Recipe Ingredients |
    |——————————|———————————————————————-|
    | Oceanic Cutlery Storage | 5 Timber, 2 Stone, 11 Quality Timber |
    | Oceanic Corner Storage | 3 Timber, 15 Quality Timber |
    | Oceanic Tableware | (Ingredients not listed) |
    | Joinery Seasoning Rack | 4 Timber, 4 Stone, 3 Quality Timber |
    | Kitchen Rack | 4 Timber, 4 Stone, 3 Ore |
    | Simple Wood Fiber Mat | (Ingredients not listed) |

    Joinery Seasoning Rack Location

    The first recipe, the Joinery Seasoning Rack, is on Garden Street. Head to the gazebo across the bridge from Suburban Lake and go up the stairs. The recipe is just inside the gazebo, requiring a small jump to reach.

    Simple Wood Fiber Mat Location

    This recipe is on Residential Street, right on the Bookstore balcony. Jump onto the book rack in front of the store to access the balcony above.

    Kitchen Rack Location

    Locate the Kitchen Rack floating near the piano statue between Art Street and Residential Street. Walk along the north end of Art Street and through the alley to find it.

    Oceanic Cutlery Storage Location

    Head to the Fishing Village in the south and go to the lighthouse where NPC Will lives. Climb the steps up the lighthouse to find the recipe bubble.

    Oceanic Tableware Location

    Travel to Whale Mountain and look near the large tree by the coast. The recipe bubble floats near the viewpoint overlooking the sea.

    Oceanic Corner Storage Location

    Finally, visit the west of Onsen Mountain, among the capybara statues. The bubble is up in a tree; jump on the trunk to reach it.

    Remember to click “Learn” after collecting each bubble so you can craft the furniture at your workbench.

  • How to Customize Clothing and Furniture in Heartopia by Completing and Solving

    How to Customize Clothing and Furniture in Heartopia by Completing and Solving

    One of the best things about Heartopia is that you can enjoy a cozy, relaxing life in a small town, designing your own home and wardrobe however you like. A key feature that makes the game special is the ability to fully express yourself through custom art and patterns.

    We’ll guide you through the tools you’ll need to start designing, and show you how to incorporate your creations into the game world so you can share them with friends nearby. Here’s everything you need to know to begin designing your own outfits.

    ### How to Get the Drawing Board

    As you play Heartopia, you’ll unlock more items at the General Store. Be sure to talk to Ka Ching daily and check her shop so you don’t miss out on new inventory.

    Once you have the Drawing Board, you can take it out and place it anywhere. Use it at home in your craft room or settle somewhere outdoors on the island for longer painting sessions.

    ### How to Use the Drawing Board

    When you interact with the canvas, you can create a new painting. Choose one of the preset sizes and start designing. You’ll begin with a basic color palette, but if you select the advanced palette tool, you’ll access many more shades and hues for more detailed work.

    If you have a specific idea in mind, you can create a custom color palette in one corner of the canvas for easy eyedropping, so you don’t have to search for colors manually.

    Keep in mind, the art will be pixelated because of game limitations and available colors. Use this to your advantage by creating retro-style designs or recreating your favorite game sprites as portraits.

    You can also change brush sizes for detailed work or fill large areas quickly with the paint bucket tool. If you aren’t into drawing, you can use the stamp tool to add pre-made designs like flowers or cute whales.

    There are also coloring pages you can use for fun.

    ### How to Make Custom Clothes

    To create new clothes, select a clothing template on your workbench to start a new drawing for that item. After designing, head to your sewing station. Choose the scissors icon to see different clothing options, then pick and place your design.

    To complete your outfits, you’ll need a tailoring ticket. These can be earned by completing quests or bought for 80 Moonlight Crystals each. Once your outfit is crafted, you can wear it by visiting your wardrobe and selecting your custom design.

    ### How to Make Custom Furniture

    Designing your own furniture follows a similar process, but options are more limited. Use the Drawing Board to create a design based on available furniture templates, then go to your workbench.

    Currently, only joinery-style furniture can be personalized with clip art stamps and stickers. Make sure you have the furniture piece in your inventory or storage, then select the brush icon at your workbench. Pick the furniture, then choose your design.

    You’ll need a can of paint to finish your design, which can be purchased from the General Store for 50 Moonlight Crystals. Once done, you can display your custom furniture at home for friends and neighbors to admire.

  • All Special Furniture Sets and How to Complete Them in Heartopia

    All Special Furniture Sets and How to Complete Them in Heartopia

    In Heartopia, special furniture sets let your personality shine through, from cozy manors to whimsical frog gardens. Each set is connected to specific system or progress paths that reward your efforts and some planning. If you’ve ever seen an eye-catching house or decorative set and wondered how players unlocked it, this guide lays out all of Heartopia’s special furniture options and how to earn each one, so you know what to aim for as you create your dream home.

    All Special Furniture Sets and How to Unlock Them

    Here’s a complete list of every special furniture set currently available in Heartopia, along with the methods to unlock each one.

    Furniture Set How to Obtain
    Polar Hymn Ice Palace Building Material Complete the Gilded Acorn Exhibition.
    Polar Hymn Ice Palace Finish the Gilded Acorn Exhibition. Image
    Purple Polar Hymn Ice Palace Finish the Gilded Acorn Exhibition. Image
    Pink Polar Hymn Ice Palace Finish the Gilded Acorn Exhibition. Image
    Gold House Complete Cassie and Naughty’s Treasure Voyage Quest. Image
    Summerday Minimalist Set Purchase from Bob’s Furniture Store. Image
    Purple Manor Buy from the Acorn Store. Image
    Pink Manor Purchase from the Acorn Store. Image
    White Manor Purchase from the Acorn Store. Image
    Manor Building Material Buy from the Acorn Store. Image
    Courtesy Set Acquire from the Time-Limited Festival Store or Bob’s Furniture Store. Image
    Marshmallow Set Obtain from the Time-Limited Festival Store or Bob’s Furniture Store. Image
    Mint Set Available through the Festival Store or Bob’s Furniture Store. Image
    Collector’s Exhibit Room Reward for collection points. Image
    Bee Workshop Earn through collection points at Bob’s Furniture Store. Image
    Free Bird Reward at collection points in Bob’s Furniture Store. Image
    Corner Restaurant Earn collection points at Bob’s Furniture Store. Image
    Refreshing Sea Breeze Reach collection points at Bob’s Furniture Store. Image
    Cute Calico Cat Collect via collection points at Bob’s Furniture Store. Image
    Flo’s Garden Obtain through collection points at Bob’s Furniture Store. Image

    This overview provides a clear starting point for unlocking and collecting all the unique furniture pieces in Heartopia, helping you craft a personal and impressive space.

  • Completing Kitchen Furniture in Hello Kitty Island Adventure

    Completing Kitchen Furniture in Hello Kitty Island Adventure

    In Hello Kitty Island Adventure, you have plenty of choices for furnishing and decorating your cabins. But sometimes, a classic kitchen is just what you’re looking for. Are there basic pieces available for that?

    Yes, there are! You can gather furniture from the Home Essentials set, which features several kitchen items. This guide will explain how you can acquire these pieces, along with some exclusive items available specifically for mobile players.

    How to Acquire All Home Essentials Furniture Items

    There are a total of nine items in the Home Essentials set, with two being exclusive to players on Apple Arcade. However, those two items are bathroom-related, so fear not—you can find all the necessary kitchen pieces!

    You can purchase each item at My Melody’s shop, Small Gift Big Smile. The selection of items varies daily, so make sure to check in every day. Each day, you’ll find 11 different pieces, and you can buy as many as you like, as long as you have enough items to trade.

    Furniture Item

    Item Name

    Price (at Small Gift Big Smile)

    Refrigerator

    100x Tofu
    2x Snowcicle

    A sink from Hello Kitty Island Adventure.

    Kitchen Sink

    50x Tofu
    2x Ingot

    Counter A from Hello Kitty Island Adventure.

    Kitchen Counter A

    15x Tofu

    Counter B from Hello Kitty Island Adventure.

    Kitchen Counter B

    15x Tofu

    Kitchen Corner Counter from Hello Kitty Island Adventure.

    Kitchen Corner Counter

    20x Tofu

    Kitchen Counter with Cabinets from Hello Kitty Island Adventure.

    Kitchen Counter with Cabinets

    25x Tofu
    2x Woodblock

    Kitchen Counter with Shelves from Hello Kitty Island Adventure.

    Kitchen Counter with Shelves

    25x Tofu
    2x Woodblock

    Clawfoot Bathtub with Curtain from Hello Kitty Island Adventure.

    Clawfoot Bathtub with Curtain

    This item is exclusive to Apple Arcade players.

    50x Tofu
    3x Iron
    2x Fabric

    Clawfoot Bathtub from Hello Kitty Island Adventure.

    Clawfoot Bathtub

    This item is exclusive to Apple Arcade players.

    50x Tofu
    3x Iron

    How to Get Furniture from Crane Craze

    A crane is lifting a crate from the water.

    All items except the two bathtubs can be earned through the Crane Craze mini-game, which is located in Merry Meadows near the temple. To unlock it, you need to have grown three separate beanstalks.

    This might take some time, but if you’re unable to access the area, you can always buy the pieces. If you do choose to play the mini-game, you can opt for easy mode to try and win a piece from the Home Essentials set.

    Good news! Each item will be displayed on the crates within the Crane Craze game, so you can easily identify which crate contains a kitchen furniture item.

  • Revamp Your Furniture at Two Point Museum: A Quick Guide

    Revamp Your Furniture at Two Point Museum: A Quick Guide

    Decorating your own museums in Two Point Museum is already a blast. You can mix and match wallpapers, flooring, and various decorations, but why limit yourself to just the basics? You have the opportunity to take customization to the next level and make each item truly your own!

    There are several ways to alter the colors of your furniture and displays in Two Point Museum. Items marked with a round paint palette icon can be adjusted to fit the overall theme of your museum.

    Utilize Sliders for Customizing Furniture and Decorations

    The initial levels in your Prehistory museum provide plenty of tips on how to arrange your exhibits to boost the decoration score, which your visitors will certainly appreciate. With numerous themes and a variety of furniture pieces unlocked through the campaign mode, you’ll find yourself customizing the colors of certain items to better fit their surroundings in no time.

    You can personalize your furniture and decorations in Two Point Museum before and after setting them up. Fortunately, once an item is placed, you won’t incur any additional costs for customization, giving you full freedom to express your style across every corner of your museum.

    If you’re changing colors before placing a piece, look for the orange palette icon on the item in your catalog. Not every piece will have this icon, meaning they are fixed in their appearance. However, any item with this icon can be customized. Click into the customization menu to select the color using a circular hue selector and then adjust the saturation meter to achieve the exact shade you want.

    In addition to changing colors, many decorations offer other customization options. By interacting with the blue paintbrush icon in the bottom right corner of any item in the menu, you can modify things like rock formations, exhibit designs on banners, the number of animal prints, and much more.

    Changing the type of plushies displayed in a gift shop by customizing the theme in Two Point Museum.

    If you want to modify an item you’ve already placed—perhaps due to a change in theme or a desire for a new layout—you can easily do so. Just hold to pick up an item, which will open a small menu on your screen that shows details about that item.

    At the bottom of this menu, you’ll find several icons for selling or storing the item. Select the Customize Furniture option from this row. This will bring up the same hue selector for recoloring as you would use for items before placement. After adjusting the color, you can return the item to its original location with a fresh look.

    Interestingly, customizing furniture or decor doesn’t seem to influence your guests’ opinions. They care more about how well the items are arranged and maintained rather than if the colors are coordinated.

  • Personalize Your Furniture in Hello Kitty Island Adventure

    Personalize Your Furniture in Hello Kitty Island Adventure

    Hello Kitty Island Adventure is brimming with furniture options. You can purchase items straight from My Melody, craft them yourself, or discover them scattered throughout the island. Moreover, certain characters will reward you with furniture as you enhance your friendship with them.

    When it comes to decorating your cabin, the options are extensive. You even have the ability to customize select furniture pieces! Thanks to My Sweet Piano, you can change the appearance and colors of your furniture. This guide will show you how to completely unlock furniture customization in Hello Kitty Island Adventure.

    Getting Started with Furniture Customization

    The quest that unlocks furniture customization is titled The Fun In Furniture. This quest is divided into two parts, but the second part doesn’t have any prerequisites besides finishing the first.

    To initiate The Fun In Furniture, you need to achieve friendship level five with My Sweet Piano. If you’re finding it challenging to give her gifts early on, consider gifting her the following items:

    Pro Tip: At TheGamer, we recommend giving her a bunch of Woodblocks until you can craft better gifts.

    Once you reach friendship level five, you can start the quest by chatting with her.

    Completing The Fun In Furniture: Part One

    The first part of the quest is straightforward; you simply need to provide My Sweet Piano with the following items:

    • Iron Ore – found around Mount Hothead
    • Woodblocks – can be crafted using Sticks
    • Mechanisms – can be made with Gizmos (obtained from Chococat)

    After you give her these items, you’ll need to wait a full day in real time before proceeding to the second part.

    Completing The Fun In Furniture: Part Two

    Now it’s time to tackle the final part! Speak to My Sweet Piano once more, and she will introduce you to the fun world of the Furniture Customizer. Initially, you’ll need to customize a Cottage Dining Chair.

    You must craft this chair first; the crafting plan is given to you when you reach friendship level four with My Sweet Piano. Head over to the crafting station to create the chair using the following materials:

    Note: Wool can be obtained from My Sweet Piano when you give her gifts. If you don’t have enough Wool, simply give her another gift or two.

    Once the chair is crafted, return to Small Gift Big Smile and interact with the Furniture Customizer. The interface is user-friendly; select the furniture item you want to customize, and then choose your preferred customization option.

    To customize your item, you’ll need the appropriate dyes. For this quest, feel free to select any color scheme. After customization, talk to My Sweet Piano, now joined by My Melody. After a brief chat, you’ll complete the quest! You can now use the Furniture Customizer at your discretion.

    What Can Be Customized?

    Not all furniture pieces are eligible for customization. Luckily, when using the Furniture Customizer, you’ll see which items in your inventory can be customized. If a furniture item is missing from the list, you will not be able to modify its look.

    How to Customize

    There are four types of furniture customization to consider, organized into different categories. These categories relate to the materials used in the furniture. For instance, the Antique Standing Lamp can be customized in terms of Wood and Fabric, while the Beanbag can only be customized in Fabric.

    Tip: If a furniture item has multiple categories, you can customize each one separately.

    You’ll find various color schemes for each category, so feel free to experiment until you find one that suits your style. You can preview the design even if you lack the required materials. If you don’t have enough materials, a circle with a line will appear next to the color option.

    Clicking ‘Craft’ will show you the exact materials needed, as well as which ones you still need to gather.

  • Sihoo’s Top Ergonomic Office Chairs Are Super Cheap This Week

    Sihoo’s Top Ergonomic Office Chairs Are Super Cheap This Week


    If your home office chair isn’t providing the comfort you need, your workday can quickly become a struggle. This is why ergonomic office chairs are crucial. Currently, two of Sihoo’s high-end office chairs are available at a 40% discount. Additionally, you can snag another 10% off by using a code we’re happy to share with you. Simply enter DT10OFF at checkout to avail of the extra discount. This offer is valid until the end of January, so take a moment to explore both chairs and find the one that suits you best.

    M57 Full Mesh — $180 $299 40% off

    Sihoo

    The M57 Full Mesh chair is tailored for those who lead a more sedentary lifestyle—an acknowledgment that many can relate to. The design incorporates mesh from the headrest to the seat, ensuring ventilation and comfort throughout the day. Surprisingly, despite mesh’s lightweight appearance, this chair can comfortably support individuals weighing up to 330 pounds. Its reclining feature allows for a tilt of up to 126 degrees, complemented by adjustable lumbar and lower back support to enhance comfort in any position. Click the link below to select a color—black, grey, or light grey—and remember to use the code DT10OFF for your additional 10% discount at checkout.

    BUY NOW

    Doro C300 — $240 $400 40% off

    Sihoo's Doro C300 in a fun home office.
    Sihoo

    The Doro C300 embodies essential features that define an ergonomic chair. This model can accommodate individuals weighing up to 300 pounds, featuring a backrest molded for optimal support. Additionally, it comes with BIFMA and TUV certifications for quality assurance. The armrests offer four-dimensional adjustability, and the headrest can be customized for maximum comfort. A significant advantage of the Doro C300 is its user-friendly design, with self-adjusting lumbar support and a weight-sensing mechanism for reclining, allowing you to stay comfortable while focusing on your tasks. Choose a color that aligns with your aesthetic—there’s a classic black that fits any environment or a modern white that injects a fresh vibe into your workspace. Click the link below to find your perfect match, and don’t forget to apply the code DT10OFF for an extra discount.

    BUY NOW


  • Mastering Furniture Movement in Supermarket Simulator

    Supermarket Simulator is an engaging and relaxing game where you take on the task of creating and managing your own grocery store. As you work toward success, you’ll encounter various challenges, one of which involves the interior design of your store. While it may seem straightforward at first, those who appreciate a well-organized space will want to master how to arrange and rotate furniture effectively.

    The game doesn’t really explain how to interact with interior items, which can be tricky, especially for newcomers. But don’t worry! We’re here to guide you through the process of moving your furniture.

    How to Rotate and Place Furniture

    Moving and rotating furniture in Supermarket Simulator isn’t too complicated, but there are some restrictions that might limit your actions. Let’s go over the essentials of how to interact with and move furniture.

    First, walk up to the item you wish to move or rotate. Hover your cursor over the furniture and click the left mouse button to enter editing mode. If done correctly, the item will turn translucent and green and start following your cursor. Now you can select the spot where you’d like to place it. When you’ve found the perfect location, click the left mouse button again to place the item and exit editing mode.

    To rotate the item, left-click to enter edit mode, then press the Q key to turn it left or the E key to turn it right. After making your adjustments, left-click once more to finalize the item’s position and exit editing mode.

    Now, let’s discuss the limitations you may encounter while trying to move furniture:

    • Only one item in the store: If you have just one shelf, you won’t be able to move it. Instead of entering edit mode when you click on it, you’ll see a notification saying “Can’t move the last Rack.” The only way to fix this is to purchase another item of furniture.
    • The shelf is occupied: If the shelf you want to move contains items for sale, it will also be immovable. To resolve this, simply wait until customers have bought all the products from that shelf.
  • Arranging Maleficent’s Furniture in Disney Dreamlight Valley

    Arranging Maleficent’s Furniture in Disney Dreamlight Valley

    As you work to mend the rift between Maleficent and Hades in Disney Dreamlight Valley, you’ll face numerous challenges. From ink barriers blocking your path to the pesky Snippets causing chaos in Storybook Vale, it’s a busy adventure ahead. Luckily, we’re here to guide you through it.

    As you approach Maleficent’s Castle suspended in the clouds, you’ll discover there’s more going on than you initially thought. The Mistress of All Evil herself isn’t immune to the turmoil she and Hades have stirred up. Here’s how you can reach her and help restore her castle to order.

    Getting to Maleficent’s Castle

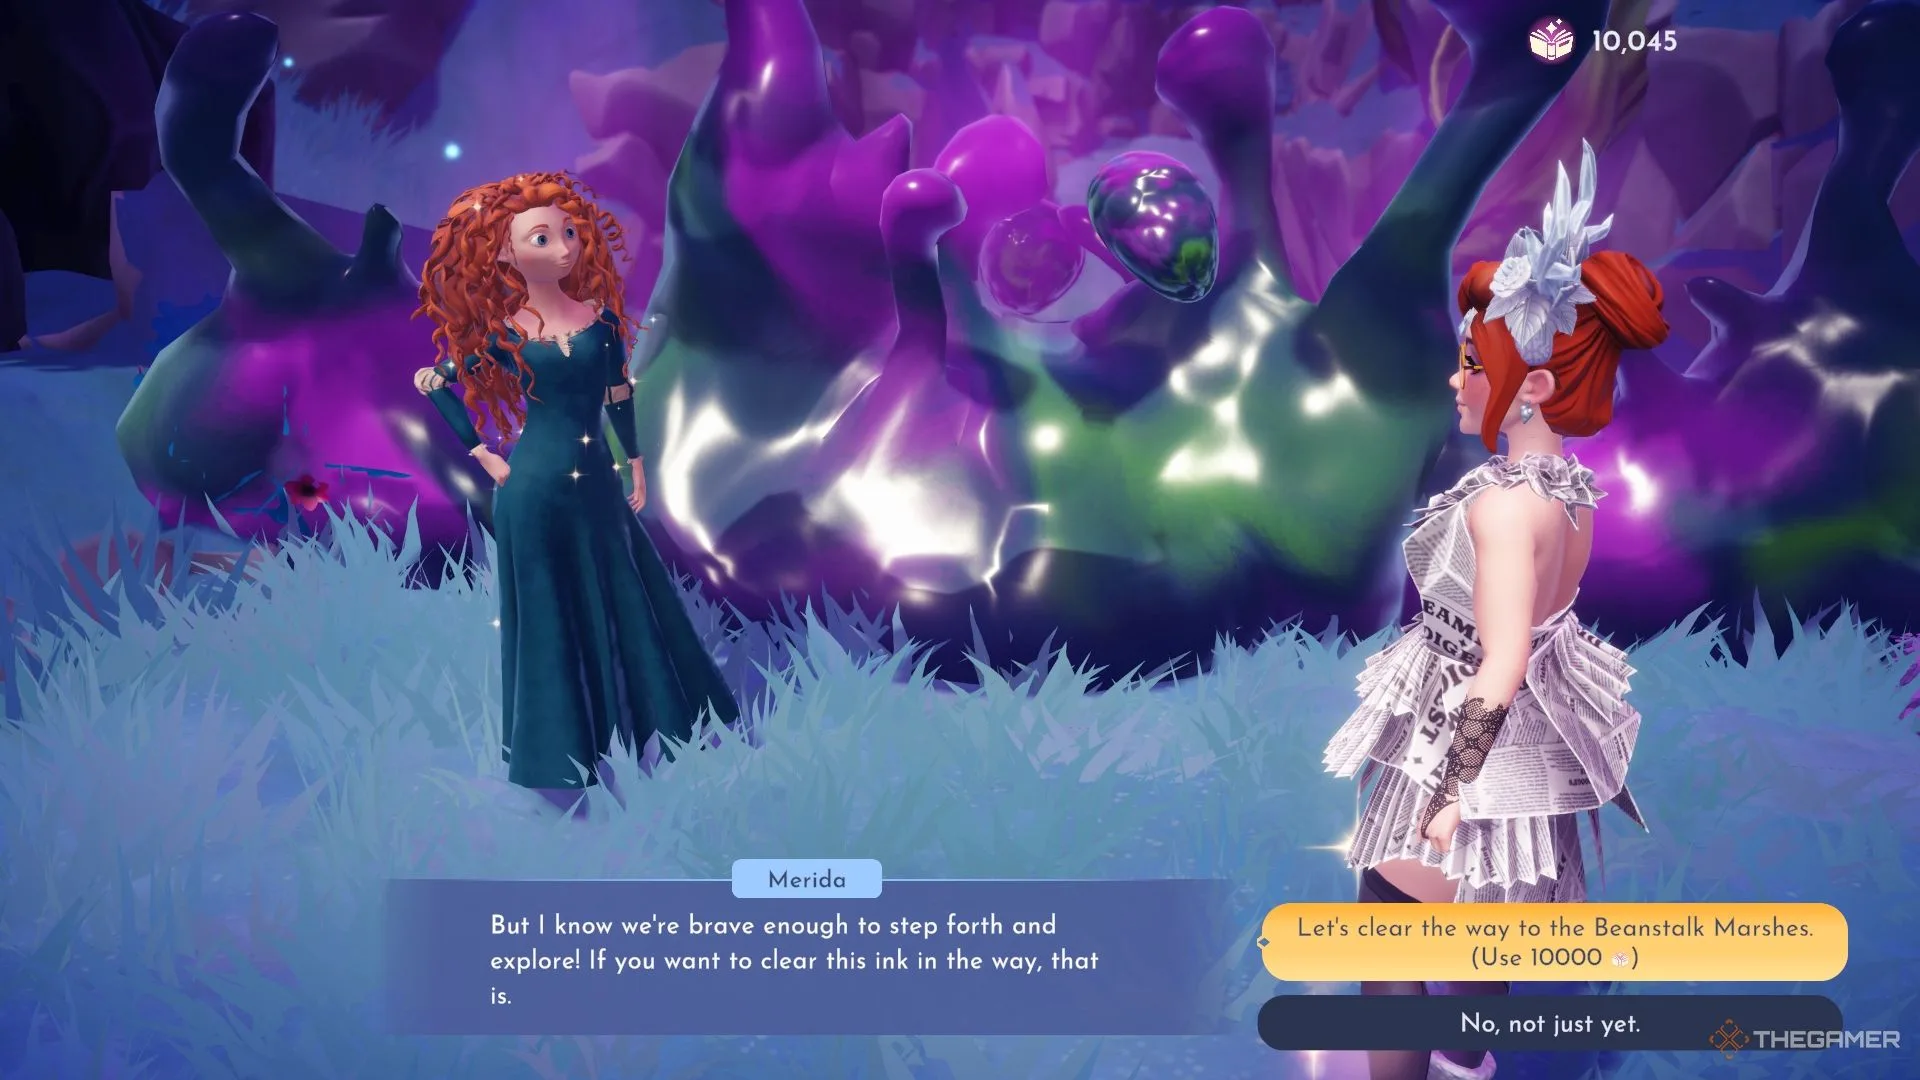
    To gain access to Maleficent’s Castle, you must have completed all the Fairy Tale Trials in Everafter. Additionally, you need to unlock the Beanstalk Marshes located in the northwest corner of the map.

    This will require 10,000 Storybook Magic.

    Once you unlock the Beanstalk Marshes, make your way north to find the enormous beanstalk leading up to Maleficent’s Castle. Enter the castle and make your way across the pond to face the Mistress of All Evil.

    Completing Maleficent’s Task

    Maleficent cheering inside her castle.

    Upon entering the castle, you’ll find Maleficent waiting for your arrival. She isn’t concerned with the chaos outside, as her focus is on a task she needs you to complete to tidy up her castle’s interior.

    Locating Maleficent’s Missing Furniture

    To retrieve her misplaced furniture, venture into the western chamber. Although the door is locked, you can change the tiles on the floor to enter the correct code. To unlock the door, set the first tile to a dragon and the second to a castle.

    The clue for this puzzle can be found on the wall to the east.

    Proceed into the next chamber, which contains a larger puzzle. The hints are displayed around the room in various orientations. Below is a layout that indicates where each symbol belongs:

    Positions Left Center Right
    Top Castle Question Mark Dragon
    Center Dragon Castle Castle
    Bottom Dragon Question Mark Dragon

    After you input the correct pattern using your Royal Shovel, the curtain at the back of the room will rise, allowing you to retrieve Maleficent’s throne from the chest inside.

    Next, find the broken piece of a Royal Net wheel on the stairs to the west of the main chamber. Place it back on the damaged pedestal and activate it with your net. This will grant you access to the door nearby.

    Once inside, you’ll discover a dimly lit library. A locker to your left is locked and requires a code. You can decipher the code by searching the walls, shelves, and chandelier. Below is the solution to unlocking the locker to obtain Maleficent’s notorious spinning wheel:

    Slot Number Symbol
    Slot 1 Castle
    Slot 2 Dragon
    Slot 3 Wolf
    Slot 4 Flower/Star

    Arranging Maleficent’s Furniture

    Once you’ve gathered the missing pieces, return to the main chamber and use the pedestal next to the checkered floor to place everything. Then, access your furniture menu to organize the items. Although the furniture was misplaced, their shadows will remain.

    You’ll need to align the furniture with the shadows cast on the walls. Make sure to inspect all three walls to align the items properly. Some pieces might need to be shifted forward to match the shadows correctly.

    After placing everything correctly, a portal will open leading to Maleficent’s Throne Room.

    Catching Maleficent’s Pets in the Throne Room

    Step through the portal into Maleficent’s Throne Room. She’ll join you and observe as you attempt to catch her mischievous pets. Initially, you’ll encounter just one shadowy, frog-like Snippet. After catching that one, three additional Snippets will appear.

    These little creatures are very quick, so try to trap them against the walls and stairs to catch them!

    Once you’ve captured all the Snippets, return to Maleficent. She’ll explain how she created these critters and what she expects from you to gain her assistance in restoring the Storybook Vale.

    You’ve accomplished a lot so far, but there’s still more to be done in your quest to resolve her conflict with Hades.