Recently, rumors have surfaced on social media suggesting that FromSoftware’s Dark Souls trilogy is in the process of being remade under the guidance of publisher Bandai Namco. However, it’s important to approach this information with caution, as the source of the leak remains unidentified.
This speculation has also sparked debate about why Bloodborne hasn’t received the same treatment, despite numerous fans requesting a port to next-generation consoles and PC to enhance performance—rather than playing the game on their PS3s at 30 FPS.
The initial leak originated from YouTuber and content creator Shirrako, who shared via X (formerly Twitter), “Dark Souls Trilogy Remake in development. A reputable source from my mirror reports.”
Bandai Namco has yet to respond to these claims.
Leak claims Dark Souls trilogy is being remade
Shirrako, recognized for his YouTube channel with over 2.5 million subscribers where he posts full gameplay videos without commentary, shared the news. The tweet generated mixed reactions across social media platforms. Many fans pointed out that the games still hold up well today, while others believed that only Dark Souls 1 and 2 need remakes to address gameplay issues and outdated graphics.
One user commented, “Honestly, the only games that need to be remade are DS1 and 2. They look kinda ugly now. DS3 still looks pretty good, though.”
Another added, “Anything but Bloodborne at this point. Sony really deserves a fate worse than Xbox.”
With Sony now pulling support from Bluepoint Games—famous for remaking Demon’s Souls and Shadow of the Colossus—speculation has intensified about who might take on the development of these rumored remakes.
Dark Souls 2 often receives the most criticism among the trilogy, with complaints about gameplay mechanics, level design, and the overwhelming number of enemies in each area. Despite this, it maintains a dedicated fanbase that claims they wouldn’t change a thing about it.
FromSoftware, known for its highly acclaimed and best-selling games, is reportedly working on a project called “FMC,” which may be ready for release as early as next year.
The studio has consistently delivered impressive games and expansions, like the recent Elden Ring: Nightreign and the upcoming The Duskbloods. It seems that they are always working on exciting new projects.
While The Duskbloods appears to be a significant shift for FromSoftware, it’s likely that they have even more in the pipeline. According to a recent report, their next game might be closer to release than we think.
FromSoft is reportedly in deep development for “Project FMC”
Chances are high that it’s related to Armored Core
Today, MP1st reported that FromSoftware is in the “advanced stages” of developing this new project, codenamed FMC, which appears to be a multiplatform game, unlike The Duskbloods.
MP1st trusts its source enough to suggest that we might see this game “no later than next year,” assuming there are no delays. Given FromSoftware’s history, that seems plausible.
If Project FMC is indeed in development, it raises the question of what it could be. MP1st speculates that it likely isn’t The Duskbloods, as it seems to be tested for multiple consoles. Typically, projects starting with the letter “F” are associated with Dark Souls or Armored Core.
Since Armored Core 6 was released a few years ago, it seems reasonable that a minor side project or expansion for Fires of Rubicon could be coming soon. Rumors have circulated about this for a while, making it likely that Project FMC could be a new Armored Core title.
If you’re like me, you might dream of it being a codename for Sekiro 2. Come on, FromSoft, it could happen!
Until FromSoftware reveals this project, we can only speculate. It’s an exciting topic for fans, especially since the multiplayer focus of The Duskbloods may not appeal to everyone.
The Duskbloods may be the newest title from FromSoftware, but according to creator Hidetaka Miyazaki, its multiplayer orientation does not signify a shift in the company’s overall direction. In a recent Creator’s Voice blog post by Nintendo, Miyazaki elaborated on the discussions that led to the game’s announcement and the design choices made by FromSoftware.
Despite emphasizing a multiplayer aspect in The Duskbloods, Miyazaki clarified that this does not imply a definitive move towards multiplayer games for future projects. The announcement of a Nintendo Switch 2 version of Elden Ring further supports this, as the studio remains committed to developing single-player experiences that maintain their traditional roots.
The unveiling of the new game generated much enthusiasm, even as some fans voiced worries about the potential decline of FromSoftware’s focus on single-player narratives. With the launch of The Duskbloods and the upcoming multiplayer-oriented Elden Ring: Nightreign, there were concerns that the franchise’s signature challenging gameplay might be compromised. Miyazaki reassured fans that this will not be the case.
From
The Duskbloods originated as a project intended for the original Nintendo Switch. Initially, FromSoftware assembled a small team to develop the game. However, upon learning about the Switch 2 from Nintendo, the company reconsidered its strategy, allowing them to enhance the game while keeping true to its initial vision, especially with the new console’s emphasis on online capabilities.
“We envision the game as a PvPvE title,” Miyazaki shared. “At its heart, it’s an online, multiplayer-centric experience that integrates both player versus player and player versus enemy interactions.” This concept isn’t entirely new for FromSoftware, as earlier titles like Dark Souls and Elden Ring featured PvPvE mechanics like player invasions and cooperative assistance against tougher foes.
In The Duskbloods, these elements will play a more significant role, with much of the game’s lore and world-building being uncovered during the character creation phase. Miyazaki further discussed a feature called “roles.”
For instance, if a player has the “Destined Rivals” role, another player will become their rival and must locate and defeat them, achieving a personal milestone distinct from the main objectives. Alternatively, the “Destined Companion” role requires one player to find another designated as their companion, yielding special rewards if they forge a connection. These roles can be assigned through blood customization, allowing players to experience a form of role-playing that enhances the narrative tension of their interactions.
Miyazaki concluded the interview by stating, “With superhuman player abilities, a versatile combat system, dynamic gameplay, and the beautifully romanticized aesthetics of the Bloodsworn, along with deep character customization and fragmented storytelling, there’s so much to appreciate in this title. I truly hope players are excited about it.”
A Dragon Build in Elden Ring stands out as one of the most distinctive builds available. They offer a different approach compared to more traditional builds.
This guide is here to help. We’ll dive into crafting the ultimate Dragon build in Elden Ring, covering everything from your initial class choice and flask distribution to the recommended shield, weapons, and the best incantations to incorporate.
Table of Contents
Elden Ring Dragon Build Overview
Stats for Dragon Build
Best Weapon for Dragon Build in Elden Ring
Best Shield
Top Ashes of War Choices
Best Incantations To Choose
Optimal Spirit Summons
Recommended Armor
Best Flask of Wondrous Physick for Dragon Build
Top Talismans
Elden Ring Dragon Build Overview
This Dragon Build utilizes Dragon Communion Incantations, enabling you to scorch foes with fiery attacks. Additionally, it employs the Ripple Blade for effective physical damage:
Starting Class: Prophet
Flask Distribution: Balanced between HP and FP
Stats: Strength, Faith, and Arcane (Primary), with Endurance, Vigor, and Mind (Secondary)
Weapons: Ripple Blade
Shield: Jellyfish Shield
Ash of War: Wild Strikes and Contagious Fury
Incantations: Dragonfire, Bayle’s Tyranny, Dragonmaw, Theodorix’s Magma, Bloodflame Blade, and Flame, Grant Me Strength.
Spirit Summons: Mimic Tear or Fire Monk
Armor: Drake-Knight Armor
Flask of Wondrous Physick: Greenburst Crystal Tear and Cerulean Hidden Tear
Talismans: Faithful’s Canvas Talisman, Flock’s Canvas Talisman, Fire Scorpion Charm, and Radagon Icon
Stats for Dragon Build
Stat
Level 60
Level 100
Level 150
Faith
33
43
45
Mind
17
19
28
Dexterity
11
13
14
Strength
16
21
29
Endurance
12
16
27
Vigor
13
15
26
Intelligence
7
7
7
Arcane
30
45
52
Best Weapon for Dragon Build in Elden Ring
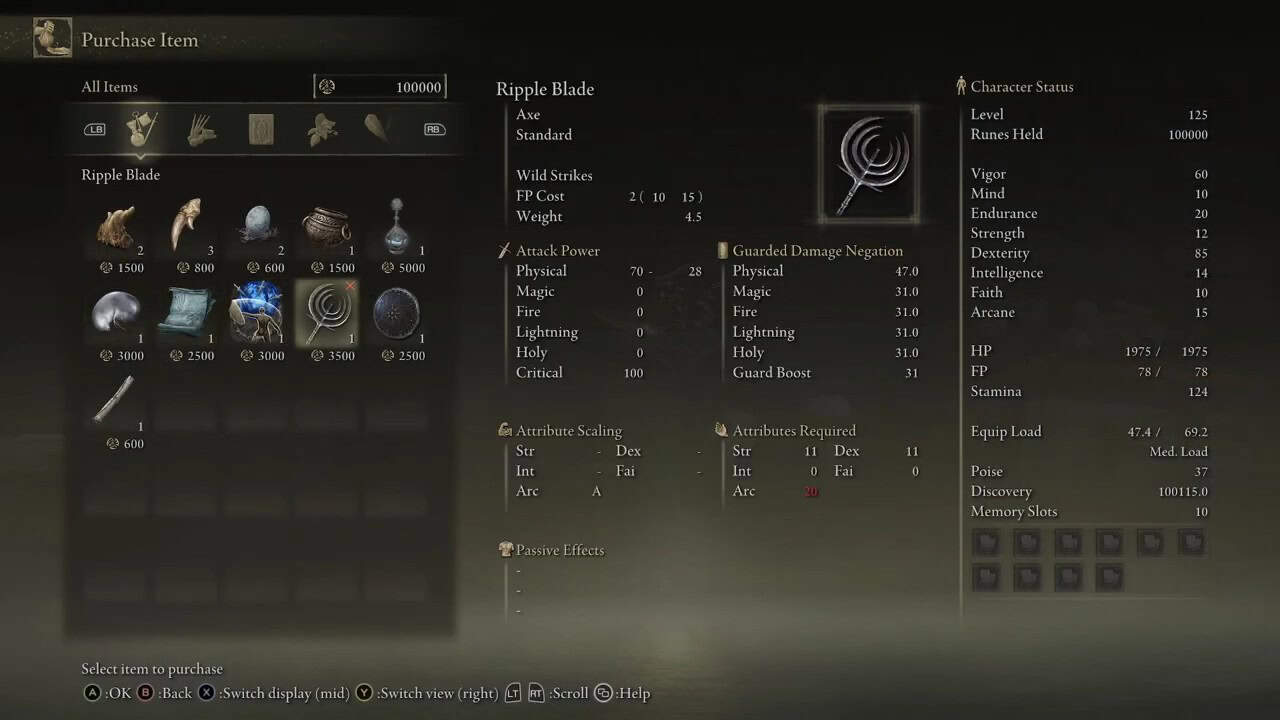
Given that this build heavily relies on Incantations that require both Faith and Arcane, we’re opting for a weapon that primarily scales with Arcane: the Ripple Blade. This weapon offers an A scaling in Arcane and deals 75 physical damage and 100 critical damage.
Additionally, it inflicts 31 fire damage, which we will explore further below. You can acquire this weapon from Pidia, the Carian Servant located at Caria Manor.
Best Shield
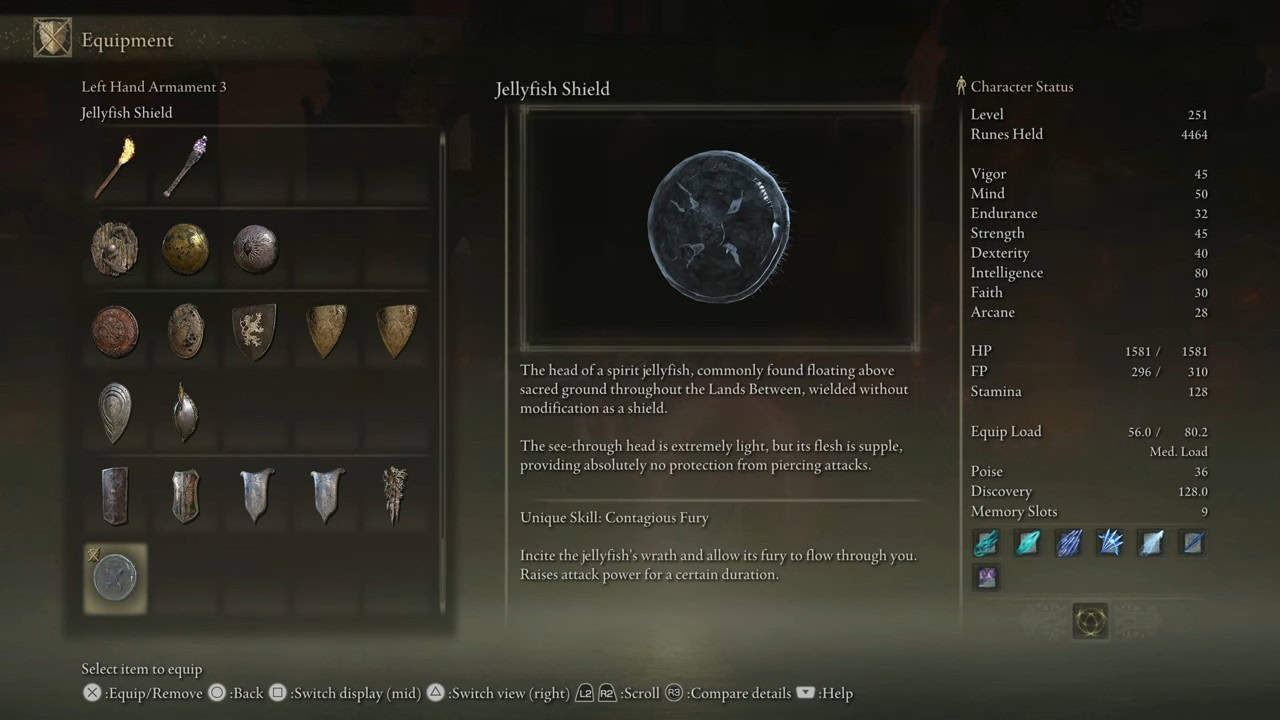
For your shield, we recommend the Jellyfish Shield. Its Ash of War feature enhances your damage output. This small shield requires minimal stats to wield, making it very accessible.
You can find the Jellyfish Shield north of the Foot of the Four Belfries Site of Grace in Liurnia of the Lakes, surrounded by several jellyfish.
Best Ashes of War Choices
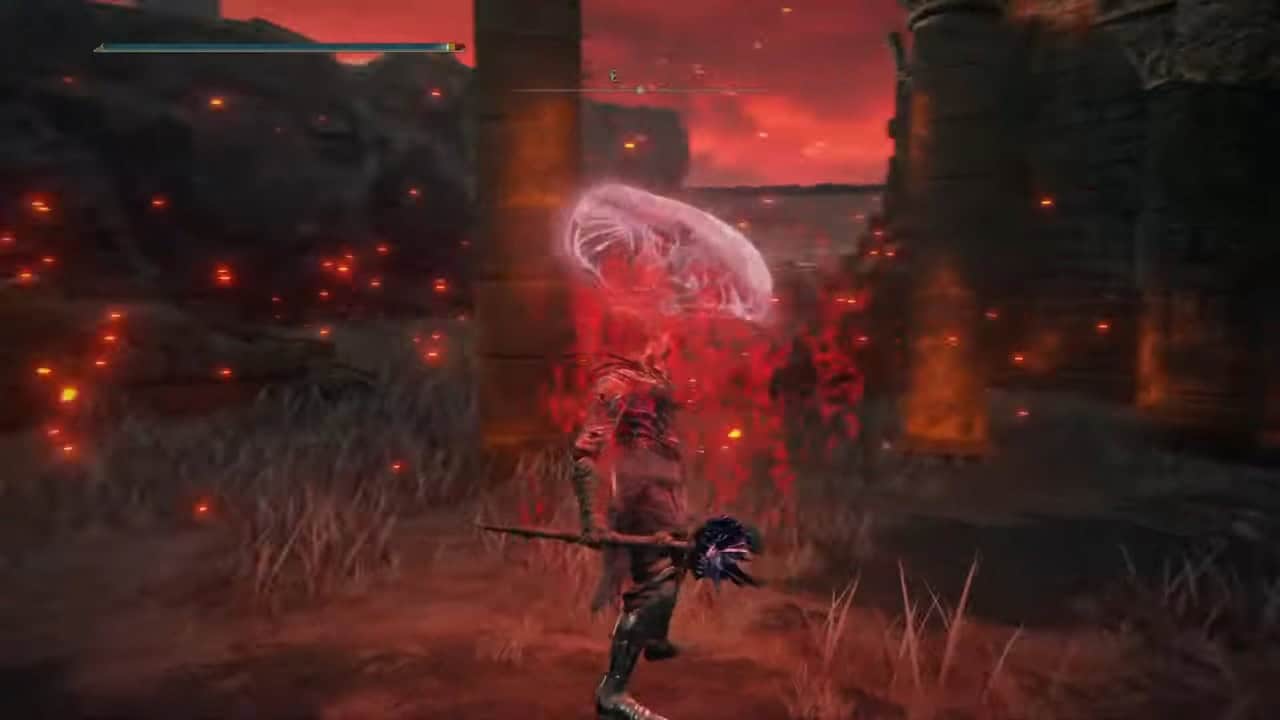
We’ll utilize the default Ashes of War for both the shield and primary weapon. For the Jellyfish Shield, this is Contagious Fury, which boosts your damage by 12.5% for 30 seconds, while for the Ripple Sword, it is Wild Strikes.
This attack allows you to unleash a series of rapid hits before finishing with a ground strike that significantly staggers opponents.
Best Incantations To Choose
Incantations are crucial for maximizing this build’s damage capabilities. We’ll be utilizing six different incantations:
Dragonfire: This conjuration unleashes a dragon head that breathes fire on adversaries.
Bayle’s Tyranny: Similar to Dragonfire, this incantation summons a dragon head but inflicts AOE lighting and fire damage.
Dragonmaw: Dragonmaw allows you to summon a dragon’s mouth that bites down fiercely on foes.
Theodorix’s Magma: This powerful incantation rains magma down on enemies from the sky, offering significant crowd control.
Bloodflame Blade: This imbues your weapon with festering blood flame, dealing both bleed and fire damage. A perfect fit for our fire-focused Dragon build.
Flame, Grant Me Strength: This incantation boosts your physical and fire damage by 20%.
TIP
Equip the Dragon Communion Seal to amplify your Dragon Communion incantations by 15%.
Best Spirit Summons
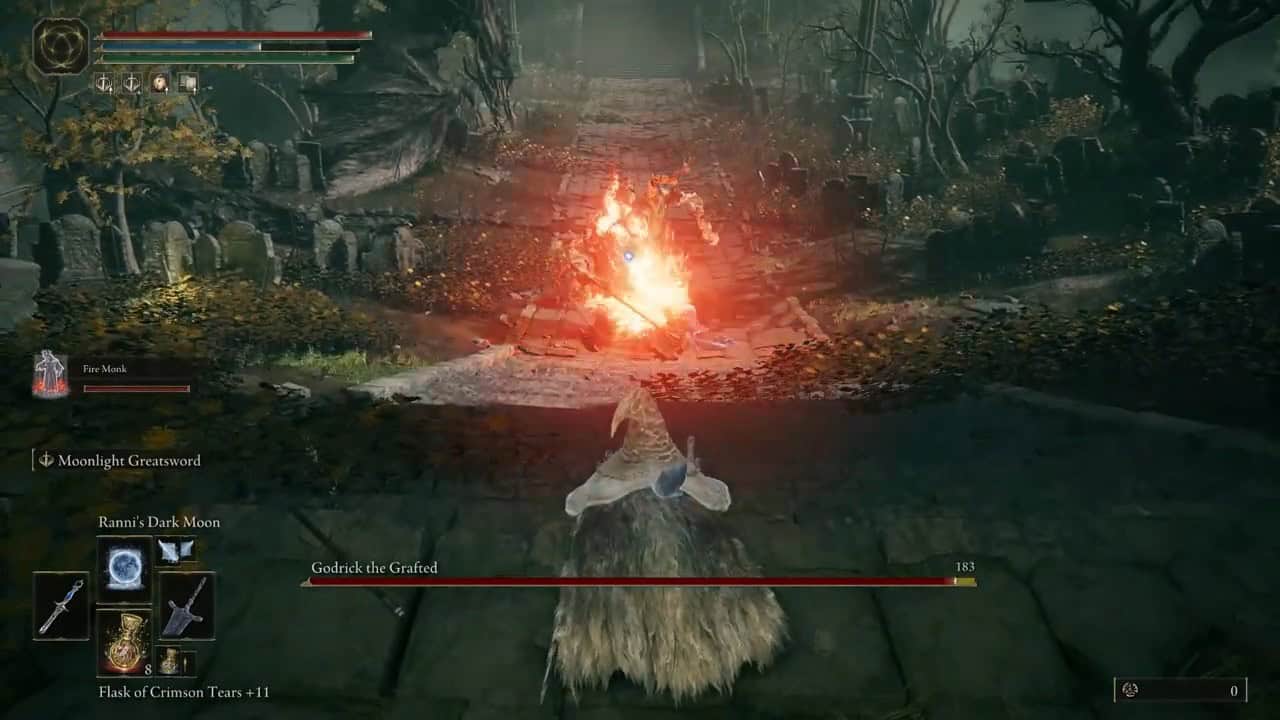
For Spirit Summons, choose between the Mimic Tear to double your attacking power or the Fire Monk to boost your fire damage output.
Mimic Tear: This summon duplicates your character, allowing for enhanced damage output.
Fire Monk: This option uses flames to deal immense damage to your foes.
Best Armor To Wear
While any light to medium armor can serve this build, we suggest the Drake-Knight armor as it aligns perfectly with the dragon aesthetic. This armor set can be located in the Crumbling Farum Azula area.
Stats
Drake-Knight Set
Damage Negation
Physical
22.6
Physical (Strike)
23.6
Physical (Slash)
19.1
Physical (Pierce)
22.6
Magic
20.4
Fire
22.6
Lightning
17.8
Holy
20.4
Resistance
Immunity
60
Robustness
110
Focus
50
Vitality
50
Poise
40
Best Flask of Wondrous Physick for Dragon Build
The Flask of Wondrous Physick permits the use of two temporary buffs in one single-use flask. For the Dragon build, we recommend the following:
Greenburst Crystal Tear: This tear enhances your stamina regeneration rate.
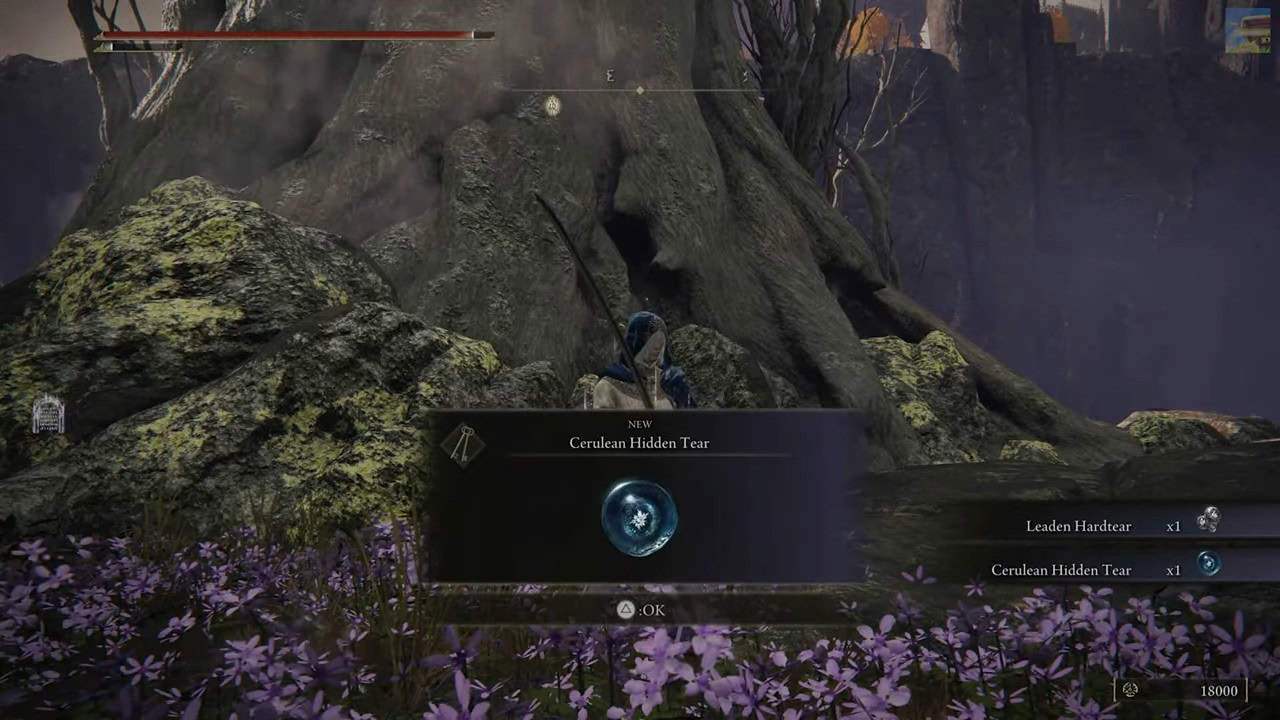
Cerulean Hidden Tear: This tear temporarily negates FP usage when performing incantations or skills.
Best Talismans
Talismans can enhance your build in various ways. There are four Talisman slots available for you to unlock and utilize. For the Dragon build, here are the ideal Talisman choices:
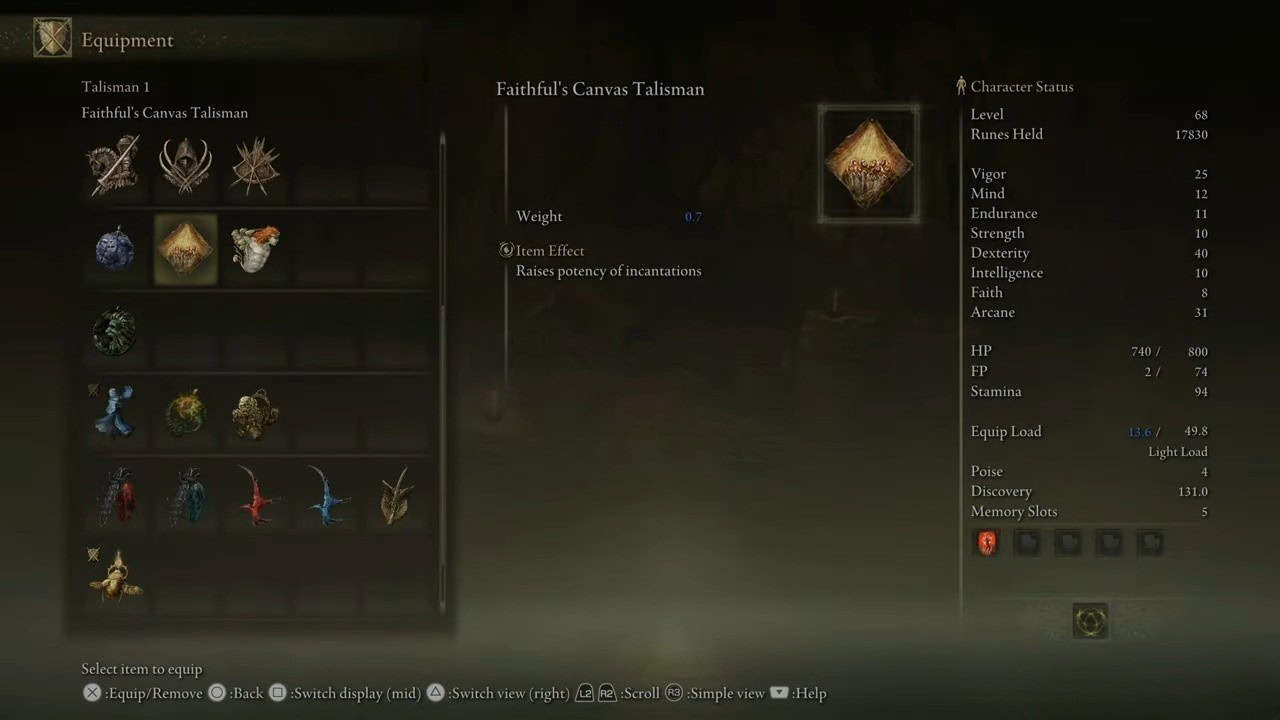
Faithful’s Canvas Talisman: This talisman boosts the effectiveness of all incantations by 4%.
Flock’s Canvas Talisman: Similar to the previous one, this talisman increases incantation potency by 8%.
Fire Scorpion Charm: This Talisman raises your fire damage by 12%, but be aware it also increases the damage you receive by 10%.
Radagon Icon: This talisman shortens the casting time for incantations.
The post Elden Ring Dragon Build: Stat, Weapons, Armor, And More appeared first on SegmentNext.
Bloody Finger Hunter Yura is one of many NPCs in Elden Ring that offers players a side quest. His storyline leads you through different areas of the Elden Ring map, featuring several challenging tasks to overcome, and we’re here to assist you with that.
This guide will cover all aspects of the Hunter of Bloody Fingers Yura quest in Elden Ring, including where to find this NPC, how to initiate his questline, the steps involved, the consequences of your decisions, and all the rewards you can earn.
Location of Bloody Finger Hunter Yura
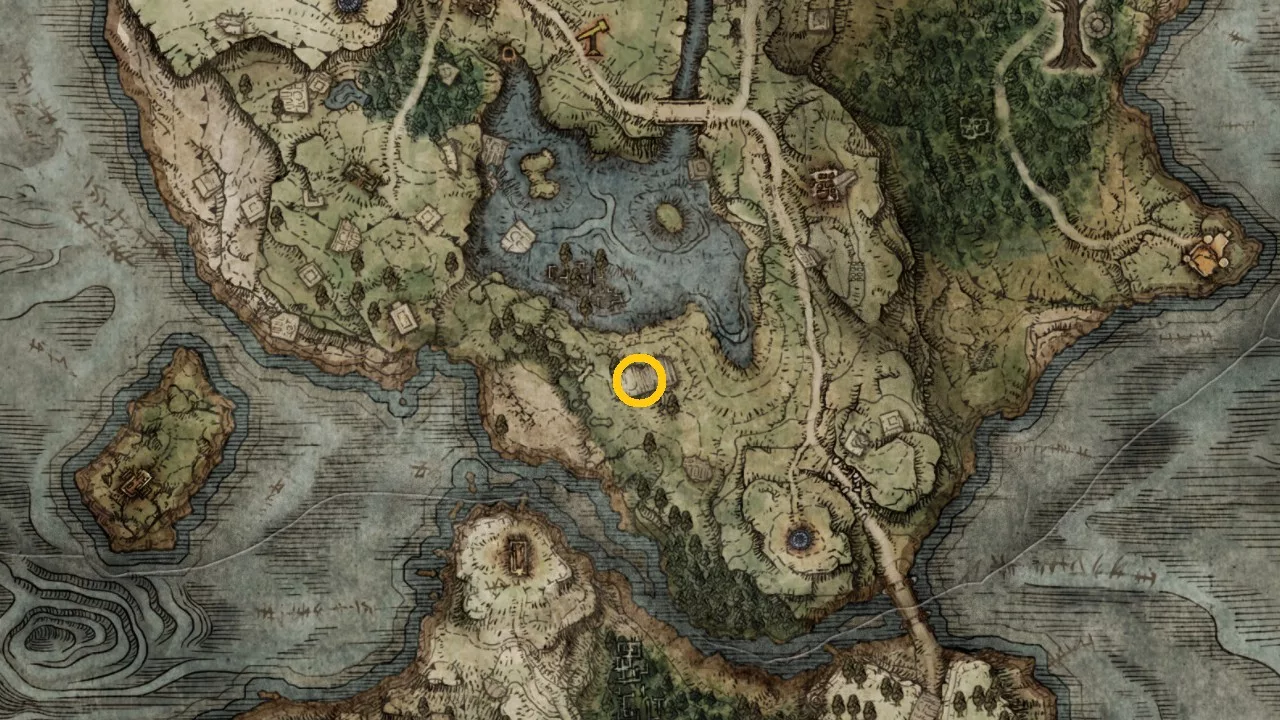
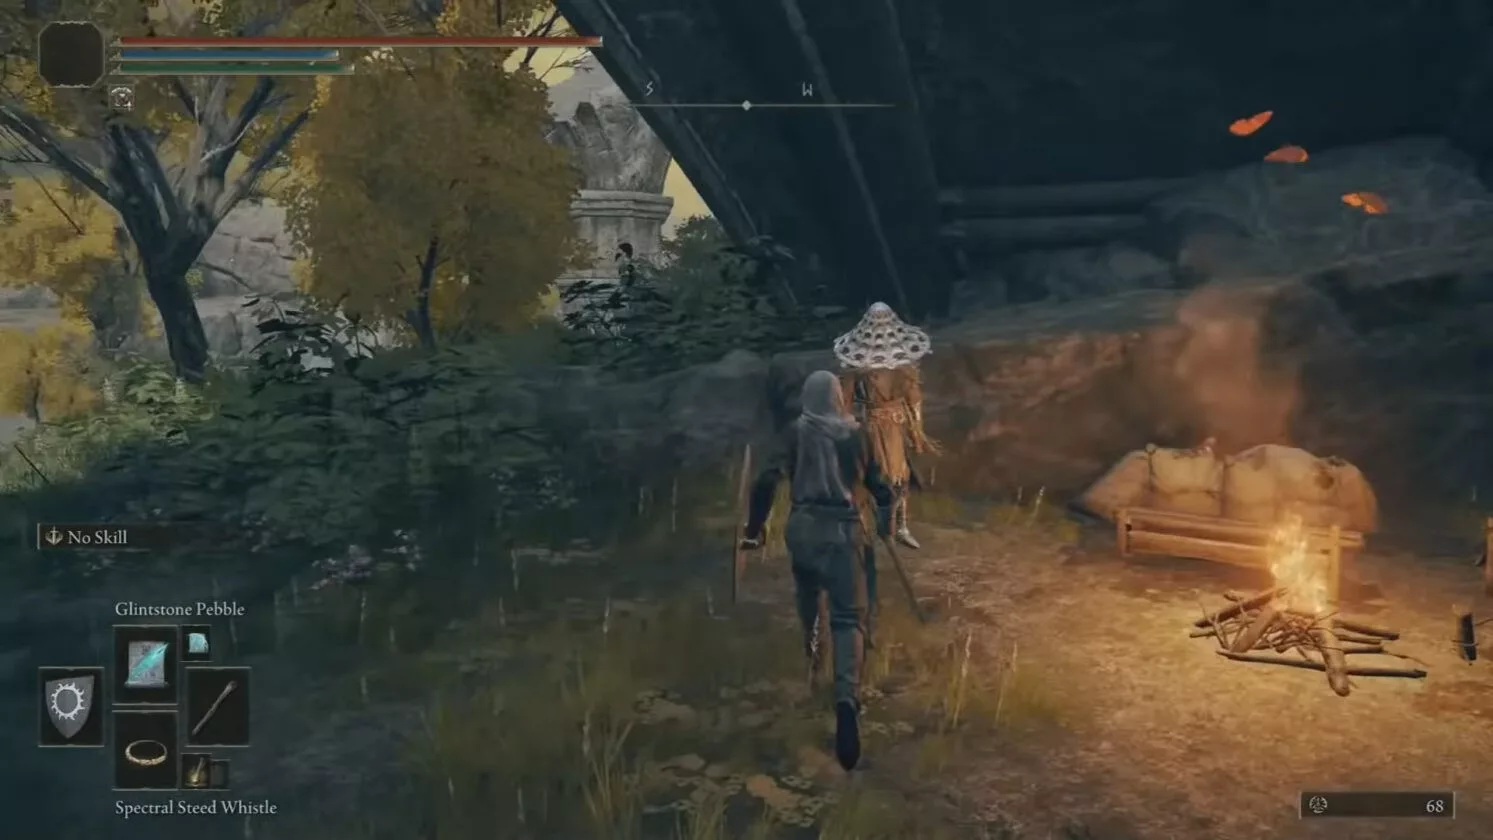
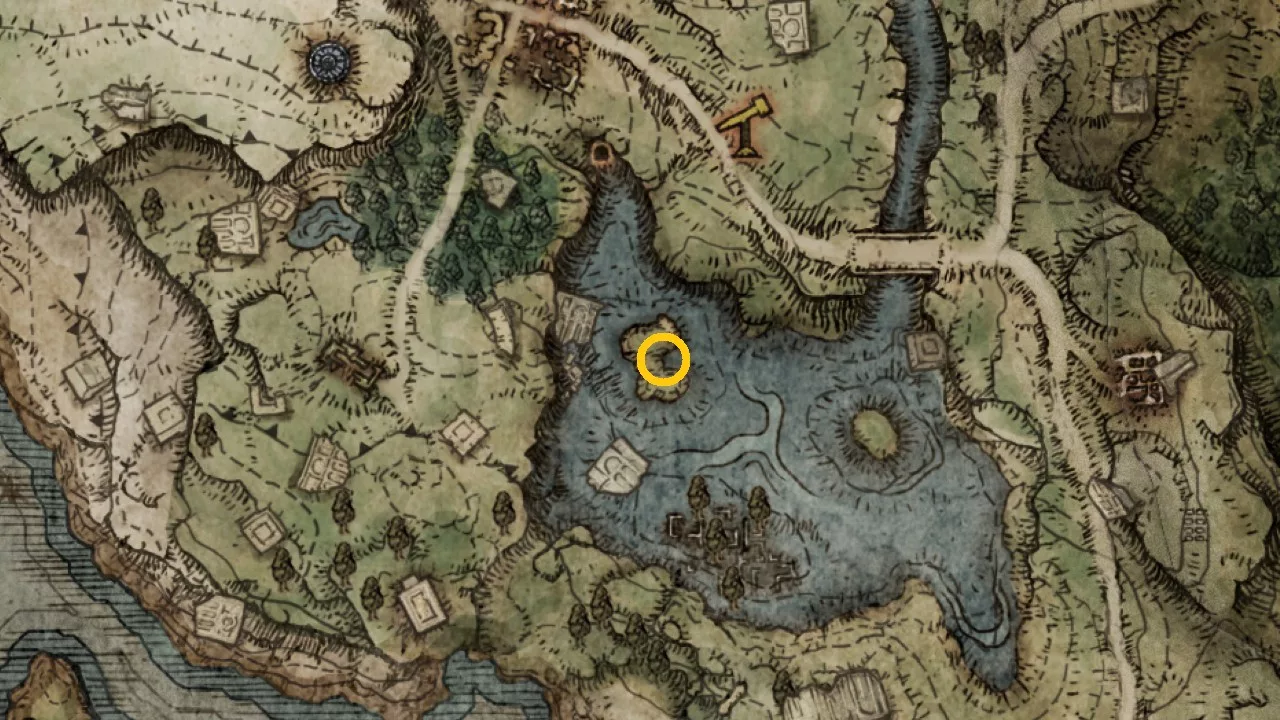
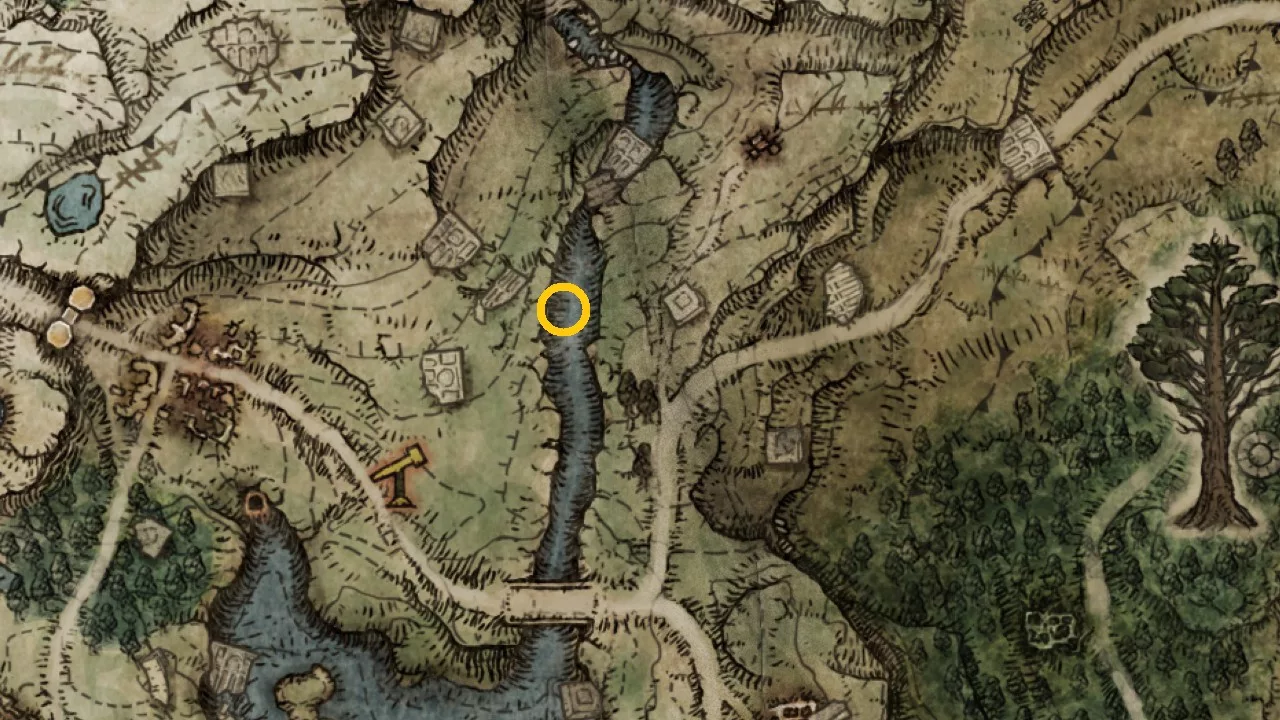
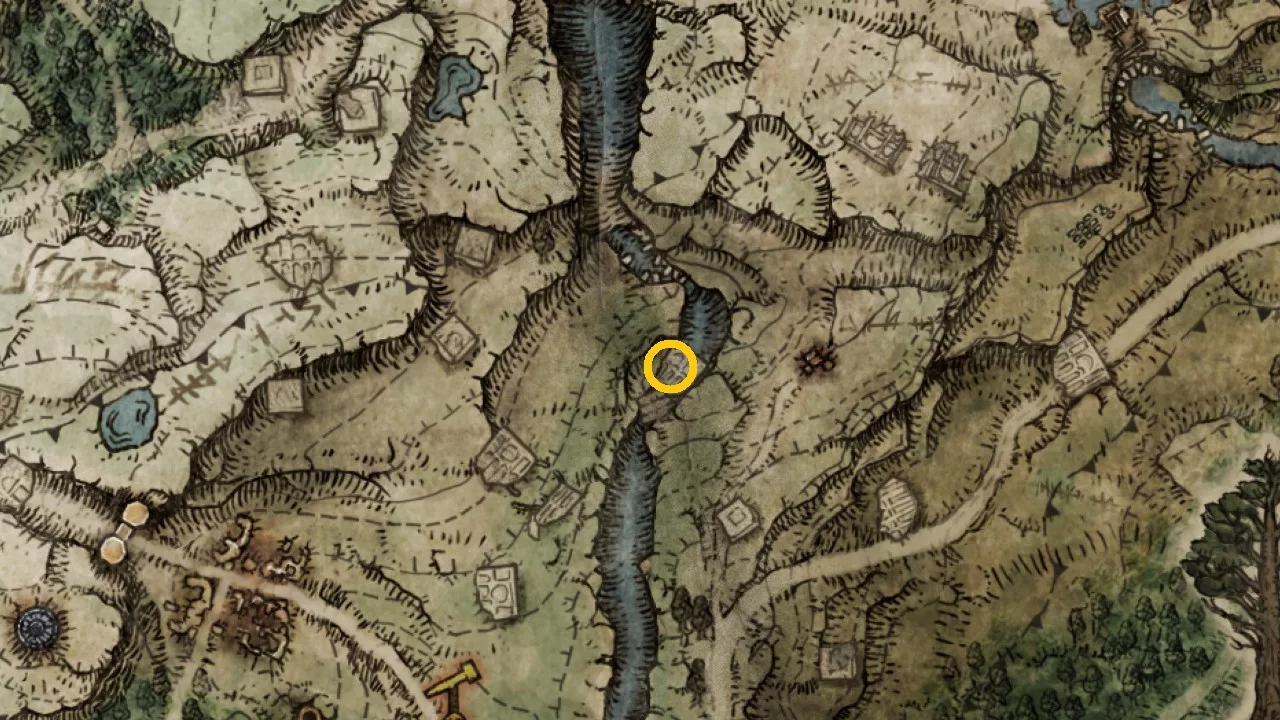
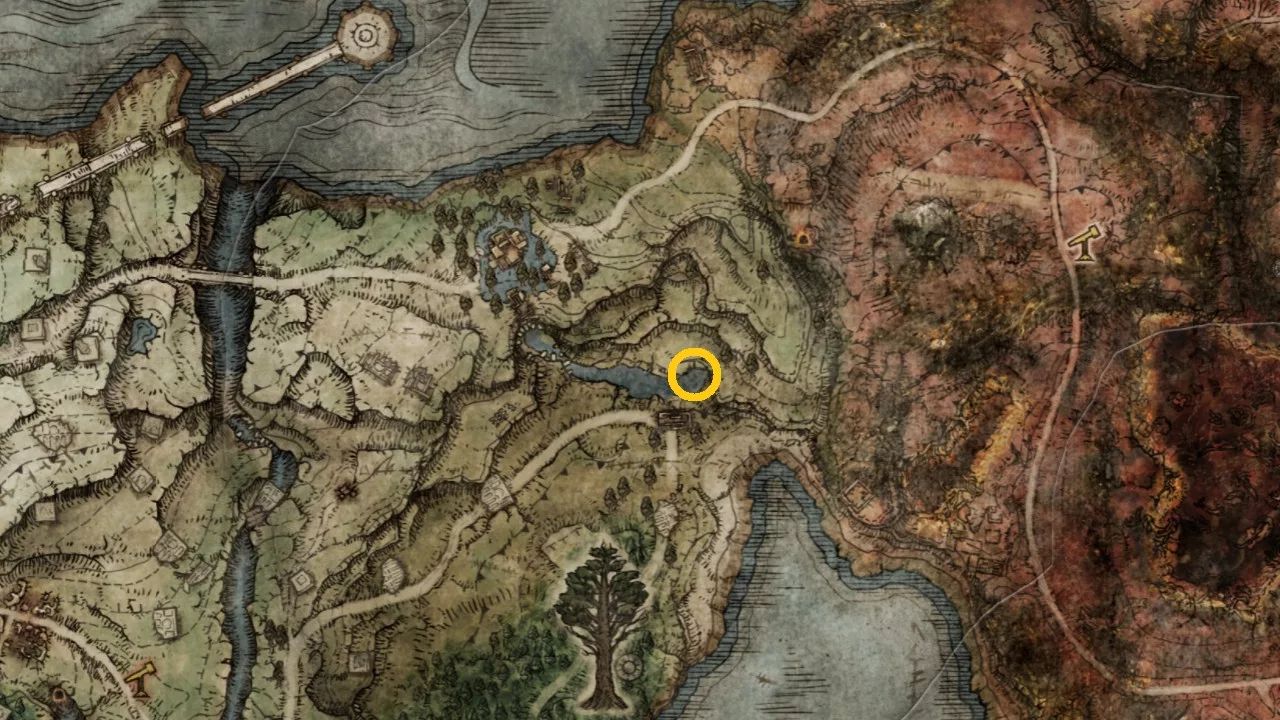
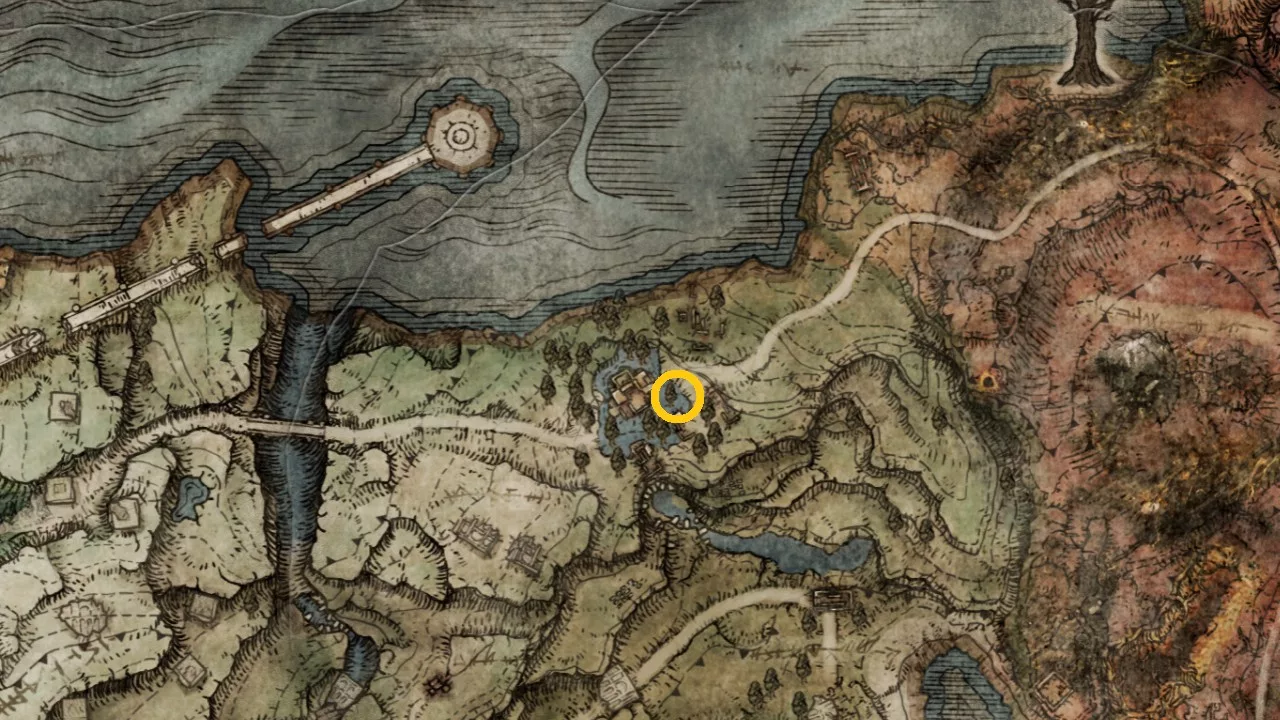
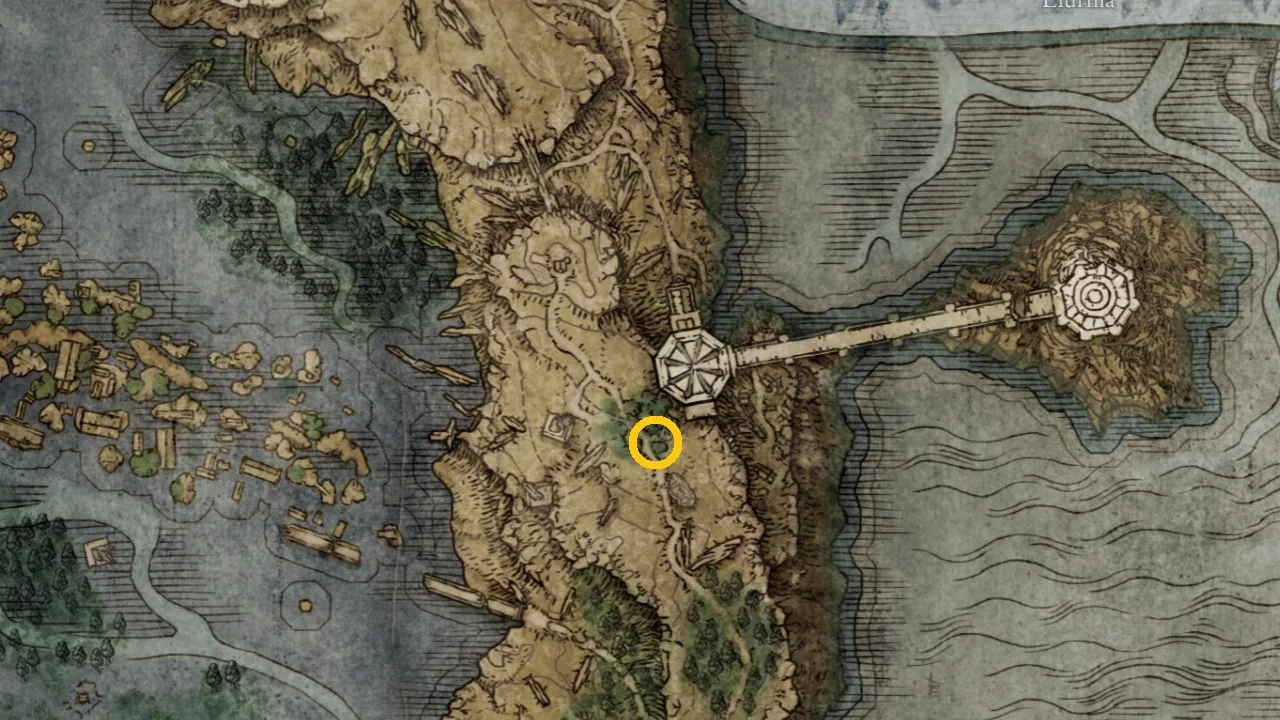
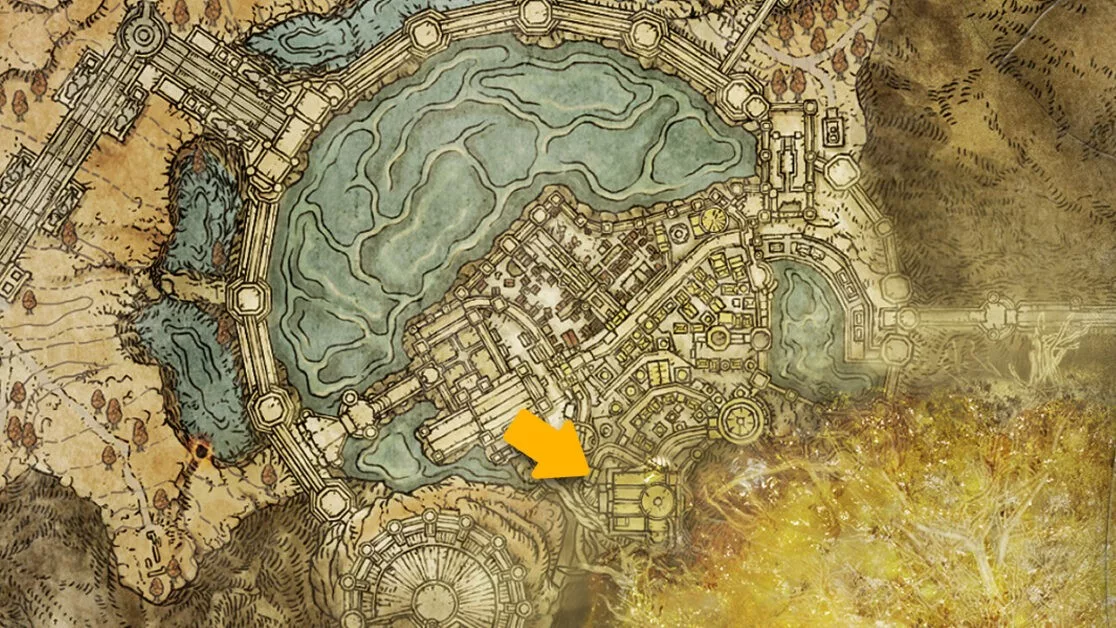
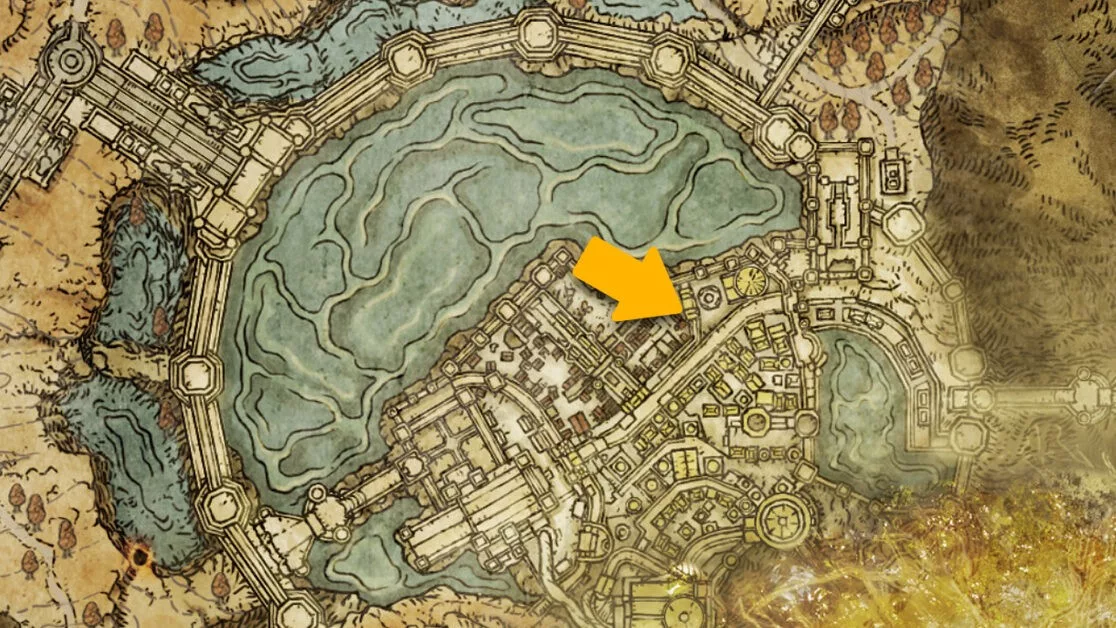
You can find Yura, the Hunter of Bloody Fingers, in the Limgrave region of Elden Ring, specifically in the southern part. Refer to the images for the detailed location. Yura possesses extensive knowledge about the Dragon Cult and can be located in the underpass beneath the ruins by heading right from this Site of Grace.
This isn’t the last encounter players will have with Yura, as he plays a pivotal role in an alternative questline. You can engage and defeat Yura as you progress through the game.
Similar to other side quests in Elden Ring, the Bloody Finger Hunter Yura Quest consists of numerous twists and turns. While some optional steps can be skipped, we strongly recommend completing them to earn valuable loot.
1. Defeat Dragon Agheel
Although the location of Yura was mentioned earlier, it’s not essential to speak with him to initiate the quest. However, if you choose to engage him, he will warn you about the nearby Flying Dragon Agheel and advise you to keep your distance. If you’re seeking information on the Church of the Dragon Communion, ignore his warning and go defeat Dragon Agheel for some loot.
At the Dragon Communion Church, you can trade dragon hearts for Incantations within Elden Ring. Regardless of whether you defeat the dragon, you’ll need to follow the mandatory steps that follow to finish the Yura questline.
2. Vanquish Bloody Finger Nerijus
Next, proceed to Murkwater Cave located north of Agheel Lake. Bloody Finger Nerijus will confront you along the way, but Yura will join the battle to assist you. If your character isn’t very strong at the start, you can use Yura as a distraction and attempt to attack Nerijus when he is focused on Yura.
Be sure to make your initial strikes count, as Nerijus will redirect his attention to you once you engage him. Additionally, you must ensure Yura survives the encounter if you wish to acquire the Reduvia Dagger that Bloody Finger Nerijus will drop upon his defeat.
3. Speak with Yura Again
After dispatching Bloody Finger Nerijus, make your way north to find Yura again. He is located near the Murkwater Coast Grace, further up from Murkwater Cave. Speak with Yura to learn more about his mission related to hunting Bloody Fingers.
4. Unlock the South Raya Lucaria Gate
After your conversation with Yura at Murkwater Coast Grace, proceed to the Academy of Raya Lucaria, located north of Stormveil Castle in the central area of Liurnia.
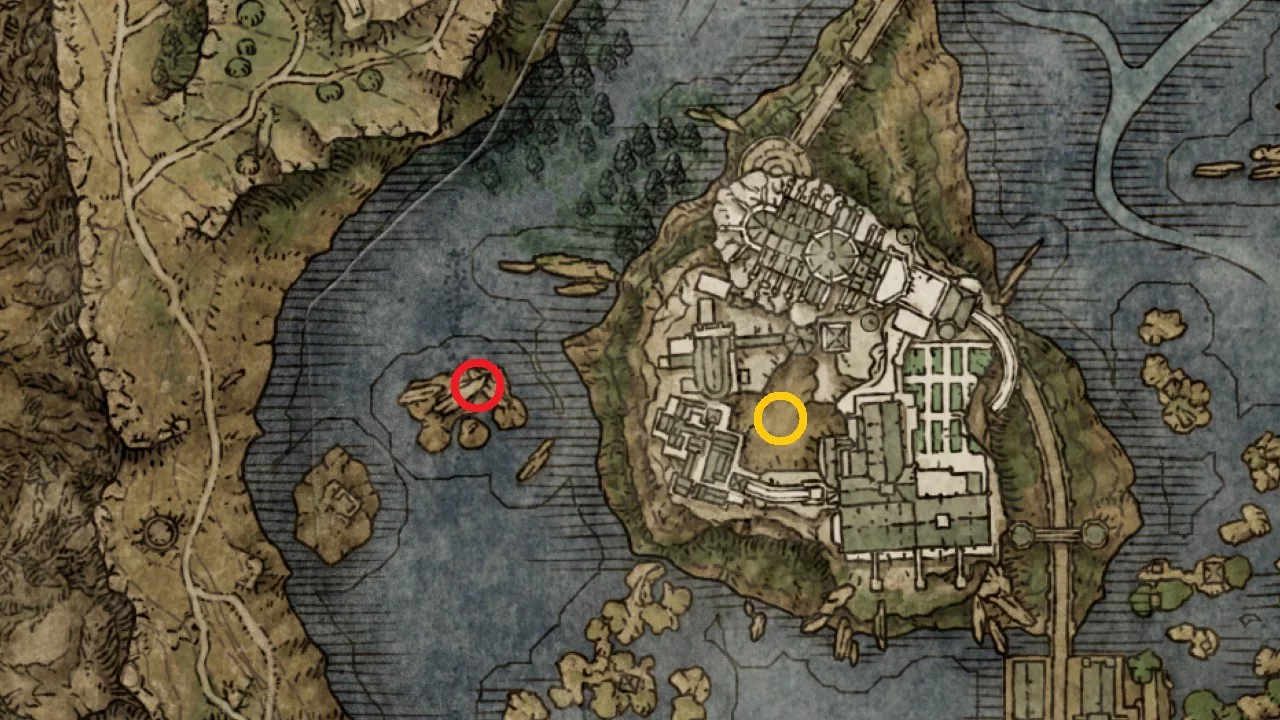
Acquire the Glintstone Key from the western side of the Academy, positioned behind a slumbering dragon on a small piece of land (highlighted in red above). Once you have the Glintstone Key, travel to the south gate of the Academy of Raya Lucaria and interact with the seal to gain entry, indicated in yellow.
5. Defeat the Bloody Finger Ravenmount Assassin
Access the Site of Grace and head through the seal to the north without interacting with it. Cross the bridge and look for a red summon sign on the ground before the first significant break. Engage with the Red Summon Sign to initiate the combat against the Bloody Finger Ravenmount Assassin and eliminate him. After your victory, speak with Yura at the bridge next to the summon sign, where he will update you on his hunt for Bloody Finger Eleonora.
Upon defeating this foe, you’ll be granted a Rune Arc, a Furlcalling Finger Remedy, and the Ash of War: Raptor of the Mists when you return to your world, along with a Smithing Stone after conversing with Yura.
6. Take Down the Bloody Finger Eleonora
Next, head to the Second Church of Marika located in the Altus Plateau. You may need to unlock the Grand Lift of Dectus to access this area. Speak with Yura at the Church of Marika to receive the Nagakiba katana. In addition, you’ll earn the Purifying Crystal Tear, one Furlcalling Finger Remedy, and Eleonora’s Poleblade as rewards. Utilize the Nagakiba Katana to defeat the Violet Bloody Finger Eleonora who will spawn near the statue.
7. Converse with the Imposter Bloody Finger Hunter Yura
Afterward, travel to the Zamor Ruins Site of Grace in the Mountaintop of the Giants, where you will encounter the Imposter Yura. He will attempt to persuade you to seek out the Three Fingers and the Frenzied Flame. He will reference Shabriri Grapes, connecting this quest to the Hyetta quest.
If you decide to eliminate this Imposter Yura, you will receive the Iron Kasa helmet and the Ronin armor set. Alternatively, if you follow Yura’s guidance, you could potentially discover the Three Fingers and unlock an alternative game ending!
To obtain one of the most legendary weapons, the IA-Co1W2 Moonlight, also known as the Moonlight Blade, in Armored Core 6, you must reach the conclusion of chapter 4, titled Reach the Coral Convergence. It’s advisable to equip the Songbird Grenade Launcher and Ben Machine Guns for efficient enemy elimination. After you acquire the weapon, it will appear in your inventory only upon defeating the chapter’s boss.
Now, let’s dive into why acquiring this weapon in Armored Core 6 is essential and how to do it.
Location of the Moonlight Blade
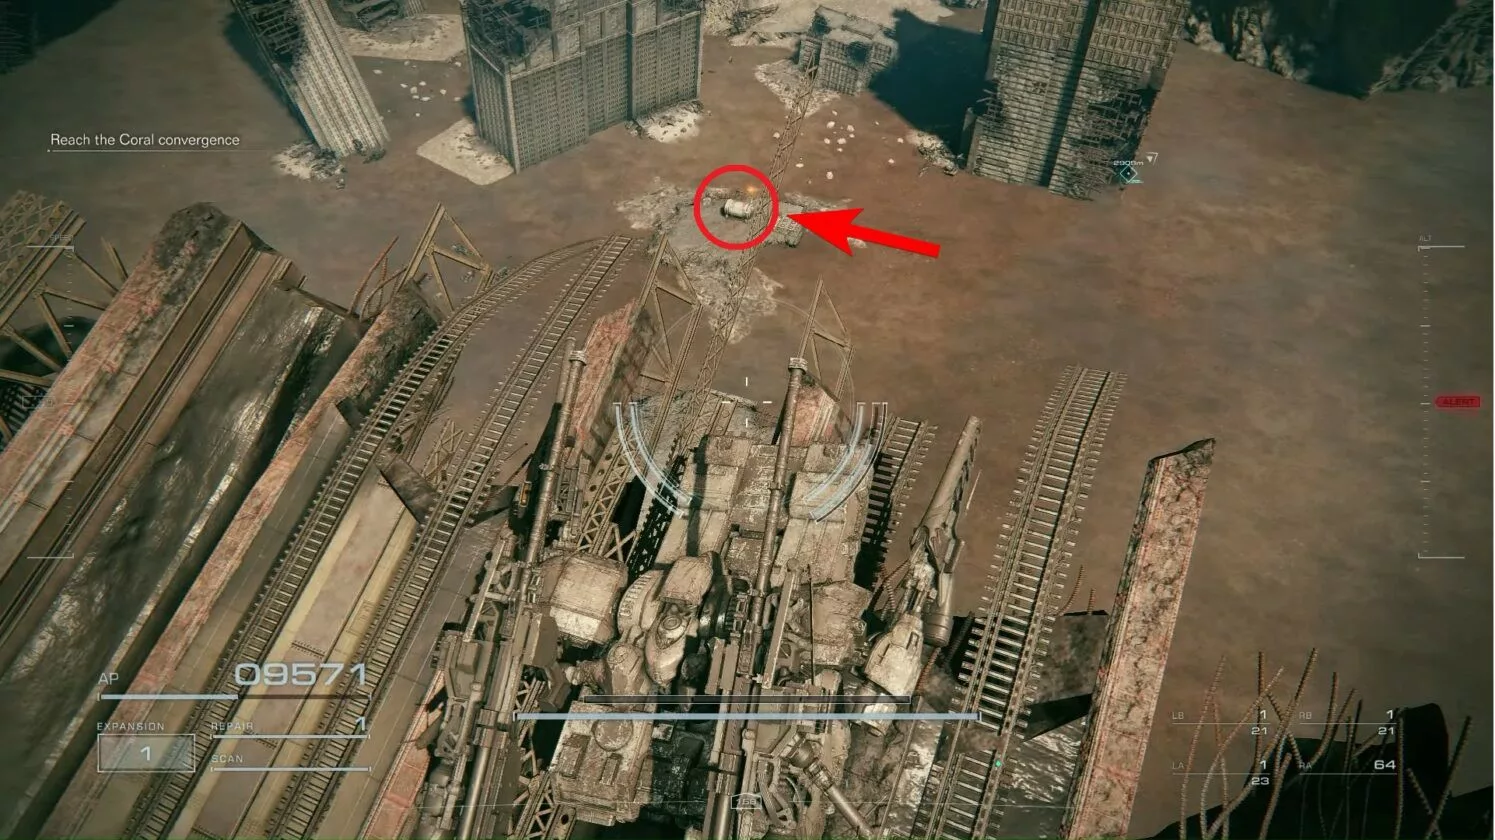
At the conclusion of the Reach the Coral Convergence mission, eliminate V6 and Gun 3 before advancing to the next checkpoint. From there, proceed toward the damaged bridge.
You can either drop into the water or stick to the left side and jet over the bridge to reach the opposite shore.
Beneath the bridge, you’ll encounter three Ancient Coral Wheel Machines; use Songbirds to eliminate them, or simply grab the weapon and take off.
Upon reaching the other side, you will find a box marked with an objective indicator. This contains the Moonlight Blade.
If you’d prefer to avoid the foes guarding the box, fly across the bridge and move directly to its end. Jump off the left edge, and you will land right in front of the chest containing the Moonlight Blade.
Stats and Attack Methods of the Moonlight Blade
The Moonlight Blade is a formidable melee weapon in Armored Core 6 that emits powerful energy waves towards foes. It features a two-hit combo that offers impressive reach while maintaining a shorter distance but providing a wider arc for charged attacks.
A normal strike hits at a maximum distance of 290m.
This two-hit combo can target two nearby enemies simultaneously, permitting you to re-target efficiently. For engaging multiple enemies together, utilize the charged attack; it maxes out at around 220m with a broad width that strikes a larger area.
During a charge, you can cancel the attack at any moment to outsmart your opponent’s dodge and quickly follow up with a faster combo.
As for its specifications, the weapon boasts an attack power of 615 alongside an impact rating of 495. The charged attack of the Moonlight Blade surpasses all other weapons in AC6. Additionally, the Direct Hit Adjustment stat significantly boosts damage against staggered enemies, while the light PA Interference enhances its effectiveness against shields.
Faith is one of the many attributes in Elden Ring. It primarily influences your capability to cast incantations, but various weapons throughout the game also benefit from it, establishing Faith as a viable option for character builds. The goal of a dedicated Faith build is to locate a powerful Faith weapon that enhances your Faith attributes.
This focus is crucial for maximizing damage output during the late stages of the game, as Faith builds often struggle with damage output against the tougher late-game bosses.
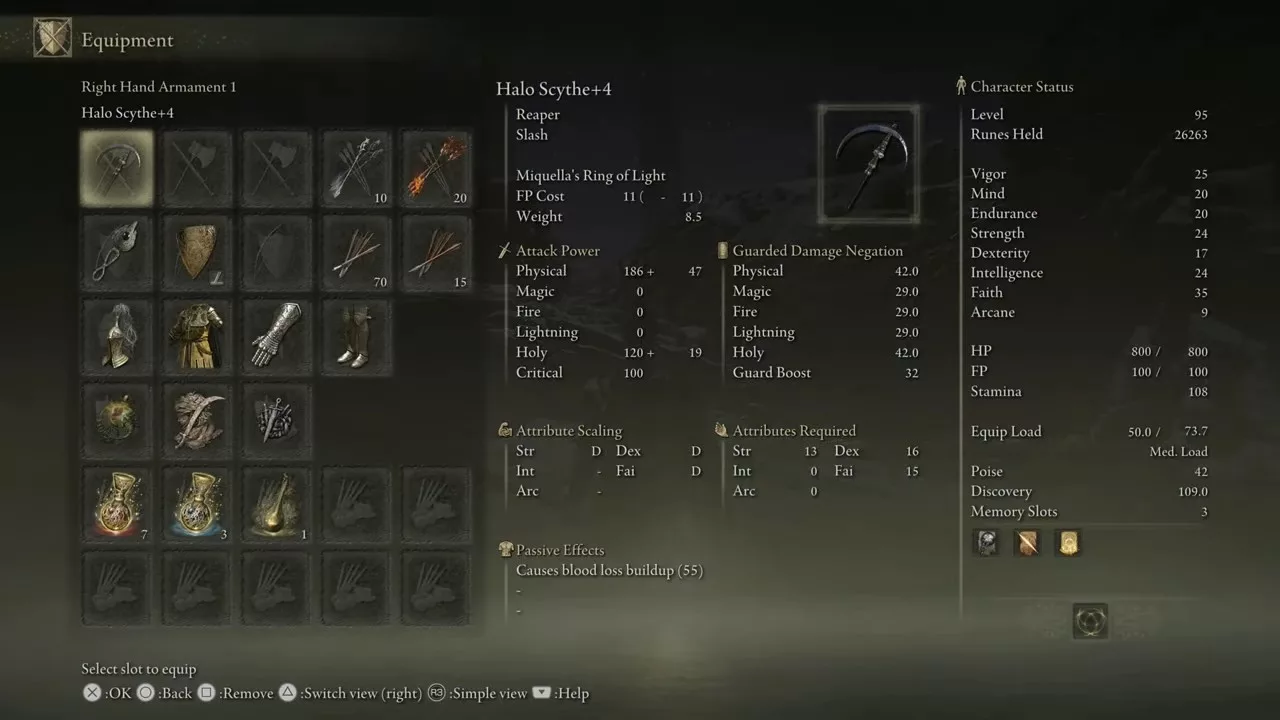
10) Halo Scythe
The Halo Scythe is attainable early on in the game, allowing you to develop your Faith build right away in Elden Ring. It is also among the simpler Faith weapons to acquire in the game.
This weapon inflicts Bleed damage, which aids in stacking blood loss on enemies. Its special skill, Miquella’s Ring of Light, releases Rings that pursue enemies at a mid-range distance. It excels against undead opponents due to its Holy Damage and can follow up with additional attacks if you possess enough Focus Points for casting.
Here are the Halo Scythe’s scaling stats:
Strength: 13 (D)
Dexterity: 16 (D)
Faith: 15 (E)
Location: To acquire the Halo Scythe in Elden Ring, you will need to defeat the Clean Rot Knights, which can be found at various locations on the map, with new players likely encountering them in the center of Aoenia Swamp located in Caelid.
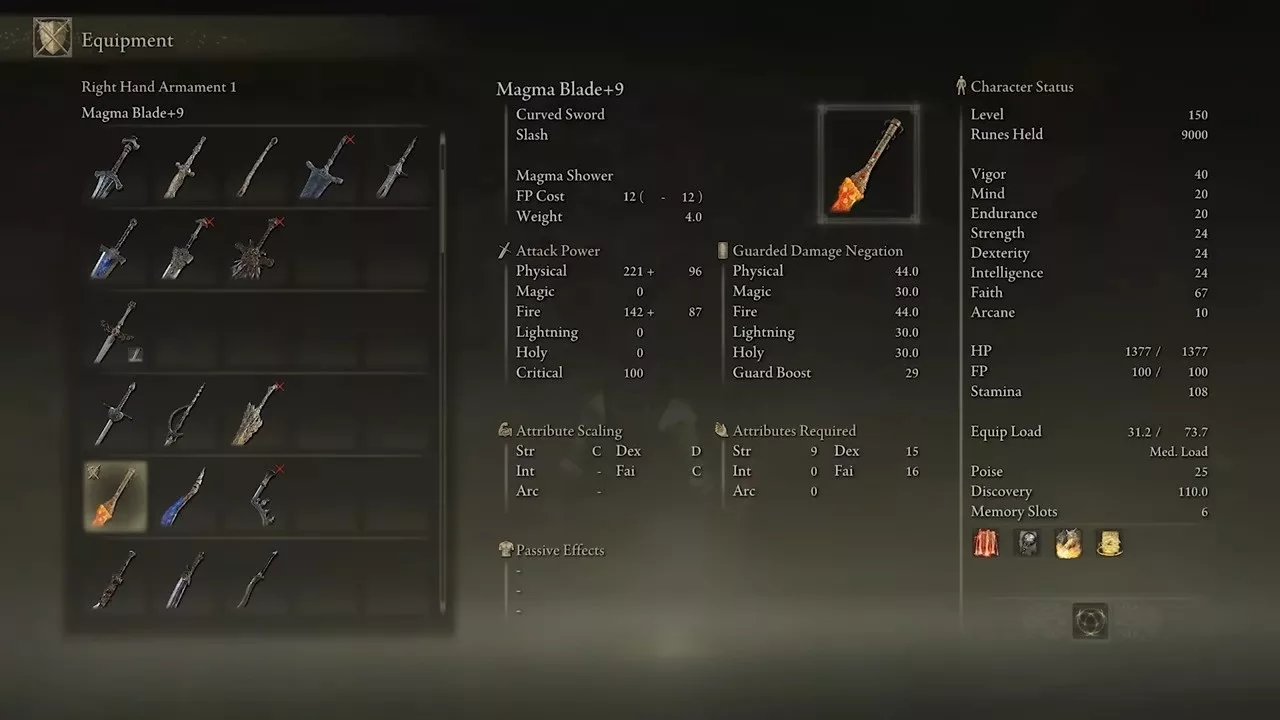
9) Magma Blade
The Magma Blade, as a curved sword, boasts an exceptional attack set that allows for rapid assaults and significant damage per second (DPS). Additionally, as both a fire and physical weapon, the Magma Blade is easily buffed, enabling you to unleash devastating damage with consecutive hits.
Its weapon skill, Magma Shower, enables the user to slash foes while simultaneously showering magma upon them. The Magma Blade can be enhanced with Ashes of War, making it a formidable choice in PvP settings, where you can relentlessly bombard your opponent with attacks.
As for the scaling stats of the Magma Blade:
Strength: 9 (D)
Dexterity: 15 (D)
Faith: 16 (D)
Location: You can obtain this curved sword in Elden Ring by defeating the Man-serpent enemies at the Volcano Manor.
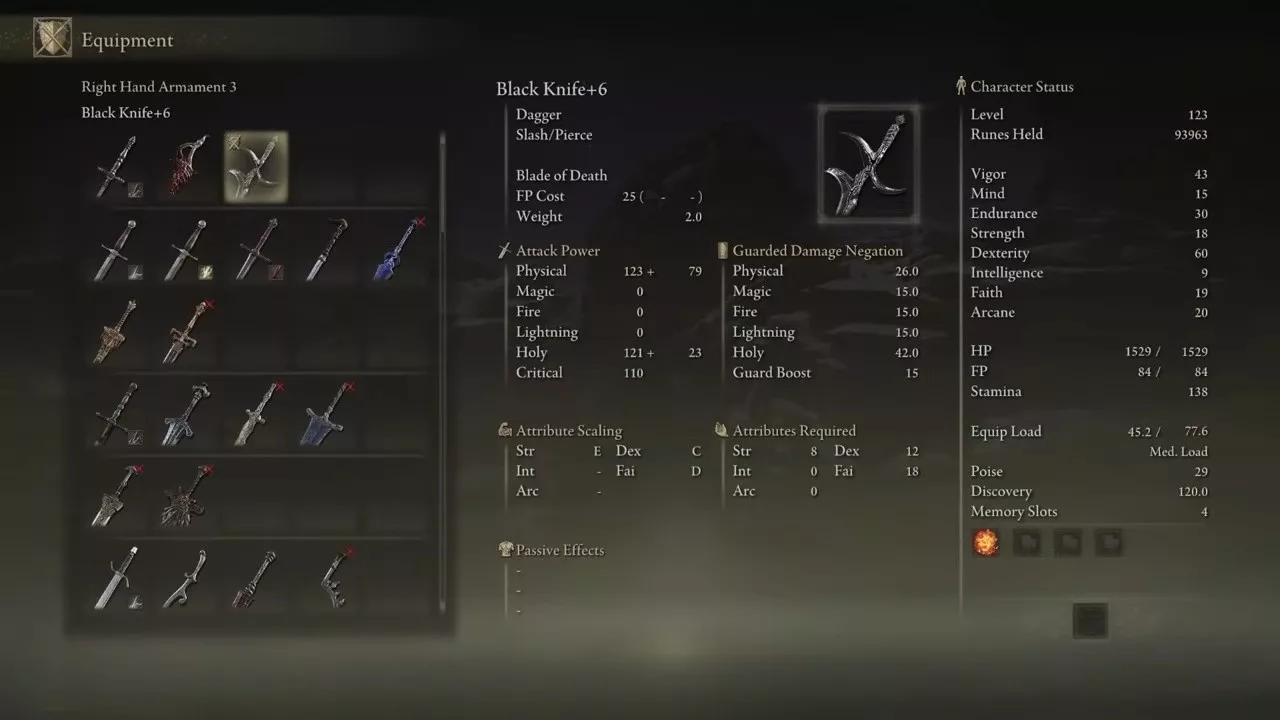
8) Black Knife
Although it’s a Dagger, the Black Knife stands out as a fantastic option among the best Faith weapons in Elden Ring. It inflicts extra Holy damage on enemies. The unique ability of the Black Knife is Blade of Death, allowing you to project a deadly projectile at your foe, significantly damaging their health.
This Ash of War is among the best in the game, as it introduces a death effect that inflicts damage over time on various enemies.
The scaling stats for the Black Knife are as follows:
Strength: 8 (E)
Dexterity: 12 (D)
Faith: 18 (D)
Location: To obtain this Dagger, you must defeat the Black Knife Assassin, found just outside the Sainted Hero’s Grave located in the Altus Plateau.
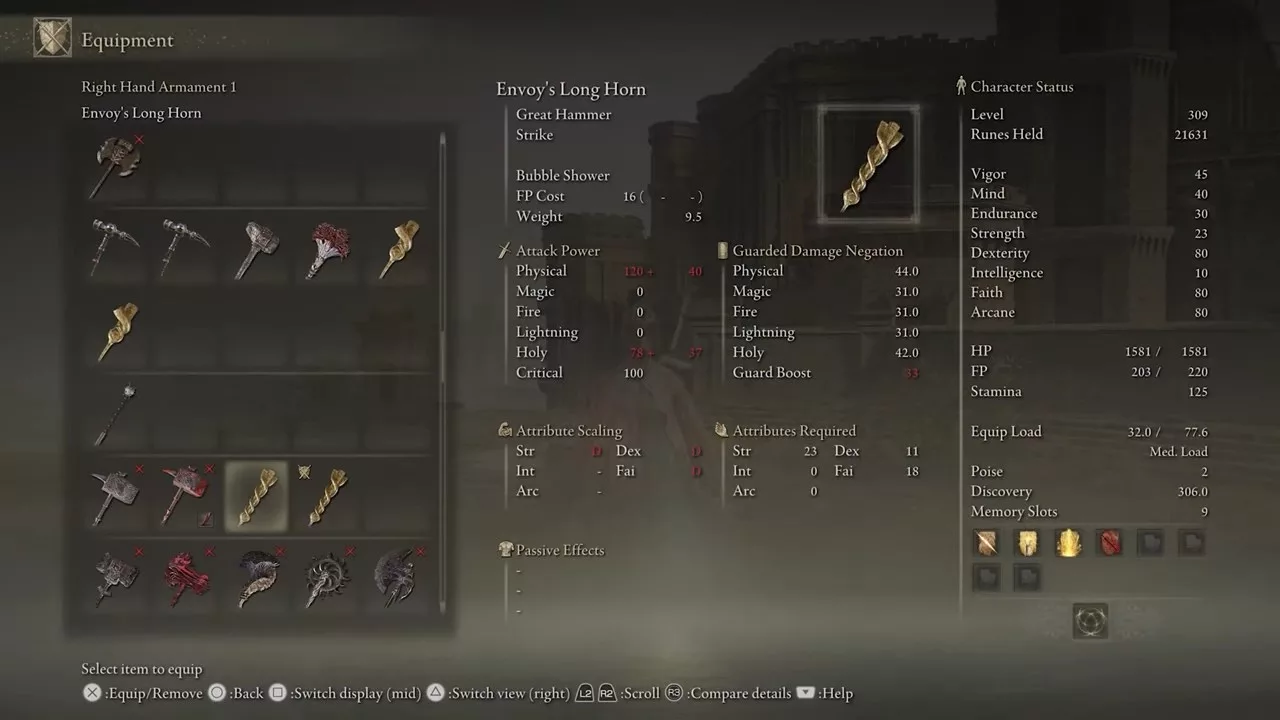
7) Envoy’s Longhorn
The Envoy’s Longhorn is a colossal weapon that commands respect for its immense damage in Elden Ring. It proves to be a formidable Faith weapon capable of tackling any foe, functioning best for those focusing on Strength and Faith builds.
Its high DPS potential allows you to utilize the Longhorn’s Bubble Shower Ash of War, unleashing a multitude of heat-seeking bubbles that target enemies, inflicting significant damage simultaneously.
Here are the scaling stats for the Envoy’s Longhorn:
Strength: 23 (D)
Dexterity: 11 (D)
Faith: 18 (C)
Location: You can farm this weapon by defeating enemies like the Large Oracle Envoy, commonly found at the East Capital Rampart in Leyndell, the Royal Capital.
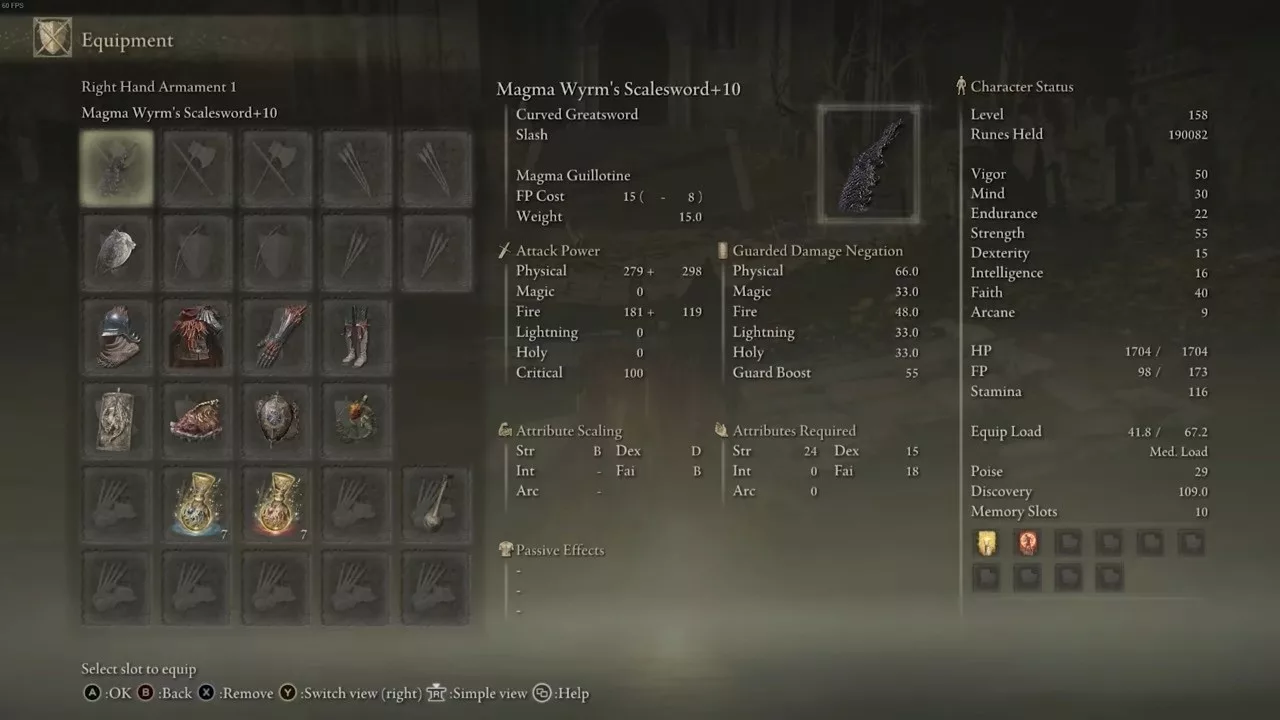
6) Magma Wyrm’s Scalesword
The next weapon is the Magma Wyrm’s Scalesword. This incredible Curved Greatsword delivers tremendous damage, depending on your build. Its Ash of War skill, Magma Guillotine, inflicts significant damage, though it requires careful timing to execute correctly.
The weapon is excellent for exchanging blows with opponents, rewarding timing and skillful execution of its special attack, which allows for follow-ups when you have enough Focus Points (FP).
This weapon is most effective in the mid-game. Its scaling stats are as follows:
Strength: 24 (C)
Dexterity: 15 (D)
Faith: 18 (D)
Location: To acquire this weapon, you need to travel to the Ruin-Strewn Precipice and defeat Magma Wyrm Makar, located directly above the Grand Lift of Dectus.
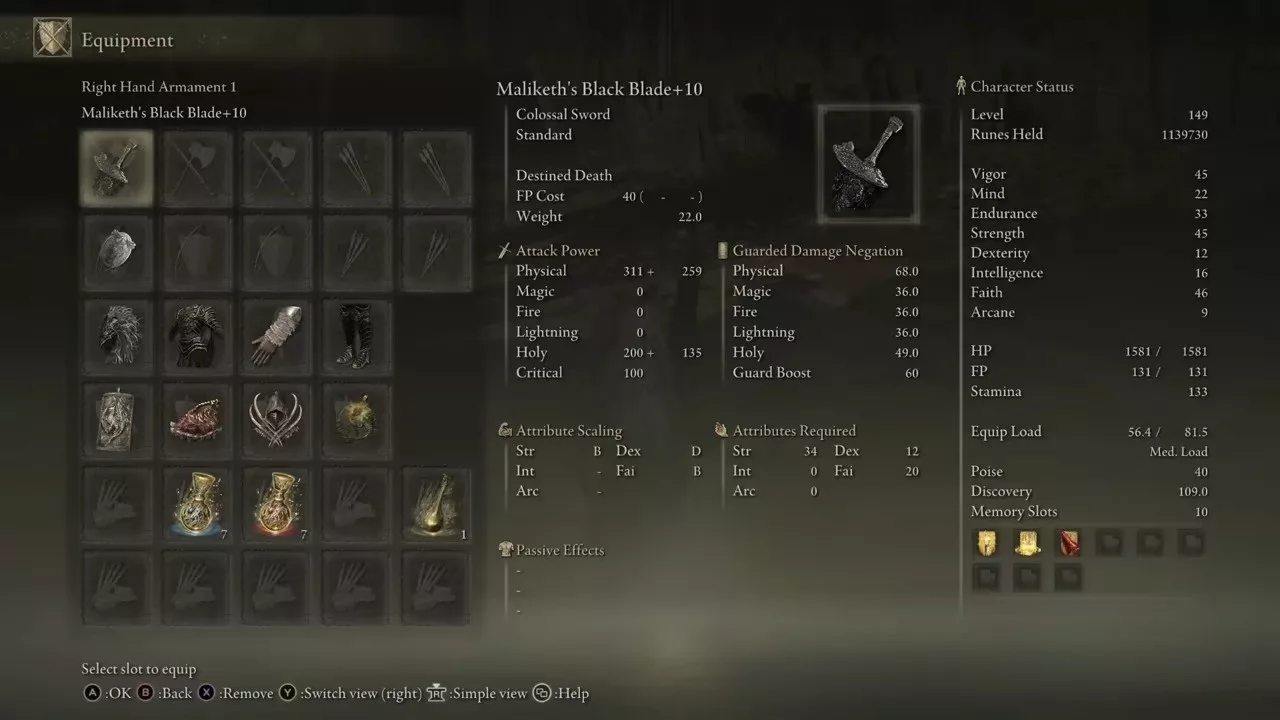
5) Maliketh’s Black Blade
Maliketh’s Black Blade is essential for any Faith build in Elden Ring. It possesses the unique skill, Destined Death, allowing its user to plant the blade in the ground and summon a flurry of blade assaults upon their foes.
The scaling stats for Maliketh’s Black Blade are:
Strength: 34 (C)
Dexterity: 12 (E)
Faith: 20 (D)
Location: To obtain this blade, you must acquire the consumable item Remembrance of the Black Blade by defeating Maliketh, the Black Blade. Afterward, take this item to the Roundtable Hold and exchange it with Enia to receive Maliketh’s Black Blade.
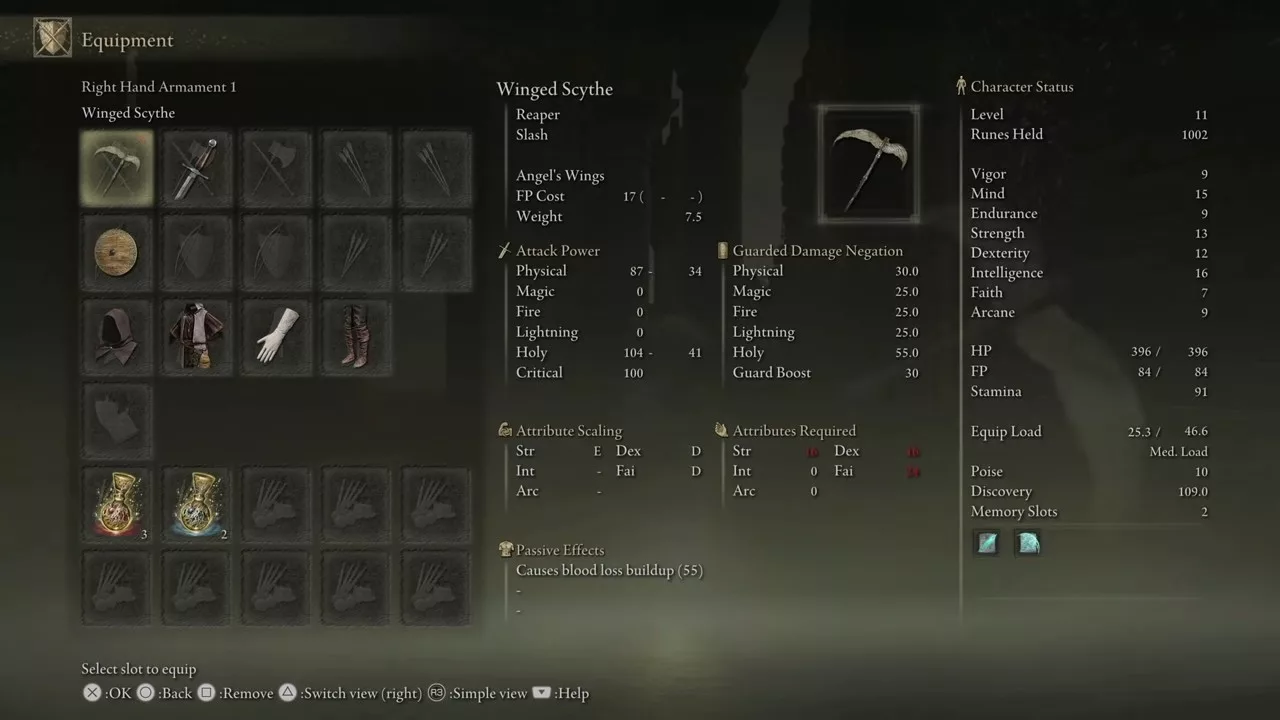
4) Winged Scythe
The Winged Scythe is perfect for players who enjoy Power Stancing weapons in Elden Ring, even though its strike speed may be on the slower side.
The unique skill, Angel’s Wings, may take some practice to use effectively, but once mastered, it can deal substantial damage to enemies while also building blood loss.
Here are the scaling stats for the Winged Scythe:
Strength: 16 (E)
Dexterity: 16 (D)
Faith: 24 (D)
Location: To find the Winged Scythe, venture to the Church of Pilgrimage site of Grace. After activating the site, head southwest towards the ruins of Tombsward Village. In those ruins, you’ll discover a tunnel entrance housing the Winged Scythe.
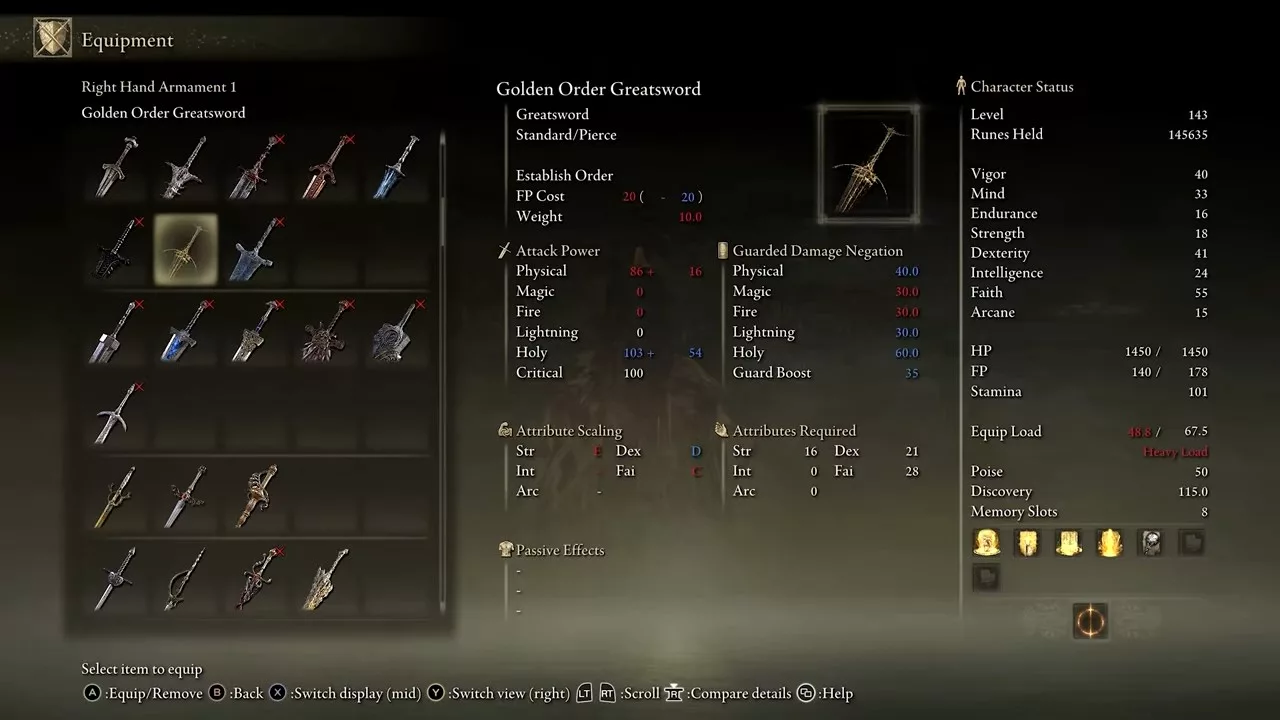
3) Golden Order Greatsword
This weapon belongs to the Greatsword category, and it is versatile enough to inflict substantial Holy damage to enemies at medium range. The unique skill, Establish Order, allows you to release a golden explosion around yourself while simultaneously launching a potent follow-up strike in the form of an arc of Holy light against foes. This sword also deals an additional 20% damage to undead enemies.
Here are the scaling stats for the Golden Order Greatsword:
Strength: 16 (E)
Dexterity: 21 (D)
Faith: 28 (C)
Location: To find the Golden Order Greatsword, you must defeat the Misbegotten Crusader situated at the Cave of the Forlorn.
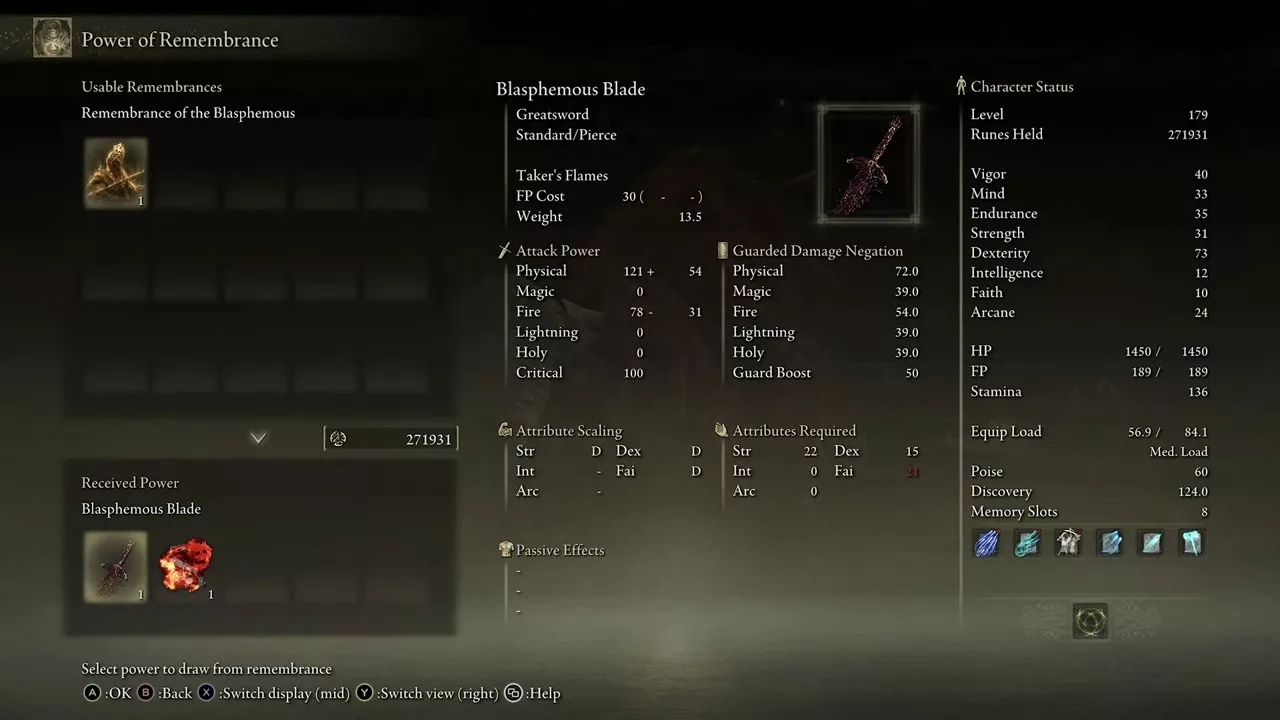
2) Blasphemous Blade
The Blasphemous Blade features a life-steal ability called Taker’s Flames, allowing you to restore health while dealing considerable damage to enemies. Taker’s Flames ignites foes and heals you for every successful attack against the afflicted enemies, providing incredible value.
Moreover, its default Ash of War is fixed, meaning it cannot be altered or enchanted with incantations. Despite this limitation, its Taker’s Flames ability makes it an excellent damage source.
The scaling stats for the Blasphemous Blade are detailed below:
Strength: 22 (D)
Dexterity: 15 (D)
Faith: 21 (D)
Location: To acquire the Blade, you need to obtain the Remembrance of the Blasphemous, a consumable item dropped by Rykard, Lord of Blasphemy. You then trade this item at the Roundtable Hold with Enia to receive the Blasphemous Blade in Elden Ring.
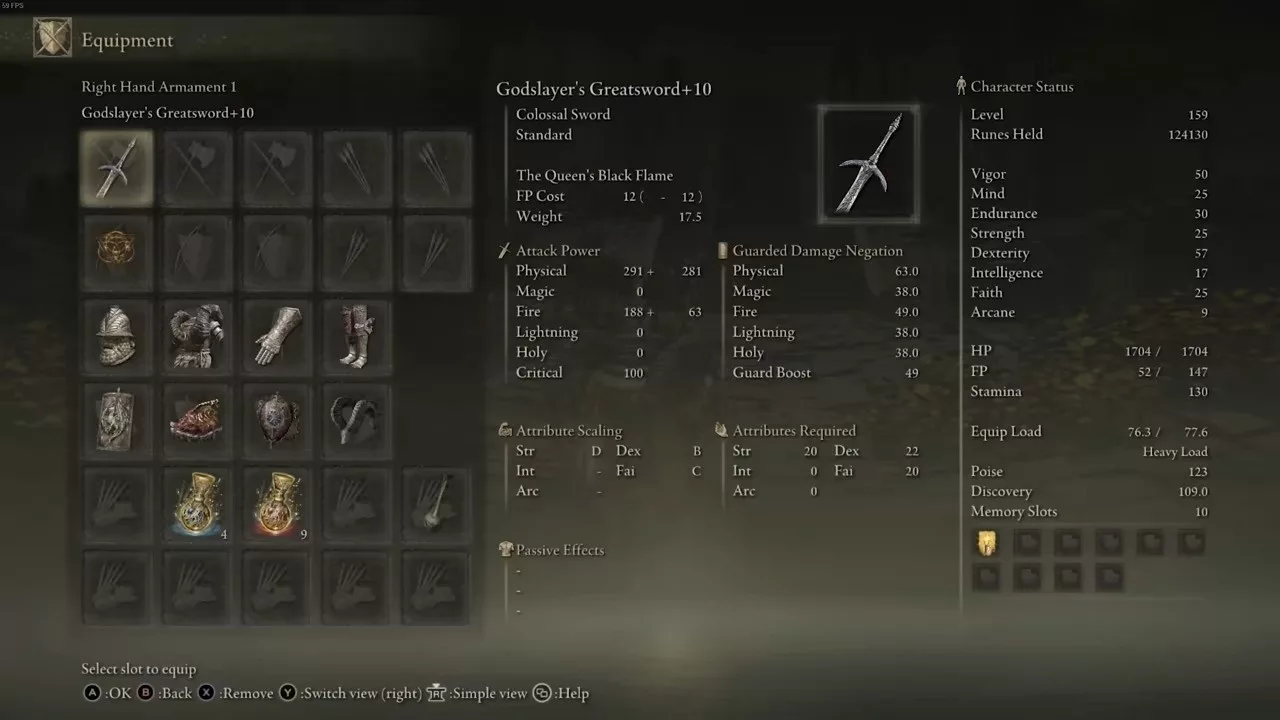
1) Godslayer’s Greatsword
The top Faith weapon on our list is the Godslayer’s Greatsword. As the best Colossal Sword for Faith builds, it offers impressive speed for its size, featuring a unique heavy attack: an uppercut.
Its Ash of War, The Queen’s Black Flame, inflicts enormous damage. Though the special attack takes time to charge, it can deliver formidable damage if timed correctly. You’ll want to carefully time your special moves to unleash their full power.
The Godslayer’s Greatsword serves well in both early and mid-game, scaling effectively with Faith and Dexterity. Its scaling stats include:
Strength: 20 (D)
Dexterity: 22 (D)
Faith: 20 (D)
Location: You can find the Godslayer’s Greatsword in the Divine Tower of Caelid. To obtain this weapon, you must defeat the boss residing in the tower, after which the weapon will be located in a chest within the boss room.
In Elden Ring, one of the rarest and most sought-after items is the Dragon Heart, which allows you to wield the powers of a melee dragon. These items aren’t bought or looted but earned by slaying dragons throughout the game. There are over 23 Dragon Hearts available, but only 20 are required to unlock every Dragon Communion Spell.
To collect Dragon Hearts, you must locate and defeat specific dragon bosses. Each slain dragon drops one Dragon Heart, and there are 19 locations where you can gather them.
Limgrave
Head south from the Limgrave Tunnel Site of Grace and travel east of the Church of Elleh to find the Flying Dragon Agheel. This is the first and easiest dragon you’ll come across. Be prepared for a tough fight—level 25 or higher is recommended.
Caelid
In the Caelid region, the second dragon is located between the Cathedral of Dragon Communion Site of Grace and the Caelid Highway South. Continue southeast from Gael Tunnel to find Magma Wyrm near the borders of Caelid and Limgrave.
In another part of Caelid, travel to the Sellia Hideaway Site of Grace and head northwest to encounter Elder Dragon Greyol, which grants you five Dragon Hearts. You can also find Flying Dragon Greyll on the Farum Greatbridge in Caelid.
Liurnia
In Liurnia, head west from the Cathedral of Manus Celes Site of Grace to the Village of the Albinaurics. Defeating Glintstone Dragon Adula here rewards you with three Dragon Hearts.
Altus Plateau
To reach Magma Wyrm Makar, travel west of the Ruin-Strewn Precipice Overlook Site of Grace, which borders the Liurnia and Altus Plateau regions.
Get ready to face one of the key challenges in Elden Ring!
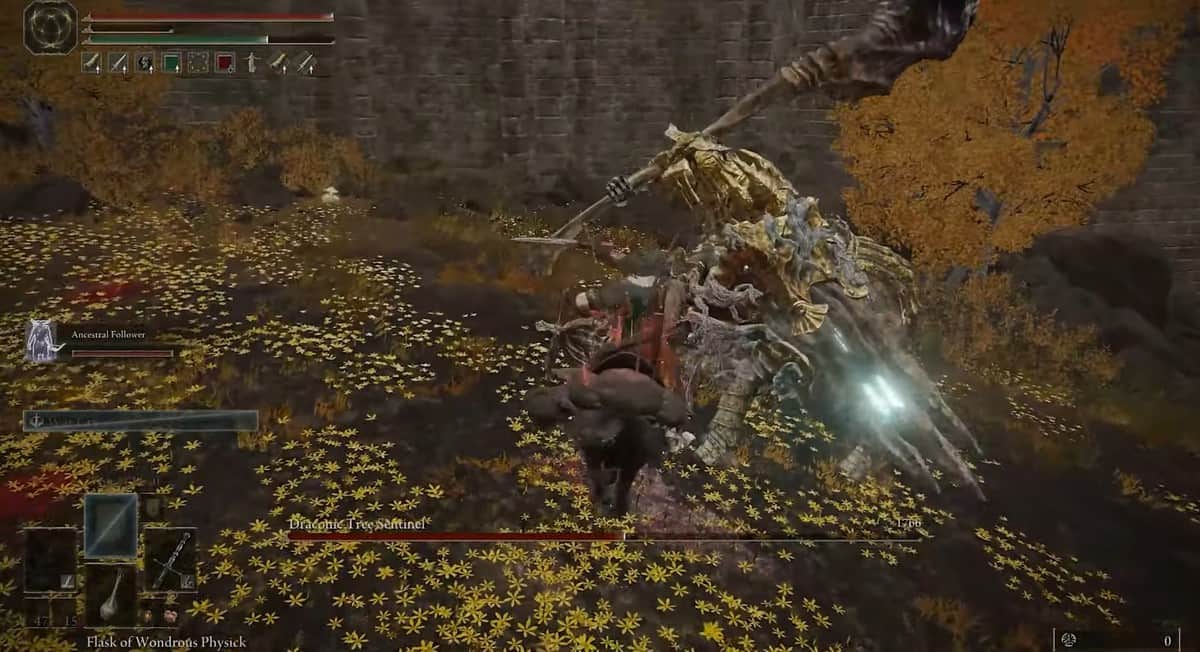
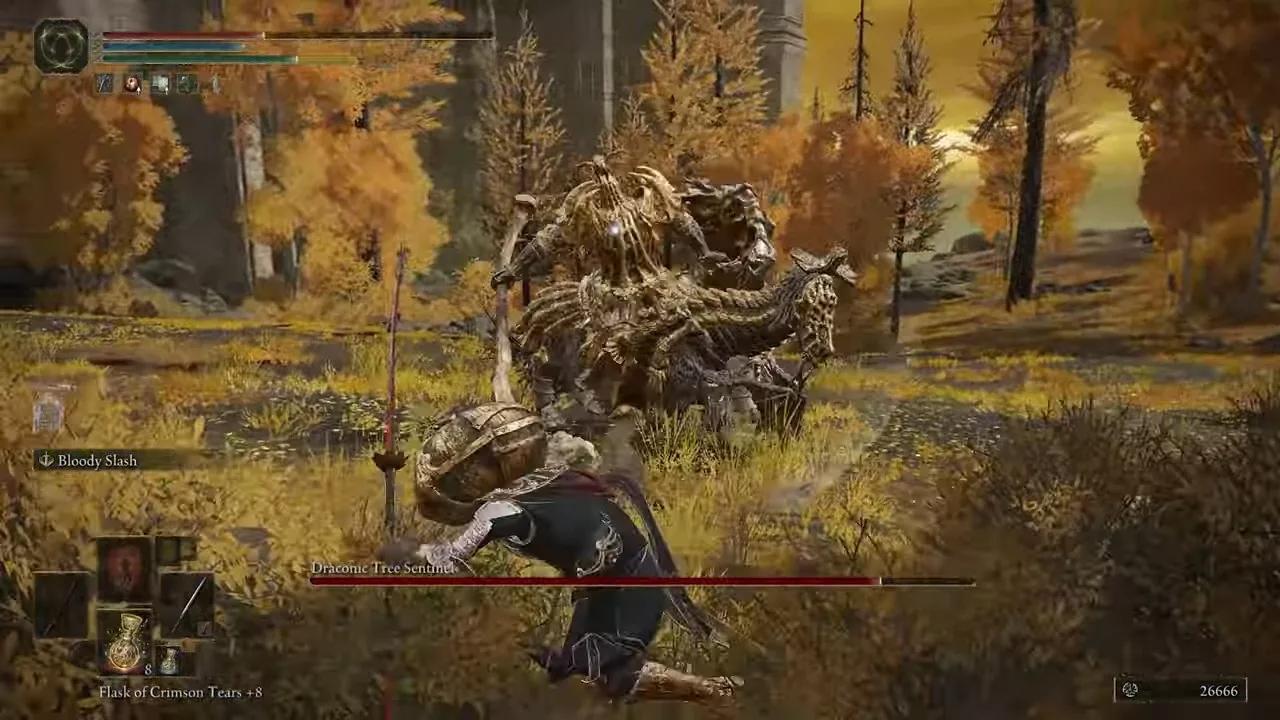
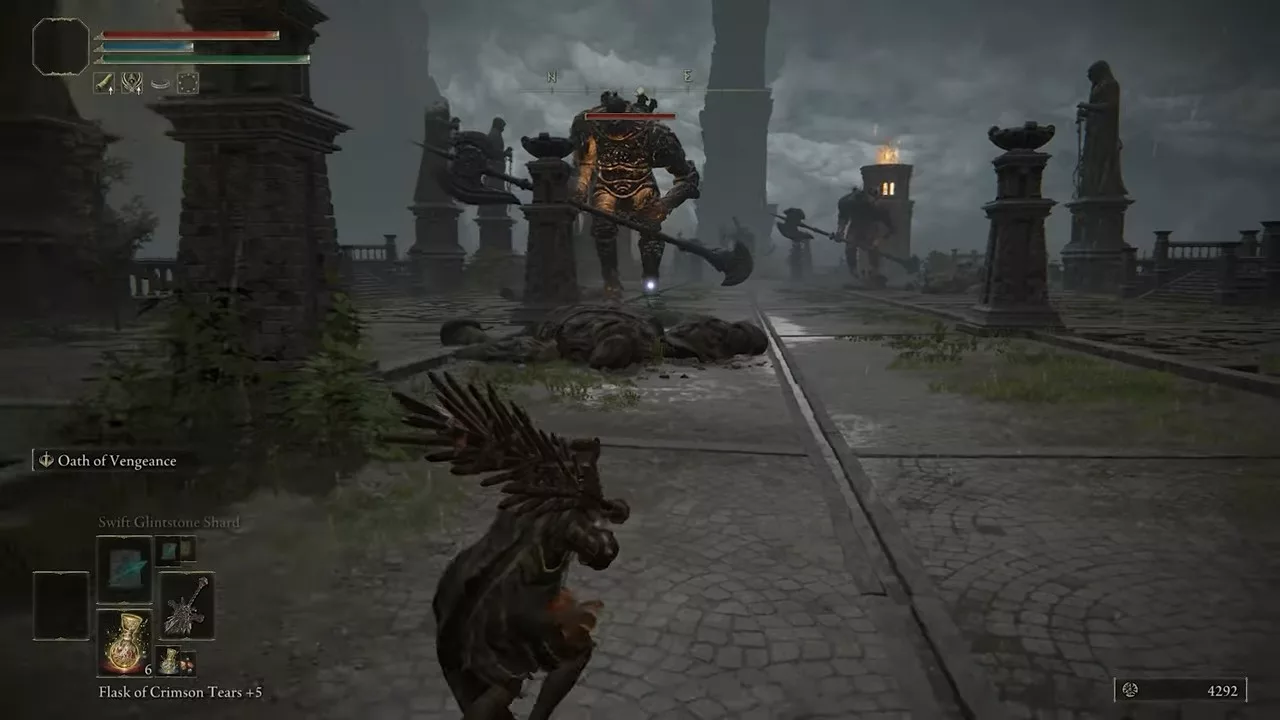
In Elden Ring, optional bosses abound, but the Draconic Tree Sentinel stands out. He blocks the entrance to the Royal Capital, and you can’t move forward without defeating him or finding another way around.
This guide covers everything about the Draconic Tree Sentinel, including his location, strategies to defeat him, and some clever tactics to secure an easy win.
Elden Ring Draconic Tree Sentinel Location
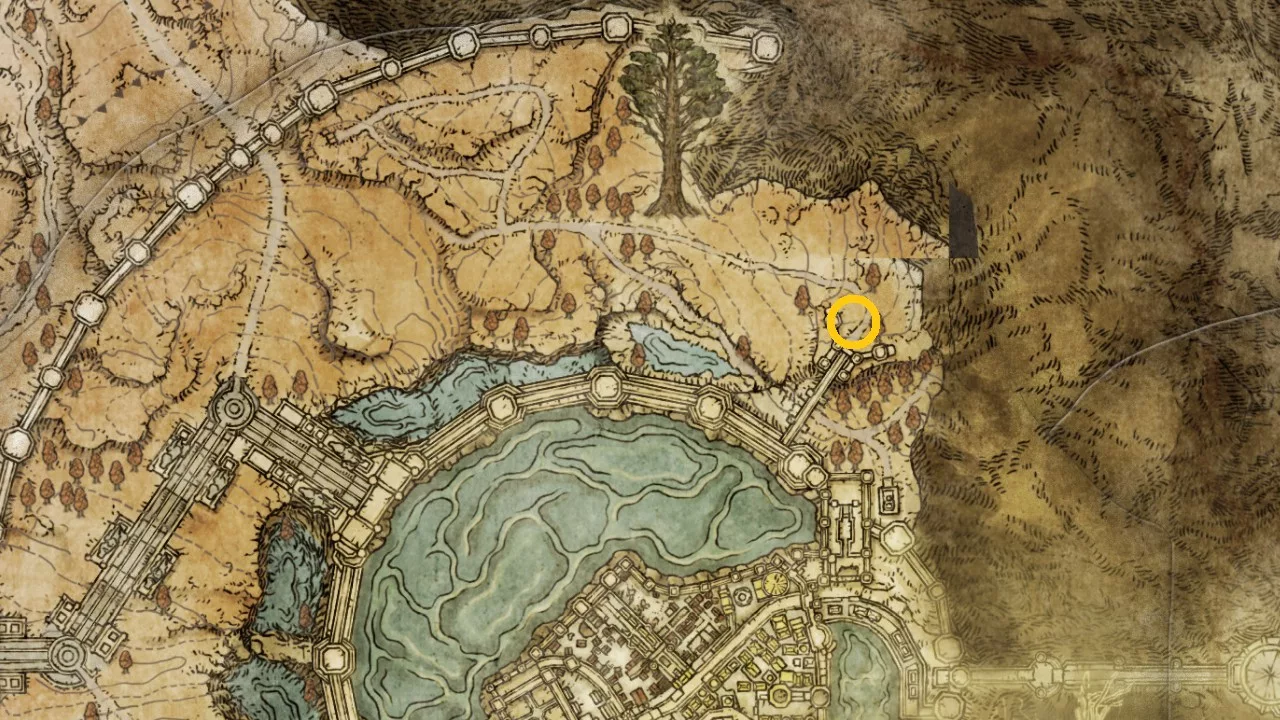
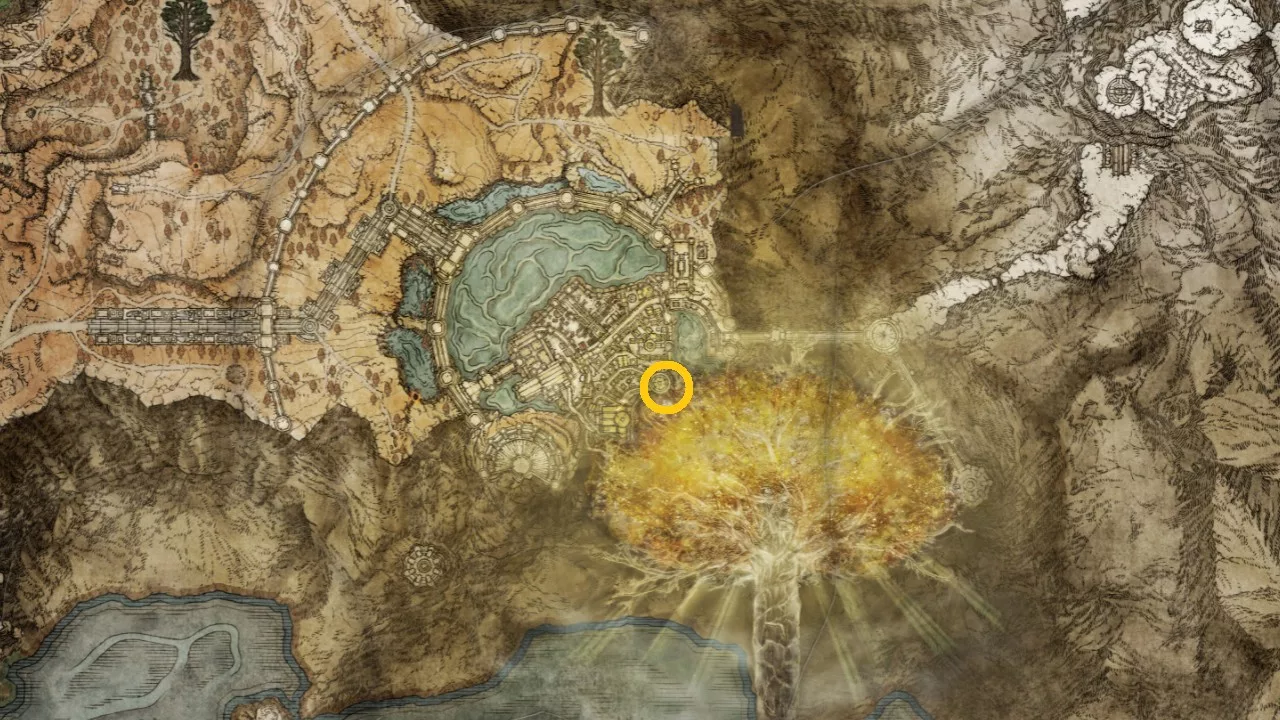
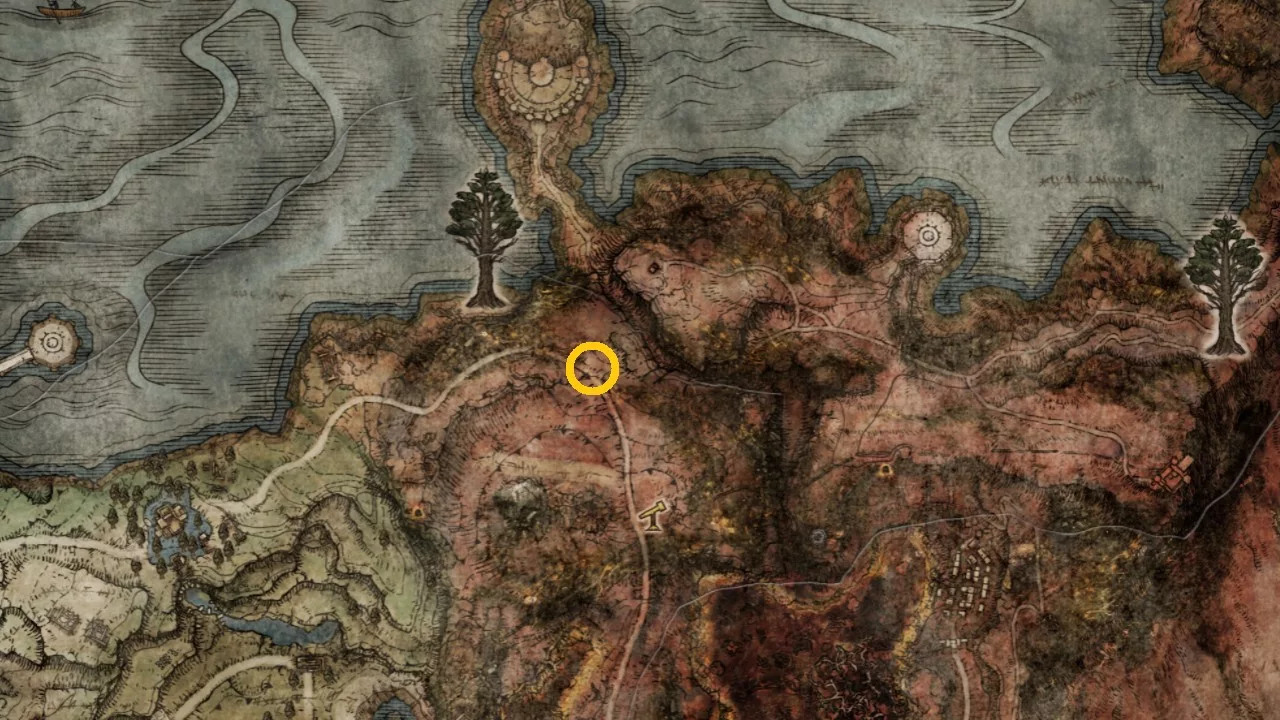
You’ll find this boss in the Altus Plateau, guarding the direct route to Lyndell Royal Capital. While there are other paths, they can be time-consuming.
To reach him, head east from the Hermit’s Shack Grace in the Capital Outskirts. Follow the round wall of the city until you arrive at the bridge guarded by the Draconic Tree Sentinel.
Tip: Since this boss roams freely without a specific arena, other enemies might interfere. Eliminate any nearby foes first to focus on the Sentinel.
How to Defeat the Draconic Tree Sentinel
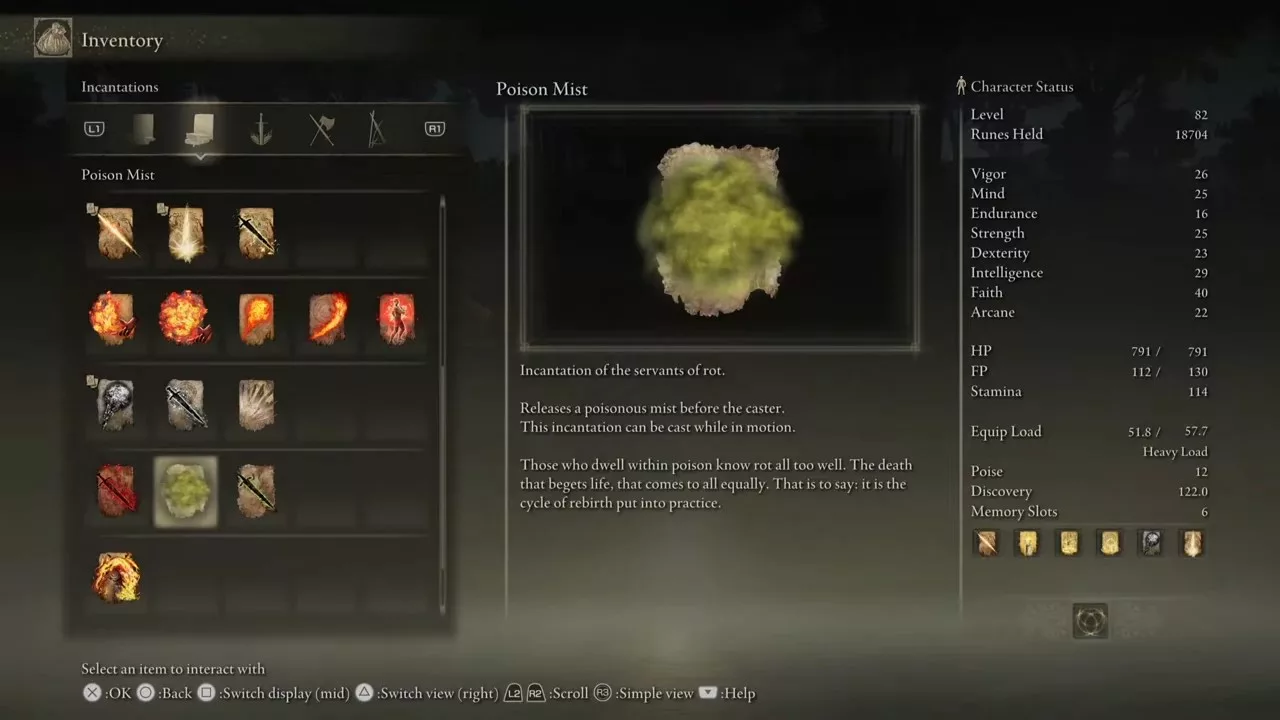
The Draconic Tree Sentinel is especially vulnerable to Poison and Bleed attacks. A single cast of the Poison Mist spell can deal over 1000 damage to him.
If you’re playing a melee character, agility is key. You can’t withstand his attacks, so ride Torrent to dodge or absorb damage.
Using a weapon with good range helps a lot. For Colossal Sword users, a crouch attack can be effective. Spears offer good range as well. If you wield a straight sword or Katana, capitalize on openings during his attack patterns.
You can also summon help by using the Furlcalling Finger Remedy. If you’re struggling, work on Millicent’s questline. After giving her the Prosthesis Arm and defeating the Windmill Village boss, you can summon her for assistance.
Don’t hesitate to use summons—they can provide crucial breathing room. Ranged summons, especially archers, work well here.
When the Sentinel’s health drops below 50%, he’ll empower himself with dragon magic, unleashing ferocious lightning attacks. Use quick spells and maintain your distance to stay safe.
Defeating the Draconic Tree Sentinel rewards you with 50,000 Runes, Dragon Greatclaw, and Dragonclaw Shield.
Draconic Tree Sentinel Attacks and Counters
The Sentinel wields a massive hammer that deals significant damage. If you’re positioned on the side with the hammer, prepare for swift attacks with little windup.
He can charge at you from a distance and slam his weapon down, causing area damage. His horse can stomp on you or breathe fireballs, which add an extra layer of challenge.
Tip: Aim to fight him when your level is around 20.
In addition to hammer strikes, the Draconic Tree Sentinel has shield attacks that can knock you back. He can also slam his shield to deliver front and back strikes.
In his second phase, he’ll start using lightning attacks, making the fight even more unpredictable.
He can imbue his shield with lightning and either summon random lightning strikes or drop targeted bolts on you. Keep an eye on the ground for the first attack and master your timing for the second to dodge effectively.
For hammer attacks, he may slam down to create an area damage effect or swing his hammer to send out a wave of lightning. This attack tracks well, so be ready to run when you see him charge up.
How to Cheese the Draconic Tree Sentinel
To cheese the Draconic Tree Sentinel, start by acquiring the Poison Mist Incantation. Travel to Weeping Peninsula and enter Castle Morne Rampart. Defeat a Scarab here to get the Poison Mist.
Next, buy a Finger Seal for casting the mist. Sneak behind the Sentinel by moving through the trees and bushes so he can’t see you, then cast the Poison Mist.
Once cast, the boss won’t detect your location, allowing his health to drop. If you notice the health decrease slowing, recast the spell.
Morgott, the Omen Kin, is one of the demigods in Elden Ring and a required encounter. Players must face him to advance in the game. Morgott is among the most challenging bosses in the mid-game section and demands significant effort to defeat.
Located in Leyndell, players should be well-leveled and equipped with strong weapons. Besides the conventional strategies, there are ways to “cheese” him.
Elden Ring Morgott, the Omen King Location
This demigod can be found in Leyndell, Royal Capital. Players should head east toward the balcony after defeating the First Elden Lord, Godfrey. There, a branch will lead them to the second level of the room in Elden Ring.
Next, players should make their way to the Queen’s Bedchamber site of grace across the bridge, which is the closest grace point to the boss. From there, head south to find Morgott’s chamber.
The recommended level to challenge Morgott is 80 or higher, with weapons upgraded to +15.
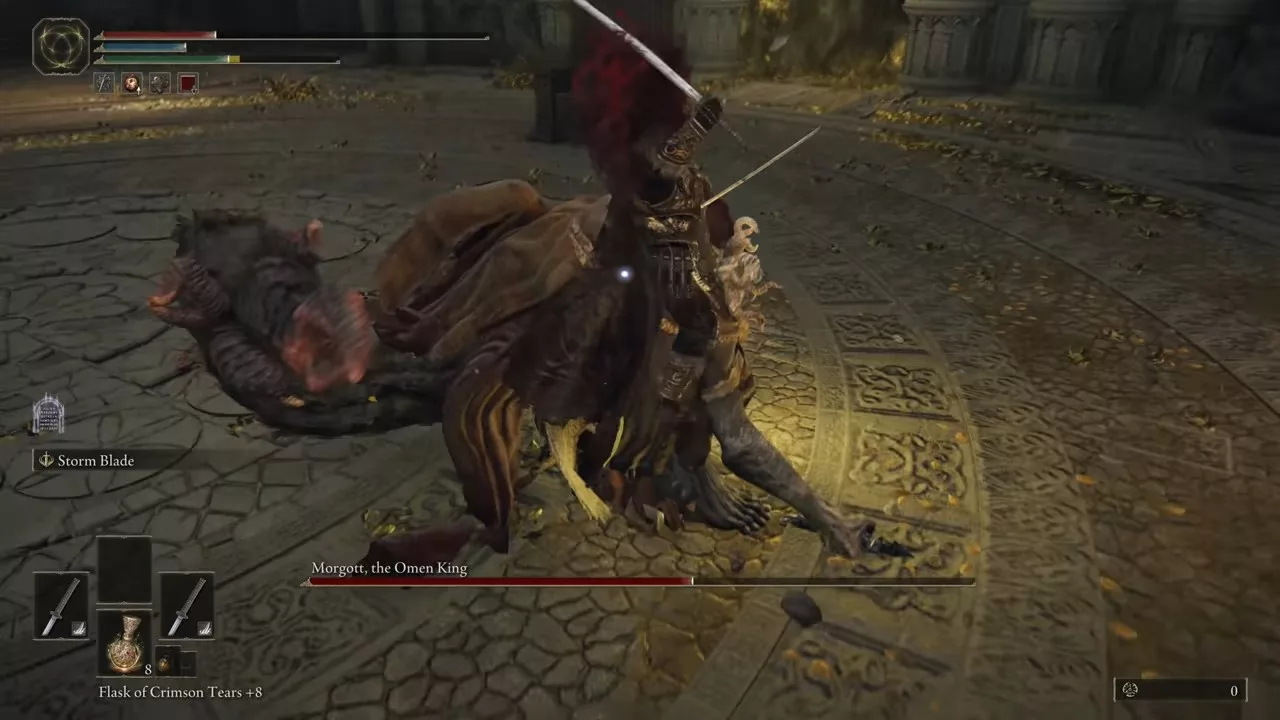
Your battle against Morgott, the Omen King, will occur in two phases. Below, we outline both stages and strategies to defeat him.
Boss Fight – Phase 1
Call Melina before the fight begins, as her assistance can be invaluable; she can absorb a significant amount of damage. Additionally, players can summon spirit ashes for help.
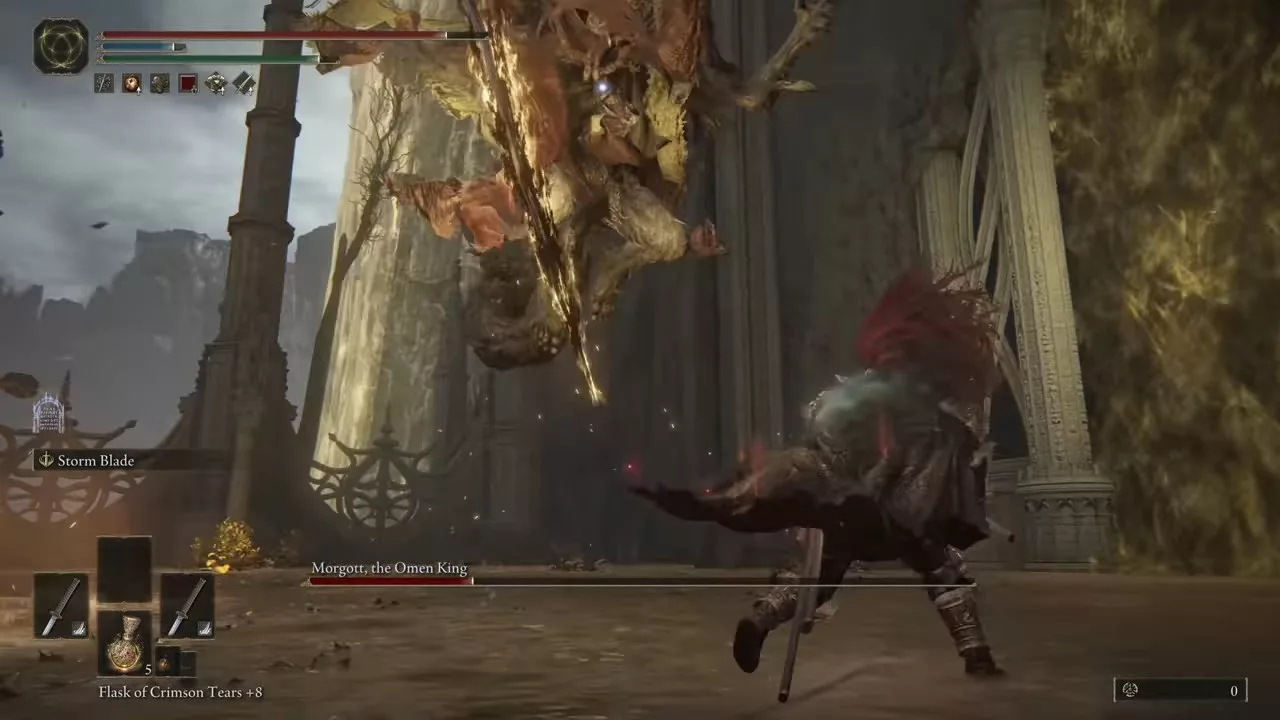
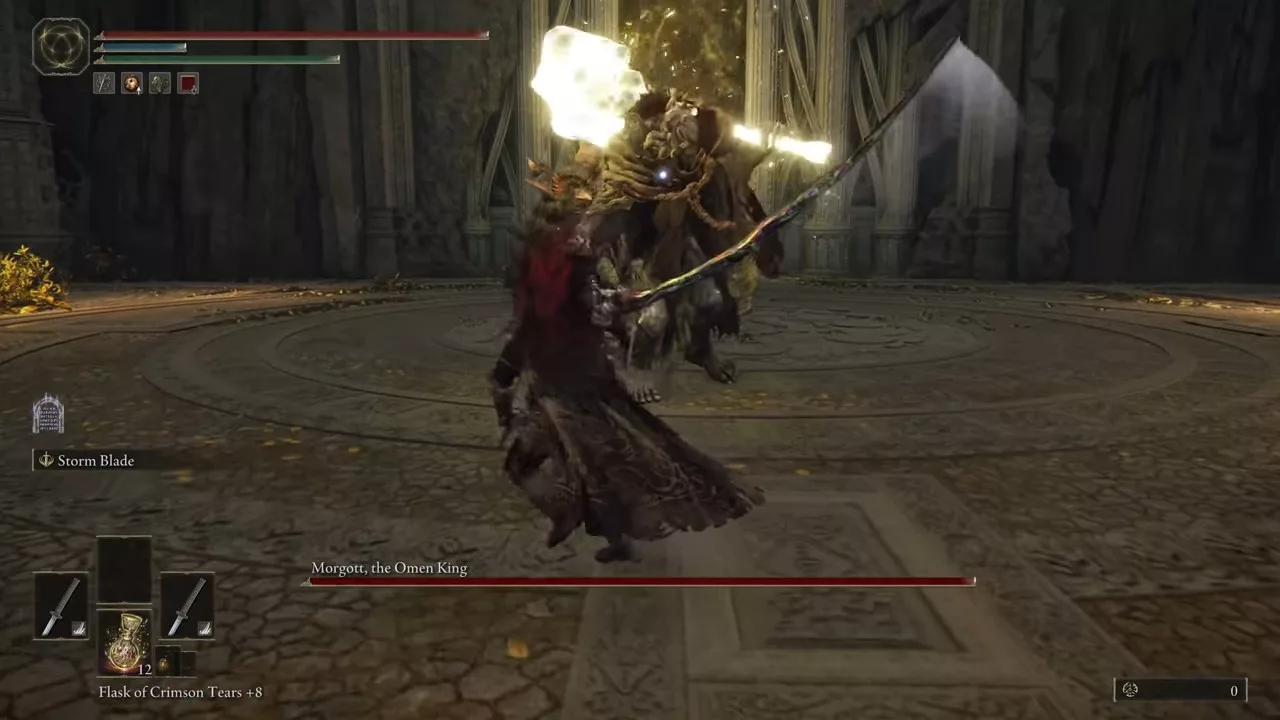
The fight starts when Morgott transforms his weapon into a long lightning blade. From the beginning, maintain distance. While Morgott focuses on Melina, take the opportunity to attack from behind.
Avoid staying too close for too long, and maximize damage before retreating. Use your Ashes of War abilities from a distance, such as Storm Blade, to deal effective range damage. If executed well, you should reduce Morgott’s health by 50% during this phase.
Boss Fight – Phase 2
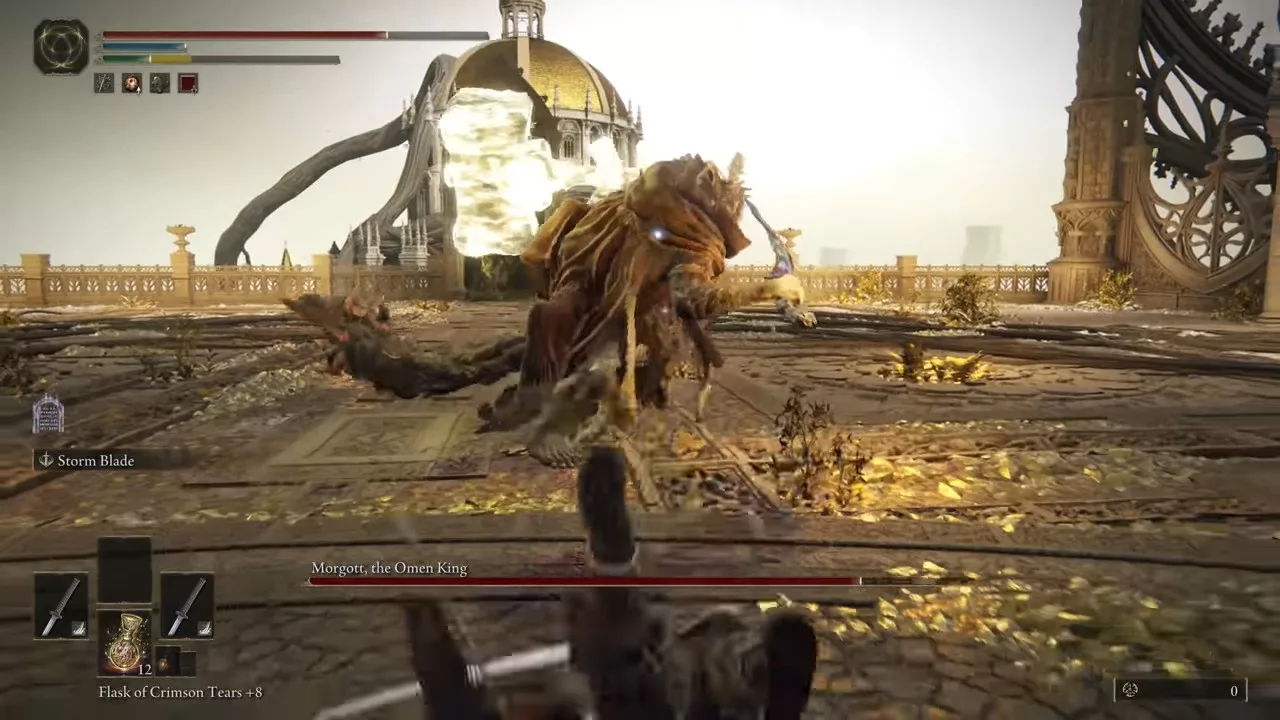
The second phase begins when Morgott crouches, preparing to unleash a massive AOE thrust that can deal significant damage. This attack will ignite the arena, but it causes minimal damage, so maintain your distance to avoid the thrust.
By this point, Melina may be defeated, and you should summon an Ash of War for backup; Lone Wolf Ashes are recommended.
The strategy remains similar to the first phase: dodge and attack from behind Morgott. Defeating him will unlock the Shardbearer Morgott trophy.
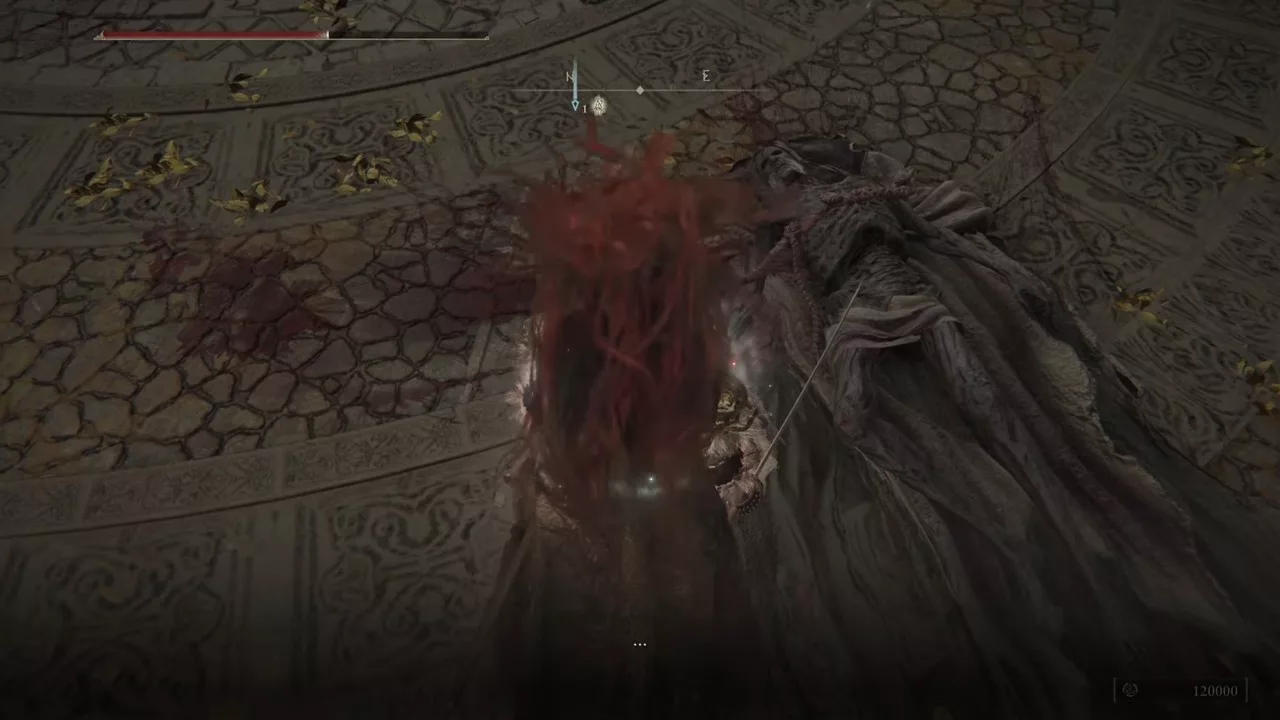
Upon victory, players will receive 120,000 Runes, Morgott’s Great Rune, and the Omen King’s Remembrance.
Attacks and Counters
Holy Blade, Rain, and Bloody Thrust are among the deadliest attacks Morgott employs, which require precise dodging to avoid substantial damage.
In his Holy Spear Throw attack, Morgott will launch a massive Holy Spear at you. Even at a distance, it can hit hard, so rolling forward is advised to evade it.
He may also charge at you with a Holy Spear. This charge can be avoided by rolling to the side. As the fight intensifies, Morgott will utilize a Holy Hammer to slam down; sidestep or roll to evade this attack. He can also perform a combo, which is dodged by rolling away as he dashes towards you.
Morgott is particularly vulnerable to slashing attacks, so we recommend a build focused on slashing weapons for maximum damage.
Morgott can throw three Holy Daggers that you can dodge by rolling forward. He may also execute the Holy Blade Rain attack, where you should look up and roll away from where the swords will land.
When he drops below 50% health, Morgott will unleash a powerful burst attack that can be avoided by stepping back. He will also perform the Bloody Slice, rushing at players to slash; rolling towards him will help you dodge it.
Finally, Morgott’s Bloody Thrust attack is a charging thrust that can be evaded by rolling towards him.
How to Cheese Morgott, the Omen King?
If you’re looking to bypass the lengthy two-phase fight with Morgott, a cheese strategy can save you time. To defeat Morgott quickly, utilize Poison Mist, which can be found in a forest southeast of the Castle Morne Rampart Site of Grace. Before entering the boss arena, use Margit’s Shackle three times at the fog door to immobilize him.
Once inside, apply Poison Mist twice and wait for the damage to accumulate. Morgott will shake as his health diminishes, leading to a swift defeat.
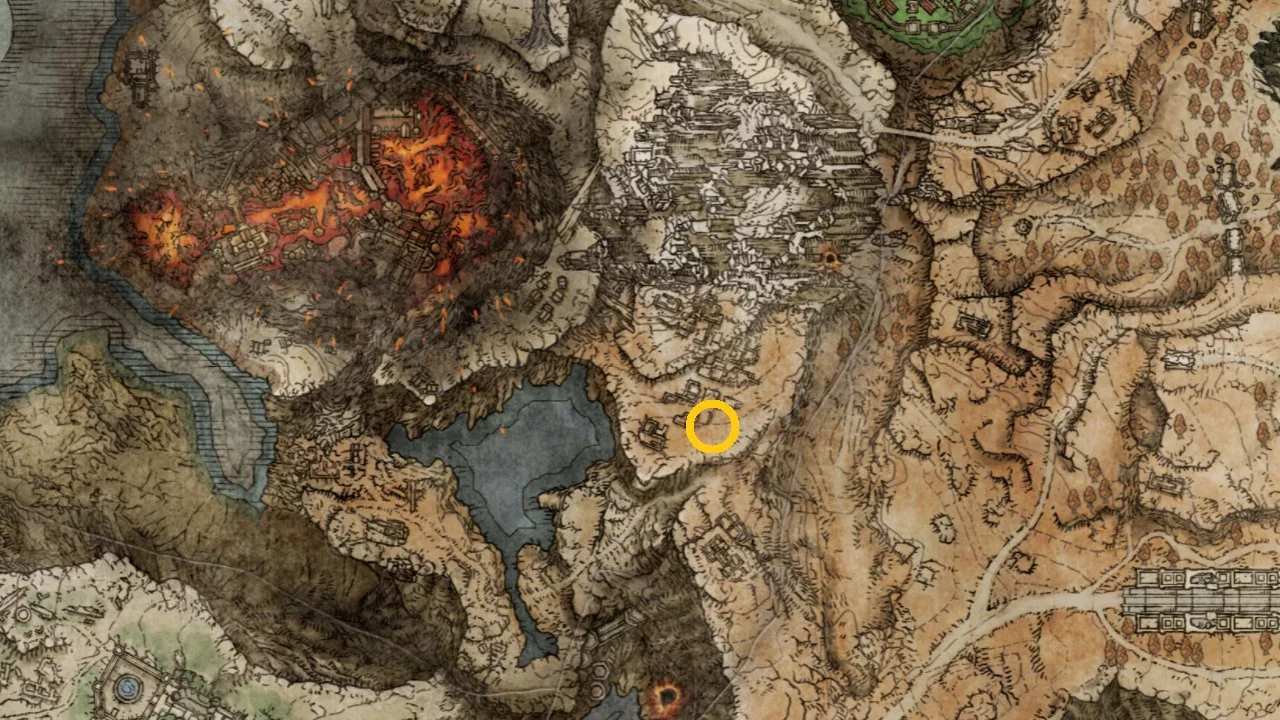
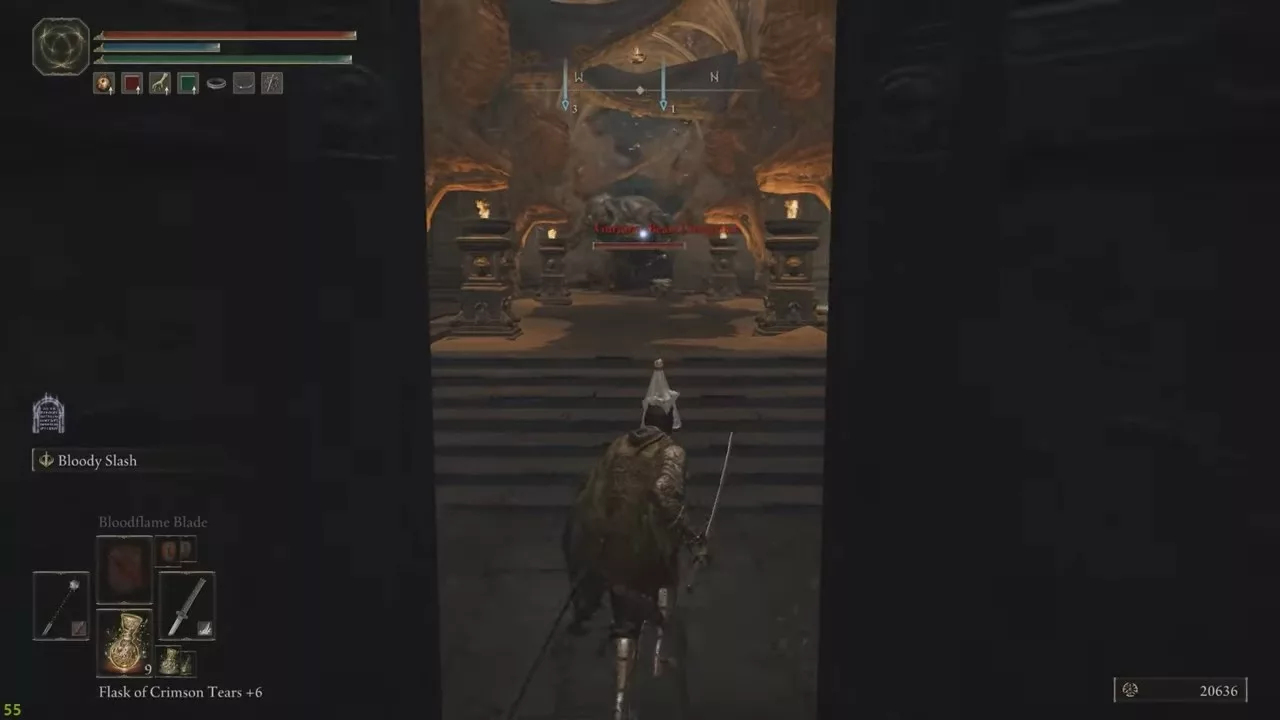
Referred to as the “Death of the Demigods,” Gurranq has a voracious appetite for Deathroots, and gathering these is central to his questline. Even if you choose not to complete his quest, encountering him is essential to advance in the main narrative of Elden Ring.
In exchange for your efforts in locating these Deathroots, Gurranq will reward you, making your quest worthwhile.
Elden Ring Gurranq Beast Clergyman Location
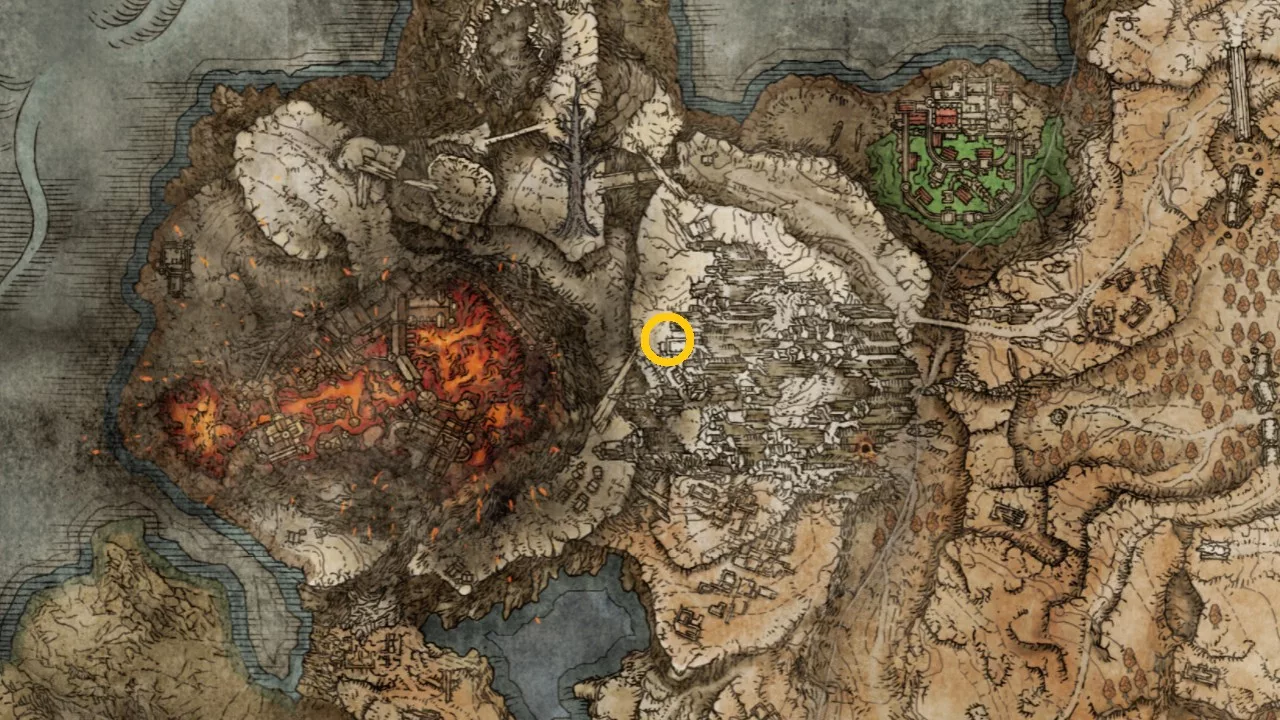
You can locate Gurranq in the Bestial Sanctum within Caelid. There are two ways to reach him: either head directly to the Bestial Sanctum through Caelid or utilize a teleportation device.
Traveling on Torrent will require you to navigate the treacherous landscape of Caelid in Elden Ring. Additionally, you must defeat the Black Blade Kindred boss before you can enter the Sanctum.
On the other hand, if you opt for the teleporter, you need to first speak with D, Hunter of the Dead, at Summonwater Village. Once you defeat the Tibia Mariner for him, he will guide you to the teleporter leading straight to the Sanctum, allowing you to avoid the Black Blade Kindred encounter. Look for the teleporter concealed in the bushes behind the Third Church of Marika.
Where to find all Deathroots in Elden Ring?
Players need to find a total of 9 Deathroots and deliver them to Gurranq to complete his quest. The Deathroots can be sourced from the following locations:
Deathroot #1 – Deathtouched Catacombs
For the first Deathroot, head to the Deathtouched Catacombs in Limgrave. It can be found inside a chest in the same area where you defeat the Black Knife Assassin boss.
Deathroot #2 – Summonwater Village
The second Deathroot is obtained from the Tibia Mariner located in Summonwater Village, which lies near the borders of Caelid and Limgrave.
Deathroot #3 – Carian Study Hall
A Tibia Mariner will also drop the next Deathroot, which can be found near the Carian Study Hall in Luirnia.
Deathroot #4 – Black Knife Catacombs
You can find the fourth Deathroot inside the Black Knife Catacombs, situated near the Frenzied Flame Village.
Deathroot #5 – Wyndham Ruins
The next Deathroot can be obtained from another Tibia Mariner located near the Wyndham Ruins once you defeat him.
Deathroot #6 – Gelmir Hero’s Grave
You’ll find the next Deathroot within the Gelmir Hero’s Grave dungeon, which is located close to the previous location.
Deathroot #7 – Hidden Path to the Haligtree
The seventh Deathroot is located in the Mountaintop of the Giants area, specifically along the Hidden Path to the Haligtree.
Deathroot #8 – Giants’ Mountaintop Catacombs
The eighth Deathroot can be found inside the Giants’ Mountaintop Catacombs.
Deathroot #9 – Church of the Eclipse
Finally, you can obtain the last Deathroot from a Tibia Mariner located near the Church of the Eclipse.
Gurranq, Beast Clergyman Questline Rewards
Upon completing this questline by delivering each Deathroot to Gurranq, these are the rewards you can expect:
Clawmark Seal and Beast Eye
Incantation: Bestial Sling
Incantation: Bestial Vitality
Ashes of War: Beast’s Roar
Incantation: Beast Claw
Incantation: Stone of Gurranq
Beastclaw Greathammer
Incantation: Gurranq’s Beast Claw
Ancient Dragon Smithing Stone
Is Gurranq meant to attack you after the 4th Deathroot?
After you hand over the 4th Deathroot, Gurranq becomes aggressive and attacks the player, an unavoidable encounter in Elden Ring. To calm him down and continue your exchanges, you must lower his health to a specific threshold.
To efficiently reduce Gurranq’s health, summoning a durable Spirit Summon can divert his attention away from you. Use Poisonbone Darts to inflict damage over time and retreat outside the Sanctum to watch his health decline.
You can craft Poisonbone Darts using the Crafting Kit or buy them from the Nomadic Merchant located in the northern section of Caelid for 120 Runes.
Two-handing and Power Stancing are methods to wield your weapons in Elden Ring. Each option offers a range of possibilities for your character build and playstyle, providing various benefits and drawbacks.
This guide will explain how to Two-hand and Power Stance in Elden Ring. Moreover, we’ll explore the benefits of each configuration. So, without further ado, let’s dive in.
How to Two-Hand Weapons in Elden Ring?
The majority of weapons in Elden Ring can be Two-handed, with the exception of bows and other ranged equipment, which require both hands from the outset.
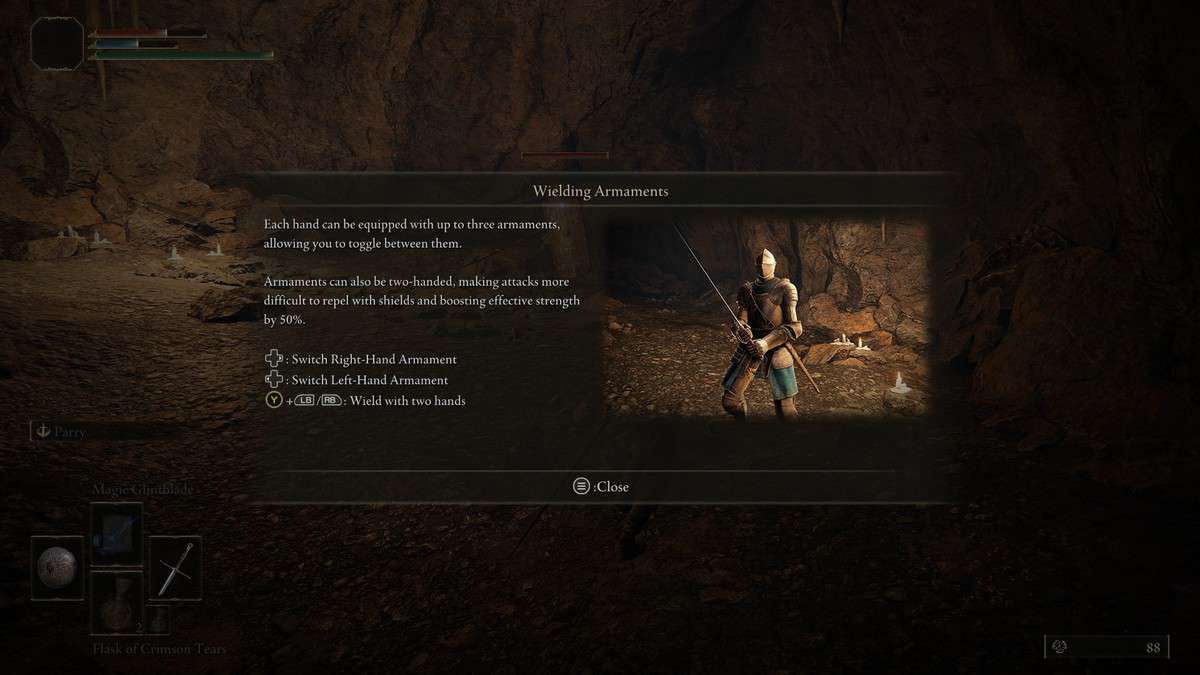
To Two-hand a weapon in your left hand, hold down Triangle on PlayStation or Yon Xbox. After that, press either L1/LB or L2/LT, and your character will use both hands for the weapon. To Two-hand a weapon in your right hand, simply press Triangle/Y, then press either R1/RB or R2/RB.
For PC users, you need to hold the E key to Two-hand a weapon with a keyboard and mouse. To use your left and right-handed weapons, click the Left and Right mouse buttons, respectively.
How to Power Stance in Elden Ring?
Power Stancing functions similarly to Two-handing, as it enhances your damage output. However, instead of wielding the same weapon in both hands, Power Stancing involves equipping different versions of the same weapon in both your right and left hands.
For instance, if you have one Nagakiba in your left hand and another Nagakiba in your right, you’re effectively Power Stancing. Conversely, if you wield a single Nagakiba with both hands, you are simply Two-handing it.
Power Stancing is commonly referred to as Dual-wielding.
To engage in Power Stancing, you need to procure two copies of the same weapon, access your gear/inventory menu, and equip one in the left-hand slot while placing another in the right-hand slot.
Power Stancing isn’t applicable to all weapons, as some can only be acquired once during a playthrough. To use Power Stance with certain weapons, you may need to enter a New Game Plus (NG+) run.
Two-Handing Weapons vs Power Stancing?
The primary advantage of Two-handing weapons is the ability to handle weapons that have higher strength requirements than your current level. Two-handing grants you an approximate 50 percent boost to your strength, allowing you to wield and utilize the weapon even if your strength isn’t sufficient.
Two-handing weapons offers significant benefits during boss encounters, as it amplifies the damage dealt by light and heavy attacks. On the flip side, Dual-wielding operates as a high-risk, high-reward strategy, which can yield impressive results with the right attack combinations.
However, the downside to Two-handing is the inability to use a shield, which means you’ll have to evade enemy strikes without the extra protection a shield provides.
In contrast, Power Stancing introduces a host of fresh combos for your chosen weapon. This style is often preferred over Two-handing for this reason. Additionally, if you’re using a build that leverages elemental or status effects (like bleed, frost, or poison), equipping two of the same weapon will expedite the build-up of these effects.
This can significantly augment the effectiveness of your builds. Like Two-handing, Power Stancing also eliminates the option to utilize a shield, presenting a noteworthy risk.
In Elden Ring, players can wield the Guts Sword from the iconic Berserk manga and anime, allowing for an immersive cosplay experience. Officially just referred to as the “Greatsword,” it is classified as a Colossal Weapon, making it ideal for heavier builds.
Its high strength requirement means you should allocate a good number of Runes to utilize it effectively. You can discover this powerful weapon in the Caelid region.
Location of Guts’ Berserk Greatsword in Elden Ring
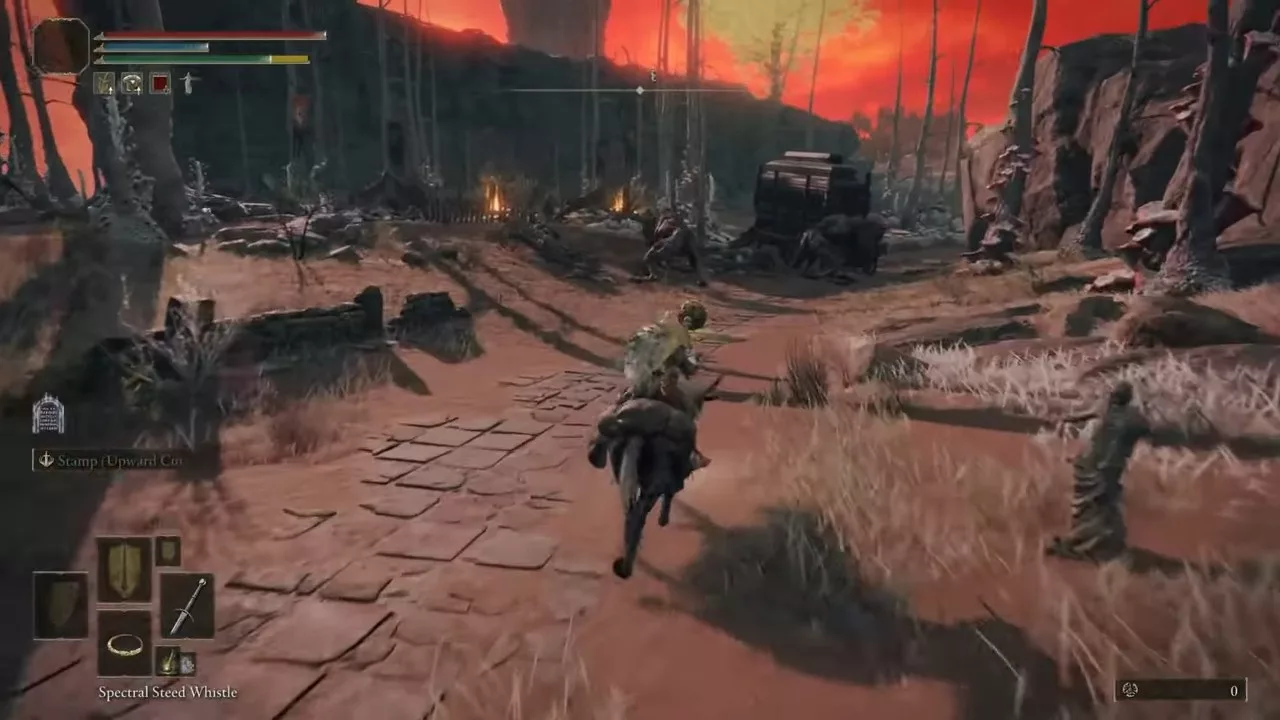
Guts’ Berserk Greatsword can be found in a wagon situated in the Caelid region of Elden Ring. This area is known to be quite challenging to navigate early in the game.
Follow the northern Caelid Highway and proceed along the path. As you approach the Minor Erdtree, glance to the south to spot a large field populated by numerous giant dogs guarding a solitary wagon.
At the rear of this wagon, you will find a chest containing the Berserk Greatsword (though it’s simply labeled Greatsword in Elden Ring).
You can choose to eliminate all the dogs guarding the wagon or stealthily bypass them to obtain the sword. Engaging the dogs early in the game can prove challenging.
Berserk Greatsword Stats in Elden Ring
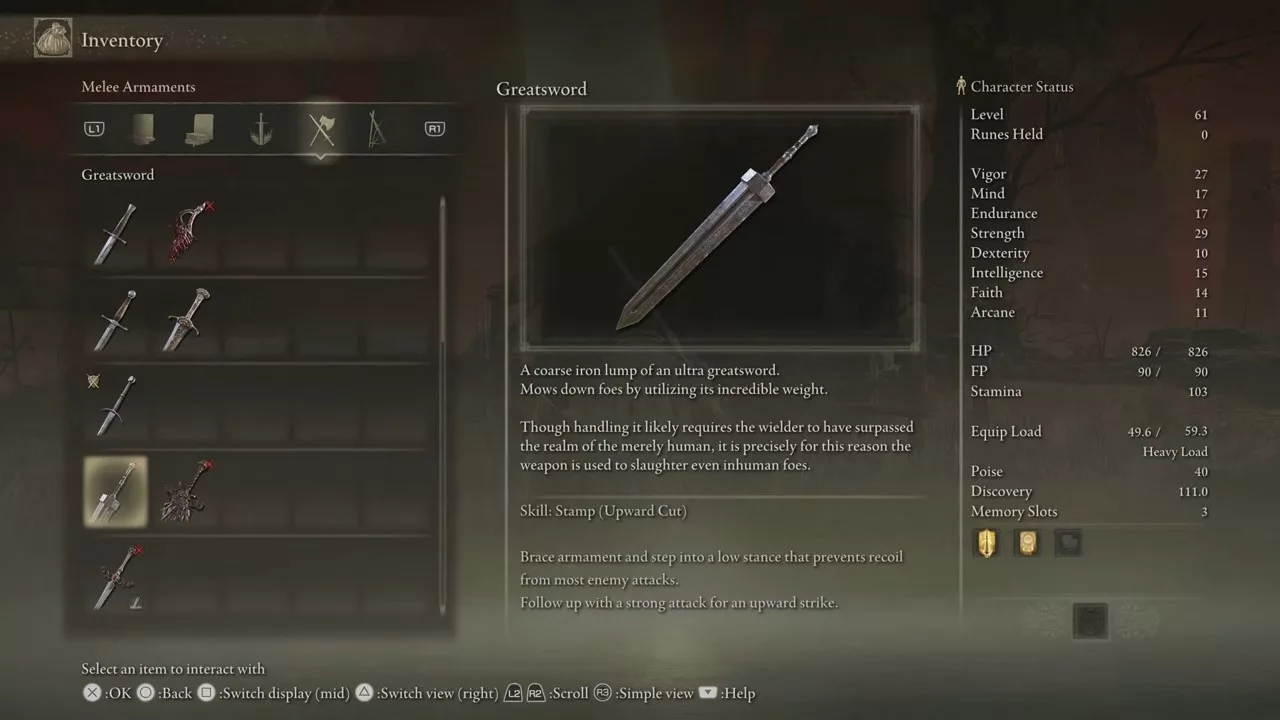
The Greatsword is a Colossal Sword that boasts impressive range and utilizes the standard colossal sword moveset. To wield it effectively in one hand, you will need 31 Strength and 12 Dexterity. It begins with a scaling of C in Strength and E in Dexterity.
As a colossal weapon, it ranks among the heaviest in the game, weighing in at 23. The default weapon skill for the Greatsword is Stamp, followed by an Upward Cut. You can customize this weapon skill with any Ash of War, allowing you to modify the affinities for your Greatsword.
This weapon can be upgraded using Smithing Stones and has a total of 25 upgrade levels. Furthermore, it provides decent defense when used for blocking during dual-wielding.
The Guts Berserk Greatsword is particularly effective within Strength-focused builds due to its formidable scaling of 162 physical attack damage, even without enhancements. This feature positions it as one of the most powerful and sought-after greatswords in Elden Ring.
Its staggering potential offers additional benefits, giving players the ability to interrupt enemy attacks and create opportunities for counterattacks. The sword’s greater range also allows players to engage enemies from a distance, offering a tactical advantage over foes wielding shorter-range weapons. The sheer satisfaction derived from its use is something most players will appreciate.
Conversely, this Greatsword does have its drawbacks. Players may find themselves moving slower due to its weight, necessitating careful planning of their build. However, for those fond of greatswords, this weapon can carry you through the majority of the game, particularly if fully upgraded.
It’s also essential to acknowledge that alternatives exist for greatsword enthusiasts in Elden Ring, such as General Radhan’s Greatsword and the Blasphemous Greatsword. Considering dual-wielding Greatswords with jump attacks can also prove effective, be mindful of this while making your choice.
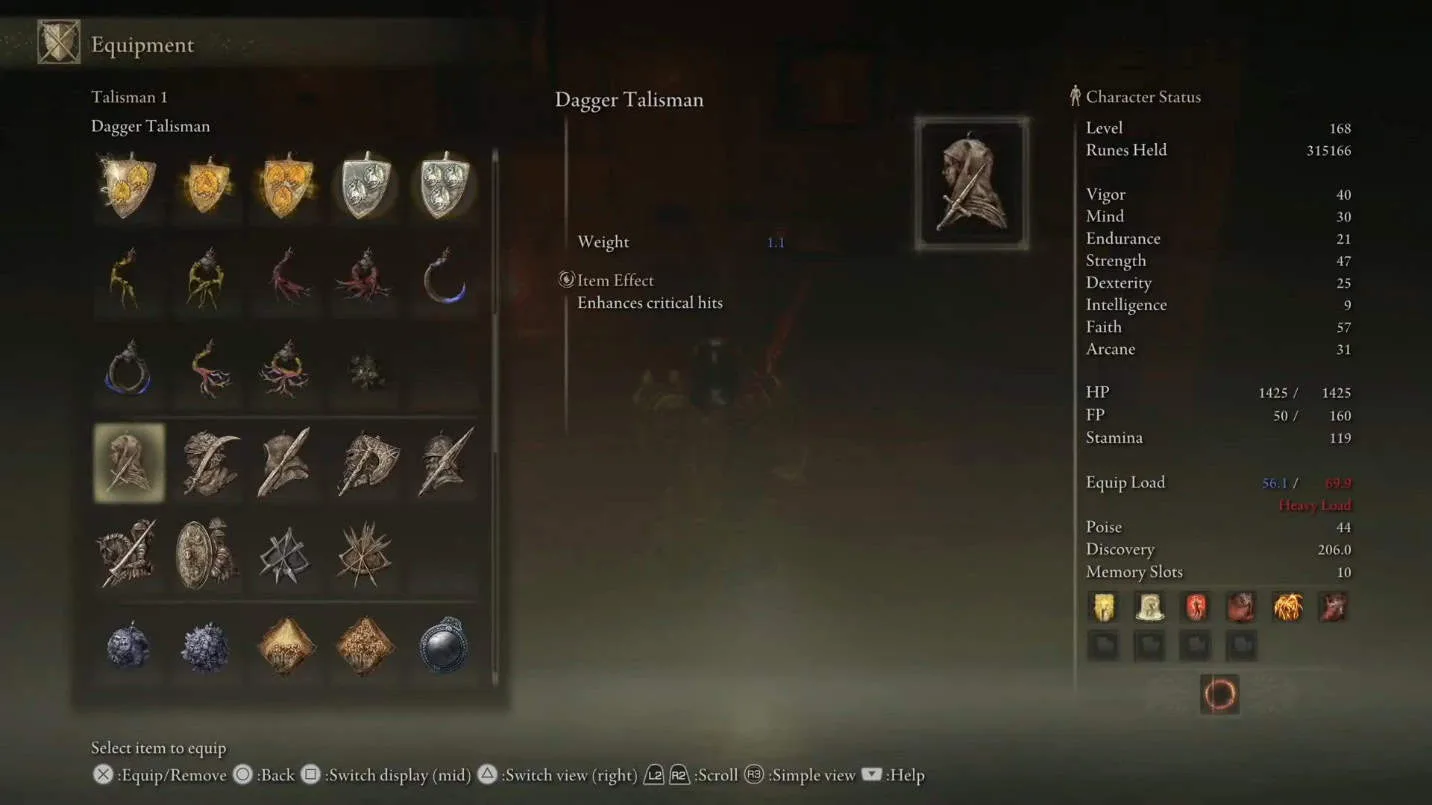
In Elden Ring., the Dagger Talisman stands out as one of the top choices for boosting your critical damage, particularly beneficial for backstab and parry builds. This talisman enhances your overall critical damage, adding extra power to those crucial backstabs and parry responses.
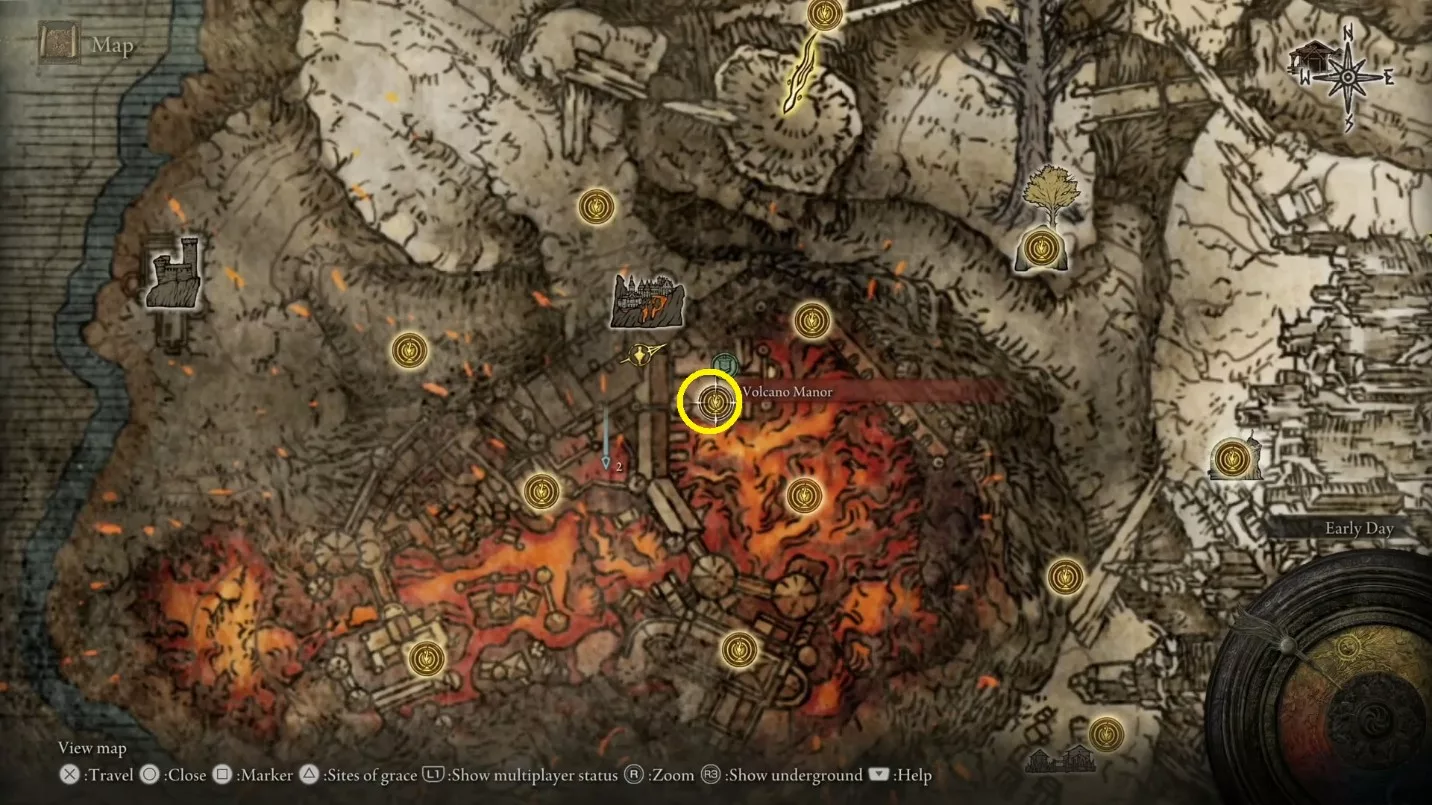
It’s ideal for any Dexterity-focused build, even if backstabbing isn’t your main strategy. You can find it at Volcano Manor later in your journey, but there’s a method to obtain it sooner as well.
Location of the Dagger Talisman in Elden Ring
The Dagger Talisman can be located at Volcano Manor in Elden Ring. If you haven’t unlocked this area, you’ll need to complete Rya’s Questline, which will grant you access to Volcano Manor.
Upon entering the manor, take the elevator up and head out onto the balcony. Proceed around the balcony until you spot a platform below to jump down to, which is situated directly northeast.
Keep moving along the platform until you encounter some lava snails to your east. Eliminate them to reveal another platform below that you can drop down onto.
Head north until you face a lava pool. From this point, proceed carefully from the west towards the building on your left. Enter through the window on your left side.
Exit the area, skirt around the snake enemy on the stairs, and step into the room on your left. Go through the opening on the right to continue down the hallway, where you’ll encounter two lava snakes. Enter the door straight across from the second snake.
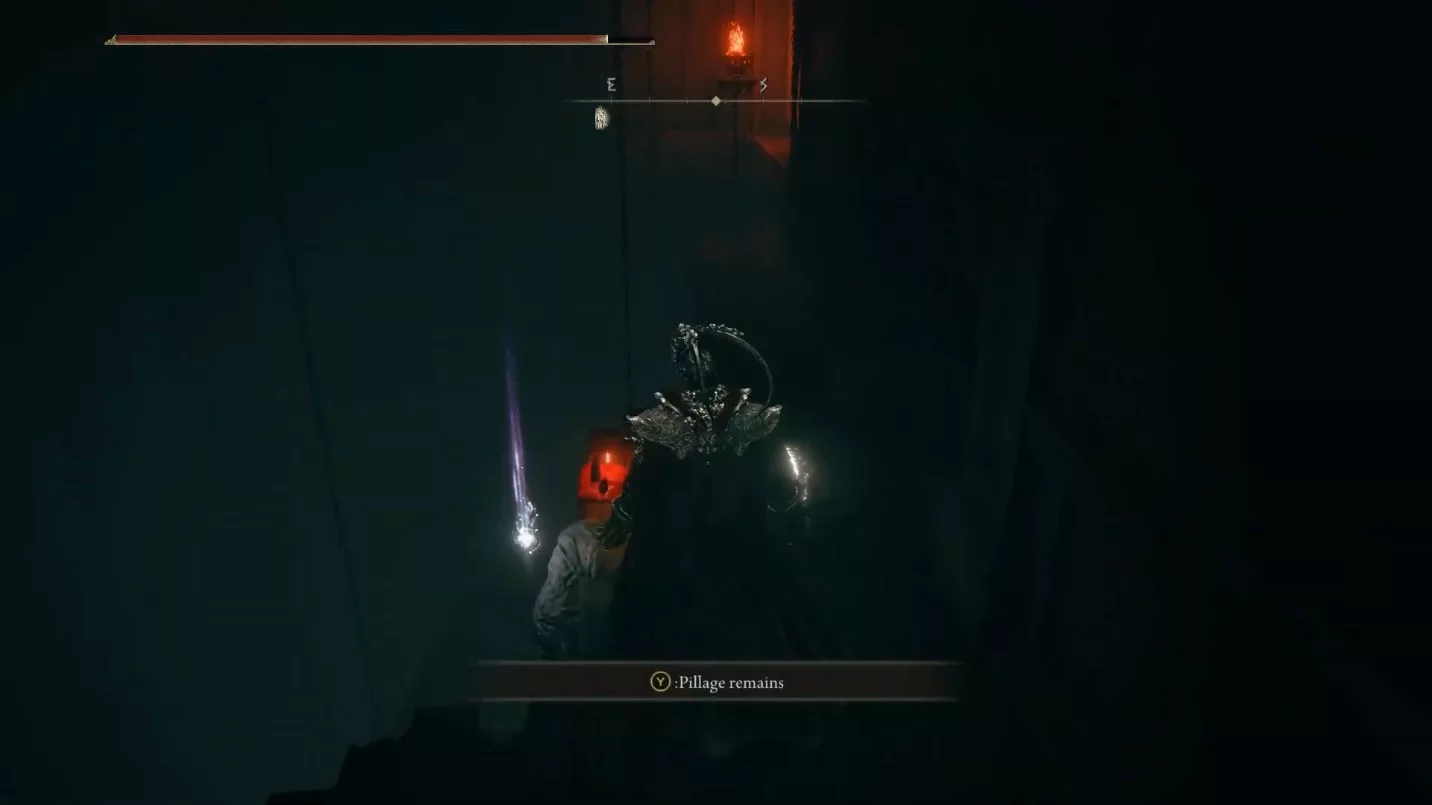
Push through the door to your right and ascend the stairs to reach the second floor. Traverse the hall and enter through the door where two dragon statues guard the entrance. You’ll arrive in an area filled with hanging cages; move to the right side of the ledge and carefully drop down to the lower platform.
Once inside the room, head up the stairs and defeat the enemy on the upper level. Exit through the opening behind it and move to the right side of the ledge; the Dagger Talisman will be found on a corpse there.
How to Acquire the Dagger Talisman Early
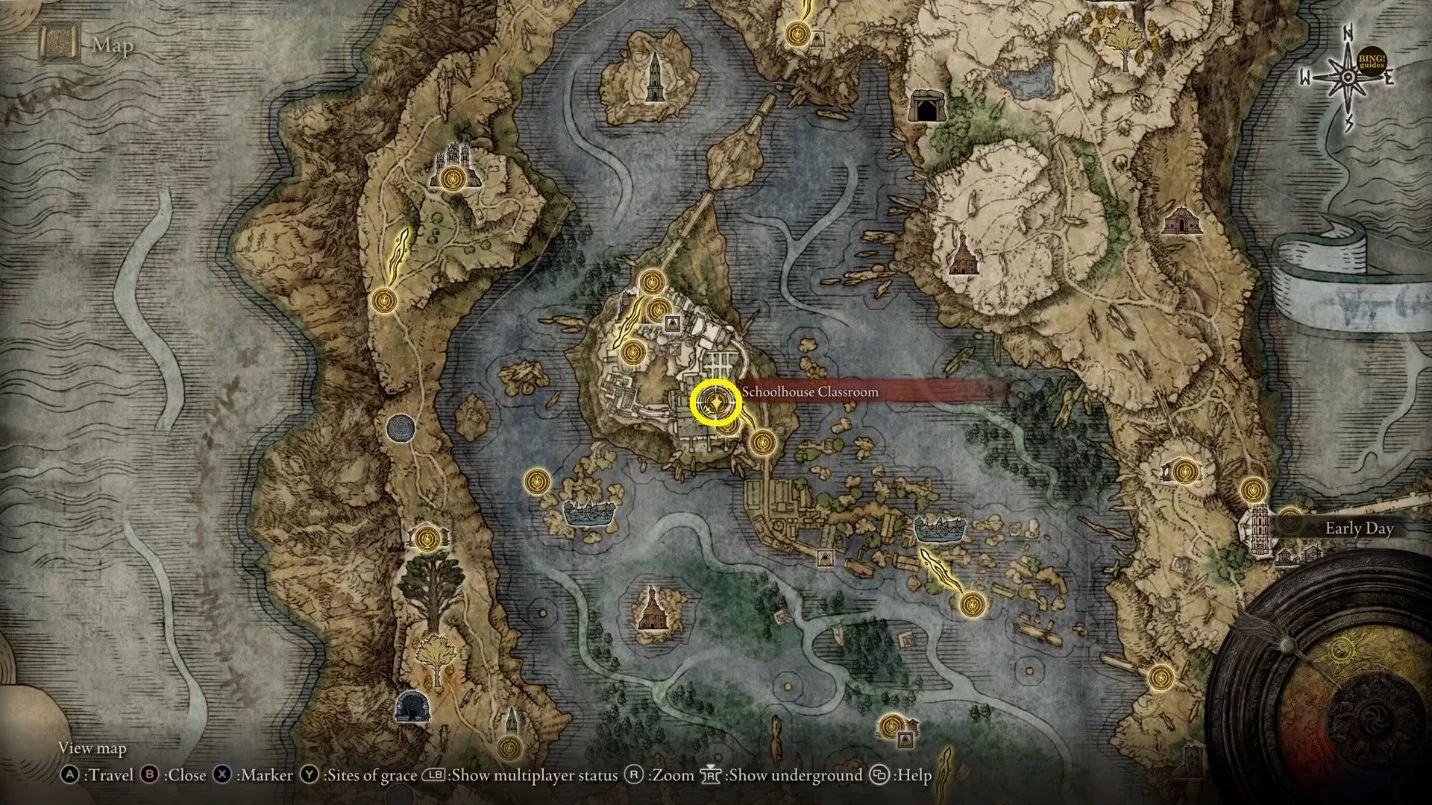
For early access to the talisman, travel to the Schoolhouse Classroom Site of Grace in the Liurnia of the Lakes area. From there, take the water wheel elevator to reach the bottom.
It’s advisable to spend all your runes on upgrades or utilize Sacrificial Twig or Twiggly Crack Tear to safeguard your runes, as you’ll need to intentionally die at the hands of an Abductor Virgin.
Upon death, you’ll be automatically teleported to the inquisition chamber of Volcano Manor. Head south, and you will come to the edge of a cliff.
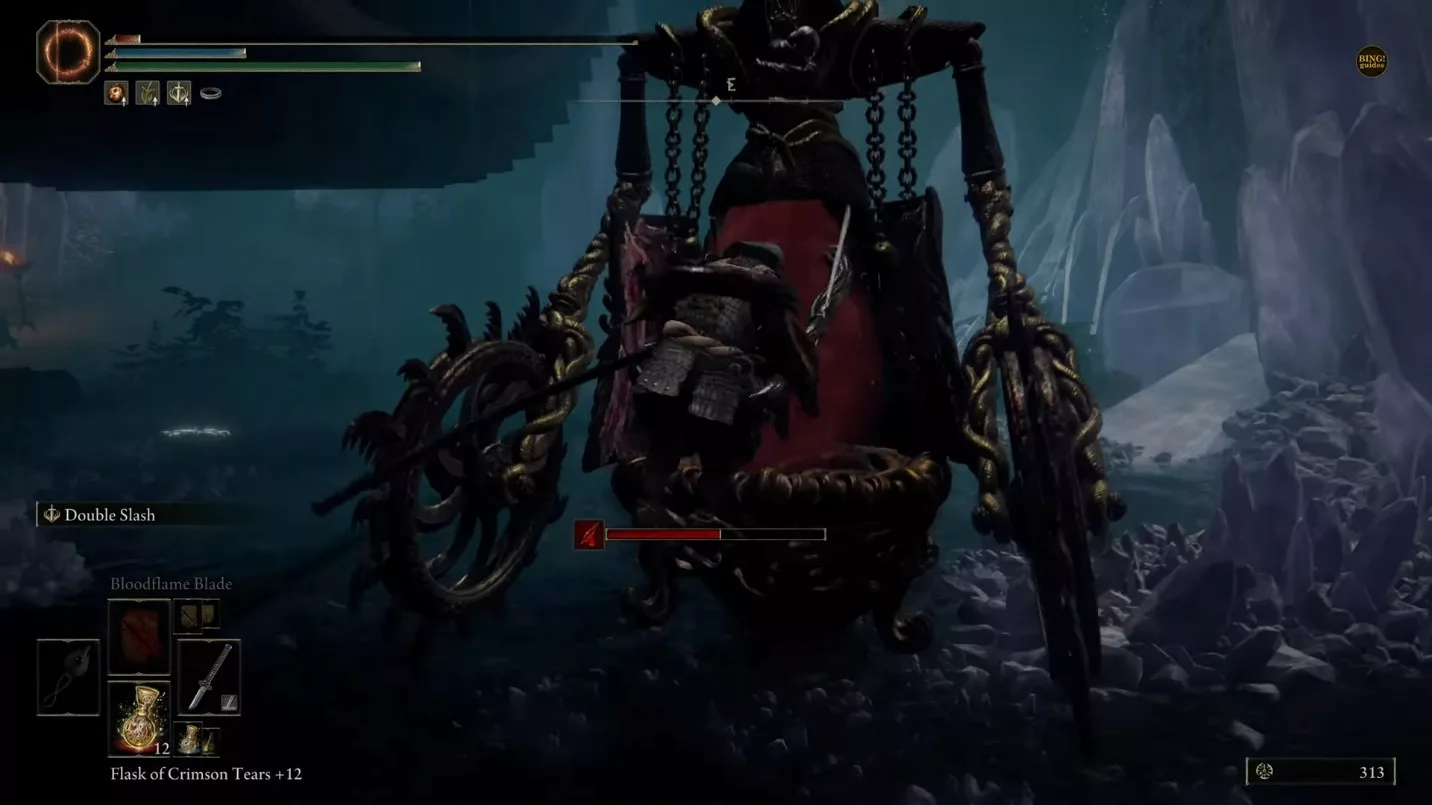
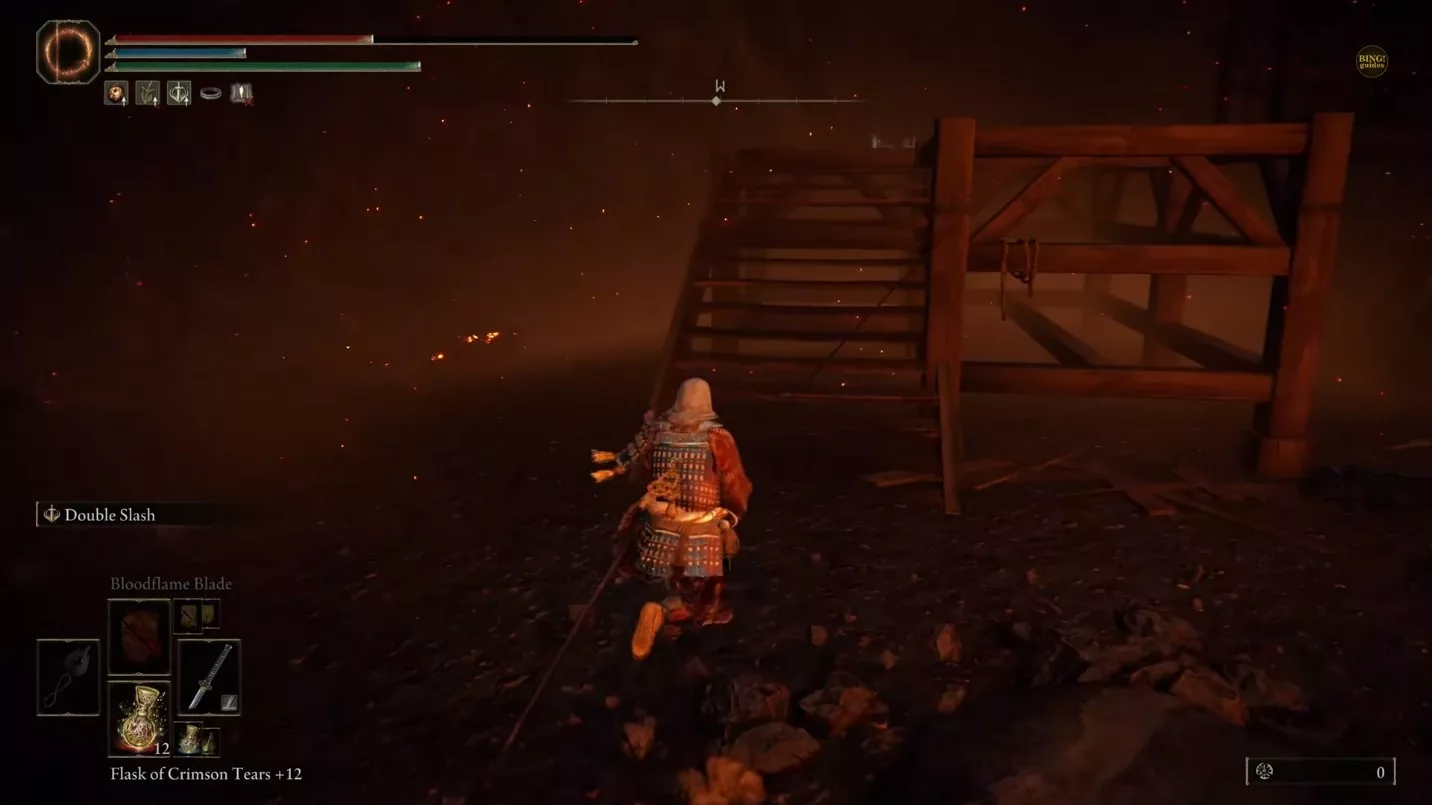
Jump down and run southeast. You may encounter a Magma Wyrm in this area. Ascend the small wooden stairs and use the cage elevator to rise up.
Repeat the elevator ride, and you’ll face the Godskin Noble boss near the Temple of Eiglay Site of Grace. Don’t enter; instead, move left to cross the bridge, leading you to the entrance of Volcano Manor.
Follow these instructions to obtain the Dagger Talisman without having to complete Rya’s Questline.
Effects of the Dagger Talisman
The Dagger Talisman enhances Critical Damage by 17%, providing a substantial boost with each successful critical hit. This talisman is exceptional for stealth-oriented builds that emphasize backstabbing and parrying.
It’s worth mentioning that the critical damage increase from the Dagger Talisman does not apply to all ranged weapons in Elden Ring, meaning that bow headshots won’t receive a critical damage increase.
In Elden Ring, the Spiked Caestus is a dual-wielded weapon option, allowing you to use one or both at your discretion. If you prefer melee combat, this weapon should definitely be in your arsenal. Its primary drawback is its lack of range, but it delivers significant damage to foes.
Acquiring the Spiked Caestus is quite simple; head to the Isolated Merchant located in the Caelid region to make your purchase. This guide will lead you through finding the weapon and understanding its effects in Elden Ring.
Location of the Spiked Caestus in Elden Ring
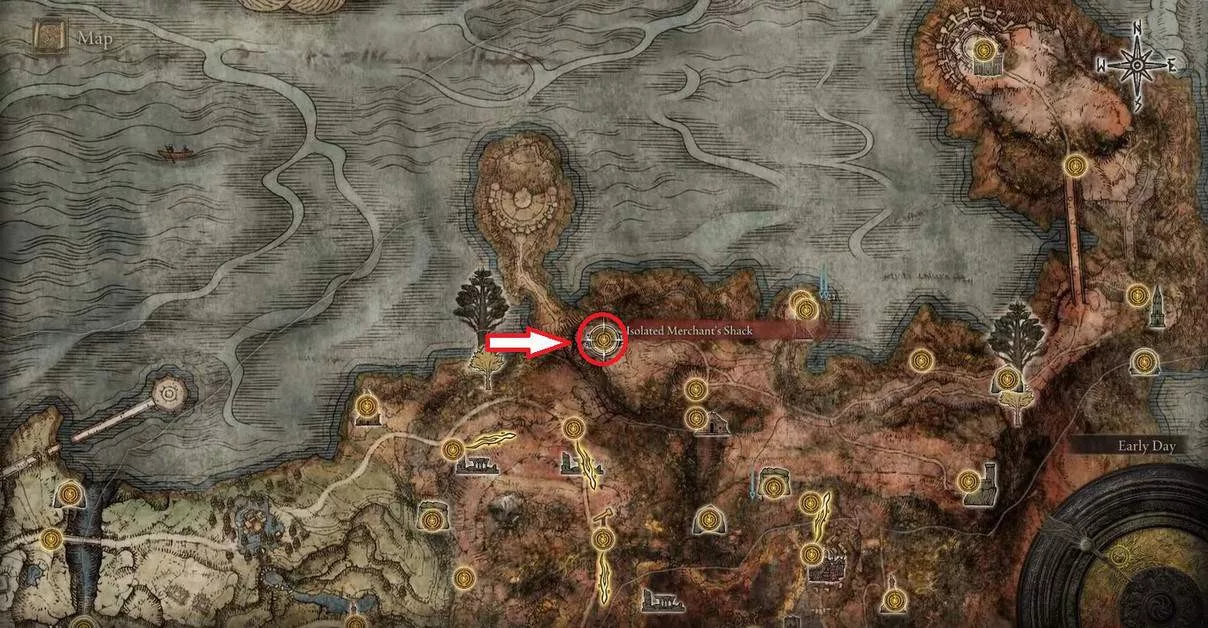
To obtain the Spiked Caestus, make your way to the Isolated Merchant’s Shack situated in the Dragonbarrow area to the north of Caelid.
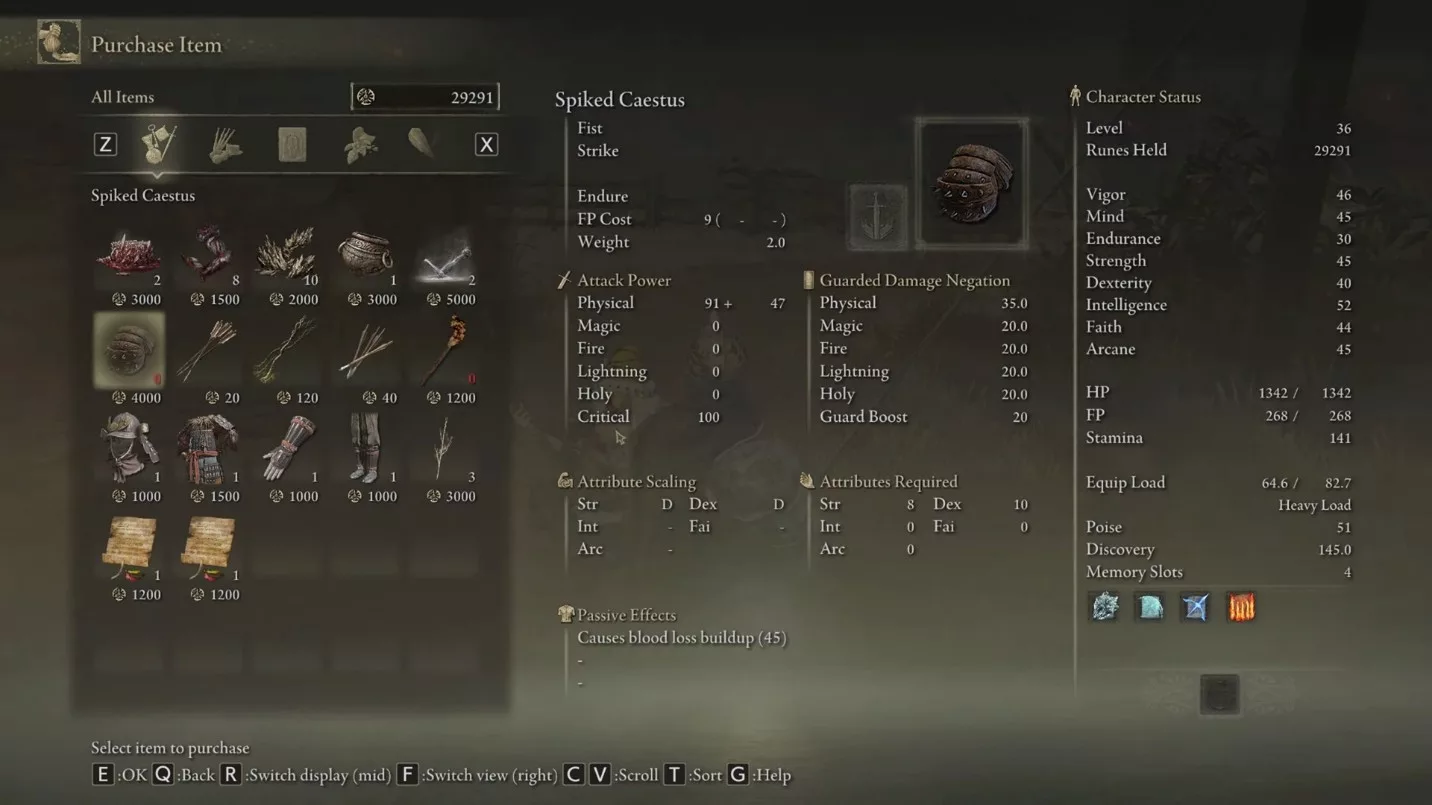
Once you arrive at the location, you’ll find the Isolated Merchant standing outside his shack. Speak with him to buy the Spiked Caestus for 4,000 runes.
Effects of the Spiked Caestus in Elden Ring
The Spiked Caestus scales effectively with both Strength and Dexterity, allowing for impressive damage output, though it is strictly a close-combat weapon. It features the endure ability, which consumes 9 FP to activate and enhances your blocks while increasing damage resistance.
Additionally, the weapon is equipped with spikes that inflict blood loss, giving you an upper hand against adversaries by allowing you to drain substantial health due to its bleeding effect.
The Queen’s Bedchamber is a location in Elden Ring that many players tend to overlook. The challenging boss encounters along the route contribute significantly to the difficulty of reaching the Queen’s Bedchamber.
Depending on which route you choose, the enemies you face will vary. Players will either encounter a version of Godfrey or Sir Gideon Ofnir before reaching the Bedchamber in Elden Ring.
Finding the Queen’s Bedchamber in Elden Ring
You can find the Queen’s Bedchamber situated within the Leyndell Royal Capital, an area that you might have overlooked during your explorations.
There are no limitations on your return; feel free to come back to the Leyndell Royal Capital and seek out the Queen’s Bedchamber in Elden Ring at your own pace.
1. Approach Via the Avenue Balcony
From the Avenue Balcony, notice a massive grey dragon to your left. Descend the staircase and proceed into the hallway towards the dragon.
Be cautious; there’s an annoying archer guard lurking here. You can either avoid him or sneak close while dodging his arrows to eliminate him quickly.
Once you exit the hallway, the dragon’s tail will be visible. Ascend the tail and traverse across it to its wings. Head towards the right wing and spot a broken pathway with a ladder on the right.
Jump onto this pathway; the ladder leads directly to the passage that will take you to the Queen’s Bedchamber in Elden Ring.
Climb the ladder and press forward toward the Queen’s Bedchamber. Continue until you encounter a stairway. There might be enemies along the way, which you can either ignore or choose to engage.
Pursue onward until you spot a large tree branch. Jump onto it and traverse along the branch to arrive at the palace entrance. Here awaits your battle against Godfrey, the first Elden Lord in Elden Ring.
Upon defeating Godfrey, take the path to the right leading to another tree branch. This branch will guide you directly into the bedchamber. Jump onto it to access the balcony. Once there, make your way around to the back to enter the Queen’s Bedchamber in Elden Ring.
Be prepared; upon discovering the Lost Grace in the bedchamber, you’ll be accosted by a Black Knife Assassin. This nimble adversary can be quite a handful, and it may take some time to vanquish this formidable foe in Elden Ring.
2. Approach From Leyndell Ashen Capital
Upon arriving at Leyndell Ashen Capital, you’ll spot a large dragon. Similar to before, approach its tail, climb atop it, and then head to the right wing, where you’ll leap onto the pathway to the left.
Ascend the ladder and proceed as previously described. However, this time, rather than heading toward the large tree branch, you can simply jump to the left side past the broken railing.
Continue up the stairs until you find an elevator leading up to the Queen’s Bedchamber in Elden Ring. But first, you will need to confront Sir Gideon Ofnir, the All-Knowing, before entering.
After defeating him, head towards the right side and follow the large trunk along the same path as before to reach the balcony. From there, take the curved route to navigate your way to the Queen’s Bedchamber in Elden Ring.
Millicent’s questline is among the most comprehensive side stories in Elden Ring, spanning across three distinct areas: Caelid, the Altus Plateau, and the Mountaintop of the Giants.
This guide will walk you through every step needed to finish Millicent’s quest in Elden Ring. You’ll find details on locations, bosses, and items essential for completing this journey. So without any further delay, let’s dive in.
Visit Gowry’s Shack
To kick off this questline, head to the southern region of Caelid (specifically the southern part of Sellia) to find Gowry patiently waiting at his shack. Use the route from the Southern Aeonia Swamp Bank Site of Grace, moving southwest, to reach his location.
Speak with him and choose the “Hear the request” option when prompted. Gowry then informs you about Millicent, who rests atop the Church of Plague in Sellia while enduring her debilitating affliction.
Your new mission is to locate the Unalloyed Gold Needle, which may not fully cure her illness but will certainly alleviate her suffering.
Locating the Unalloyed Gold Needle
The Unalloyed Gold Needle is not tucked away in a secret vault; you will need to venture into the Swamp of Aeonia located in Central Caelid to acquire it.
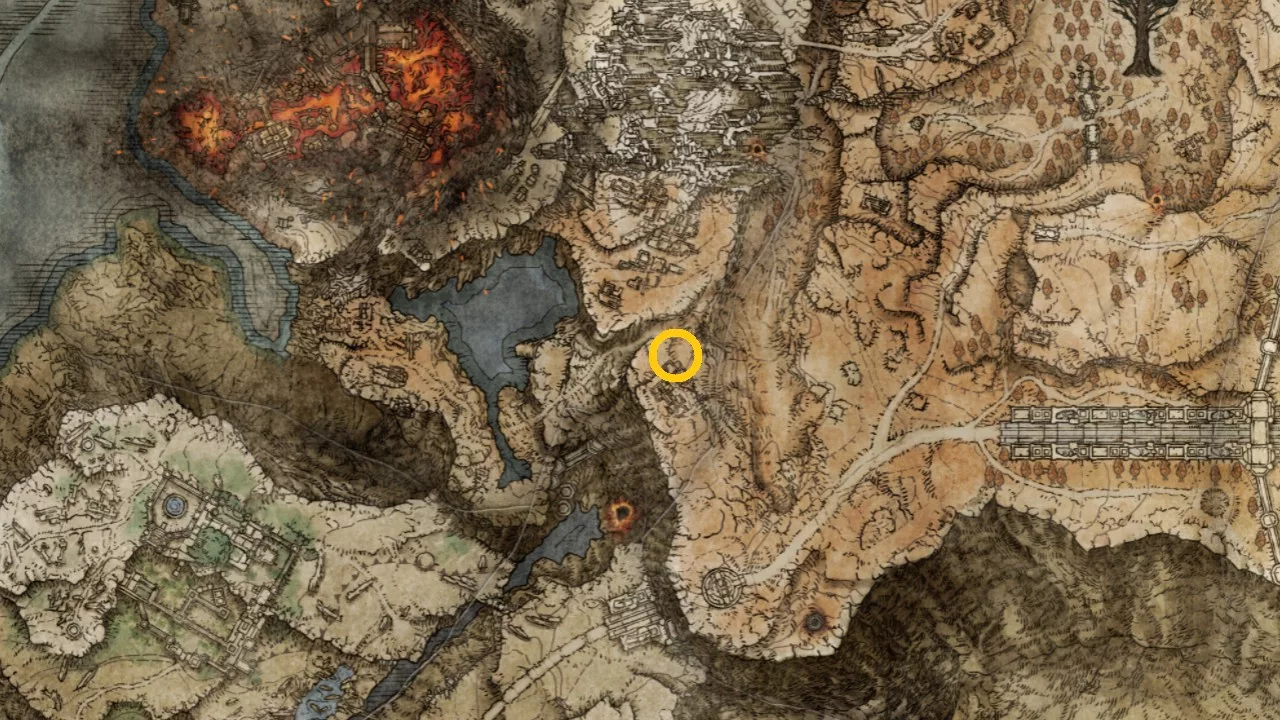
You can find the Unalloyed Gold Needle west of Gowry’s Shack, specifically at the Heart of Aeonia, as marked on the map above. Be prepared to defeat Commander O’Neil, who is a challenging boss guarding this item.
Return to Gowry’s Shack
Now that you have the needle, return to Gowry and hand it over. Then, take a moment to rest at the nearby Site of Grace before speaking to him again. He will provide you with the repaired needle, which you must deliver to Millicent.
During this second interaction, Gowry will elaborate on the mysteries of Sellia, the sorcery town where the next phase of this quest unfolds, leading you to Millicent at the Church of Plague.
Encounter and Cure Millicent at the Church of Plague
After receiving the Secrets of Sellia from Gowry, make your way to the Church of Plague to meet Millicent and offer her the Unalloyed Gold Needle.
The church is heavily guarded by numerous foes. You can choose to sneak past them or defeat them in order to enter the church, which contains a Site of Grace and a Sacred Tear for your flask.
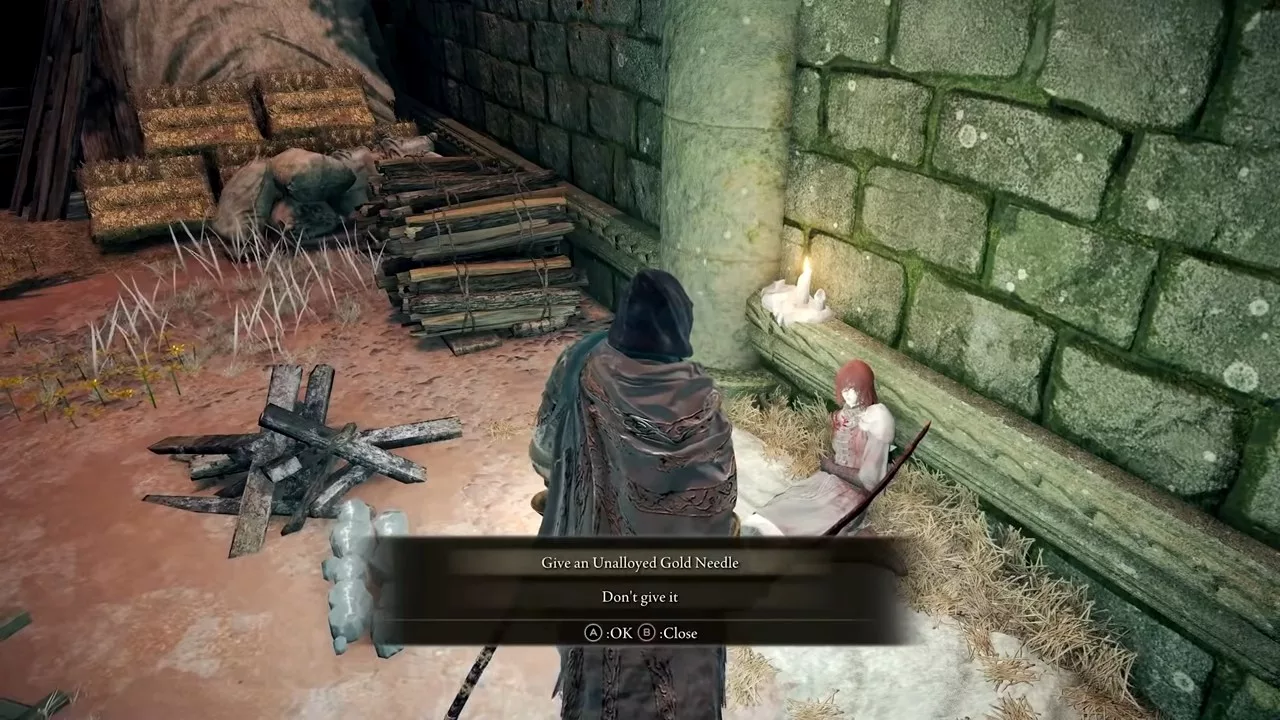
Inside, Millicent is found resting against the western wall. Speak to her, and she will discuss her curse. After concluding your dialogue, a prompt will appear to give her the Needle.
Select “Give the Alloyed Needle” when prompted. After she uses the needle, check back with her later to receive the Prosthesis-Wearer Heirloom talisman.
Head Back to Gowry’s Shack and Chat with Millicent
Once you’ve cured Millicent at the Church of Plague, return to Gowry’s Shack. However, this time you will meet Millicent, who is now exploring the area and recalling her memories.
Once your conversation ends, check back at the shack much later to talk to Gowry. He expresses his gratitude for your efforts in retrieving the needle for Millicent and healing her. You will then have several options: “Study Sorcery,” “Millicent paid a visit,” and “Leave.”
It is advisable to inform Gowry about Millicent in order to progress in the questline. By doing so, Gowry will assign you the task of ensuring Millicent’s safety as she regains her memories, which helps you move forward in the storyline.
Locate Millicent in the Altus Plateau
After your conversation with Gowry, proceed to meet Millicent to the north of the Erdtree-Gazing Hill Site of Grace, situated near a cliff.
Speak with her as she shares her memories coming back. The first name mentioned is Malenia; she expresses her desire to find her. To continue the quest, you must retrieve Valkyrie’s Prosthesis for her.
Where to Find Valkyrie’s Prosthesis
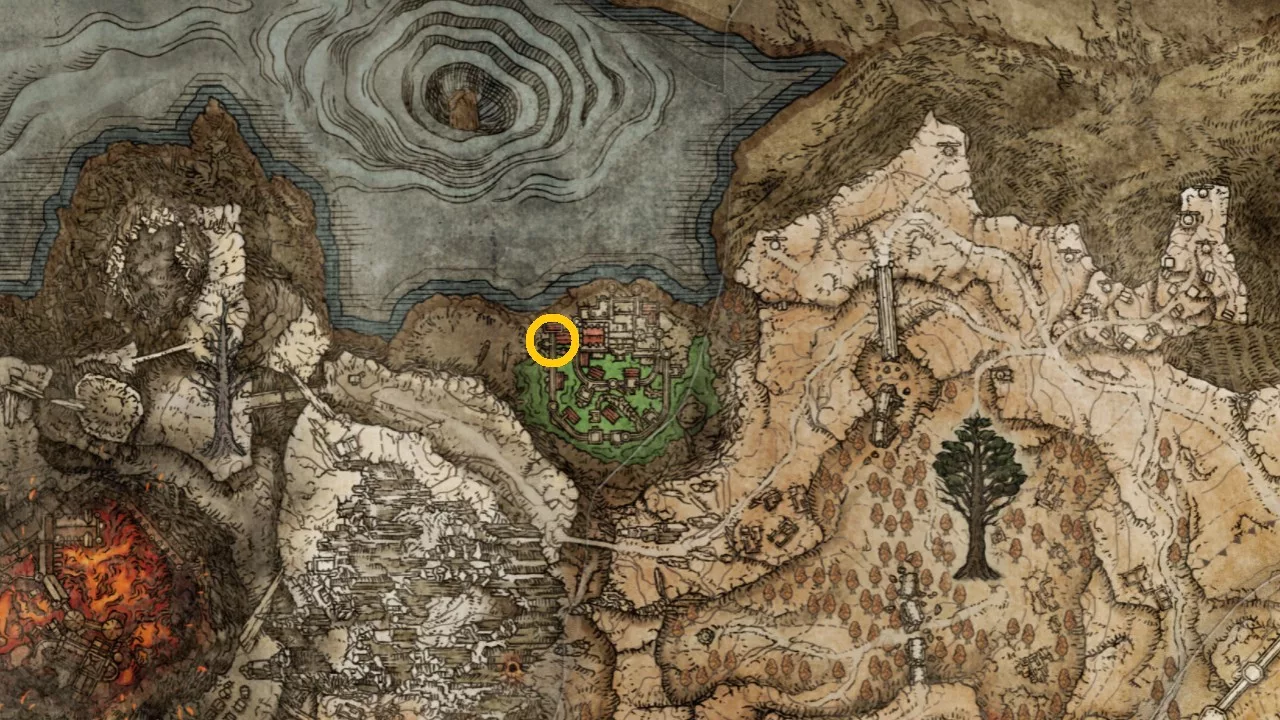
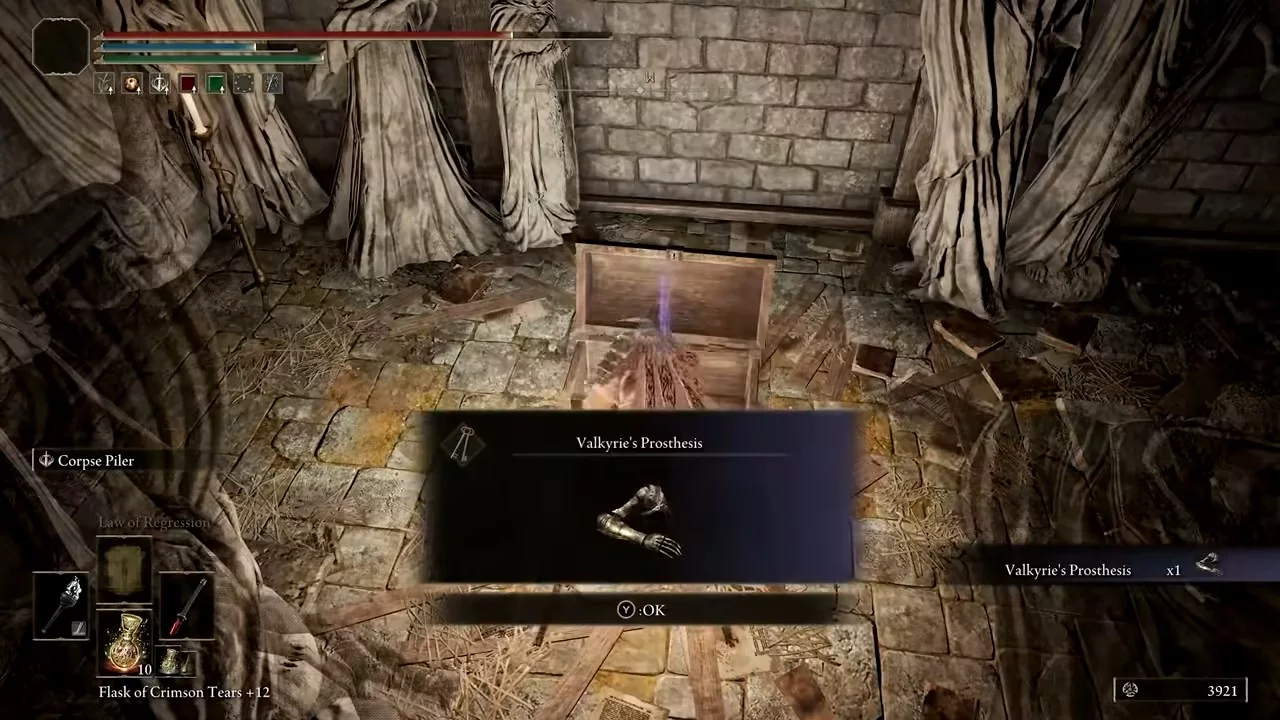
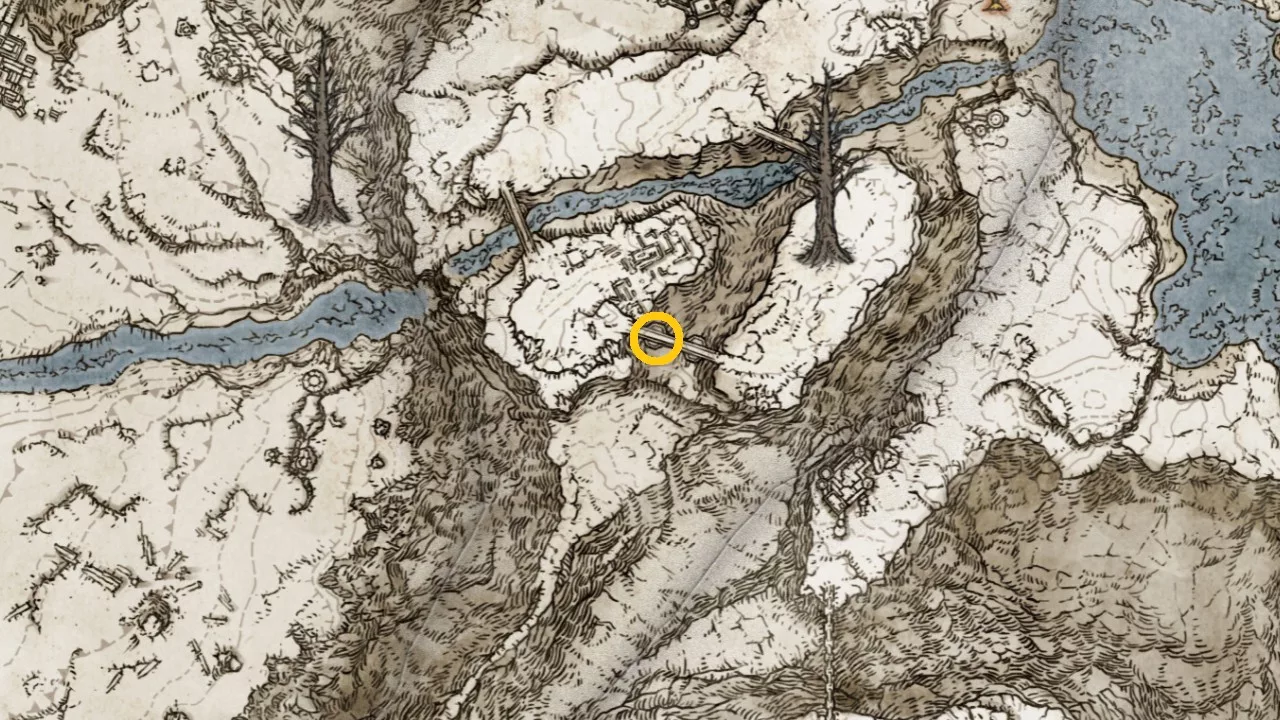
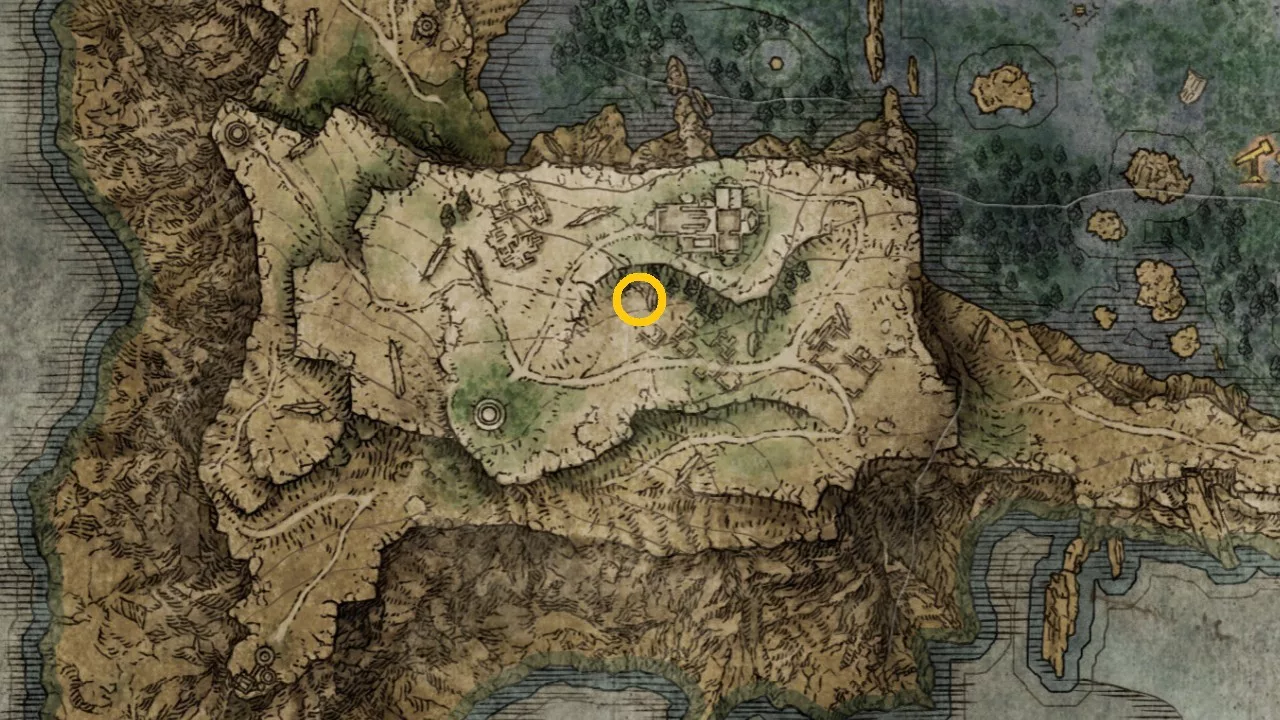
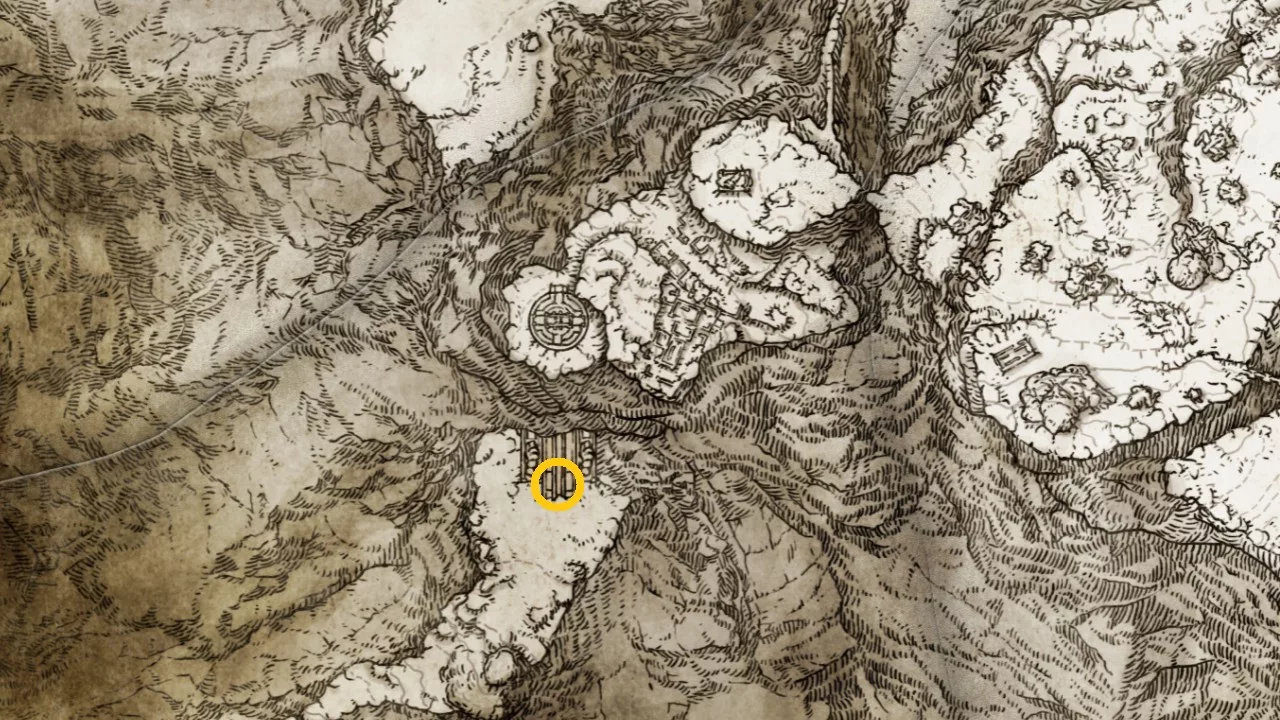
Once you’ve talked to Millicent at Erdtree-Gazing Hill, head to the Shaded Castle in the northern Altus Plateau to find Valkyrie’s Prosthesis. The precise location is shown on the map above.
The prosthesis can be found inside a room protected by a Cleanout Knight. After retrieving it, head back to Millicent and present her with the prosthesis. Make sure to exhaust the dialogue with her to successfully conclude this section of the quest.
Defeat Godskin Apostle at Windmill Village
After handing Valkyrie’s Prosthesis to Millicent, proceed towards the Windmill Village, located along the northern road of the area. Explore until you encounter the local leader, Godskin Apostle.
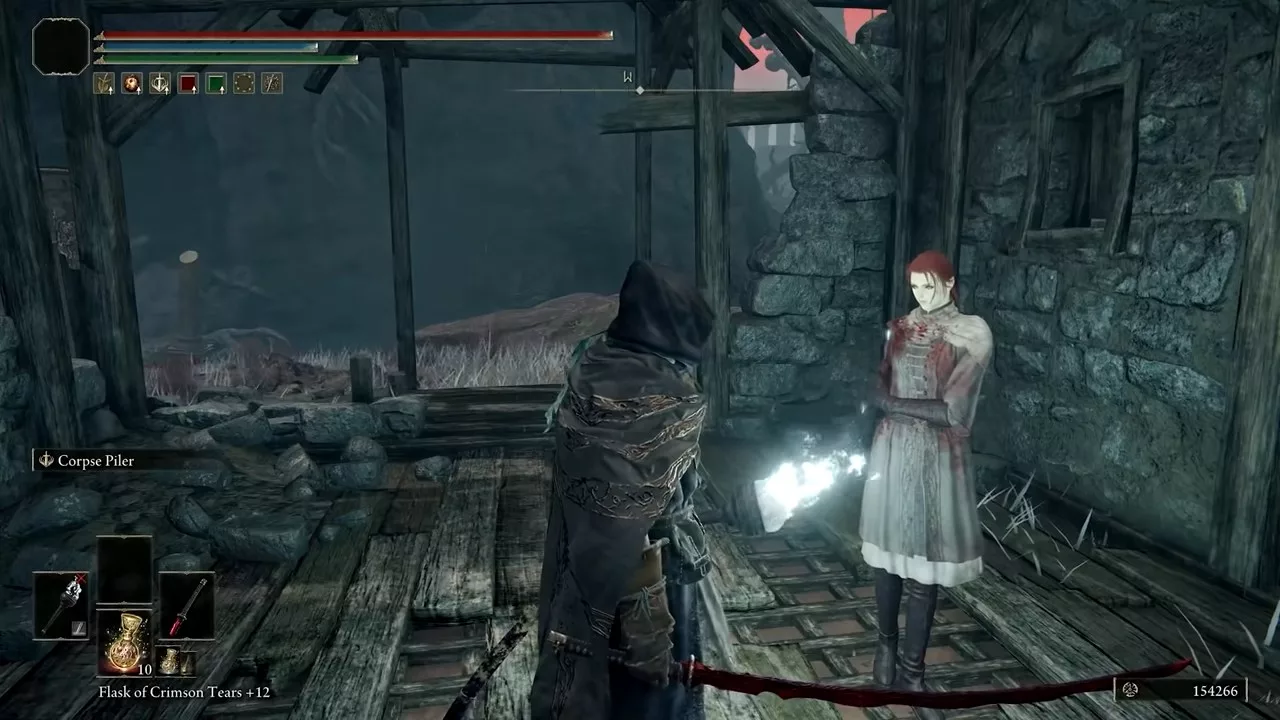
Once found, engage him near the wind turbines. After defeating this boss, rest in the area to prompt Millicent’s appearance. Speak to her when she arrives, and she will express her gratitude for the prosthesis. As a token of appreciation, she offers to assist you in a battle.
Locate Millicent at the Mountaintop of Giants
The next chapter of Millicent’s questline occurs at the Mountaintop of Giants in Elden Ring. You will find Millicent at the Ancient Snow Valley Ruins Site of Grace. Upon arrival, speak with her as she reveals the existence of a Medallion that provides access to Haligtree, where she believes Malenia can be found. This medallion is comprised of two halves, and both are required to continue your quest.
Locating Haligtree Secret Medallion Halves
To proceed with the quest, you must find both halves of the Haligtree Secret Medallion.
Left Half of Haligtree Secret Medallion
The left half of the medallion can be located within Castle Sol. Travel to the northern section of the map and take down Commander Niall. Afterward, head to the location marked on the map above to retrieve it.
Right Half of Haligtree Medallion
The right half of the Haligtree medallion is found in the Village of the Albinaurics, beneath the cliffs surrounding the Cathedral of Manus Sellus. Make your way to the rear of the village and speak with a character named Albus, from whom you will receive the right half of the Haligtree medallion.
Reach Miquella’s Haligtree and Speak with Millicent
After acquiring both halves of the Haligtree Medallion, use fast travel to the Grand Lift of Rold located in the Forbidden Lands. Choose the Hoist Secret Medallion option in front of the lift, initiating a cutscene.
Upon entry, you will unlock the hidden path to Haligtree, but lighting four flames in Ordina, Liturgical Town, is a prerequisite for entering Haligtree. Locate the evergaol in Ordina and find four statues holding candles throughout the area.
Three flames can be found in the watchtowers: one on the right and two on the left. The fourth statue is at ground level. Once all four flames have been ignited, ascend the staircase in Ordina to reach Miquella’s Haligtree.
Upon arrival at Miquella’s Haligtree, navigate downwards, facing various giant ants and Albinaurics. Continue to press forward until you encounter Loretta, Knight of the Haligtree, boss. Afterward, proceed to the Player Room in Haligtree to find Millicent. Speak with her as she discusses Malenia to complete this part of the quest.
Defeat the Ulcerated Tree Spirit Boss
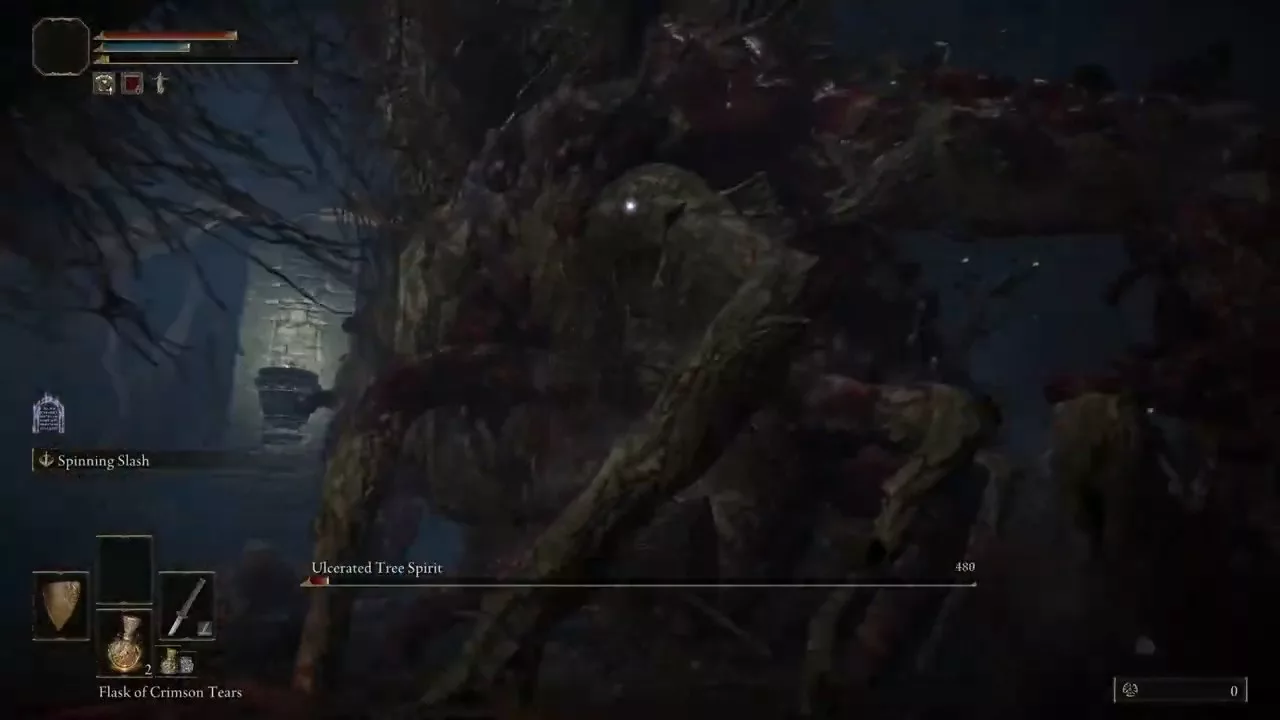
As you explore Miquella, you will encounter the Drainage Channel Site of Grace past the inner wall. This will lead you to the Ulcerated Tree Spirit Boss. Eliminate this boss, and then rest at a site of grace to prepare for the final stages of the questline.
Millicent Quest Choice
The concluding step of this chapter requires you to make a choice. Head back to the Drainage Channel Site of Grace where you’ll encounter two options.
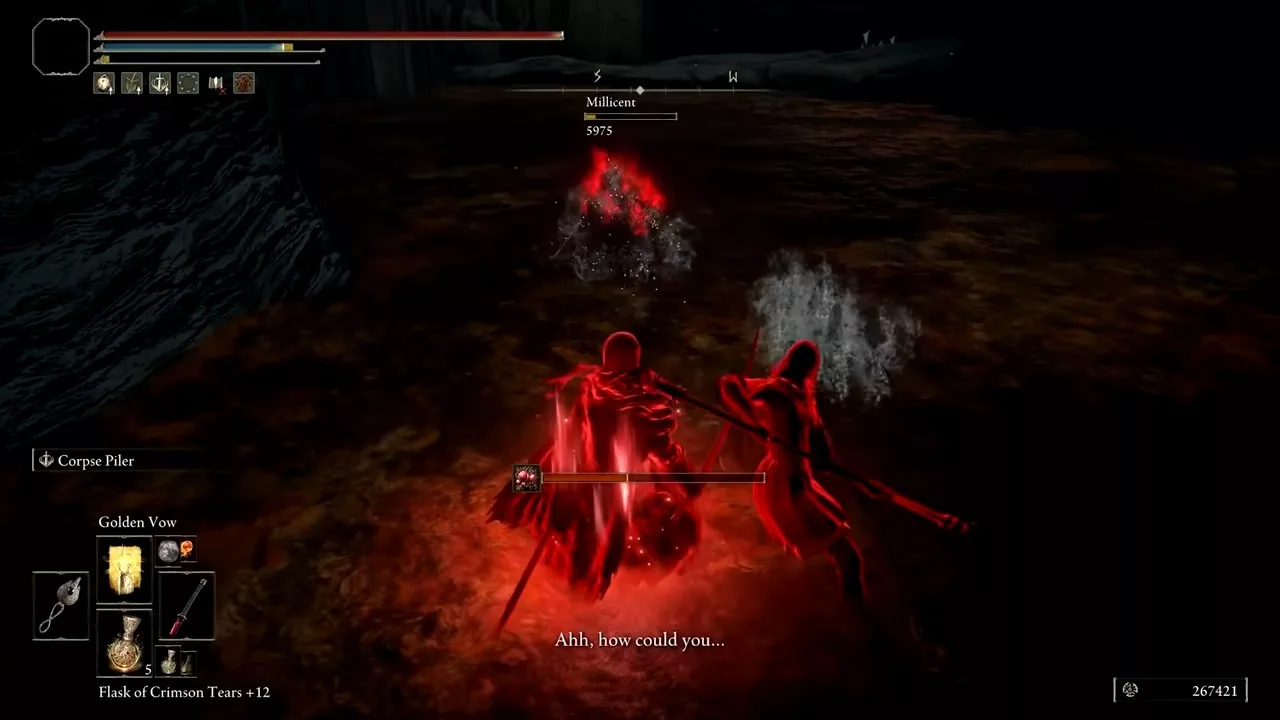
You can either opt for the yellow sign to fight alongside Millicent against enemies, leading you to receive the Rotten Winged Sword Insignia talisman, which boosts attack power. Alternatively, choosing the red sign will pit you against Millicent, rewarding you with Millicent’s Prosthesis.
Finding Miquella’s Needle and Defeating Malenia
The final task in Millicent’s questline involves heading to the Haligtree Roots and engaging in a boss battle against Malenia. This fight consists of two phases, and you can find detailed strategies in our Elden Ring Malenia Boss guide.
After you successfully defeat Malenia, return to the area to use the Unalloyed Gold Needle. Finally, head back to Gowry to wrap up the questline.
You can obtain Miquella’s Needle after completing all parts of Millicent’s questline. Simply utilize the Gold Needle on a scarlet blossom located in her boss chamber to receive Miquella’s Needle as your reward.
Using Miquella’s Needle to Reverse the Frenzied Flame Ending
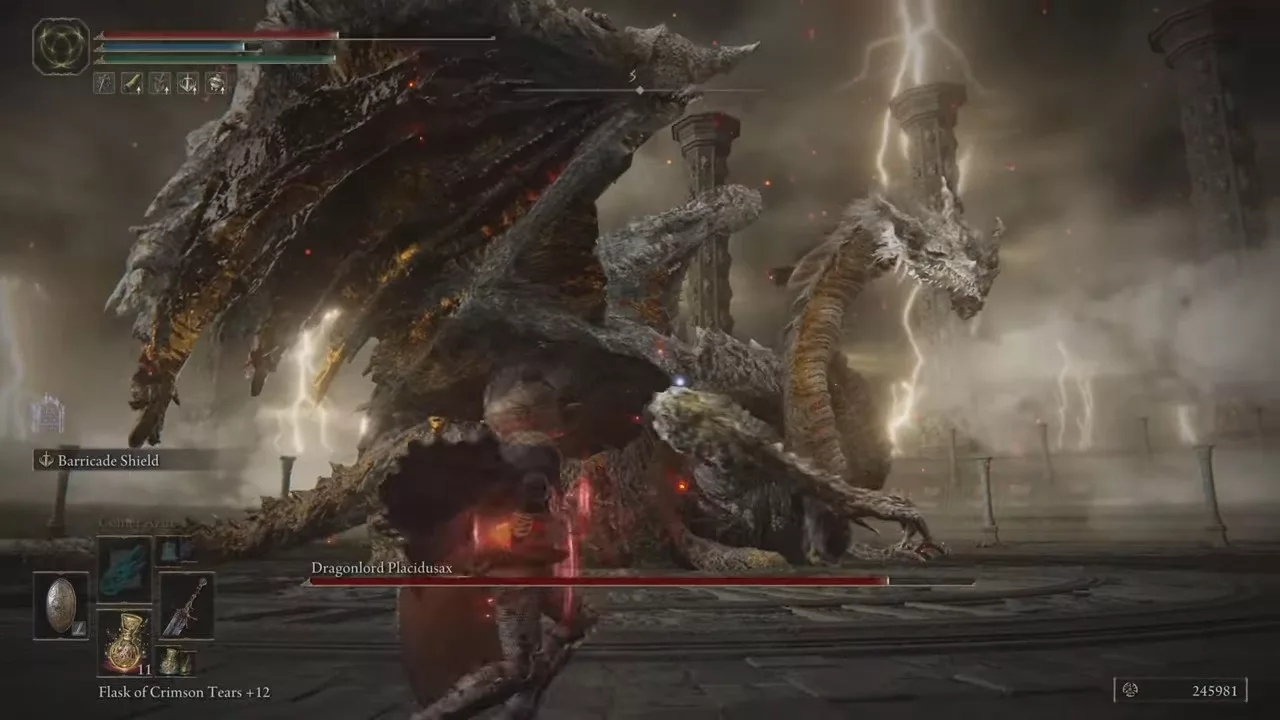
To undo the Frenzied Flame Ending with Miquella’s Needle, simply head to the area of Dragonlord Placidusax and engage in a boss fight. You can choose to use the Needle either before or after defeating Dragonlord Placidusax.
Once cured, your eyes will revert to their original color, and you will be unable to make another pact with the Three Fingers, thus concluding the Millicent questline in Elden Ring.