الوسم: FPS

  • Battlefield 6 Battle Royale Can Help Solve Its Major Call of Duty Issue

    The upcoming Battle Royale mode in Battlefield 6 is almost confirmed to be arriving soon. So far, we know that the ring is lethal and kills players immediately upon contact, starting you off with only a pistol and a sledgehammer, and allowing players to bring in custom loadouts saved from traditional multiplayer matches.

    After the failure of Battlefield 5’s Firestorm, there’s been plenty of speculation about a new Battle Royale in Battlefield 6. Many are curious and hopeful that this new mode will have a slower, more strategic pace than what we’ve seen in other Battle Royale games.

    Right now, with the maps available at launch, Battlefield 6 feels small and tiring. The gameplay is fast-paced, similar to Call of Duty, which makes sense since former Call of Duty boss Vince Zampella is leading the project. Unfortunately, Battlefield 6 doesn’t quite match the size and grandeur of maps like Dragon Valley or Empire’s Edge from previous entries. Instead, its maps feel basic—unfinished buildings and dull desert areas crammed into smaller boundaries, which quickly become tiresome less than a month after release.

    A Battle Royale with larger maps could change everything. It could allow for longer, more tactical rounds, encouraging careful planning and team coordination. We want squad play to be meaningful again—something missing from the current multiplayer, where you can’t even request orders from a squad leader like in past games. Keeping the weapon balance similar to multiplayer, possibly adding shield plates for more strategic encounters, and maintaining class roles would give players reasons to choose different roles and strategies.

    For EA, a Battle Royale seems like a straightforward opportunity. The genre may feel overused, and some fans might be tired of seeing another Battlefield BR attempt, but it’s clear that titles like Call of Duty: Warzone, Apex Legends, and Fortnite continue to dominate and be incredibly popular.

    Battlefield 6 has a good foundation for future maps and gameplay modes. Instead of sticking to small, close-quarters maps in Season 1, fans want the game to open up more, allowing players to slow down and explore bigger environments. This would not only give a different experience but also showcase how the game can evolve when taking a different approach.

    One area that could benefit from this is vehicle gameplay. Vehicles currently feel overpowered on the small maps, where a tank seems to be around every corner. On larger Battle Royale maps, there’s potential for exciting strategy—coordinating with teammates to take down large vehicles could be thrilling, especially if enough space and time are given.

    Of course, this is all hopeful thinking. The Battle Royale mode could follow the fast, chaotic style of Warzone, with weapon drops, goofy skins, and over-the-top, unrealistic weapons. Many want to see the developers stick to a grounded, realistic approach, but only time will tell whether Battlefield’s Battle Royale will meet the expectations of fans or go in a completely different direction.

  • How To Turn On The Steam FPS Counter: A Step-by-Step Guide

    How To Turn On The Steam FPS Counter: A Step-by-Step Guide

    The frames per second (FPS) that your computer or laptop can achieve can significantly impact the gaming experience, even for top-tier games. If the FPS is too low, gameplay can become frustratingly choppy. While some gamers can easily detect changes in FPS, it’s often challenging to assess during fast-paced multiplayer sessions or while playing across different platforms. Fortunately, Steam offers a convenient built-in feature that allows you to monitor the performance of your system while gaming, enabling you to adjust settings if necessary, particularly with demanding upcoming titles. Here’s a simple guide to activate Steam’s FPS counter efficiently.

    How to Enable the FPS Counter on Steam

    This functionality is integrated into the Steam launcher, meaning it works with any game launched through the platform. It only takes a moment to enable or disable, but you’ll need to do this prior to starting a game.

    Step 1: Open Steam and click on Steam located in the upper left corner.

    Valve

    Step 2: Select Settings.

    Step 3: Click on In-game and scroll down to locate the In-game FPS counter dropdown menu.

    The steam in-game settings.
    Valve

    Step 4: Choose your preferred location for the FPS counter display: top left, top right, bottom left, or bottom right of your screen.

    Step 5: If you prefer, you can also enable the High contrast color option for a more visible red display instead of gray.

    Once you launch your next game, you’ll see the FPS displayed in your chosen location until you return to the settings menu to disable it.

  • Resolve FPS Stuttering Issues in Marvel Rivals

    Resolve FPS Stuttering Issues in Marvel Rivals

    Marvel Rivals has quickly become one of the standout games of 2024. It’s visually stunning, engaging to play, and draws in a massive player base. Unfortunately, some players are experiencing stuttering issues that disrupt gameplay.

    But don’t worry—this is a technical glitch that can be resolved with a few adjustments. While NetEase Games may improve optimization in future updates, there are current workarounds. This guide will help you boost your frame rate, so stay tuned.

    How Can You Increase Frames Without Upgrading Hardware?


    While upgrading your system is often a go-to solution for low performance in newer games, the issue with Marvel Rivals stems from optimization rather than hardware.

    If you’re experiencing frame drops when Doctor Strange appears on the screen, don’t panic. This is an in-game issue, not related to your hardware.

    For example, Doctor Strange causes numerous systems to struggle with frame rates. His character increases the rendering load when he opens a portal, affecting many players. While a patch may address this in the future, here are some tips to improve your frame rate now:

    In-Game Optimizations For Best FPS

    To get started, launch Marvel Rivals and head to the settings menu by clicking the gear icon in the top-right corner. Go to Display settings and follow the configurations below:

    Display Settings

    Setting the correct display options can enhance your in-game experience. While it may not produce a significant boost, you’ll likely see some improvement.

    Display Mode Full Screen
    Aspect Ratio Based on your display, 16:9 is recommended.
    Resolution 1920×1080
    Anti-Aliasing and Super Resolution Use AMD FSR for AMD GPUs and Nvidia DLSS for Nvidia GPUs.
    Super Resolution Mode Quality
    Super Resolution Sharpening 80
    Frame Generation Mode Off
    Low Latency Mode Nvidia Reflex if using an Nvidia GPU; otherwise, keep it off.
    Limit FPS Off
    V-Sync Off

    Graphics Settings

    Click on the Optimize button to let the game auto-set the graphics settings for your computer. However, adjust the following parameters for better performance:

    Global Illumination SSGI – Low Quality
    Reflection Quality Screen Space Reflections
    Post-Processing Low
    Shadow Detail Low
    Effects Detail Low
    Foliage Quality Low

    Windows Optimizations To Improve Performance


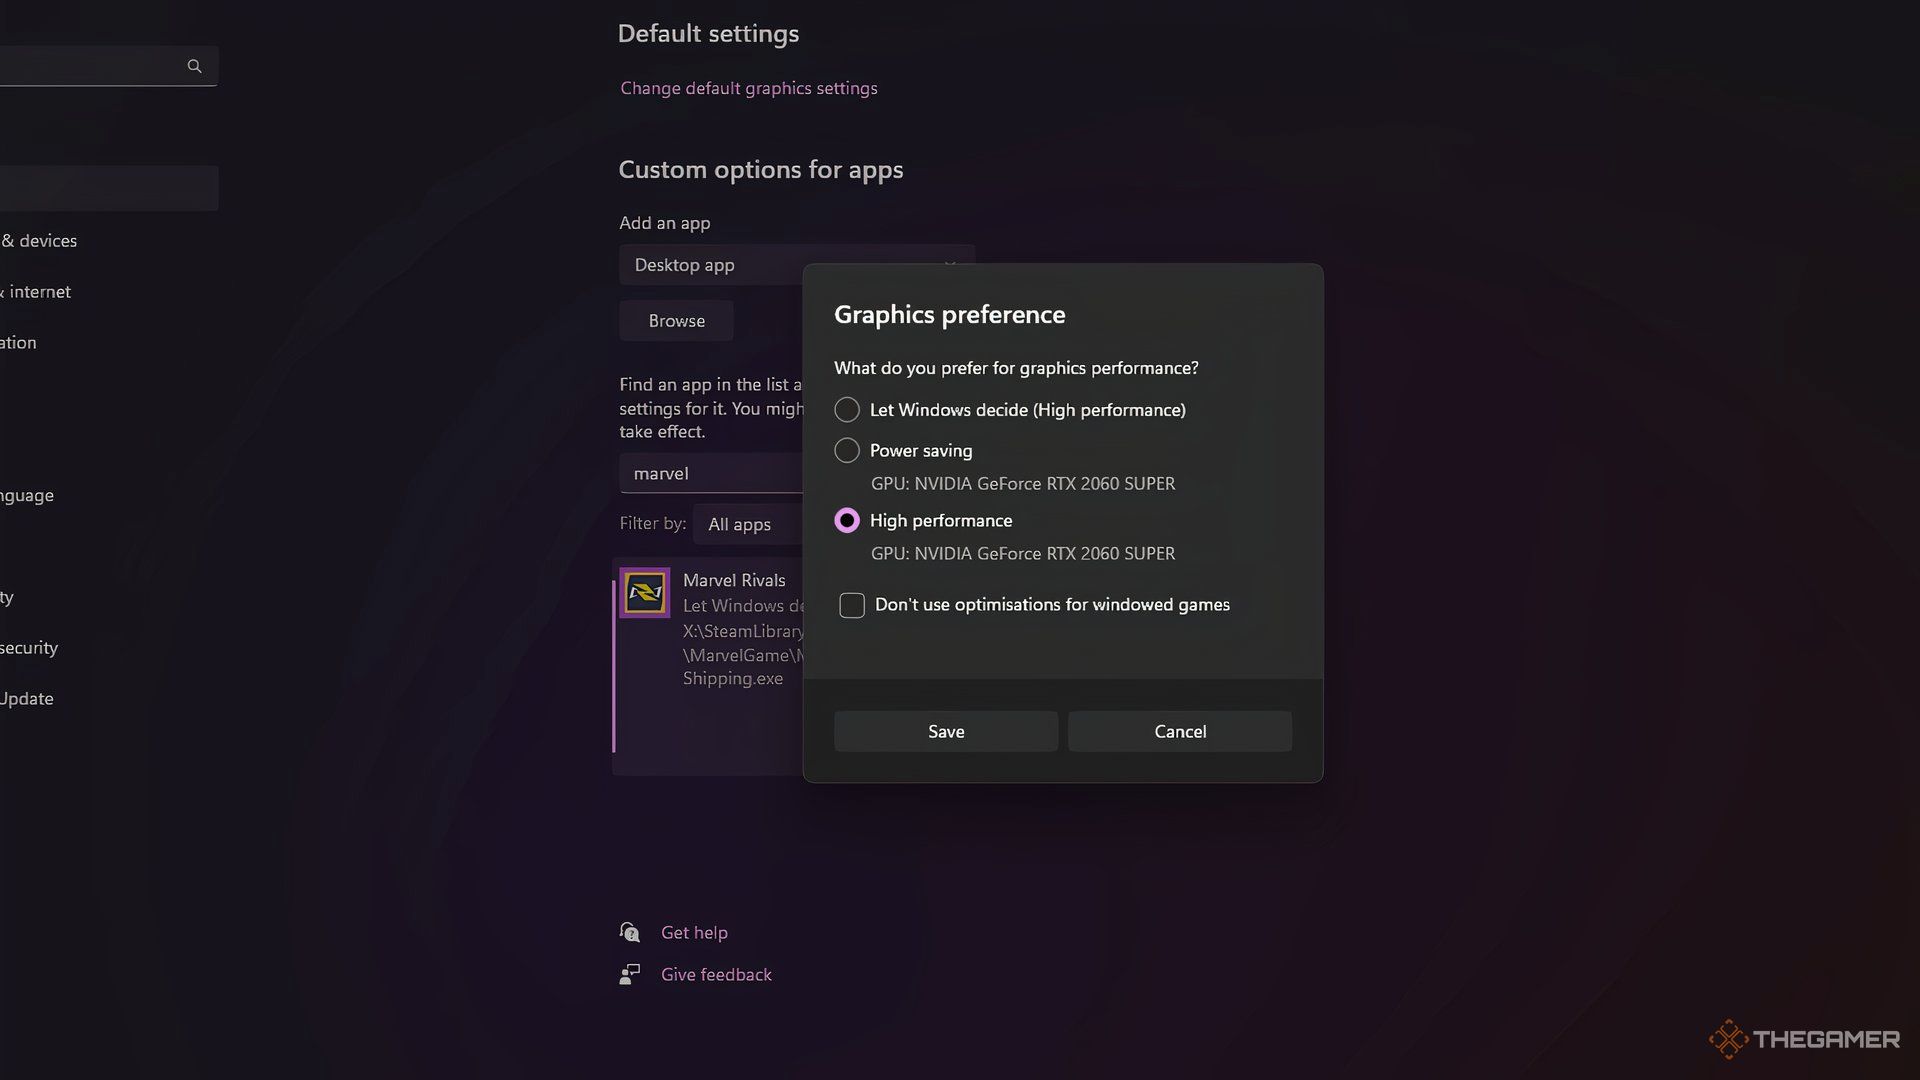
    Windows Display settings showing graphics performance options.

    In addition to adjusting graphics settings, you should modify some Windows Settings for optimal performance while playing Marvel Rivals. Follow these steps:

    Windows Graphics Settings

    • Open Windows Settings, then go to the System menu and select Display.
    • Scroll down to find the Graphics tab. Locate Marvel Rivals in the list and click on it.
    • Click the Options button, choose High Performance, and then hit Save.

    Disabling Game Bar and Enabling Game Mode

    • Open Windows Settings and select the Gaming submenu.
    • In Gaming settings, click on Game Bar and disable it.
    • In Gaming settings again, click on Game Mode and turn it on if it’s off.

    The Game Bar consumes significant system resources, so it’s advisable to keep it disabled. If you usually use Game Bar for recording, consider using OBS Studio instead.

    Also, ensure your Graphics Card Drivers are up to date:

    • For Nvidia cards, open Nvidia GeForce Experience and check for updates there.
    • For AMD cards, use the AMD Software: Adrenaline Edition.
  • Repairing Weapon Durability in STALKER 2: A Complete Guide

    Repairing Weapon Durability in STALKER 2: A Complete Guide

    Knowing how to fix your weapons in STALKER 2 is crucial for your success in the game. If your gear isn’t functioning at its best, you’ll have a tougher time surviving. Thankfully, you can enlist the help of a Technician to restore your equipment’s durability and prevent your firearms from jamming just when you need them the most. However, this service does come at a cost, so you’ll need to locate one first. These Technicians can be hard to find, and managing weapon durability can be challenging in STALKER 2, especially when you’re ambushed by bandits in the Heart of Chornobyl. Understanding how to repair your weapons and what options you have for broken guns is essential. Fortunately, we’ve got all the details for you below.

    How to Repair Your Weapons in STALKER 2 with a Technician

    (Image credit: GSC Game World)

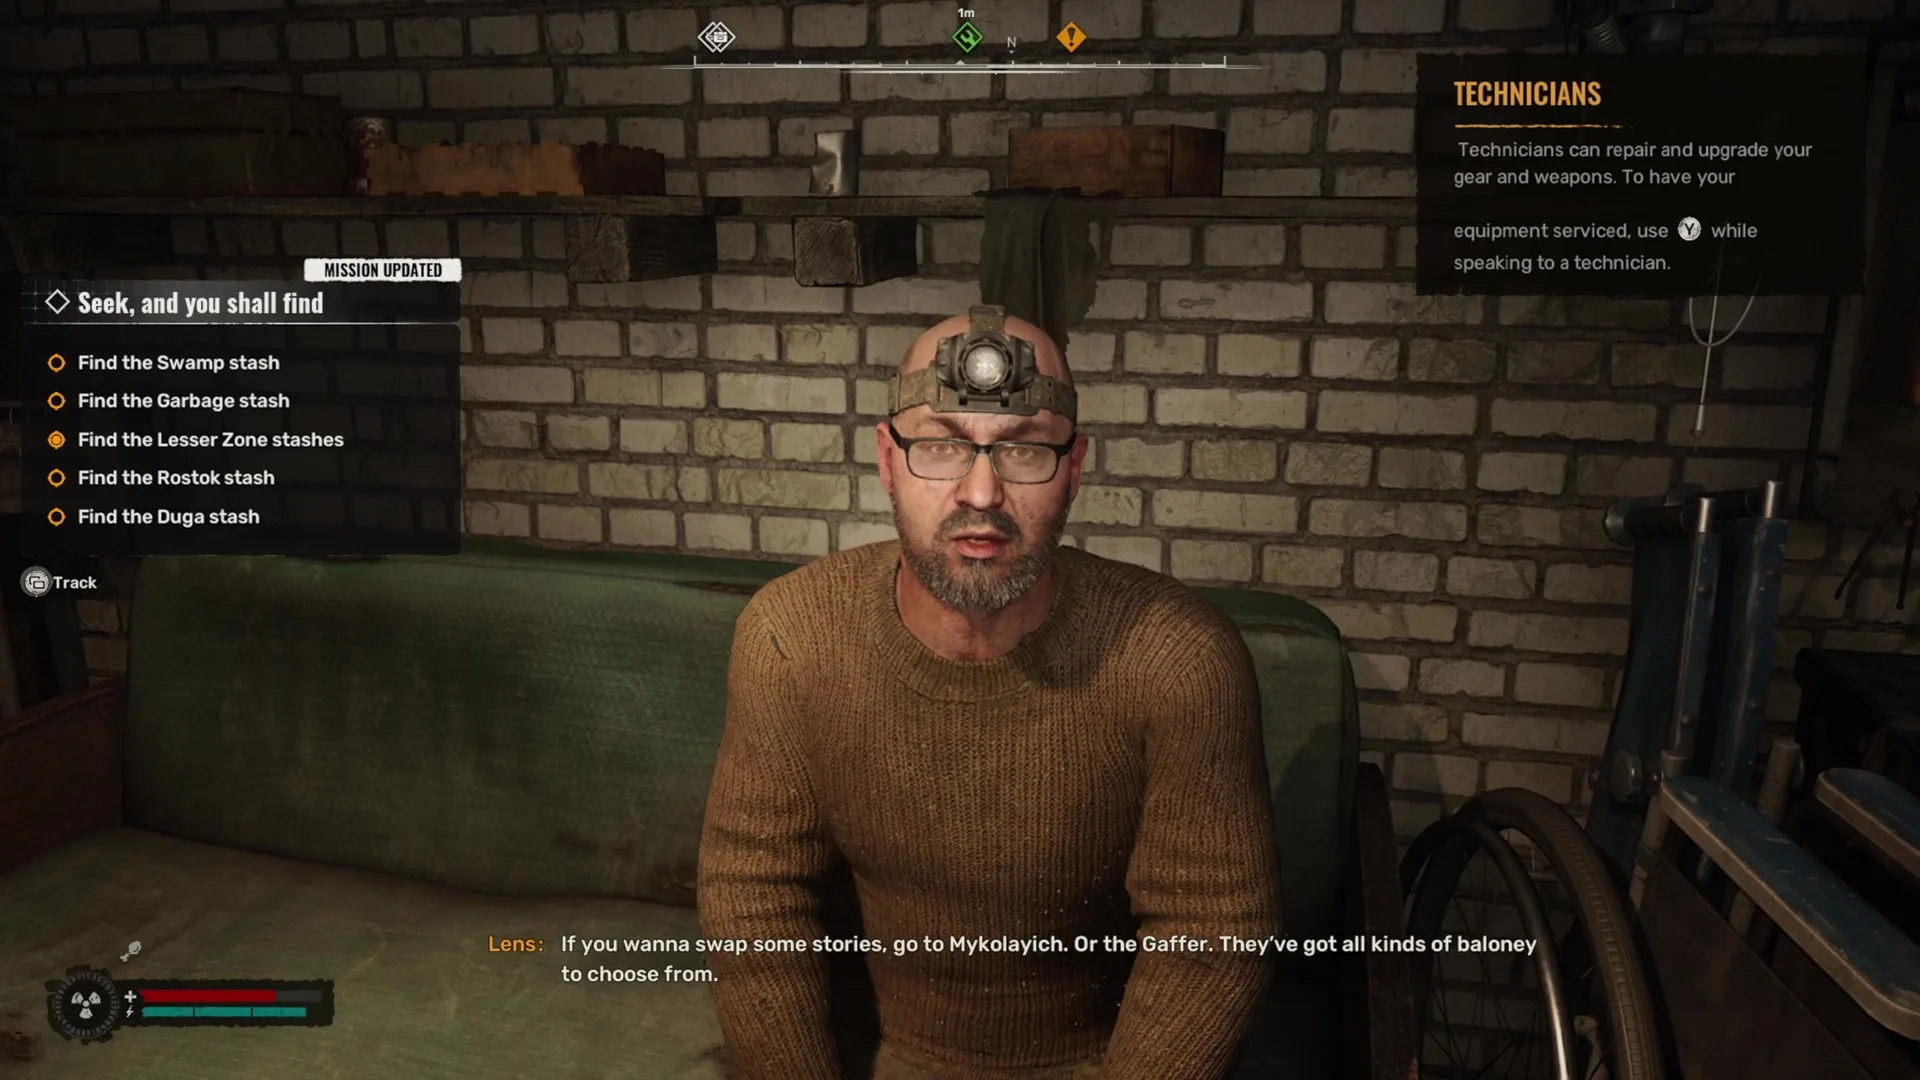
    To repair your weapons in STALKER 2, you can find a Technician who will fix your guns in exchange for coupons. These Technicians can be located in larger settlements, such as the initial town of Zalissya, shortly after you escape from the first STALKER 2 Anomalies. Here, you will meet a character named Lens, who can repair your weapons (located in the building next to Warlock’s bar).

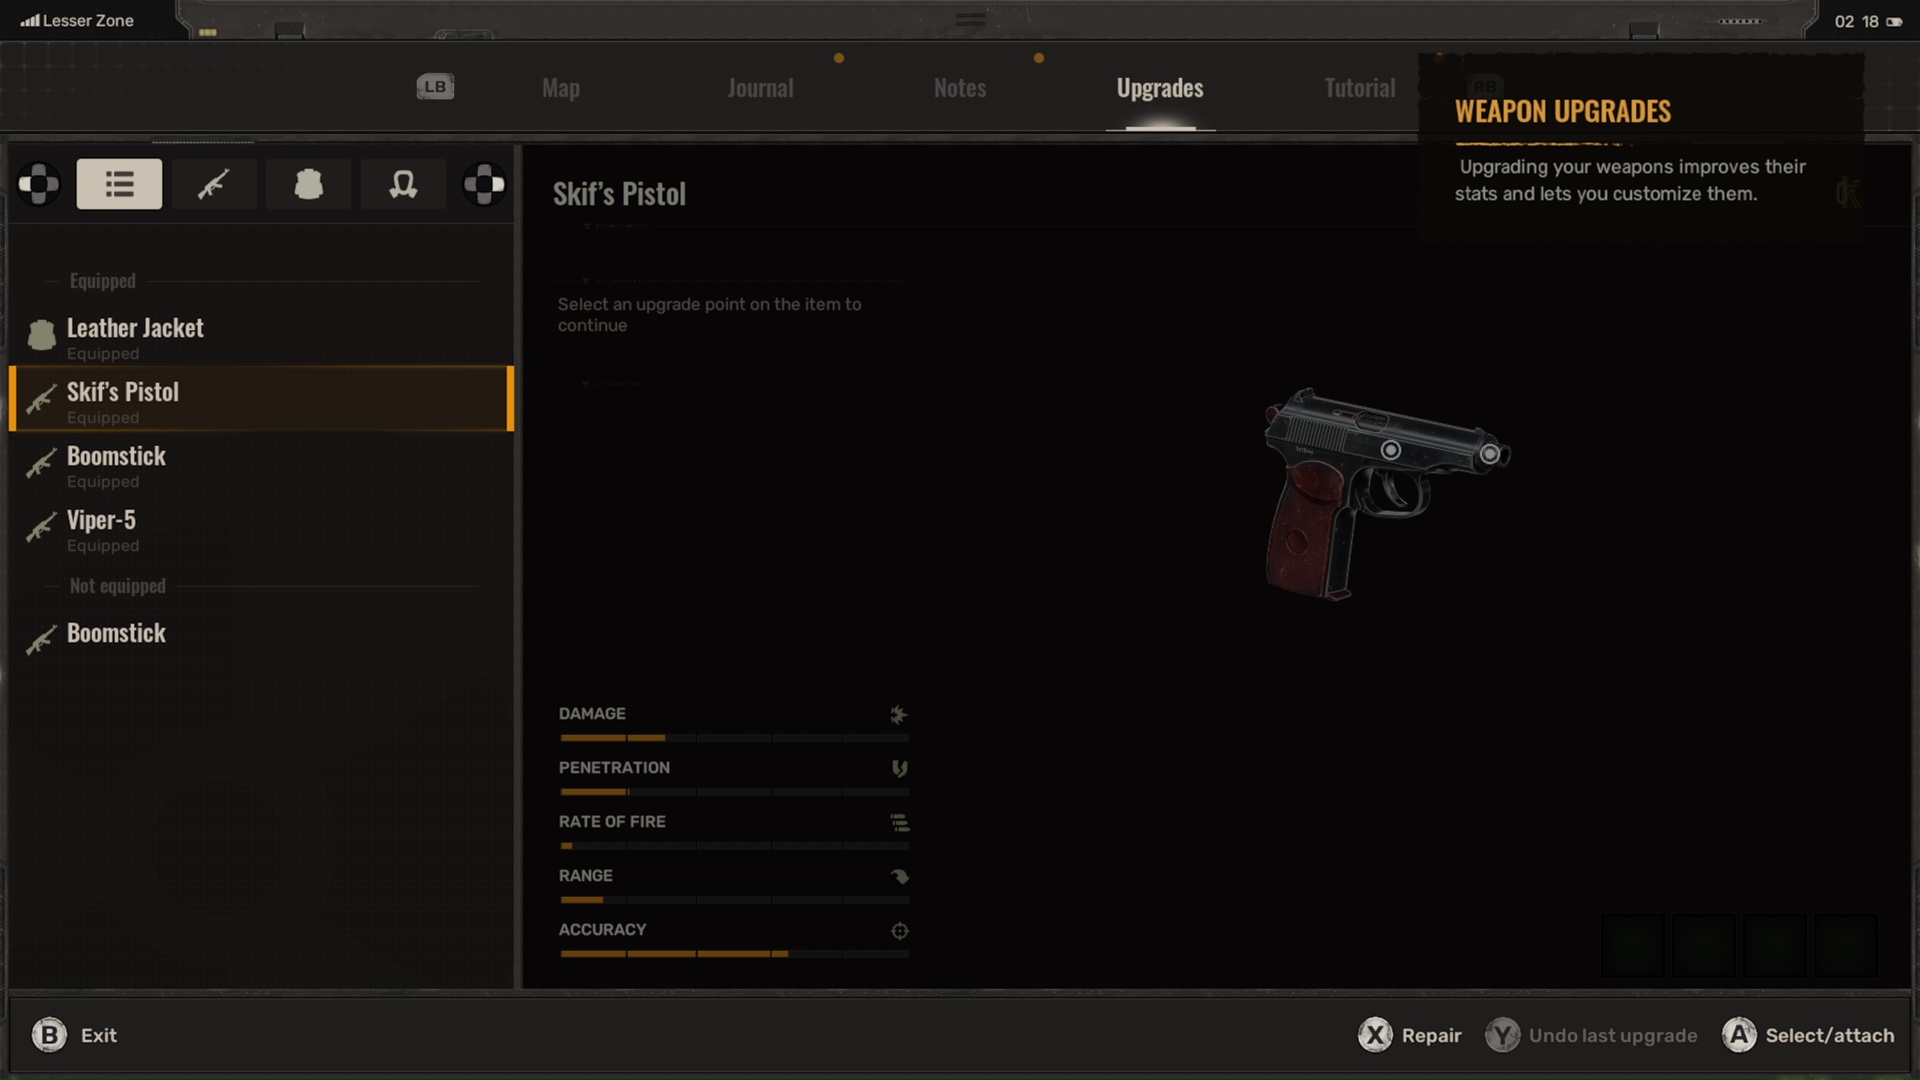
    To get a technician to repair a weapon for you in STALKER 2, simply talk to them to open the dialogue and then press X (if you’re using an Xbox controller) to access the Technician menu. From there, select the weapon that’s damaged and press X again to completely restore it, bringing its durability back to 100. The lower the durability of a gun, the less accurate it becomes and the greater the chance of jamming when firing, which makes keeping your weapons well-maintained very important.

    STALKER 2 repair weapons

    (Image credit: GSC Game World)

    Repairing your initial weapon, Skif’s Pistol, is free, but this offer only lasts until the first upgrade. All other weapons will incur a fairly high repair fee, which depends on how much durability needs to be restored. For instance, the cost for fixing the Stalker 2 Drowned gun can exceed 10,000 coupons!

    Since guns wear down through repeated firing and damage while being transported in perilous areas, you’ll want to ensure you have enough coupons for emergency repairs. Additionally, keep in mind that fast travel in STALKER 2 is only available between settlements. If you get stranded in the Zone with malfunctioning equipment, you’ll face a long and dangerous trek back.

    What to Do with Broken Guns in STALKER 2

    Stalker 2 repair weapons with a red shield icon signaling that it’s very damaged

    (Image credit: GSC Game World)

    You can sell damaged weapons featuring a yellow shield icon, but weapons marked with a red cracked shield icon cannot be sold for coupons in STALKER 2. This means that, especially in the early game, it’s often better to replace broken weapons with new ones you find in the game world rather than spending a lot of money to repair underwhelming weapons. If the damaged weapon has any attachments, be sure to remove those beforehand and, as our STALKER 2 tips suggest, make sure to unload any ammunition as well.

    Your other option is to pay to repair the weapon if it’s one you’re particularly fond of. Alternatively, you can drop the broken gun or store it in a stash and place a map marker on that location. This way, you avoid carrying around a useless firearm and can grab it later once you have enough coupons for repairs.

    Shortly after arriving in Zalissya, you’ll face the choice of whether to kill or assist Squint in STALKER 2, a decision whose consequences we detail elsewhere.

  • Finding the Journalist Stash in Zalissya for Stalker 2

    Finding the Journalist Stash in Zalissya for Stalker 2

    In STALKER 2, you’ll find the Journalist Stash in Zalissya located on the roof of a house, next to a blue truck. However, getting to this stash proves to be quite tricky thanks to Skif’s limited climbing abilities. Although the blue truck seems easy to climb, it presents one of the challenges of the game. The effort is worthwhile since the crate holds a new pistol and top-notch body armor. Here’s a step-by-step guide on how to access the Zalissya Journalist Stash in STALKER 2, allowing you to secure this essential survival equipment.

    Just like when you search for the workshop keycard in STALKER 2, solving this challenge requires some creative jumping. Although it might feel as uncertain as searching for a dog collar near Bulba in STALKER 2, there’s a clear solution.

    Location of the Zalissya Journalist Stash in STALKER 2

    (Image credit: GSC Game World)

    To find the STALKER 2 Journalist Stash in Zalissya, head to the rooftop of a house positioned just north of the town, where a blue flatbed truck is parked nearby. To access the stash, you should sprint and leap onto the front of the truck, then jump onto the roof of the house. From there, you can drop onto the balcony above the main entrance and enter through a hole in the wall to reach the stash located inside the roof.

    This may sound straightforward, but jumping onto the truck’s hood can be surprisingly tricky since you cannot easily climb onto it (for some reason, the flatbed at the back is also unclimbable). You’ll need to sprint toward one of the headlights and time your jump to catch hold of the bodywork at the peak of your leap. After that, just hop onto the truck’s top, then to the roof of the house. If you struggle significantly, check your character’s weight, as carrying too much can hinder your jumping ability.

    Rewards from the Zalissya Journalist Stash

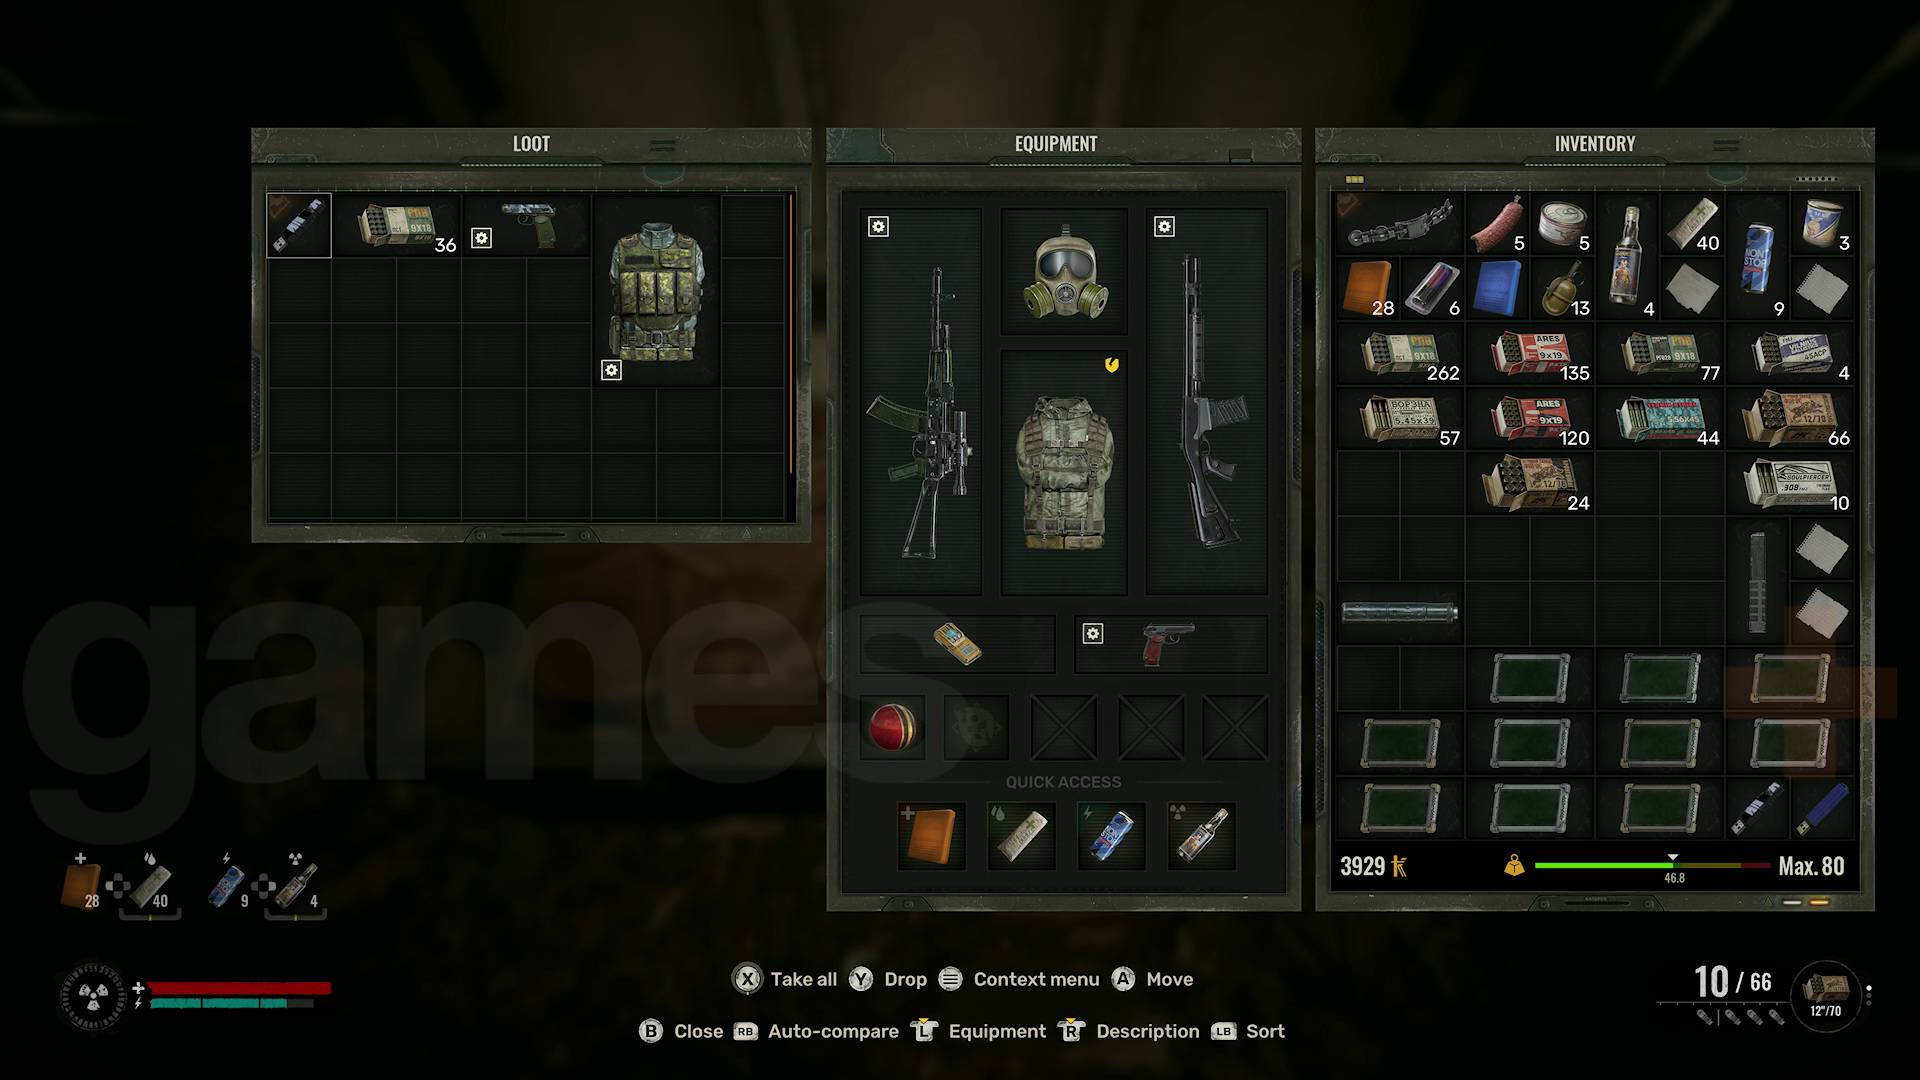
    Stalker 2 Heart of Chornobyl journalist's house stash loot pistol and armor

    (Image credit: GSC Game World)

    Your acrobatic efforts will be rewarded with the following items from the STALKER 2 Journalist Stash on the roof of the Zalissya house:

    • PTM Monolith pistol
    • Mercenary’s Light Suit body armor
    • Journalist’s message #2
    • 36 rounds of 9x18mm PST ammo

    The Monolith pistol provides a significant upgrade from Skif’s starting weapon, offering improved penetration. Additionally, the Mercenary Light Suit offers a substantial boost compared to Skif’s basic armor. Keep an eye out for other Journalist Stashes as you explore the area, since, as stated in our STALKER 2 tips, looting these locations is a smart move for acquiring valuable gear.

  • STALKER 2: The Lost Boys Dew – Ninth Choice Guide

    STALKER 2: The Lost Boys Dew – Ninth Choice Guide

    The “Lost Boys” quest in STALKER 2 presents you with a tough decision: align with the Ninth, who is a soldier of the Monolith, or Dew, the leader of a group of mercenaries. This optional mission starts when you investigate the disappearance of a gang of diggers who failed to return to Lens. During your search, you meet a member of the Ninth who assisted Mastiff, one of the missing individuals, while Dew, suspicious of the Monolith, believes he must eliminate the Ninth to prevent Mastiff from becoming a zombie mutant.

    This side mission isn’t straightforward and culminates in a choice without much background. This guide provides a step-by-step walkthrough for the Lost Boys quest in STALKER 2, detailing how to complete it and the implications of siding with either the Ninth or Dew.

    Discover What Happened to Mastiff’s Group in STALKER 2

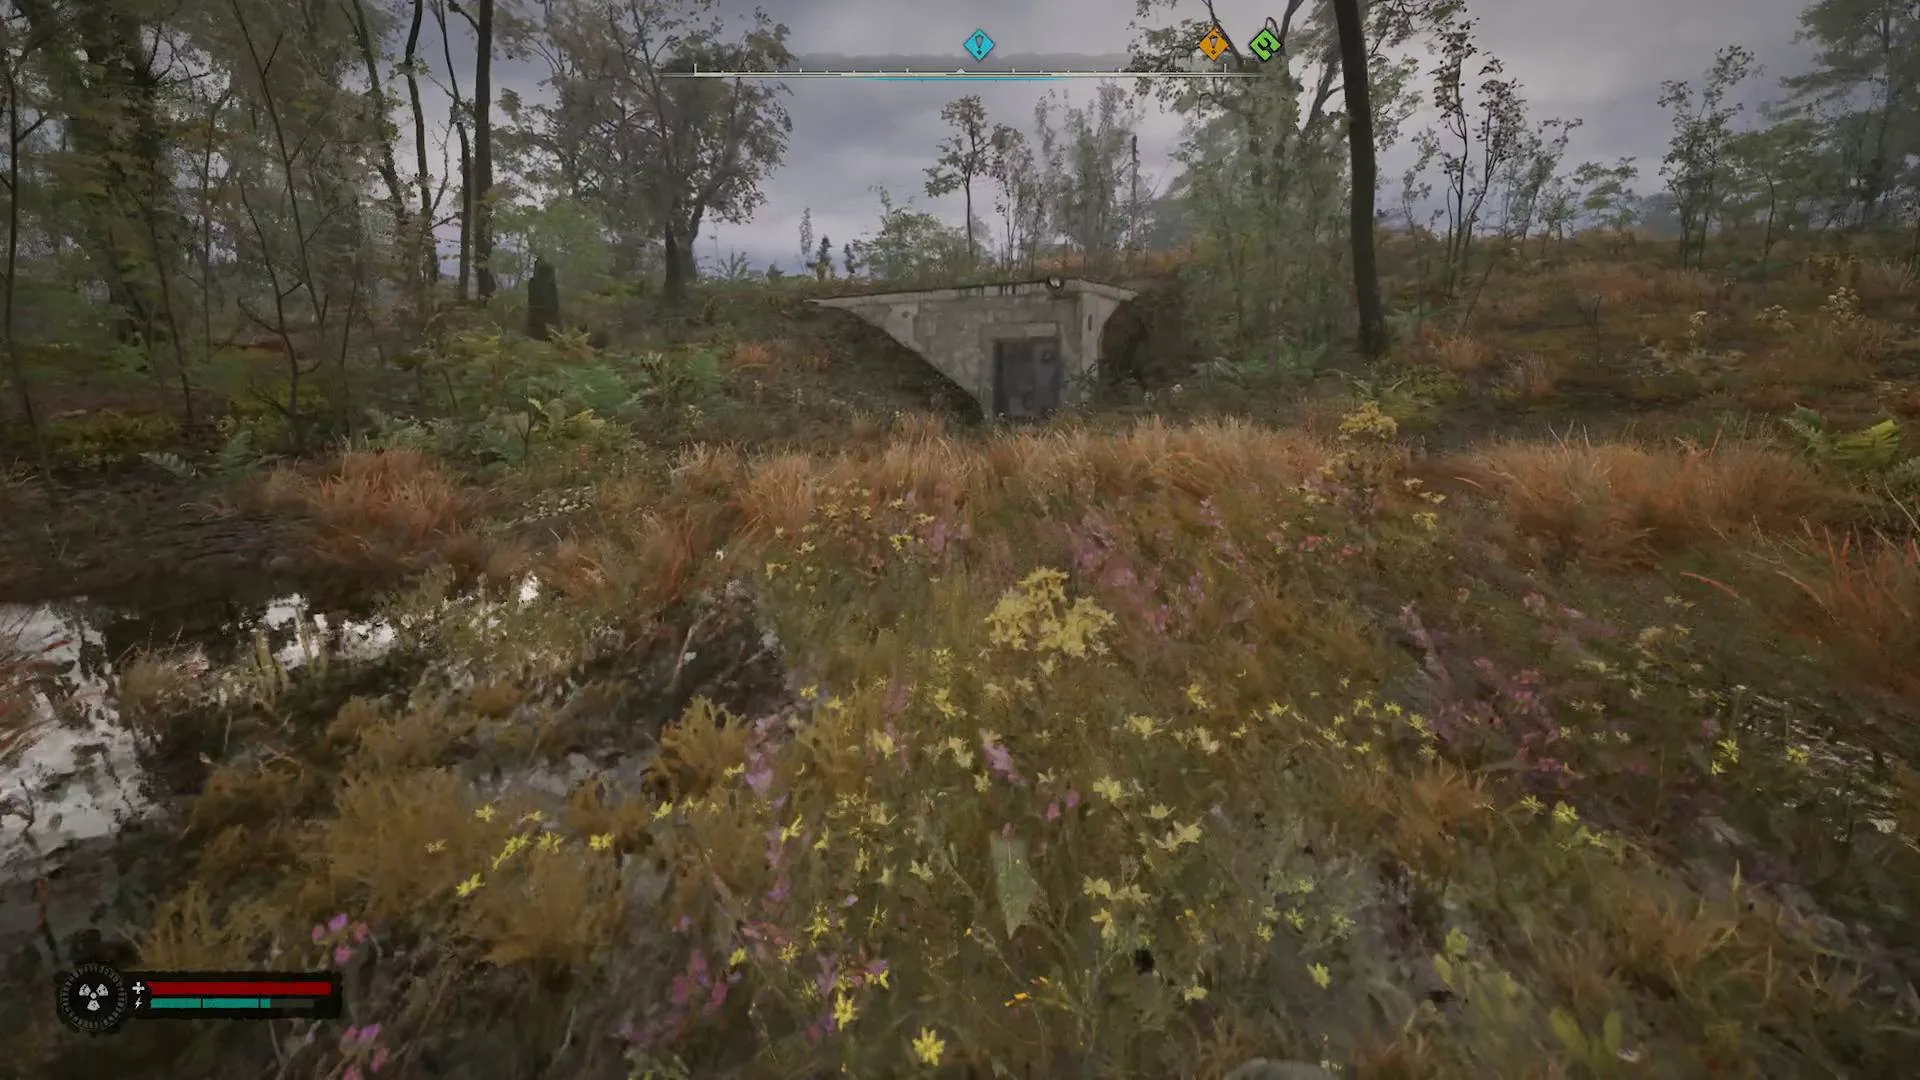
    To start, you’ll need to locate where Mastiff and his crew went missing. Follow the blue waypoint, which will lead you south of Zalissya for a short distance until you find a concrete bunker entrance. Once inside, continue to look for clues about the gang’s fate.

    Search any bodies you find and delve deeper into the bunker while being cautious of various electrical anomalies. Eventually, you’ll find an injured man named Max Saturday. Heal him and talk to him to learn that a member of the Monolith has taken Mastiff. After this, restore power in the level behind Max, and then exit through the nearby door.

    Locate Mastiff in STALKER 2

    Next, to find Mastiff, travel southeast from the facility for several hundred meters, keeping an eye on the blue waypoint. You will arrive at a small set of buildings, one of which contains Mastiff, as you can hear him moaning in pain. Unfortunately, the door to the building is locked, and you can’t open it directly.

    Instead, go to the smaller shed next to the house (located to the right of the front entrance) and break the yellow padlock. Inside, look for a hole in the floor that leads to an underground tunnel, conveniently allowing you to access the locked door in the house where Mastiff is lying on a bed.

    Mastiff will mention the attic, leading you to the Ninth. After speaking with him, you’ll soon be interrupted by Dew and his gang. At this juncture, you need to decide whether to assist the Ninth in fighting off Dew or to take action against the Ninth.

    Choosing the Ninth in STALKER 2: The Lost Boys

    If you decide to support the Ninth, prepare to combat Dew’s mercenaries. Although the Ninth will join you in the fight, defeating Dew’s skilled armed team will be challenging. The skirmish becomes easier if it transitions indoors, where the Ninth can aid you, albeit at the risk of his own life.

    Once the fight concludes, talk to the Ninth to learn more about him and his faction. You’ll also receive the Rubber Layer blueprint, which can be used to upgrade your gear at any technician (the vendors responsible for weapon repairs in STALKER 2).

    Upon returning to Lens, you’ll earn 500 coupons for finding Mastiff. However, the Ninth will caution you that most characters in STALKER 2 are less tolerant of Monolith members than he is, expressing strong opinions about them in the process.

    Choosing Dew in STALKER 2: The Lost Boys

    If you choose to side with Dew, you will initiate a fight against the Ninth. While the Ninth is a single adversary, he has superior health, acting as a tank compared to Dew’s fighters. Defeating him won’t yield much loot, though.

    The advantage of this decision emerges when you return to Lens, as he’ll reward you with 1,000 coupons for completing the quest, double the amount if you choose the Ninth. The trade-off is that you miss out on the blueprint.

    Can You Prevent Dew from Attacking the Ninth?

    Attempting a non-violent resolution to the Lost Boys quest by persuading Dew not to attack the Ninth won’t work. Despite the Ninth suggesting you could try to talk Dew down, if you claim the house is empty, he will search it anyway, leading to a confrontation. If you assert the Monolithian’s honesty, Dew will perceive you as a traitor and initiate combat. No matter your dialogue choices, one side—Dew’s group or the Ninth—will ultimately fall.

    Looking for more decisions to explore? Check out whether you should help or eliminate Squint in STALKER 2, or the best recipient for the religious icon in STALKER 2.

  • STALKER 2: Thieves’ Secrets and Door Unlocking Guide

    STALKER 2: Thieves’ Secrets and Door Unlocking Guide

    The No Honor Among Thieves mission in STALKER 2 involves reaching out to the Brood Bandits, which sounds pretty straightforward. However, you’ll encounter a locked door that might leave you questioning how to proceed. Maybe you’re wondering if there’s a key or what your options are when the path is blocked.

    As is the case with many tasks in STALKER 2: Heart of Chornobyl, the solution is both frustratingly simple and somewhat hidden. Yes, it relates directly to the digger that’s crashed into the side of the building. Here’s how you can get past the door, locate the shipment, and wrap up your mission.

    How to Enter the House in No Honor Among Thieves for STALKER 2

    (Image credit: GSC Game World)

    Upon reaching the mission area for No Honor Among Thieves, you’ll spot a house with a digger embedded in its side. Unfortunately, the door is locked and the key is nowhere to be found. If you peer through the windows, you’ll notice bodies and signs of a struggle inside, hinting that you need to get in there.

    However, the locked door is misleading. The key to entering is tied to the digger crashing into the house. While the ladder on the digger might tempt you to climb it, you won’t be able to use it to get on top by yourself. This is where many players might get stuck. Similar to the tricky Journalist Stash on the roof, you can’t simply hop onto the digger.

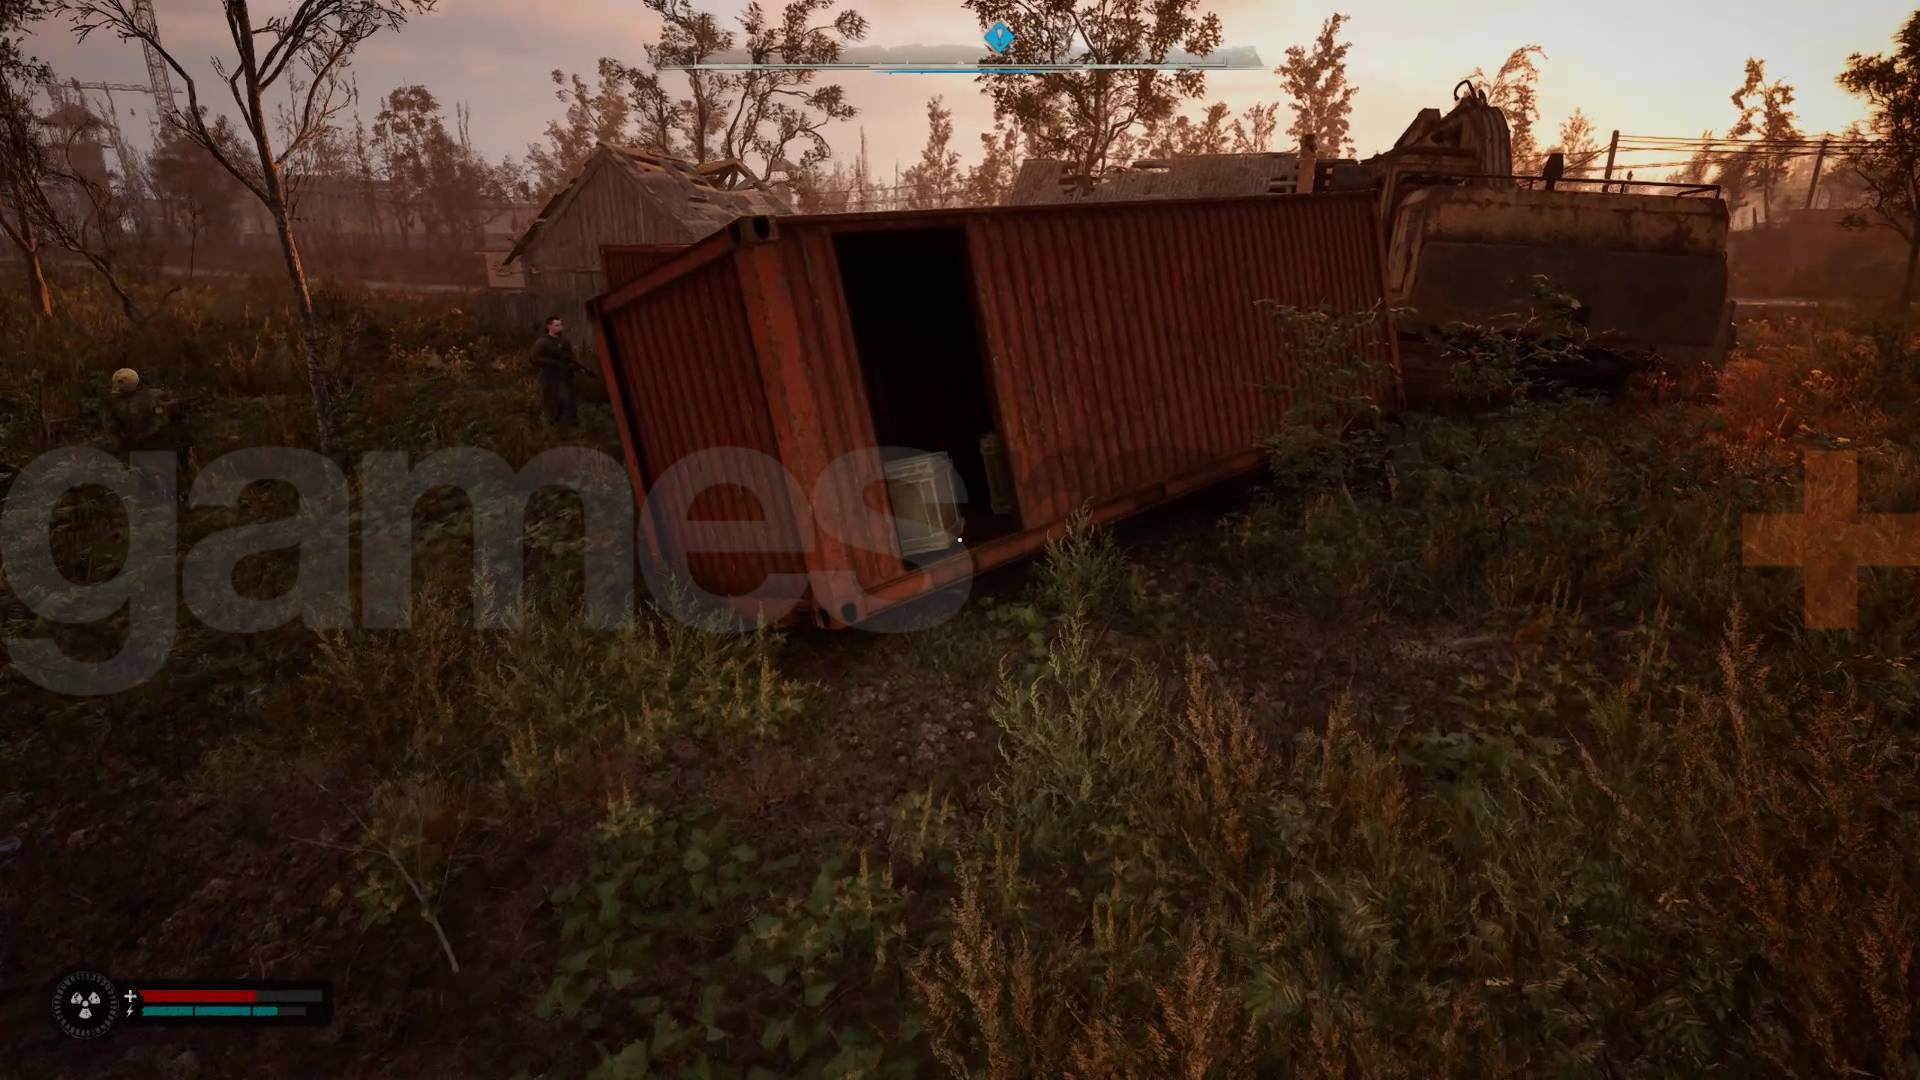
    Your best bet is to walk around to the back of the red shipping crates located just past the digger. If you take a closer look, you’ll realize you can enter one of these containers:

    STALKER 2 No honor among thieves shipping container

    (Image credit: GSC Game World)

    You may need to move some boxes around to create a space, but you can enter the container and then climb out through a hole in the roof to reach the top.

    STALKER 2 No honor among thieves digger roof

    (Image credit: GSC Game World)

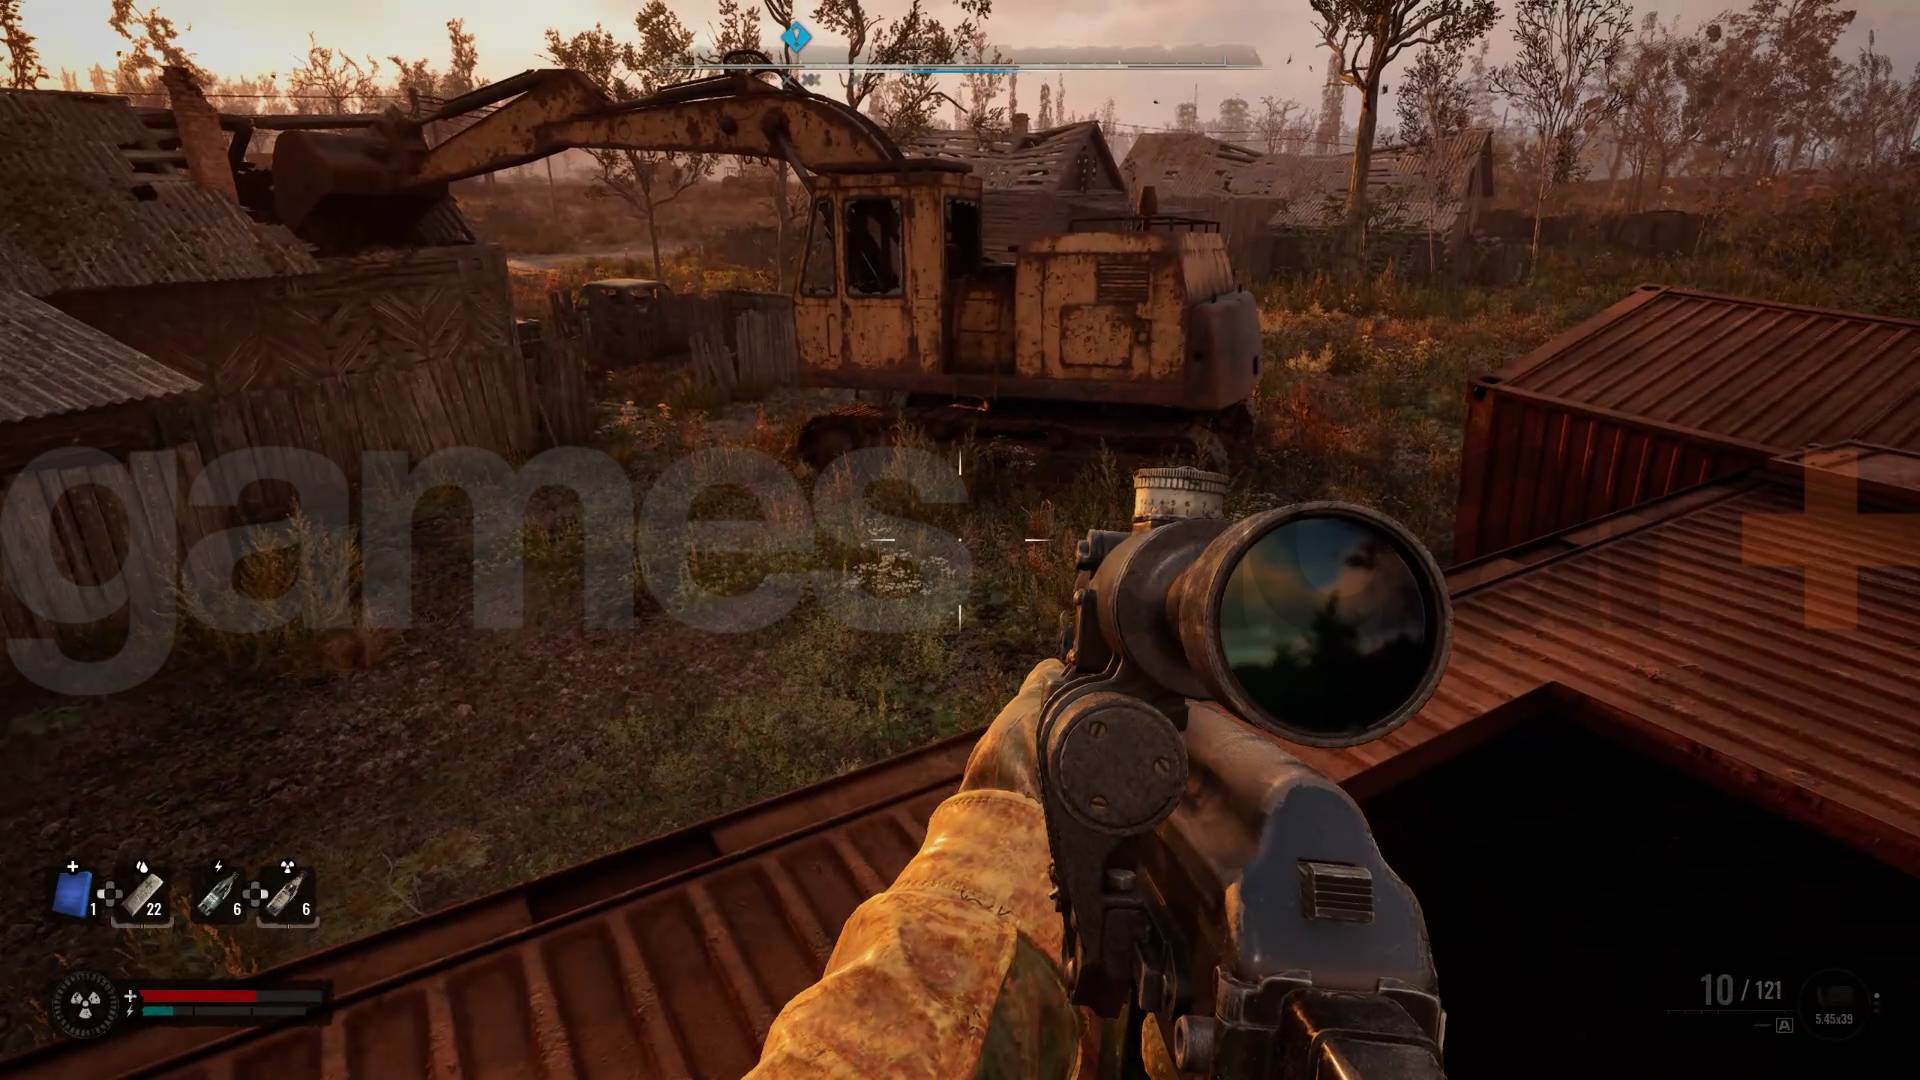
    From there, you can jump to the adjacent red container, then to the digger. Climb on top of the driver’s cab, and then step onto the arm because merely walking or jumping up it will not work. Once you’re positioned on the arm, you can carefully walk across it to the roof of the house. After that, you can enter through the hole that a tree is growing out of.

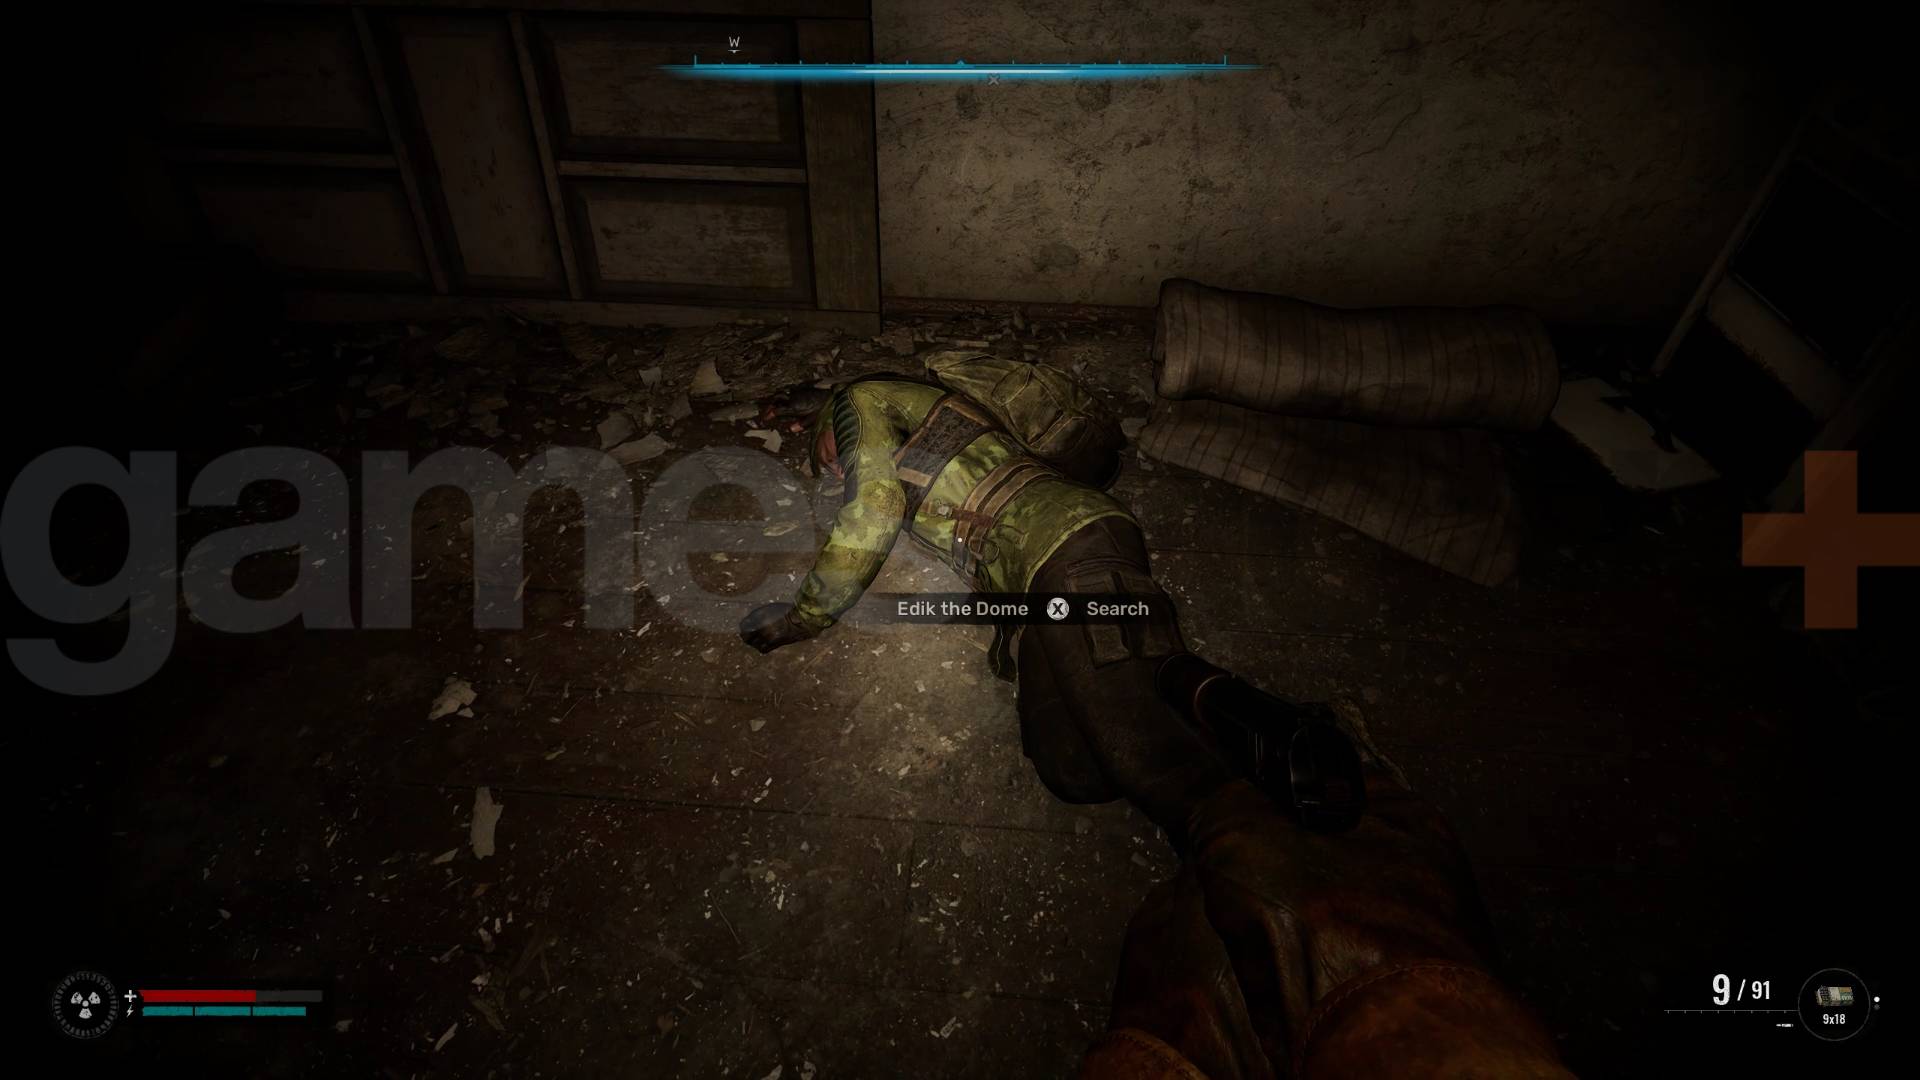
    Inside, you’ll come across several bodies to loot, but your main objective is to locate Edik the Dome and collect his PDA to continue the mission.

    STALKER 2 No honor among thieves edik the dome

    (Image credit: GSC Game World)

    Once you’ve got the PDA, it will push the mission forward to the next objective: ‘Pick up the Brood Shipment from Docent.’ This will highlight a new location on your map to explore.

    Upon arrival, you’ll face a battle with all the bandits present to move ahead, but you’ll find that the warehouse itself is locked, which is a recurring challenge in this mission. You can either climb onto the blue van next to some crates to reach a gantry that leads to a balcony, or scale a ladder next to a large chimney. This will get you on the roof, allowing you to drop down onto the balconies.

    Inside, what do you know? Another LOCKED DOOR. This time, it’s easy to bypass—just ascend the stairs to the upper level and drop down through a hole in the floor.

    STALKER 2 No honor among thieves

    (Image credit: GSC Game World)

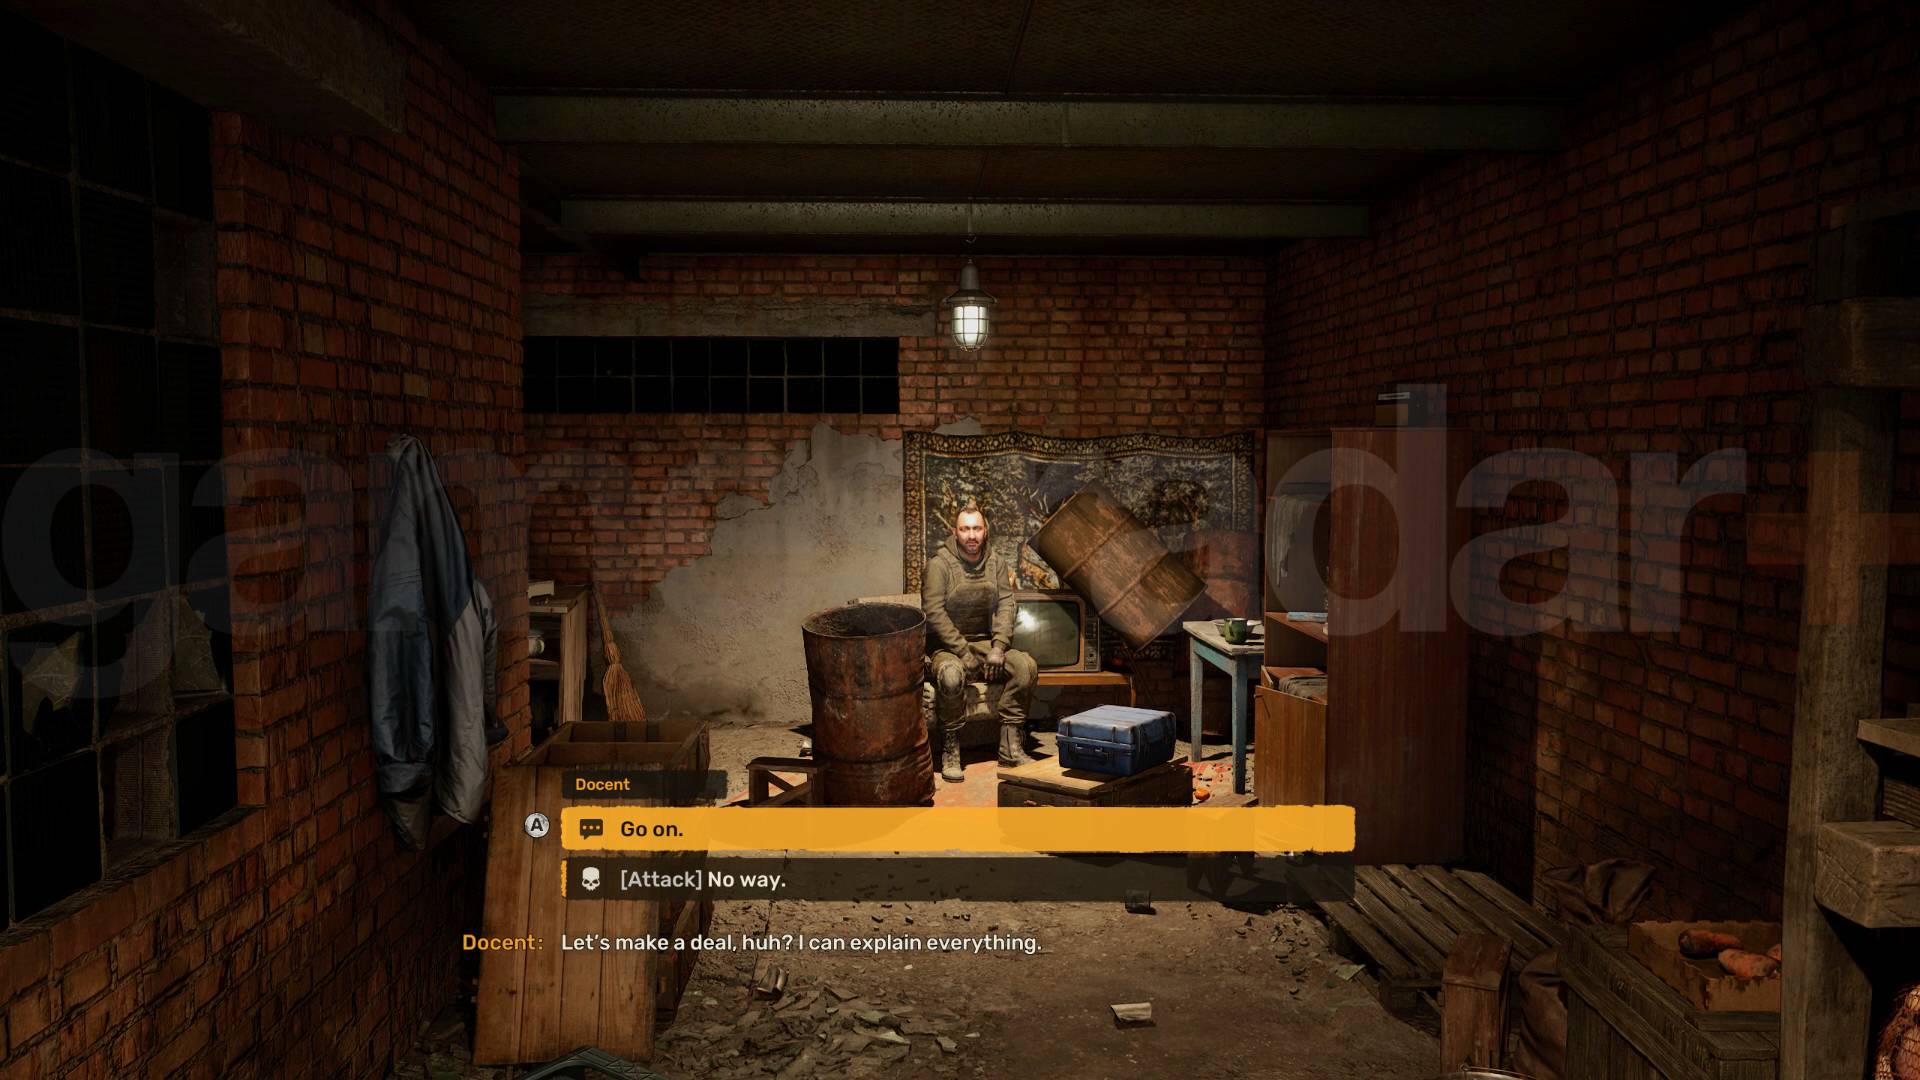
    Inside, you’ll meet Docent, who offers you a deal: if you spare his life, he’ll hand over the missing shipment and the location of a stash containing a special weapon belonging to the Shah. It’s wise to accept the deal if you’re aiming to get the stash; within is a pristine AKM-74S with a drum magazine. With its power and unlimited fire rate, it’s a solid choice for an SMG. Just keep the firearm hidden, as Docent advises against displaying it in the Brood bar to avoid recognition.

    No matter your decision, make sure to return with the shipment to complete the mission.

  • Activating the Flashlight in Stalker 2: A Quick Guide

    Activating the Flashlight in Stalker 2: A Quick Guide

    Utilizing your flashlight in Stalker 2 is essential to navigating the dark environments of the game, but you might also need to tweak some display settings for better visibility. There’s a quick prompt to activate your flashlight during the Stalker 2 tutorial, but it can be easy to overlook, leaving you to wander aimlessly in the shadows. Below, I’ve outlined how to turn on your flashlight and adjust certain settings to enhance your experience in the game.

    How to Turn On Your Flashlight in Stalker 2 and Light Up the Darkness

    (Image credit: GSC Game World)

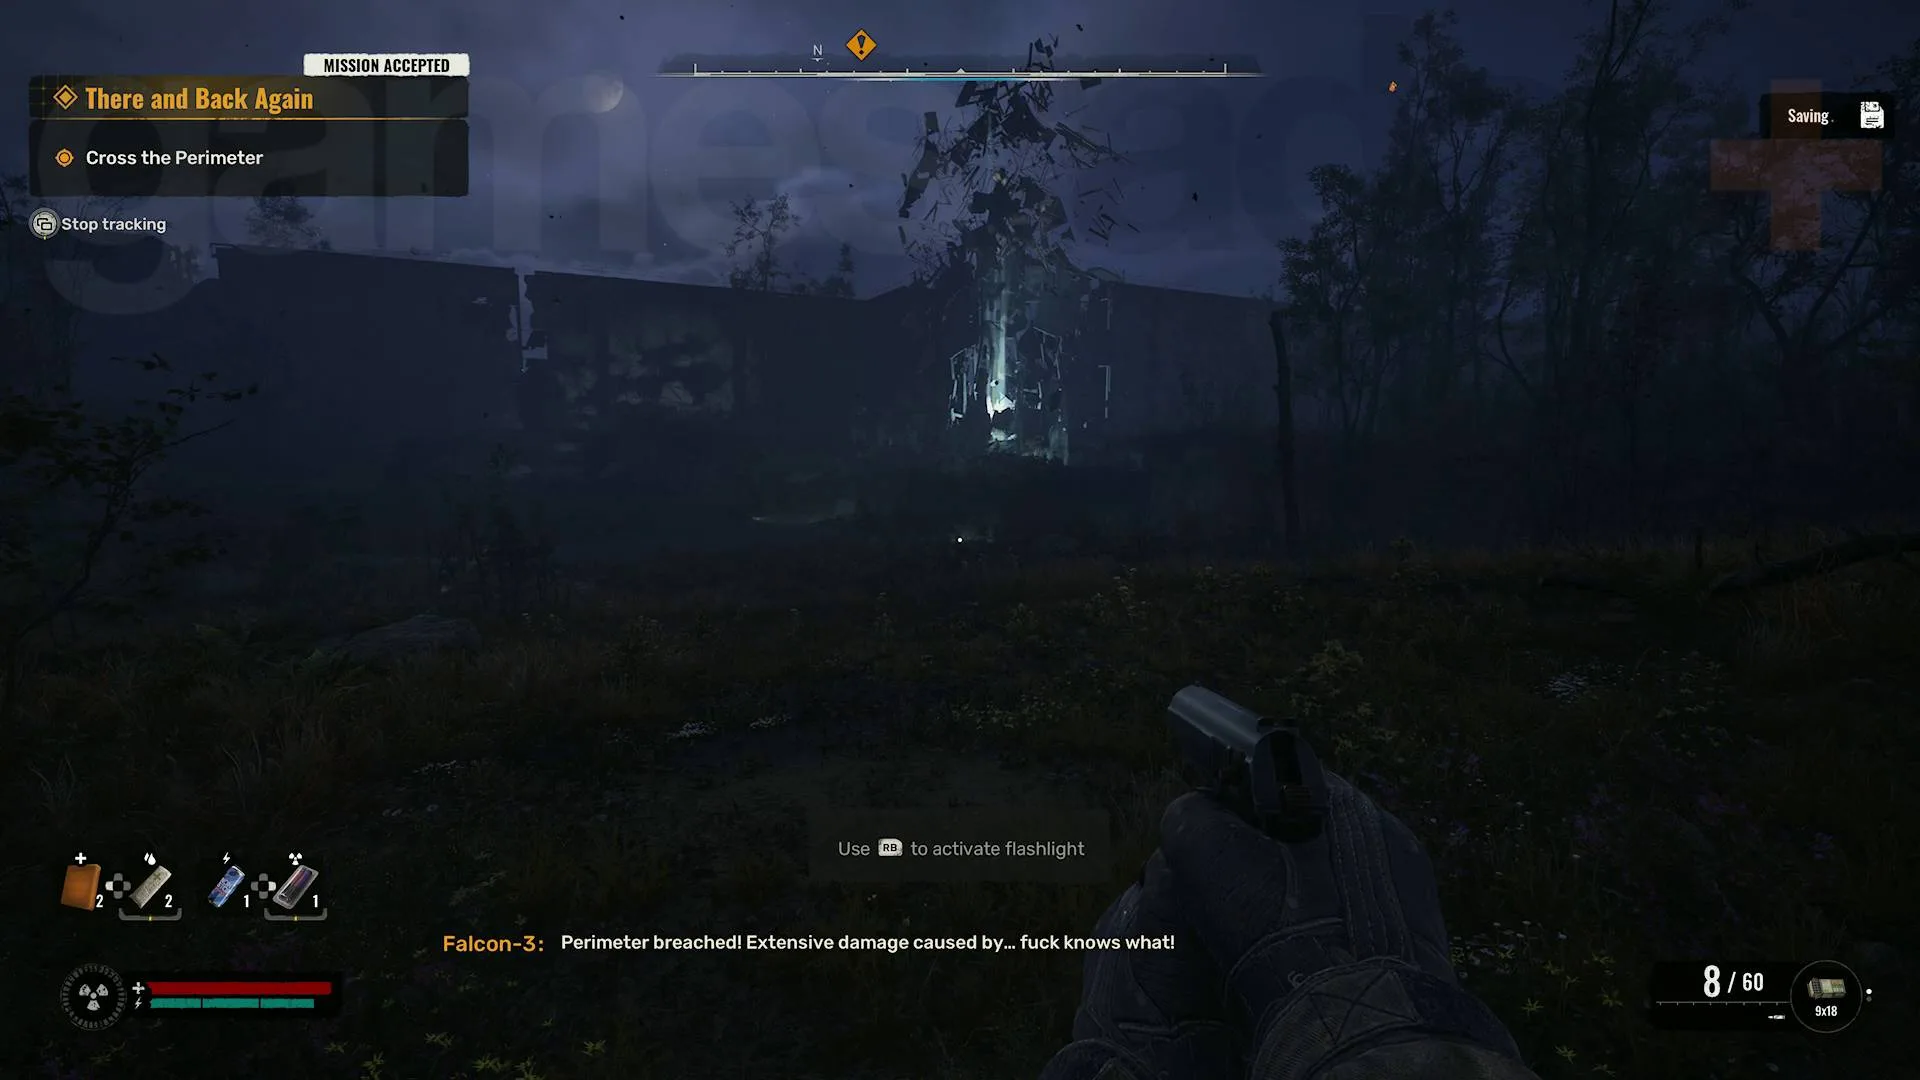
    To activate your flashlight in Stalker 2, simply press RB on Xbox or Tab on PC. Push the same button once more to switch it off—it’s that straightforward! Fortunately, there’s no need to manage batteries, so you can keep your flashlight on whenever you need. The game features some really dark locations, especially at night, like in the Stalker 2 prologue titled “There and Back Again.”

    The flashlight’s brightness is somewhat limited, so if you’re still finding it difficult to see in Stalker 2, consider adjusting some in-game display settings. Pause the game, go to the “Options” menu, and then navigate to the “Display” tab. From here, you can tweak the brightness, gamma, and HDR settings if applicable.

    Stalker 2 display settings for brightness and gamma adjustment

    (Image credit: GSC Game World)

    Increasing the brightness and gamma will certainly help you see better, although it may lead to a slightly washed-out appearance. Disabling HDR can make the game appear less vibrant but may help lighten shadows and dark sections a bit. If you’re encountering the message about compiling shaders in Stalker 2 every time you play, that’s a separate concern.

  • Who Should Receive the Sensors: Richter or Zotov in STALKER 2?

    Who Should Receive the Sensors: Richter or Zotov in STALKER 2?

    In STALKER 2, choosing whether to give the Sensors to Richter or Zotov involves aligning yourself with either the Stalker or Military factions. You can only pick one, which means you’re making a choice about who to support, albeit temporarily. While the decision doesn’t have an immediate dramatic effect, it does influence how you’ll proceed with a later mission and how you transition to a new section of the map.

    This choice arises after you determine whether to assist or eliminate Squint. Regardless of your choice, you’ll end up with the Sensors and then need to decide where to send them. While neither option significantly alters your path, there are some differences worth noting.

    Since this is an open-world game, you may have already had to choose between Dew or the Ninth during the Lost Boys mission. If you haven’t done that yet, we can guide you through your options.

    Hand the Sensors to Richter in STALKER 2

    If you decide to give the Sensors to Richter in STALKER 2, he will express concern that the Ward could misuse them against the Stalkers. He will also share that Solder is an IPSF tech located within the Sphere, a significant dome structure in the Zone. Your next step will be to find a way to access it.

    The main advantage of choosing Richter is that he provides you with a code to access the Sphere via a keypad-locked door, found at the end of a tunnel filled with acid spots. This seems like a preferable option compared to Zotov, who sends you to a heavily guarded side gate. However, both options ultimately lead to the same destination, just in reverse order—Zotov’s plan allows you to escape through the acid tunnel instead.

    This decision also influences your path later on when you need to track down Nestor, a name you learned from Solder. Richter will direct you to a Detention Center to gather information and obtain a key for the Northern Checkpoint, while Zotov will send you to the Western Checkpoint. Although both routes lead to the next part of the map, they involve different missions before reconnecting.

    Hand the Sensors to Zotov in STALKER 2

    If you give the Sensors to Zotov instead, he will also be aware that Solder is an IPSF tech working in the Sphere. The mission will play out similarly as you’ll infiltrate the Sphere to locate Solder.

    However, Zotov has a contact on the inside who can get you through a side entrance. This option requires more stealth than Richter’s route, but it will eventually lead you to escape through the same acid tunnel that Richter’s option utilizes. In essence, both routes are similar but taken from different angles based on your choice.

    After exiting the Sphere, you’ll have Nestor’s name. Zotov will advise you to check out the Pontoon Bridge Checkpoint in the west of the Lesser Zone, whereas Richter will inform you about the Northern Checkpoint. Both options will unlock new areas in the map, each requiring a unique mission before the storylines converge again.


    In summary, this choice affects your journey rather than fundamentally changing it and leads to another decision later about whether to shoot or incapacitate Solder. Personally, I think Richter’s option may be more advantageous since starting with the acid tunnel can make for an easier entry compared to sneaking through the main base. Still, the differences are minor and shouldn’t heavily influence your choice, so feel free to select the character you prefer.

  • Unlocking the Black Op 6 Piano Puzzle: A Complete Guide

    Unlocking the Black Op 6 Piano Puzzle: A Complete Guide

    The piano puzzle in Call of Duty: Black Ops 6 is located in your safe house. Solving it launches a series of challenges that ultimately unlock a basement, leading to the safe code for Black Ops 6. This marks the start of a chain of interconnected puzzles that will culminate in earning you $1000, allowing you to upgrade your base before diving into the main storyline.

    Solution to the Black Ops 6 Piano Puzzle

    (Image credit: Activision)

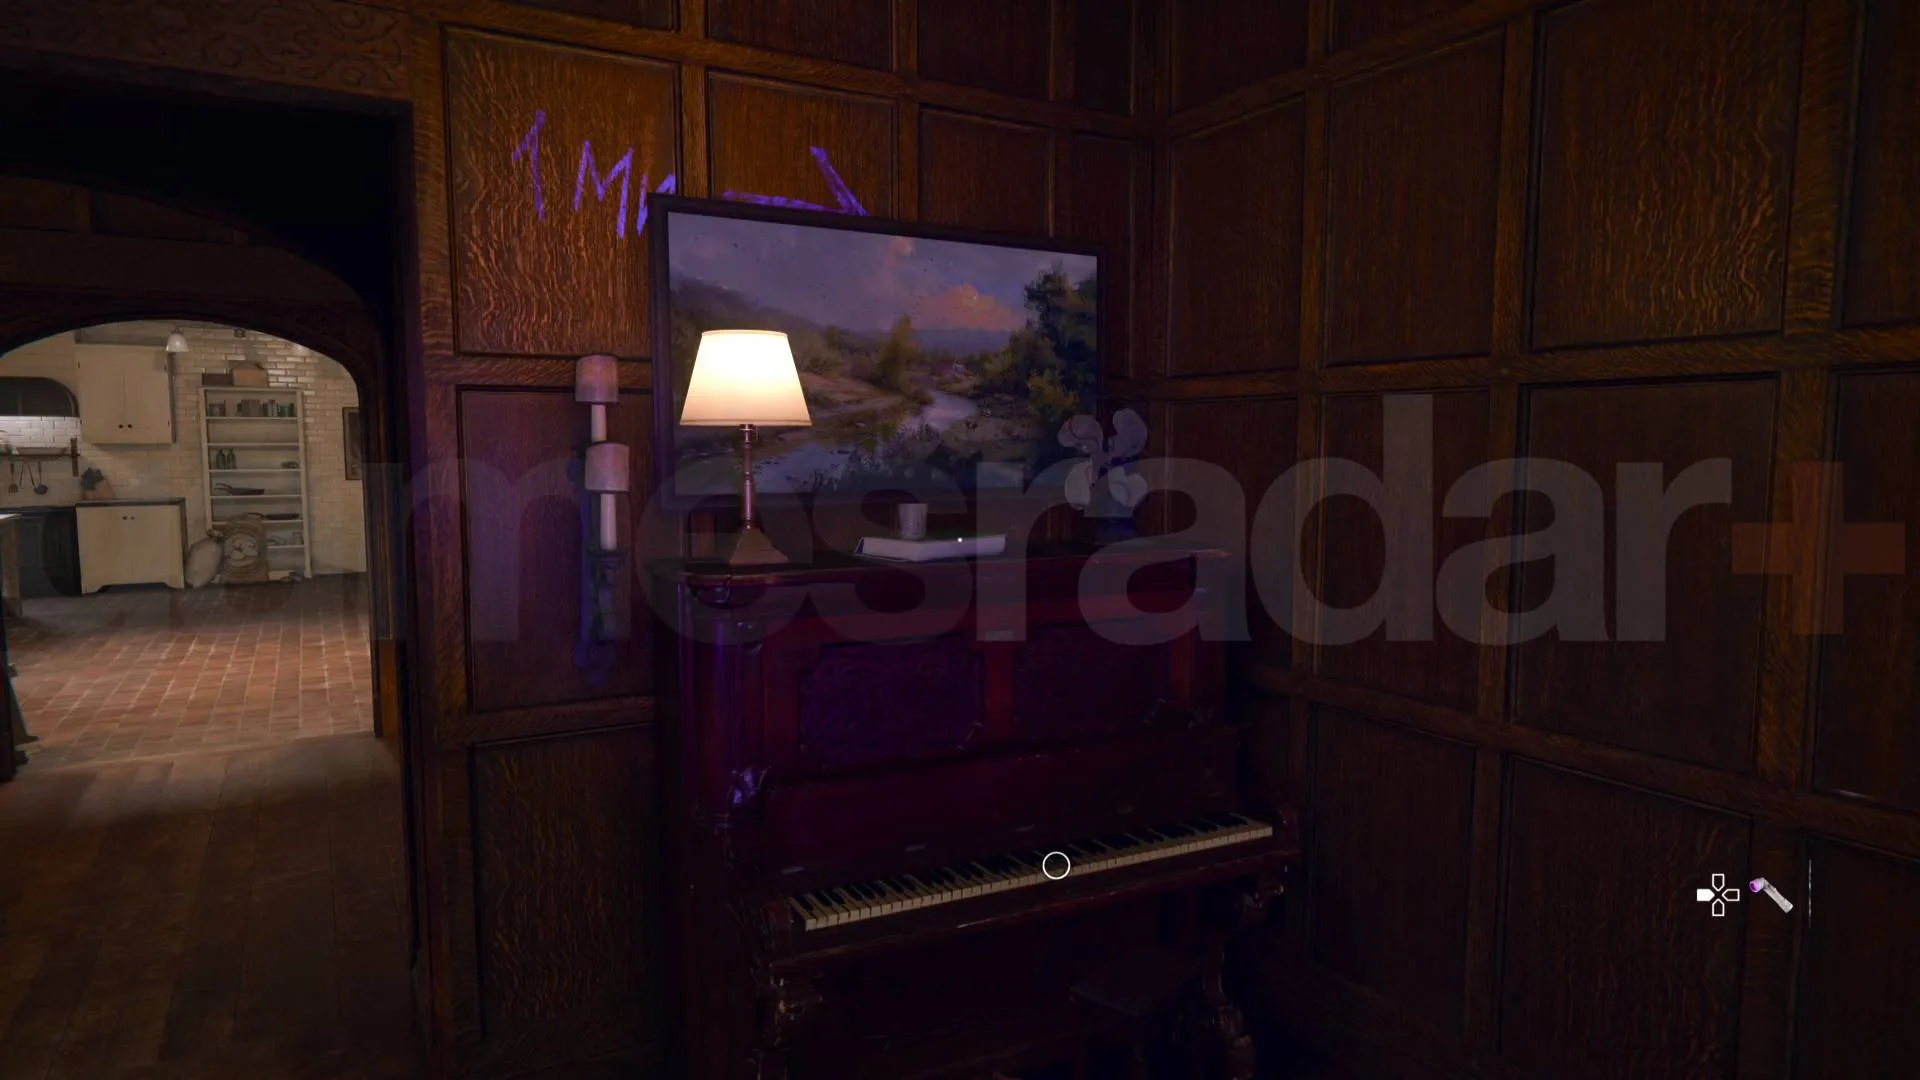
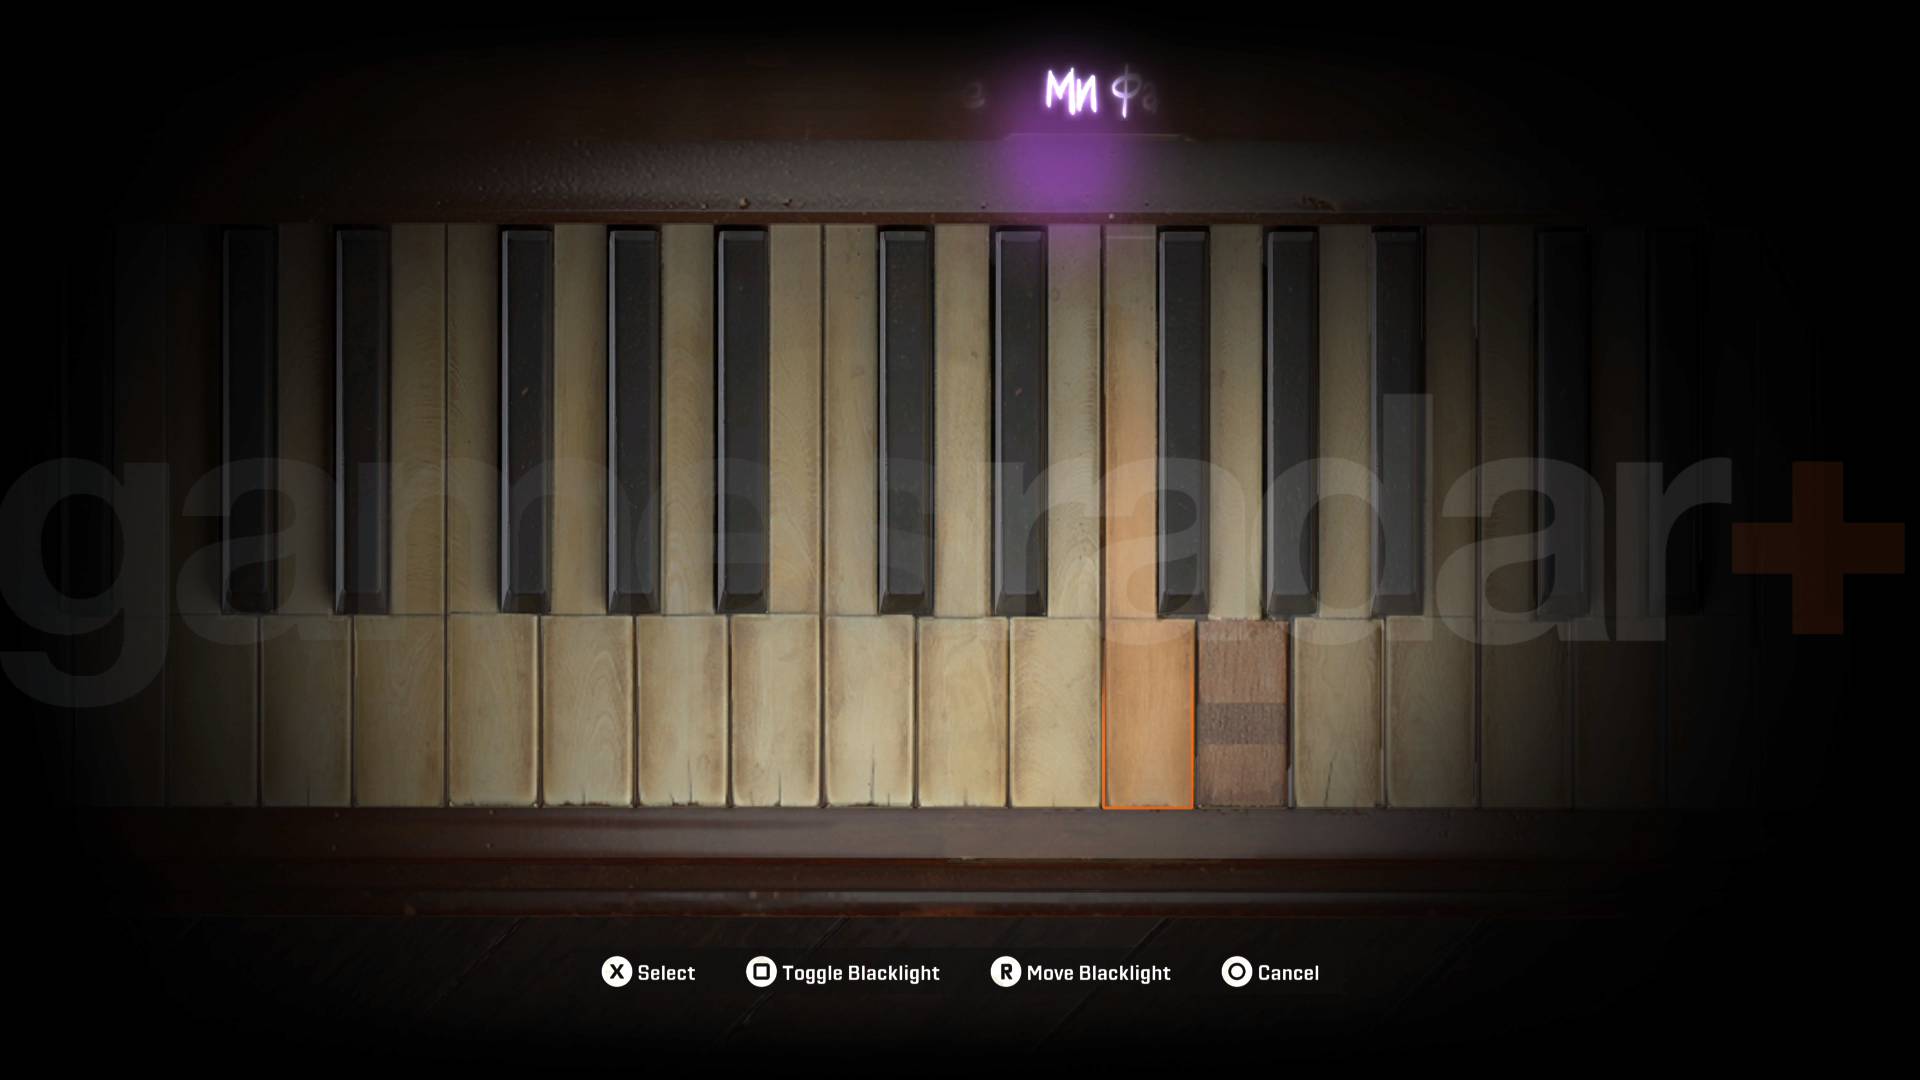
    The piano puzzle can be found on the ground floor of your safe house, specifically in a room opposite a white kitchen. Look for a blacklight sitting on a table, which is essential for unlocking the puzzle. The blacklight illuminates symbols and numbers on nearby walls, guiding you through the challenge.

    Black Ops 6 Piano Puzzle code

    (Image credit: Activision)

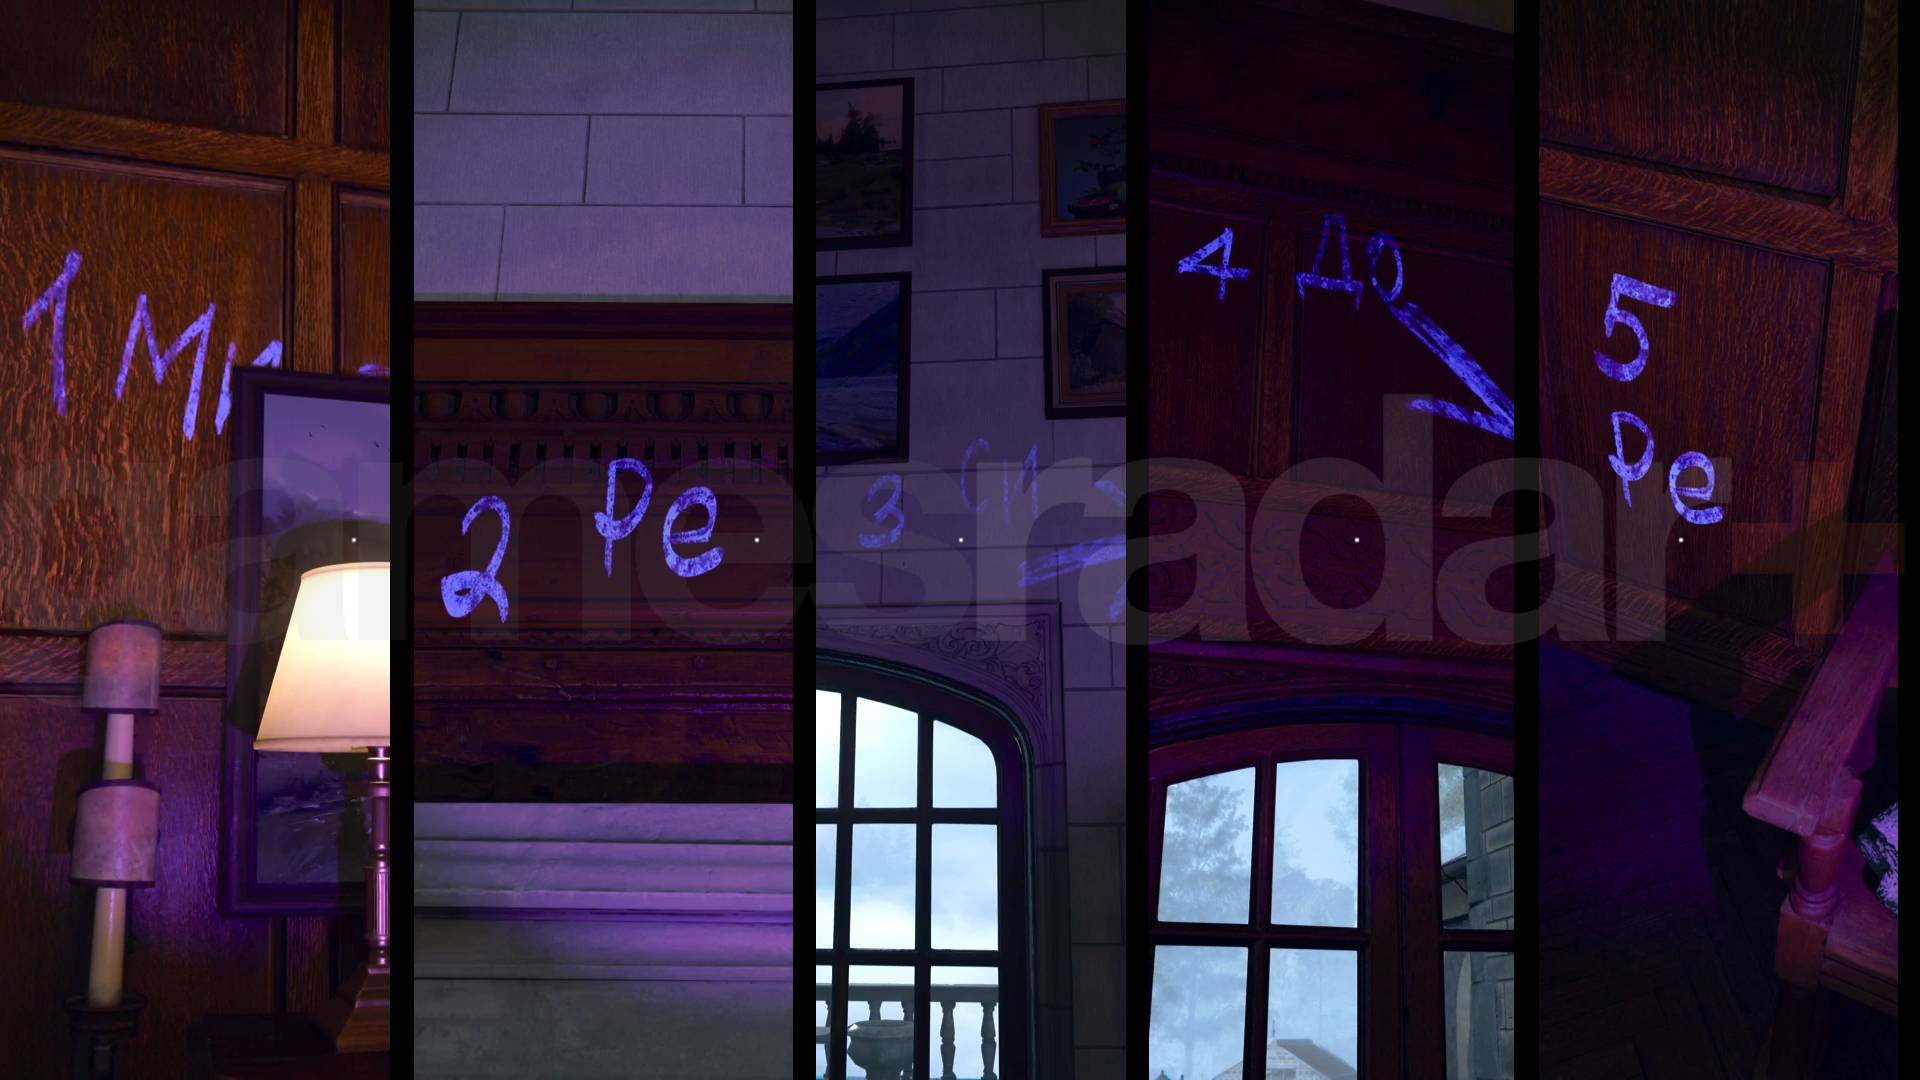
    Here are the symbols I discovered in the piano puzzle:

    1. Mn
    2. Pe
    3. CN
    4. Ao
    5. Pe

    Keep in mind that these symbols may vary for you, so be sure to use the blacklight to find the first symbol above the piano and follow the arrows for further clues.

    As you explore the piano, moving the blacklight will reveal symbols around the keyboard. The key to completing the Black Ops 6 piano puzzle is to locate and play the symbols in the order indicated on the wall.

    Black Ops 6 Piano Puzzle

    (Image credit: Activision)

    If you play the correct notes, a door near the piano will unlock, revealing stairs leading down. However, your progress will be halted until you activate the Black Ops 6 boiler located in the basement. Once that’s done, the new door will open, granting access to another puzzle where you’ll need to decipher the Black Ops 6 keypad code.

  • Top GPR 91 Build for Black Ops 6: Unleash Your Power!

    Top GPR 91 Build for Black Ops 6: Unleash Your Power!

    The ideal loadout for the Black Ops 6 GPR 91 takes advantage of the weapon’s excellent handling to create a setup that’s both user-friendly and surprisingly powerful at longer distances. This setup strikes a balance between a tactical approach and an aggressive style of play, catering to players who value stability and precision in their firearms. It’s easy to see why the GPR 91 has made it onto our list of top assault rifles in Black Ops 6.

    This GPR 91 configuration utilizes all eight attachment slots available through the Gunfighter Wildcard, enabling an even greater level of customization. This requires some leveling up, but the effort is definitely worthwhile. Below is the recommended GPR 91 loadout for Black Ops 6, along with tips on the best Perks and gear to complement it.

    Top GPR 91 Loadout in Black Ops 6

    (Image credit: Activision)

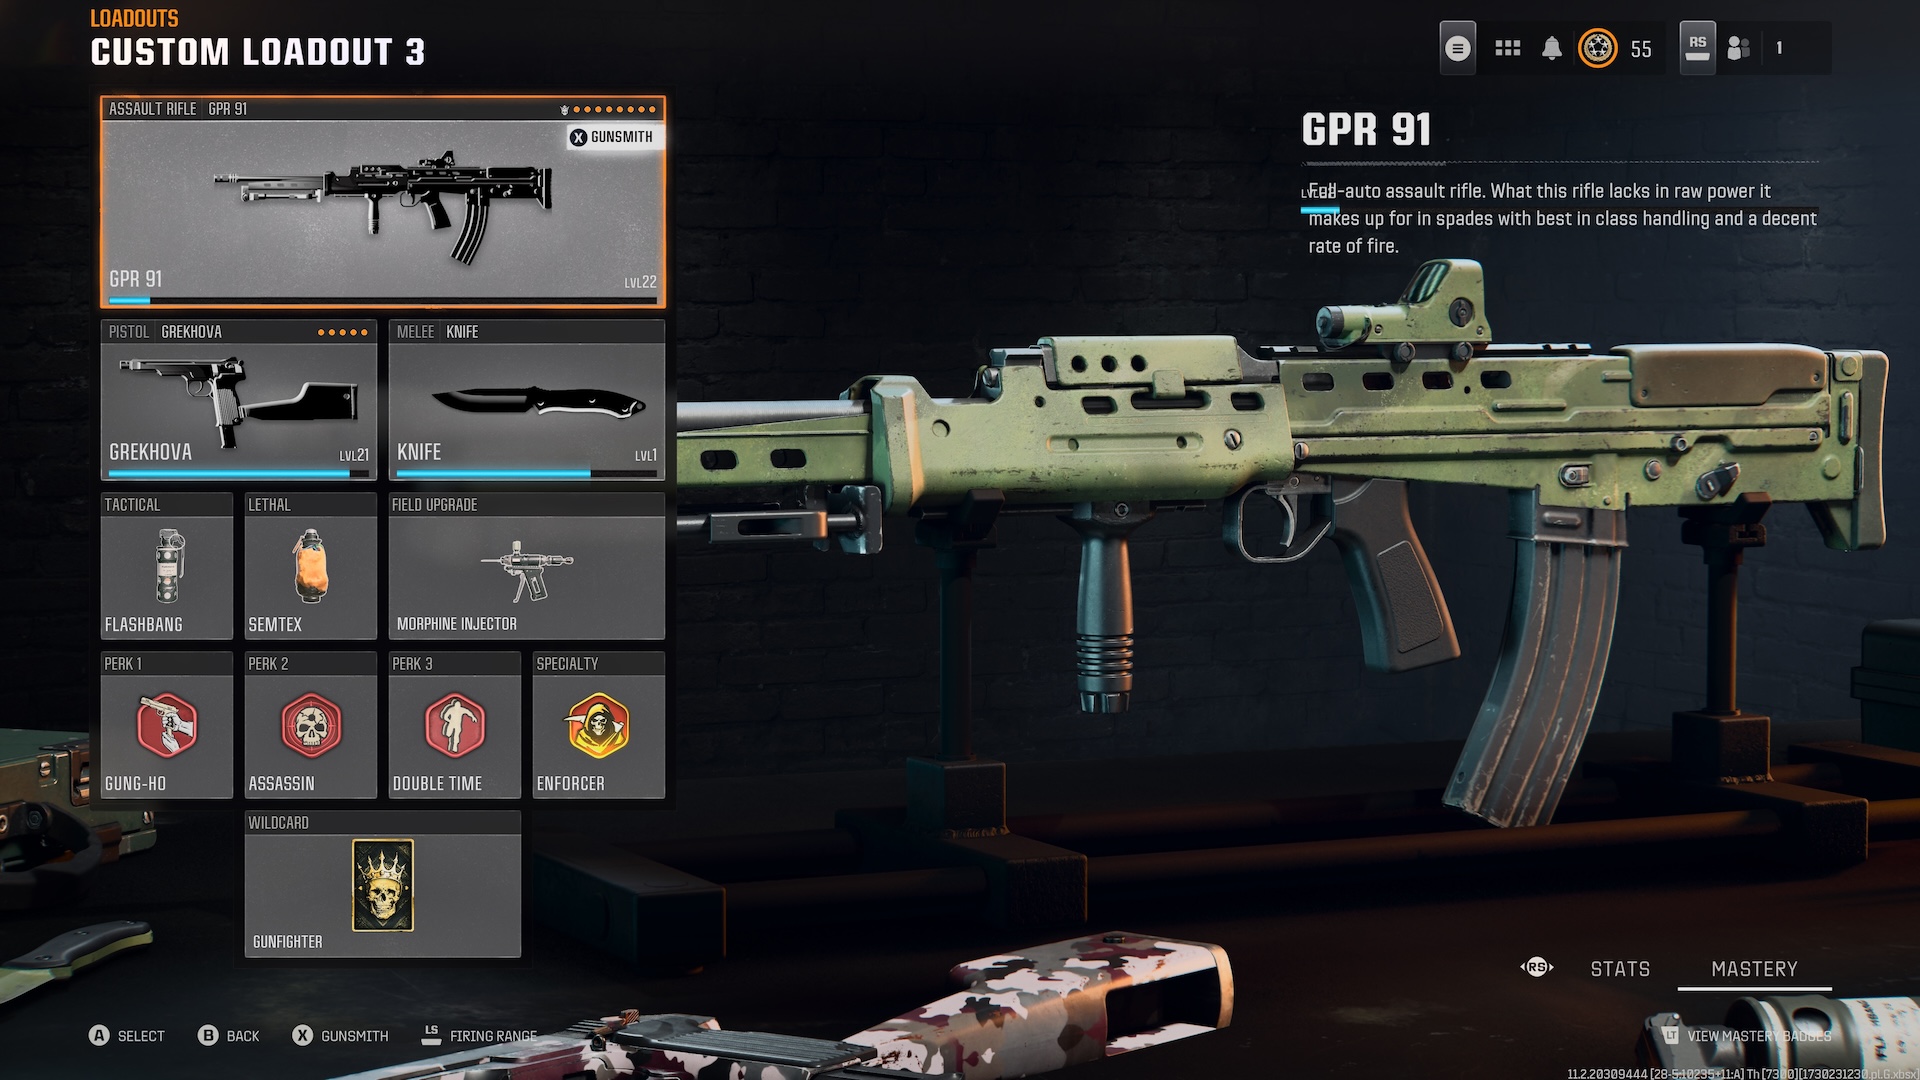
    Here are the recommended GPR 91 attachments (with eight slots thanks to the Gunfighter Wildcard):

    • Optic: OM3 ‘92 HOLO
    • Muzzle: Compensator
    • Barrel: Long Barrel
    • Underbarrel: Vertical Foregrip
    • Magazine: Extended Mag I
    • Rear Grip: Quickdraw Grip
    • Stock: Heavy Stock
    • Fire Mods: Nato Overpressured (switch to recoil Springs once the weapon is leveled up)

    This top-tier GPR 91 setup is designed to enhance both accuracy and firepower. The Long Barrel significantly increases damage range, while the Quickdraw Grip improves aim-down-sights (ADS) speed.

    The extended magazine is a game-changer, allowing you to spend less time reloading, which is especially important since the GPR 91 has a slower reload rate. Additionally, the Compensator offers excellent recoil control, further enhancing this assault rifle’s handling.

    Best GPR 91 Class in Black Ops 6

    Best GPR 91 class in Black Ops 6

    (Image credit: Activision)
    • Secondary: Grekhova
    • Melee: Knife
    • Tactical Gear: Flashbang
    • Lethal Gear: Semtex
    • Field Upgrade: Morphine Injector
    • Perks: Gung-Ho, Assassin, Double Time
    • Specialty: Enforcer
    • Wildcard: Gunfighter

    This GPR 91 loadout pairs with the Grekhova as your sidearm. This fully automatic pistol can be modified for impressive hip-fire accuracy by using the Weighted Stock. Here are the recommended attachments for the Grekhova:

    • Muzzle: Compensator
    • Barrel: Long Barrel
    • Magazine: Extended Mag I
    • Rear Grip: Assault Grip
    • Stock: Weighted Stock

    The Flashbang proves to be as effective as ever in Black Ops 6 and is often involved in daily challenges. While it might not be immediately obvious, the Morphine Injector is a fun tool that allows you to enter last stand mode upon being killed. If you manage to take down an enemy while in this state, you will revive yourself, which can catch opponents off guard.

    For Perks, choose Gung-Ho, Assassin, and Double Time. This combination unlocks the Enforcer Specialty, providing a temporary boost to speed and health regeneration. The Gunfighter Wildcard is critical here, as it lets you add an impressive eight attachments to the GPR 91. This flexibility significantly enhances your stats and gives you plenty of room to try out different configurations. Don’t forget to equip a melee weapon of your choice. Although the Grekhova is very effective, it’s wise to have a silent option available when needed.

  • Top Assault Rifles in Black Ops 6 You’ll Want to Try

    Top Assault Rifles in Black Ops 6 You’ll Want to Try

    The top assault rifles in Black Ops 6 are designed to give players a perfect blend of stability and recoil control, allowing them to effectively engage targets from a distance. These weapons also offer versatility, making it easy for players to adapt to various combat scenarios. Some assault rifles provide a user-friendly experience, helping newcomers master new movement mechanics and improve their shooting accuracy. Others require a bit more practice to harness their full potential. If you’re aiming to use the best firearms in Black Ops 6, you’ll find that many of the finest options are assault rifles.

    Choosing an assault rifle, often referred to as an AR, is a reliable strategy. Currently, they all appear quite effective, even when stacked against the rapid-firing submachine guns in the game. This effectiveness stems from their greater firepower, which can become devastating in mid-to-long-range encounters when paired with the right attachments. Here’s a look at the leading ARs in Black Ops 6, along with tips on the optimal attachments for each one.

    Black Ops 6 XM4

    (Photo credit: Activision)

    The Black Ops 6 XM4 is often seen as the most well-rounded weapon in the game. This perception comes from the fact that it’s typically the first gun players try, leading to significant familiarity. It offers an impressive balance of accuracy and firepower. The XM4’s manageable recoil allows for easy handling, and while it might not hit as hard as some rivals, its overall versatility makes it a top pick.

  • Top Loadouts and Weapons for Black Ops 6 You Need to Try

    Top Loadouts and Weapons for Black Ops 6 You Need to Try

    The top guns and loadouts in Black Ops 6 involve selecting the best weapons and combining them with the ideal attachments to enhance their performance. Pairing these weapons with suitable Perks is key to creating an effective playstyle. Players are actively exploring the game’s mechanics and identifying which weapons stand out amongst the large selection available. This iteration of the game appears to present a more balanced experience, featuring a wider range of usable weapons than ever before. Nonetheless, a handful of standout weapons have captured our attention, and we’ve dedicated time to leveling them up and testing various builds.

    To maximize the effectiveness of the leading guns in Black Ops 6, players must invest time in upgrading each weapon with the appropriate attachments. To make things easier, we’ve compiled a list of the five best firearms to use now that the game has launched.

    Best Black Ops 6 XM4 Loadout

    Starting off with one of the first weapons you’ll likely get your hands on in Black Ops 6, the XM4 is incredibly well-balanced and adaptable. Its versatility makes it ideal for testing in multiple game modes. With a solid mix of mobility, handling, and accuracy, the XM4 excels in mid-range combat. Below are the recommended attachments to elevate the XM4’s performance.

    Recommended XM4 Attachments:

    • Muzzle: Compensator
    • Barrel: Long Barrel
    • Underbarrel: Vertical Foregrip
    • Rear Grip: Quickdraw Grip
    • Stock: Light Stock

    For backup, consider carrying the 9MM PM Pistol, which is excellent for finishing off opponents in case you run low on ammo. Pair this with the Omnimovement ability for effective last shots. Here are the attachments for the pistol:

    Recommended Pistol Attachments:

    • Muzzle: Ported Compensator
    • Barrel: Reinforced Barrel
    • Magazine: Extended Mag
    • Laser: Fast Motion Laser
    • Fire Mods: 9X18MM Makarov FMJ

    In your loadout, include Concussion Grenades, a Spring Mine, and Semtex. Choose the Perks Dexterity, Assassin, and Double Time to unlock the Enforcer Specialty. By opting for the Tactical Expert Wildcard, you can add two extra Concussion Grenades to your inventory.

    Best Black Ops 6 KSV Loadout

    Next, let’s discuss another excellent option in Black Ops 6: the KSV. This SMG shines with impressive firepower and a fast rate of fire, making it perfect for aggressive run-and-gun tactics that leverage the game’s advanced movement mechanics. The Morphine Launcher is a fun addition as it allows you a last stand when downed. Here are the ideal attachments for the KSV.

    Recommended KSV Attachments:

    • Muzzle: Muzzle Break
    • Barrel: Long Barrel
    • Underbarrel: Vertical Foregrip
    • Magazine: Flip Mag
    • Rear Grip: Quickdraw Grip
    • Stock: Infiltrator
    • Laser: Strelok Laser
    • Fire Mods: Soviet Overpressured

    For your sidearm, the fully automatic Grekhova Pistol is also among the best weapons in the game. Here’s how to set it up:

    Recommended Grekhova Attachments:

    • Muzzle: Compensator
    • Barrel: Long Barrel
    • Magazine: Extended Mag I
    • Rear Grip: Assault Grip
    • Stock: Weighted Stock

    Continue your build with the Stim Shot to stay mobile, and carry Semtex as your lethal equipment along with a Knife for emergencies. For Perks, select Gung-Ho, Assassin, and Double Time to access the Enforcer Specialty. Utilizing the Gunfighter Wildcard allows you to equip eight attachments on the KSV.

    Best Black Ops 6 AK-47 Loadout

    The AK-74 is another reliable assault rifle worth leveling up. It’s solid, feels weighty, and is stable in combat. By selecting the proper attachments, you can enhance its damage range and mobility. Here’s how to set up the AK-74:

    Recommended AK-74 Attachments:

    • Optic: Prismatic Reflex
    • Muzzle: Compensator
    • Barrel: Long Barrel
    • Underbarrel: Vertical Foregrip
    • Magazine: Fast Mag II (Fast Mag I at lower levels)
    • Rear Grip: Quickdraw Grip
    • Stock: Light Stock
    • Laser: Steady Aim Laser

    Pair the AK-74 with the Grekhova Pistol. Use these attachments to manage recoil effectively:

    Recommended Grekhova Attachments:

    • Muzzle: Compensator
    • Barrel: Long Barrel
    • Magazine: Extended Mag I
    • Rear Grip: Assault Grip
    • Stock: Weighted Stock

    For your AK-74 loadout, include the Stim Shot and Semtex grenade along with the Spring Mine. Keep all Perks red to maintain the Enforcer Specialty, and consider using the Gunfighter Wildcard for additional attachments.

    Best Black Ops 6 AEK-973 Loadout

    The AEK-973 Marksman Rifle offers a more tactical playstyle, ideal for lining up headshots and moving cautiously from cover to cover rather than rushing in. Here’s how to optimize the AEK-973 build:

    Recommended AEK-973 Attachments:

    • Optic: Dobrych 4X
    • Muzzle: Muzzle Brake
    • Barrel: Long Barrel
    • Underbarrel: Vertical Foregrip
    • Magazine: Fast Mag I
    • Rear Grip: Quickdraw Grip
    • Stock: Heavy Stock
    • Fire Mods: Recoil Springs

    A suitable sidearm for this setup is the Grekhova Pistol. Make sure to safeguard your back with Spring Mines against potential flankers.

    Recommended Grekhova Attachments:

    • Muzzle: Compensator
    • Barrel: Long Barrel
    • Magazine: Extended Mag I
    • Rear Grip: Assault Grip
    • Stock: Weighted Stock

    Gear up with a Stim Shot, Semtex, and Spring Mine to complete the setup. The Perks to consider are Gung-Ho, Assassin, and Double Time for the Enforcer Specialty. Gunfighter is indispensable for increasing attachment options.

    Best Black Ops 6 Grekhova Pistol Loadout

    The Grekhova Pistol stands out as a formidable choice in many loadouts and can even serve as a primary weapon due to its versatility. Use these attachments to significantly enhance the weapon’s potential:

    Recommended Grekhova Attachments:

    • Muzzle: Compensator
    • Barrel: Long Barrel
    • Magazine: Extended Mag I
    • Rear Grip: Assault Grip
    • Stock: Weighted Stock

    The Weighted Stock is especially important, transforming the Grekhova into an extremely accurate hip-fire weapon. Start with a Stim Shot, Morphine Injector, and the right Perks for the Enforcer Specialty.

    Best Black Ops 6 Jackal PDW Loadout

    During the beta, players quickly recognized the Jackal PDW as one of the top guns to use. Its speed and adaptability perfectly blend with the new movement mechanics. It can be optimized for quick engagements or mid-range combat. Below is our recommendation for close-range dominance, but for comprehensive details, refer to our complete Jackal PDW build.

    Recommended Jackal PDW Attachments:

    • Muzzle: Compensator
    • Barrel: Long Barrel
    • Underbarrel: Ranger Foregrip
    • Rear Grip: Commando Grip
    • Stock: Balanced Stock

    Include the GS45 Pistol for moments when you need a quick switch. The pistol allows for extensive customization, helping in tight situations.

    Recommended GS45 Attachments:

    • Optic: Accu-Spot Reflex
    • Muzzle: Compensator
    • Barrel: Reinforced Barrel
    • Magazine: Fast Mag II (Fast Mag I at lower levels)
    • Rear Grip: Quickdraw Grip
    • Fire Mods: Rapid Fire

    Extra gear should include Stim Shot, Semtex, Assault Pack, and a Knife for melee combat. Focus on the Enforcer setup with Perks like Assassin, Gung-Ho, and Double Time, enhanced by Perk Greed for additional bonuses.

    Best Black Ops 6 Ames 85 Loadout

    The Ames 85 is a superb all-around assault rifle that’s quickly made its mark in Black Ops 6. It’s particularly effective at mid-range, allowing players to position themselves carefully and take aim at enemies.

    Recommended Ames 85 Attachments:

    • Optic: Pinpoint Holoscout
    • Muzzle: Compensator
    • Barrel: Long Barrel
    • Underbarrel: Vertical Foregrip
    • Rear Grip: Quickdraw Grip

    For your sidearm, the GS45 Pistol remains a solid choice, offering dependable performance when the Ames 85 might be too bulky for close encounters.

    Recommended GS45 Attachments:

    • Muzzle: Ported Compensator
    • Barrel: Reinforced Barrel
    • Magazine: Fast Mag II (Fast Mag I at lower levels)
    • Rear Grip: Quickdraw Grip
    • Fire Mods: Rapid Fire

    For the remaining loadout, opt for a Flashbang, Semtex, and an Assault Pack. A knife can facilitate faster movement, so include that in your gear. Choose Perks like Assassin, Dexterity, and Bankroll while enabling Perk Greed for one additional selection—Ghost is a great option.

    Best Black Ops 6 SVD Loadout

    Arguably the best sniper build currently is with the SVD, which is lightweight and excels in mid-range skirmishes. With this gun, players can maneuver around to spot enemies and take them down efficiently. It has high damage potential, capable of one-shotting targets in the upper torso or head.

    Here are the ideal attachments for the SVD:

    Recommended SVD Attachments:

    • Muzzle: Muzzle Break
    • Barrel: Long Barrel
    • Magazine: Fast Mag II (Fast Mag I at lower levels)
    • Comb: Quickdraw Riser
    • Stock: Heavy Stock

    Mobility is vital in this setup, so consider a secondary weapon like the Marine SP shotgun for close-quarters encounters. Here’s how to set it up:

    Recommended Marine SP Attachments:

    • Muzzle: Full Choke
    • Barrel: Combat Barrel
    • Underbarrel: Vertical Foregrip
    • Stock: Quickdraw Stock
    • Fire Mods: 12 Gauge Slug

    For sniper support gear, take Concussion Grenades and Thermo Grenades, along with the Acoustic Amp to enhance audio cues from enemy movements. As for Perks, combine Ghost, Tracker, and Vigilance to unlock the Recon Specialty, and include Overkill for shotguns as your secondary.

    Best Black Ops 6 C9 Loadout

    Lastly, consider the C9 submachine gun, tailored more for mid to close-range combat. This weapon provides excellent stability, making it suitable for players who are new to the game.

    Here’s our recommended loadout for the C9:

    Recommended C9 Attachments:

    • Optic: Remuda Mini Reflex
    • Barrel: Gain-Twist Barrel
    • Underbarrel: Vertical Foregrip
    • Rear Grip: Quickdraw Grip
    • Stock: Infiltrator Stock

    While the C9 is impressive on its own, don’t forget to have the GS45 pistol ready for backup if you ever find yourself needing a quick switch. Below are recommended attachments for the pistol, along with suggested gear and Perks.

    Recommended GS45 Attachments:

    • Muzzle: Ported Compensator
    • Barrel: Reinforced Barrel
    • Magazine: Fast Mag II (Fast Mag I at lower levels)
    • Rear Grip: Quickdraw Grip
    • Fire Mods: Rapid Fire

    In terms of gear, include a Stim Shot, Semtex, and an Assault Pack. Opt for Enforcer Specialty through Perks such as Assassin, Gung-Ho, and Double Time. Utilizing Perk Greed can also provide additional opportunities for bonuses, ensuring you maintain an edge in gameplay. Incorporate a Knife in your melee slot for quick mobility around the map.

  • Unlocking the Safe Code for Black Ops 6: A Quick Guide

    Unlocking the Safe Code for Black Ops 6: A Quick Guide

    To find the safe code in Black Ops 6, you’ll first need to tackle a series of puzzles in your safe house. While it may not be obvious at the start, many tasks you encounter between missions are interconnected. Completing all of these tasks will unlock the final code you need. Here’s a breakdown of the process.

    Black Ops 6 Safe Code Guide

    While the code you’re after is technically obtained after solving one specific puzzle, it’s the result of a sequence of interconnected challenges. Here’s how to proceed:

    1. Solve the Piano Puzzle and Activate the Boiler: You can tackle these tasks in any order. However, do note that the boiler will unlock a door you encounter after the piano puzzle. Completing both will give you access to a secret basement.

    2. Access the Basement: Once inside, you’ll find a door that requires you to decrypt the keypad to continue.

    3. Hack the Computer: Open that door and you’ll need to hack a computer. This action will decode a message and unlock another door in the underground area.

    4. Pick the Lock: Behind the newly opened door, there’s a lock waiting to be picked. After doing so, you can enter another room where you’ll find a key for one final door.

    5. Radio Signal Puzzle: Behind this last door, you’ll discover the Radio Signal Puzzle. Here, you’ll need to tune into a specific radio frequency and use the received message to select various numbered objects, ultimately leading to the final safe code.

    Final Code

    The safe code for Black Ops 6 is 7218—at least, that was the combination for me. If it doesn’t work for you, make sure to go through the previous steps to determine your unique code.

    Once you have the code, enter it into the safe to unlock $1,000, allowing you to fully upgrade your safe house before moving on. You’ll also get the blueprint for the Case Cracker knife.

  • Top XM4 Loadout and Build for Black Ops 6

    Top XM4 Loadout and Build for Black Ops 6

    The optimal XM4 setup for Black Ops 6 leverages the weapon’s stability for mid to long-range combat. By selecting the appropriate attachments, you can enhance handling and aim down sights (ADS) speed, making it competitive with fast-firing SMGs like the Black Ops 6 C9, which currently dominate the game. The XM4 is likely the first weapon you’ll become familiar with, so knowing how to customize it effectively is essential. It’s reliable enough to support you throughout your gaming sessions, though you can also consider the Black Ops 6 Ames 85 as another assault rifle option after you unlock it.

    This XM4 build is designed to extend the gun’s damage range, allowing it to deliver more powerful shots at greater distances. While it’s still early in the game’s lifecycle, the XM4 could become a standout choice among the best loadouts in Black Ops 6. To maximize its potential, pair it with a solid sidearm, preferably a pistol, and the right Tactical Gear to match your playstyle.

    Top XM4 Loadout for Black Ops 6

    (Image credit: Activision)

    Recommended XM4 Attachments:

    • Muzzle: Compensator
    • Barrel: Long Barrel
    • Underbarrel: Vertical Foregrip
    • Rear Grip: Quickdraw Grip
    • Stock: Light Stock

    This XM4 loadout is all about enhancing the assault rifle’s firepower, accuracy, and mobility. The Compensator helps control vertical recoil, while the Vertical Foregrip assists with horizontal recoil. The Long Barrel boosts the weapon’s damage range, and the Quickdraw Grip significantly improves ADS speed.

    The Light Stock increases overall mobility, enhancing hip fire movement speed and strafing. This setup allows you to engage enemies at a distance and quickly aim to deliver high-damage shots, even when they are further away.

    Top XM4 Class in Black Ops 6

    Black Ops 6 XM4 loadout build

    (Image credit: Activision)
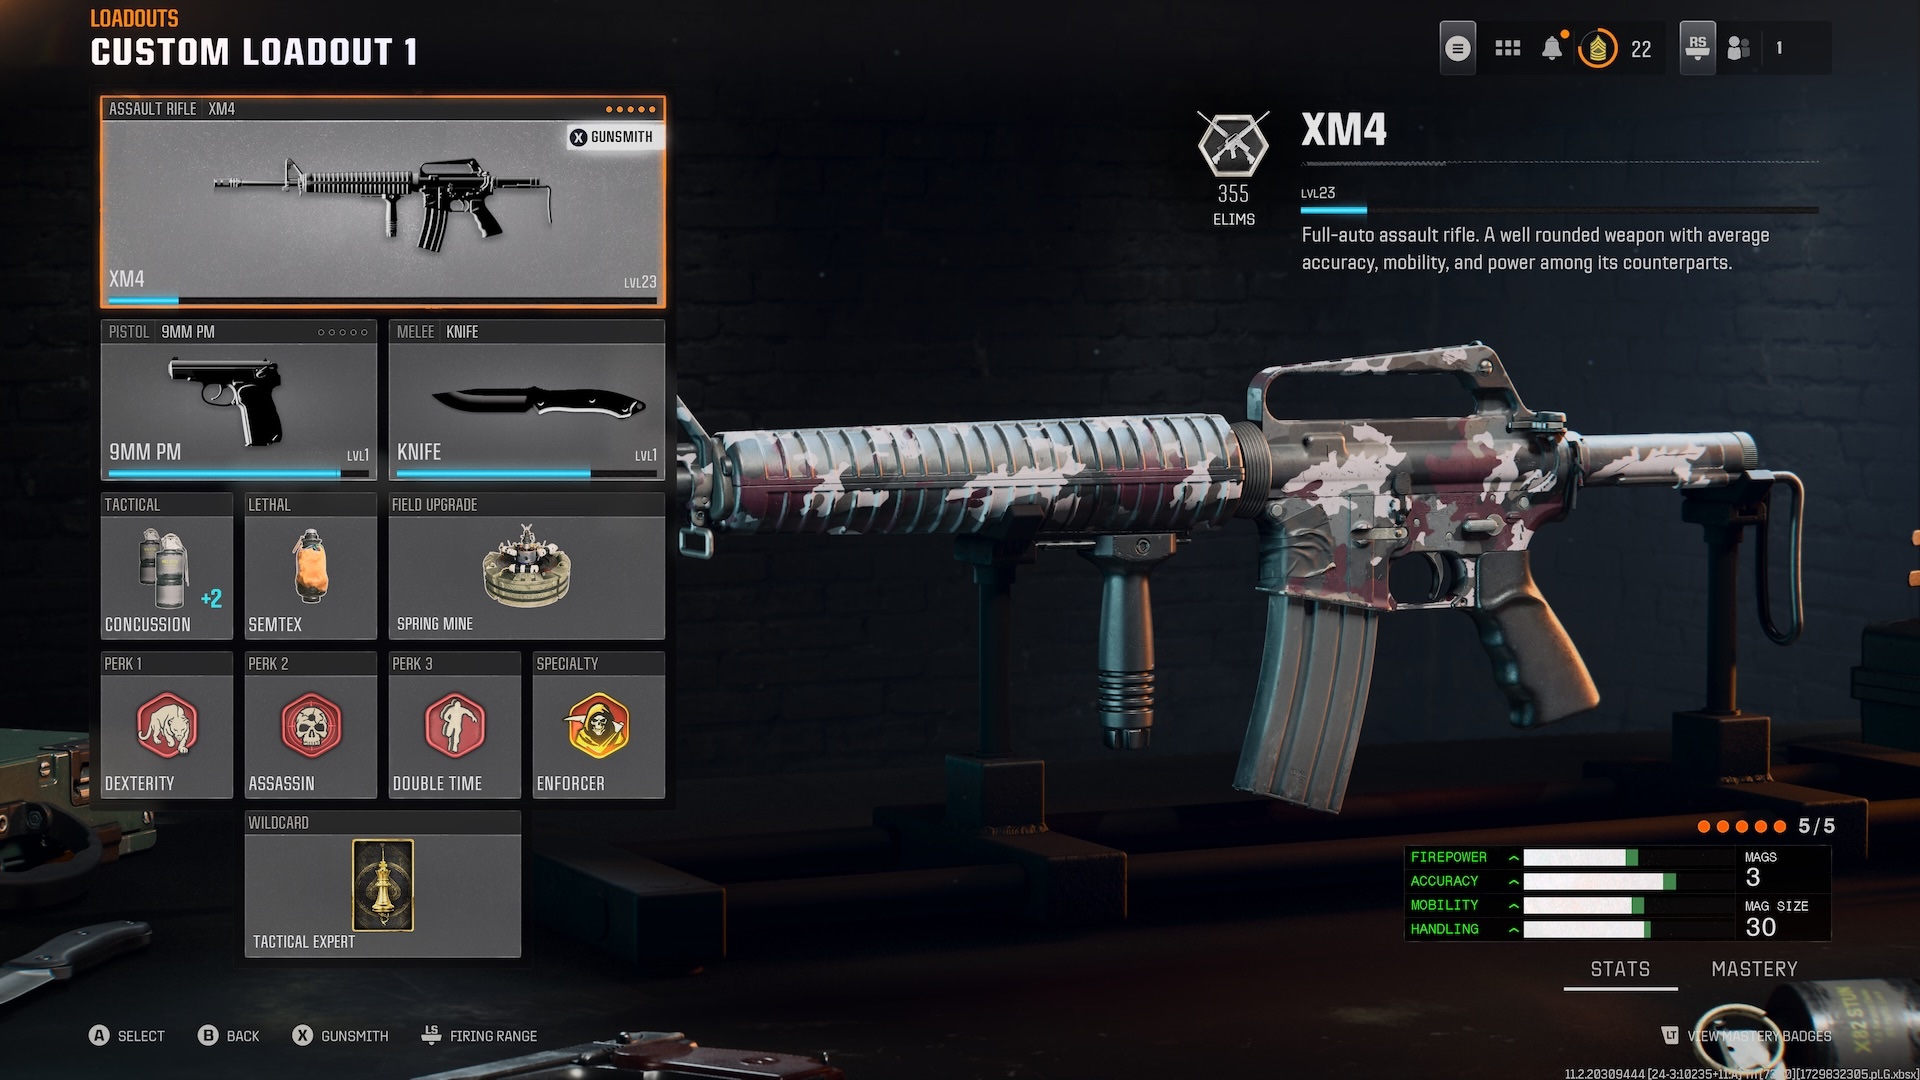
    • Secondary: 9MM PM
    • Melee: Knife
    • Tactical Gear: Concussion
    • Lethal Gear: Semtex
    • Field Upgrade: Spring Mine
    • Perks: Dexterity, Assassin, Double Time
    • Specialty: Enforcer
    • Wildcard: Tactical Expert / Gunfighter

    For this XM4 setup, it’s advisable to take the 9MM PM. This pistol can be quite effective, especially when enhanced with the right attachments to improve stability and ADS speed.

    Selecting your Tactical Gear is subjective; however, using the Concussion Grenade can help you earn extra XP, as it frequently appears in Daily Challenges. For Lethal Gear, Semtex is highly effective, as it allows you to stick it to enemies for guaranteed kills.

    As for Perks, choose Dexterity, Assassin, and Double Time. These perks will activate the Enforcer Specialty, which temporarily increases movement speed and health regeneration. The Spring Mine is an excellent kill tool; placing it in corridors or common hiding spots is a great strategy. Finally, if you choose the Tactical Expert Wildcard, you gain extra Tactical grenades. Once you reach level 33, you might consider the Gunfighter Wildcard for adding three more attachment slots to your primary weapon. For the XM4, think about including your favorite optic, the Fast Mag I for quicker reloads, and the Strelok Laser to improve accuracy when transitioning between hipfire and ADS.

  • Top Jackal PDW Loadout and Build for Black Ops 6

    Top Jackal PDW Loadout and Build for Black Ops 6

    The ultimate loadout for the Black Ops 6 Jackal PDW takes advantage of its speed and the new Omnimovement mechanic, allowing you to swiftly navigate the battlefield while hunting for kills. This SMG has already made a name for itself in the evolving meta, boasting a fantastic rate of fire, but it requires the right setup for optimal performance.

    With outstanding capabilities, the Jackal PDW stands as one of the top choices in Black Ops 6. It’s not only effective but also fun to use. When combined with appropriate Perks, it can enhance your gameplay significantly. Below, I’ll share my suggested attachments for the Jackal PDW, the best secondary weapon to accompany it in Call of Duty: Black Ops 6, and the ideal Perks and Equipment to choose.

    Top Black Ops 6 Jackal PDW Setup

    (Image credit: Activision)

    Recommended attachments for the Jackal PDW include:

    • Muzzle: Compensator
    • Barrel: Long Barrel
    • Underbarrel: Ranger Foregrip
    • Rear Grip: Commando Grip
    • Stock: Balanced Stock

    This optimal loadout for the Jackal PDW leverages the game’s new movement mechanics, giving you a speedy weapon choice. While you should generally try to close the distance with enemies, aiming down sights at medium range can also be effective if you target the upper body. Using the Commando Grip is crucial, as it enhances your Sprint to Fire Speed and Aim Down Sights (ADS) Speed. The Balanced Stock contributes to both your Movement Speed and Aim Walking Speed, making you a formidable opponent as you maneuver through various environments.

    The Ranger Foregrip further boosts your Movement Speed, while the Long Barrel increases your Damage Range, which can be advantageous on larger maps. Although this setup is not designed for long-range combat, the longer barrel keeps your weapon effective in open areas. For close-quarters maps like Derelict, consider swapping the Long Barrel for the Gain Twist Barrel or the Reinforced Barrel if you’ve reached the necessary level. Lastly, the Compensator is a perfect choice for lower levels, as it improves Vertical Recoil Control.

    Ideal Jackal PDW Class in Black Ops 6

    Best Jackal PDW build for Black Ops 6

    (Image credit: Activision)
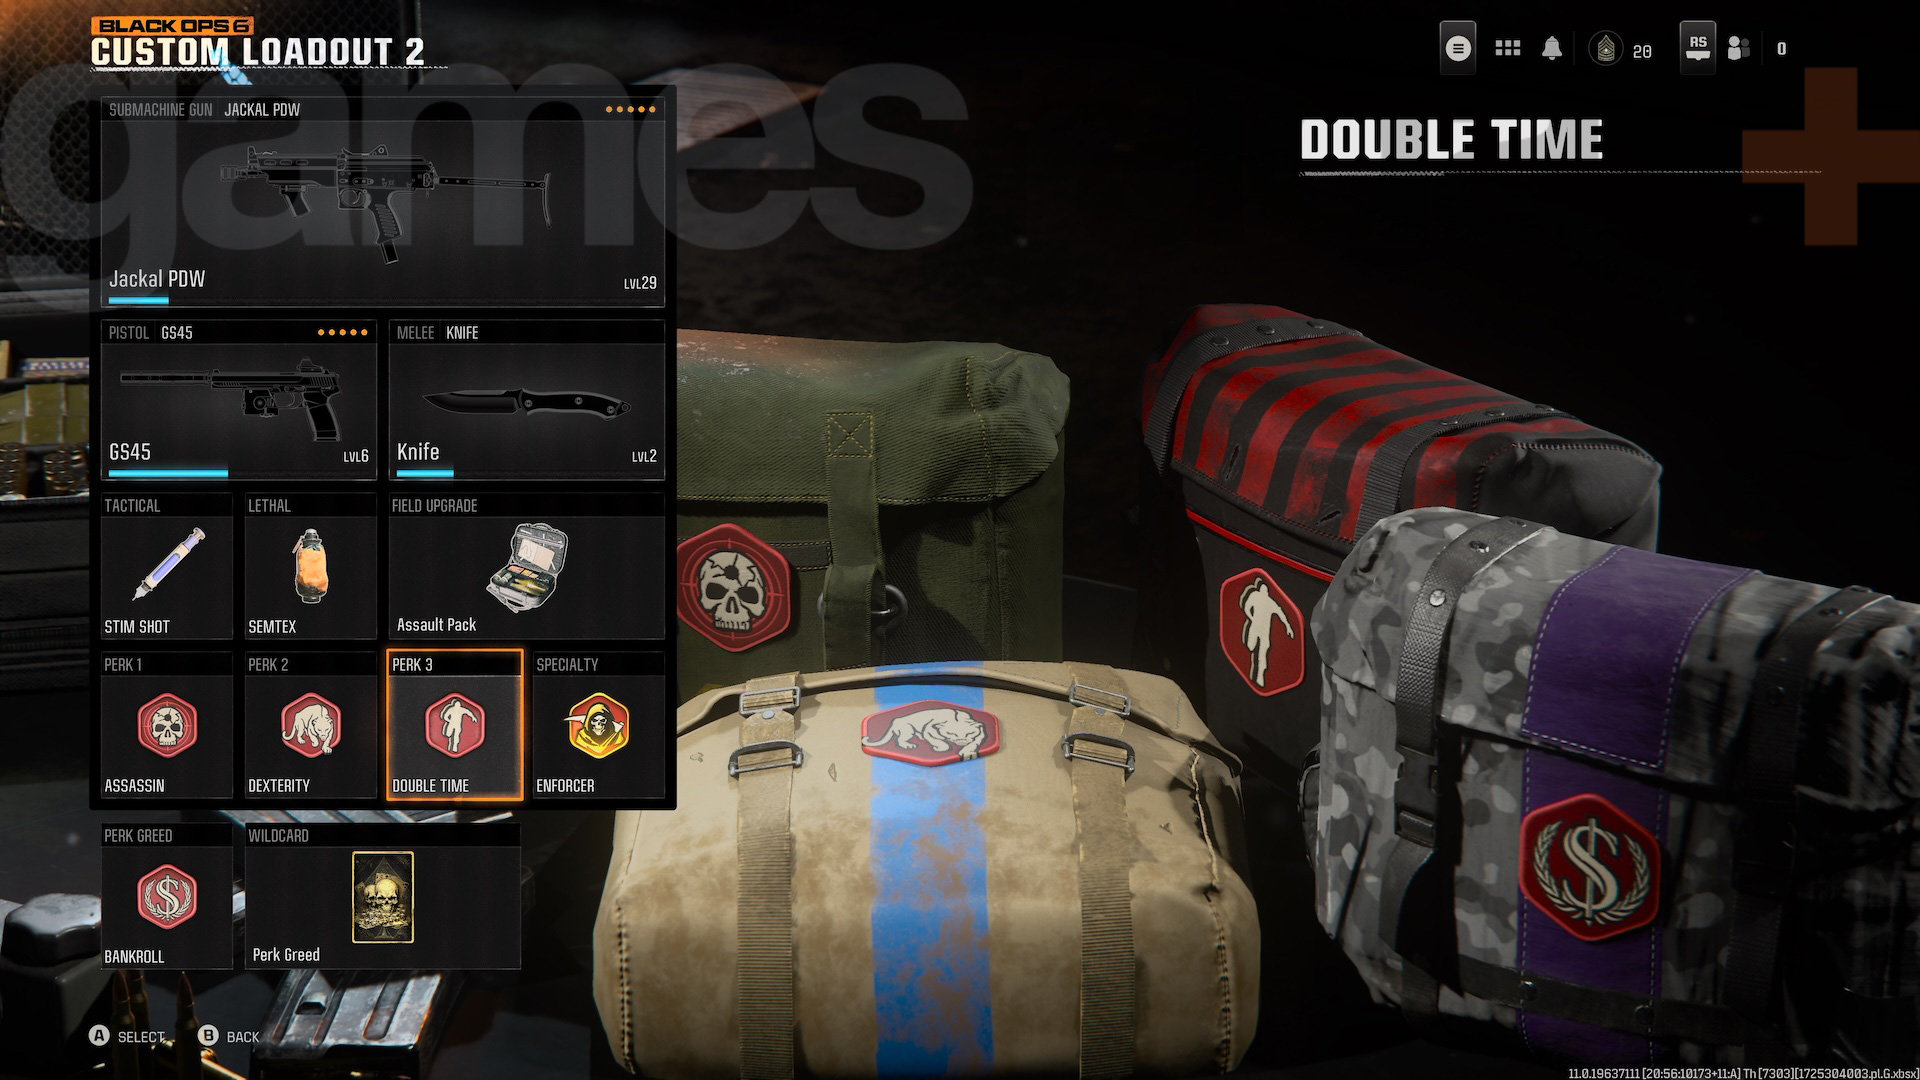
    • Secondary: GS45
    • Melee: Knife
    • Tactical Gear: Stim Shot
    • Lethal Gear: Semtex
    • Field Upgrade: Assault Pack
    • Perks: Assassin, Dexterity, Double Time, Bankroll (Perk Greed)
    • Speciality: Enforcer

    To complement your Jackal PDW, equip the GS45 handgun and a Knife. These weapons provide quick options for close encounters, especially since the Jackal can use up ammunition rapidly. The GS45 is suitable for the tight ranges typical of SMG battles, while the knife helps increase your movement speed.

    As for equipment, the Stim Shot is highly effective for healing after skirmishes, letting you re-enter the battle quickly and catch opponents off-guard. Semtex is excellent for dealing with players holding back, along with sticking enemies. The Assault Pack is beneficial for replenishing ammo when you run low, making it a must-have in your setup.

    For perks, go with Assassin, Dexterity, and Double Time. This combination unlocks the Enforcer Speciality, granting you a temporary boost to movement speed and health regeneration following a kill. This perk is particularly valuable when you’re up against multiple foes. You can also add Bankroll using the Perk Greed Wildcard; alternatively, Ghost can be used instead of Bankroll for a stealthier approach away from enemy radar.

    Also, make sure to check out the latest news about Black Ops 6 Zombies to keep up with what else the game offers.

  • Ultimate C9 Loadout and Build for Black Ops 6

    Ultimate C9 Loadout and Build for Black Ops 6

    The ideal loadout for the Black Ops 6 C9 is designed for precision and effectiveness at mid-range. It offers a smooth, agile setup utilizing the best attachments for this submachine gun. To get the most out of the C9, it’s essential to combine it with the right perks, a suitable sidearm, and tactical gear.

    The C9 excels in mid to long-range combat, making it one of the top loadouts in Black Ops 6. When paired with the right perks, you’ll receive extra information on your minimap, making it easier to track and flank opponents before repositioning. Below, you’ll find our suggestions for the best attachments for the BO6 C9, as well as useful perks, field upgrades, and an ideal sidearm to complement this setup.

    Top C9 Loadout for Black Ops 6

    (Image credit: Activision)

    Recommended C9 Attachments:

    • Optic: Remuda Mini Reflex
    • Barrel: Long Barrel
    • Underbarrel: Vertical Foregrip
    • Magazine: Fast Mag II
    • Rear Grip: Quickdraw Grip

    This C9 setup offers a bit more range compared to other SMGs like the Black Ops 6 Jackal. While maintaining high mobility, the Long Barrel attachment allows you to engage enemies from further distances. The Fast Mag II supports quick aiming down sights (ADS), and the Quickdraw Grip enhances this even further. However, one drawback of the C9 is its notable horizontal recoil, making the Vertical Foregrip essential. Choose your preferred optic, and we recommend the Remuda Mini Reflex for this loadout.

    With the C9, your strategy should focus on swift positioning, scouting for enemies, and eliminating them with precision. Instead of aggressive close-quarter tactics, this setup promotes a more strategic approach to target selection. You can still utilize Omnimovement to navigate through spaces and avoid danger effectively.

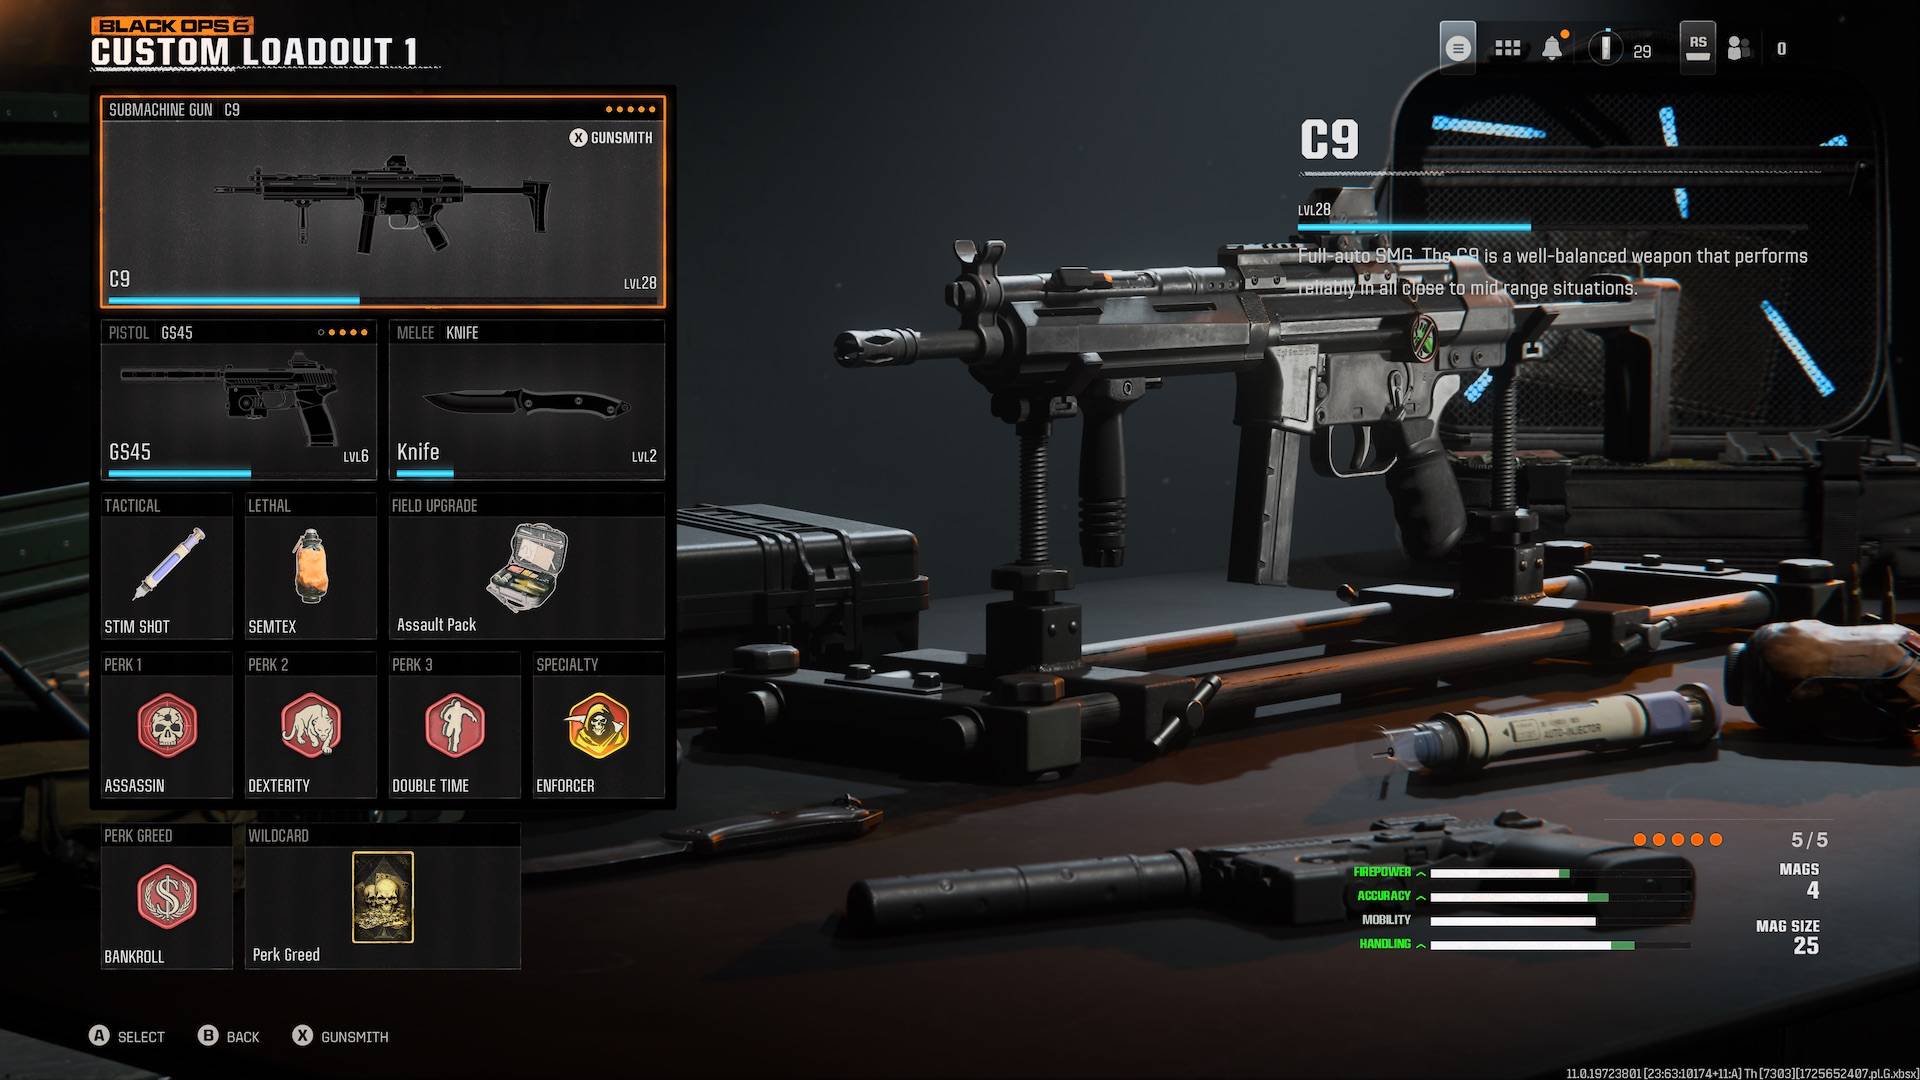
    Optimal C9 Class in Black Ops 6

    Best C9 class in Black Ops 6

    (Image credit: Activision)
    • Secondary: GS45
    • Melee: Knife
    • Tactical Gear: Stim Shot
    • Lethal Gear: Semtex
    • Field Upgrade: Assault Pack
    • Perks: Assassin, Dexterity, Double Time, Bankroll (Perk Greed)
    • Specialty: Enforcer

    To round out this C9 loadout, consider using the GS45 as your secondary weapon. This pistol is perfect for close encounters when reloading your primary weapon is necessary, offering reliability and power. Once you unlock it, attach the Quickdraw Grip to enhance your aim speed significantly.

    For tactical gear, bring a Stim Shot to heal yourself after taking damage or to boost before entering a conflict. The Semtex grenade is a classic choice that’s useful for many objectives and challenges. The Assault Pack is invaluable for resupplying ammunition and gear after securing kills.

    For perks, go with a combination of Assassin, Dexterity, and Double Time. This setup allows you to unlock the Enforcer Specialty, which gives you a temporary boost in speed and health recovery after each kill. If you can chain kills together, this will give you an edge in engagements. Finally, consider using Perk Greed with Bankroll as your additional perk to earn scorestreaks faster. Helicopters are particularly effective in the current map lineup.

    Keep an eye out for updates on Black Ops 6 Zombies as the game progresses!