الوسم: Four

  • How to Find All Four Wheels in Of Ash and Steel by Completing and Solving

    How to Find All Four Wheels in Of Ash and Steel by Completing and Solving

    In “Of Ash And Steel,” Greyshaft Island can be a dangerous place, and it’s common for valuable items to go missing. Early in your journey to the city, you’ll meet a man whose cart wheels are lost. Your task is to find all of them.

    Most of the wheels are close by, with one hidden a little further away. Without quest markers or a map, finding all the wheels can be challenging. Here’s what you need to know to locate every cart wheel and finish the Bad Neighborhood quest.

    Cart Wheel Location 1
    The first wheel is located under the broken stone bridge. After speaking with Radim, go right along the path, then turn left. Follow the trail to the bridge, cross it, and find a wooden plank at the end of the path. Walk across the plank to reach the broken stone bridge, where you’ll find the wheel resting on the broken stones. Return to Radim once you’ve collected it.

    Cart Wheel Location 2
    The second wheel is at a nearby Hobster camp. From Radim’s location, head northwest until you see the camp, surrounded by wooden defenses. Beware; Hobsters here are tough enemies. Lead some of them back to Radim, who will assist in defeating them. Afterward, pick up the wheel near the tent at the camp and check for other loot or a note before moving on to the next location.

    Tip: Make sure to land the final blow on the Hobsters to earn the most experience points.

    Cart Wheel Location 3
    The third wheel is outside a cave, close to the Hobster camp. Leave the camp heading north until you see a cave with a cart outside. The wheel is resting against the cart. Be cautious of another Hobster nearby, but you can avoid him, grab the wheel, and quickly leave.

    Cart Wheel Location 4
    The last wheel is farther out at a hermit’s house. Before heading there, buy a few bottles of rye from Radim to save time when you meet the hermit. Cross the wooden bridge on the right of Radim, then follow the path away from the abandoned village. Proceed past the ruins and a small graveyard until you find the hermit’s house near a tiny cemetery. Speak with him, and he will trade the wheel for bottles of rye. Return to Radim with the wheels to finish the quest.

  • How to Get All Four Photos for Lance: Completing and Solving

    How to Get All Four Photos for Lance: Completing and Solving

    Much of humanity was wiped out by ARC during the First Wave and in later events, either directly by the machines or from the long-lasting damage caused by their attacks. Although many lives were lost, the survivors in Speranza strive to keep the memories alive, and traces of people’s existence still remain above ground.

    Lance, the town’s pharmacist and top medical expert, wants to make his space feel more welcoming. He’s searching for inspiration from past times, especially from places like the Buried City, which has many intact homes and buildings. He hopes that a local pharmacy there might spark ideas for him.

    How to Document the Pharmacist’s Life

    Lance’s Life quest unlocks after finishing the previous quest called Espresso for Apollo, requiring you to revisit the Buried City.

    Your first step is to find Farmacia Arbusto in Piazza Arbusto. Look for a pharmacy with a green sign that says “Farmacia” and a green medical cross visible on the building.

    Note: This pharmacy also appears in an earlier quest called A Reveal In Ruins, where you can find the ESR Analyzer.

    Unlike typical entrances, you’ll need to break through the doors before entering. Once inside, go to the second floor. Interact with the three portraits hanging on the wall near the stairs for the first objective.

    Next, walk over to the piano in the room for your second task. Then, go into the next room and observe the flower pots sitting on the dresser, as well as the dining table beneath the staircase leading to the third floor. You need to document all four items by taking pictures.

    After completing these observations, extract and head back to Speranza. Talk to Lance to complete the quest. As a reward, you’ll earn a significant amount of experience points and three valuable medical items that are difficult to find without advanced medical facilities: a Defibrillator, a Surge Shield Recharger, and three Sterilized Bandages.

  • Four Hurt in Liverpool Parade Crash; Mayor Reports Severe Injuries

    Four Hurt in Liverpool Parade Crash; Mayor Reports Severe Injuries

    Certainly! Here’s a rewritten version of the provided content in American English, making it unique and free from plagiarism:


    Image Description:
    Police officers respond at the site where a vehicle drove into a group of Liverpool fans during a parade celebrating their team’s Premier League championship in downtown Liverpool on May 27, 2025. — Reuters


    Key Updates:

    • Mayor expresses hope for recovery: "We are hoping, of course, that they pull through," the mayor stated.
    • Casualties recorded: Nearly 50 individuals were injured when the car struck Liverpool supporters.
    • Massive turnout for the parade: The city was bustling with fans celebrating their team’s Premier League victory.

    On Tuesday, the mayor of Liverpool announced that four individuals are in critical condition in the hospital after a car crashed into a crowd of Liverpool fans during a Premier League title parade. He added, "We are hoping they will pull through."

    Officials believe the incident, which occurred in a crowded area of Liverpool on Monday, was isolated and not linked to terrorism. However, they haven’t disclosed how a man managed to drive into a celebrating crowd during the festivities.

    Footage shared on social media captured a gray minivan driving through the closed street, causing several people to be thrown into the air and at least four to be dragged beneath its wheels.

    As the vehicle came to a halt, furious fans surrounded it and began breaking the windows while police struggled to protect the driver.

    Later reports indicated that 20 people were treated at the scene, and an additional 27 were taken to the hospital, including some children.

    Metro Mayor Steve Rotheram informed the BBC, “There are still four people who are very, very ill in the hospital. We are hoping, of course, that they pull through.”

    With many people off work for the Spring Bank Holiday, officials estimated that around one million fans lined the 10-mile parade route to watch their team celebrate with the Premier League trophy from an open-top bus.

    Liverpool last claimed the league title during the COVID-19 pandemic, when public gatherings were not allowed due to lockdown measures.

    The crash occurred as the parade was wrapping up. A Reuters photographer observed emergency responders carrying victims on stretchers to ambulances in the vicinity.

    Police quickly identified and arrested a 53-year-old white British man from the Liverpool area approximately two hours after the incident.

    Former law enforcement officials and local politicians indicated that publicly disclosing the arrest was crucial to prevent social media speculation suggesting that the incident was a terrorist attack.

    "I was concerned that we needed to clarify the situation promptly," Mayor Rotheram explained to the BBC.

    “If there is a lack of information, we know that certain factions will attempt to escalate the situation by spreading misinformation.”

    This same police department was involved in the response to the tragic murder of three young girls in the nearby town of Southport last year, an incident that led to days of rioting fueled by online rumors regarding the suspect’s identity.

    Prime Minister Keir Starmer praised the emergency services for their quick actions, stating, “Everyone, especially children, should be able to celebrate their heroes without experiencing such horror.”


    Feel free to modify any part as needed!

  • Australia Floods Claim Four Lives, Thousands Left Stranded

    Australia Floods Claim Four Lives, Thousands Left Stranded

    Here’s a rewritten version of the content in American English, made unique and plagiarism-free:

    —

    Drone footage reveals a flooded area after heavy rains in Tinonee, New South Wales, Australia, on May 21, 2025. — Reuters

    SYDNEY: On Friday, authorities recovered the body of a man from a vehicle caught in floodwaters in southeastern Australia, bringing the death toll to four. This follows three days of relentless rain that cut off towns, swept away livestock, and obliterated homes.

    Police reported that the man was discovered near Coffs Harbour, approximately 550 kilometers (342 miles) north of Sydney. Search efforts are ongoing for another individual reported missing since the onset of the flooding earlier this week.

    Emergency services indicated that around 50,000 individuals remain isolated, while residents returning to their homes faced warnings about potential hazards.

    “Floodwaters can harbor contaminants, including vermin and snakes, so it’s crucial to evaluate those risks. There’s also the danger of electricity,” stated Damien Johnston, Deputy Commissioner of State Emergency Services, during a news conference.

    Video footage from television showed submerged intersections and street signs, with vehicles nearly entirely submerged, as rapidly rising waters overflowed riverbanks in the Hunter and Mid North Coast regions of New South Wales, Australia’s most densely populated state.

    Debris washed ashore from the floods, alongside lost and deceased livestock.

    Prime Minister Anthony Albanese was forced to postpone his planned visit to Taree, one of the most severely affected towns, due to the flooding.

    “We attempted to go through with the visit, but circumstances made it impossible, which I believe people can understand,” Albanese informed reporters from Maitland in the Hunter region.

    “Our thoughts are with the communities currently cut off. We are here to emphasize that you are not alone.” Australia has been experiencing increasingly severe weather patterns that some experts attribute to climate change. Following droughts and catastrophic wildfires at the end of the last decade, frequent flooding has devastated regions since early 2021.

    “What were once infrequent storms are now becoming the new standard—climate change is reshaping Australia’s weather patterns, one flood at a time,” commented Davide Faranda, a weather researcher at ClimaMeter.

    Disruptions in Sydney

    A wild weather system that unleashed approximately four months’ worth of rain over three days moved south towards Sydney on Thursday night, resulting in heavy rainfall, though the weather agency projected a decrease in intensity by Friday evening.

    Drone footage captures a flooded area in Tinonee, New South Wales, Australia, after heavy rains on May 21, 2025. — Reuters
    Drone footage captures a flooded area in Tinonee, New South Wales, Australia, after heavy rains on May 21, 2025. — Reuters

    Waterlogged rail tracks affected various suburban train lines in Sydney, including airport services, while Sydney Airport had to close two of its three runways for one hour Friday morning due to high winds, resulting in flight delays.

    The Warragamba Dam, which supplies 80% of Sydney’s drinking water, is currently operating at about 96% capacity and could overflow, officials reported.

    —

    This version maintains the original meaning while ensuring it is uniquely phrased and tailored in American English.

  • Chapter Four Guide: The Gate of Saint Jerome in Stone of Madness

    Chapter Four Guide: The Gate of Saint Jerome in Stone of Madness

    In the last chapter of The Stone of Madness campaign, The Gate of Saint Jerome, you encountered Shadow and learned about her tragic history. After Mother Superior found out about her love, Shadow was locked away in a cell with her infant until she passed away.

    You said goodbye to Shadow by either killing Mother Superior or giving her baby’s toy. In return, she handed you the emblem. However, it was damaged, and now you must find a great fire to fix it. This chapter marks the start of your quest for that fire. If you’re ready, the final part of the campaign lies ahead.

    How to Repair the Emblem

    Your first task in this chapter is to repair the emblem given to you by Shadow. To do this, you’ll need a strong fire. There are two potential fire sources: the central fire in The Cells or the kitchen oven in the Refectory. If you choose the fire in The Cells, a cutscene will trigger when you approach it, revealing that the fire has extinguished and an inmate is trapped there.

    First, talk to the Doctor about the situation. To free the inmate, use Alfredo’s Investigate skill to follow the tracks next to the jailed inmate. The tracks will lead you to a first-floor cell in the north, ending near a mirror. Interact with these tracks to unlock the barred door where the inmate is held.


    Once the inmate is free, press the button again to close the door. Next, go up to the second floor of the western section of The Cells and activate the switch. This will reignite the fire that the inmate was previously held near.

    Finally, activate the fire area, then hand over the emblem to either Eduardo or Agnes, and interact with the fire to finish your objective and trigger a cutscene.

    Alternatively, you can utilize the oven in the Refectory. However, to do this, you first need to secure a key from the friar working in The Great Wall area.

    Where to Find Three Moonshine Barrels

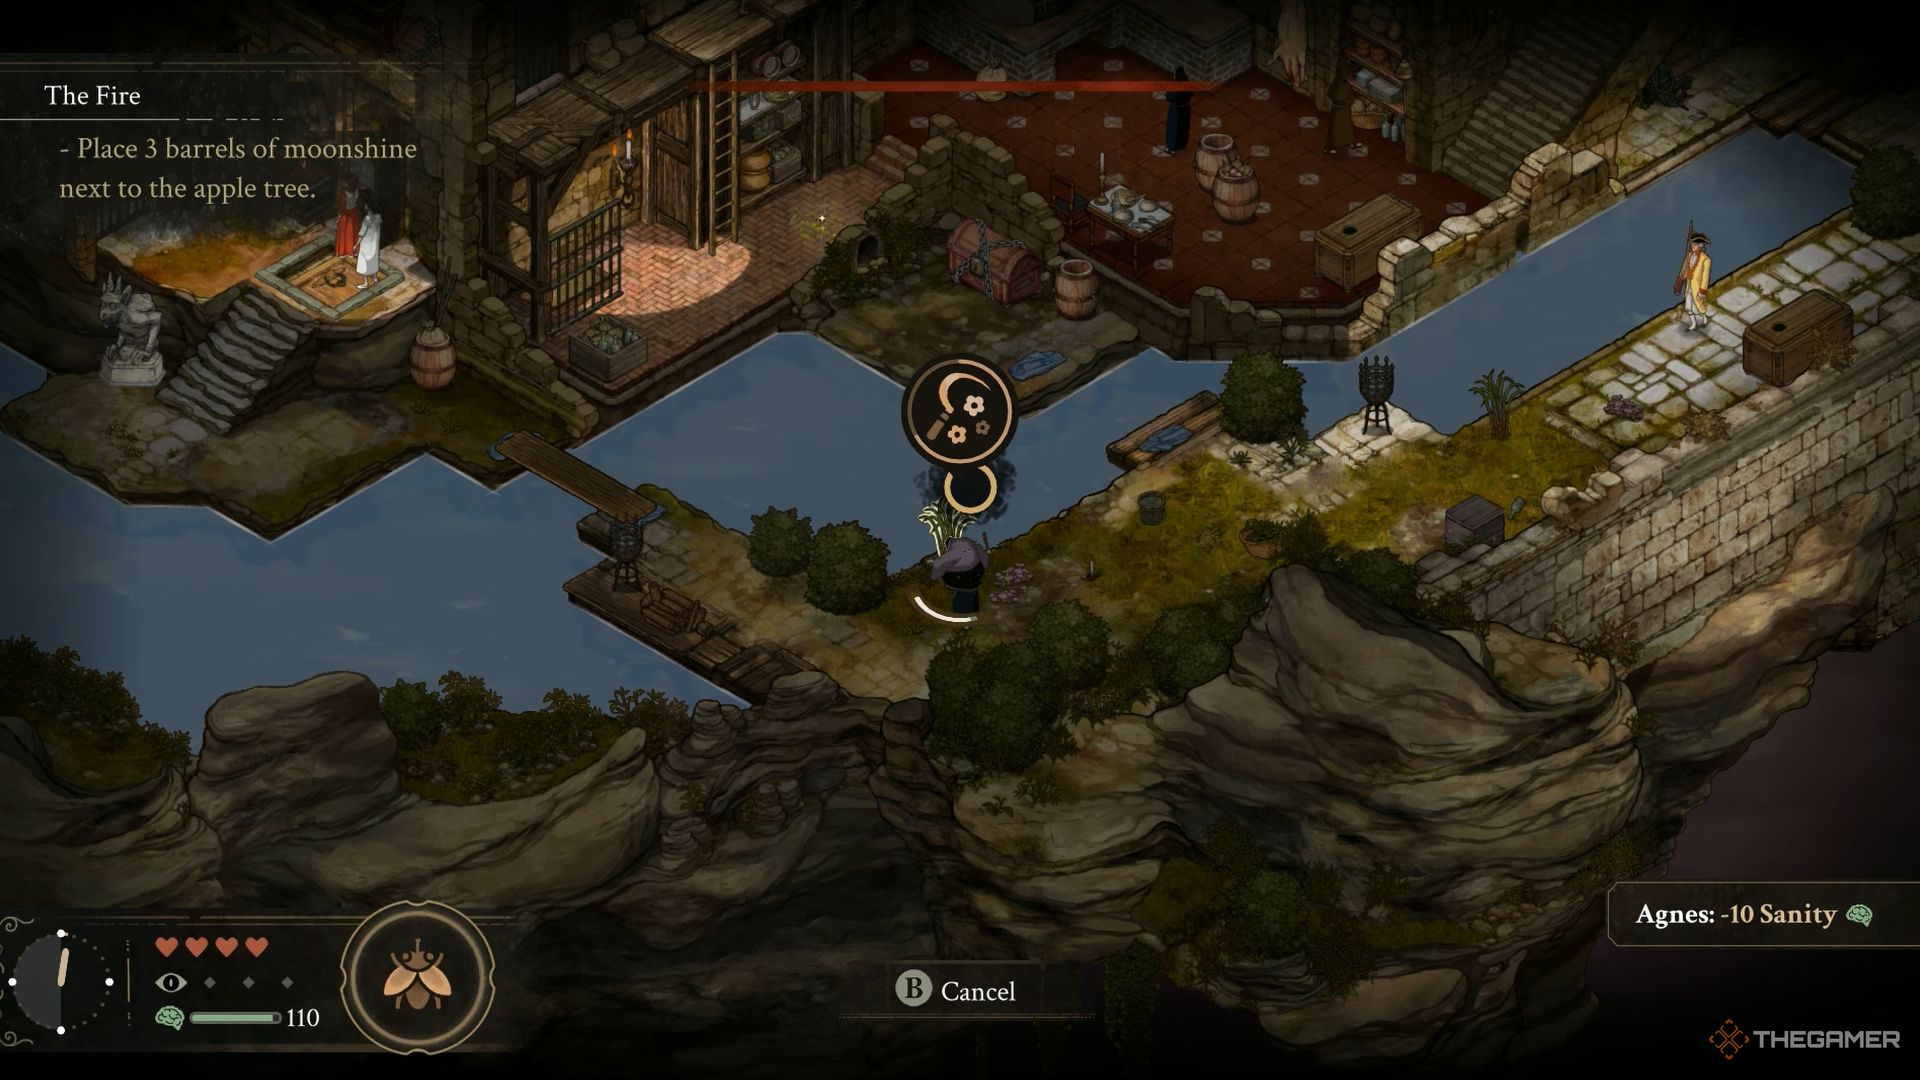
    Your next goal is to create a distraction for your escape by lighting the large apple tree in The Great Wall area. To accomplish this, you need to collect three Moonshine Barrels and bring them to the apple tree. You can either hunt for barrels or gather sugar cane to make moonshine.

    You can craft Moonshine Barrels at night in your cell using Agnes’s Witches Cauldron skill combined with the sugar canes you’ve collected.


    Agnes collects sugar canes next to the river in The Stone of Madness.

    To gather sugar cane, look for it near the river east of the Refectory. There are two sugar canes here—use Agnes to collect them while avoiding the Nun and the soldier. After that, go to the Shed cellar door in The Great Wall, descend the stairs, and find two more sugar canes near the river.

    Across the river, you’ll see another sugar cane, but Eduardo will need to place a plank across the water to reach it. You can also find sugar cane in The Cells’ Apothecary area, specifically in the room on the west side with vases.


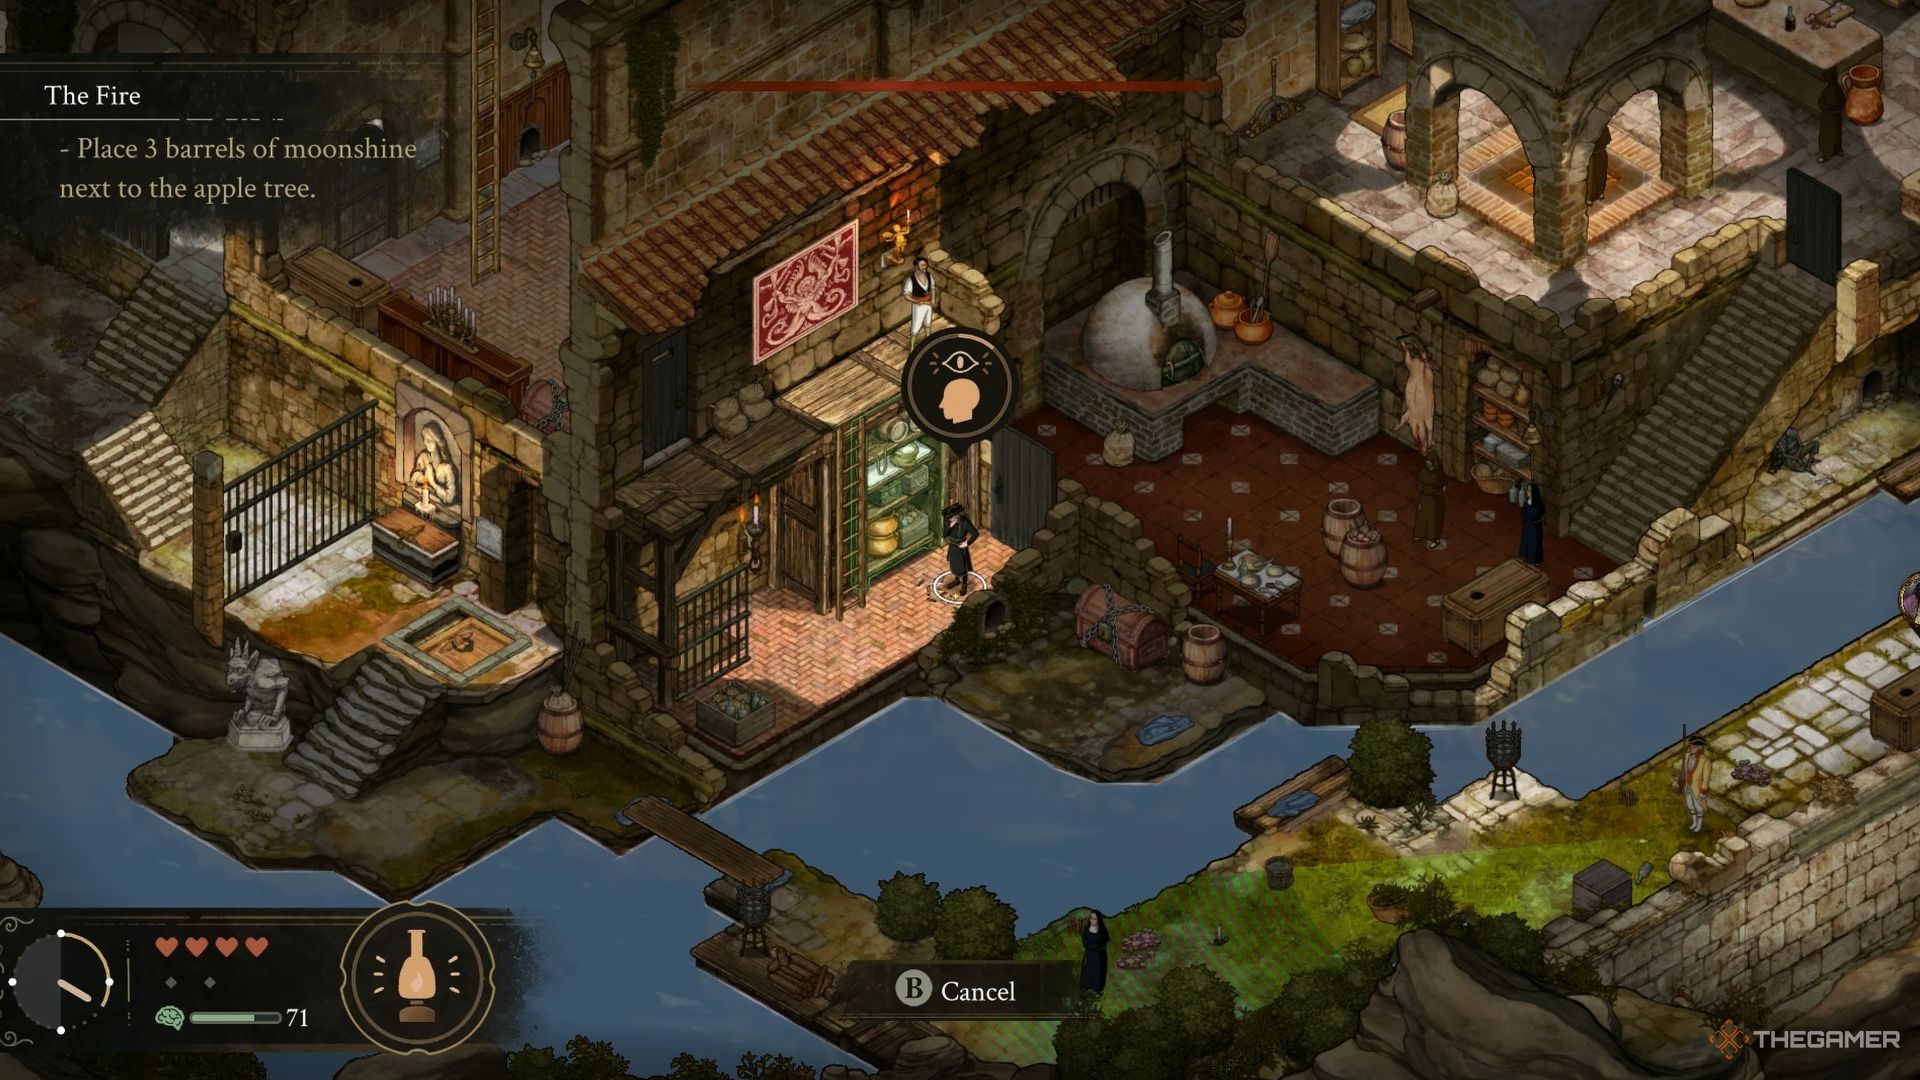
    Alfredo investigates the tracks next to the river in The Stone of Madness.

    One Moonshine Barrel is located in the Pianist’s room, and another can be found in the Refectory’s kitchen. To locate the one in the kitchen, employ Alfredo’s Investigate skill to follow the tracks on the lower floor. They will lead you to a hidden barrel behind a wall crack.

    Once you gather all three Moonshine Barrels at the apple tree, your mission will be complete.

    How to Rescue Alfredo

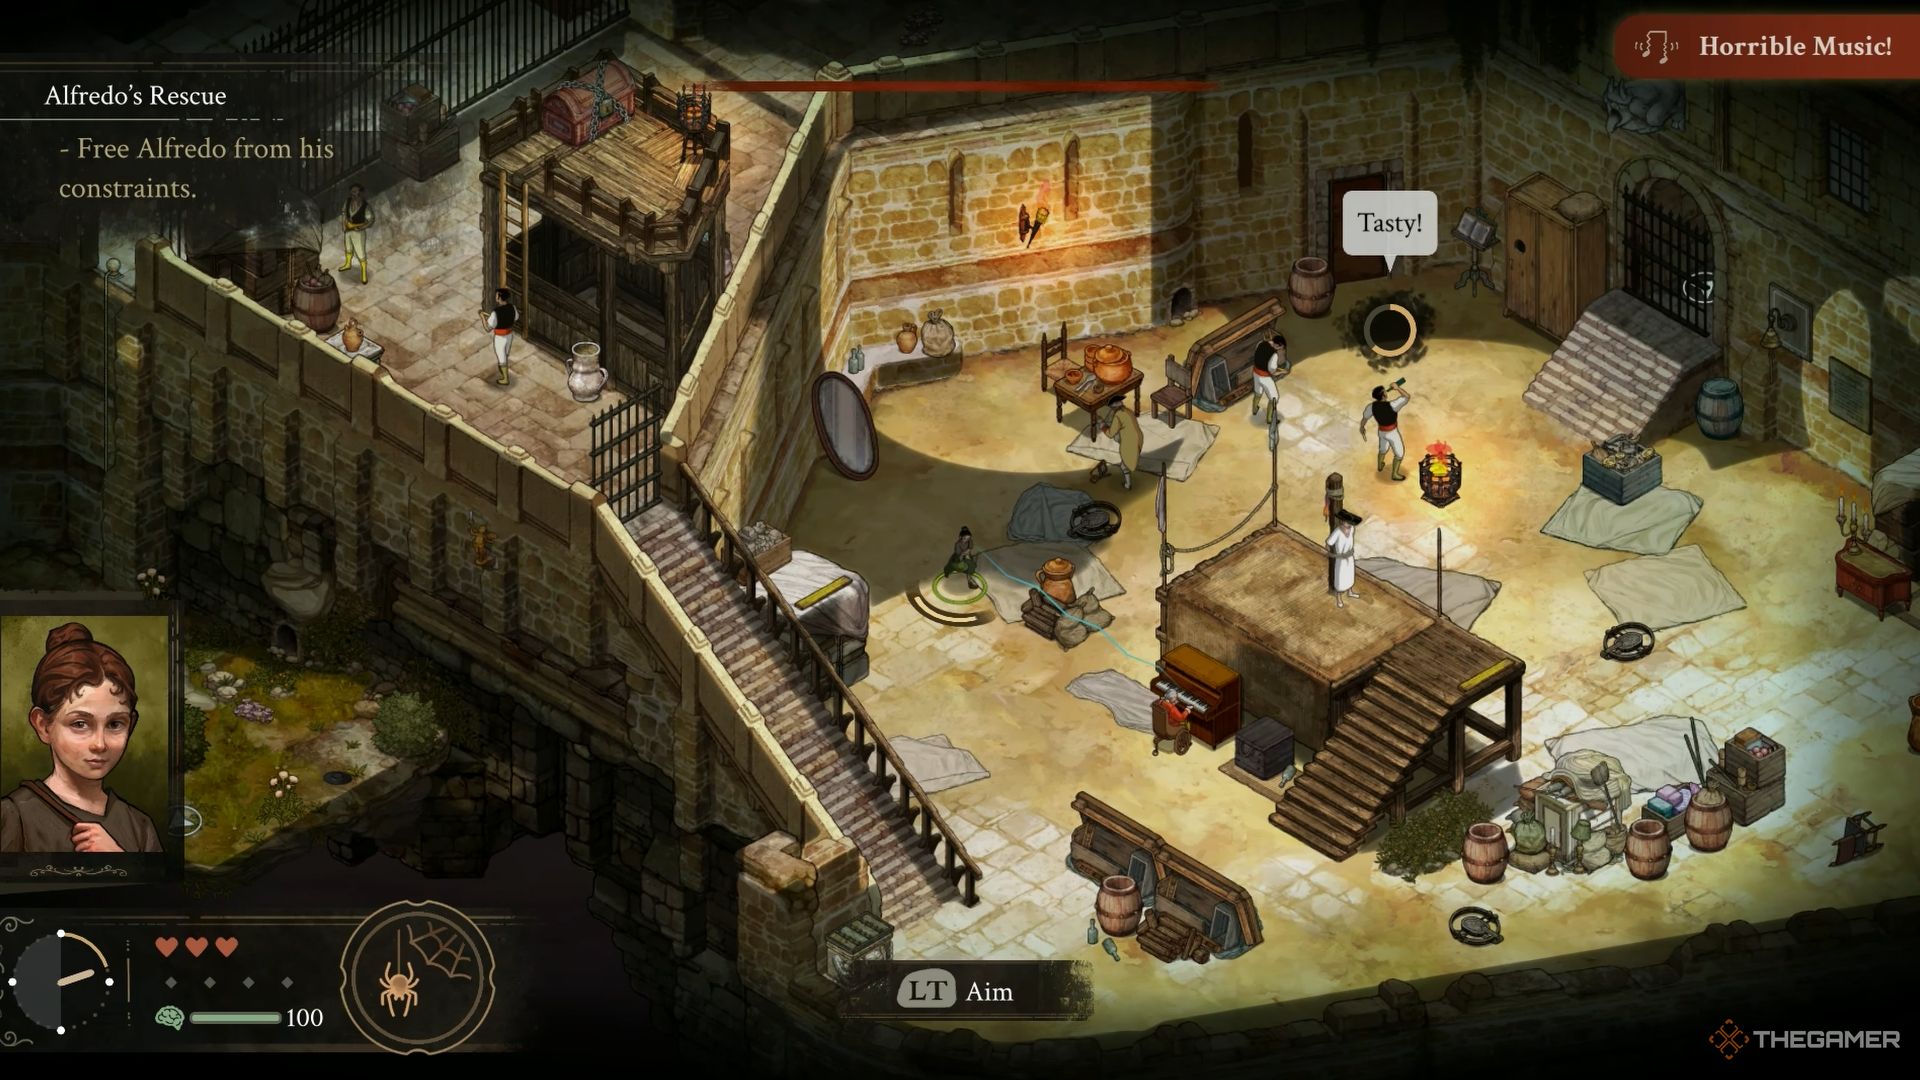
    While attempting to ignite the fire, Alfredo was captured, and your current mission is to rescue him. He’s imprisoned in the Inmate Courtyard, where a cutscene plays when you arrive.

    First, buy the Silver Key from Panecillo for 50 coins. You can find him near the stairs in the northern section of The Cells.

    Next, ascend the stairs and unlock the large wooden door to gain easy access to Mother Superior’s office.

    Alternatively, you can skip getting the key from Panecillo by starting from the cellar door in the Old Storeroom. This method lets you reach Alfredo directly without needing the key.


    Guards capture Alfredo inside the inmate courtyard area in The Stone of Madness.

    In the garden outside Mother Superior’s office, look for a place to tie a rope. Lower Amelia down using the rope, then help her navigate through the hole to Alfredo’s location. Use shadows and barrels strategically to guide Amelia towards Alfredo.

    A guard will periodically patrol the wooden platform where Alfredo is being held. Hide behind the barrel near the bear trap when the guard moves down. Use Sleeping Chocolate to put regular guards to sleep and distract the soldier with a Mousetrap. While they’re occupied, free Alfredo. Once you rescue him, this task will be accomplished.

    How to Escape the Monastery

    Your ultimate mission is to escape the monastery. To do this, all three characters must exit through the large gate at The Great Wall. First, eliminate the guard positioned at the top of the stairs with Leonora. Next, take care of the armed soldier and the other guard near the metal gates—if you can, use Agnes’ Goetia skill to eliminate them.

    Once the patrolling guards are dealt with, climb the ledges on the wall using Leonora and take down the soldier posted there. After interacting with the switch on the wall, guide Leonora and Agnes to the gate. Finally, escort Alfredo, disguised as a priest, to the gate without alerting Mother Superior.

    Alternatively, access the gate via the area where you previously interacted with Shadow. For this, have Eduardo break the planks in the dark passage, then use the switch inside to lift the bars. This will allow you to guide each character to the gate one by one.