Tag: Fisch

  • Completing the Journey: Solving Access to Netter’s Haven Cave

    Completing the Journey: Solving Access to Netter’s Haven Cave

    The latest update for Roblox’s Fisch introduces an exciting array of features such as Lobster Cages, schools of fish, new boats, and some of the most innovative gameplay mechanics yet. Among these enhancements, the Lobster Altar, nestled deep within Netter’s Haven, stands out as particularly enchanting.

    Getting to the Altar isn’t a simple stroll in the park. You’ll need to present six rare offerings, which must be placed on stone pedestals. These items are hard to find; some consist of Shiny lobsters, while others require rare quest items or catches that depend on specific weather conditions.

    How To Access Netter’s Haven Cave

    You will discover the Lobster Altar etched into a massive stone wall at the back of Netter’s Haven, situated in the Second Sea at these coordinates: -775, 90, 950. Upon arrival, you’ll see a large stone passage blocked by jagged rocks. In front of it are six stone pedestals, each waiting for a specific offering. Placing the correct items on all six pedestals will open the way into the cave. Below is a detailed list of the required items and instructions on how to obtain each one.

    Required Item

    How to Obtain

    Lobster Roll

    Speak with Chef Larry at Lobster Shores at -607, 155, 2697 and complete his quest by catching a specific Lobster with the required weight and mutation. This quest can be completed multiple times.

    Shiny Ancient Lobster

    Located in the Ancient Lobster pool near Ancient Isle in the First Sea.

    Shiny Slipper Lobster

    Caught in the Slipper Lobster pool near Lushgrove in the Second Sea.

    Shiny Rock Lobster

    Found in the Rock Lobster pool near Pine Shoal in the Second Sea.

    Shiny Western Rock Lobster

    Fish in the Western Rock Lobster pool just off the coast of Netter’s Haven.

    Moon Idol Sea 2

    Visit Lushgrove at 1410, 155, -580 and use a Blue Moon Totem to access the hidden bunker. Fish inside to catch the idol.

    To fish for these lobsters effectively, make sure you have the right equipment. A Utility Boat and Lobster Cages are essential, so be sure to purchase and deploy one from the Utility Shipwright in Lobster Shores.

    For optimal results, we suggest using the Obsidian Cage or the high-performance Cursed Cage, both of which increase your luck and maximum catch weight, making it easier to snag mutated variants.

    After acquiring all six offerings, return to the Lobster Altar and place each item on its pedestal. Once all items are positioned correctly, the stone wall will slide open, revealing the entrance to Netter’s Haven Cave and the glowing Lobster King Pool hidden within.

  • Completing Oscar’s Locker Quest to Get the Rod of Oscar in Roblox

    Completing Oscar’s Locker Quest to Get the Rod of Oscar in Roblox

    Not all items in Roblox’s Fisch are readily available for purchase. When it comes to rare items, obtaining them often requires significant effort. One such item is the Great Rod of Oscar, a powerful tool known for its sleek design, impressive stats, and unique passive abilities, making it one of the most sought-after fishing rods in the entire Second Sea.

    The Great Rod of Oscar provides not only an XP boost but also the Oscar Mutation and remarkable catching capabilities, transforming you from a skilled fisher into a true fishing expert. To acquire this rod, you’ll need to follow in Oscar’s footsteps and unlock his locker, and we’ll guide you through that process.

    How to Obtain the Great Rod of Oscar


    Your adventure starts in the Second Sea, specifically on the Isle of New Beginnings. Look for the Dead Man Joe NPC, who can be found near some wreckage to the right of the local merchant. His coordinates are -377, 78, -448.

    During your chat, he will mention two crucial points: an Amulet you need to find and Oscar’s locker, where the desired fishing rod is hidden. This conversation serves as your starting clue.

    Finding the Amulet

    Next, you’ll need to sail to the First Sea. Go to the Grand Reef and steer toward the dilapidated wreck just outside the entrance to Atlantis. Underneath the broken vessel, you’ll discover the Amulet gently glowing in the sand.

    Here are the exact coordinates: -3560, 145, 480. After finding the Amulet, return to Dead Man Joe.

    Accessing Oscar’s Locker

    Once you speak to him again while holding the Amulet, Dead Man Joe will guide you to the Cursed Shores and hint at a mysterious place called Oscar’s Locker. Swim to the northern edge of the Cursed Shores and dive into the water to uncover a hidden cave entrance. The coordinates are -436, -40, 1666.

    You can navigate through the tunnel using either a submarine or diving gear, depending on what you prefer.

    Swim carefully through the submerged tunnel that leads to a vast chamber filled with glowing treasure, coral, and ancient remnants—this is Oscar’s Locker. Be cautious, as if you enter before acquiring the Amulet, your health will gradually decrease.

    Inside, the Great Rod of Oscar awaits on a pedestal. It costs 5,000,000 E$. While it’s quite a price to pay, the rod is definitely worth every single coin.

  • Completing the Quest to Solve the Moon Idol in Roblox Fisch

    Completing the Quest to Solve the Moon Idol in Roblox Fisch

    In the world of Roblox’s Fisch, there’s a unique item that really catches the eye—not just for its rarity but also for the benefits it brings. The Moon Idol isn’t just another find; it’s a valuable asset that can not only earn you in-game currency but also grant access to the enigmatic Lobster Altar.

    Once you capture it, you’ll gain powerful enhancements that will improve your fishing skills and help you rack up experience points. This guide will show you how to locate the Moon Idol, catch it, and make the most out of it.

    How to Obtain the Moon Idol

    The Moon Idol can only be found during the Blue Moon, a rare phenomenon that occurs on clear winter nights. You can either wait for it to happen naturally or create the conditions yourself using a Blue Moon Totem.

    This totem is available for purchase on Lushgrove Island for 500,000 E$ at the coordinates: 1300, 155, -550. When the right weather sets in, make your way to the special bunkers—those ancient stone doors that only open when the blue moonlight shines brightly. There are two bunker locations, one in each sea:

    Seas GPS Description
    First Sea 2705, 190, 2555 Located near the first level of Snowcap Island, nestled among snowy trees.
    Second Sea 1420, 155, -570 Behind the Sporey Mom NPC on Lushgrove Island.

    Use your Blue Moon Totem at the entrance to unlock the sealed passage. Inside, you’ll discover a small fishing pool surrounded by glowing blue crystals—this is where the Moon Idol resides.

    However, snagging it won’t be simple. The Moon Idol is a Secret rarity fish with a -80% progress speed, so it’s essential to use a rod with high Resilience and Control, preferably enchanted with Steady or Blessed Song.

    Keep in mind that you will only catch the idol if you fish in these locations during the Blue Moon. At no other time or place can you find it.

    How to Use the Moon Idol

    Catching the Moon Idol activates a 24-hour buff on the exact fishing rod you used. This rod will glow with a crescent effect—a sign that it’s been Moon-Kissed. You’ll also see a moon icon above your head, indicating the effect is active. The following benefits apply to that rod for the next 24 hours:

    • Visual glow effect on the rod while catching fish.
    • +50% experience gain from all fish caught.
    • 10% chance of landing a double-weight fish.
    • 5% chance of catching fish with the Moon-Kissed mutation.

    The XP boost alone is ideal for leveling up or grinding out challenging catch tiers, while the weight and mutation bonuses can lead to significant profits over time. The Moon-Kissed mutation adds a soft blue glow to fish, making them more valuable when sold.

    If you catch a Moon Idol in Sea 2, it has an additional function. You’ll need that specific Second Sea Moon Idol to unlock the Lobster Altar on Netter’s Haven, part of the Lobster Trip update.

    You can choose to sell the idol for in-game currency or keep it as a glowing trophy of your fishing adventures, but utilizing its buff is nearly always the better option.

  • Completing the Quest: Solving Nets in Roblox’s Fisch Game

    Completing the Quest: Solving Nets in Roblox’s Fisch Game

    The recent Lobster Trip update introduced Roblox’s Fisch, a whole new approach to fishing where players can capture schools of fish instead of just one at a time. With nets, players can scoop up numerous fish in a single action, adding a new dynamic to the gameplay in the Second Sea. So, what exactly are these nets?

    To get started, you’ll need some special equipment, a suitable boat, and an understanding of how everything functions. This guide will explain how to acquire each type of net, their benefits, and tips for using them effectively in the ocean.

    How to Acquire Nets

    Unlike regular fishing rods, nets are intended for catching multiple fish simultaneously. You can only obtain these nets from a dedicated net store, and they aren’t sold in the shops of the First Sea.

    All nets can be found in the Second Sea at a location known as Netter’s Haven, which is situated behind Waveborne at the following coordinates: -640, 85, 1030. Here, you’ll find the net store and NPCs that will reward you with unique gear if you help them out.

    Each net has different specifications and requirements. Some can be purchased for Embercoins, while others require a bit more effort to acquire. Below is a comprehensive list of all the nets available for purchase in Fisch:

    Nets How to Acquire Luck Max kg
    Fishing Net Purchase for 300E$ at Netter’s Haven. 45% 250 kg
    Premium Net Purchase for 600E$ at Netter’s Haven. 75% 500 kg
    Obsidian Net Purchase for 1,500E$ at Netter’s Haven. 150% 1,000 kg
    Bubba’s Net Feed a school of fish to Bubba NPC. 200% 5,000 kg

    The most effective net is Bubba’s Net, but it can’t be purchased outright. First, you’ll need to catch a school of fish and then locate and interact with the NPC Bubba, who is found around Netter’s Haven at these coordinates: -816, 90, 992. Talk to him, select the “Feed” option, and he will reward you with Bubba’s Net.

    How to Use Nets

    To utilize nets in Fisch, you’ll require a Utility Boat, which is specifically designed for deploying fishing gear like nets and cages. You can purchase a Utility Boat from the Utility Shipwright NPC at Netter’s Haven, located at -622, 84, 1001. Once you have your boat and net ready, follow these steps:

    • Sail to the Second Sea and approach any red-marked fishing school on the map. There are plenty of these schools throughout the waters of the Second Sea.
    • Board your Utility Boat and sail over the red square that indicates the fish school. Once there, move to the back of your vessel.
    • Switch to your net by pressing the designated button to toggle between cages and nets.
    • Once ready, get back in the driver’s seat and press the button to submerge the net and start the mini-game.
    • Complete the mini-game by matching the cursor within the target zones several times to catch the school.
    • Collect your fish; if you’re aiming for Bubba’s Net, be sure to return and feed the school to the Bubba NPC.

    Nets provide a significant advantage over traditional fishing rods by allowing you to catch multiple fish at once. If you’re targeting rare species or looking to accumulate currency quickly, mastering the use of nets can be incredibly beneficial.

  • Completing the Quest: Solving How to Catch the Sea Leviathan in Roblox

    Completing the Quest: Solving How to Catch the Sea Leviathan in Roblox

    In Roblox’s Fisch, many elusive creatures await capture, but the Sea Leviathan stands out as one of the most challenging. Not only is it rare, but it’s a massive creature that requires strategy, suitable equipment, luck, and careful planning. You can find this extraordinary fish exclusively in the Second Sea, so catching it isn’t something you can do on a whim.

    To hunt the Sea Leviathan, you’ll need to wait for the special event dedicated to it and be ready to compete against other players. Fortunately, once you grasp the mechanics of the Sea Leviathan Hunt, it becomes much easier. This guide will outline each step, from initiating the event to selecting the best rod and bait.

    How to Catch the Sea Leviathan

    The Sea Leviathan is only available during a specific, timed event known as the Sea Leviathan Hunt, which occurs solely in the Second Sea. This hunt has a mere five percent chance of triggering during Foggy weather at Night.

    The quickest way to trigger it is by cycling through the weather. Using Smokescreen Totems can create Fog, while Tempest or Windset Totems can clear it up.

    When Fog appears, pay attention to server-wide notifications. If you see a message stating “A Sea Leviathan has spawned near Island Name”, it’s your signal to head out immediately.

    When you arrive at the spawning area, spotting the Sea Leviathan should be straightforward due to its enormous size and the fact that it floats on the surface of the water.

    The hunt will conclude after 15 minutes from the event’s beginning or as soon as someone catches the Sea Leviathan, so act quickly.

    However, just finding the Sea Leviathan isn’t enough; you also need to understand its preferences and the right tools for catching it. Here are the details:

    • Bait: Luminous Larva
    • Weather: Foggy
    • Time: Any
    • Season: Spring

    The Sea Leviathan hits your rod with a staggering 90 percent reduction in progress speed, making your catch bar move slowly.

    That’s why using rods with high resilience and control is essential. In the Second Sea, rods from the First Sea suffer a significant reduction in stats, so we recommend the Azure Of Lagoon.

    If you have the resources to utilize the Rebuff Altar, you can negate the penalty for First Sea rods. If that’s the case, consider using rods like the Heaven’s Rod, Celestial Rod, or Seraphic Rod.

  • Completing the Brickford Lego Event Quest in Roblox: Fisch’s Guide

    Completing the Brickford Lego Event Quest in Roblox: Fisch’s Guide

    The LEGO Event offers an exciting experience along with a chance to collect exclusive items in Roblox’s Fisch, such as a special fishing rod, unique bait, and an exclusive boat. The primary objective of this quest is to catch rare fish from the event and establish your status as a Master Fisher.

    This guide will provide you with the steps to start the quest, details on how to complete it, and the rewards you can earn. If you want to participate in the LEGO Event before it concludes on May 23, 2025, it’s best to begin the quest as soon as possible.

    Completing the Brickford LEGO Event Quest

    To kick off the Brickford LEGO Event quest, you need to find Brickford Masterson, the main NPC for the event. He can be found on a LEGO ship near Moosewood Island at these coordinates: 412, 132, 365. After speaking with him, you will receive a Brick Built Rod and some Stud Bait for free.

    Both items are crucial, as you won’t be able to catch any fish from the LEGO Event without them. Regular fishing rods will not work in the LEGO Pools.

    The player character shows the LEGO pool notification near Moosewood in Fisch.

    You will also receive a task to catch and return lost fish. Keep in mind that all fish associated with this event can only be found and caught in the First Sea, specifically in designated LEGO Pools. These pools appear every 15 minutes near various islands, and you’ll be notified when a new one appears through the server chat.

    Additionally, there’s the Studolodon, an exclusive event fish that can’t be caught in regular LEGO Pools. To obtain it, you’ll need to participate in the Studolodon Hunt, a server event that may happen during rain.

    You can also start this hunt yourself by using totems such as the Tempest Totem, Windset Totem, and Smokescreen Totem.

    The player character is fishing in a LEGO pool near Moosewood in Fisch.

    Once you’ve caught all the required fish, or at least a handful, return to Brickford to claim your rewards. Here’s what you can earn for your efforts:

    • Brick Built Rod – Provided at the beginning after speaking with Brickford Masterson.
    • Stud Bait – Earned progressively as you turn in unique LEGO Event fish. You’ll receive three pieces for each species, totaling 48.
    • Arctic Explorer Boat – Awarded for submitting all 16 LEGO Event fish.
    • Master Fisher Title – Granted after collecting all 16 LEGO Event fish.

    To successfully finish the event, make sure you’re consistently fishing and targeting every LEGO Pool spawn. Don’t forget to go for the Studolodon as well—it’s essential for the quest and your bestiary, and catching it will be your final significant challenge. Stay alert, gather Stud Bait whenever you can, and complete the event before it wraps up.

  • Completing the Brickford Lego Bestiary Guide in Roblox: Fisch

    Completing the Brickford Lego Bestiary Guide in Roblox: Fisch

    At the LEGO event in Roblox’s Fisch, players face a unique challenge: filling out the Brickford LEGO bestiary. To succeed, you’ll need to catch 16 exclusive fish created specifically for this occasion. However, this challenge is tricky because the fish pool locations are always changing.

    Completing the bestiary allows you to earn exciting rewards, such as a special boat and a title. In this guide, we’ll break down how to locate the right fishing spots and what the local fish prefer.

    How to Fill Out the Brickford LEGO Bestiary


    To start completing the LEGO bestiary, seek out LEGO Pools in the First Sea. These exclusive spots pop up every 15 minutes and remain accessible for only ten minutes.

    When a LEGO Pool appears, the server chat will display a message indicating where it can be found.

    You can identify the correct location by the red square with LEGO pieces falling from above. To fish, you’ll need the Brick Built Rod, available from Brickford Masterson in Moosewood. Without this rod, you won’t be able to catch event fish.

    Remember, LEGO Pools cannot be spawned with Sundial Totems or any other means, so just wait for the 15 minutes and keep an eye on server messages.

    Here’s the complete list of fish you’ll need to catch to finish the bestiary:

    Fish Weather Season Time Bait
    Studphin Any Any Any Stud Bait
    Crab Stud Any Any Any Stud Bait
    Studolodon Any Any Any Stud Bait
    Glow Brick Any Any Any Stud Bait
    Clown Brickfish Any Any Any Stud Bait
    Azure Studfish Any Any Any Stud Bait
    Tentabrick Any Any Any Stud Bait
    Goldbrick Any Any Any Stud Bait
    Jellystud Any Any Any Stud Bait
    Yellow Studfish Any Any Any Stud Bait
    Studling Crab Any Any Any Stud Bait
    Stud Turtle Any Any Any Stud Bait
    Stud Shark Any Any Any Stud Bait
    Brickhorse Any Any Any Stud Bait
    Stud Koi Any Any Any Stud Bait
    Cardinal Studfish Any Any Any Stud Bait

    If you manage to catch all 16 fish, you will receive the following rewards:

    • Arctic Explorer boat
    • Master Fisher title
  • Completing the Challenge: Solving How to Catch Studolodon in Roblox

    Completing the Challenge: Solving How to Catch Studolodon in Roblox

    In Roblox’s Fisch, one important fish to catch for your Brickford Lego collection is the Studolodon. Unlike other fish from the LEGO event, you can’t find this one in standard LEGO pools. Instead, you’ll need to join the Studolodon Hunt.

    The Studolodon Hunt occurs frequently and can even be triggered manually. If you’re an experienced player, you’ll know the necessary steps. It’s essential to understand the conditions required for this server event and the preferences of the fish you’re trying to catch.

    How to Find Studolodon


    Before diving in, make sure to activate the Brickford LEGO Event quest at Moosewood. This will provide you with a Brick Built Rod and Stud Bait, essential tools for catching the Studolodon, as other rods and baits won’t work in LEGO pools.

    Once prepared, you’ll need to wait for rain to start at First Sea. This is the moment and location required for the Studolodon Hunt to commence.

    You can also trigger the hunt manually by combining Windset, Tempest, and Smokescreen Totems.


    The player character shows the Studolodon Hunt notification near Ancient Isle area in Fisch.

    Once you’ve set everything up correctly and the hunt has begun, you will get a notification in the chat revealing the nearest island where the Studolodon Pool is located. Head towards this marker and look for the red area labeled LEGO – Studolodon Pool.

    You can recognize it easily from a distance due to the storm swirling above the pool and the large plastic fish swimming around.

    How to Catch Studolodon


    The player character is fishing in the Studolodon Pool in Fisch.

    Once the Studolodon pool appears, you have a ten-minute window to catch the fish; otherwise, it will vanish. Act quickly, as other players will be competing for it, and only one fish is available per pool.

    However, capturing the Studolodon is tricky. Its progress meter fills up 85 percent more slowly, and it possesses a high resilience of ten. This means the fish can break loose and hinder the fishing process.

    To enhance your chances, it’s advisable to enchant the Brick Built Rod with Resilience or Mystical beforehand, allowing for better control over the fish.

    Utilizing Aurora Totems or activating Merlin’s Luck can also boost your luck and speed up the catching process. If possible, try to join a private server to reduce competition and increase your chances of being the sole player fishing in the event pool.

  • Solving the Brother’s Rod in Roblox: Fisch Guide

    Solving the Brother’s Rod in Roblox: Fisch Guide

    The Brother’s Rod is a fantastic fishing tool you can earn for free by completing a quest in the Second Sea in Roblox’s Fisch. To obtain it, you’ll need to assist Luka in locating his lost brother, Kael, by following a series of straightforward steps.

    Luka has been separated from Kael for quite some time, and your mission is to help him find his brother. This quest involves not just locating Kael but also catching fish, retrieving a pendant, and bringing Kael back. Here’s a detailed guide to help you through the quest efficiently.

    How to Get the Brother’s Rod

    The Brother’s Rod is gained by completing the Lost Brother quest in the Second Sea. The quest consists of several stages, and we’ll break down each step for clarity.

    How to Start the Quest

    Your adventure begins at the Isle of New Beginnings. This island is easy to find. If you’re at Waveborne, the starting area, just hop on a boat and head northeast.

    You’ll spot Luka on the island’s coast. Swim around the edge to find him, dressed in a white shirt and beige pants. His coordinates are 251, 79, -415.

    Once you approach him, interact with Luka to learn about his missing brother, Kael, and to trigger the quest.

    How to Locate Kael

    Finding Kael is as simple as finding Luka. Just board your boat and sail to The Cursed Shores. Navigate around the island until you discover Kael on the coast at the coordinates -552, 84, 1818. He’ll appear worn out and mention that he can’t leave until he feels better.

    Assisting Kael

    To help Kael recuperate, you need to catch three fish. There’s no need to travel far – the closest body of water is right next to him. Grab your fishing rod, catch three fish, and hand them to Kael.

    After you provide the fish, talk to Kael again to proceed with the quest.

    Where to Locate Kael’s Pendant

    Before returning to Luka, Kael will ask for your help in finding a pendant he lost in Azure Lagoon. Here’s what you need to do:

    • After your chat, get on the boat with Kael.
    • Navigate to Azure Lagoon, located at 1310, 80, 2113. Once you reach the island, make your way to the nearby lighthouse.
    • When you’re at the lighthouse, turn left from the ladder, walk a few steps, and look for a blue pendant under a tree, near some flowers.
    • Interact with the pendant to pick it up.

    After retrieving the pendant, return with Kael to Luka at the Isle of New Beginnings. Once the brothers reunite, you’ll complete the quest and be rewarded with the Brother’s Rod.

  • Completing Sea 1 Rods in Roblox Sea 2: Fisch Solutions

    Completing Sea 1 Rods in Roblox Sea 2: Fisch Solutions

    Now that you’ve reached the Second Sea in Roblox’s Fisch, you may have realized that your fishing rods from the First Sea aren’t performing as well anymore. This is because these rods suffer a -50% debuff, making them less effective in this new area. Fortunately, there’s a way to fix this problem: the Rebuff Altar. This unique location allows you to completely eliminate the debuff and restore your rod to its original strength.

    The Rebuff Altar can be used with most First Sea rods, although a few exceptions exist. To proceed with rebuffing your rod, you will need to locate the altar, gather three essential items, and perform a specific activation ritual, all of which we’ll guide you through here.

    How to Locate the Rebuff Altar

    You can find the Rebuff Altar at The Cursed Shores, south-east of Waveborne. This misty island is surrounded by stone spikes and can be found at the coordinates: -235, 85, 1930. To get to the Rebuff Altar, follow these steps:

    • Get on your boat and head southeast from Waveborne.
    • As you near The Cursed Shores, look for two streams of water flowing onto the island — take the left one.
    • Swim along the stream until you reach a wooden bridge. Get off your boat here and cross the bridge.
    • On the other side, you’ll notice a large green portal to the south. Go through it.
    • This portal will lead you into a rocky cave. Move straight ahead and downwards, following the path. It’s advisable to use a Glider to avoid taking fall damage.
    • At the end of this path, you’ll find yourself in an open area where the Rebuff Altar is located.

    Once you arrive, you can start the process to rebuff your rod. If you’re unsure how it works, don’t worry; we’ll walk you through it.

    How to Utilize the Rebuff Altar


    At the Rebuff Altar, you’ll see four podiums, three of which form a green circle. The first podium activates the rebuff, provided that all the necessary resources are placed on the other three.

    Keep in mind that removing the debuff is not free. You’ll need to find three rare types of fish and place them correctly on the podiums. Here’s what you need and where to place them:

    Fish

    How to Obtain

    Podium Position

    Moon Idol (Sea 2)

    Catch during the Blue Moon event.

    Left Podium

    Cursed Thread

    Caught in the Open Ocean.

    Right Podium

    Sea Leviathan

    Caught only during a Sea Leviathan Hunt.

    Middle Podium

    After placing the three fish on the podiums, the next step is to wait for it to be night time on the server. This is essential to complete the ritual. If you’d prefer not to wait, simply use the Sundial Totem to change the time of day. Finally, select the rod you wish to rebuff and interact with the fourth podium.

    Keep in mind that you cannot rebuff rods that are level-locked, such as the Seraphic Rod and No-Life Rod.

  • Completing the Lorelei Quest in Roblox: Fisch Guide

    Completing the Lorelei Quest in Roblox: Fisch Guide

    In Roblox’s Fisch, players can embark on a fishing adventure across various unique islands in a sprawling world. Some fish are rare specimens that can enhance your collection, while others are essential for completing specific quests.

    One such fish, the Crystal Wrasse, is necessary to finish the Lorelei quest located in the Second Sea. What’s more, catching this fish earns you a special item called the Mermaid’s Favor, a necklace that greatly increases your earnings. If you’re aiming to catch a Crystal Wrasse and finish the Lorelei quest in Fisch, here’s everything you need to know.

    How to Catch a Crystal Wrasse


    The Crystal Wrasse is a special fish you need to catch for the Lorelei quest. Before delving into the quest details, let’s discuss how you can catch this elusive fish.

    This fish is found in the Grand Reef bestiary, situated in one of the First Sea locations. Grab your fishing rod and head over to this island. Like other fish in Fisch, the Crystal Wrasse has specific preferences that can boost your chances of catching it. Here’s what you should know:

    • Bait: Insect
    • Time: Any
    • Weather: Any
    • Season: Any

    The Crystal Wrasse is relatively easy to catch, especially if you’re using insect bait, so you should have no trouble getting one quickly.

    How to Complete the Lorelei Quest


    The player character gives a Crystal Wrasse to the Lorelei NPC on the Isle of New Beginnings in Fisch.

    To begin this quest, you must teleport to the Second Sea area. Once there, go to the Isle of New Beginnings and find Lorelei, the mermaid NPC located in the center of the island at the coordinates: X: -365, Y: 78, Z: -469. Interact with her to initiate the quest, which involves bringing her a Crystal Wrasse.

    If you haven’t caught one yet, travel to the First Sea and check out the Grand Reef area, where you can find this fish.

    After you have a Crystal Wrasse, return to the Isle of New Beginnings and hand the fish over to Lorelei.


    The player character holds a Mermaid's Favor with his hand in the Isle of New Beginnings in Fisch.

    Upon completing the quest, Lorelei will reward you with a special necklace called the Mermaid’s Favor. This item is quite valuable and can enhance your profits. When activated, it grants you a ten percent increase in earnings for every fish you sell.

    Note that this effect only lasts for five minutes. Therefore, it’s wise to catch as many fish as you can before using the Mermaid’s Favor to maximize your earnings.

  • Completing the Hunt for a White Crate in Roblox: Fisch

    Completing the Hunt for a White Crate in Roblox: Fisch

    Roblox’s Fisch is packed with exciting quests that not only offer experience points but also special loot. One such quest is the Message In A Bottle, which adds an element of mystery and excitement to your gameplay while rewarding you at the end.

    If you’re seeking adventure beyond just fishing and want to uncover hidden treasures, the Message In A Bottle quest is perfect for you. Although the mission is fairly simple, tracking down the elusive item can take a little time. Below is a straightforward guide to help you start and finish this quest.

    How to Start the Message In A Bottle Quest


    To kick off the Message In A Bottle quest, make your way to the Moosewood area, which is a starter zone in the First Sea. Look for a small bottle with a message located near the pier at these coordinates: X: 480, Y: 135, Z: 235.

    Approach the bottle and press the necessary button to interact with it. After doing so, you’ll receive your next task: travel to Roslit Bay and locate a White Crate hidden on the island.

    Where to Find a White Crate

    Your next stop is Roslit Bay. To find a White Crate, you’ll need to identify the Shipwright NPC at the pier and engage with him to spawn a boat. Then, head north from the Moosewood area until you arrive at Roslit Bay.

    Upon reaching the pier in Roslit Bay, search for a lava rift and follow its path until you reach a small pond on the opposite side of the island. Continue onwards, passing the pond until you find an open area with a White Crate situated in the center.

    The exact coordinates of the White Crate are: X: -1879, Y: 166, Z: 589.

    Approach the crate and interact with it. Doing so will automatically conclude the Message In A Bottle quest and grant you the following rewards:

    • Experience Points
    • 15 Kraken Tentacles

    Keep in mind that Kraken Tentacles are a rare type of bait, available only as rewards for completing Captain Neptune’s quest or by redeeming specific codes.

  • Completing the Quest to Solve the Octophant in Roblox: Fisch

    Completing the Quest to Solve the Octophant in Roblox: Fisch

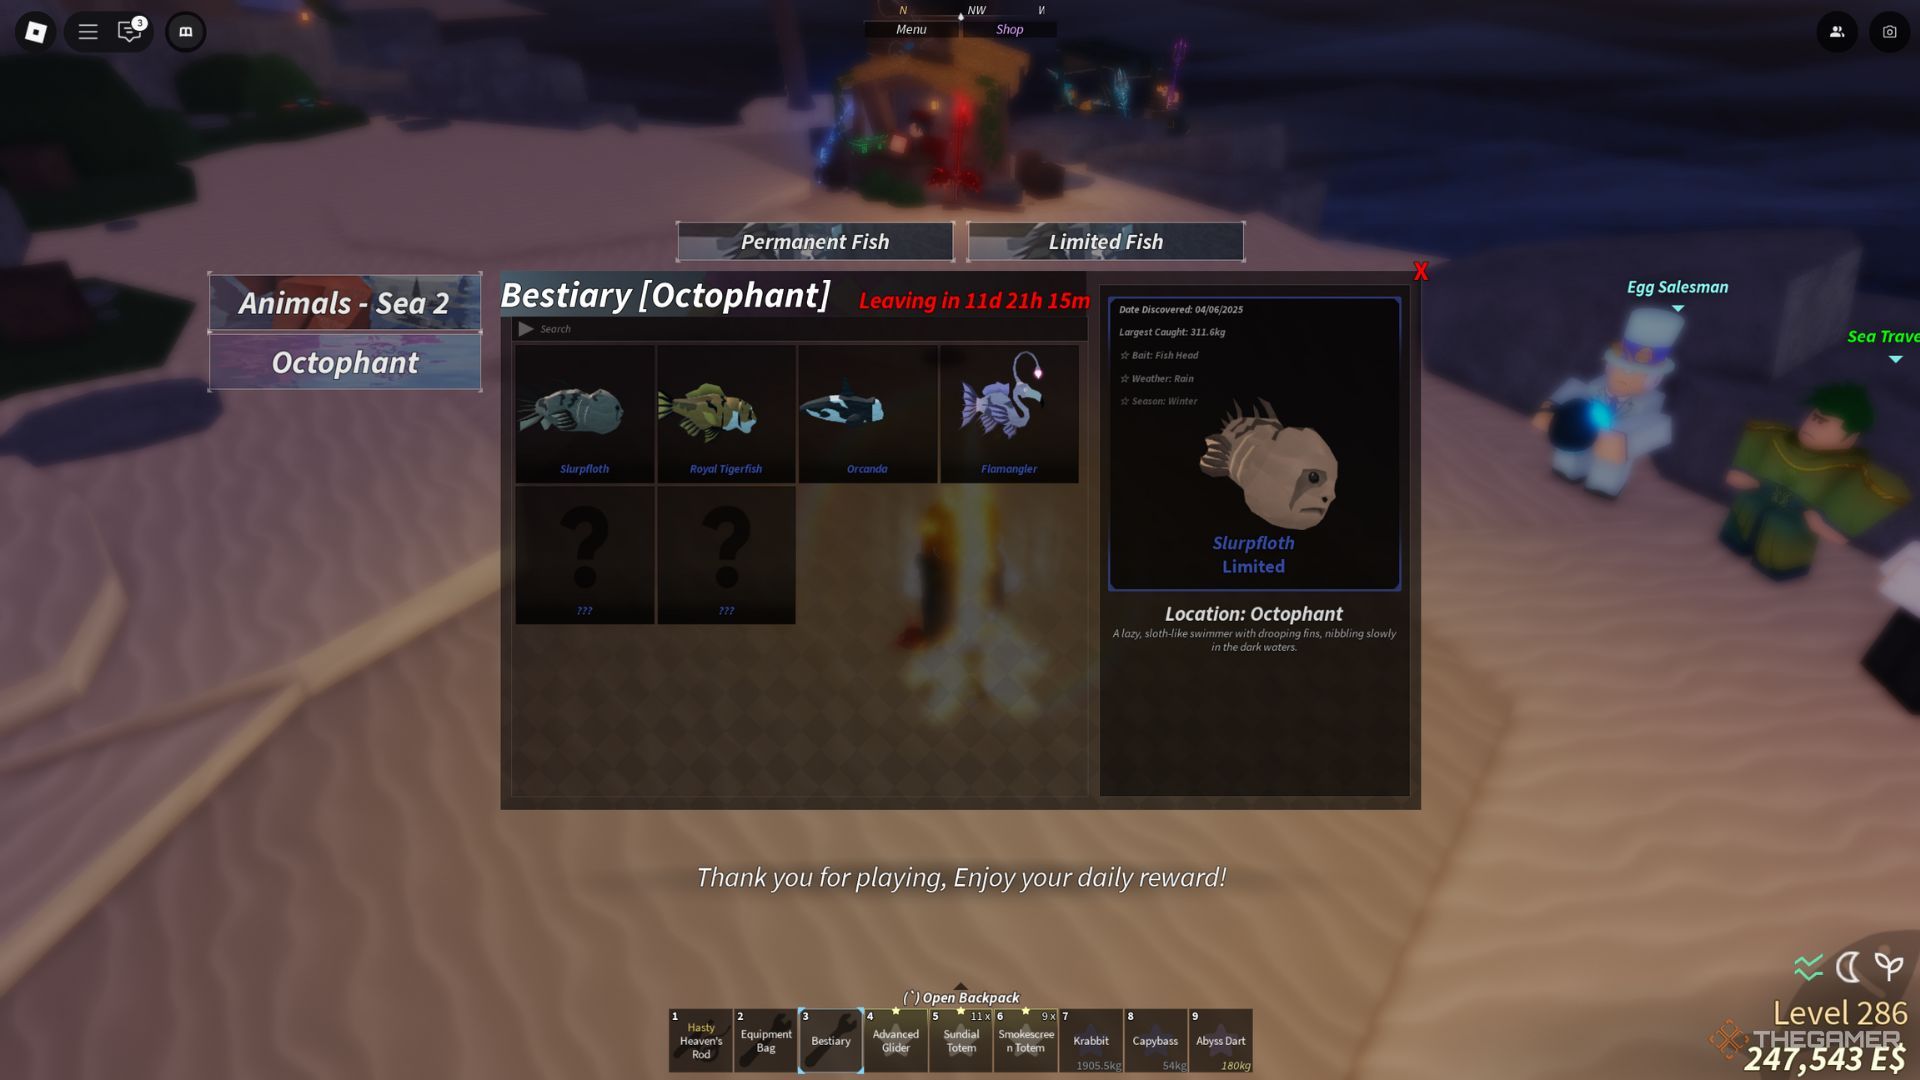
    The Animal Hunt event in Roblox’s Fisch introduced an array of surprising and quirky creatures in both seas. Among them, the most elusive is the Octophant, which resides in a special event pool located in the Second Sea. If you can locate this pool, you have the chance to complete the Octophant Bestiary and even catch the Octophant itself.

    To finish this bestiary, simply going to the right location and casting your line won’t cut it. First, you must de-protect the main catch, a new mechanic that many players may find unfamiliar.

    The Octophant Bestiary Guide


    The Octophant Bestiary is exclusive to the Second Sea, meaning you need to have reached Level 250 and defeated Cthulhu at Terrapin Island before you can start working on it.

    Once you’re in the Second Sea, go to Lushgrove at these coordinates: 1135, 105, -555. Here, you’ll need to wait for the event to begin. You’ll receive a notification in chat that alerts you, or you can look for a shaded pool area that appears near the island.

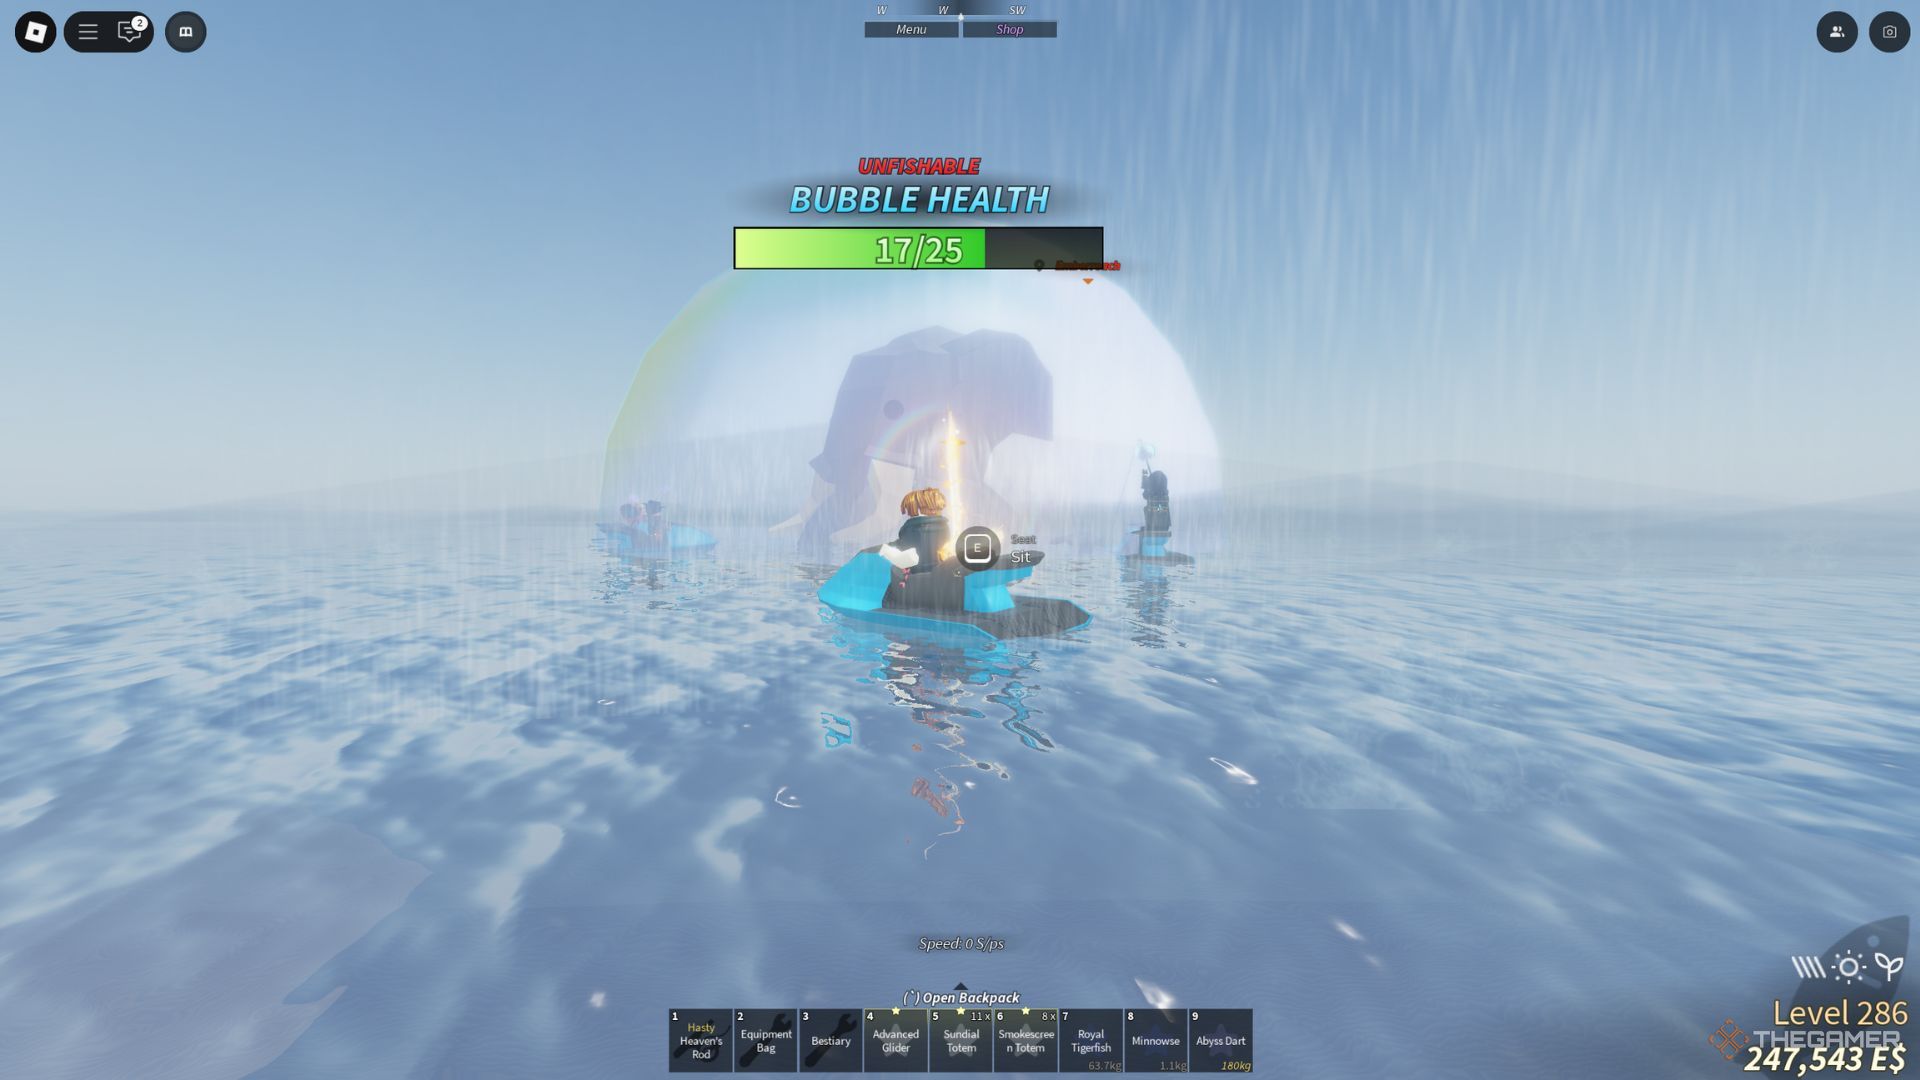
    This is the Octophant pool — a unique square fishing zone that is only accessible during rainy weather. You can find all six fish from the bestiary in this area. Above the pool, you will also spot the Octophant encased in a bubble, complete with an HP bar.

    We will go into more detail about catching it later, but for now, here’s a list of the other fish available and their preferences:

    Fish

    Weather

    Season

    Time

    Bait

    Slurpfloth

    Rain

    Winter

    Any

    Fish Head

    Flamangler

    Windy

    Spring

    Any

    Lagoon Leech

    Orcanda

    Foggy

    Winter

    Any

    Sapphire Krill

    Shrimpanzee

    Foggy

    Spring

    Any

    Phantom Leech

    Royal Tigerfish

    Clear

    Summer

    Any

    Ember Berries

    If you’re not keen on waiting for the pool to spawn on its own, there’s a strategy you can use. Employ Tempest Totems, Windset Totems, and Smokescreen Totems in quick succession to manipulate the weather. By continuously forcing rain, you can significantly hasten the appearance of the Octophant event pool.

    How To Catch Octophant


    A player character showcases the Octophant pool near Lushgrove in Fisch.

    The Octophant acts as a mini-boss you can capture at the event’s conclusion. It will be visible above the pool within a bubble having an HP bar of 25 points. Once the pool is active and the bubble is in sight, your mission is to catch 25 fish in the designated area.

    Each fish you reel in will diminish the Octophant’s shield health points, clearly indicated by the gauge displayed above its head. After you’ve caught 25 fish, the bubble will burst, allowing one fortunate player the opportunity to catch the creature.

    For the best chance of success, ensure you’re using a powerful rod like the Free Spirit Rod or the Great Dreamer Rod, both of which boast excellent stats and useful passives for challenging catches. Here’s what you need to know about the Octophant:

    • Weather: Clear
    • Time: Any
    • Season: Summer
    • Bait: Golden Worm

    Keep in mind that once the Octophant is caught, the event will conclude. So, if you’re determined to capture this legendary creature, be ready to act quickly and be fully prepared when the chance arises.

  • Starting Your Journey in the Second Sea of Roblox Fisch: Completing Tips

    Starting Your Journey in the Second Sea of Roblox Fisch: Completing Tips

    Welcome to the Second Sea in Roblox’s Fisch, where your fishing adventure takes a thrilling turn. By entering this region, you’re stepping out of the familiar territory of the First Sea and into a world filled with tougher challenges. If you aim to make significant progress here, you’ll need to adapt swiftly, identify the best fishing spots, and prepare adequately.

    To help you navigate this new chapter, we’ve created a detailed progression guide for the Second Sea. This guide will cover how to earn currency, recommend which fishing rods to prioritize, and highlight the best locations for fishing. Whether you’re new to this area or looking to enhance your fishing experience, you’ll find a comprehensive roadmap to guide you toward success.

    Second Sea Progression Guide


    Before delving deeper into the Second Sea, it’s crucial to understand that the currency here is different. You’ll encounter Embercoins instead of the familiar Credits from the First Sea. These two currencies cannot be exchanged for one another. Luckily, you can earn Embercoins through various methods just like in the First Sea:

    • Selling fish
    • Completing quests
    • Filling out local bestiaries
    • Opening crates and chests
    • Daily bonuses
    • Perfect Catch bonuses
    • Redeeming codes
    • Purchasing Embercoins with Robux

    Once you accumulate some Embercoins, the next step will be upgrading your fishing rod. Here’s where it can get exciting.

    Best Rods


    The player character's inventory shows two of the best rods available in the Second Sea in Fisch.

    One common mistake newcomers make is sticking with their top-tier First Sea rods, such as Heaven’s Rod or Rod of the Depths. Although these rods have their merits, all rods from the First Sea experience a 50% stat reduction in the Second Sea.

    Don’t discard those First Sea rods just yet, as they can still outperform the basic rods you encounter early in the Second Sea. Use them temporarily until you can invest in superior options.


    The player character stands next to the Verdant Shear Rod in the Lushgrove area in Fisch.

    Your first goal should be to acquire the Verdant Shear Rod. This impressive fishing rod is well-known for its outstanding stats and unique ability: there’s a 10% chance of triggering tree growth. While the tree grows, every fish caught will get a mutation that triples their value. This is an excellent way to boost your earnings and speed up your access to higher-level gear.

    The cost of this fishing rod is 40,000E$, and you can find it at the coordinates: 165, 115, 730.


    The player character stands next to the Free Spirit Rod in the Angler on Isle of New Beginnings area in Fisch.

    After you get the Verdant Shear Rod, your next objective should be the Free Spirit Rod. You can purchase it for 200,000E$ at Isle of New Beginnings, specifically at the coordinates: -390, -80, 390. Known for its exceptional luck, this rod is great for hunting rare fish. Additionally, it has two strong passive abilities:

    • A 20% chance to trigger Skeletal Flowering, where purple gems drop, applying the Bloom mutation and increasing fish value fivefold.
    • A stabbing effect that advances minigame progress by 6% and negates any Progress Speed debuffs.

    The player character stands next to the Great Dreamer Rod in The Cursed Shores area in Fisch.

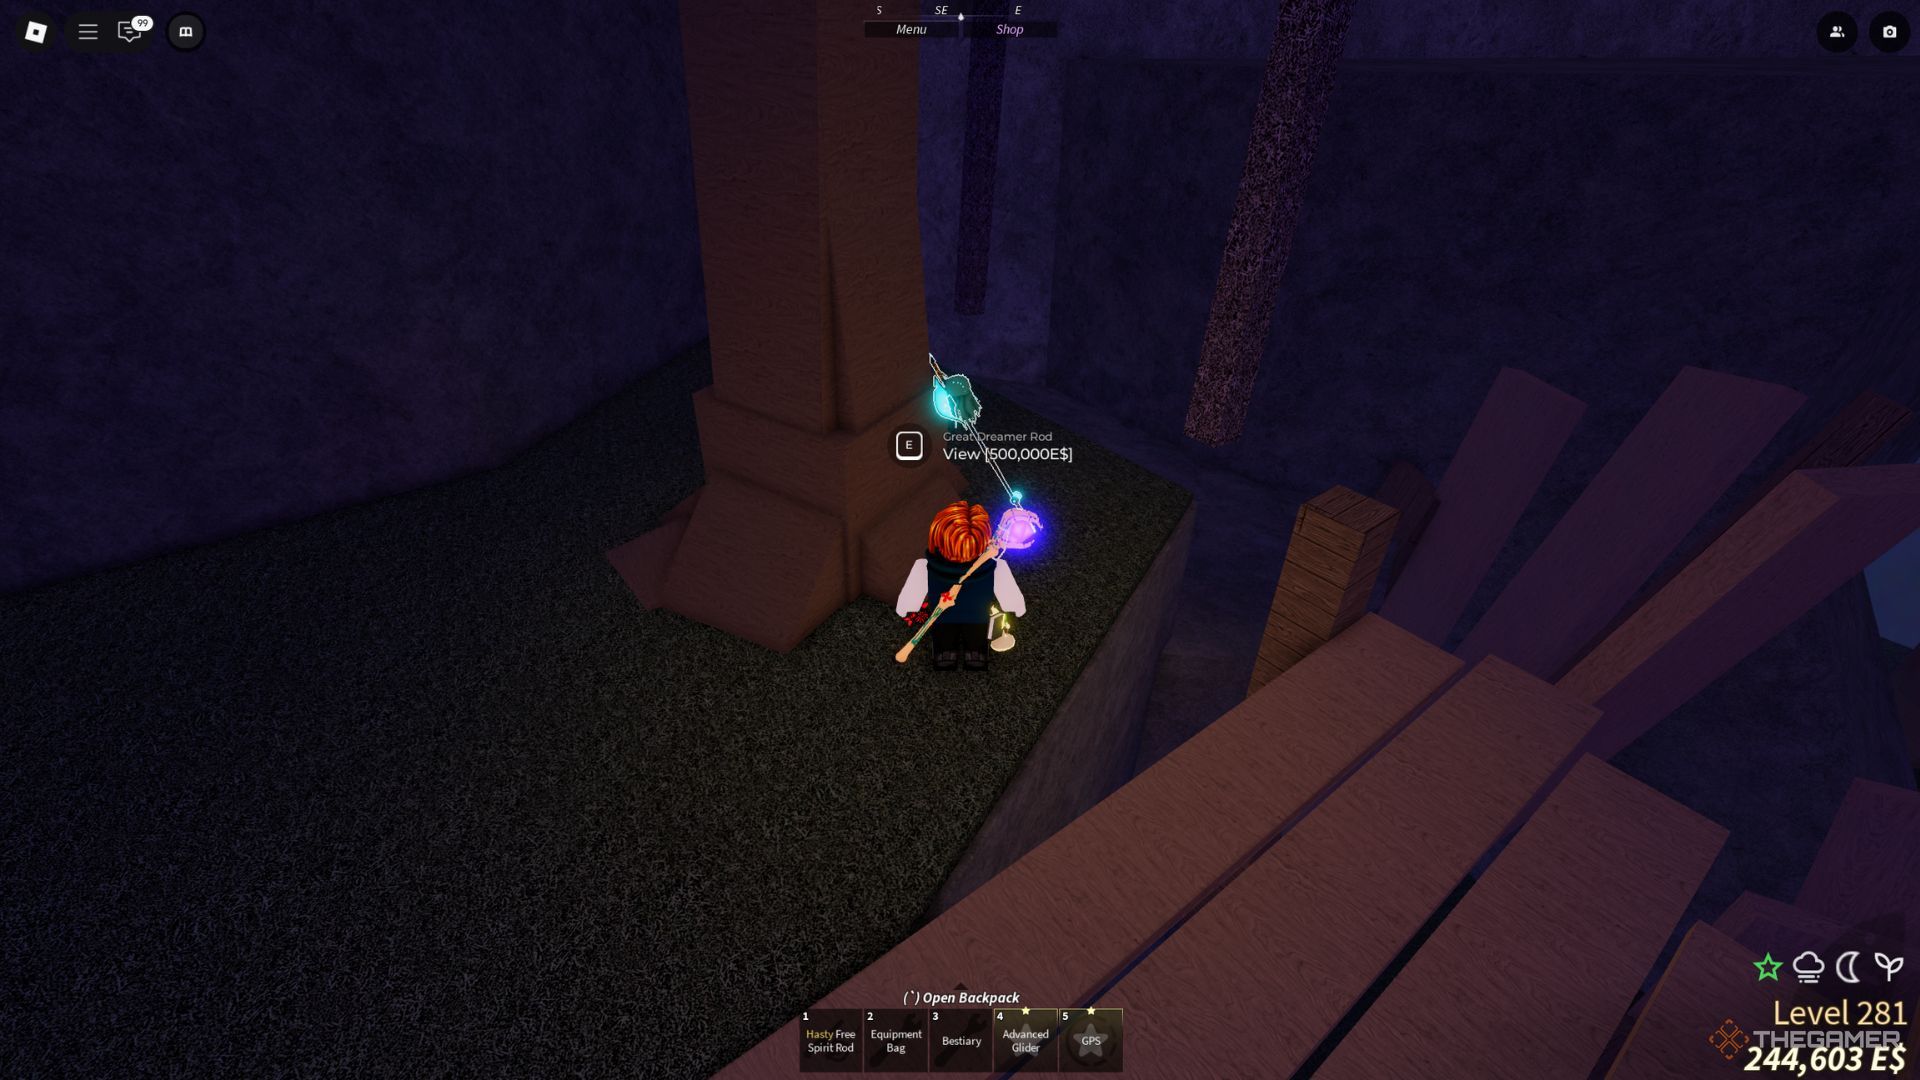
    Finally, don’t overlook the Great Dreamer Rod, the priciest rod in the Second Sea, costing 500,000E$. You can find it in The Cursed Shores at these coordinates: 2875, 165, 530. If you’re aiming for those elusive big fish that are challenging to catch, this is the rod you want.

    It boasts one of the best lure speeds and is very resilient. Like the other rods, it also has impressive passive abilities, such as a chance to summon Cthulhu to assist you in catching fish.

    Additionally, there’s a 5% chance for the Cursed Touch mutation to apply to a catch, which increases the value of the fish fivefold.

    Best Fishing Spots

    With your new rods in hand, you’re probably wondering where to fish for the best results. Among all the islands available, two stand out:

    • Isle of New Beginnings — This island is perfect for early progression. It features a variety of exotic fish that are relatively easy to catch and yield generous amounts of coins and experience. A great spot for quickly earning Embercoins.
    • Azure Lagoon — Another great area filled with a diverse range of high-value fish. It’s an excellent choice once your rod setup is stronger.

    To enhance your fishing experience even further, consider starting the Aurora Borealis event while fishing on these islands. This boosts your overall luck, which is vital for landing rare and valuable fish.

    You can activate the Aurora Borealis using the Aurora Totem, which you can purchase for 500,000C$ back in the First Sea at Brine Pool, located at -1810, -135, -3280. It’s a wise investment for night fishing when the most rare and profitable fish tend to appear.

  • Completing the Azure Lagoon Bestiary in Roblox: Fisch Solutions

    Completing the Azure Lagoon Bestiary in Roblox: Fisch Solutions

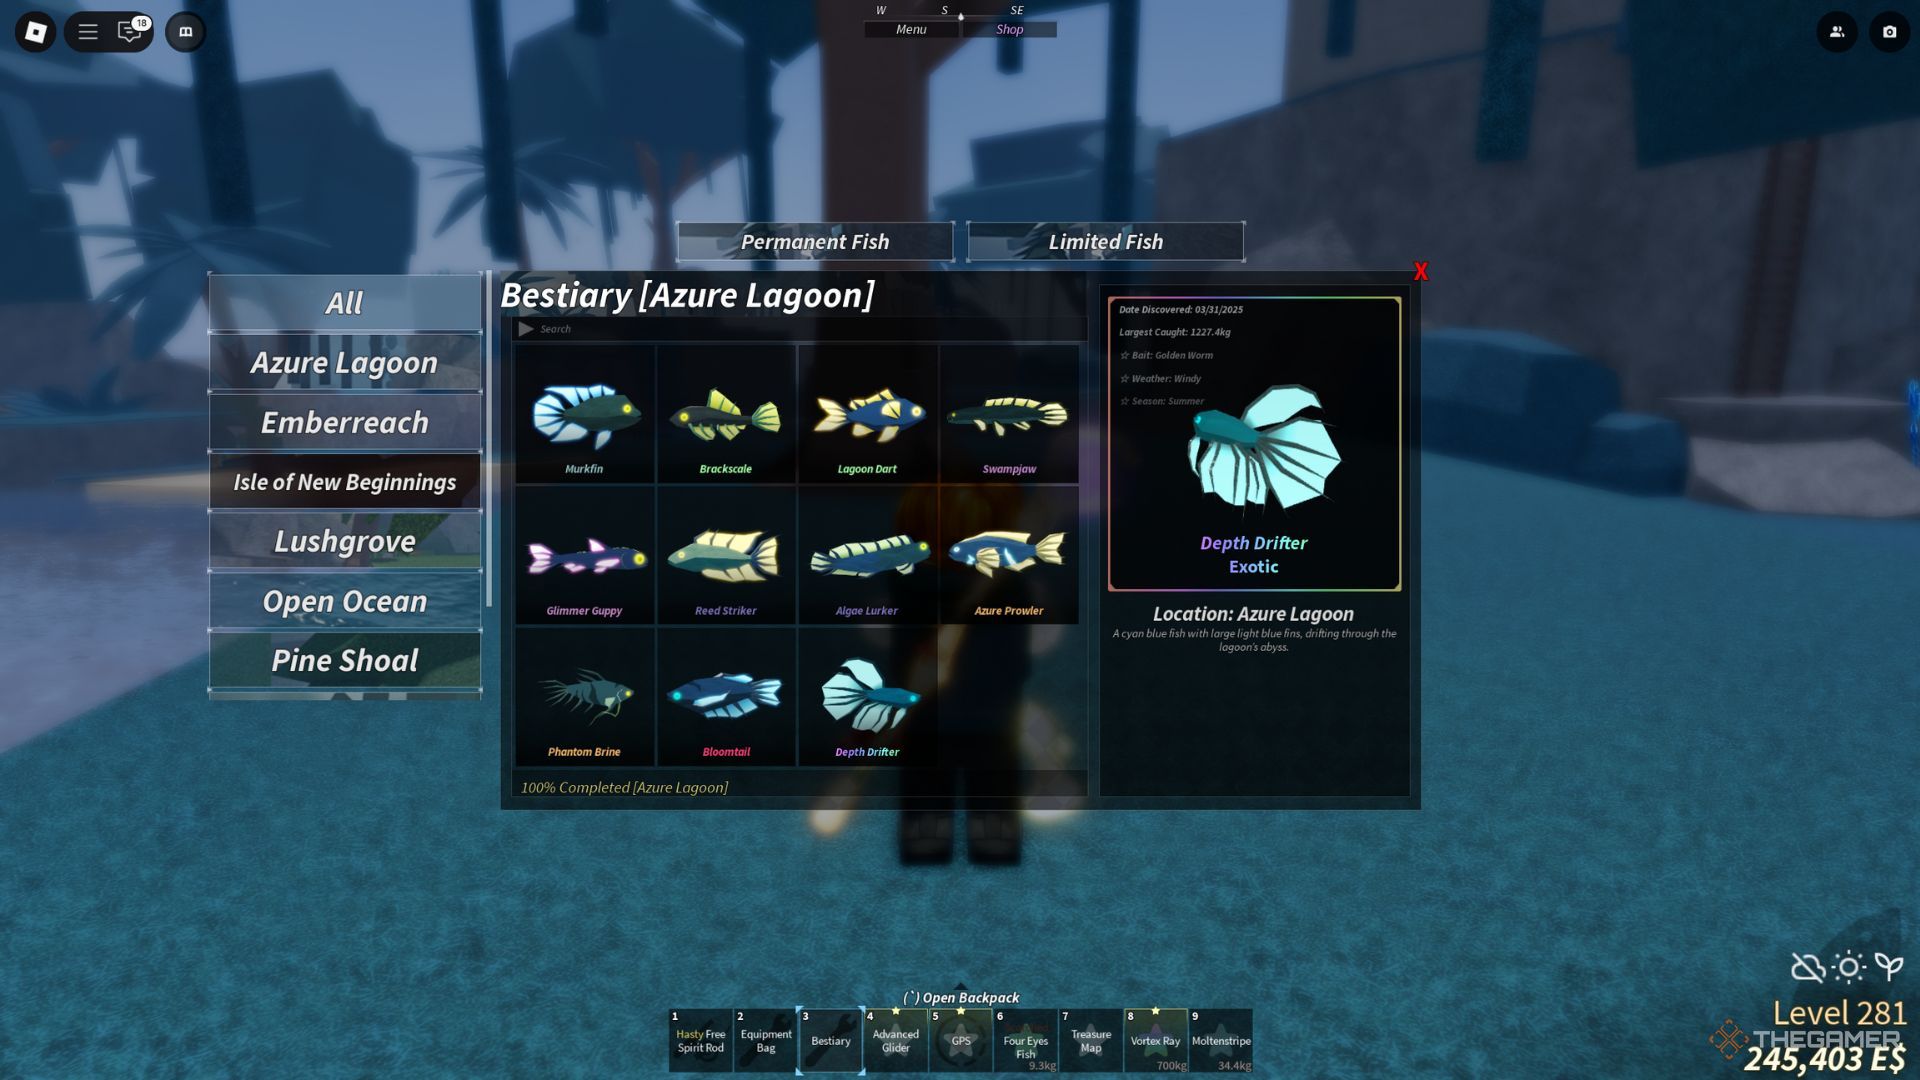
    Azure Lagoon is one of the many fishing spots found in the Second Sea of Roblox’s Fisch. Here, you can purchase an Azure Of Lagoon fishing rod and discover various fish species to add to your bestiary. In total, you can catch 11 different types of fish, plus a hidden one known as the Verdant Mirage, which isn’t easy to reel in.

    To complete the Azure Lagoon bestiary, you’ll need more than just determination and a good fishing rod. Each fish has particular requirements—such as bait, time of day, season, and weather—that influence your catch rates. This guide will cover everything you need to know to catch them all and optimize your fishing adventures.

    How to Complete the Azure Lagoon Bestiary

    Located southwest of Waveborne, at coordinates 1310, 80, 2113, Azure Lagoon features several small rocky islands adorned with vibrant blue grass, surrounded by deep waters—an ideal spot to uncover different species.

    Your journey begins once you arrive, but completing the local bestiary requires understanding each fish’s specific preferences: what bait to use, the best time to fish, the ideal weather, and the season they appear in. We’ve prepared a comprehensive chart to assist you in planning your catches and minimizing bait waste.

    Fish Weather Season Time Bait
    Murkfin Foggy Autumn Day Worm
    Depth Drifter Windy Summer Any Golden Worm
    Brackscale Rain Spring Any Seaweed
    Bloomtail Rain Spring Night Mist Worms
    Lagoon Dart Rain Summer Night Shrimp
    Phantom Brine Foggy Winter Day Mist Worms
    Swampjaw Rain Autumn Night Insect
    Azure Prowler Clear Autumn Night Mist Worms
    Glimmer Guppy Foggy Winter Day Flakes
    Algae Lurker Clear Spring Day Squid
    Reed Striker Windy Summer Night Minnow

    To speed up your fishing and catch the fish you want more efficiently, remember to use totems. These tools allow you to manipulate the weather and time, creating optimal conditions for the fish you’re targeting without having to wait.

    It’s also wise to use a strong Second Sea rod. First Sea rods, like the Heaven’s Rod, may not work as effectively. We recommend the Great Dreamer Rod or the Free Spirit Rod, both of which offer excellent stats and can be enhanced with enchantments to further improve your fishing success.

    How to Catch Verdant Mirage

    In addition to the common entries in the Azure Lagoon bestiary, there’s one elusive fish to pursue—the Verdant Mirage. While this fish can spawn even under less-than-ideal conditions, its appearance rate will be significantly lower. To enhance your chances of catching it, try to recreate the following settings:

    • Weather: Foggy
    • Time: Day
    • Season: Autumn
    • Bait: Luminous Larva

    This secret fish doesn’t contribute to the 100% completion of your bestiary but is a valuable addition to your collection and can be sold for a significant amount.

  • Completing the Isle of New Beginnings Bestiary in Roblox: Fisch

    Completing the Isle of New Beginnings Bestiary in Roblox: Fisch

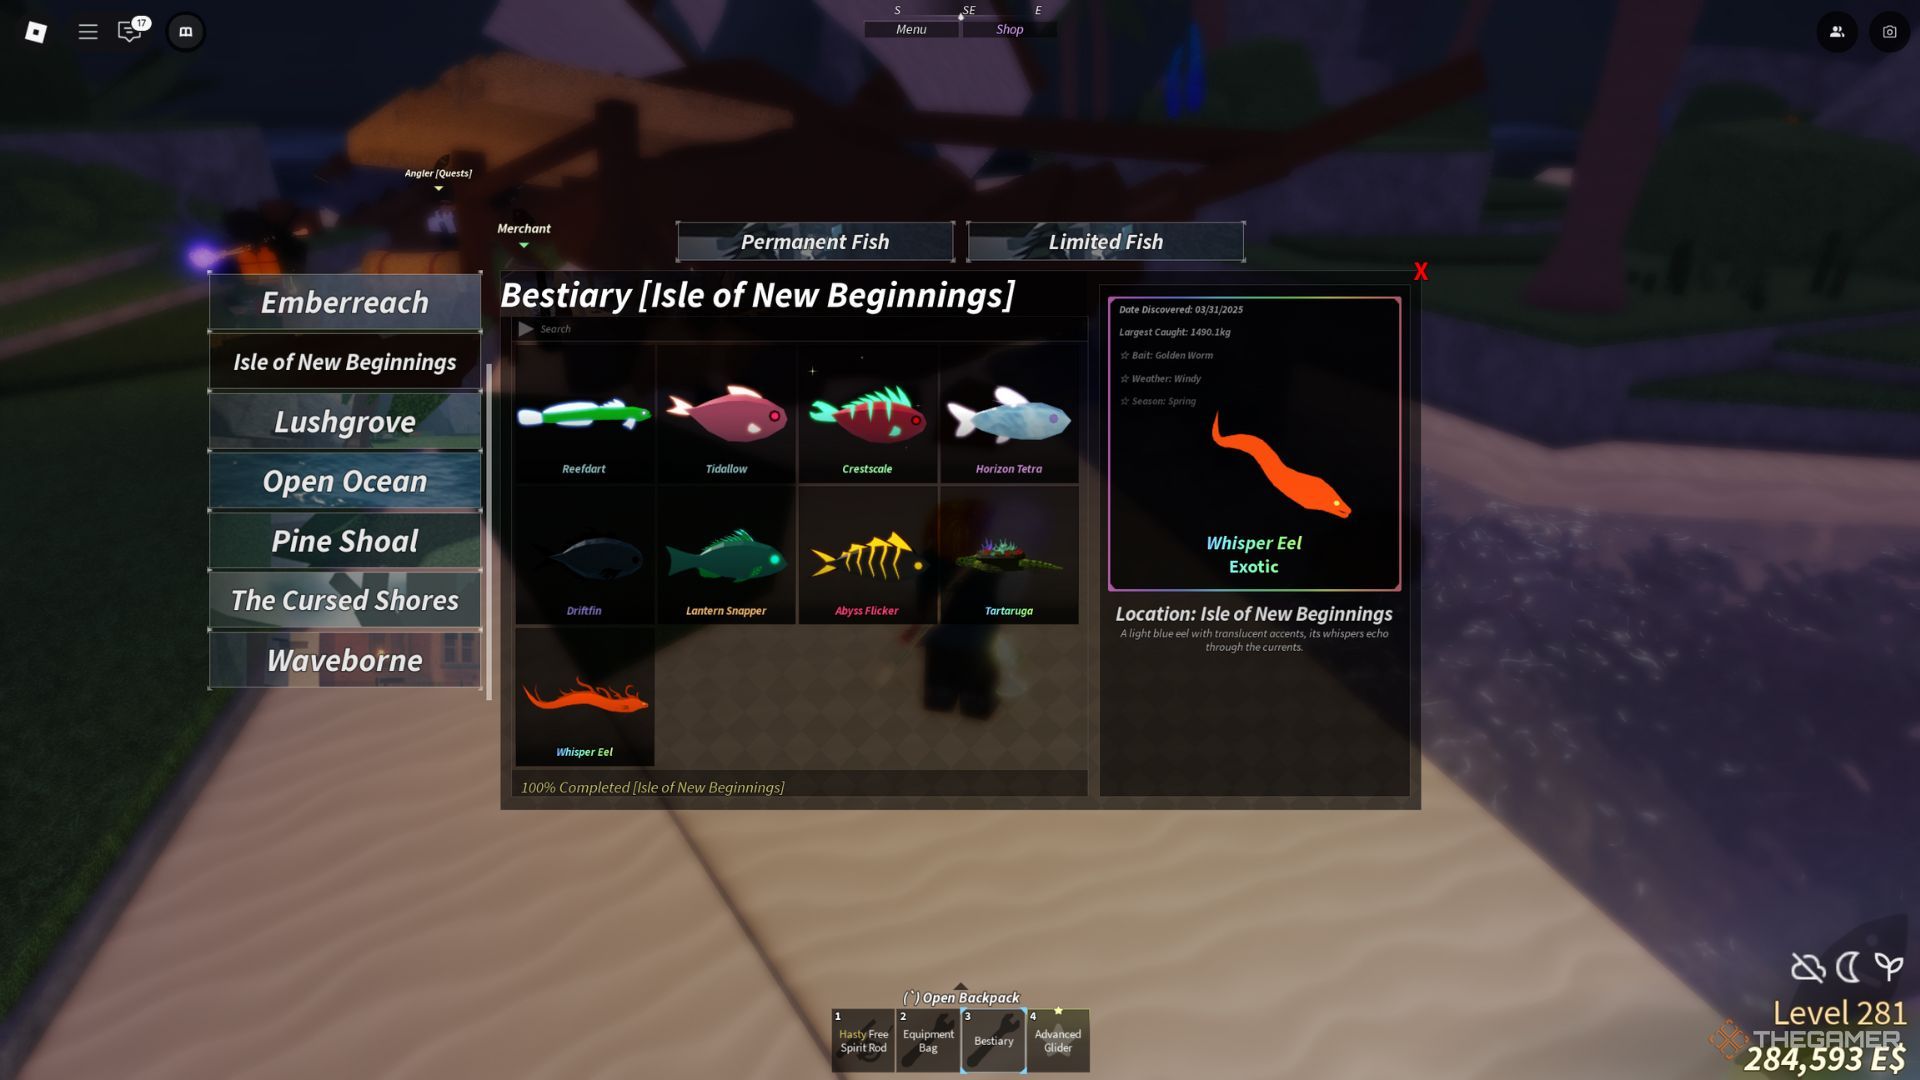
    In Roblox’s Fisch, you will discover the Isle of New Beginnings, a prime location situated in the Second Sea. Here, you can catch nine different species of fish to fill out your local bestiary, and if you’re up for a challenge, you can try to catch the elusive Phantom Koi, a hidden gem of this area.

    To successfully complete your bestiary, you’ll need to come prepared. Each fish has its unique preferences, which are crucial to observe for a better chance of catching them. Pay attention to the weather, time of day, bait, and even the seasons. Don’t worry; we’ve got all the details you need.

    Guide to the Isle of New Beginnings Bestiary


    The Isle of New Beginnings is located northeast of Waveborne, specifically at the coordinates -300, 83, -380. The island is characterized by small, flat rocks and rugged stone formations rising from the sea, surrounded by shipwrecks and scattered debris.

    This location hosts a diverse array of fish, but similar to other areas in Fisch, patience and preparation are key to catching them all. Each type of fish has specific conditions that it prefers; to efficiently complete your bestiary, make sure to consider their ideal bait, weather, time, and season.

    Here is a helpful table that outlines all the fish found in this area along with their preferred fishing conditions:

    Fish Weather Season Time Bait
    Reefdart Clear Spring Night Shrimp
    Whisper Eel Windy Spring Any Golden Worm
    Tidallow Clear Summer Day Seaweed
    Tartaruga Foggy Winter Any Mist Worms
    Crestscale Windy Summer Any Seaweed
    Abyss Flicker Rain Winter Night Crystal Bananas
    Horizon Tetra Clear Spring Day Flakes
    Lantern Snapper Clear Summer Night Crystal Bananas
    Driftfin Rain Autumn Night Insect

    To maximize your fishing experience on the Isle of New Beginnings, consider utilizing totems that can adjust the weather and time to match the conditions you need for the fish you’re targeting.

    Keep in mind that rods from the First Sea, like the Heaven’s Rod, operate at only 50% efficiency in the Second Sea. For better results, switch to Second Sea equipment, such as the Great Dreamer Rod or the Free Spirit Rod, which are optimized for local fishing.

    Don’t overlook the importance of enchantments either; these can significantly enhance your rod’s capabilities, making your fishing sessions much more effective.

    Catching the Phantom Koi

    Player character fishing at the Isle of New Beginnings in Fisch.

    Among the usual fish in the area, there’s a secret fish called the Phantom Koi. Here are its preferred conditions:

    • Weather: Foggy
    • Time: Day
    • Season: Autumn
    • Bait: Luminous Larva

    This rare catch isn’t needed for full completion of the local bestiary, but it still makes a great addition for collectors or fishermen looking to earn more rewards.

  • Unlocking the Deep Relic Song in Roblox: Fisch Guide

    In Roblox’s Fisch, the Song of the Deep is a special treasure that stands out due to how you acquire it and how its enchantments work. Unlike many other relics that you can simply catch while fishing, you have to purchase the Song of the Deep, and it’s not going to be cheap.

    When you use the Song of the Deep on the Keeper’s Altar to enhance a fishing rod, you might receive amazing benefits or, conversely, lose all the existing enchantments on that rod. If you’re eager to take a chance with this unique relic, we’ve outlined everything you need to know to obtain the Song of the Deep.

    How to Get the Song of the Deep

    The only method to acquire the Song of the Deep is by visiting Captain Ahab. You can locate this character in Moosewood, near the dock, at the coordinates 362, 133, 194.

    Captain Ahab is a bearded man wearing a blue suit and a gray shirt. Approach him, and he will ask you to bring him Moby, which is your ticket to getting the relic. So, to get the Song of the Deep, you will need to catch and deliver Moby to Captain Ahab.

    However, catching Moby won’t be easy since it is a rare and elusive fish. The only way to find Moby is to catch it during the Whale Migration event. Keep in mind that there’s only a five percent chance of Moby appearing during this event.

    To boost your chances of catching Moby, consider the following preferences:

    • Weather: Any
    • Time: Any
    • Season: Aurora Borealis
    • Bite: Squid

    Prepare yourself to fish for Moby and wait for the Whale Migration event to trigger. This event can occur with a 20 percent chance during rainy conditions.

    To help speed up the process, use the Tempest Totem to create rain.

    Once the event begins, follow the path line that shows the direction of the whale group. When you encounter the group, check if Moby is present, as its appearance rate is quite low.

    If you see a third fish along with two whales, that’s Moby, so you can start your fishing attempt.

    Before you can catch Moby, all whales must be caught, and this can be done by anyone, not just you.

    After successfully catching Moby, return to Captain Ahab and speak with him again. Hand over Moby to receive your reward.

    Moreover, when you deliver Moby to Captain Ahab for the first time, you’ll not only receive the Song of the Deep but also gain The Moby Bobber as a bonus. You can take advantage of Captain Ahab’s services as often as you like.