الوسم: far

  • All Desert Grave Locations in Far Far West: Completing and Solving Guide

    All Desert Grave Locations in Far Far West: Completing and Solving Guide

    Each map in Far Far West features a challenge where you need to find hidden graves scattered across the area. Once you spot the glowing blue grave marker that starts this side quest on each map, you’re free to explore and find all the hidden graves before defeating the boss and leaving the map.

    Unlike some other missions, you can usually find all the graves in just one playthrough, so there’s no need to go back and look again. Here’s the location of every hidden grave in the Desert map of Far Far West.

    Most of the graves are concentrated near the center to the west side of the map. You’ll need to locate all ten graves to complete the quest.

    We’ve numbered the graves from the bottom of the map going upward to help you find each one. To begin the quest, just find any of the graves and interact with it.

    All Desert Grave Locations

    Grave 1
    Start at the bottom right of the map, near the water. It’s tucked into a small crevice under a rope bridge, so follow the shoreline around into the ravine to spot it near the water’s edge.

    Grave 2
    From Grave 1, head northeast toward the shoreline on the map’s right side. Near the little islands on the right, find the hut with a tall wooden lookout; the grave is in front of the structure.

    Grave 3
    From Grave 2, travel straight west across the map. The grave is situated between two landmasses—reach it by crossing the middle pipes over the water, then jump onto the area where the grave is located.

    Grave 4
    From Grave 3, head northwest to a small island. Walk along the cliffs near the shore and climb the rope to a lookout point; the grave is right next to the rope.

    Grave 5
    From Grave 4, go up the rope and walk across the mountains. Find the small hole in the mountains to the right, and you’ll discover the grave beneath the pass.

    Grave 6
    From Grave 5, head northeast diagonally. Climb the hill, then interact with the grave at the top of the hill next to the stairs.

    Grave 7
    From Grave 6, go straight west past the water, just above the darker circular area. The grave sits beneath a rocky outcrop, so look for it near there.

    Grave 8
    From Grave 7, move directly west, past the water and the dark circle. The grave is on the ground beneath a large rock formation.

    Grave 9
    From Grave 8, head diagonally southwest toward a small shallow pond. The grave rests on a tiny island in the middle of the pond.

    Grave 10
    From Grave 9, continue west toward the crescent-shaped island visible on the shore. The final grave is on the shoreline, nestled between two rocks near the water’s edge.

    A map above shows all grave locations marked in blue for easy reference. You only need to find one grave on the map to start the quest, and then you can collect all ten graves at your own pace.

  • All Correct Answers for Otto’s Rules of the West Completing Quiz in Far Far West

    All Correct Answers for Otto’s Rules of the West Completing Quiz in Far Far West

    When you arrive at the Canyon in Far Far West and begin your mission, you’ll meet Otto at Otto Ranch & Co. He’ll give you quests for the area. Otto’s main concern is making sure you operate a horse legally, so you’ll need to get a license to avoid riding around in Far Far West without a permit.

    This involves taking a written test, which you must pass by answering Otto’s driving questions. Since Otto wrote the quiz himself, the answers might not be what you’d expect. Here are all the answers to his quiz questions.

    Once you talk to Otto, you’ll be offered a choice of quests. The first one, The Rules of the West, is the written exam for your rider’s license. Select this option, click start, and follow Otto outside. You’ll step onto the side of a building where a screen will lower, displaying multiple-choice questions to answer. To pick an answer, approach the buttons on the platform’s edge and press the one that matches your choice. There are 20 questions in total, and you need to answer at least 15 correctly to pass.

    Below are all the questions and answers from Otto’s quiz:

    | Question | Answer |
    |—|—|
    | A harmless tumbleweed rolls across your path. What do you do? | I spur my horse and ride it down. |
    | A cow stops you and asks for your mount’s papers. What do you do? | No way, I’m going too fast to get caught. |
    | A bandit tries to horse-jack you at a crossroads. What does the code say? | The code requires an official duel, even at 2 a.m. |
    | Wearing a seatbelt is mandatory while riding. How do you strap in? | As long as my hat stays on, nothing else really matters. |
    | How do you make sure you’re on the right path? | I don’t follow paths. I make my own. |
    | 1 in 5 horse accidents is caused by booze. What does that tell you? | 4 out of 5 accidents are caused by sober hunters. |
    | You arrive at an intersection at the same time as another rider. Who has the right of way? | Whoever has the bigger caliber goes first. |
    | Your horse is running low on energy. What do you give it? | The souls you just ripped from your enemies. |
    | Night falls, and you can’t see well. What do you do? | I shoot into the air every 5 seconds to light the way and keep moving. |
    | A man in striped clothes with a ball and chain calls out from the roadside. What do you do? | There’s a bounty on his head, so I take him to the sheriff. 1,000 gold ain’t nothin’. |
    | Which of these road users am I legally allowed to run over? | Cryptids and marauders. What are they even doing on the road anyway? |
    | How do you brake on your robot horse? | I jump off the saddle with style. |
    | A reckless rider passes you on the right. What do you do? | Yeehaw, now that’s a real cowboy! |
    | You see a post with ghostly skulls hanging from it. What does it mean? | Cryptics ahead. Time to start shooting. |
    | You enter town. When are you allowed to “honk” (whistle through your fingers)? | Because you feel like it, it’s stylish, and you want attention. |
    | Your mount’s reverse sensor isn’t working. How do you back up safely? | A real cowboy never backs up. |
    | You arrive at the Tired Horse Saloon. How do you park? | I don’t tie my horse. I trust it. It won’t go anywhere without me. |
    | A convoy moves slowly and blocks the road. Can you lane split with your horse? | Yes, I’m a fearless cowboy. |
    | You accidentally trigger a storm with your horse. What do you do? | I deal with my teammates’ judgment first, then the enemies. |
    | You’re about to pass a Cryptic Grunt. Where are its blind spots? | Why bother? I blow it up. |

    You need to answer at least 15 questions correctly out of the 20. Once you pass, you’ll see a notification that the quest is complete.

  • How To Complete The Great Marauders Secret and Solve Area 41 in Far Far West

    How To Complete The Great Marauders Secret and Solve Area 41 in Far Far West

    When you begin playing Far Far West, you’ll notice several continents that are locked at first. One of these hidden areas is Area 41, located south of your starting point. This continent holds many secrets of its own. To access Area 41, you’ll need to seek out Dr. Spark-Twist.

    When you speak to him, you’ll be tasked with completing a few quests before the area opens up. Once you finish these tasks, you’ll not only unlock the map of Area 41 but also earn the Dr. Spark-Twist skin for your character.


    How to Complete the Great Marauder Secret

    First, you need to pick a mission and head to the Desert. On the map, look for the quest icon—a character with a hat giving a thumbs-up. Follow that marker to find Dr. Spark-Twist’s hut, where he holds a gun and has a request for you.

    Talk to him. You’ll see quests you can track. To unlock Area 41, you must complete both quests he offers, finish your main mission, and then leave the Desert.


    How to Complete Fighting Spy

    The initial quest from Dr. Spark-Twist for the Great Marauder Secret involves taking out all Marauder camps spreading information. When you accept this mission, two exclamation points will appear on your map in matching colors.

    Travel to each camp location. Fight off the enemies around the camp, then pick up the radio device on the ground. Once the area is clear and the device is collected, move to the next marked spot.

    Tips: Use spells primarily, as the camps are filled with enemies behind shields shooting from a distance. If playing solo, grab health potions and ammo early. Setting up near enemies for resource sharing or marking camps on your map can help you fight more effectively from a distance.

    After clearing both camps, the necessary item will spawn. Collect it to finish the quest, then return to your main mission and leave the Desert to proceed with the story.


    How to Complete Mass Surveillance

    Return to the Desert and speak to Dr. Spark-Twist once more; this time, accept his second quest. The guide marker will lead you far south on the map. Head in that direction and prepare to fight off surrounding enemies.

    When you arrive, you’ll see a machine with a series of numbers. Dr. Spark-Twist will give you a code—enter this into the machine. Next, defend the area against waves of enemies as the satellite setup begins. The countdown lasts about 45 seconds, so be prepared for continuous attacks.

    Tip: Since there are no health items nearby, make sure you’re well-equipped before starting the satellite deployment. You can leave the area during the countdown, and it will continue without interruption.

    Once the satellite is fully set up, complete your current mission and extract from the area. This will finish the second quest, and with that, you’ll unlock Area 41 and earn the Dr. Spark-Twist skin.

  • How to Get Gold Fast by Completing and Solving in Far Far West

    How to Get Gold Fast by Completing and Solving in Far Far West

    Gold is essential in Far Far West, but upgrading costs can quickly drain your funds after just a few purchases. One moment, you feel rich and powerful, and the next, you’re staring at your gold total like a cowboy who just lost everything at the saloon. It’s a tough spot.

    Fortunately, there are quick and efficient ways to earn gold without turning your game into a constant mining grind. With some smart strategies, you can leave each expedition feeling financially stable for a little while. If your goal is to become the richest outlaw in the West, it’s time to put in some serious effort.

    How to Get Gold Quickly

    The fastest way to farm gold involves opening the hidden gold vault in the mine on the Canyon map. To unlock it, you need to gather four medallions scattered across the area. Each medallion is tied to a small puzzle or interaction. We have a detailed guide on how to complete this secret mission if you need help.

    Once the vault is open, the quickest approach is to take all the gold inside the mine and extract immediately. This method is safe and saves time, making it ideal if you’re mainly interested in quick profits.

    Another good way to get gold fast is by completing side objectives on each map. These offer additional gold rewards, and the more you complete, the more gold you stack up over multiple runs. This method balances playing with earning, especially if you’re already exploring the map and gathering loot.

    You should also loot every chest you come across. Chests aren’t just useful for ammunition and health bottles—they can also contain gold deposits. Opening chests whenever possible is worth it because of the chance to find additional gold.

  • Top Strategies for Completing and Solving Fast in Far Far West

    Top Strategies for Completing and Solving Fast in Far Far West

    In Far Far West, leveling up can start to feel like a second job, especially with that cowboy hat on. Between Hero XP, weapon levels, spell upgrades, and prestige rewards, there’s always a new bar waiting to be filled while enemies try their best to turn you into tumbleweed confetti.

    Some methods for earning XP are very quick, others are slow and painful, and some involve deliberately avoiding the extraction train to fight endless waves of enemies—kind of a rebellious choice, really. Once you understand how the game calculates XP, it becomes much easier to manage the grind. There are a few strategies that can help speed things up and make each mission feel more fulfilling.

    Note: Far Far West is still in early access, so these tips might change later.

    How to Level Up Quickly

    Below are the best ways to level up fast in Far Far West.

    Strategy Description
    Repeat the Tutorial Completing the tutorial takes about three minutes and grants around 900 Hero XP each time. It’s one of the fastest farms for Hero XP.
    Farm Hard Difficulty Missions Hard missions give good Hero XP and are manageable for most players. Doing all side objectives boosts XP gains even more.
    Endless Enemy Farming Finish the mission objectives, call the train, then stay behind instead of extracting. Enemies will keep spawning endlessly, letting you farm Weapon XP as long as you have ammo.
    Stack Damage Jokers Jokers that boost damage, like Glass Cannon, increase your total damage output, which directly increases Weapon XP since XP is based on damage dealt.
    Spam Low Cooldown Spells Casting spells grants Spell XP. Spells with short cooldowns level up faster than powerful spells with longer cooldowns.
    Prestige the Shotgun Repeatedly Some players repeatedly prestige the shotgun because later prestige rewards include XP tickets that give three levels instantly.
    Trigger Storms and Side Objectives Storm events and optional missions increase your overall rewards, making each run more effective for leveling.
  • How to Complete Every Title in Far Far West and Solve the Secrets

    How to Complete Every Title in Far Far West and Solve the Secrets

    The titles in Far Far West seem like the game is reacting to your actions, almost like it’s saying, “This is so you!” Sometimes you’re just wandering around the desert, and other times you unlock something exciting like Vulture Bait because the wasteland apparently keeps track of everything you do. These little titles are basically cowboy personality tests with a bit of dirt and explosions thrown in.

    Some titles sound fun, while others might make you a little nervous. Still, unlocking them is a pretty entertaining way to show off your progress and give your outlaw a more legendary vibe. If you’ve been curious about the locked titles menu, this guide will tell you all about each kind and how to unlock them.

    Note: The game is currently in early access, so details might change later.


    How to Unlock All Titles

    Titles can be unlocked at the Rootin’ Tootin’ Shack in the main lobby area. Each title has its own requirements to unlock.


    Title Type How to Unlock
    Bounty Hunter Normal 400 gold
    Survivor Of The Noose Normal 400 gold
    Blackout Drinker Normal 400 gold
    Vulture Bait Normal 400 gold
    Dust Eater Normal 400 gold
    Rusty Normal 400 gold
    Sheriff Fine Complete 50 missions
    Well-Oiled Machine Fine 650 gold
    Pyromaniac Prime Reach level 100 with the Fire element
    Slopmancer Prime Reach level 100 with the Acid element
    Dynamo Prime Reach level 100 with the Elec element
    Shaman Prime Reach level 100 with the Voodoo element
    Botanist Prime Reach level 100 with the Cactus element
    Six-Shooter Ace Prime 1,000 gold
    Gambling Ace Mythic Gamble 100 times at the Gamba Machine, lobby
    Warlock Mythic Cast 3,000 spells
    Cryptic Reaper Legendary Kill 25,000 Cryptics of any kind
    Legend of the Far West Legendary Raise Hero Prestige to 10
  • How to Restore the Great Bell in Far Far West by Completing and Solving

    How to Restore the Great Bell in Far Far West by Completing and Solving

    Far West may appear to be a quiet desert map, but don’t be fooled by the tumbleweeds — it’s hiding some surprises. Like every starting area in Far Far West, there’s a special quest here, and this one is unexpectedly fun.

    This quest focuses on exploration and memory tests, all while the game casually expects you to stay focused despite distractions trying to throw you off. It’s the kind of task you might overlook on your first try, only to realize later how important it was. Luckily, once you know what to look for, everything clicks into place quickly.

    What Are the Far West Bell Locations?

    The goal is to find three bells scattered across the Far West map, complete their ghost bell mini-games, and then take all three to the big bell located in the church on the southeastern side of the map.

    Here’s where to find each bell:

    Bell Location Notes
    Bell 1 North side near the water Sitting openly close to the shoreline, easy to spot if you look at the top edge of the map first.
    Bell 2 Middle area on a hill Positioned on higher ground in the central part of the map.
    Bell 3 Southeast of the church, between rocks Found among rocky structures just southeast of the church area.

    What Is the Bell Puzzle Solution?

    Each bell glows with a purple aura, making it stand out against the surroundings. When you interact with a bell, a mini-game starts — ghost bells will ring out in sequence, and you need to shoot them in the exact order they ring.

    If you lose track of the sequence, you can interact with the bell again to reset it and try once more. After successfully completing the mini-game at all three locations, you’ll have three bells in your inventory. The final step is to go back to the church in the southeast corner of the map, near the third bell. To reach the big bell, climb using the crates and the church ladder to access the rooftop, then interact with the bell to finish the secret mission.

    Once completed, the Bell Shot Joker is permanently unlocked for future playthroughs.

  • Top Builds in Far Far West: Completing & Solving Strategies

    Top Builds in Far Far West: Completing & Solving Strategies

    Far Far West offers a dynamic gameplay experience where you’re given a variety of spells and weapons, but no clear strategy on how to use them. With so many options competing for your attention, it’s easy to create a build that seems powerful and clever but falls apart as soon as things get difficult.

    That’s why the right combination of gear is essential. The best setups are not just about dealing the most damage—they’re about how your main weapon, sidearm, and spells work together during hectic battles. This guide explains builds that stay effective when everything around you turns chaotic, enemies swarm in, and your decisions are driven purely by instinct and confidence.


    Best Builds

    Elemental Wipe Build

    Items:

    • Spells: Contagion (Acid), Thunderstrike (Electric), Firebeam (Fire)
    • Weapons: Minigun (Primary), Duel Revolvers (Secondary)

    Why It Works:
    This setup is versatile, combining corrosion, burst damage, and continuous beam fire. Contagion causes chain explosions, Thunderstrike deals area damage, and Firebeam melts remaining enemies. The Minigun provides sustained pressure, while the Duel Revolvers are handy for quick enemy clears when your primary runs low.


    Summoner Control Build

    Items:

    • Spells: Bandito (Cactus), Ritual (Voodoo), Strikes (Electric)
    • Weapons: Leveredge (Primary), Duel Revolvers (Secondary)

    Why It Works:
    A defensive approach that helps control enemies. Bandito creates a tanking distraction, Ritual sustains your team, and Strikes provides reliable area damage. Leveredge offers steady long-range fire, with Duel Revolvers ready for emergencies.


    Burn and Burst Build

    Items:

    • Spells: Surcharge (Fire), Geyser (Acid), Swap (Electric)
    • Weapons: Shotgun (Primary), Duel Revolvers (Secondary)

    Why It Works:
    Ideal for close-to-mid range battles. Geyser groups enemies and disrupts them, Surcharge adds burn damage, and Swap allows quick repositioning or escapes. The Shotgun excels in tight spaces, with Duel Revolvers as backup.


    Frontline Build

    Items:

    • Spells: Corruption (Voodoo), Wallo (Cactus), Fireball (Fire)
    • Weapons: Quad Cylinder (Primary), Duel Revolvers (Secondary)

    Why It Works:
    A hybrid control setup that turns enemies into allies while restricting movement. Corruption flips enemy fights, Wallo creates choke points, and Fireball deals area damage. Quad Cylinder manages mid-range bursts and Duel Revolvers help finish off foes.


    Mobile Sniper Build

    Items:

    • Spells: Bubble (Acid), Portal (Electric), Wisp (Fire)
    • Weapons: Long Ranger (Primary), Boomerang (Secondary)

    Why It Works:
    A fast-moving, ranged-focused build. Portal helps you reposition and duplicate projectiles, Bubble blocks enemy movement, and Wisp spreads ongoing burn damage. Long Ranger lets you pick off enemies from a distance, with the Boomerang handy for quick hits.


    Defensive Build

    Items:

    • Spells: Doll (Voodoo), Pistolero (Cactus), Rain (Acid)
    • Weapons: Leveredge (Primary), Duel Revolvers (Secondary)

    Why It Works:
    Built for durability over longer fights. Doll grants temporary invulnerability, Pistolero provides consistent damage, and Rain coats the area in corrosion. The Leveredge offers reliable damage, and Duel Revolvers support a defensive stance.


    Diver Build

    Items:

    • Spells: Thunderstrike (Electric), Fireball (Fire), Decoyo (Cactus)
    • Weapons: Shotgun (Primary), Duel Revolvers (Secondary)

    Why It Works:
    Designed for aggressive players seeking chaos and quick openings. Decoyo distracts enemies, Thunderstrike punishes groups, and Fireball keeps consistent pressure. The Shotgun excels at close range, with Duel Revolvers for urgent kills.


    Sustain Leech Build

    Items:

    • Spells: Drain (Voodoo), Thrower (Acid), Strikes (Electric)
    • Weapons: Minigun (Primary), Duel Revolvers (Secondary)

    Why It Works:
    Focused on survival and continuous damage. Drain keeps you alive, Thrower creates corrosion zones, and Strikes provide area damage. The Minigun maintains steady pressure, while Duel Revolvers are effective for cleanup.

    This selection of builds emphasizes the importance of combining spells and weapons effectively to handle the chaos of Far Far West.

  • Complete Your Journey: Rewards & Event Guide for Genshin Impact

    Complete Your Journey: Rewards & Event Guide for Genshin Impact

    Genshin Impact introduces new quality-of-life features and rewarding events with each major update. The event “To Temper Thyself And Journey Far” is quite generous—it allows players to earn a Stella Fortuna for a character of their choice. This item helps upgrade the character’s constellations, significantly boosting their abilities.

    You can easily reach the event milestones by completing your training goals, which include activities like finishing daily commissions and using your Original Resin. Since these are tasks you already perform to train your characters, there’s now a stronger motivation to develop your team.

    ### What Are the Rewards for “To Temper Thyself And Journey Far”?

    This event gives you a free Stella Fortuna for a five-star character you already own. You pick any character from the available list, and you can change your choice at any time.

    If you don’t choose a character, the game will automatically select one based on their levels. If multiple characters share the same level, the first one on the roster will be chosen for you.

    ### Can You Get Extra 5-Star Character Constellations?

    You can only receive one Stella Fortuna per character, and it cannot be earned again during subsequent event runs. To unlock this free constellation, you need to complete specific training goals. Besides the Stella Fortuna, you may also receive other helpful items to upgrade your characters, such as:

    – 20 Mystic Enhancement Ore
    – 1 Crown of Insight
    – 10 Hero’s Wit
    – 1 Sanctifying Elixir
    – 100,000 Mora
    – 1 Dust of Enlightenment
    – 5 Sanctifying Essences

    ### How Do Training Goals Work?

    Training goals are achieved through daily and weekly tasks. To complete your daily goals, you must finish all daily commissions and spend 120 Original Resin. Doing this five times each week completes a weekly training goal.

    Once you hit a weekly milestone, you receive rewards based on your progress. To earn the Stella Fortuna, you need to complete this weekly goal eight times during the event period.

  • How to Defeat the Far Fields Savage Beastfly in Hollow Knight: Silksong

    How to Defeat the Far Fields Savage Beastfly in Hollow Knight: Silksong

    The Savage Beastfly is one of the most hated bosses in the Metroidvania genre, especially in Hollow Knight: Silksong. Developers took a boss that players already disliked and made it even worse by placing the rematch above a lava pit with temporary platforms. Luckily, there’s a Mask Shard hidden somewhere in this area for those willing to endure the challenge a second time.

    If you decide to take on this dangerous lava-filled stage, here are some helpful tips. Don’t worry, completing this fight means you probably won’t face this nightmare again — or at least, that’s the hope.

    How to Start the Savage Beastfly Challenge

    It’s not entirely clear what activates this quest, but for us, it appeared after:

    • Getting the Clawline and Faydown Cloak
    • Defeating the original Savage Beastfly in Hunter’s March
    • Starting the tasks to collect three melodies in the Citadel by defeating the Clockwork Dancers

    If this Wish doesn’t show up on the Bellhart Wishboard, make sure you’ve met these minimum requirements. If it still doesn’t appear, you might need to unlock it through other means.

    Warning: Don’t delay fighting the Savage Beastfly! If you wait until Act Three, it will be tougher, with more health and a dangerous projectile attack, making the fight much more difficult.

    Tracking the Savage Beastfly

    Once you accept the quest, go to the Far Fields Bellway Station. From there, track the boss by heading to the top-left corner of the central vertical room near Greymoor. Follow the tracked items, and a translucent path will guide you around the west side of the map. All the locations are near each other along a natural route, so it’s hard to miss the next destination.

    Your trail will eventually lead back to the arena where you fought the Fourth Chorus boss, after getting the Drifter’s Cloak.

    How to Defeat the Savage Beastfly in the Far Fields

    This boss fights just like its first encounter — all moves and combos are the same. If you want a refresher, check out our original guide. The challenge now is fighting on a stage where the platforms can be destroyed. Plus, the boss has swapped its support enemies for a stronger spear-wielding foe that throws fire, limiting your safe zones.

    Before the fight, equip the Magma Bell, which you can buy from Forge Daughter in the Deep Docks nearby. Wearing this reduces fire and magma damage by one mask, which is incredibly useful here.

    The main threat after the Beastfly is a new minion it summons. This enemy throws fire spears that can temporarily block sections of your platforms. Use a combination of a Sting Shard and the Pollip Pouch to eliminate this helper quickly—upgrading your gear can allow a single Sting Shard to wipe it out with ease.

    Strategy for Beating the Savage Beastfly

    When you’re ready to face the boss, follow these tips:

    • Kill the minion ASAP, preferably with a Sting Shard.
    • Avoid excessive pogo-jumping, which can throw off the boss’s movement.
    • When the Beastfly slams downward, stay on one side of the arena.
    • If you run out of space, double jump high and float with the Drifter’s Cloak until more safe ground appears.
    • With the Magma Bell equipped, if an attack seems unavoidable, aim for the lava instead of the boss itself for less damage.

    This fight requires practice and patience. Focus on keeping as much platform space as possible, and don’t let the minions overwhelm you. Remember, if you fail, the boss will be gone for good this time—use that as motivation to give it your best shot.

  • Pokémon Champions: What We Know So Far

    Pokémon Champions: What We Know So Far


    Pokémon Day is an exciting occasion, bringing a host of announcements and updates for fans of the beloved franchise. This year's celebration included a significant update about Pokémon Legends: Z-A, as well as the unveiling of a new title set to launch on the Nintendo Switch. Pokémon Champions promises an intense focus on battling, reminiscent of the classic Pokémon Stadium titles. While details are still scarce, we are eager to see if Pokémon Champions will be released prior to Metroid Prime 4: Beyond.

    It's important to note that Pokémon Champions will not be available on PS5, Xbox Series X, or PC, though there’s plenty of exciting content coming to those platforms.

    Release Speculation

    Charizard and other Pokémon in a battle in Pokémon Champions.
    Game Freak

    Currently, Pokémon Champions is in development without a confirmed release date. Given its nature as a non-mainline title, we predict it could launch sometime in 2025 or early 2026.

    Platforms

    Pokémon Champions being played on a mobile device.
    Game Freak

    Pokémon Champions will be available on the Nintendo Switch, iOS, and Android, featuring full cross-platform functionality. There has been no confirmation regarding a potential Switch 2 version, but compatibility with the new hardware is anticipated.

    Trailers

    Pokémon Champions! | Announcement Trailer

    The announcement trailer was a surprise during the Pokémon Day livestream in February 2025. It highlights the evolution of Pokémon battles, from kids using link cables on their Game Boys to today's online competitions via mobile devices and the Switch.

    Given its emphasis on battles, players shouldn’t expect a significant narrative or extensive single-player content.

    Gameplay

    Screenshot from the Pokémon Champions trailer.
    Screenshot Game Freak

    The gameplay preview offered only brief glimpses, featuring two trainers poised for battle, each with two Pokémon. This could indicate either a two-Pokémon limit during battles or the introduction of duo battles.

    Core gameplay mechanics such as types, abilities, and moves will be retained, suggesting a turn-based combat style. A notable feature is the ability to import Pokémon from Pokémon Home, although not all Pokémon will be compatible—most likely due to a limited roster in Pokémon Champions.

    Preorder

    At this stage, there is no preorder opportunity for Pokémon Champions due to the absence of a release date. However, it may follow the model of a free-to-play game, similar to Pokémon Unite. Updates will be provided as more information becomes available.


  • Google Pixel 9a: What We Know So Far

    Google Pixel 9a: What We Know So Far


    Among the multitude of Android smartphones available today, Google's Pixel series is renowned for its excellence. Following the launch of the Pixel 9 series last August, speculation arises regarding the forthcoming budget-friendly Pixel 9a, which is typically released mid-cycle for the flagship models. Here’s what we know so far about the Pixel 9a, including its anticipated release date and rumored specifications.

    Google Pixel 9a: Possible Release Date

    Someone holding the Google Pixel 9.
    Joe Maring / Digital Trends

    While an official release date for the Google Pixel 9a hasn’t been confirmed, leaks are inevitable. Based on historical patterns, the A-series launches around late spring or early summer. For instance, the Pixel 6a debuted in July 2022, and the Pixel 7a released earlier in May 2023. Similarly, the Pixel 8a also hit the market in May, just before Google I/O. Recent reports suggest that the Pixel 9a could launch even earlier in 2025, with pre-orders potentially starting in mid-March. This trend might continue for the Pixel 10a in 2026.

    An earlier release aligns with Google's decision to unveil the Pixel 9 family in August 2024, deviating from their usual October schedule. If this pattern continues, it seems logical for the A-series to follow with a March launch.

    Google Pixel 9a: Price

    Google Pixel 8a in Aloe.
    Christine Romero-Chan / Digital Trends

    The pricing for the Google Pixel 9a will vary based on storage capacity, a common factor among smartphones. Reports indicate that the 128GB variant will retail for $499, while the 256GB option will be priced at $599. Notably, the starting price remains unchanged from the 128GB variant of the Pixel 8a, although the 256GB model reflects a $50 increase compared to the $549 price of the Pixel 8a.

    Despite the relatively modest price hike, some potential buyers might find the price for the Pixel 9a on the high side, even if justified by the additional features rather than just increased storage capacity.

    Google Pixel 9a: Design and Display

    Pixel 9a 5K render.
    Onleaks x Android Headlines

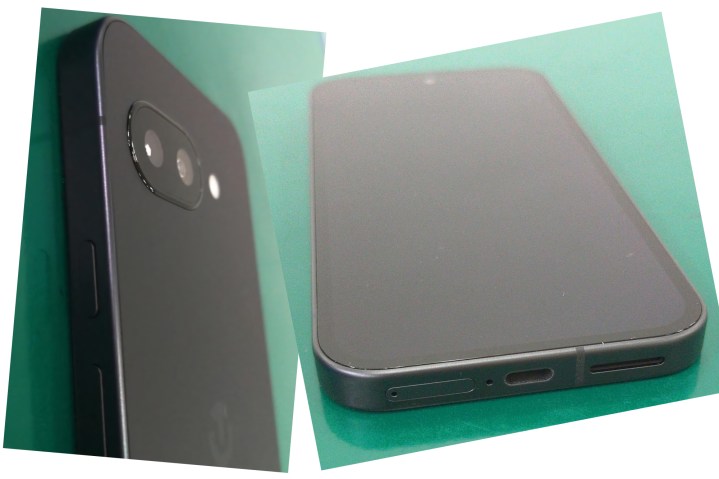
    After a notable redesign of the Pixel 9 series, we can expect similar upgrades with the Pixel 9a. Leaked visuals hint at the significant changes we can anticipate. The Pixel 9a features flat sides, a metallic frame, and rounded corners, reminiscent of its flagship counterparts. However, the camera setup stands out with a new design.

    Leaked Image of alleged Pixel 9a design candidate.
    HỘI GOOGLE PIXEL VIỆT NAM / Facebook

    The leaked images reveal a departure from the traditional camera bar known from earlier Pixel smartphones. Instead of a bulging camera visor, the Pixel 9a opts for a pill-shaped section for its dual camera lenses, which protrudes only slightly, sitting mostly flush against the back of the device.

    In terms of color options, the Pixel 9a is projected to offer four choices: Porcelain, Obsidian, Peony, and Iris. The Peony color is expected to resemble that of the Pixel 9, while Iris is rumored to be a new bluish-purple shade.

    The Pixel 9a is likely to feature a slightly larger display, measuring either 6.2 or 6.3 inches, with a consistent 120Hz refresh rate. The bezels may be marginally thicker compared to the other Pixel 9 models, but detailed specifications about the screen are still scarce.

    Google Pixel 9a: Performance and Software

    Pixel Weather app on the Google Pixel 9 Pro XL.
    Joe Maring / Digital Trends

    It is anticipated that the Pixel 9a will be equipped with the Google Tensor G4 chip, mirroring the rest of the Pixel 9 lineup. Major chipset updates are not expected until the Tensor G5, projected to debut with the Pixel 10 series.

    The Pixel 9a is likely to launch with Android 15 preinstalled, featuring at least 8GB of RAM, potentially more, and supporting several of Google’s Gemini AI capabilities. Storage options are expected to include at least 128GB and 256GB configurations.

    Moreover, the Pixel 9a will adhere to Google’s commitment to seven years of major software updates and security patches, along with Pixel Feature Drops.

    Google Pixel 9a: Cameras

    The Google Pixel 8a's camera visor.
    Google Pixel 8a Andy Boxall / Digital Trends

    While the Pixel 7a and 8a featured a 64MP main camera, it appears that the Pixel 9a will revert to a 48MP primary sensor, with the ultrawide remaining at 13MP. While this may seem like a reduction, it is believed that this camera may be the same sensor found in the Pixel 9 Pro Fold, promising excellent photo quality despite its lower megapixels. The selfie camera is also likely to maintain its 13MP resolution.

    Google Pixel 9a: Battery Life

    Battery page on the Google Pixel 9 Pro XL.
    Joe Maring / Digital Trends

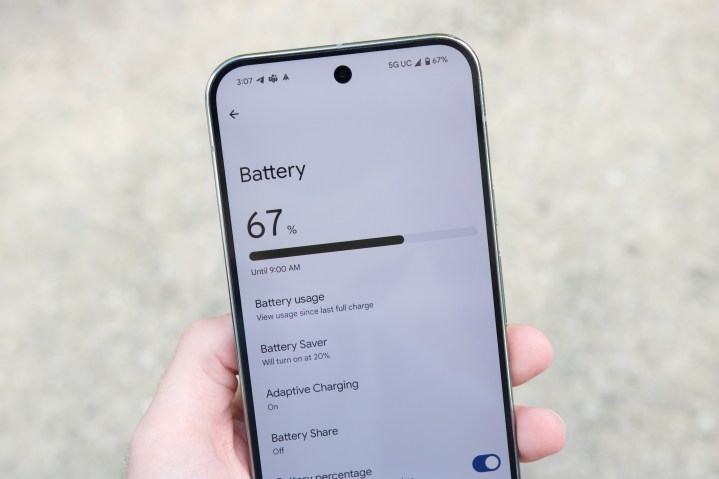
    Details regarding the Pixel 9a's battery life are still limited. Current rumors suggest it may come with a 5,100mAh battery, larger than the 5,060mAh in the Pixel 9 Pro XL and a step up from the 4,492mAh found in the Pixel 8a. Charging capabilities are expected to mirror those of the Pixel 8a, with 18-watt wired and 7.5W wireless charging options.


  • Intergalactic: The Heretic Prophet – What We Know So Far

    Intergalactic: The Heretic Prophet – What We Know So Far

    When discussing the top PlayStation 5 titles or the greatest video games ever created, it's likely that a release from Naughty Dog will be among the list. Ahead of The Game Awards 2024, our compilation of upcoming games was already impressive, but one last announcement that night brought yet another potential contender to the forefront—one that may challenge other big names like Ghost of Yotei and Wolverine. Given that this is a project from Naughty Dog, it quickly became one of our most awaited PS5 titles, although some folks might need a little more info to get on board. We gathered as much intelligence as possible on Intergalactic: The Heretic Prophet, and here’s what we discovered.

    If you don’t currently own a PS5, don't worry! There are numerous forthcoming titles for Xbox Series X, PC, and Switch as well.

    Release Window Speculation

    Jordan gazing at a shattered moon in Intergalactic: The Heretic Prophet.
    Naughty Dog

    While a specific release date has yet to be announced for Intergalactic: The Heretic Prophet, we can make an educated guess about its arrival. Neil Druckmann, the head of creative, mentioned that the team has been “developing this exciting new adventure since 2020.” This indicates that the game has been in production for about four years. Considering the typical development timeline for titles created by Naughty Dog, it’s reasonable to project that the game could still have another year or two in the pipeline, likely positioning it for a 2026 release.

    Platforms

    A ship soaring near a colossal red planet in Intergalactic: The Heretic Prophet.
    Naughty Dog

    As a long-standing PlayStation first-party development studio, Naughty Dog's choice to make Intergalactic: The Heretic Prophet a PS5 exclusive is hardly surprising. However, considering that most of Naughty Dog's recent titles have also launched on PC, it’s likely that this one will follow suit after approximately six months to a year.

    Trailers

    Intergalactic: The Heretic Prophet - Announcement Trailer | PS5 Games

    The announcement trailer for Intergalactic: The Heretic Prophet debuted at the closing of The Game Awards 2024. It begins with a quote from an Ancient Sempirian Scripture: “The suffering of generations must be endured to achieve our divine end.” The setting unfolds on a luminescent red planet adorned with a shattered moon, as a spaceship approaches.

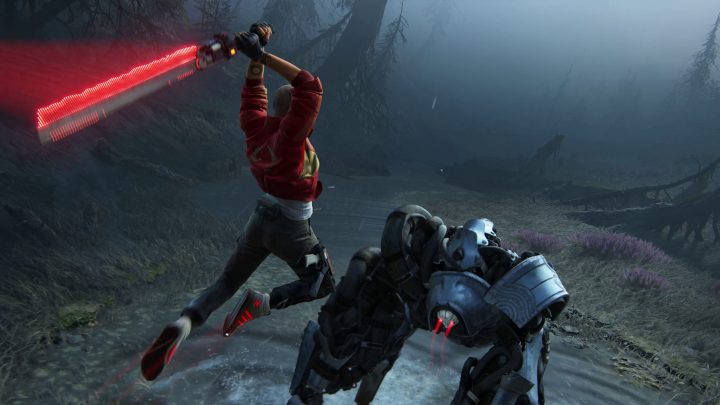
    Here, we are introduced to Jordan A. Mun, a bounty hunter who embarks on a perilous mission on the treacherous world of Sempiria. Her target is Colin Graves, a member of a group referred to as the Five Aces. This isolated planet has been silent for centuries, and no one has returned from it in over 600 years. Jordan persuades her partner to take on this risky bounty, suggesting that she has personal motives beyond just the monetary reward. The trailer concludes with a dramatic encounter featuring a giant robotic adversary wielding a massive laser axe.

    For the time being, that's all we know about the narrative. The development team aims to craft a story that is not only engaging but emotionally impactful, heavy on character development.

    Gameplay

    Jordan battling a giant robot in Intergalactic: The Heretic Prophet.
    Naughty Dog

    While the earlier trailer did not reveal gameplay mechanics, we can glean some insights from what we've seen. The primary weapon showcased appears to be Jordan's crimson laser sword, which she uses to jump and strike enemies at the trailer's climax. This suggests that Intergalactic: The Heretic Prophet will likely be a third-person action game emphasizing melee combat.

    However, a moment in the trailer also shows Jordan acquiring a firearm while aboard her ship, indicating that gunplay might be an option as well. Furthermore, Druckmann has previously addressed his vision for the game: “Our narrative goals are matched only by our gameplay ambitions: We aim to provide the most profound gameplay experience in Naughty Dog's history, leveraging lessons from our previous projects and pushing our boundaries further than ever before.” While this statement is somewhat vague, it undoubtedly sets high expectations.

    Preorder

    As we estimate, Intergalactic: The Heretic Prophet is still at least a year away. We will promptly update this article as soon as any preorder information becomes available.