الوسم: expedition

  • Completing Expedition 2 Project Steps in Arc Raiders

    Completing Expedition 2 Project Steps in Arc Raiders

    A new season of Arc Raiders introduces a fresh Expedition for players to complete. Like previous seasons, players will gather materials and contribute them to this project. However, there are several new items required this time that didn’t have any use before, making it easy to sell or recycle them by mistake.

    Expedition 2 Project Steps

    For those unfamiliar, new players will unlock the Expedition project once they reach level 20. If you’ve already wiped, it’s available from the start, so you can begin donating materials immediately. The expedition is divided into five steps, each unlocking after completing the previous one. Here’s what you’ll need for each step:

    Expedition 2 Project Step 1

    Material Amount Needed
    Metal Parts 150
    Plastic Parts 200
    ARC Alloy 80
    Steel Springs 15

    Expedition 2 Project Step 2

    Material Amount Needed
    Durable Cloth 35
    Wires 25
    Electrical Components 20
    Cooling Coils 4

    Expedition 2 Project Step 3

    Material Amount Needed
    Light Bulb 4
    Battery 30
    Shredder Gyro 10
    Exodus Modules 1

    Expedition 2 Project Step 4

    Material Amount Needed
    Frequency Modulation Box 5
    Advanced Electrical Components 5
    Ion Sputters 3
    Leaper Pulse Units 3

    Expedition 2 Project Step 5

    Material Amount Needed
    Combat Items 200,000
    Survival Items 100,000
    Provisions 150,000
    Materials 300,000

    Key items to watch for include the Shredder Gyros, Frequency Modulation Boxes, Ion Sputters, and Cooling Coils. These items are useless outside the expedition and are only useful for this purpose. The Ion Sputter and Frequency Modulation Box are particularly difficult to find since they are exclusive to the Stella Montis map.

    For the final step, you can donate any materials from these categories. Don’t expect to donate 100k of Survival Items in one shot; it will take quite a bit of playtime to reach that number. Typically, completing the fifth step could take a few weeks for an average player, especially if you’re new and unsure where all the spawn points are.

    Benefits of the Expedition 2 Project

    Although losing everything upon doing the second expedition sounds risky, there are notable benefits. These include 12 extra stash spaces, a bonus XP boost, more Scrappy materials, up to 5 additional Skill Points, and a special cosmetic skin related to the Expedition.

    The two most valuable perks are the increased stash space and additional Skill Points. Skill Points are based on your total accumulated wealth—every million worth of resources or currency grants one Skill Point, up to five million. Gathering these points allows you to use them immediately when Season 3 begins.

    What You Lose in a Character Reset

    Wiping your character resets your player level, Skill Points, items, Work Station upgrades, blueprints, money, and quest progress. Anyone who doesn’t commit to the Expedition before the end of Season 2 will lose all their progress and gear, which might put them at a disadvantage.

    However, if you plan to play Arc Raiders long-term, wiping can be beneficial, especially since the stash upgrades can significantly reduce storage issues.

  • How to Find and Defeat All Verso’s Drafts & Optional Bosses in Clair Obscur: Solving Expedition 33

    How to Find and Defeat All Verso’s Drafts & Optional Bosses in Clair Obscur: Solving Expedition 33

    The Drafts section of Verso in Clair Obscur: Expedition 33 is a colorful area filled with candy, children’s toys, and a generally friendly vibe. Still, there are enemies here that will attack if you get too close, including some tough bosses.
    The main threat in this zone is Osquio, but there are also optional bosses to find and defeat. Most of these are warped versions of other enemies, with a few unique ones mixed in. Here’s where to find each of them.

    ### Chromatic Franctale Location

    Most of the Verso Drafts is on a big hill. As you go down, you’ll reach a flat area where there’s a large grey archway. Next to the archway, there are two big drums in a pond.

    Walk through the middle of these drums to find a rope that takes you to a lower area. Down there, you’ll encounter the Chromatic Franctale boss.

    #### Tips for the Fight

    Most of its attacks involve shooting lasers or throwing its own head. This boss’s attacks are stronger than usual, hitting more times per strike. However, the lasers are pretty easy to predict, so blocking or parrying works well. Using parries is your best strategy here.

    —

    ### Chromatic Machinepieds Location

    To find this boss, head to the carousel. Enter through the large grey archway at the bottom of the hill, then go to your left into a small passage. The boss awaits at the end of this corridor.

    #### Tips for the Fight

    This enemy attacks rapidly, making most moves hard to dodge. But the boss’s single punch is easy to parry. Since most of its attacks are quick, attacking aggressively can be effective. Remember, this boss is weak to Earth skills, so use those to your advantage.

    —

    ### Monsieur Frappe Location

    Monsieur Frappe is a chunky Gestral standing under a big umbrella near the carousel. To start the fight, shoot him, then talk to him. This isn’t a typical battle; you don’t attack him directly. Instead, you need to parry his attacks three times to win.

    His attacks are tricky because he throws random moves that are tough to time. It might take some trial and error, but it’s manageable.

    #### Tips for the Fight

    You won’t deal damage by attacking normally. Instead, shoot his balloons to make other balloons appear, which will fire into the air. Shoot those balloons also to deal damage and start the fight properly. Timing your parries is crucial here, but once you get the hang of it, winning is straightforward.

    —

    ### Chromatic Licorne Location

    Licorne isn’t hiding in a hard-to-reach spot. It roams around the water near the Reverie Paths flag, close to the merchant Najabla. You need to climb some large toy blocks in this area, doing some platforming past wooden beams and obstacles. Follow the path on the right once you reach a certain point to find the boss.

    #### Tips for the Fight

    Licorne’s attack speed is quick, but its moves are easy to read and parry. Focus on timing your parries to block its hits. When counterattacking, use Earth skills since the boss is vulnerable to them.

    —

    ### Chromatic Barbasucette Location

    This boss is out in the open near the water by the Reverie Paths. Unlike some others, it’s easy to find. It lingers around the area, making it simple to approach.

    #### Tips for the Fight

    This enemy uses a lot of candy-based shields, which can be broken by shooting the candy pieces. Destroying these sweets not only removes its shields but also damages it. Use Earth attacks to deal heavy damage, as they are its weakness. Its strikes can be powerful but are generally telegraphed and easy to block.

    —

    ### Romanifo Location

    Romanifo appears as a simple Gestral child standing by the pool filled with seesaws and surrounded by balloons. To start the fight, shoot the balloons, then talk to Romanifo.

    #### Tips for the Fight

    This fight is different: Romanifo doesn’t take damage from normal attacks or skills, nor does it attack you directly. Instead, you need to shoot its balloons to spawn a series of smaller balloons that fire into the air. Shoot those balloons too to deal damage. Timing and precision matter here.

    —

    ### Licornapieds Location

    To reach Licornapieds, pass through the gingerbread door using the birthday cake. After that, navigate past enemies to find a train. Take the train to reach the boss.

    #### Tips for the Fight

    Licornapieds combines many attack patterns from previous enemies, so you’ll recognize its moves. It’s slightly easier to predict and dodge its attacks. Use Earth skills when attacking, as the boss is weak to them. Keep chipping away at its health to win.

  • Solving the Half-Baked Gestral Seesaw Puzzle in Clair Obscur: Expedition 33

    Solving the Half-Baked Gestral Seesaw Puzzle in Clair Obscur: Expedition 33

    Clair Obscur: Expedition 33 has a lot happening. Deep within this painted world, you’ll see humanity on the verge of destruction, a fractured land, and terrifying monsters that seem designed only to destroy the survivors.

    Meanwhile, Verso’s Drafts is a place filled with pure fun and wild imagination. It’s a bright, colorful area crowded with enemies that look like they could have only been created by someone with an incredibly sweet tooth. Many Gestrals are here, eager to play games with you, including a friendly seesaw game.

    Where to Find the Seesaw Minigame

    If you’ve explored Verso’s Drafts, you’ve probably come across the diving board with the red ring. If you’re tired of that, there’s a more relaxed mini-game just a short walk away. From the water area with the rings, head further south, down one more hill. You’ll spot several Gestrals playing around, including some on various seesaws. One of them is sitting alone on a seesaw, happily asking you to join in.

    How to Win the Seesaw Mini-Game

    After agreeing to play with this little Gestral, you’ll enter a combat event. Unlike most of these mini-games, there’s no need to parry here—because a seesaw simply won’t move like that. As the match starts, the Gestral jumps into the air, and a symbol appears telling you to jump to dodge its attack. Usually, the jumps are generous enough to avoid hits, but you need to be precise. Instead of jumping exactly when the symbol appears, try jumping just before the Gestral lands. This way, you’ll land on the seesaw just as it’s rising, pushing it down and sending the Gestral flying back into the air. You’ll need to do this about three or four times to win.

    Once you succeed, the Gestral will thank you and reward you with a new Pictos called Empowering Jumps. This boost increases the damage of Counter attacks by 100% for every successful Jump Counter during that turn.

  • Completing All Verso’s Drafts Outfits & Hairstyles in Clair Obscur: Expedition 33

    Completing All Verso’s Drafts Outfits & Hairstyles in Clair Obscur: Expedition 33

    The Thank You Update for Clair Obscur: Expedition 33 introduces many new cosmetic options, including various outfits and hairstyles for your crew of explorers. These items don’t impact gameplay but help you customize your characters’ looks to your preference. Most of the new outfits and haircuts, except one, can be found in Verso’s Drafts area. Here’s how to unlock each one.

    Baguette Outfit and Haircuts (Monoco)
    To unlock the Baguette outfit and hairstyle for Monoco, you need to defeat the Mime in Verso’s Drafts. This involves visiting Candy Land, accessible through the lollipop-surrounded cave. Explore deeper into the cave until you reach a flag, then move left and go down the small passageway nearby to find the Mime. After defeating the Mime, you’ll unlock the full Baguette set for Monoco.

    Chic Haircut (Maelle and Verso)
    Both Maelle and Verso have the Chic haircut. To unlock Verso’s, complete the hopscotch puzzle in the Gestral Baths. For Maelle’s, solve the hopscotch puzzle next to the water. Solutions for both puzzles can be found in the game instructions.

    Chic Outfit (Everyone)
    You can buy the Chic outfit for all characters from the merchant outside Coastal Cave. To access this merchant, leave Verso’s Drafts and proceed to get the outfit.

    Esquie Outfit (Everyone)
    To unlock the Esquie outfit for everyone, visit the carousel in the region. You need to ride the carousel with each character to unlock the outfit for all. The merchant who sells Esquie haircuts is located in Verso’s Drafts, near the Reverie Path flag, close to Osquio Mountain.

    Esquie Haircut (Everyone)
    The Esquie haircut is available from Najaba, a merchant near the bottom of the region, close to the Reverie Path flag. She sells the Esquie haircut for all characters.

    Double Bun Haircut (Lune, Maelle, Monoco, and Sciel)
    Everyone except Verso can unlock the Double Bun hairstyle. Each character’s method differs:

    • Maelle can unlock it by completing certain challenges.
    • Lune, Monoco, and Sciel each have specific steps involving in-game puzzles or interactions detailed within the game’s quest logs.

    French Bob Haircut (Monoco)
    To unlock the French Bob for Monoco, visit the Gestral Baths, locate the diving board, and perform the dive into the red ring. Timing is essential: run to the corner of the diving board and jump at the last moment before hitting the edge to land inside the ring.

    How to get the outfit by the carousel
    Once at the bottom of the region, find the archway to access the carousel. To unlock the outfits, you need to ride the carousel with each character individually. Speak to the very cool Gestral, who has Esquie and Osquio heads coming out of his shoulders, to get a special ticket that allows you to skip the line and choose your ride. When riding together, everyone receives the Esquie outfit for that character. To unlock all character outfits, repeat the process with each character.

    Esquie Haircut for everyone
    The merchant Najaba, located near the bottom of the region by the Reverie Path flag, sells Esquie haircuts for all characters. Talk to her to purchase the haircut for each explorer.

    Unlocking the Double Buns (Lune, Maelle, Monoco, and Sciel)
    Everyone except Verso can unlock the Double Bun hairstyle. The specific steps to unlock each character’s version are detailed through puzzles and in-game challenges in the quest guides.

    Getting the Monoco French Bob
    Visit the Gestral Baths, find the diving board, and perform a precise jump into the red ring by running to the corner and jumping at the last second.

    Getting the outfits by the carousel
    Proceed to the archway at the region’s end, ride the carousel with each character after obtaining a special ticket from Gestral by the pool, and each ride unlocks their outfit.

    Summary
    Most cosmetic items are acquired through defeating characters, solving puzzles, or purchasing from merchants located in specific areas such as Verso’s Drafts, Coastal Cave, or near the Gestral Baths and carousel. These options allow players to personalize their team’s appearance without affecting gameplay performance.

  • Where to Find All Verso’s Drafts Pictos in Clair Obscur: Solving Expedition 33

    Where to Find All Verso’s Drafts Pictos in Clair Obscur: Solving Expedition 33

    Picto Effect Location Images
    Slowing Attack The basic attack inflicts Slow for 1 turn. From the Open Playground checkpoint (the starting point in the area), head to the right and find the hot springs spot. It has one hot spring with two large Esquie statues, a waterfall, and some Gestrals. The Picto is among them. Additional
    Empowered Healer Using a healing skill increases damage by 50% for 1 turn. Continue past the hot springs, meet a Gestral next to a hopscotch, turn left, follow the path into the forest, take the right fork into a narrow trail with planks. The Picto is in front of you. Images Additional
    Gradient Parry Adds 5% to the gradient charge during Parry. In the previous fork, instead of passing through the blankets, turn left and follow the trail after a small jump. The Picto can be seen on the hand of an Esquie statue. Images Additional
    Longer Break Extends break by 1 turn; cannot break the same target twice. Find an enemy in a wheelchair with boxing gloves after the previous hot springs. Defeat it to get Longer Break. Images
    SOS Healing Tint Use after dropping below 50% health. After defeating the long-legged enemy, turn right to face two tall enemies resembling large-legged beings. Alternatively, from the first checkpoint, go northeast to a water pool with NPCs. The enemy is near a door with eyes. Images Additional
    Double Third Every third skill hit does double damage. From the start, descend north, find a large figure with two lollipops next to a turtle, defeat it to unlock this Picto. Images
    Empowering Jumps Jump counters do 100% extra damage per success. Past the previous enemy, on the right in the water level, find a small Gestral on a seesaw. Challenge it to perform perfect jumps; timing is tricky, but it increases the damage of jump counters. Images Additional
    Damage Share 50% of damage received transfers to allies if possible. After defeating the tall enemy with long legs, turn right to see two red stone enemies resembling turtles. They are beside trees. Images
    1st Critical Adjustment On crit, next non-crit hit deals 100% more damage. Back to the area where you fought the big lollipop enemy, go through the pink cave to the sky-blue tunnel, then turn right to find the Pictos near the entrance. Images Additional
    Overcharge Use 3 gradient charges at turn start to deal 200% damage. Exit the carousel area through the large doors into the final big outdoor section of Verso’s Draft. Follow the water past a turtle enemy in a wagon. Climb toy cubes and continue left for a candy prize. Images Additional
    AP Discount Skills cost 1 less AP. In the open area, cross the xylophone bridge, turn left, behind a cube you’ll see a trader selling this Picto for 217,000 Chroma. Images Additional
    Consuming Attack Uses up to 100 Burns for +10% damage per Burn. Also sold by the previous trader; costs 130,200 Chroma. (No image specific)
    Frenzy Each skill hit increases damage by 10%. After getting three cake pieces and opening the door with eyes, defeat enemies in the area and interact with a train wagon at the end to reach the arena with a mini-boss. Defeat it to get the Picto. Images Additional
    Trigger Happy Shooting balloons 10 times grants +2 AP; subsequent shots deal 200% more damage. Near a seesaw with a kid holding balloons, aim and destroy the balloons, then talk to the kid. The fight involves shooting only the floating balloons on the sides. Images Additional
    Alternating Critical On crit, next non-crit hit deals 100% more damage. Return to the area where the big enemy with lollipops was defeated, go through a pink cave to a sky-blue tunnel, then turn right to find the Picto near the entrance, past a big enemy. Images Additional
  • Complete All Expedition Requirements in Arc Raiders

    Complete All Expedition Requirements in Arc Raiders

    In Arc Raiders, the game is about fighting for resources in a dangerous world. You hope to find the parts needed to upgrade your gear and weapons. But what if you want to start over from scratch? Experienced players who enjoy server wipes can do this through a feature called the Caravan.

    We will help you prepare for the expedition, explaining what you gain and what it costs. Whether it’s worth it for you depends on the bonuses and the fresh start it offers. Here’s everything you need to know before your first expedition and whether you should wait for the next one.

    How to Unlock the Expedition Project

    Once you reach level 20, you unlock the opportunity to start the expedition project. This allows you to build a caravan to explore the world. However, you won’t immediately go on the journey. Instead, this feature enables what’s called the prestige system: you send your current character on a long trip, then start fresh as a new player.

    During this process, you get to experience the game from the beginning again. But now, with extra bonuses that make server wipes worthwhile. Keep in mind, setting up the caravan takes time, effort, and resources.

    The expedition project is completely optional. Casual players can skip it if they prefer.

    How to Build the Caravan

    Building the caravan happens in stages, with each phase having a specific timeframe. You’ll have eight weeks to prepare and contribute materials, getting the caravan ready for departure. If you miss the finalization deadline, no worries—your progress will be saved until it’s time to depart.

    The process involves the following phases:

    Caravan Phase Description Materials Needed
    Phase One Building the base frame of the caravan 150 Metal Parts, 200 Rubber Parts, 80 Arc Alloy, 15 Steel Springs
    Phase Two Installing wiring and power systems 35 Durable Cloth, 30 Wires, 30 Electrical Components, 5 Cooling Fans
    Phase Three Constructing walls, roof, and installing core systems 5 Lightbulbs, 30 Batteries, 20 Sensors, 1 Exodus Module
    Phase Four Adding storage, workbenches, and utilities 5 Humidifiers, 5 Advanced Electrical Components, 3 Magnetic Accelerators, 3 Leaper Pulse Units
    Phase Five Loading supplies: gear, provisions, repairs 250,000 Coins worth of Combat Items, 100,000 Coins of Survival Items, 180,000 Coins of Provisions, 300,000 Coins worth of Materials
    Phase Six Final preparations for departure No additional materials needed; wait for the last week of the season to leave

    Benefits of the Expedition

    Embarking on an expedition allows you to reset your character, with several perks to make the switch smoother. Each expedition unlocks permanent items for your account and unique cosmetics. You also receive buffs that give your next character an advantage. These buffs can stack and grow stronger over multiple resets, but they do not affect new players directly.

    If you’ve completed an expedition before but fail the next attempt, you’ll lose the buffs but keep any previously unlocked items. Starting fresh means skipping tutorials and immediately accessing all the maps and features you’ve unlocked.

    What You Lose During a Character Reset

    Resetting your character will erase everything tied to that character: level, skills, items, workshop progress, and crafting abilities. However, any paid items, cosmetics, achievements, and rankings will remain. No data related to in-game currency or overall stats will be lost.

  • Final member of first Everest expedition passes away

    Final member of first Everest expedition passes away

    The sole surviving member of the first successful Mount Everest expedition passed away in Kathmandu on Thursday at the age of 92, his family confirmed.

    Kanchha Sherpa was just a teenager when he joined the historic 1953 expedition led by Edmund Hillary and Tenzing Norgay Sherpa, who became the first climbers to reach the summit of the world’s highest peak.

    The exact cause of Kanchha Sherpa’s death early Thursday morning remains unclear.

    “He had been feeling unwell for several days,” his grandson, Tenzing Chogyal Sherpa, told AFP.

    Born in 1933, Kanchha Sherpa was only 19 when he signed on as a porter, with no previous mountaineering experience. Despite this, he endured a grueling journey over more than two weeks to Everest’s Base Camp, carrying supplies, tents, and equipment, before ascending to over 8,000 meters (26,200 feet) near the summit.

    “He was a legend and an inspiration to everyone in the mountaineering community,” stated Fur Gelje Sherpa, president of Nepal’s Mountaineering Association. “We’ve lost one of our guardians.”

    Kanchha Sherpa continued working in the Himalayan mountains for another twenty years after that iconic climb. Ultimately, his family said, he was encouraged by his wife to retire from dangerous expeditions, especially after many of his friends lost their lives assisting other climbers.

  • Indian and Filipino Climbers Tragedy on Everest Claims Lives

    Indian and Filipino Climbers Tragedy on Everest Claims Lives

    Tragic Losses on Mount Everest During the Climbing Season

    In a heartbreaking incident, an Indian climber and a fellow mountaineer from the Philippines became the first fatalities of the current climbing season on Mount Everest, which spans from March to May, as reported by hiking officials on Friday.

    Subrata Ghosh, a 45-year-old from India, tragically passed away on Thursday while descending from the summit of the world’s highest peak, specifically at a location known as the Hillary Step. According to Bodhraj Bhandari of Snowy Horizon Treks and Expedition, Ghosh had made the difficult decision to refuse to descend from that point.

    Further details were not provided, but it is important to note that the Hillary Step resides in the so-called "death zone," an area situated above 8,000 meters (26,250 feet) where oxygen levels are perilously low for human survival.

    Bhandari remarked, “We are working to retrieve his body to base camp. The exact cause of his death will only be determined after an autopsy.”

    Meanwhile, Philippine climber Philipp II Santiago, also 45, lost his life late Wednesday at the South Col while attempting to summit. Himalayan tourism official Himal Gautam shared that Santiago succumbed to exhaustion in his tent after reaching the fourth high camp.

    Both Santiago and Ghosh were part of an international expedition organized by Bhandari.

    This season, Nepal has granted 459 climbing permits for Everest, with nearly 100 climbers and their guides reaching the summit this past week. Mountain climbing, trekking, and tourism are vital sources of income for Nepal, a nation grappling with poverty.

    Since the advent of summit attempts over a century ago, at least 345 individuals have lost their lives on Everest, as per statistics from the Himalayan database and various hiking officials.

  • Ultimate Expedition Guide to Palworld Adventures

    Ultimate Expedition Guide to Palworld Adventures

    In Palworld, there’s a lot happening, and tackling it all by yourself can be quite challenging. That’s where your charming companions, the Pals, come into play. While the Pals stationed at your base take care of farming, mining, and generating electricity, your active team helps protect you during adventures and fights against formidable enemies.

    But what about the Pals you keep in your Palbox? They don’t directly help with farming or join your adventures. Would you like to use them more effectively and tap into their hidden potential?

    Understanding Expeditions

    Expeditions allow you to dispatch your Pals to gather items for you, enhancing their usefulness. To initiate an Expedition, you need to have a Pal Expedition Station built in one of your bases.

    To obtain the blueprint for the Pal Expedition Station, you first need to reach level 15. Once you hit this level, you can construct the Pal Expedition Station using the required materials:

    The player rides a Jetragon and looks at the Pal Expedition Station building in Palworld.

    After you gather all necessary materials, you can set up the Pal Expedition Station. However, remember that this structure requires a good amount of space in your base. Therefore, you should think carefully about where to place it.

    Consider the future layout of your base and plan for any additional constructions you may need later. This will help ensure you have enough space for both the Expedition Station and other facilities that may be necessary as your base expands.

    Expedition destination highlights locked areas in Palworld.

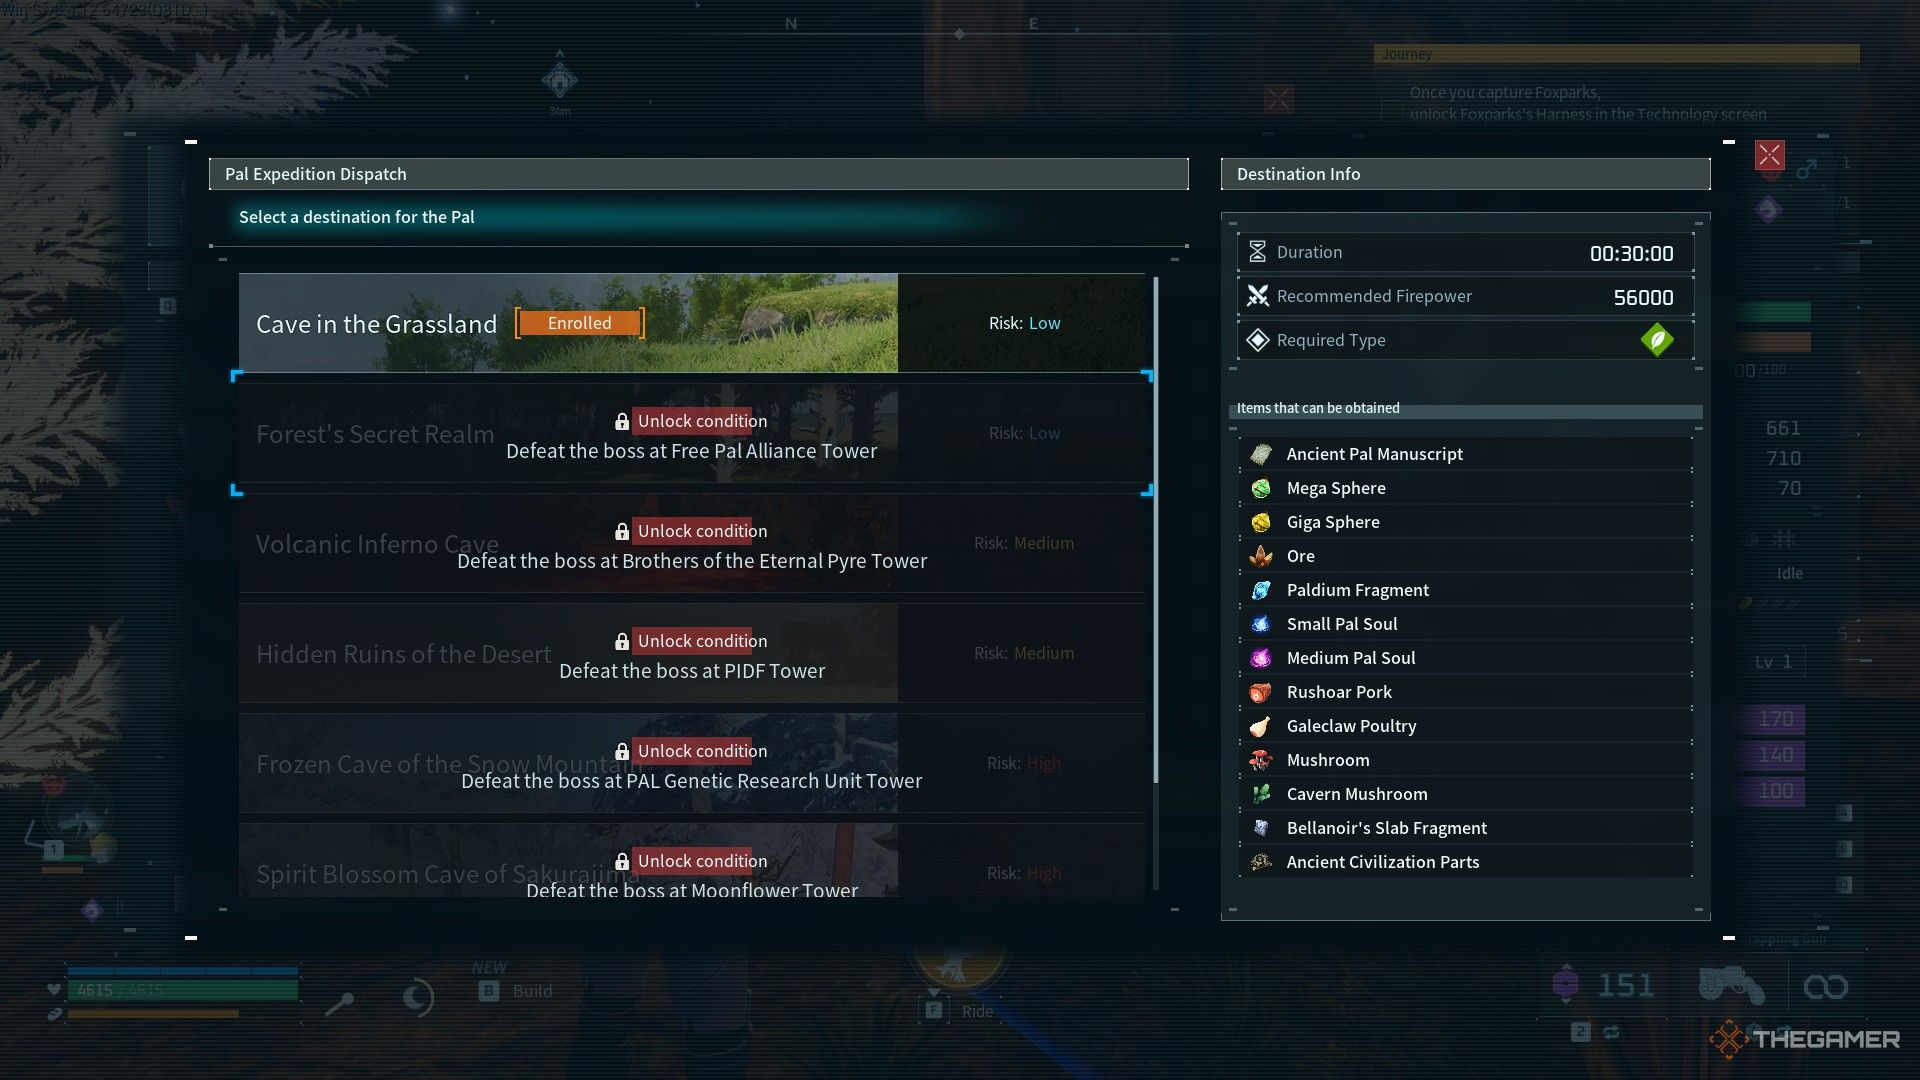
    Once your Pal Expedition Station is built, you’re all set to send your Pals on Expeditions. Just interact with the big gateway of the building, and you’ll see the Pal Expedition screen pop up. On the left, you’ll find a list of potential Expedition locations for your Pals.

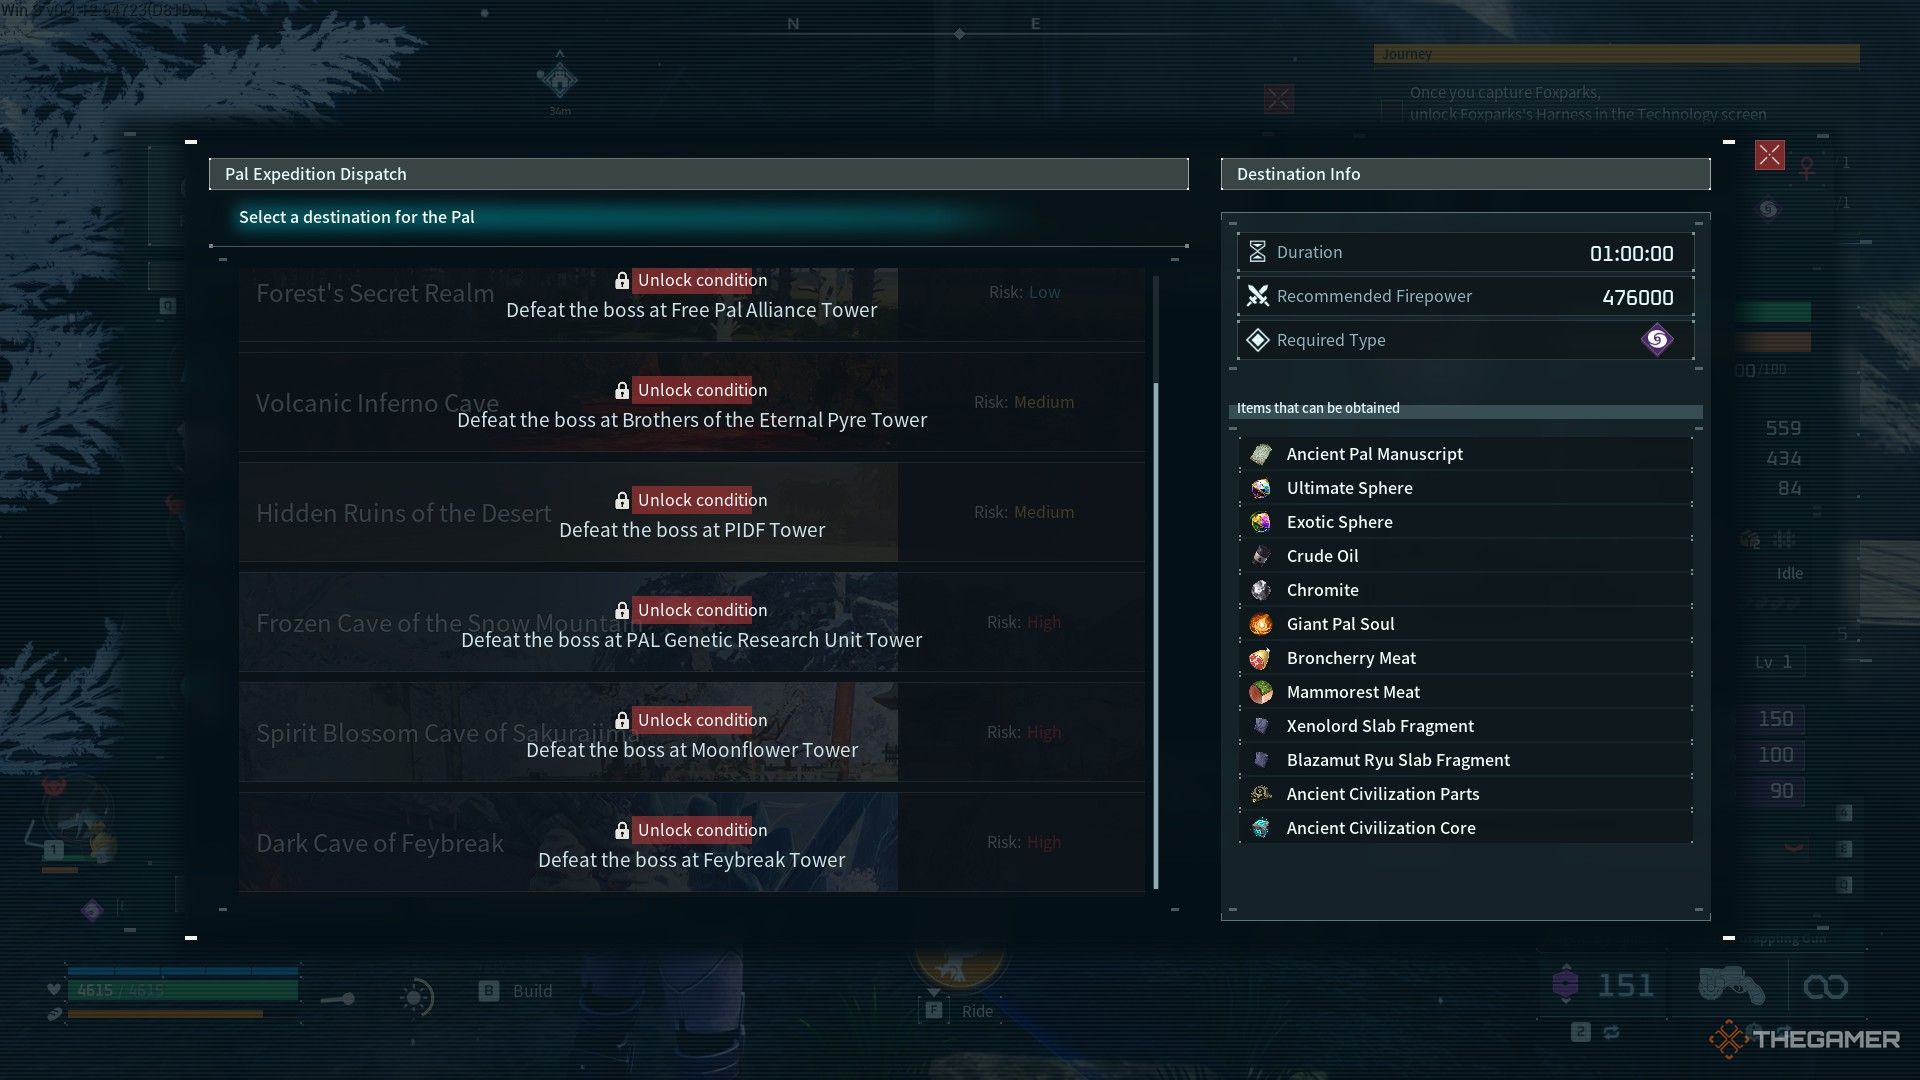
    These locations are associated with Tower Bosses. After you defeat a Tower Boss, you unlock a new Expedition option. The Expedition at the top is related to the easiest Tower Boss and has shorter durations and more common rewards. In contrast, the options lower down the list require longer durations and yield higher-quality rewards.

    Here’s a table showing the conditions for unlocking each Expedition:

    Expedition Destination Tower Name Boss Name Recommended Level
    Cave in the Grassland Rayne Syndicate Tower Zoe and Grizzbolt 25
    Forest’s Secret Realm Free Pal Alliance Tower Lily and Lyleen 40
    Volcanic Inferno Cave Eternal Pyre Tower Axel and Orserk 40
    Hidden Ruins of the Desert PIDF Tower Marcus and Faleris 40
    Frozen Cave of the Snow Mountain PAL Genetic Research Unit Tower Victor and Shadowbeak 50
    Spirit Blossom Cave of the Sakurajima Moonflower Tower Saya and Selyne 50
    Dark Cave of Feybreak Feybreak Tower Bjorn and Bastigor 60
    The player sends 100 Pals to the Cave in the Grassland expedition in Palworld.

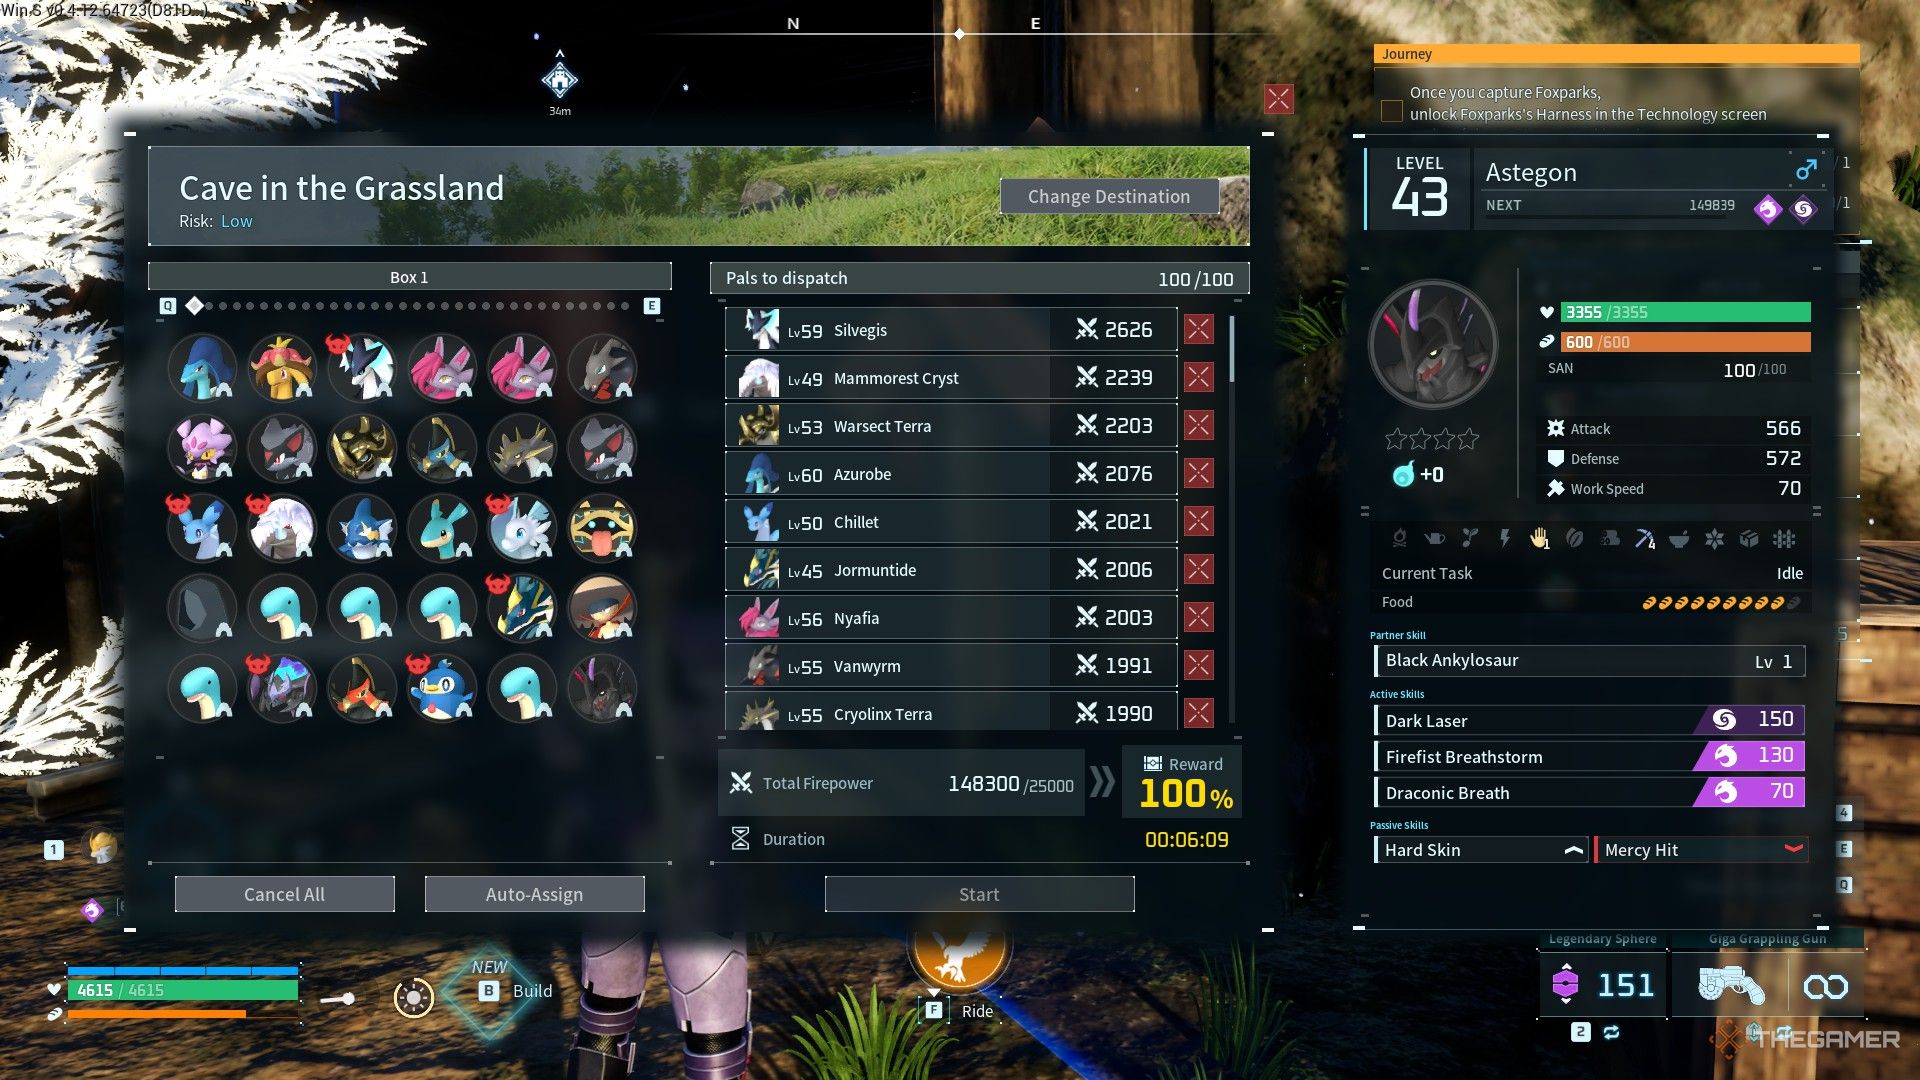
    Now, when you tap on an unlocked Expedition spot, you’ll be able to choose Pals from your Palbox. It’s essential to note that only Pals in the Palbox can go on Expeditions; those in your active team or working at the base are not eligible. Each Pal you send adds Firepower, which depends on their level and stats, indicating their overall strength.

    You can send up to 100 Pals on one Expedition. Each destination has a required total Firepower. The closer your combined Firepower is to this target, the better your rewards will be. This means that your Pals will come back with more valuable items after their trip.

    Note that sending Pals with Firepower beyond the required total won’t yield extra rewards but may reduce Expedition time.

    If you wish to send your best Pals quickly, you can utilize the ‘Auto-Assign’ feature to select your strongest team automatically. After selecting your Pals, click ‘Start’ to send them on their journey.

    Keep in mind that while you don’t need to meet the full Firepower requirement, proceeding with less than the total will result in fewer and lower-quality rewards.

    Sending more Pals than necessary won’t increase your rewards, but it will decrease the duration of the Expedition. Aim for high Firepower for quicker results, especially since Expeditions requiring higher Firepower typically take longer—if you’re not above the requirement, they will last an hour to complete.

    The player checks the required types for expeditions in Palworld.

    Additionally, except for the first Expedition spot, all others have specific type requirements. This means you can’t send any Pals; they need to match the required type for the Expedition you’re attempting. Capturing Pals of the appropriate types will maximize rewards and minimize Expedition duration. Below is a table of type and Firepower requirements for each Expedition destination:

    Expedition Destination Recommended Firepower Required Type
    Cave in the Grassland 25,000 Any Type
    Forest’s Secret Realm 56,000 Grass Type
    Volcanic Inferno Cave 144,000 Fire Type
    Hidden Ruins of the Desert 209,000 Ground Type
    Frozen Cave of the Snow Mountain 286,000 Ice Type
    Spirit Blossom Cave of the Sakurajima 375,000 Water Type
    Dark Cave of Feybreak 476,000 Dark Type

    Keep in mind that Expedition timers only count down while you’re actively playing the game. If you close the app, the timer will pause.

    Generally, each base can only accommodate one active Expedition at a time, so you cannot have more than one Pal Expedition Station in a single base. However, by building Pal Expedition Stations in different bases, you can run multiple Expeditions at the same time.

    All Expedition Rewards

    Below is a breakdown of the rewards your Pals can earn through Expeditions:

  • Unlocking Expeditions in Lego Horizon Adventures: A Guide

    Unlocking Expeditions in Lego Horizon Adventures: A Guide

    The core of Lego Horizon Adventures revolves around its main storyline. Once you’ve finished the primary narrative, there’s still plenty to discover. After defeating the Apex Predators in each area, you will open up the Expeditions feature.

    5:31

    Related

    Lego Horizon Adventures: 7 Beginner Tips

    Before you delve into the Lego-ified Sacred Lands, Wilds, and beyond, here are some helpful pointers!

    Expeditions let you continue your journey in Lego Horizon Adventures after finishing everything else, whether solo for fun or with a friend to showcase the game’s features. The gameplay is easygoing and enjoyable, making co-op play even more fun.

    How To Unlock Expeditions

    Starting screen for an Expedition in Lego Horizon Adventures.

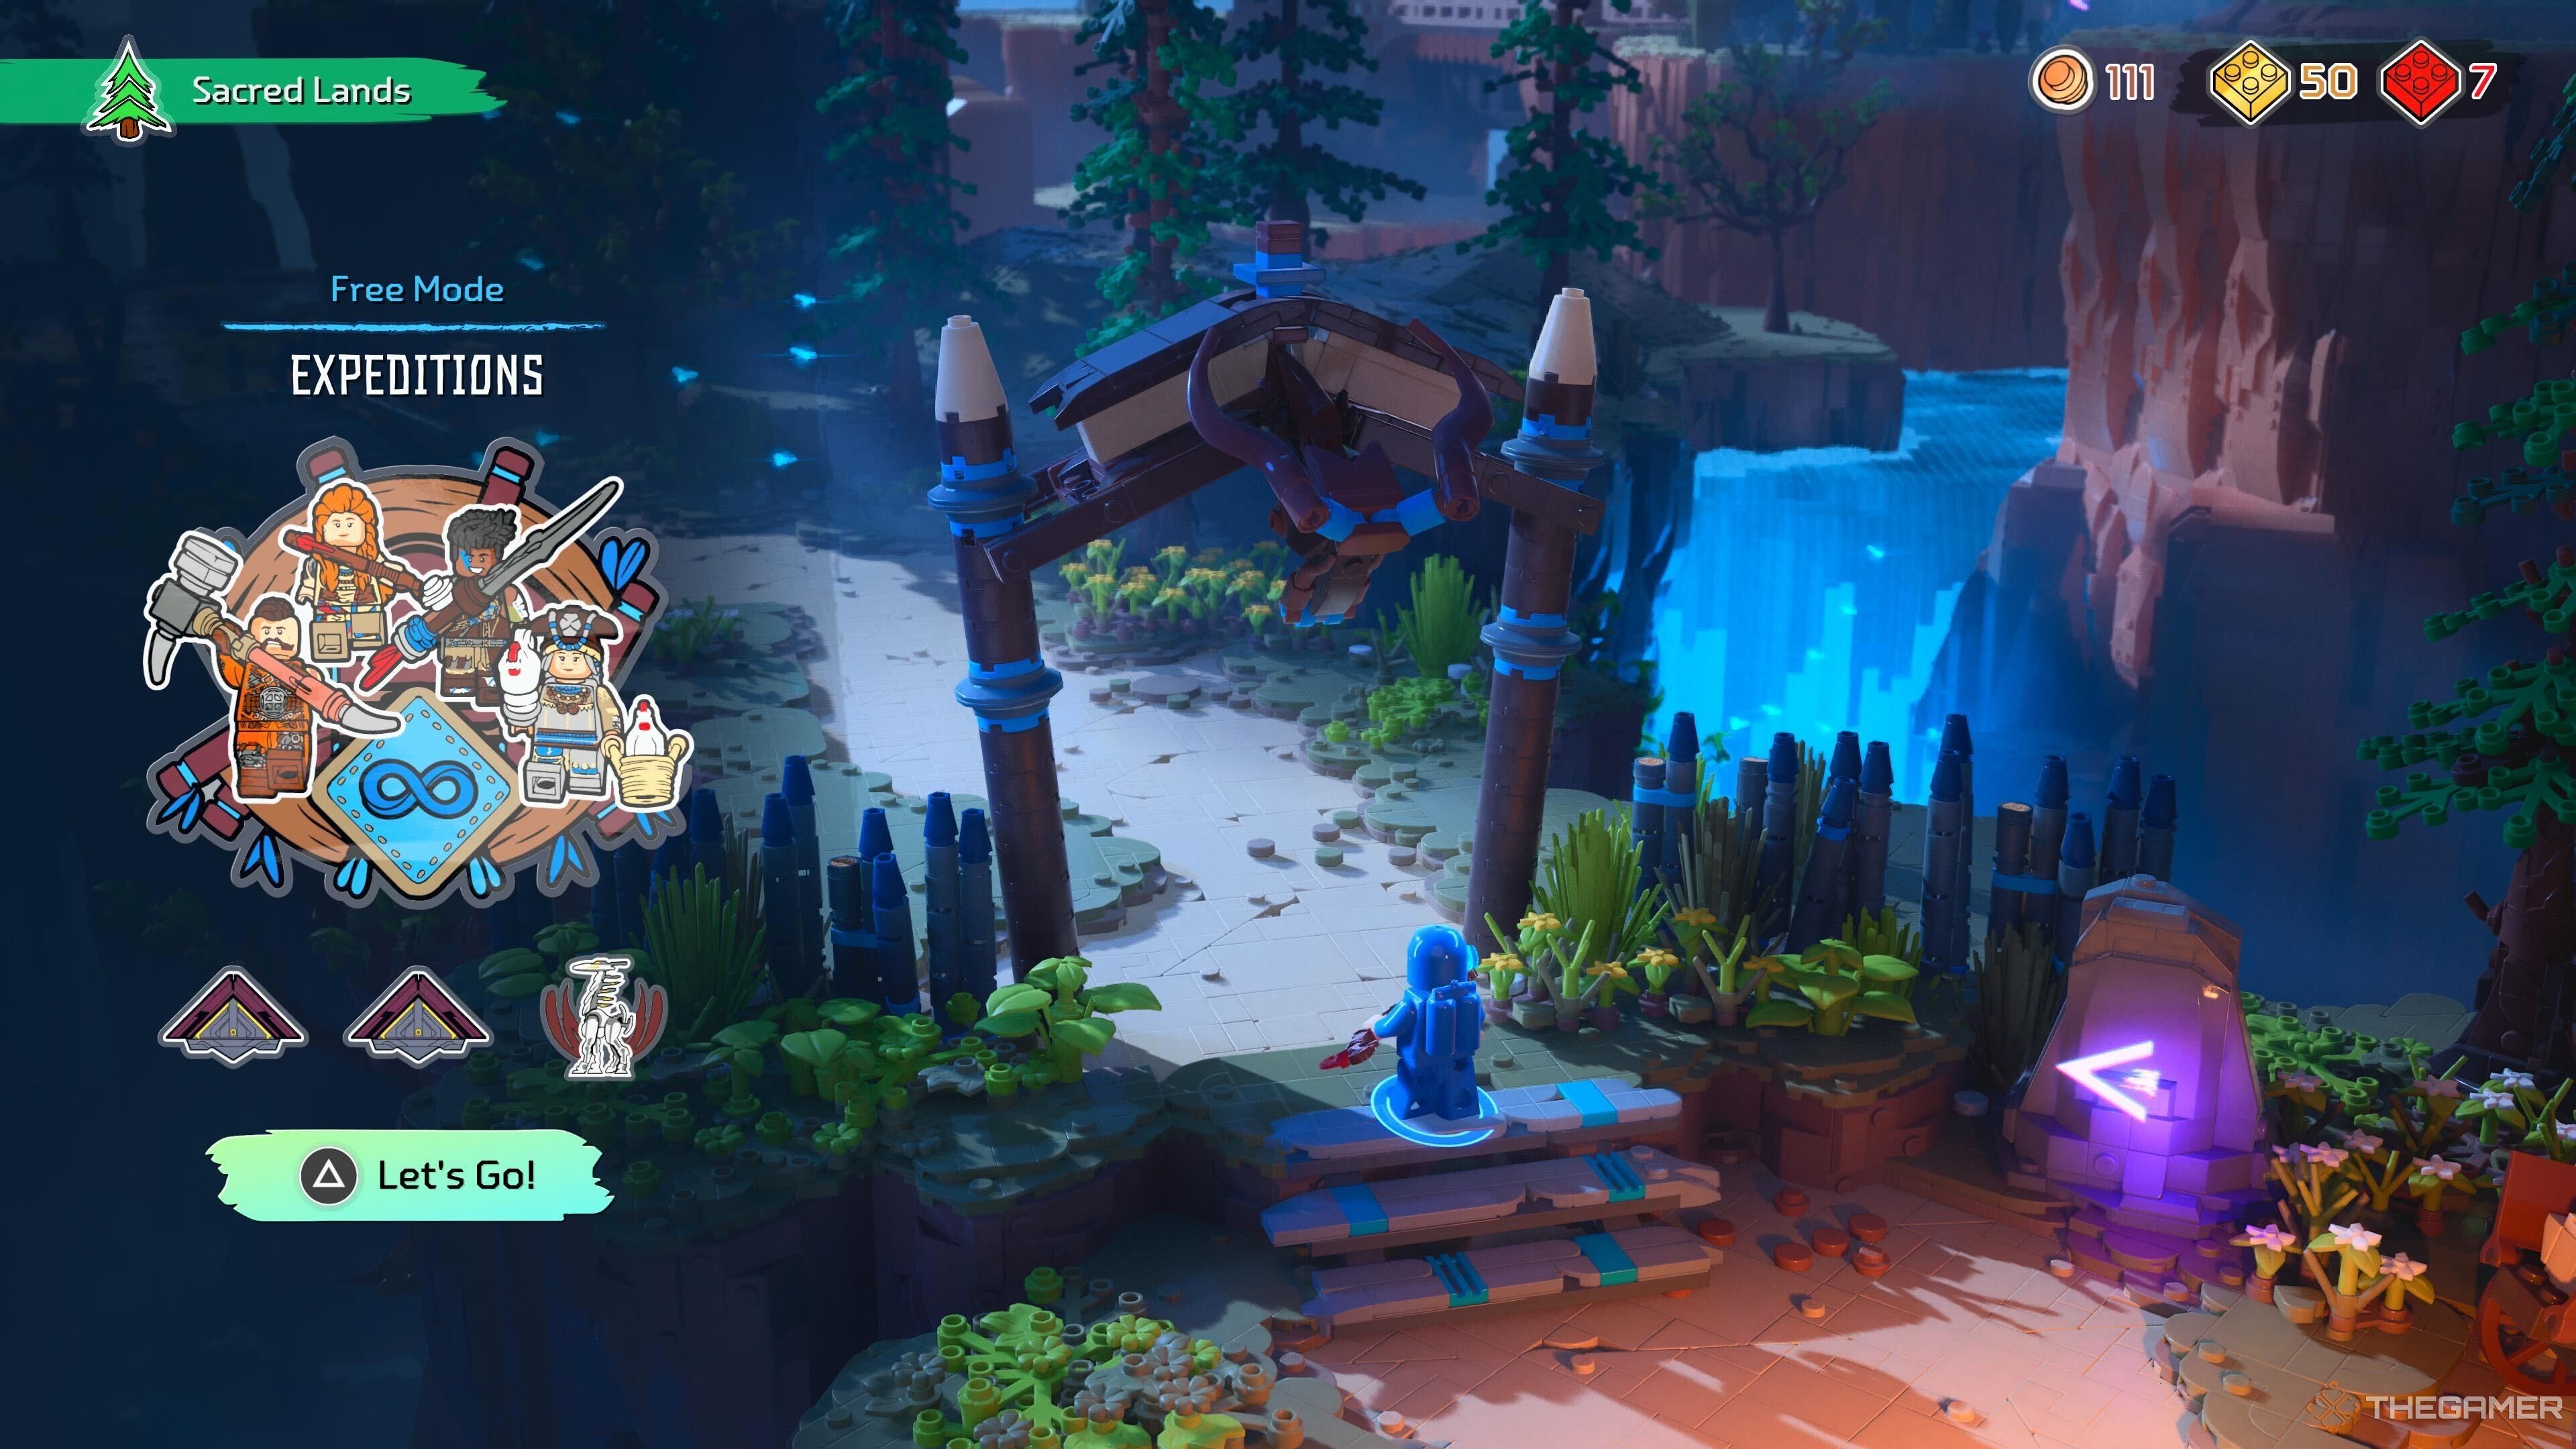
    You can unlock Expeditions after completing all the main missions and defeating the Apex Predator Hunts in a specific location. The Apex Predator Hunts are available once you’ve finished the story missions for that area, with additional hunts becoming available afterward.

    Your progress is tracked by area, meaning you don’t have to finish all hunts across different locations before starting the Expeditions.

    There are four Expeditions available, which can be replayed unlimited times to earn XP and fulfill Community Job objectives:

    • Sacred Lands
    • Sunfall Desert
    • Snowchant Mountains
    • The Jewel Rainforest

    Understanding Expeditions

    Objective screen for an Expedition in Lego Horizon Adventures.

    Expeditions essentially allow you to revisit each area after concluding the main story, helping you find secrets you might have missed or earn extra XP.

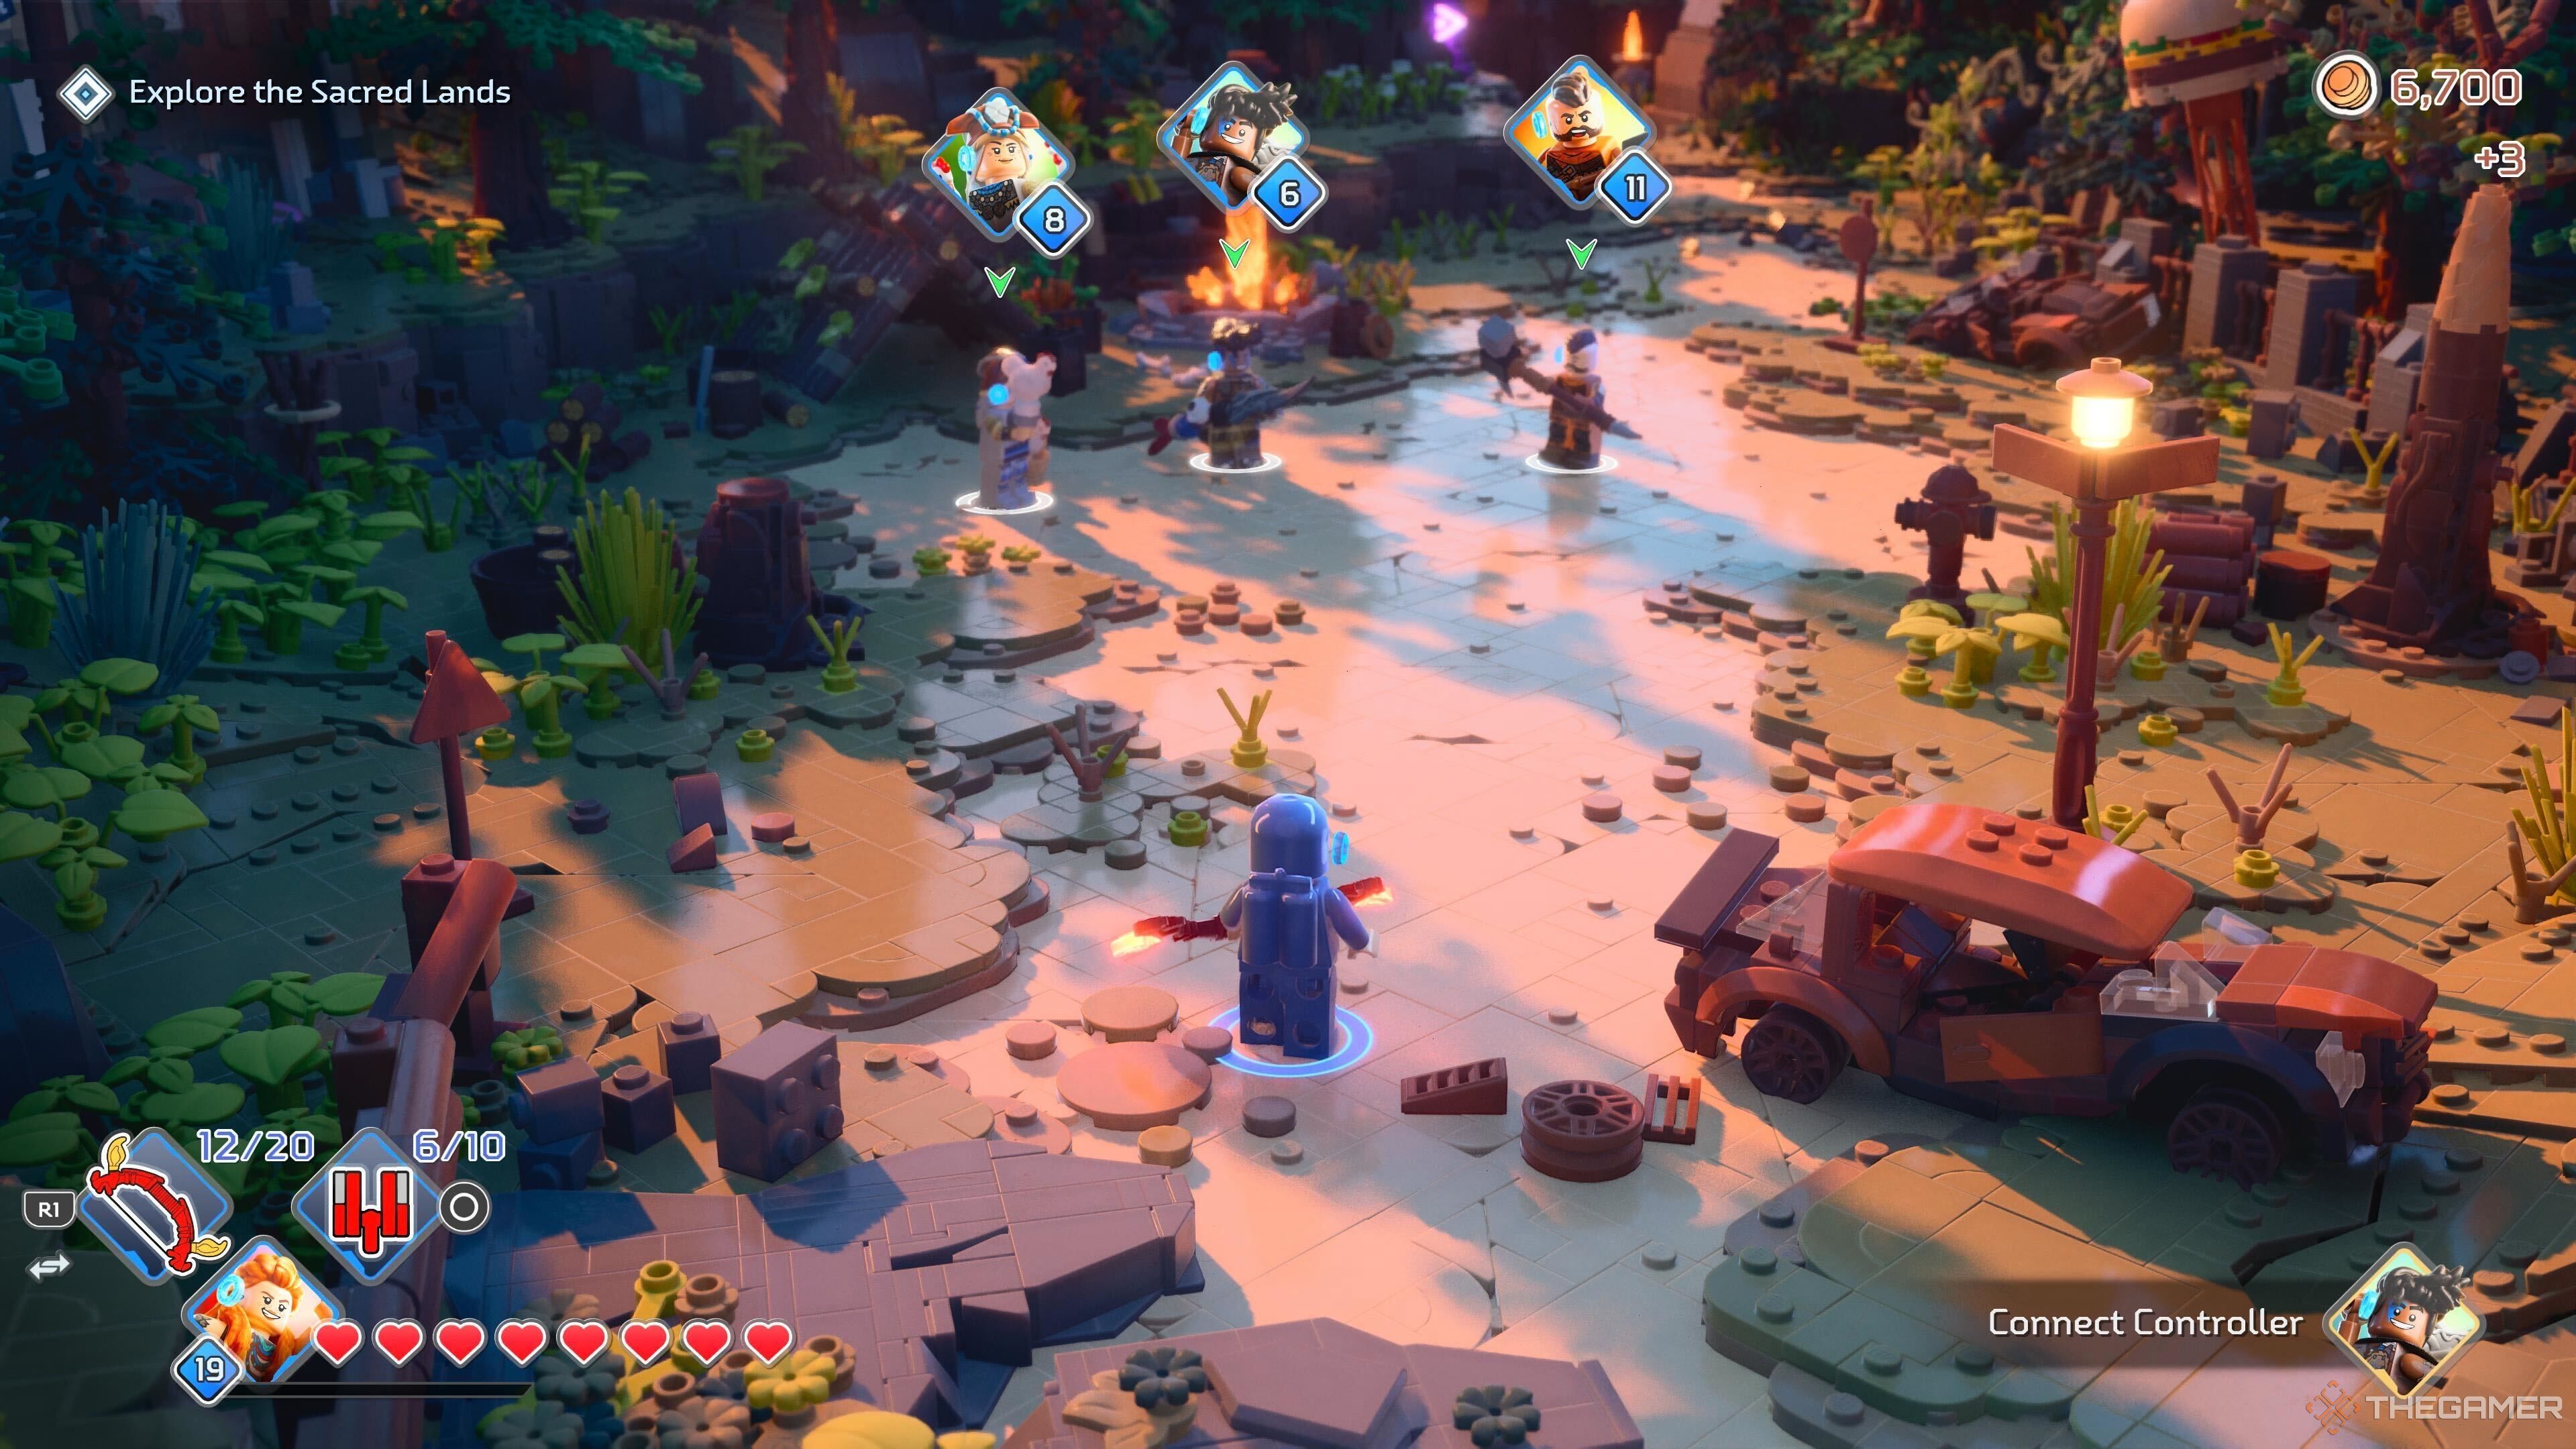
    These missions kick off just like any others, giving you the chance to choose a character, but the goals are straightforward: simply ‘explore X location’.

    You navigate through various sections just as you did in the main story, facing enemies, collecting blocks, and searching for hidden treasure chests. At the end, you pick up a blue brick and return to the hub area. You can repeat Expeditions as often as you want, which lets you accumulate XP and work on completing Community Jobs.

    Blue bricks do not function as currency in Lego Horizon Adventures; they only indicate that you have already retrieved that area’s gold block during the main storyline.

    Next

    Lego Horizon Adventures: Red/Apex Bricks, Explained

    Once you finish a region, you’ll gain access to Apex Machine Hunts to gather Apex Bricks – but what do they do?