الوسم: Elin

  • Farming Strategies for Success in Elin

    Farming Strategies for Success in Elin

    Farming in Elin is a key aspect of the game. It’s an essential way to boost your attributes, earn money, and create valuable equipment. Plus, you’ll need to craft travel rations to utilize the game’s fast travel system, which can save you a lot of time otherwise spent exploring.

    This guide explains the mechanics of farming, including how fertility and crop levels work. You’ll learn how to grow crops during winter and where to find the exotic seeds necessary for cultivating stronger plants. With a solid grasp of crop rotations and proper nutrition, you’ll be better prepared to tackle dungeons and other challenges.

    Understanding Fertility

    A common mistake for beginners is misunderstanding the fertility system. Planting more crops than your land can support will cause them to wither and reduce your yield significantly.

    You can check the soil fertility through a home board; if you’re exceeding the fertility limit, it will give you a warning. By middle-clicking the status bar, you can also display the current map’s fertility.

    Fertility can be enhanced by land modifiers—like fertile terrain (which the starting meadow has)—and by improving soil quality. You can recruit farmers and gardeners or consult a policy book to level up your soil using gold.

    A typical rookie mistake is planting excessive seeds. Seeds only deplete fertility once they take root, making it easy to oversaturate your fields. Always check your seeds’ fertility requirements or expand your farming areas gradually.

    Most plants consume fertility, but wildflowers, trees, and weeds can limit your crop output. Clear out all wildplants from your base and implement the Weed Pulling policy at a home board to keep them from returning. You can also lay down flooring to reduce weeds further. Another strategy for improving fertility is purchasing more land.

    • Expanding territory with your maid costs gold bars for additional farming space and fertility. However, you have to clear weeds and overgrowth on new land to ensure you don’t end up with less fertility than before.
    • You can use land deeds and relocation deeds to acquire fertile forest and plains areas and then move them closer to your main base. Fertility is calculated by map, so having multiple farms can be less expensive than upgrading one to its maximum.

    Obtaining Superior Seeds

    You’ll start with a basic seed pack from Loytel, but they won’t last long. A sickle is indispensable for gathering seeds from already planted crops and wild plants you find.

    Remember: you cannot collect seeds and food from the same plant, meaning you’ll need to set aside about half of your crops for replanting. Fruit trees don’t follow this limitation and will always yield fruit, lumber, and seeds.

    Bringing your sickle while exploring makes it easier to gather common seeds. Starting meadows and nearby areas are full of flowers, Api nuts, and crim bushes. For more specialized seeds, you’ll need to venture further:

    • Most standard crops can be obtained through harvest quests in nearby towns. You’ll incur a karma penalty for taking home crops from these quests, but not for seeds.
    • Some seeds can be taken from crops in settlements, such as cotton from the Merchant’s Guild, wheat in Yowyn, and rice in Mifu Village.
    • Kumiromi devotees can create seeds from spoiled food and by feeding fruit to their fairy companion, which is the only method to get rainbow fruit seeds besides pilfering them from other players’ homes.
    • The Ecopo merchant in Yowyn offers upgraded seeds for Ecopo tickets, perfect for those wanting a specific strain.

    Upgrading Your Seeds

    The plants you grow at the start are the same as those available from vendors. With some investment in your farm, the crops you grow will surpass anything from high-level shops.

    When you harvest seeds from a crop you planted, they will become upgraded, improving their attributes. The upgrade can enhance either one of the potential attributes or provide a bonus of rich collagen, which grants charisma experience. Characters lacking the gourmet feat won’t see the rich collagen bonus, meaning an upgraded seed without visible traits still carries this benefit.

    Seeds only upgrade from crops you planted, so you won’t find enhanced seeds when harvesting in villages or moongates. After the first upgrade, subsequent levels will only boost existing benefits rather than adding new traits. To achieve diverse attributes in your harvest, you’ll need to plant various crops.

    Interestingly, inedible plants are affected by seed levels as well. Upgrading trees results in better quality wood, allowing for higher sell prices and more traits.

    The maximum seed level corresponds to your farming skill, but attribute bonuses max out at seven levels, meaning farming levels above 70 provide fewer benefits.

    Tips for Faster Crop Growth

    To expedite your farming, you can utilize fertilizer and watering, both of which can be combined for better results. Use a watering can daily for a growth speed boost. Setting up a water source near your farmland—like using a bottomless pot of water—can ease the process.

    It’s noted that higher-quality materials yield watering cans with bigger capacities. You can also find ways to avoid watering altogether, which reduces management while sacrificing the experience:

    • Plant wheat and rice in paddy fields for quicker growth, as if they were watered daily.
    • The Ether Disease spell, living humidifier, increases rainfall, automatically watering your crops on rainy days.

    Fertilizer, obtained from the compost bin, can also accelerate growth. Set the auto-dump settings to accept rotten food and discarded corpses, and you’ll have plenty of fertilizer.

    Fertilizer is effective when applied once per plant, and it lasts throughout the plant’s life—ideal for fruit trees. However, none of these methods will instantly grow plants.

    Crops grow according to in-game time, typically taking one or more weeks. To speed this along, consider these strategies:

    • Sleeping hastens time but consumes stamina first. Crafting large item stacks can regenerate your stamina quickly.
    • To pass time without boredom, undertake delivery and escort quests, especially if using fast travel.

    Creating Irrigated Fields

    You can create new water sources with a bottomless pot of water, which is essential for setting up paddy fields and allowing easy refills for your watering can. While this pot isn’t literally bottomless, it holds water blocks.

    Here’s a quick guide to increasing its capacity:

    • Typical bottomless pots can irrigate small farms.
    • Ice Clay can be sourced in snowy biomes and offers a significant capacity increase.
    • Though Rubynus and other precious materials can create pots holding over 200 blocks of water, acquiring the necessary materials involves a complex process.

    If you’re serious about growing rice and wheat, follow this step-by-step form:

    1. Purchase a dye from the trader in Olvina made from diamonds or mithril.
    2. Convert that dye into carpet at a flooring workshop.
    3. Place down the carpet in a non-base map.
    4. Use the meteor spell to ignite the carpet.
    5. Dig up the ash to create soil from your chosen carpet material.
    6. Mix that special soil with clay to craft your water pot.
    7. Visit the coastline and fill the pot.

    While convoluted, these crafting tricks can be useful down the line as updates may add more functions for advanced materials.

    Utilizing Delegated Farming

    Delegated farming is one of the basic civic policies to unlock and costs nothing, making it feasible to run constantly at every settlement. Here’s how it operates:

    • Crops near a farming sign get automatically harvested, although this process is slower than manual harvesting.
    • Seeds are replanted without drawing from your storage.
    • Seeds can gain levels through delegated farming, but only one level at a time compared to the potential of manual harvesting.
    • Crops of different strains next to each other will merge into the higher-level crop, which can help save inventory space but may inadvertently remove useful strains.

    Best Crops to Grow

    When deciding which crops to cultivate, consider the returns on attributes, growth rate, and fertility needs. For individual players, prioritizing benefits aligned with their playstyle is key.

    Crop Attributes Extra Products Usage
    Rice and Wheat Will, Perception, Learning Potential Straw Used to craft travel rations for fast travel.
    Mushrooms Perception, Charisma Rare mushroom variants Grow quickly and can train cooking. Poison mushrooms can serve as bait.
    Palulu Strength, Endurance Big leaves, Palulu wood Rare for boosting strength and endurance; the wood fetches a high price.
    Cherry Blossom Price, Rest Quality None Best wood for furniture; no edible parts.
    Pasture Strength, Endurance, Strength Potential None Inedible yet allows ranching for diverse food attributes.
    Flowers Magic, Perception Honey Honeycomb aids in magic training and can be included multiple times in recipes.
    Corn Endurance Potential, Charisma, Magic None Produces abundant yields, good for supporting more durable characters.
    Rainbow Fruit Learning, Perception Potential, Charisma Potential Bone Needles Offers farming of rare learning attributes, consuming more fertility.
    Radish Dexterity, Endurance Potential, Will Potential None Implies hidden benefits due to connections with moving foods.

    Cultivating During Winter

    In winter, your fairy will notify you that the lack of sunlight hinders plant growth, but you don’t have to abandon your farming efforts. Here are winter options:

    • Mushrooms don’t require light to grow and are accepted in vegetable dishes.
    • Sun lamps, which can be crafted, provide light across a wide area without needing electricity.

    Mushrooms can be grown in caves or tents that you can carry, allowing for a portable farming setup. To craft sun lamps, you’ll need a sun crystal, which can be mined or acquired through other means.

    Electricity for the lamps can be generated via various methods, ensuring your winter farming efforts remain fruitful. Options include hiring residents with power generation skills, crafting the Wheel of Pain to generate power with a resident, or purchasing a generator.

    By following these tips and techniques, you can establish a successful farming operation in Elin, regardless of the season!

  • Ultimate Handbook to the Deities of Elin

    Ultimate Handbook to the Deities of Elin

    Understanding Religion in Elin

    Religion in Elin can be quite daunting at first. You might come across zealous cultists wandering through the wilderness or encounter enigmatic shrines hidden away in dungeons. However, despite these initial perceptions, aligning yourself with a deity can lead to numerous advantages, like acquiring powerful allies and iconic weapons.

    The benefits of worshiping a specific deity will vary depending on your playing style, but there are no lasting penalties for exploring different faiths. This guide will walk you through the various deities you can choose to worship, the perks associated with their beliefs, and how to enhance your hidden piety stat for divine rewards.

    How Faith and Piety Function

    Elin’s religious framework consists of multiple systems that offer different benefits.

    When you pledge allegiance to a deity, the game tracks how long you stay devoted to them. As your time of service increases, you will receive a range of attribute and skill enhancements. Additionally, you unlock the ability to Pray, which can be used once a day to fully replenish your health and mana.

    Praying also grants a small boost to your faith and piety levels, making the Model Follower feat a wise investment—it automates your prayers daily, ensuring you don’t miss prayers if you’re busy traveling or enjoying a fishing trip.

    Conferring tribute at your deity’s altars boosts your piety, a secondary stat that isn’t visible in your character sheet. Reaching certain piety thresholds unlocks unique rewards the next time you pray:

    • First Reward: Receive an apostle, a companion or pet who can provide strong support without the need for charisma.
    • Second Reward: Obtain a divine weapon, a powerful weapon that includes faction enchantments to benefit your entire team as long as you remain faithful.
    • Developers hint there might be additional rewards in the future that are not yet available.

    However, remember that you cannot earn more piety than your current faith level, which is tracked on your character sheet. Generally, this won’t be a concern unless you offer substantial tributes early in the game. To claim a divine weapon, your faith skill should reach at least 30. If you receive the message "You feel a sense of oneness" after a tribute, it indicates you have maxed out your current piety level.

    Changing Deities

    If you decide to switch deities, be aware that you will abandon your previous one. Divine punishment will be applied, and its duration depends on how long you’ve been loyal to that deity. This punishment manifests as a burdensome iron ball that cannot be removed until the time expires (traveling in the overworld will help decrease the time, but sleeping won’t).

    If you’re a Demigod, you have the unique advantage of being completely immune to divine punishment, allowing you to worship as you please.

    You can approach your faith and piety with two strategies:

    1. Stick with one deity to max out their respective benefits.
    2. Switch deities to collect all divine weapons while managing the divine punishment.

    Keep in mind that you cannot have more than two apostles in your group at the same time, as they will begin to fight each other. However, they can coexist in a village, allowing you to recruit a variety of companions.

    Overview of Deities and Their Piety Rewards

    Most altars are located at the Truce Grounds, north of Palmia, where you can find the main pantheon of eight deities:

    • North of Palmia is Nefu Village, home to the Horome altar.
    • To the southeast, in Mifu Village, you’ll find the altar for Kizuami.
    • Yevan has an altar located in Aquli Teola, west of Palmia.

    Eyth of the Void is part of the main pantheon but currently offers no advantages for worship, and Yaksha of Oblivion is exclusively revered by NPCs without offering bonuses.

    Deity Favored Playstyle Divine Weapon Passive Bonus Apostle Favored Tribute
    Lulwy of Wind Ranger Bow Speed bonuses Angel (fast mount) Booze
    Opatos of Earth Tank Mace Reduced damage Knight (tank companion) Ore
    Jure of Healing Healer Polearm Cast heals with stamina Cleric (healer companion) Baked goods
    Ehekatl of Luck Rogue Dagger Randomizes spell costs Cat (mage pet) Raw Fish
    Mani of Machine Ranger Shotgun Machines as followers Android (ranged companion) Pipes
    Itzpalt of Element Spellcaster Staff Resist elemental damage Exile (mage companion) Books
    Kumiromi of Harvest Farmer Scythe Better farming Fairy (archer pet) Vegetables, seeds
    Horome of Moonshadow Spellsword Longsword Mana restoration on hits Fox maiden (mount) Spell rods, rice wine
    Kizuami of Trickery Pacifist Shortsword Easier debuffs Vixen (mage companion) Noodles, rice wine
    Yevan of Strife Melee Fighter Longsword Killstreak bonus Militant (support mount) Swords and Armor

    Ideal Deities to Worship

    Selecting a deity has significant consequences for gameplay, especially regarding weapons and companions. Among the noteworthy benefits are:

    • Mani’s Divine Gun, known for its high damage, silencing abilities, and area damage effects.
    • Ehekatl’s Cat Apostle, which enhances the loot you find.
    • Kumiromi’s benefits, maximizing the sales price of fresh produce, ideal for players focused on base-building.
    • Horome’s Fox Apostle, who becomes an excellent mount as she levels up.
    • Opato’s Divine Hammer, which doubles health and creates earthquakes with its strikes.

    Due to the apostle limit of two, you’ll need to strategize between which companions to recruit, such as balancing between a cat, fox maid, or formidable angel.

    Gods with Special Interactions

    Some deities present unique conditions and events worth noting:

    • Jure: Easily convertible during a festival at Noyel, where your loyalty transfers seamlessly and you receive a useful body pillow.
    • Opatos: The most punishing to forsake, as its penance is based on your carrying capacity.
    • Horome and Kizuami: They allow a unique, curse-free conversation if you transition between them.
    • Mani and Lulwy: Best worshipped after acquiring their weapons for maximum effect.

    Summary

    Pledging allegiance to a deity in Elin can open up many gameplay possibilities, including access to powerful weapons and companions while enhancing your stats and skills. Decide carefully which god aligns best with your playstyle, and understand the consequences of switching faiths. Collect tributes systematically and strategically recruit NPCs to amplify your experience. Lastly, taking the time to learn the unique interactions of the various gods can significantly enrich your adventure!

  • What Should You Long For in Elin?

    What Should You Long For in Elin?

    If you’ve been exploring the Nefias in Elin, you might have come across the unusual item called the “Fragrance of Goddess.” This item grants you the ability to wish for any in-game item, although its usage isn’t immediately clear.

    This guide will explain how to acquire the Fragrance of Goddess, how to utilize it for wishes, and recommend the best items to aim for. We’ll also discuss “Black Cat’s Saliva,” which enhances your wishes. Be cautious, as it’s easy to spoil your wishes, so we’ll highlight common pitfalls to avoid.

    How to Obtain the Fragrance of Goddess

    As you wander through the world or explore Nefias, you’ll occasionally encounter statues dedicated to various deities. Interacting with these statues offers rewards linked to their respective gods. Here, we are particularly interested in the Luck Goddess, Ehekatl:

    • The Luck Statues grant you the item Fragrance of Goddess, which you’ll use to make wishes.
    • The Harvest Statue provides a special book that gives an additional feat point when read. You can also give this book to companions.
    • The Machine Statue offers a high-tier gene that can be installed at half the usual cost.
    • Statues related to Element and Earth provide single-use transmutation hammers useful for altering most items, such as transforming a weapon into a more powerful material.

    These statues appear quite infrequently and can only be used once each. Their selling price is high but drops significantly after you receive their boon. Statues of Wind and Healing currently serve no purpose in the game, so feel free to sell them if you can bring them to a shop.

    A practical way to locate these statues is by using a Detector tool while traveling. This gadget beeps when you enter a map that contains a specific item. You can set the detector to focus on either finding Statues of Luck or just interesting items in general.

    • Inputting “Statue” into the detector will show the locations of shrines, which are more common but offer less exciting rewards.
    • By entering “Statue of,” you’ll mostly find god statues, possibly alongside some decorative statues in towns.
    • Inputting “Statue of Luck” will narrow it down to only that type of statue, though you might miss out on other valuable items like Element Hammers and Mani’s Genes.

    The detector requires you to take a few steps on the map before it starts beeping to indicate if you’ve found a statue. Remember, it must be actively held in your hand, not just equipped onto your hotbar. Some modded tools may alter how the detector functions for more efficiency.

    High-level Nefias can also yield statues. During our exploration of level 100+ dungeons, we found two Luck Statues on consecutive floors, but regular battles can make using the detector challenging.

    If you’d like to keep a statue for later—whether for decoration, monetary gain, or to save a wish—you have two options:

    • You can occasionally catch golden statues while fishing, but the results are random. In a test run with 1,000 bait and an 80 fishing skill, we only managed to catch two statues of different gods.
    • Claiming the land using a land deed will prevent the area from despawning. You can build a new base around the statue you discovered or use a delivery box to transport it to another location. This method does not work in dungeons.

    Regardless of how you collect the Fragrance of Goddess, the next step will be to learn how to use it for wishing.

    How to Make Wishes

    After you’ve acquired the Fragrance of Goddess necessary for making wishes, you need to understand how it works. The item description mentions its connection to the Goddess of Wishes but doesn’t explain the process.

    Early in the game, you might have learned to be cautious when drinking from wells and fountains since it could negatively impact your learning capabilities or cause harmful mutations. Now that you can make wishes, you should take every chance to drink from fountains.

    It’s a good idea to carry a Blessed Potion of Cure Mutation when drinking from fountains. This potion can nullify negative mutations while preserving the beneficial ones.

    You have about a 10% chance of making a wish, so some wells may not yield results. It’s beneficial to use wells located in settlements. The only source of drinking water that won’t work for wishes is the holy well in Noyel, but you can collect water from there for blessing potions and items.

    When you drink from a well while holding the Fragrance, a text box may appear, similar to when writing an epitaph or tuning the detector. Type your specific wish in this prompt; the game will then search for an item that matches your request and provide either a generic or enchanted version, depending on the context.

    If you’re not prepared for the wish prompt, it’s easy to accidentally confirm a wish without entering any text. This will cause you to lose your wish and receive a “quiver” since the text prompt starts with q already filled in.

    Best Items to Wish For

    Having the ability to wish for anything is both exciting and a bit daunting. Given the effort required to make a single wish, you’ll want to ensure you use it wisely.

    The outcome of your wishes may vary based on your language settings and the phrasing you use. Since the text box may not accommodate lengthy item names, you might struggle to obtain a specific item if multiple items share a name.

    This is particularly true for decorative items like “A Crystal,” which can misleadingly yield the crafting material “Earth Crystal.” All tests were conducted in English.

    If you’re playing with an Oath of Destiny, it’s often better to wish for items that yield consistent results. The Palmia Times features notes about wishes made by other adventurers and their results. If you need to, you can reload and try different phrasings for your wish.

    Item

    Wish Phrasing

    Benefits

    Other Ways to Acquire

    Generator

    “Generator”

    Wished generators are advantageous as they don’t require manual activation like crafted ones.

    A single generator can be found at the Truce Grounds. It does not respawn.


    A hypothetical character with about a thousand points in strength and pickpocketing could steal them from towns.

    Lightsaber

    “Lightsaber”

    This laser sword scales with your magic device and casting skills, ensuring 100% armor penetration.

    None

    Vindale Cloak

    “Vindale”

    This cloak protects you from Ether Disease, making it a critical item if you lack reliable antibody sources.

    None

    Seven League Boots

    “League”

    These boots boost your movement speed on the world map, essential for certain timed quests.

    None

    Machine Table

    “Machine Table”

    This crafting table is tough to gather materials for.

    Craftable, but requires rare microchips.

    Railgun

    “Railgun”

    This sci-fi rifle has significant power, and wished versions typically feature many upgrade slots.

    Available at high-level firearm shops, investment level 30+.

    Futon

    “Futon”

    The best portable bed, excellent for keeping on hand during travels.

    Craftable at higher levels.

    King’s Bed

    “King’s Bed”

    This bed significantly boosts the productivity of villagers and raises property value.

    Can be obtained with furniture tickets or crafted; requires high skill levels.

    Syringe of Ether Solvent

    “Solvent”

    This removes only the latest symptom of Ether Disease, allowing you to keep some benefits while losing others.

    Available in Little Garden after dealing with a Big Daddy and freeing a little sister.

    Rare Crafting Materials

    “Sun Crystal”


    “Mana Crystal”

    Used to craft valuable utility items like the Sun Lamp and Grimoire of Study.

    Mine in high-level Nefias.

    Unique Furniture

    “Tree of Cherry”


    “Ether”

    For those looking to create a unique base, these items are excellent starting points.

    Some furniture items can only be obtained through wishes, while others require hundreds of furniture tickets.

    If you’re not concerned with potential spoilers, you can access debug mode by adding “-DEV” to your startup properties in Steam. This will place you in a developer room with a Luck Statue right next to a well.

    You can repeatedly test different wishes before finalizing one in your game.

    Banned and Restricted Wishes

    Some wishes yield disappointing results, particularly when trying to acquire wealth:

    • Wishing for Oren may provide you with money, but it’s less than what you’d receive by wishing for a valuable item to sell.
    • You won’t get enough from wishing for small medals to buy an antibody potion (although you can directly wish for “antibody” to get the potion).
    • Wishing for gold nets you only four bars, whereas wishing for a “resident ticket” can grant you three, each valuable enough to exceed that amount.

    Additionally, some wishes are banned, either directly or indirectly. Attempting one of these will result in wasted wishes as the Gods will simply laugh:

    Banned Wish

    Details

    Specific Eggs

    To raise the ultimate pet you must do it through traditional means.

    Specific Spellbooks

    You can wish for a generic spellbook, but it won’t be impressive.

    Specific Spell Rods

    Except for the “Rod of Wish.”

    Choosing Item Materials

    You can ask for a “sword” but not specify “iron sword.”

    Statues or Shrines of Gods

    You can’t use your Statue of Luck to wish for another Statue of Luck.

    Statue Drops

    Items given by other god statues, like a “paper hammer,” are prohibited.

    Items With Stars In Their Name

    To obtain “★Ehekatl’s Body Pillow,” you’ll need to collect 40,000 chips at the casino.

    Finally, some wishes may grant you exactly what you requested, but in a counterproductive manner:

    • Wishing for a “Rod of Wish” will result in receiving a rod with zero charges, teaching you a lesson about greed.
    • Wishing for genes will yield blank genes lacking traits. While edible, these wished genes have no nutritional benefits.
    • Wishing for the gods by name results in (non-functional) statues or figures of them; not all deities have available statues or figurines.
    • Wishing for a fertilized egg without specifying the creature will produce a chicken when hatched.

    How to Obtain Black Cat’s Saliva

    You can only possess one Fragrance at a time and can only make one wish per year. Attempting to obtain a second Fragrance or a new one within the year following your last wish will result in the item “Black Cat’s Saliva.”

    This secondary item boosts the effectiveness of your wishes:

    • Items you wish for will be crafted with higher quality materials and enchantments. For example, your railgun might be made from real metal instead of grass.
    • You may wish for larger quantities of items.
    • Items that have levels (like monster balls) will appear at elevated levels.
    • Wishing for currencies results in larger drops (though they’re typically not worth wishing for).

    The method for collecting Saliva is akin to acquiring your first Fragrance, but it can accumulate. Walk around with your detector in hand and set it to “Statue Of.” You’ll likely gather various beneficial items from different god statues along with those of Ehekatl.

    Saliva isn’t used up when making a wish, allowing the strength of all subsequent wishes to increase through collection. You can intentionally hold onto your Fragrance to turn future rewards into Saliva.

    Since the potency of wishes grows with more Saliva, it’s usually wise to spend early wishes on items less influenced by quality and material. For example, the Seven League Boots can be swapped in combat, making their quality less critical beyond their travel speed.

  • Mastering Mount Riding in Elin: A Quick Guide

    Mastering Mount Riding in Elin: A Quick Guide

    Mounted combat in Elin presents numerous advantages, making some character builds heavily reliant on mounts, summons, and companions. Despite its significance, the game doesn’t clearly outline how mounts function or the benefits they provide.

    This guide aims to explain how to obtain mounts and highlight which creatures serve as the best steeds in battle. Most mounts are fully realized characters rather than ordinary farm animals, though there may be occasions where you ride a quadruped into battle without the complexities of interpersonal dynamics.

    Note: The game is currently in Early Access, so expect updates to this guide as it evolves.

    How to Use a Mount

    Before you can ride a mount, you’ll need to acquire the Riding skill. Some starting classes, like the farmer, have this skill by default, but most players will need to visit the trainer in the Tinker’s Camp and pay some platinum coins.

    Once you have the Riding skill, it will appear in your ability bar. You can activate this skill on friendly characters to ride them, which includes pets, villagers, and key companions. However, do note that your mount counts toward your total companion limit, and the game will notify you if your party exceeds your charisma capacity.

    Tip: If you lack a suitable starting mount, the animal tamer in Yowyn has horses for sale at a few thousand Oren. Additionally, you can find more exotic mounts like carbuncles and dinosaurs from animal tamers.

    How Do Mounts Work?

    The Ride ability doesn’t provide much clarity on the advantages of using a mount, whether for travel or combat. Some aspects are intuitive, while others require examining the attributes of both you and your steed when mounted and unmounted. Here are a few key points to consider:

    • While mounted, you benefit from your mount’s speed attribute, although this will be penalized if your riding skill is low, affecting both combat and general travel.
    • In most scenarios, your mount will be the initial target of enemy attacks.
    • Your mount still retains access to its attacks and abilities, but you control its movement entirely; they can’t utilize abilities that would reposition you.
    • Spells targeting a single opponent will affect both you and your mount, including healing and buffs.
    • If your mount falls in battle, they will faint rather than die, allowing you to revive them with healing or by waiting a short time outside of combat.
    • You can gain traits from your mount, such as the ability to float over traps if your mount has levitation.

    Consideration: Changing your mount’s appearance can be done using a hitching post. By default, all mounts appear as horses.

    While riding has numerous advantages, there are also some downsides worth noting:

    • Since your mount’s movements are dictated by you, they cannot take any actions while you’re commanding them, effectively using both your turns for movement.
    • Both you and your mount may incur penalties related to accuracy, speed, and casting failures, especially with lower riding skills; more advanced mounts will require a higher skill level to minimize these penalties.
    • You lose specific traits if your mount does not have them. For instance, if you’re riding a horse, a character with wings cannot fly.

    Additionally, the symbiosis skill functions similarly to riding, but in reverse. The character you ‘host’ becomes attached to you, making it less likely to be targeted by enemies and sharing some buffs. However, the character will act based on your speed rather than that of the mount.

    What Makes a Good Mount

    When picking out a mount, a few factors are essential. Durability and speed are crucial attributes to consider, but the mount should also fit your gameplay style.

    • A resilient mount can offset a rider’s lack of health.
    • A fast mount allows for more actions per opponent action, which is vital since increasing your character’s speed can be challenging.
    • Your mount’s attack range should ideally align with yours. A melee mount won’t be effective if you primarily rely on ranged attacks, and vice versa.

    Warning: Some mounts may have hidden attributes that significantly reduce their speed while mounted. If you encounter the message "this creature is too weak to carry you," this implies their speed stat is dramatically decreased. This mainly applies to mounts like the silver bell, which could be overpowering otherwise.

    You can acquire mounts in several ways:

    Mount Type Uses
    Starting Villagers While not a great mount, Loytel can help with skill leveling and fills an early party slot.
    Adventurers With an affinity over 75, you can recruit most characters, but charisma must exceed their highest attribute. Regularly give gifts to adventurers with a simple interest until they agree to join you.
    Captured Monsters Beasts may have fewer equipment slots, requiring gene engineering for enhancement. A lightning drake, for example, can be a solid choice.
    Divine Apostles Most deities grant powerful party members when you accumulate enough piety. As these are automatically recruited, you don’t need to grind for skills or attributes. Some make great mounts, while others work better in different roles.

    Note: To recruit unique NPC adventurers, you must defeat them in a duel, often with equal-sized teams. You can choose to focus your attacks on the adventurer to make it easier.

    Good Example Mounts

    If you’re aiming to recruit reliable mounts, consider the following characters, which are easy to obtain and excel in their intended roles:

    Mount Role Details How to Obtain
    Golden Knight Aliga Tank Highly resistant to damage, combined with abilities that enhance its durability. Earn through piety rewards from Opatos by sacrificing ores at shrines; quantity matters more than rarity.
    Steel Dragon Corgon Tank Offers a breath attack and the ability to taunt enemies, protecting vulnerable members of your party. Progress through Loytel’s questline while developing Vernis and exploring the mines.
    Carbuncle Speed/Spellcaster Fast and powerful spellcaster; capable of providing healing during battle, ensuring durability in the party. Available from animal tamers on the second floor of the Fortune Bell.
    Maiden of Blades Misaki Tank/Speed Gains speed and resistances with levels; it’s vital to monitor equipment to avoid negative speed effects. Requires a high charisma to recruit; found tending the shrine of Horome in Nefu Village.

    How to Upgrade Your Mount

    To enhance your mount’s effectiveness, consider the following strategies, which can also apply to your pets and party members:

    • High-quality equipment is essential. Depending on the mount’s type, they can wear various gear types. For instance, a quadruped can have two sets of shoes while also using a weapon.
    • Blessing a mutation potion with holy water guarantees beneficial mutations. Applying these to your mount can improve their speed, strength, and damage resistance.
    • Equipping your mount with ether gear or applying ether spells can significantly boost their speed, though prepare antidotes for any side effects.
    • Spells like Broomification can temporarily enhance your mount’s speed, though it may reduce other attributes.
    • Mounts with fewer equipment slots receive extra gene editing slots, and granting them specific skills can help them protect you better.

    Tip: Be cautious with Broomification, as it can negatively interact with specific mounts, suppressing their innate speed bonuses. It’s better suited for characters that do not have a naturally high speed.

  • Boost Your Pet’s Affinity in Elin: A Complete Guide

    Boost Your Pet’s Affinity in Elin: A Complete Guide

    Managing Pets in Elin: A Guide

    In Elin, running a successful party is essential, and there comes a time when tackling everything alone becomes overwhelming. While companions can be beneficial, pets offer unique advantages that bring their own complexities. Fortunately, Elin provides plenty of time to learn and adapt.

    Starting with the straightforward task of receiving a pet grizzly bear quickly transitions into a detailed process involving breeding, genetic modifications, and dietary planning. Here’s a comprehensive guide to help you begin raising a pet that can join you in Nefias.

    How to Acquire Pets

    The first pet you’re likely to encounter is given by Fiama, who provides a creature of your choosing during the tutorial quest. As you progress through the homestead questline, you’ll meet the Steel Dragon, Corgon, who can also be recruited. Animal tamers offer a range of pets for sale.

    If you’re looking to expand your pet collection beyond quests and vendors, you can catch new creatures. While capturing wild animals can be easier, hatching pets from eggs yields stronger stat growth than their wild versions.

    To catch a creature, use monster balls—small spheres you throw at nearly defeated enemies. Basic balls can be found in regular shops and at the Fortune Bell Casino prize counter, while premium balls are available from Miral and Garokk’s workshop. Tossing these balls is similar to using items or potions, and the hover menu will indicate if an enemy is too strong to be captured. After catching a creature, you can retrieve the ball and throw it again to release your new pet.

    Another method to obtain pets is hatching fertilized eggs. While these are quite rare, you can find them through several means:

    • Eggs can often be found in bird nests scattered throughout the fields.
    • You can collect eggs from pets that are designated as livestock, which have a slim chance of being fertilized.
    • Feeding a creature love potions might unexpectedly result in an egg, even from those that usually don’t lay eggs.

    Fertilized eggs need to be placed in a bed or incubator to hatch into a tame creature. It can take a few days for the egg to hatch, so be careful not to accidentally eat it!

    Raising Your Pet’s Affinity

    Building a strong bond with your pet offers various benefits. For example, pets with high affinity grow faster. Additionally, you can retrieve any equipment you’ve given them without upsetting them.

    Here are some effective methods for increasing your pet’s affinity:

    • Adventuring Together: Completing quests and defeating enemies alongside your pet will help raise its affinity, though they may lose some affection if they perish.
    • Headpatting: If you’re a worshiper of Horome, you can use this ability to improve your affinity with any character. Although it shares a cooldown with chatting, it won’t reduce affinity.
    • Love Potions: These provide a significant immediate boost to affinity. You can either blend them into food or throw them directly at your pet. However, love potions are rare, so stock up by investing in a drug dealer and using influence to restock.

    When visiting the dealer, keep an eye out for acid-proof liquids that can make your equipment immune to harmful acid damage.

    Protecting Fragile Pets

    Losing a pet can significantly drop your affinity, and you’ll have to wait a week for them to respawn. To mitigate this, consider letting them ride on you with the Symbiosis skill. This ability functions oppositely to riding: your pet will remain on your back and most attacks will target you instead. They still retain their abilities and can continue to act, with a slight decrease in speed and success rates depending on your skill level.

    Feeding Your Pet

    Like other companions, your pet’s stats will improve based on their diet. To develop their desired attributes, you need to feed them appropriately.

    It’s helpful to have gourmet feats to understand the traits of various foods, though they’re not mandatory. Before deciding what role you want your pet to fill, use a stethoscope—available from Talesinger Farris—to examine their character sheets. This will reveal their attributes, growth potential, and any inherited traits.

    For instance, the silver bell stands out with:

    • Just 1% of a normal character’s hit points but possesses immunity to nearly all damage due to an innate feat.
    • A remarkable speed of 300, allowing it to act more frequently than other creatures.
    • High potential in marksmanship, which isn’t obvious just from observing them in the wild.

    From this assessment, you can determine the best diet for your pet. In this case, feeding them endurance-boosting foods might not be effective; instead, focus on foods that enhance their attack power to maximize their speed.

    Pets can also use gear just like humanoid companions. If you don’t want them to utilize shared equipment, you can instruct them not to.

    Training Your Pet

    To develop combat skills, your pet must engage in battles, but you don’t have to start from scratch. Use the gallows from the tutorial quest:

    • Putting a creature in the gallows allows your pets and companions to practice their attack skills on it.
    • Placing your pet in the gallows will enhance their defensive skills.

    Rest assured, using townsfolk or pets as practice targets will not result in fatal injuries. They will always stop short of deadly damage.

    Teaching Your Pet New Skills

    Unlike your character, pets can’t simply learn new skills by paying trainers with platinum coins. Instead, you need to engage in gene editing. There are several ways to acquire genes for your pets:

    • Genes can drop randomly from any enemy, particularly from stronger variants. Elites possess "evolved" versions of genes that offer unique abilities.
    • The Little Garden, located southwest of Derphy, sells a variety of genes that allow you to modify a pet’s combat AI.
    • Statues of Mani, the machine deity, provide high-level genes when visited. These can be found in the wild or dropped during fishing.

    Nino at the Tinker’s Camp sells gene editing tools, but they come with a hefty price tag. It’s usually better to wait until later in the game to purchase these, especially if you haven’t yet identified a gene you want to use.

    You’ll need electricity to operate the editing tool, which means you’ll have to acquire or construct a generator.

    Basic genes cost fewer feat points, making them appealing if you’re merely looking to teach a skill. On the other hand, activated abilities like fire breath are costlier but open up many new possibilities.

    Once a creature learns a skill from a gene, they can further enhance that skill naturally. This makes simple genes with a point or two particularly valuable for developing a pet into a specific role.

    Now you’re equipped with the knowledge to navigate pet management in Elin effectively!

  • Ways to Earn Cash in Elin

    Ways to Earn Cash in Elin

    Elin’s sandbox experience allows players a lot of freedom, but there’s one rule you can’t escape: taxes must be paid. Just like in real life, neglecting your tax duties can lead to shopkeepers refusing to serve you and guards attacking you on sight.

    This means every character needs to find ways to turn their activities into income, especially through passive methods. The best strategies will vary based on your starting class and playstyle, but all will help you stay on the good side of the taxman.

    Elin is in Early Access. The information shared here may change as the game develops.

    Crafting

    A straightforward and effective way to make money early in the game is by dirt digging at your homestead and crafting it into infinite grass or soil floors. The stamina cost for crafting is based on the difference between your skill level and item level, making lower-level items prime for mass production.

    As you progress, you’ll unlock more recipes and crafting stations. Keep in mind that even if your skill exceeds the recipe requirements, there is a minimum stamina cost to create items. Therefore, not all low-level recipes will always be the most lucrative. Look for traits that enhance profitability:

    • Easily obtainable materials, such as wood, stone, or scrap metal.
    • Products that stack in your inventory, like furniture and tiles (as opposed to weapons and jewelry).
    • Items that inherit qualities from their materials, such as expensive woods yielding expensive furniture.

    Some materials can be interchanged through intricate crafting processes. For instance, using scrap metal to create nails, then using those nails with bones to produce bone meal.

    Busking

    A pianist in Elin plays music to a crowded clubroom at the Fortune Bell Casino.

    Playing music in crowded areas will earn you tips from nearby spectators. Additionally, you can find performance gigs at quest boards. These gigs offer time-limited opportunities that attract many listeners, along with extra rewards if you meet a certain performance threshold.

    To get started, all you need is a musical instrument. You can craft a lute at the tinkerer’s bench or purchase one from most towns using coin or furniture tickets.

    Make sure to enable the feature to automatically resume your song if interrupted; otherwise, your performance may end whenever you miss a note.

    A significant drawback is the initial skill grind; if your musical ability is low, you may be met with hostility. Practice at the orphanage, where the crowd is more forgiving, before advancing to the Fortune Bell Casino in Palmia.

    Adventuring

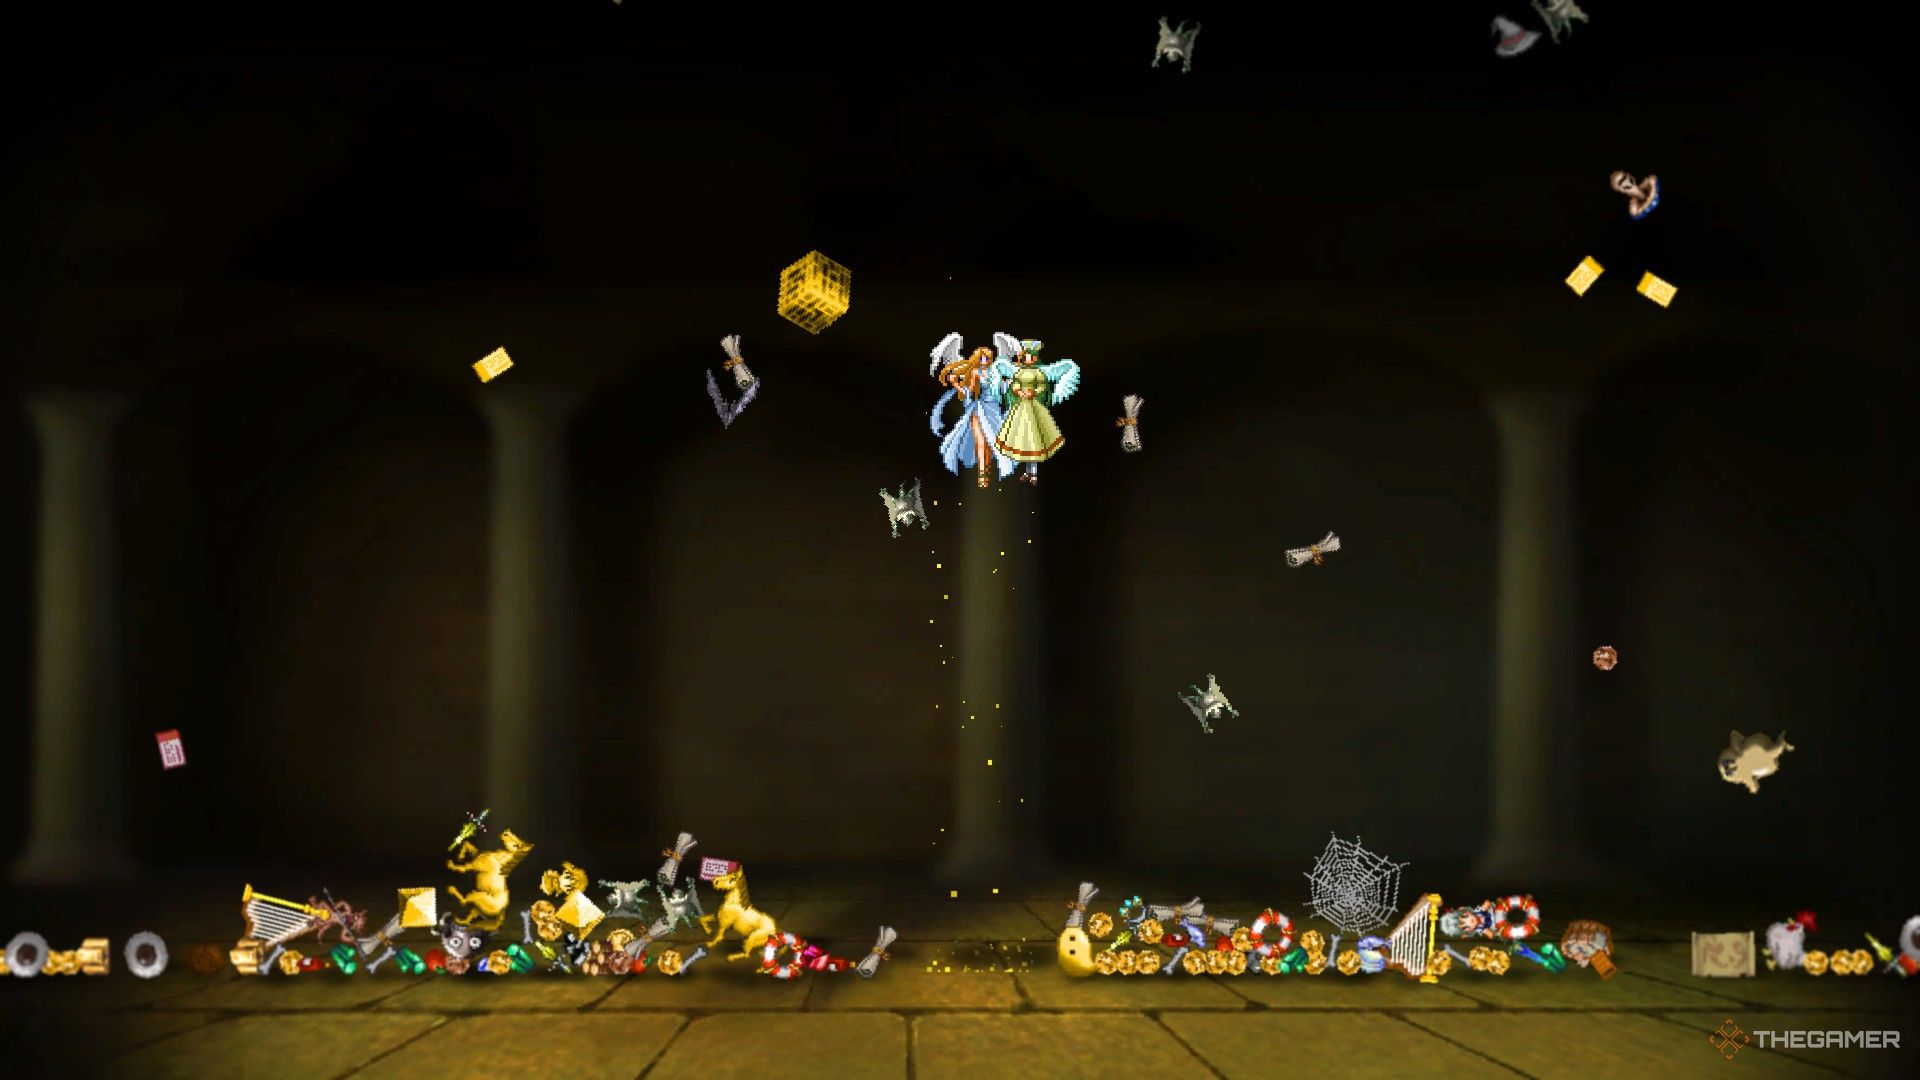
    A player in Elin examines their treasure hoard, containing lots of gold and various miscellaneous loot.

    Dungeons are filled with loot just waiting to be collected, and even cursed items can fetch a decent price.

    Initial dungeons often yield a wealth of mediocre loot that sells well and doesn’t weigh much. To maximize your carrying capacity, bring containers to increase your inventory slots, with pouches and purses being particularly effective due to their lightweight.

    • Join the Fighter’s Guild in Port Kapul early on for additional rewards when clearing dungeons and defeating elite foes.
    • Learn the appraisal skill at the tinker’s camp to enhance the sell value of loot and bypass identification fees. The longer you keep an item in your inventory, the more information is revealed.
    • Keep figurines and cards dropped by enemies to either build a tourism industry or sell as regular loot.

    The major downside to adventuring is the necessity for extensive preparation for higher-level dungeons or the repetitive nature of low-level runs. High-level dungeons will require you to stock up on healing items and potentially level up your companions.

    Sculpting

    A player in Elin stands next to a holographic card and sculpture of an intimidating demon.

    Sculpting allows you to turn basic resources like stone and metal into valuable statues. As you level up, you’ll unlock the ability to create higher-quality sculptures, but you will need to speak to a trainer in Olvina to acquire the skill.

    The primary advantage of sculpting is that it automatically pauses game time if your character gets overworked, as most sculptures weigh significantly more than their base materials, avoiding crushing damage from overloading your backpack.

    The only requirement is a steady supply of stone. Collect as much as you can by using a pickaxe in any dungeon.

    While you can use higher-tier materials for more valuable sculptures, stone typically offers the best balance of time and profit.

    While the game permits you to carve statues out of human corpses, it’s not advisable. Flesh statues are edible, though.

    Fishing

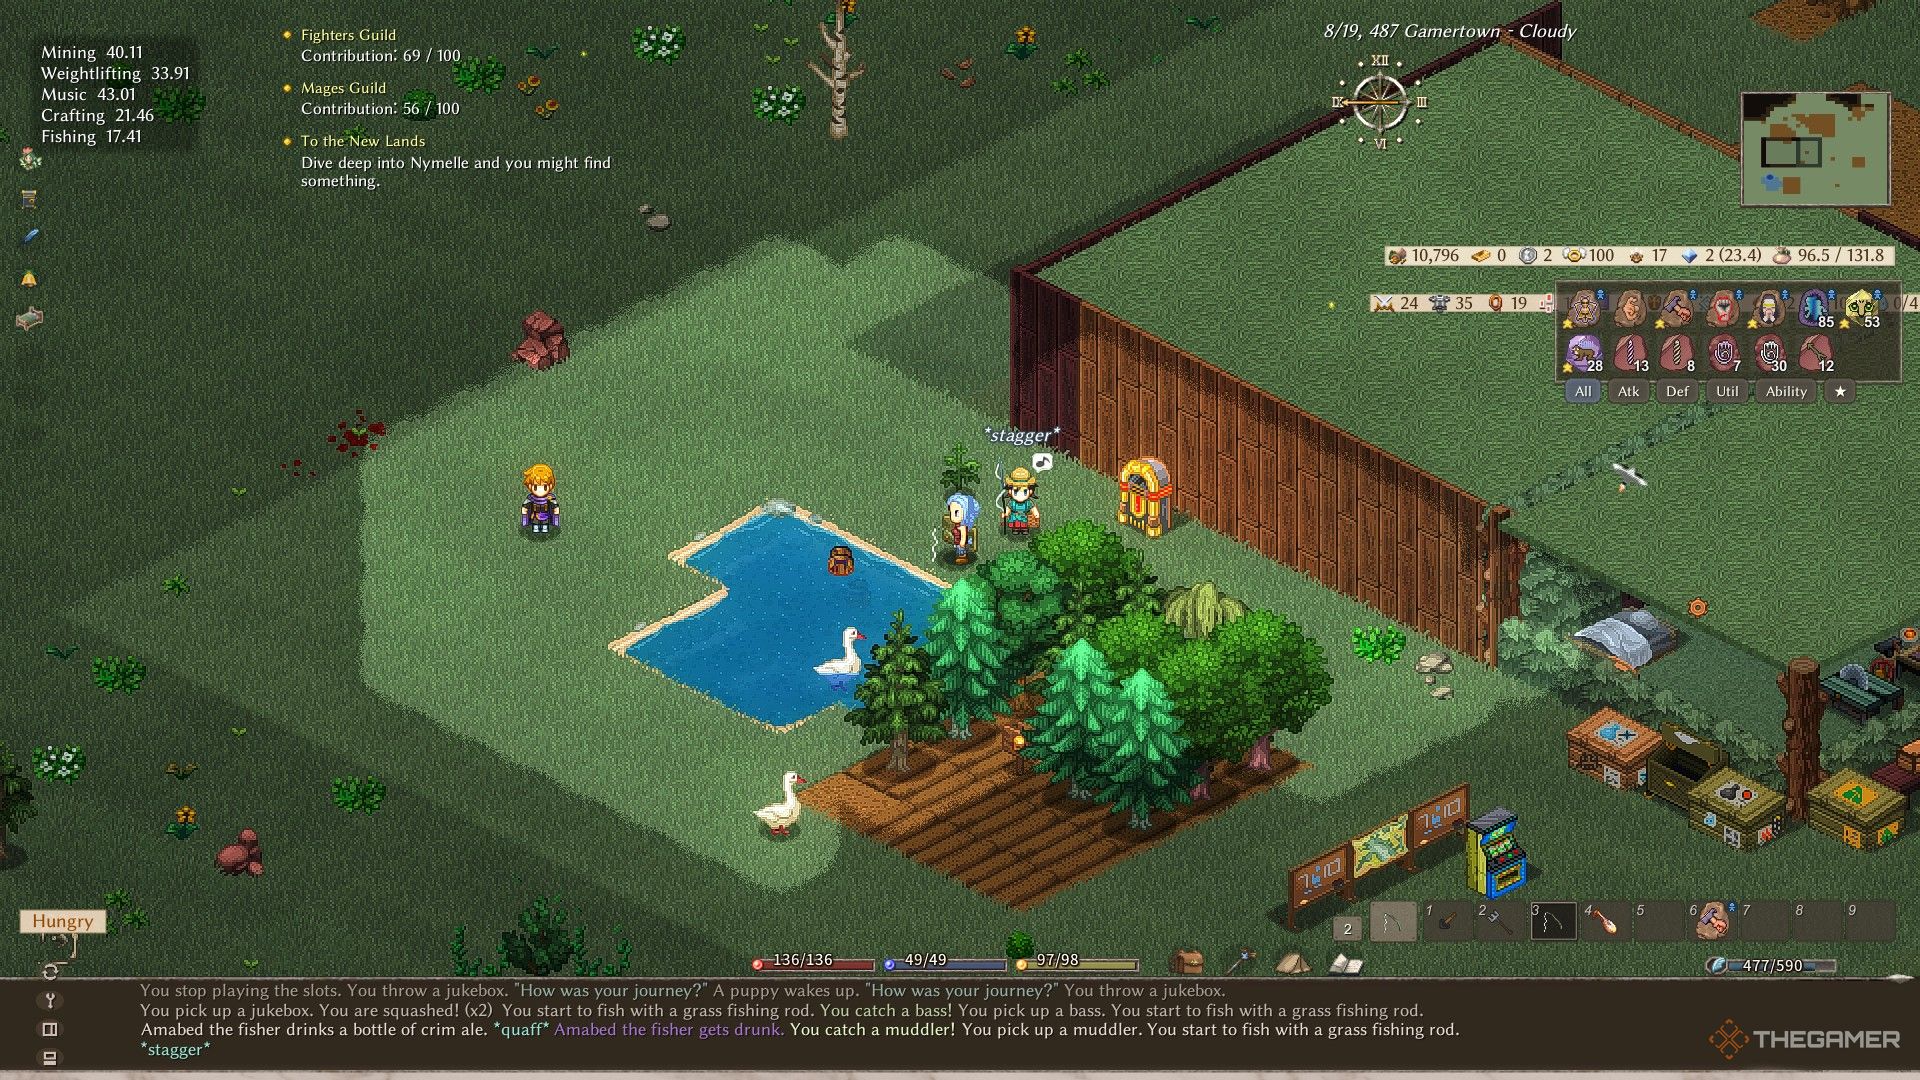
    A player in Elin fishes in a pond while managing an adjacent tree farm.

    Fishing isn’t the best way to make money at the beginning, as raw fish spoils quickly, making it difficult to sell. You’ll also need to buy the fishing skill unless you chose it as a starting profession.

    As you advance in the game, fishing can become a viable income source. Acquiring a fridge or cooler can prolong the shelf life of your catch, and cooking stations allow you to create more valuable dishes from raw fish.

    The game may inform you that fishing isn’t possible during winter; however, you can purchase a build board from Loytel and designate your fishing area as snow-free to keep the water unfrozen.

    Fishing presents several benefits compared to other tasks:

    • It has a low stamina cost, allowing you to leave it unattended for extended periods without risk of overexertion.
    • At higher levels, it can net you rare items, providing considerable profit for lucky players.
    • It’s a low-risk way to earn rare currencies like strange coins and small medals.

    Be cautious when your fishing skill reaches around 20; at this level, you can start catching sharks and whales, which weigh too much to carry. Attempting to lift them may result in being crushed.

    Homesteading

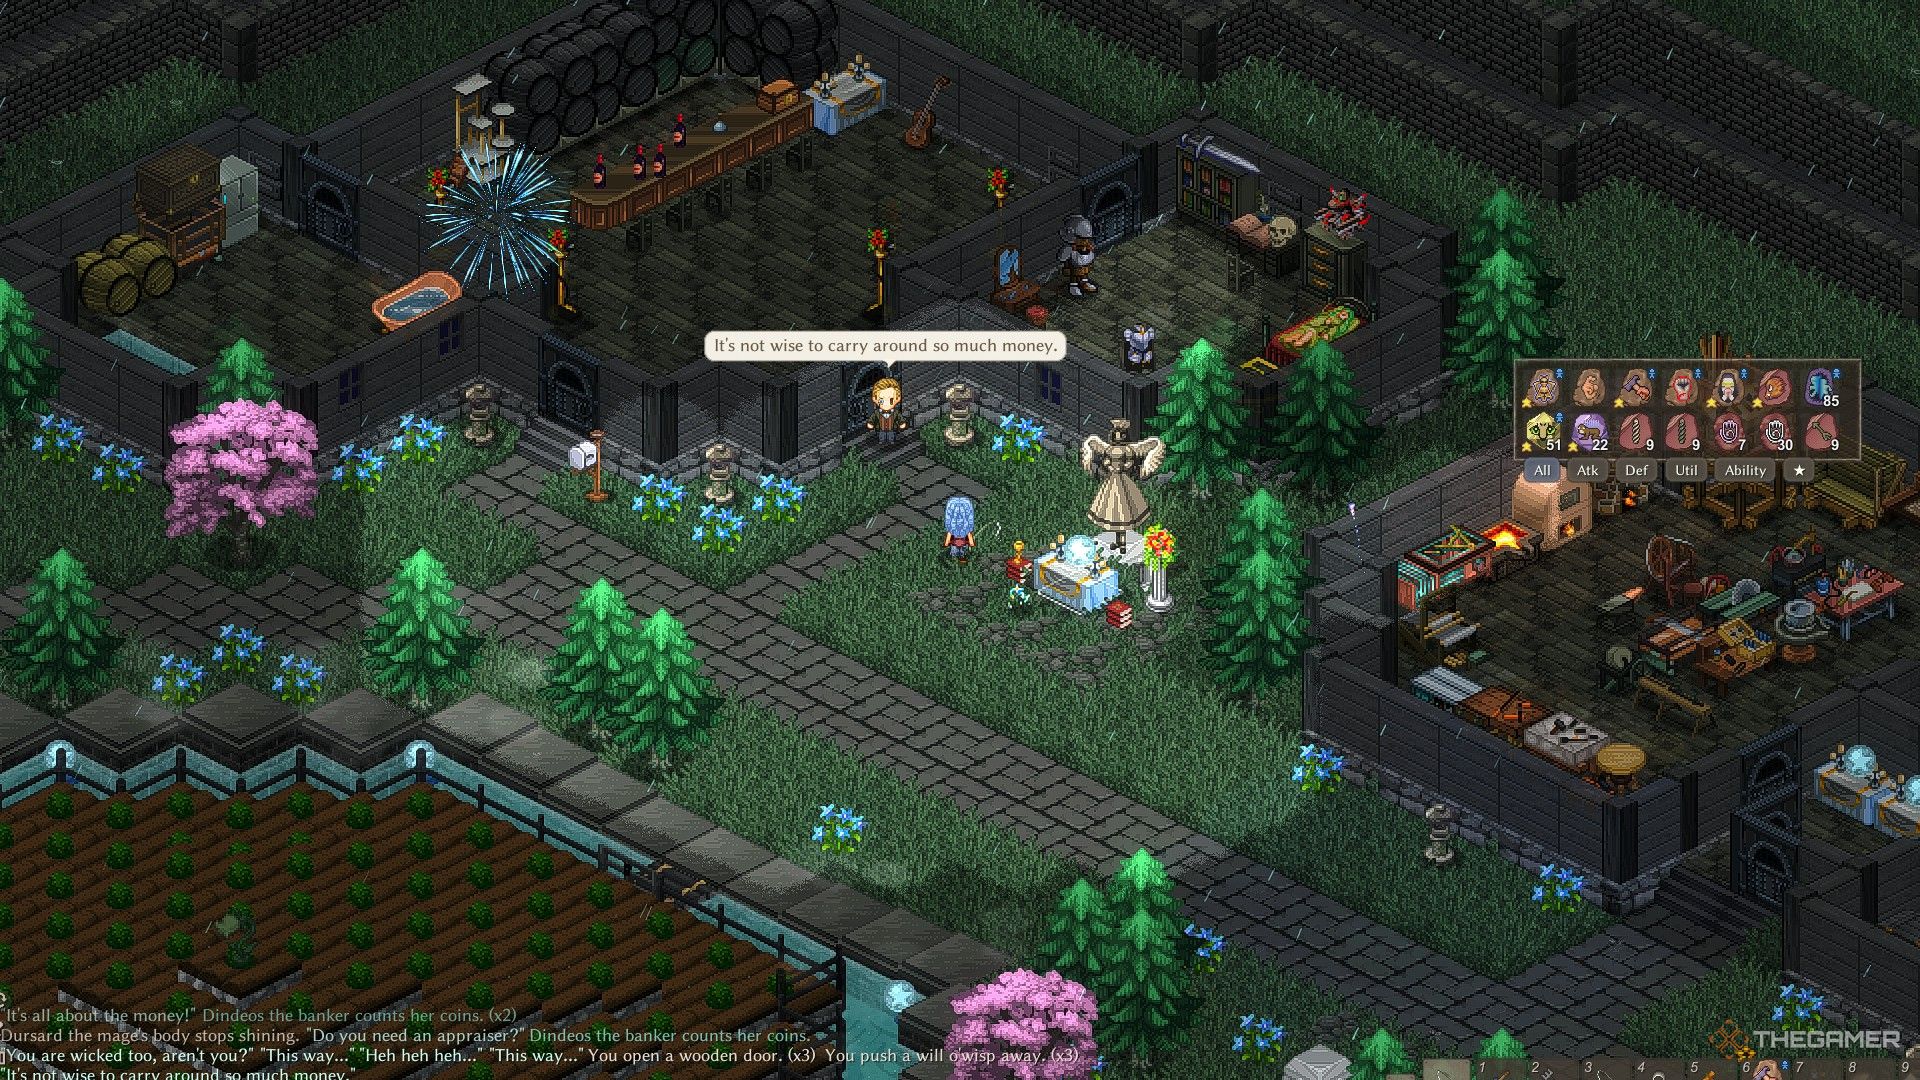
    A banker NPC is recruited into a player home in Elin.

    Villagers can be a lucrative source of income if you’re fortunate; even simple farmers and fishermen can generate some revenue.

    Treasure hunters are particularly profitable. Any treasure maps you find can be stored in a shared chest, gradually converting into treasure chests filled with thousands of coins, rare items, and sometimes artifacts. You’ll need to find villagers or pets with suitable jobs and hobbies to maximize profits, but you can buy whips from the talesinger to reroll a villager’s job and hobby.

    Some treasure chests may be locked. You can either pay an information broker to open them or learn lockpicking from a trainer in Derphy.

    Other villagers can also produce goods for sale. Lumberjacks gather logs while cooks create meals and seasonings. Ideally, you want products that won’t spoil, favoring explorers and antique dealers.

    Farming

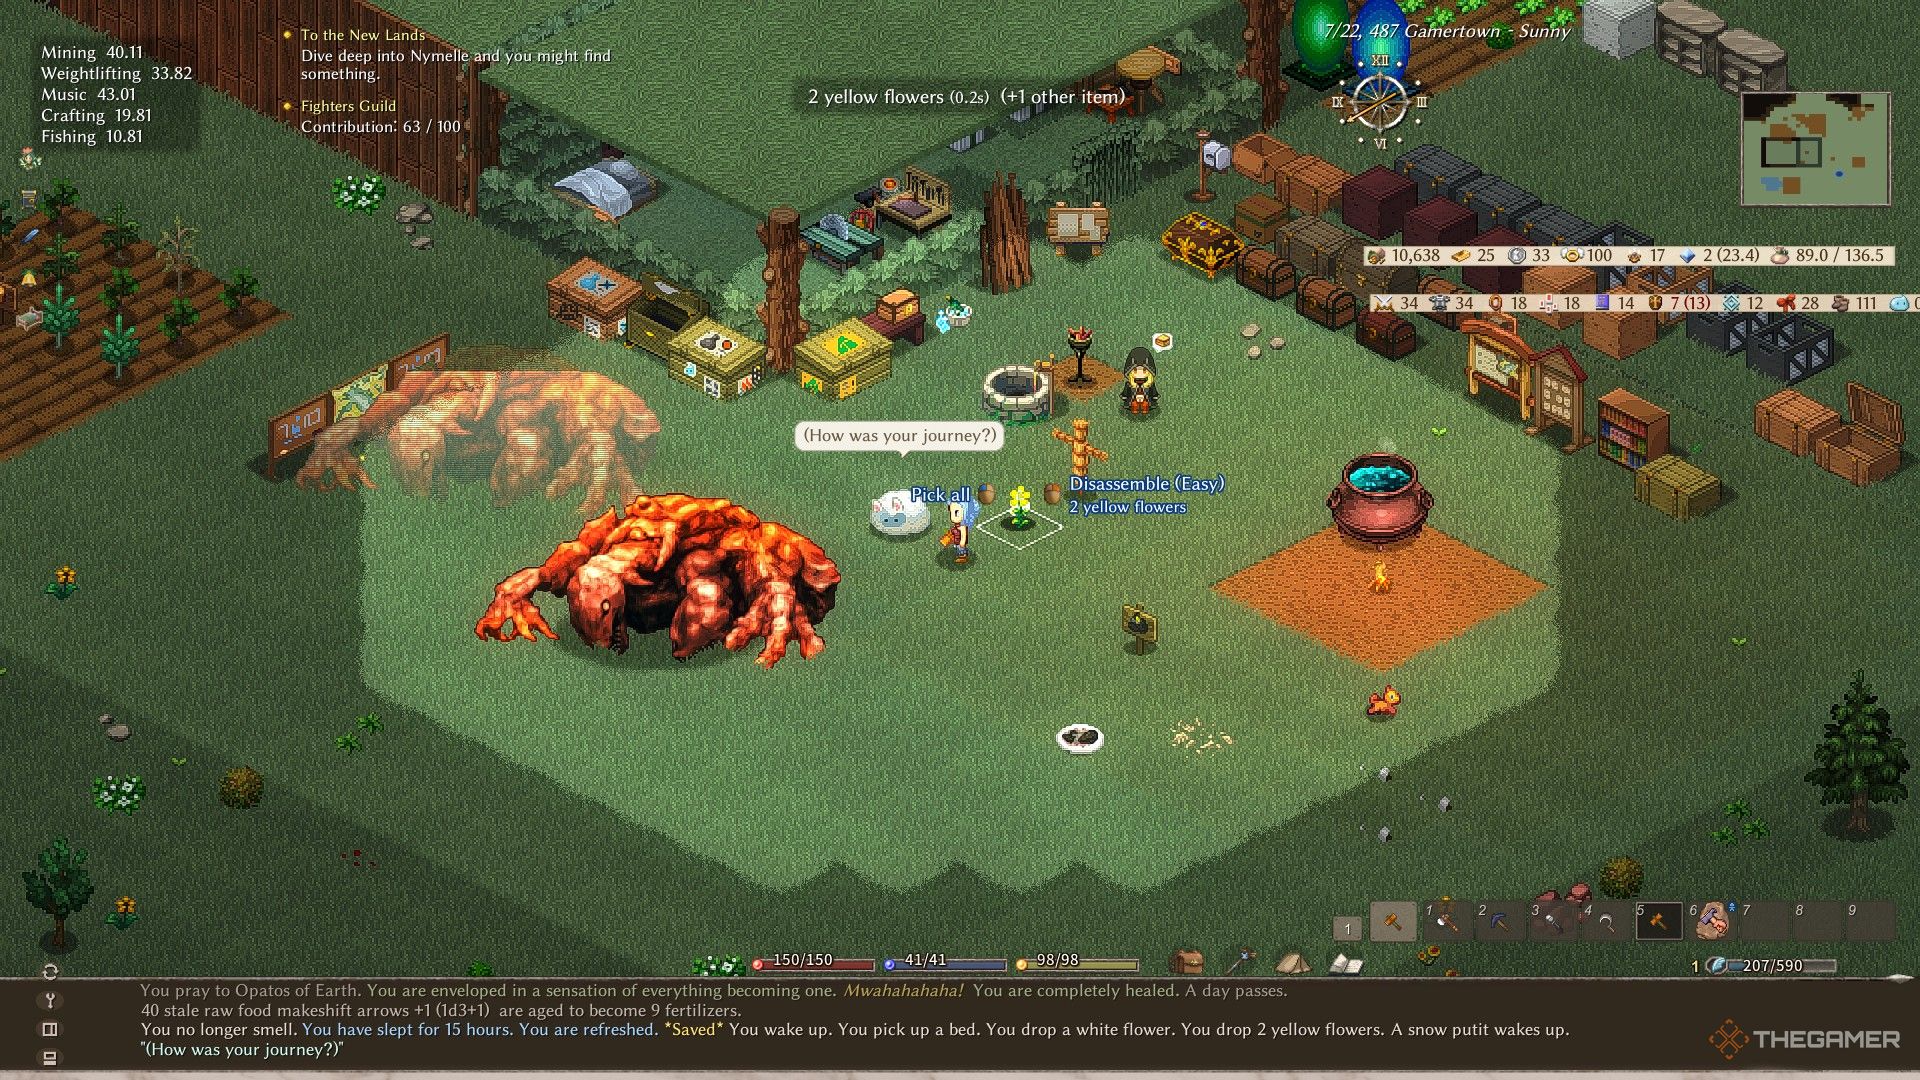
    A large farm in Elin containing assorted berries, mushrooms, and grains.

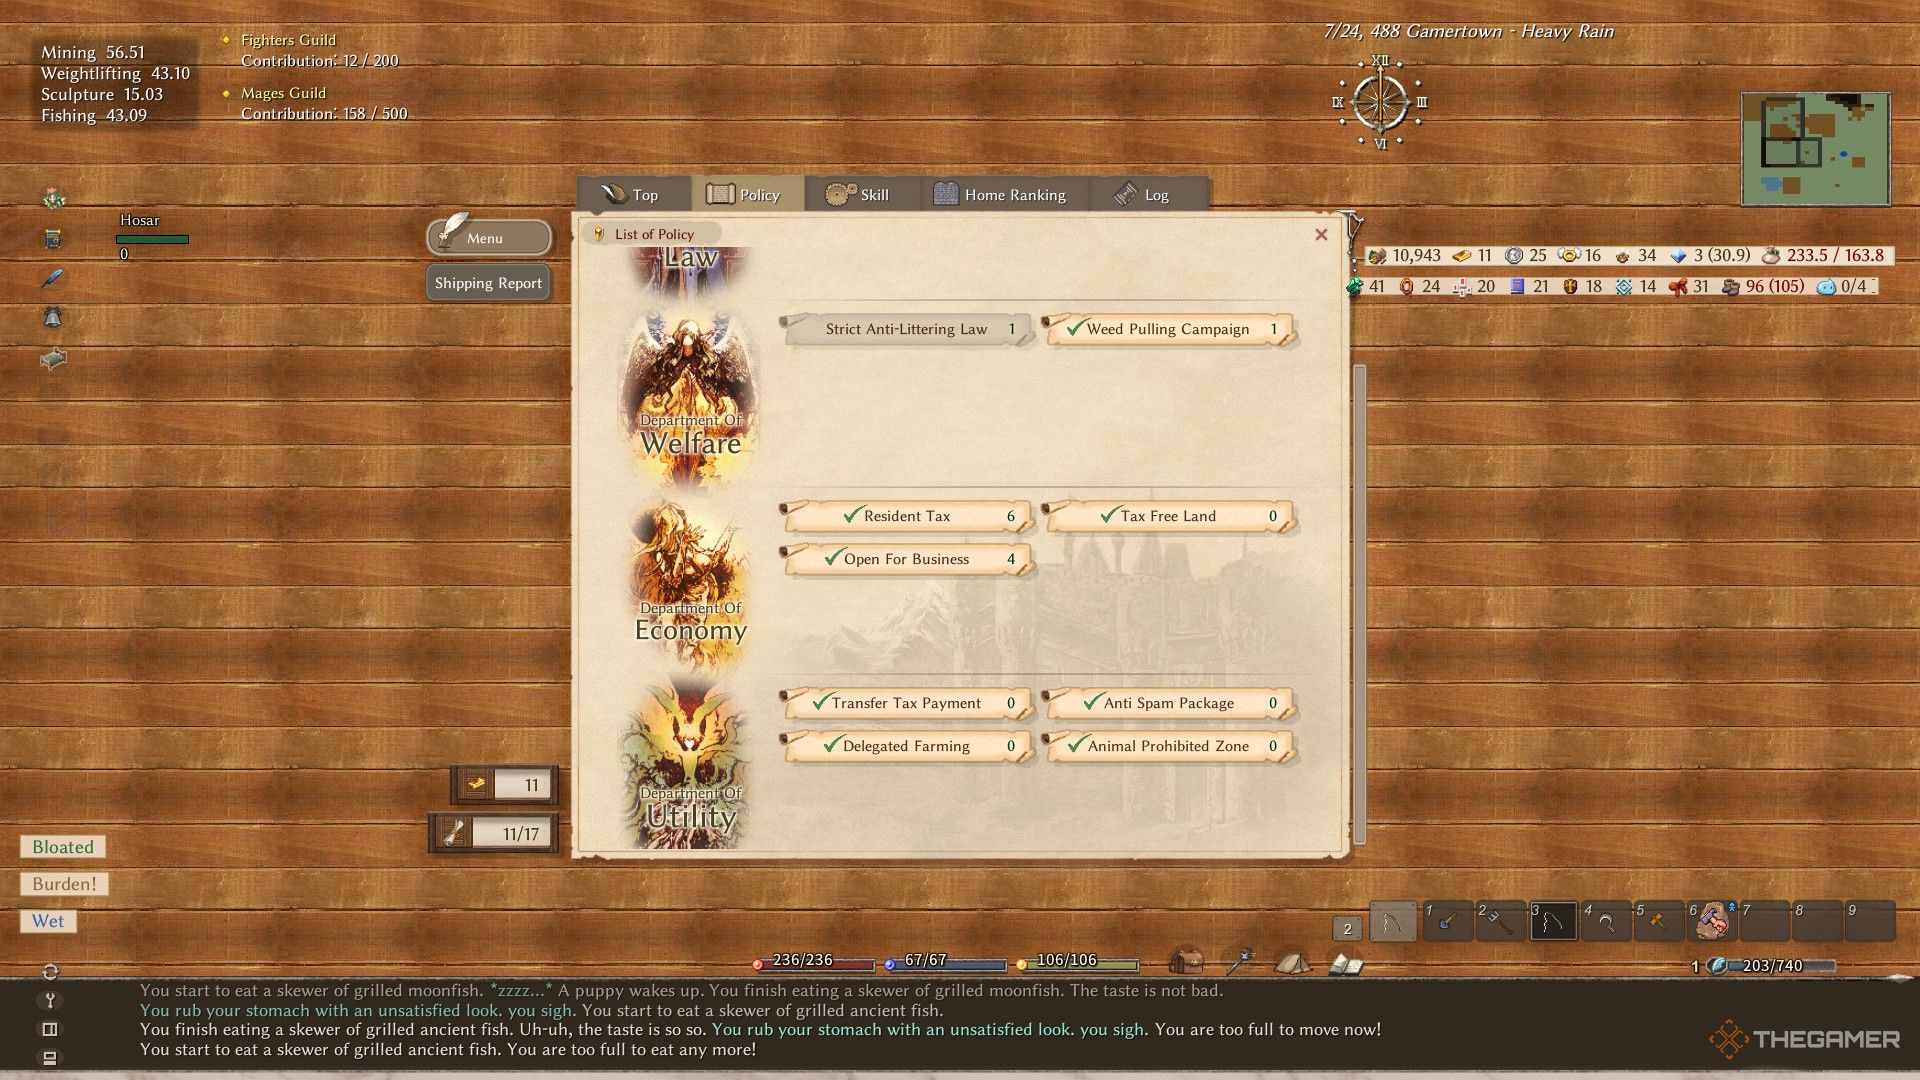
    The Delegated Farming policy on your home board automatically harvests and replants crops on your farm. If you set up your delivery chest to accept fresh produce automatically, you can maintain steady income even while away from home.

    If you need seeds, gather some with a sickle, as each biome has unique plants. Alternatively, you could steal rare seeds from settlements or moonstone portals.

    A dependable early crop is crim bushes. By using a millstone, you can convert the berries into powder, which has good market value and lasts in storage.

    This method requires no special tools or skills, but the more farmer residents you employ, the more land you can manage.

    Winter farming poses additional challenges but remains possible depending on your chosen crops and available resources:

    • Without sun lamps, mushrooms can be cultivated in winter. Use a build board to keep fields snow-free for maximum visibility or grow them under cover.
    • If you have sun lamps, you can grow any crop year-round, but you’ll need a power supply to support them.

    You can also accept harvesting quests in towns. These test your weightlifting skills more than your farming abilities, so maintain a light inventory. Completing these will reward you with Oren, platinum coins, and furniture tickets.

    Tourism and Taxes

    A player in Elin configures their home board to levy taxes and accept tourists.

    By selecting the “open for business” policy, you can attract tourists to your homestead. Your income will depend on your economic policies and your tourism value:

    • Policies like traveler’s inn increase tourism earnings at the expense of government points.
    • The rip-off store and its related policies can change the type of tourists you attract while allowing you to charge higher prices for goods.
    • Your primary source of tourism value comes from aesthetic items such as figures, statues, and cards. Having duplicates won’t help, so aim for a diverse collection.

    If tourism is not an option, you can levy taxes on your residents through various housing board policies. The resident tax policy provides a monthly income that varies based on your homestead’s ranking and other policies. If paired with the tax evasion policy, your villagers may cover most of your tax obligations.

    Guild Salaries

    A player in Elin has reached apprentice rank in the Mages' Guild, earning a salary of 200 orens a month.

    Each of the four guilds provides a monthly salary once you reach the first rank of membership, alongside benefits such as discounts and exclusive shops. There’s nothing stopping you from joining all guilds and collecting salaries from each.

    • The Fighters’ Guild is located in Port Kapul. You move up ranks by defeating elite enemies (those with a glowing aura).
    • The Mages’ Guild resides in Lumiest. Advancement comes through deciphering ancient texts with your literacy skills.
    • The Thieves’ Guild can be found in Derphy. You earn ranks by selling stolen goods to their fence.

    The Merchants’ Guild, situated south of Mysilia, may not be the best choice for income. Advancing ranks requires investment in shops, usually costing more than the returns.

    How to Combine Multiple Methods

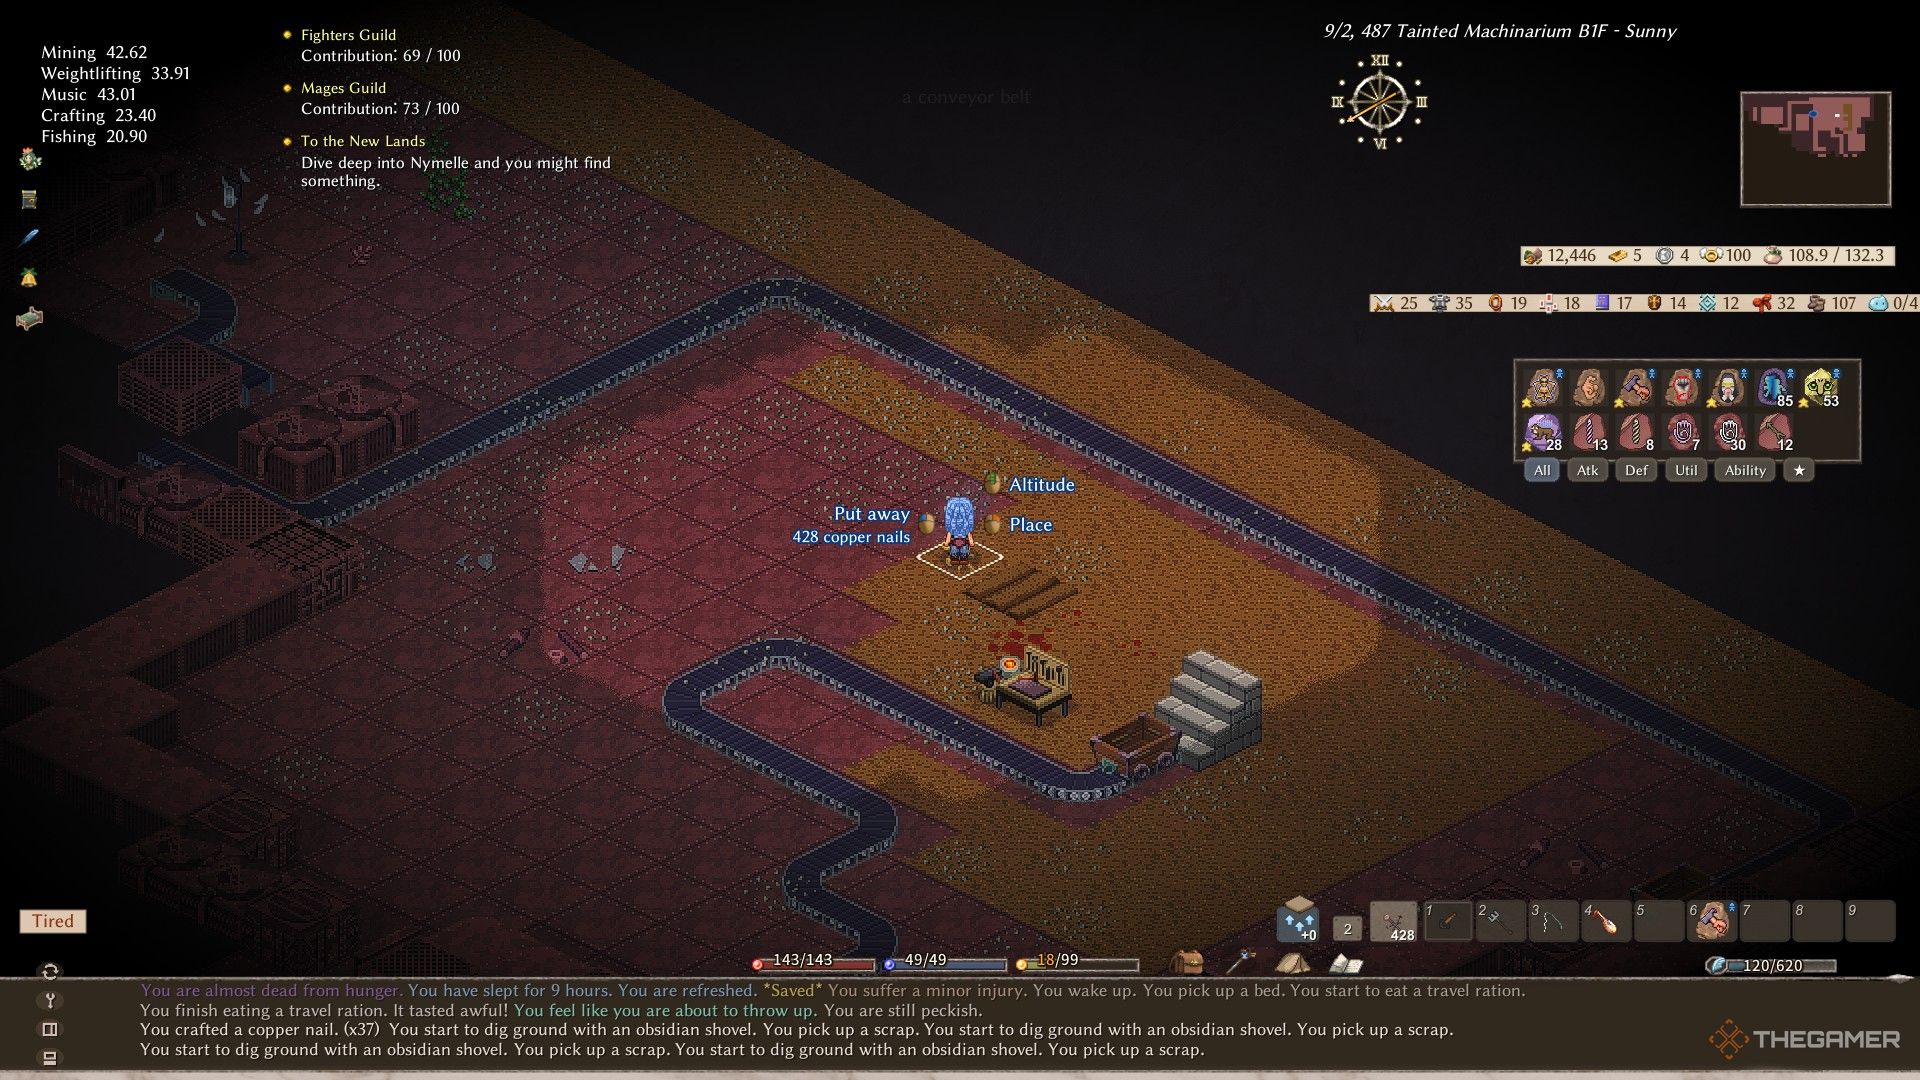
    An adventurer in Elin has cleared a mechanarium and is now strip mining the walls and floors for cheap copper.

    You can seamlessly integrate several of these methods based on your character’s skills:

    • Any travel-related job can easily carry a simple instrument and busk in towns while passing through.
    • Fishing specialists often end up with surplus ancient books. Deciphering these can improve your mage guild standing for additional passive income.
    • Killing elite foes for the Fighter’s Guild also yields tourism-enhancing cards and figurines.
    • Once a dungeon is cleared, strip mine it for crafting resources. Mechanariums are particularly useful as they produce scrap that can be used as fishing bait.

    Avoid methods that compete for your time and skills—fishing and sculpting, for instance, are both time-intensive and require different sets of skills. However, a certain degree of sculpting skill is needed to craft the cooker, which can enhance your fish by transforming it into higher quality meals.