الوسم: Dreamlight Valley

  • Completing the Cheshire Cat’s Riddles in Disney Dreamlight Valley

    The Cheshire Cat is stirring up some mischief, but this time it’s all in good fun! Joining a scavenger hunt filled with riddles in Disney Dreamlight Valley and its various Realms is a fantastic way to pass the time and earn exciting rewards. We’re here to guide you through each clue so you can grab your ultimate prize.

    Before diving into this quest, you’ll need to check off a few requirements. The riddles can be tricky, but don’t worry— with a little assistance, you’ll unlock the Cheshire Cat’s best friend reward and be able to dress like a charming character from Wonderland. Here’s everything you need to know!

    How to Complete the Cheshire Cat’s Scavenger Hunt

    To kick off this quest, you must reach friendship level ten with the Cheshire Cat. Additionally, you need to progress past level four with Stitch and have finished Mickey’s level ten quest. Once all of that is done, chat with the Cheshire Cat.

    He has a scavenger hunt ready for you, but he won’t give away many hints. Luckily, you can ask other villagers for help deciphering the riddles to find the treasure.

    The First Clue

    Your first step is to speak with Alice about kicking off the scavenger hunt. You’ll discover that the clue is on rice paper, which you can actually eat! Open your inventory and consume the paper to unlock a new memory.

    The rice paper restores 25 energy!

    Once you’ve unlocked the memory, you’ll see an image of the Dream Castle influenced by the Cheshire Cat. Head to that location to find your next clue.

    The Second Clue

    Inside the Dream Castle on the third floor, you’ll spot a bush with spoiled milk and white roses. Bring them to Alice and discuss what they might signify.

    Alice will suggest returning to where you first painted roses with her in Wonderland. Make your way to the Queen’s Maze, then head to the back area where the cards are set up for a game of croquet. Near the large heart-shaped gate, you’ll find a white rose bush.

    Interact with it to activate a dried sprout. Pick up the dried sprout to create a portal.

    The Third Clue

    Step through the portal to access a hidden room in the Dream Castle. Follow the trail of pink paw prints until you discover a Cheshire Catfish lying on the floor.

    Take the fish and head back to the Dream Castle, where the Cheshire Cat will be waiting for you.

    The Fourth Clue

    Now you have three out of four ingredients, and the Cheshire Cat will direct you to find the last one. You’ll need to travel to the Glade of Trust to collect the final ingredient: Coffee Bean.

    If you’ve already stocked up on coffee beans, simply grab one to start cooking.

    Where to Find the Cheshire Chest

    Make your way to the nearest cooking station and combine the Coffee Bean, Cheshire Catfish, Dried Sprout, and Spoiled Milk to prepare the Cheshire Cat Concoction. Deliver it to the Cheshire Cat, then use it to enchant your Royal Fishing Rod.

    Next, head to the Frosted Heights and look for golden bubbles. Cast your line to fish out the Cheshire Chest, then bring it back to the Cheshire Cat for a hint about its contents.

    The chest holds your reward: open it to receive the Cheshire Cat Jacket and Cheshire Cat Gloves, completing the outfit you’ve been assembling since the cat’s arrival in the Valley.

  • Completing the Hunt for Missing Furniture in Disney Dreamlight Valley

    Completing the Hunt for Missing Furniture in Disney Dreamlight Valley

    To truly make Disney Dreamlight Valley feel like your own, you need to befriend different villagers who offer special rewards and quests. The characters you unlock at the beginning come from a wide range of Disney and Pixar stories, bringing a mix of familiar faces to the Valley.

    The Cheshire Cat is a playful character, but you’ll need to roll with his quirks if you want to achieve your goals. Right now, he’s stirred up some trouble with a few villagers, and they’re not thrilled. Assist him in straightening things out quickly to restore harmony!

    How to Unlock the Furniture Fluster Friendship Quest

    Before you can start this quest, you’ll need to reach friendship level two with the Cheshire Cat. Additionally, you must have the following characters unlocked so that he can carry out his playful schemes:

    • WALL-E
    • Daisy
    • Aladdin
    • Vanellope
    • Mirabel
    • Mother Gothel

    Once you meet these requirements, talk to the Cheshire Cat. He’ll tell you that he’s decided to move some furniture around on his own, and it appears that none of it belongs to him. The other villagers aren’t too happy about this!

    Where to Place the Cutesy Furniture

    The only clue the Cheshire Cat gives is to visit the home of the “Diamond in the Rough,” which is Aladdin. Head over to his place, and you’ll find that it’s a bit of a mess. Aladdin and Jasmine’s furniture has disappeared and has been swapped out for some whimsical purple items.

    Speak with Aladdin to gather the purple cutesy items, then take everything back to the Cheshire Cat. Unfortunately, he won’t be much help. You’ll have to track down the furniture’s owner yourself.

    You may already have an idea of who the furniture belongs to if you recognize similar pieces.

    Find Daisy Duck in the village, and visit her house to return the items. But first, you’ll need to collect three rusted pieces of furniture from inside her home.

    After that, you’ll discover that the missing items should go where there are pink paw prints. Place the Tulip Vase, Vanity, and Hair Dryer in their correct spots in Daisy’s house, then talk to Daisy about who might own the rusted furniture.

    Where to Place the Rusted Furniture

    Daisy will suggest a few possible owners for the furniture, but if you’ve been playing for a while, you might recognize the style. Locate WALL-E in the village and discuss the situation with him.

    Once you meet him at his home, return the missing furniture to its rightful place, then have another chat with him. It looks like no one else’s belongings are here, but Aladdin’s furniture is still unaccounted for.

    How to Craft New Furniture for Aladdin

    Head back to the Cheshire Cat to ask about the missing furniture. Apparently, he’s misplaced it entirely, and you’ll need to craft new items for Aladdin and Jasmine.

    Gather the following materials to create the missing pieces:

    • Fiber (10)
    • Softwood (25)
    • Purple Rising Penstemon (3)
    • Green Rising Penstemon (3)

    Go to your crafting station to create the Pretty Pillow, Intricate Chest, and Agrabah Table. Bring these items to Aladdin and place them in his house. Once you’ve set everything up, talk to him again to check that everything is in order.

    Finally, return to the Cheshire Cat to finish the quest and gain additional friendship points. It seems the Cheshire Cat just wanted to stir up a little chaos out of homesickness!

  • Completing the Puzzle: Finding Cheshire Cat Paw Prints in Disney Dreamlight Valley

    Completing the Puzzle: Finding Cheshire Cat Paw Prints in Disney Dreamlight Valley

    With so many activities in Disney Dreamlight Valley, it’s easy to get caught up in all the excitement. Luckily, there are numerous ways to keep track of your progress and stay informed about the latest events and quests. The arrival of the Cheshire Cat adds even more fun to the Valley, and that’s definitely a plus.

    This limited-time event allows you to gather brand new furniture inspired by a whimsical theme. Explore the Valley and the various Realms in the Dream Castle to discover the Cheshire Cat’s playful mess and unlock exciting rewards while you can!

    The event is active from May 7, 2025, to May 20, 2025.

    How to Finish the Calmer Chaos Event Duty

    Your first task is to dig around the Valley. Search the main village biomes for sparkling holes in the ground. They resemble regular treasure spots but have a pink glow from within!

    When you dig these up, you’ll reveal bright pink memory shards. Collecting these allows you to unlock a piece of a memory image featuring the Cheshire Cat. There will be a limited number available at any one time in the village, so stay vigilant.

    Switch to furniture mode to quickly scan the Valley for the pink spots!

    Once you complete the image, simply check off the duty to redeem your reward. You’ll receive the Twisting Rabbit Mirror, a decorative item for your home.

    How to Finish the Clean Your Room! Event Duty

    Your next task is to enter the Dream Castle and make your way to the Toy Story Realm. You’ll know it’s time for the event when you see pink paw prints all over the door. Inside the Realm, you’ll find more prints to clean up.

    Using your Royal Watering Can, clean up these paw prints to earn points towards the next reward. You’ll need to clear 20 sets of paw prints to get your hands on the Rabbit Rocking Chair.

    Only five sets of paw prints will appear at a time, but they will respawn regularly.

    How to Finish the Jungle Bungles Event Duty

    The following week, starting May 13, 2025, you’ll find even more paw prints in the Dream Castle, this time on the door to The Lion King Realm. Enter to begin hunting for those pesky pink paw prints.

    You’ll need to clean 20 of these prints to earn your reward: the Rabbit Vanity. Since the Lion King Realm is a larger area than the Toy Story Realm, searching for the prints might take a bit more time, but they will respawn over time.

    How to Finish the More Than a Mirage Event Duty

    Finally, to earn the last reward, keep an eye on the Aladdin Realm door. Once you see pink paw prints there, enter and begin searching Agrabah for the Cheshire Cat’s markings.

    Again, you’ll need to clear 20 of his mischievous markings to claim your prize. This time, you’ll receive the Rabbit Grandfather Clock, completing this year’s collection of event items.

  • How to Solve Completing the Cheshire Cat in Disney Dreamlight Valley

    How to Solve Completing the Cheshire Cat in Disney Dreamlight Valley

    With a vibrant cast of characters in Disney Dreamlight Valley, there’s always something to keep you entertained. The goal is to invite new villagers as you craft a perfect paradise for beloved Disney and Pixar personalities. However, adding every character to your community can be a challenge.

    One tricky character is the Cheshire Cat, who prefers to follow his own rules. Getting him to settle down or act predictably can be quite the task, yet he has an important part to play in your village. We’re here to guide you on how to bring him into your community, so you can take leisurely strolls with your enigmatic feline companion.

    How to Unlock the Cheshire Cat


    To find the Cheshire Cat, you’ll first need to unlock the Alice in Wonderland Realm at the Dream Castle. This will require 15,000 Dreamlight, but you can’t simply walk in through the door.

    Instead, you’ll have to chase a white rabbit around the Plaza and Peaceful Meadow until you fall down a rabbit hole into Wonderland.

    Wonders of Wonderland Quest

    Upon entering Wonderland, you will meet Alice. Follow her through the forest, only to get separated. This is when the Cheshire Cat appears, offering guidance on how to reunite with Alice.

    He’ll send you on a series of errands through the woods to find smiles hiding in the trees and gather ingredients to create More Time. Once you accomplish this, he’ll share a secret about escaping the forest so you can track down the Queen’s Maze…and hopefully find Alice too!

    The Queen’s Maze Quest

    Inside the maze, keep an eye on the white rabbit as it evades the guards and follow its lead. You’ll need to pull several levers to unlock gates throughout the maze until you reach the end.

    Be wary of the guards! If they spot you, you’ll be sent straight back to the beginning. Instead, look for secret paths among the hedges to make your way to the Queen of Hearts’ tea table.

    Teeny, Tiny Problems Quest

    Once you’re reunited with Alice at the tea table, you’ll need to ask the Cheshire Cat for advice on how to help Alice regain her size. He’ll give you instructions to assist the other inhabitants of Wonderland, each with their own specific tasks that need completing.

    Once you’ve collected all the required materials, you can create the Contrary Perfume that will help Alice grow back to her normal size. You’ll then need to use this perfume to explore the tea table and find keys for animal cages. With the keys in your possession, you can aid Alice in freeing the animals captured by the queen.

    Leaving Wonderland Quest

    Before exiting Wonderland, Alice will have you tidy up after the animals and paint the white roses red so the Queen of Hearts won’t notice the mess. Afterwards, meet Alice at the forest’s entrance and talk to the Cheshire Cat about how to reveal the door back to the Valley.

    Solve the mushroom puzzle and apply the Contrary Perfume to the door to navigate your way home. Once you return, build a house for Alice and welcome her to the village. She’ll then send you back to find the Cheshire Cat, who will leave a bright pink trail of footprints before vanishing completely.

    Mannequin Madness Quest

    Finally, after bringing Alice into the Valley and losing track of the Cheshire Cat, head over to Scrooge’s Store. Inside, you’ll notice a lot of clutter and a cheerful mannequin in pink and purple—the Cheshire Cat’s signature colors.

    Speak with Scrooge about what’s going on, then help him clean up the store. After that, turn to Alice for assistance in your investigation. Return to the store to follow the mannequin as it teleports around, leaving behind a mysterious coupon.

    Collect the items that show up in Scrooge’s store with the coupon and check in with Alice to wrap up the quest.

    The Cheshire Cat tends to appear at his own convenience, but for now, your quest concludes here.

    That’s all you need to start the Cheshire Cat’s quests for now. More details will be unveiled on April 30, 2025, and May 7, 2025. We’ll update our guide so you can fully embrace this whimsical feline friend!

  • Unlocking Eye Stalks in Disney Dreamlight Valley: A How-To Guide

    There are many creative ways to showcase your personality in Disney Dreamlight Valley, whether it’s by decorating your village or making your own clothes and furniture. Most of these creations are tracked in your collections menu, but some hidden items add an extra layer of fun to the game. One of the most exciting hidden treasures is located in the Monsters, Inc. Realm.

    We’ll guide you through the steps to find and unlock this item. Completing this task is straightforward, so everyone can take part. Here’s what you need to know about locating the elusive keycard in Disney Dreamlight Valley.

    Locating the Keycard Pieces

    Once you unlock the Monsters, Inc. Realm, where you can recruit Mike Wazowski and Sulley, it’s time to explore the Laugh Floor for broken keycard pieces.

    You need to find three fragments:

    • On a cubicle desk. Head to the back of the Laugh Floor to collect this piece.
    • Inside a file cabinet. Open the file cabinet at the first cubicle to find this keycard fragment.
    • In a drawer. The final piece is located in the file cabinet at the third cubicle.

    Crafting the Repaired Keycard

    After gathering all three pieces, exit the Realm and go to the nearest crafting station. In the crafting menu, look for the Repaired Keycard and combine the pieces to create it.

    You don’t have to keep all the pieces in your inventory! They can be stored elsewhere if you collected them before.

    Once you have the Repaired Keycard, return to Mike and Sulley’s Realm to use it.

    Unlocking the Monster Eye Stalks Hat

    Go to the Laugh Floor in the Monsters, Inc. Realm and approach the final door console in Bay F5. Use the keycard here to open a door.

    The door reveals the last set of notes, saved as a memory, and a green chest. Open this chest to obtain the Monster Eye Stalks hat, which your avatar can wear.

    This special item won’t be added to your clothing collection, but it will be available in your wardrobe.

  • Discovering the Stone Pillar Point in Disney Dreamlight Valley

    Discovering the Stone Pillar Point in Disney Dreamlight Valley

    After saving Agrabah and reuniting with Aladdin, your new adventures in Disney Dreamlight Valley are ready to unfold. The first mission was assisting Scrooge with a fun, mock heist to test his security system, followed by enlisting his help to acquire your own enchanting flying carpet.

    Now, Aladdin wants to do something special for Jasmine, especially after all they’ve been through. He seeks your assistance to organize a thoughtful surprise. Everything starts off smoothly, but you might find yourself facing a few unexpected twists along the way.

    How To Get Flowers For Aladdin


    To begin this quest, you must reach Friendship Level seven with Aladdin and finish all his previous Realm and Friendship quests, including “Good As Gold.” Once you’re ready, talk to Aladdin, and he will ask you to gather four yellow flowers and six purple flowers to give to Jasmine.

    He doesn’t specify which types to collect, so as long as they are in the requested colors, you’re good to go! Some of the easiest ones to find are:

    • Purple Falling Penstemon
    • Dandelion
    • Purple Marsh Milkweed
    • Yellow Bromeliad
    • Yellow Daisy
    • Purple Hydrangea

    Once you’ve collected the flowers, return to Aladdin and enjoy the scene between him and Jasmine to move on to the next step, which is finding the mermaid’s isle.

    How To Repair The Stone Pillar


    Player character standing next to a barrel on its side they can open on Ariel's island in Disney Dreamlight Valley.

    Next, head to Dazzle Beach and take the raft that Goofy helped you fix over to the island where you first met Ariel. Talk to Aladdin, then look to the right side of the area for a golden sun piece and pick it up.

    Bring this piece to the large rock pillar with a sun-shaped slot on the left side, right next to Aladdin. Insert the piece into the slot.

    Speak to Aladdin again, then go to the back of the sun pillar and use your Fishing Rod to catch the Stone Pillar Cube. Head back to the right side of the isle and interact with the barrel lying on its side.

    Retrieve the Stone Pillar Point from inside, return to the pillar in the sand, and use your shovel to dig it up three times. When prompted, select the option to place the Stone Pillar Cube and Point in the menu to restore it, then speak with Aladdin again.

    How To Activate The Pillar


    Player character interacting with the Golden Sun pillar and getting a hint about the other pillar in Disney Dreamlight Valley.

    Use your phone to take a photo of the Stone Pillar and interact with it, then return to the valley using the raft. Speak with Maui, Ariel, and then either Belle, Minnie Mouse, or Rapunzel before heading back to Ariel’s isle after your conversations.

    The third character you need to talk to depends on whether you have the A Rift In Time expansion. If you don’t, speak to Belle or Minnie Mouse; those with the expansion should talk to Rapunzel instead.

    Next, have a chat with Jasmine for an important clue about activating the pillar. Go ahead and read the message on the pillar with the golden sun, then return to the Stone Pillar and begin rotating the pieces.


    Player character moving pieces of a pillar around until it's on the correct combination in Disney Dreamlight Valley.

    • Interacting from the front of the pillar turns the middle piece.
    • Interacting from the left side of the pillar turns the bottom piece.
    • Interacting from the right side of the pillar turns the top piece.

    Align the pieces so that the bottom piece shows the seed symbol, the middle piece displays the water droplet symbol, and the top piece features the flower symbol to solve the puzzle. This will reveal the Treasure-ful Tea Set on a nearby rock.

    Once you talk with Aladdin after witnessing the scene between him and Jasmine, you will complete the quest. Your reward will be the Golden Tea Set and a fantastic boost of 2,200 Friendship with Aladdin.

  • Crafting Sandcastles in Disney Dreamlight Valley: A Guide

    While you explore the Valley with your new friends, you’ll discover a host of secrets and hidden treasures. Disney Dreamlight Valley is packed with excitement, and your Disney and Pixar companions will happily coexist as they gradually reclaim their lost memories.

    Every character has a distinct role in the village, and you’ll frequently assist them in achieving their objectives and uncovering the magic that lies hidden in the Valley. Jasmine holds her own secrets, and as your bond strengthens, you’ll aid her in unlocking the mysteries of her past. Here’s what you need to know to help her along the way!

    How to Create a Sea Sand Torch

    After stumbling upon a locked journal inside the enchanted flower, Jasmine digs deeper to find out how to unlock it. To start this quest, you’ll need to have both Moana and Maui in your village, and you must also unlock the Glade of Trust.

    Once you’ve reached a friendship level of four with Jasmine, she’ll ask you to talk to Moana about crafting a special sea sand torch to collect sea sand sparks. Moana is eager to assist, but she’ll need you to gather the following materials:

    • Softwood (5)
    • Fiber (5)
    • Sand (3)
    • Aquamarine (1)

    With these items in hand, bring them to Moana in exchange for the sea sand torch. Next, place the torch on Dazzle Beach and check in with Jasmine. Together, head to the torch to collect the sea sand sparks.

    How to Build a Sand Castle

    Your next task is to obtain the Special Starfish from Maui. Propose a trade with him, and he’ll be glad to give it to you—if you can win a challenge of your choice. Return to Jasmine to discuss your strategy, and watch as she dares the demigod to a sandcastle-building contest.

    If you concentrate on building the other parts, Jasmine will handle the centerpiece. Gather the following materials at a crafting station to create the sand towers, walls, and door:

    • Sand (50)
    • Clay (14)
    • Seaweed (7)

    Using these supplies, you can craft a Sandcastle Kit, which includes four sand towers, three sand walls, and one sand door. Once crafted, collect the centerpiece from Jasmine.

    While the sandcastle components fit together seamlessly, they don’t have to be connected to be counted. Additionally, feel free to create extra pieces if you wish to design a more intricate castle.

    Adorn Dazzle Beach with the newly crafted sandcastle pieces, then approach Maui to begin the judging process. Observe as he and Jasmine assess the sandcastle, and afterward talk to Jasmine to receive the Special Starfish.

    How to Create the Beach Key

    With the Sea Sand Sparks and Special Starfish in your inventory, hurry to a crafting station to finally make the Beach Key. This key allows you to return to Jasmine and Aladdin’s home and unlock one of the two locks on the secret journal.

    After removing the first lock, talk with Jasmine to complete this part of the quest. While there’s still more to uncover about the secret journal, you’ll need to strengthen your relationship with Jasmine further before proceeding.

  • Unlocking Princess Jasmine in Disney Dreamlight Valley: A Guide

    Unlocking Princess Jasmine in Disney Dreamlight Valley: A Guide

    In Disney Dreamlight Valley, you can easily populate your village with numerous characters from Disney and Pixar. This delightful assortment is full of charm, but some characters face challenges when trying to come back to the Valley due to troubles in their original Realms.

    As the leader of the Valley, it’s your responsibility to assist. Princess Jasmine is a bold and self-sufficient character who needs help restoring order to her city. Here’s what you need to know to ensure her safe return!

    Unlocking Jasmine

    To bring Jasmine into your village, you’ll need to complete a set of quests in the Aladdin Realm, located in the Dream Castle. Go to the castle’s top floor by the fountain, and find the door with a lamp design.

    Accessing it will cost 15,000 Dreamlight. Once you enter, the quest titled “The Ancient Revealed” will start, as the city of Agrabah is in chaos and only you can help fix it.

    Before you enter, it’s wise to clear out your inventory because you’ll gather many materials inside the Realm.

    The Ancient Revealed Quest Overview

    Your first task is to reach Princess Jasmine in the bustling central market. Since the way forward is blocked, you’ll have to navigate the rooftops and dodge dust devils in the alleys.

    Once you arrive at the market, join forces with Jasmine to make your way to the Artisan’s District and gather Aristan Alloy Ingots scattered across the marketplace. With these, you can upgrade your pickaxe to access sandstone and reunite with Aladdin.

    Brave the Storm Quest Overview

    After finding Aladdin, continue jumping across the rooftops to reach the Southern Market. At this spot, you’ll fix damaged stalls while uncovering a mysterious amulet.

    Monkey Business Quest Overview

    The amulet you discovered lacks gemstones, which a group of monkeys is holding on the roofs. You’ll need to barter with them to retrieve the gems.

    Three clusters of golden bananas are hidden throughout the city; find them and trade with the monkeys to get your gemstones. Once you have secured them, Aladdin will set them in the amulet, allowing you to easily navigate sandstorms.

    Breaking Through Quest Overview

    Now that the amulet is restored and you’ve discovered an ancient tome amidst a sandstorm, work with Aladdin to reconstruct an alchemy station while Jasmine figures out the text.

    You’ll need to gather alchemy station parts from the desert outside of the city. After assembling it, you must also find fuel and charcoal to ignite the braziers in the Artisan’s District.

    Finally, locate a buried lamp mold in the sand and melt down a new golden lamp to contain the Windcaller when you confront them.

    Wish Magic Quest Overview

    Next, you’ll need to capture the remnants of the Genie’s power, found in areas that represent the wishes made by Aladdin. Each remnant is located in different places, including an oasis outside the city and the fountain inside it.

    Once you’ve collected everything, bring the items to the alchemy station and present them to Jasmine in the central market.

    Carpet Diem Quest Overview

    After rescuing the Magic Carpet, join Aladdin at the Windcaller monument. Here, you’ll break the crystals encircling the monument before heading back to the village to construct a house for Jasmine and Aladdin.

    Welcome Princess Jasmine and Aladdin to your Valley, along with the Magic Carpet as your personal companion!

    Unlocking More of Jasmine’s Friendship Quests

    As you spend time with Jasmine, you’ll increase your friendship level and gain special rewards inspired by her character. Completing new quests will help her establish her place in the village.

    Upon reaching level two, you can assign a role to Jasmine to assist you in gathering additional resources.

    To strengthen your friendship with Jasmine, you can give her daily gifts, play Scramblecoin, perform your daily tasks while with her, and engage in daily conversations. Over time, your relationship will deepen, and you’ll unlock her level ten quest!

    Rewards from Jasmine’s Friendship

    Each level brings unique rewards that reflect the Disney Princess. From clothing to furniture and designs, you’ll have plenty of options to express yourself and embrace the vibe of a desert oasis.

    Here are all the rewards and the corresponding levels at which you can unlock them:

    Jasmine’s level ten reward will be unlocked only after completing her final friendship quest.

    Friendship Level

    Reward

    Level Two

    Ornate Blue Door

    Level Three

    Floral Design Motif

    Level Four

    500 Star Coins

    Level Five

    Elegant Chaise

    Level Six

    Floral Design Motif

    Level Seven

    1,000 Star Coins

    Level Eight

    Pillar and Curtains

    Level Nine

    Raja Design Motif

    Level Ten

    Desert Bloom Ensemble

    • Desert Bloom Necklace
    • Desert Bloom Slip-Ons
    • Desert Bloom Top
    • Desert Bloom Trousers
  • Creating Stall Repair Kits in Disney Dreamlight Valley

    As you forge new friendships in Disney Dreamlight Valley, you’ll notice that many characters need your assistance. Whether they’re dealing with chaos at home or searching for missing loved ones, it’s your mission to sprinkle some magic and help them find their happy endings. While it may be challenging, embracing your role as the ruler of the Valley is essential.

    Jasmine and Aladdin won’t leave Agrabah until everything is sorted out, and the dust devils along with the Windcaller are only adding to the chaos. With your help, they can restore their beloved home. Here’s how you can assist in bringing Agrabah back to life!

    Where to Find Bridge Materials

    Once you connect with Aladdin during The Ancient Revealed quest, you’ll both work together to access the South Market. But first, you need to build a bridge to traverse the gap between rooftops.

    To create that bridge, you’ll require three types of materials:

    • Pile of Planks: Found next to the trellises on the right side of the palace when facing it.
    • A Fine Rope: Hidden behind some sandstone remnants.
    • A Timber Stack: Located right beside the gap where the bridge needs to be built, on the left side.

    After collecting these items, place them at the edge of the roof near Aladdin to construct the bridge. This will allow you to cross over and follow Aladdin toward the South Market.

    How to Reach the South Market

    Once you’ve crossed the rooftop gap, turn left with Aladdin and break through more Sandstone. Retrieve the plank from the corner of the rooftops to make your way into the next section of the market.

    Be sure to grab the timber stack, fine rope, and pile of planks here, as you’ll need them!

    Continue along the rooftops to reach the Southern Market by building more bridges with the materials you find. Then, descend the ramp after using your pickaxe on the scaffolding to enter the wreckage of the marketplace, which is in disarray.

    How to Repair the Market Stalls

    Talk to Aladdin in the Southern Market. He’ll provide you with Rose Water to use on your Royal Watering Can, which will help clear away the decayed fruit in the market.

    With this new ability, you can search the remnants of the Southern Market for materials to craft Stall Repair Kits. You’ll need the following:

    Material

    Amount

    Locations

    Something Sticky

    3

    • Next to the plank you used to descend into the market.
    • Located by two piles of decaying fruit near the monkeys on the rooftops behind the Southern Market.
    • Beyond two dust devils to the left of the scaffolding, in the alley.
    • Behind a dust devil, to the right of the stairs.

    Fine Rope

    3

    • Beyond two dust devils to the left of the scaffolding, in the alley.
    • Hiding behind a dust devil, to the right of the stairs.
    • At the top of the stairs.
    • Behind two dust devils, leading into a long alleyway away from the market center.

    Timber Stack

    3

    • On the rooftops, in the corner before entering the Southern Market.
    • In the corner by the scaffolding, underneath a lamp.
    • Behind two dust devils that lead into a long alleyway away from the market center.

    Bolts of Silk

    3

    • Beyond two dust devils to the left of the scaffolding, in the alley.
    • Behind a dust devil, next to the stairs.
    • Behind two dust devils, leading into a long alleyway away from the market center.
    • At the top of the stairs.

    Once you have gathered the materials, speak to Aladdin again. He’ll guide you on how to create the Stall Repair Kits at the nearby Crafting Station. Make all three kits, and then apply them to the three stalls in the Southern Market.

    You can find these stalls next to the gate, beside the scaffolding, and against the wall between the two alleyways. Don’t forget to collect any bags that drop, as they will provide you with additional materials! Finally, return to Aladdin. Completing these tasks will conclude your quest, but there’s still plenty of work to be done before Agrabah is back to its former glory.

  • Hades’ Level 10 Friendship Challenge in Disney Dreamlight Valley

    In Disney Dreamlight Valley, you’re on a mission to battle the Forgetting and save beloved characters from Disney and Pixar. As you build friendships with them, you’ll explore new areas and discover what has happened while you were away in your role as the Valley’s ruler. Some characters will require your assistance to tackle challenges and find their place in the community.

    Although Hades rules the Underworld, he occasionally needs a helping hand. As his favorite helper, it’s up to you to assist him with his needs. Everyone should recognize how fantastic Hades is, and throwing the perfect party is the way to demonstrate that.

    How to Unlock Hades’ Level Ten Friendship Quest

    Before kicking off this quest, you need to fulfill a few criteria. First, you must have Hades at level ten friendship. Additionally, you should have Tiana, Prince Eric, and Mirabel living in your village.

    Once you meet these requirements, talk to Hades about organizing a party to show off his greatness. The first step in planning a party is to arrange catering, and who better than Tiana to handle that?

    Speak to her, and she’ll ask Hades for a favor. If he wants her to cater, he must help promote her restaurant. When you inform Hades, he agrees and gives you four Underworld Gemstones.

    Plant these gemstones in Mythopia and wait five minutes for them to grow!

    After planting the gemstones and collecting the harvest, it’s time to set up the newly grown signs around Mythopia. Once that’s done, head back to Hades to continue with the party plans.

    How to Craft the Corinthian Marble DJ Table

    Your next task is to find suitable entertainment. Hades wants the party music to be unforgettable, so he asks you to join him in auditioning Mirabel and Prince Eric. Tag along and share your thoughts after each tryout.

    You can give any response you like here! The outcome will remain unchanged.

    Unimpressed with both, Hades decides he’ll take on the DJ role himself. However, you’ll need to create a proper setup for him, which requires the following items:

    • Marble (15)
    • Magma (20)
    • Lightning Spice (10)

    You can find all these materials in Mythopia. Once you’ve collected them, head to your Crafting Station to put everything together. With the DJ table in your bag, take it to Hades.

    How to Attend Hades’ Party on Mount Olympus

    The final touches for the party involve creating invitations and choosing a dress code. To craft the invitations, catch four Blue Bird Snippets from the Bind. Then, gather four Opals and three Yellow Tale Cone Flowers to make the invitations.

    Once the invitations are set, meet Hades at the Mount Olympus gates. He’ll release the invitations into the air and discuss the dress code with you. You’ll have three options to choose from:

    • Zeus-core clothing. Go for white, yellow, and classy styles.
    • Hephaestus-core clothing. Choose red, yellow, and trendy outfits.
    • Artemis-core clothing. Opt for green, brown, and sporty attire.

    Dress up in your selected style, then enter through the gates to Mount Olympus. Follow the signs Hades placed to find a portal that leads directly to the throne room.

    When you arrive, chat with Hades about the party. He’ll kick off the music, and you can watch as he gathers feedback from his guests. He’ll ask Scrooge, Flynn, and Mother Gothel for their opinions, then unexpectedly wrap up the party.

    At the peak of Mount Olympus, talk to Hades one last time to conclude everything. Although it didn’t happen as he envisioned, you’ll earn a special outfit as a reward: the Armor of the Styx.

    This unique outfit inspired by Hades showcases your friendship with the Lord of the Underworld!

  • Navigating to Hades’ Throne Room in Disney Dreamlight Valley

    Disney Dreamlight Valley offers a rich world packed with beloved Disney and Pixar characters, each with distinct connections to their neighbors and the community. As you journey through the Storybook Vale, you’ll partner with Merida and Flynn Rider to confront the challenges posed by the Neverafter.

    To restore harmony, you’ll join forces with Hades and aim for Mount Olympus. This task may be tough, but with determination, you can help the Lord of the Underworld reclaim his rightful throne in the Storybook Vale.

    Unlocking Mount Olympus

    To access Mount Olympus, you’ll need to gather a significant amount of Storybook Magic—specifically, 10,000 Storybook Magic. This is the last area in Mythopia, and you’ll also have to complete the preceding Mythic Trials for the gates of Olympus to open.

    To reach Mount Olympus, follow these quests:

    You can unlock this area before finishing all the Mythic Trials, but the gate will remain closed until you do.

    Once you’ve lit all the braziers near Mount Olympus by clearing the corruption in each trial, you can ascend the mountain to reach Hades’ realm of power.

    However, you still have work to do. The path to the throne room is obstructed, and you must collaborate to clear it of the corrupted Snippets hiding within.

    Crossing the Bridge on Mount Olympus

    Your first challenge will be navigating the rotating bridges that block your way to the throne room. Consult Hades for guidance.

    He reveals that the secret to opening the gates and solving the puzzles involves finding the pairs of vases he once concealed. Placing them on the correct pedestals will unlock further progress.

    Fortunately, the first pair of vases is easily accessible.

    Look to the left for a sunken platform. Use your Royal Fishing Rod to lift it up, then cross over to retrieve the vase featuring Hades.

    Directly at the entrance, you’ll find a toppled marble column. Utilize your Royal Pickaxe on the debris to access the second vase, then place them on the empty pedestals by the gate.

    Once you place the vases, the gates will open, allowing you to proceed to the rotating bridges!

    Follow Hades to the spinning wheel and use your Royal Net to activate the mechanism. Move across to the next bridge, descend the staircase, and interact with the marble pillar.

    Once it’s shifted, break through the rubble to obtain the next vase. Return upstairs to activate the second rotating bridge, leading you to another platform situated left of the locked gate.

    Here, apply your Royal Watering Can on the mechanism on the floor, then retrieve the second vase. Pull the lever on your right to lower a bridge and discover two more empty pedestals. Place the vases here and move on to the next area of Mount Olympus.

    Reaching the Throne Room on Mount Olympus

    To access the throne room, you’ll need to open another set of gates. This time, however, the spinning wheel is broken. Head to the nearby rubble on the right and fish the sunken platform out of the clouds. Use it to reach and retrieve the severed wheel, then reinstall it next to the gate.

    Keep moving forward with Hades after activating the wheel, then descend the staircase and shift another marble pillar. Here, you can collect a vase before backtracking.

    If you’re running low on energy, try opening some of the green chests on Mount Olympus for snacks!

    Return to Hades’ location, where you can use the Royal Pickaxe to clear more debris and pull a lever to lower the bridge leading to the last section of the mountain. However, you’ll first need to go back to the beginning of this section and interact with the marble pillar again.

    Continue moving the pillar until it fits under the broken floor connecting the two railings. Climb up and retrieve the final vase, then make your way to the throne room after placing the vases on the pedestals outside the last gate.

    Ensure you have plenty of energy for this final part! You’re really going to need it.

    Once inside the throne room, be ready to confront corrupted demon Snippets. Use your Royal Net to capture them. You’ll need to chase them down a total of eight times before you can truly catch one, with three to catch in total.

    Act fast to catch them, as they can despawn and make you restart. After you’ve cleared the throne room, inform Hades of your success and complete the quest.

  • Arranging Maleficent’s Furniture in Disney Dreamlight Valley

    Arranging Maleficent’s Furniture in Disney Dreamlight Valley

    As you work to mend the rift between Maleficent and Hades in Disney Dreamlight Valley, you’ll face numerous challenges. From ink barriers blocking your path to the pesky Snippets causing chaos in Storybook Vale, it’s a busy adventure ahead. Luckily, we’re here to guide you through it.

    As you approach Maleficent’s Castle suspended in the clouds, you’ll discover there’s more going on than you initially thought. The Mistress of All Evil herself isn’t immune to the turmoil she and Hades have stirred up. Here’s how you can reach her and help restore her castle to order.

    Getting to Maleficent’s Castle

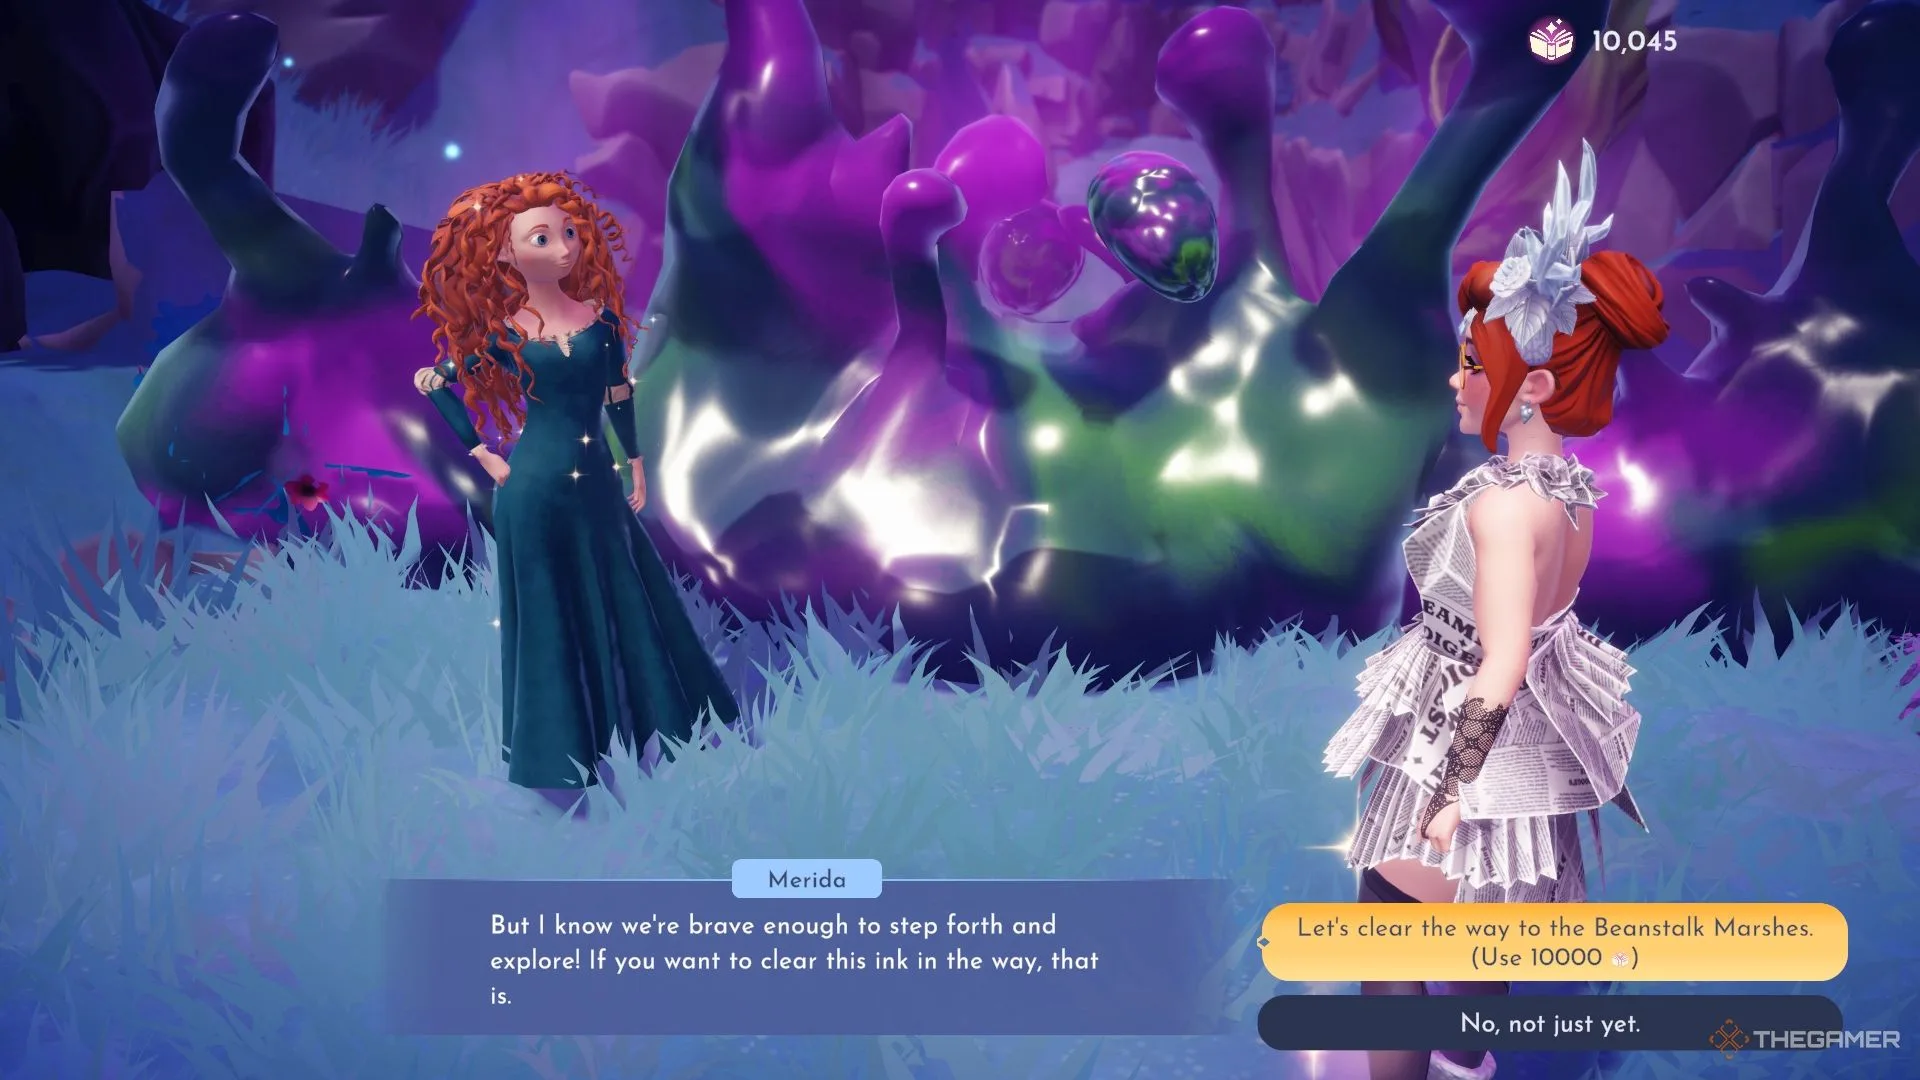
    To gain access to Maleficent’s Castle, you must have completed all the Fairy Tale Trials in Everafter. Additionally, you need to unlock the Beanstalk Marshes located in the northwest corner of the map.

    This will require 10,000 Storybook Magic.

    Once you unlock the Beanstalk Marshes, make your way north to find the enormous beanstalk leading up to Maleficent’s Castle. Enter the castle and make your way across the pond to face the Mistress of All Evil.

    Completing Maleficent’s Task

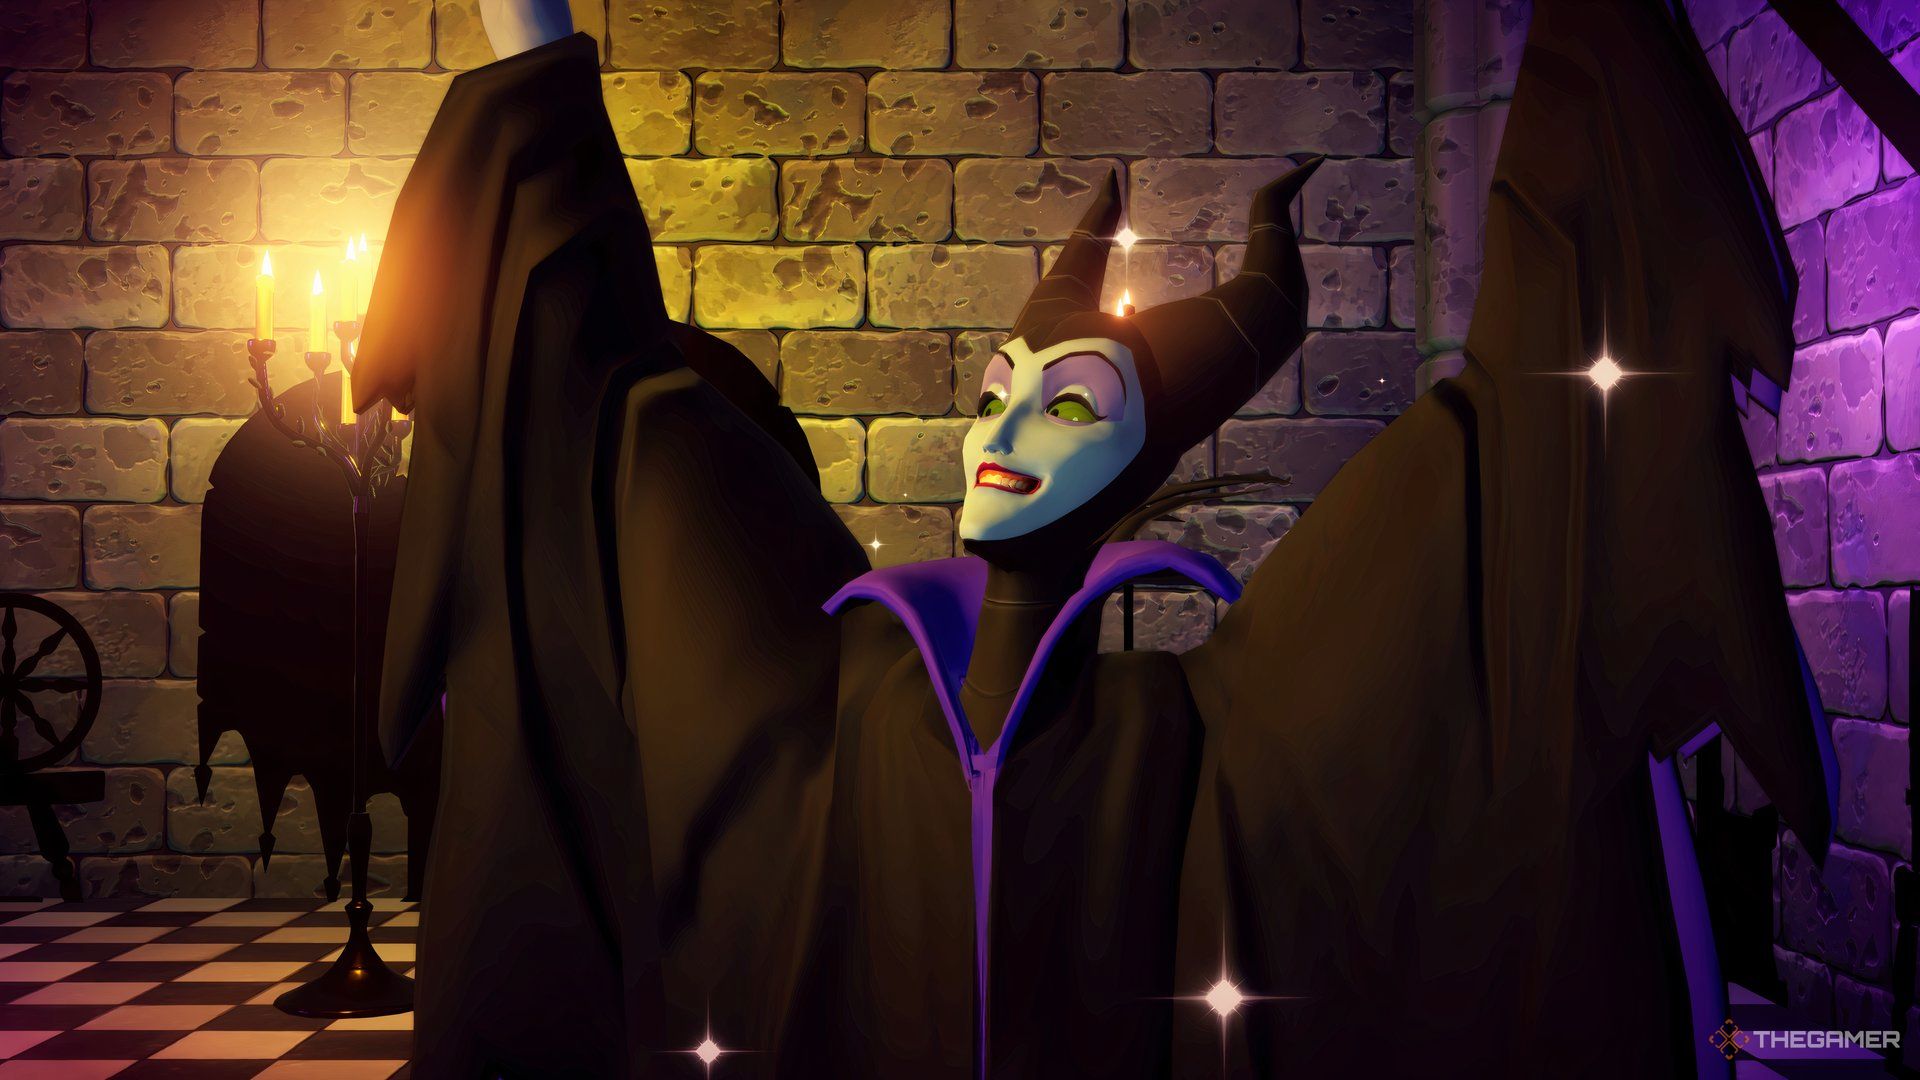
    Maleficent cheering inside her castle.

    Upon entering the castle, you’ll find Maleficent waiting for your arrival. She isn’t concerned with the chaos outside, as her focus is on a task she needs you to complete to tidy up her castle’s interior.

    Locating Maleficent’s Missing Furniture

    To retrieve her misplaced furniture, venture into the western chamber. Although the door is locked, you can change the tiles on the floor to enter the correct code. To unlock the door, set the first tile to a dragon and the second to a castle.

    The clue for this puzzle can be found on the wall to the east.

    Proceed into the next chamber, which contains a larger puzzle. The hints are displayed around the room in various orientations. Below is a layout that indicates where each symbol belongs:

    Positions Left Center Right
    Top Castle Question Mark Dragon
    Center Dragon Castle Castle
    Bottom Dragon Question Mark Dragon

    After you input the correct pattern using your Royal Shovel, the curtain at the back of the room will rise, allowing you to retrieve Maleficent’s throne from the chest inside.

    Next, find the broken piece of a Royal Net wheel on the stairs to the west of the main chamber. Place it back on the damaged pedestal and activate it with your net. This will grant you access to the door nearby.

    Once inside, you’ll discover a dimly lit library. A locker to your left is locked and requires a code. You can decipher the code by searching the walls, shelves, and chandelier. Below is the solution to unlocking the locker to obtain Maleficent’s notorious spinning wheel:

    Slot Number Symbol
    Slot 1 Castle
    Slot 2 Dragon
    Slot 3 Wolf
    Slot 4 Flower/Star

    Arranging Maleficent’s Furniture

    Once you’ve gathered the missing pieces, return to the main chamber and use the pedestal next to the checkered floor to place everything. Then, access your furniture menu to organize the items. Although the furniture was misplaced, their shadows will remain.

    You’ll need to align the furniture with the shadows cast on the walls. Make sure to inspect all three walls to align the items properly. Some pieces might need to be shifted forward to match the shadows correctly.

    After placing everything correctly, a portal will open leading to Maleficent’s Throne Room.

    Catching Maleficent’s Pets in the Throne Room

    Step through the portal into Maleficent’s Throne Room. She’ll join you and observe as you attempt to catch her mischievous pets. Initially, you’ll encounter just one shadowy, frog-like Snippet. After catching that one, three additional Snippets will appear.

    These little creatures are very quick, so try to trap them against the walls and stairs to catch them!

    Once you’ve captured all the Snippets, return to Maleficent. She’ll explain how she created these critters and what she expects from you to gain her assistance in restoring the Storybook Vale.

    You’ve accomplished a lot so far, but there’s still more to be done in your quest to resolve her conflict with Hades.

  • Where to Locate Sally’s Worms in Disney Dreamlight Valley

    In Disney Dreamlight Valley, every beloved Disney and Pixar character plays a part in the village. Friendships drift and form as you develop the community, but not everyone gets along smoothly. As the leader, it’s your job to mend disagreements and help the villagers create a harmonious life in their new surroundings.

    Sally, who loves to stitch things together, wishes to bring more of her Halloween Town roots into the valley. By crafting compost, you can help her make the village more vibrant. Here’s everything you need to know to assist Sally and cultivate a bountiful garden!

    How to Build a Compost Bin

    To start this quest, you must meet specific conditions. First, ensure that Sally’s friendship level is at least four, and you also need to invite Mike Wazowski to the village.

    Begin by talking to Sally. She aims to grow herbs from Halloween Town, but the soil isn’t rich enough. To enhance the soil, she needs your help building a compost bin.

    For the compost bin, you’ll need the following materials:

    • Bricks (15)
    • Soil (10)
    • Dark Wood (10)
    • Vegetable Trimmings (3)

    You can get Vegetable Trimmings from Remy!

    Once you have all the materials, head over to your Crafting Station to assemble everything. Then, meet Sally in the Vitalys Mines to set up the bin. Follow her to the site she has chosen for the compost bin.

    Next, gather the ingredients to make compost. You’ll need six Dry Wood and eight Dried Plants, which you can collect around the Sunlit Plateau.

    Make sure you have the compost materials in your inventory!

    Once you’ve obtained everything, return to Sally in the mines. When you arrive, you’ll find the bin has been knocked over!

    How to Build a Critter Trap

    To capture the critter responsible for this chaos, you need to create a trap. While Sally tidies up, your job is to gather the supplies needed to build a Critter Trap.

    Here are the materials required:

    • Hardwood (10): Can be gathered in Dreamlight Valley, specifically in the Forest of Valor and the Glade of Trust.
    • Blueberry (5): Found in bushes located in the Forest of Valor and Dazzle Beach.
    • Iron Ingots (2): Crafted from Iron Ore.
    • Dream Shards (5): Dug up from sparkling spots around the Valley.

    Head to your Crafting Station to piece it all together. After that, return to the mines to set the trap. As Sally monitors the situation, she gives you an additional task.

    Where to Find Worms

    To ensure your next batch of compost thrives, you need to find worms for it to flourish. You can find them in sparkling holes in the Glade of Trust, so keep a lookout.

    There are three specific spots where you can find happy little worms peeking out.

    Dig up the worms and bring them back to Sally. Together, head into the mines to check on the trap and place the worms in their new home.

    Upon arrival, you’ll discover that the trap has caught something, but it’s not a critter. Release the trapped villager and have a chat with them, then listen to Sally explain the workings of the compost bin.

    Once you’ve completed the discussion, talk to Sally to finish the quest. As a reward, you’ll be able to keep the compost bin!

  • Crafting Grecian Baked Fish in Disney Dreamlight Valley

    Every character in Disney Dreamlight Valley, whether hero or villain, has an important job to do. However, not everyone is satisfied with their position. Take Hades, for example; he definitely wants to elevate his status. While we might not be able to change his attitude, we can guide him on how to become a better boss.

    Whether he wants to admit it or not, Hades is in dire need of improvement. Here’s how you can help him learn the basics of customer service and gain a better understanding of your role as the ruler of the Valley.

    Helping Hades With Remy’s Restaurant

    After reaching a friendship level of seven with Hades, you can discuss leadership with him. He believes he has strong leadership qualities but wants to prove it to everyone else. That’s where you step in.

    Hades aims to take charge of Remy’s restaurant for a day and whip up some delicious Grecian Baked Fish. First, you need to speak with Remy to get permission for Hades to take the reins—under your guidance, of course. Then, gather two of each of the following ingredients for him:

    Ingredient Name

    Location

    Salt

    Gathered from the waters of Everafter.

    Elysian Grain

    Available for purchase at Goofy’s Stall in the Elysian Fields.

    Olives

    Foraged in Mythopia.

    Ambrosia

    Available for purchase at Goofy’s Stall in the Elysian Fields.

    Stygian Mudskipper

    Caught in the waters of Mythopia.

    How to Put Out Hades’ Oil Fires

    Once you’ve collected everything, bring it all to Hades and share the news. Go to the restaurant and observe him as he interacts with customers, like Vanellope. Before long, chaos ensues, and the dining area is ablaze!

    Remember, it’s an oil fire, so using water won’t work to extinguish the flames.

    Use your Royal Shovel to smother the flames, then discuss with Hades what went wrong. After a heated exchange, he recognizes that he might want to consider a different career path.

    Helping Hades With Ursula’s Potion

    Next, Hades is eager to improve his sales skills. He plans to strike a deal with Ursula to sell a potion or two. For this, he wants you to dress up as a proper minion in formal black and blue attire.

    Once you’re all dressed up, watch Hades as he pitches to Flynn Rider. Unfortunately, it becomes clear that Ursula has tricked Hades, and you’ll have to collect payment for the potion yourself.

    Where to Find Hades’ Payment

    Head to Ursula’s lair to find a note she left behind. This note contains a clue about where she stashed Hades’ payment for the potion. You’ll need to fish in the Bind to track it down.

    Keep an eye out for orange bubbles in the water of the Bind. You’ll reel in a fire extinguisher and will need to explain to Hades that he’s definitely been taken advantage of.

    Helping Hades Manage Scrooge’s Store

    For Hades’ final challenge, he will attempt to run Scrooge McDuck’s Store for a day. This task is ideal for a god like him, but you’ll have to handle all the communication. Talk to Scrooge about letting Hades take a turn in his store. Despite his reluctance, Scrooge agrees to trust your judgment.

    Watch how Hades interacts with his customers, especially when dealing with someone as demanding as Mother Gothel. When she doesn’t get her way, things can get out of hand.

    How to Put Out Hades’ Fires

    True to form, Hades accidentally sets the store on fire. This time, you can use your watering can to extinguish the flames and then rush to find Scrooge McDuck. While he’s not angry, he certainly won’t let Hades run the store again.

    Once outside, chat with Hades about how his management day turned out. Despite the madness, it proved to be a valuable experience for him, and you’ve completed another quest in Storybook Vale!

  • Mastering the Fiery Plains Mythic Trial in Disney Dreamlight Valley

    There’s plenty to explore in Disney Dreamlight Valley, and helping Hades make his way back to Mount Olympus is just the start. To open the gates to his heavenly domain, you must tackle Mythic Trials in Mythopia and light the braziers located in various areas.

    As you join forces with Hades, you’ll delve into intriguing mysteries and tackle different puzzles. Each Mythic Trial draws inspiration from ancient Greek myths and puts your skills to the test. Here’s how to crack the trial puzzles found in the Fiery Plains of Mythopia with the Lord of the Underworld!

    The First Flame Torch Puzzle

    When you enter the Mythic Trial in the Fiery Plains, make sure to talk to Hades. He’ll explain that to eliminate the corruption, you need to ignite all three flaming torches.

    To light the first torch, go to the left and move the cart straight back. Once it settles into position, it will catch fire. This torch is the simplest of the three to ignite.

    The Second Flame Torch Puzzle

    The second torch is accessible by going through the gate at the eastern edge. Here, pull the lever to lower the bridge, cross over, and then water the mill located on the first platform you encounter using your Royal Watering Can.

    Smash the rocks near another lever to create a shortcut for later!

    Proceed further back to activate another lever, and pour more water on the gears here. Now, move the cart across the trial area and place it in the alcove next to the first torch.

    The Third Flame Torch Puzzle

    For the final torch, cross the bridge and navigate the rotating platforms until you reach a spinning wheel. Use your net to access the last torch. Ascend the stairs and activate the spinning wheel to unlock the gate below.

    Go through the gate, break the rocks to access the cart, and then push the cart all the way back to the starting area, placing it in the alcove opposite the second flaming torch.

    After you finish, return to Hades and interact with the corruption beside him to wrap up the trial. You’ll then return to Storybook Vale and finish the quest by chatting with the Lord of the Underworld again, getting you one step closer to Mount Olympus!

  • Unlocking Disney Dreamlight Valley’s Floating Islands: A Guide

    Decorating plays a major role in Disney Dreamlight Valley, but there’s a limit to how many items you can place in the village. Luckily, the Sew Delightful update allows you to broaden your creative horizons by accessing new areas throughout the Valley.

    By meeting certain criteria, you can unlock new regions for decoration. We’ll guide you on how to access these areas so you can fulfill all your design dreams. Here’s what you need to know about getting to the floating islands in Dreamlight Valley, decorating them, and increasing your space for all your furniture pieces.

    Getting to the Floating Islands

    To unlock the floating islands, you must first make progress in the main storyline of Dreamlight Valley. When you receive the ‘Islands In The Sky’ quest, speak with Merlin about the islands that hover above the village.

    Consult the wizard to discover that he has established a connection to those islands via the wells located around Dreamlight Valley. Simply interact with any of the wells to access the islands. You can also fast travel there using your map.

    All wells in the game, except for the one in the Plaza, provide access to fast travel to the floating islands.

    Guide to Decorating the Floating Islands

    Use the wells to reach the floating Plaza Island. Once there, you can chat with Merlin about how to use this new space. It shares the same climate as the Plaza but lacks obstacles and fixed objects.

    Don’t worry about Night Thorns appearing on the floating islands!

    Talk to Merlin to learn how to decorate the islands. He suggests moving Villager homes to the floating biomes to create more space. In fact, he’d love for you to relocate his home up into the sky for a little peace and quiet.

    Open your furniture menu to begin decorating. Move Merlin’s library into the house category and then add five or more decorations around the biome.

    After you finish, return to Merlin to showcase your work. Now he can finally enjoy some undisturbed reading time, and the islands are yours to decorate!

    Unlocking More Floating Island Biomes

    While the Plaza Island is free to unlock, there are three additional islands available for purchase. However, they will require a fair amount of Dreamlight magic. Here are the biomes you can buy and their costs:

    Island Name

    Cost

    Plaza Island

    Free

    Forest Island

    15,000 Dreamlight

    Sunlit Island

    15,000 Dreamlight

    Frosted Island

    15,000 Dreamlight

    Each of these biomes is roughly the same size as the original but without the unique geographical features like cliffs or bodies of water. Here, you can let your creativity flow freely, as each area has its own separate decoration limits.

    Since the floating islands load in separately, they won’t create any lag in your game.

    You can unlock these additional biomes at any time by using the wells around the village or by selecting the Floating Islands tab from the fast travel menu.

  • Unlocking Sally in Disney Dreamlight Valley: A Step-by-Step Guide

    Unlocking Sally in Disney Dreamlight Valley: A Step-by-Step Guide

    In Disney Dreamlight Valley, you’ll spend time getting to know beloved characters, beautifying your village, and creating bonds with adorable animals across different biomes. Each character brings their own intriguing story that adds depth to the Valley beyond their well-known films.

    As the leader of the Valley, your role is to make everyone feel at home and assist them in adapting to their new surroundings. This could involve helping new villagers remember their past to help them settle in. For example, if you wish to bring Sally from The Nightmare Before Christmas into your Valley, here’s how to do it!

    How to Unlock Sally

    To welcome Sally into your village, you must accomplish a few tasks first. Start by unlocking Jack Skellington and ensuring his house is in your village.

    You also need to include both Mirabel Madrigal and Vanellope Von Schweetz in your Valley.

    Tip: Be sure you finish Mirabel’s first quest to proceed further.

    Additionally, you must complete the main quest, Odds & Ends, with Merlin. After doing that, your adventure begins by locating spiderwebs scattered around the village—specifically within the homes of villagers.

    The Woven Bridge Quest Walkthrough

    Once you’ve met the necessary requirements, check your mailbox for a letter from Jack. The residents of Arendelle have noticed a significant number of spiderwebs in their house, so you’ll need to assess the situation and report back to Jack.

    Inside the house, talk to Kristoff, who is eager to bake but is concerned about accidentally igniting the webs. He will ask you to clear them away and guide you on your next steps.

    Note: There are three webs within the house, and each of these will yield two separate webs for you to collect.

    Once you’ve gathered all the webs, head to Jack Skellington to hand them over. He will mention a message written within the webs, but he can only decipher part of it. To find out the remainder, you’ll need to clear out more webs found in the following villagers’ homes:

    • Mirabel’s House: Contains three webs.
    • Vanellope’s House: Contains five webs.
    • Remy’s House: Contains three webs.

    After you’ve removed all the spider webs, bring them back to Jack. The message left by Sally indicates that she needs assistance in creating a portal to the village. However, the spiders appear too exhausted to help. To rejuvenate them, you’ll need to create a special potion!

    Gather the following materials so that you can craft the potion at your Crafting Station:

    • One empty vial
    • One blueberry pie
    • Four red bell flowers
    • Four night shards
    • Six cotton
    • Eight mushrooms

    After collecting everything, craft the potion and take it to Jack’s home. Toss it into the cauldron he has prepared. As the potion brews, the portal will open, allowing you to welcome Sally into your village!

    Following your chat with her, you can reunite Sally and Jack.

    How to Unlock More of Sally’s Friendship Quests

    To unlock additional quests, focus on increasing your friendship level with Sally. Spend time with her while completing your tasks, offer her gifts, serve her meals at the restaurant, and engage in Scramblecoin games.

    Every few levels, you will unlock a new friendship quest that provides a significant boost in friendship points and unique rewards that reflect Sally’s charming style.

    Once you reach friendship level ten, you can embark on Sally’s best friend quest, allowing you to complete her personal storyline and unlock her ultimate reward: a stunning patchwork dress and matching gloves!

    Sally’s Friendship Rewards

    As you enhance your friendship level, new rewards will become available. Whether it’s Star Coins, fresh motifs, vibrant furniture, or stylish outfits, each prize will be inspired by Sally.

    Below is a list of all rewards you can earn by deepening your relationship with Sally:

    Friendship Level Rewards

    Level Reward
    2 Patchwork Rug
    3 Sally’s Patches Motif
    4 500 Star Coins
    5 Black and White Striped Socks
    6 Patchwork Motif
    7 1,000 Star Coins
    8 Sally’s Patchwork Bed
    9 Motif
    10 Sally’s Patchwork Gown and Gloves

    Make sure to complete Sally’s final friendship quest to unlock her level ten reward!