الوسم: Dragon Age: Inquisition

  • Crafting the Iron Bull in Dragon Age: Inquisition Guide

    Crafting the Iron Bull in Dragon Age: Inquisition Guide

    In Dragon Age: Inquisition, damage-dealers come in a variety of forms, as any class can fill this role effectively. Mages typically strike from a distance, Rogues operate both up close and from afar, while Warriors are entirely melee fighters.

    Yet, no one stands out quite like Iron Bull. As a melee damage dealer, Iron Bull often finds himself in more peril compared to his teammates, but he thrives in dangerous situations. When placed in high-risk scenarios, his true potential shines, making him a high-risk, high-reward character.

    Key Skills for a Low-Health, High-Damage Iron Bull Build

    Iron Bull’s unique ability tree, Reaver, offers him bonuses that bring an element of chance. In the right circumstances, he can remain on his feet and unleash astounding damage, but if left unsupported, he can fall quickly.

    Some skills are necessary to progress through the Reaver tree, even if they won’t significantly contribute to this build. We won’t cover those skills in detail here, but they will be included in the total skill point investment.

    Top Skills in the Reaver Tree

    The Reaver tree focuses on Iron Bull dealing more damage as his health decreases. While he can inflict extra damage when wounded, he has abilities that allow him to heal slightly, which helps him stay in the fight.

    Skill Upgrade Description
    Ring of Pain (Active) Torrent of Pain Creates an area that damages enemies within it, boosting Iron Bull’s damage. The more hurt Iron Bull is, the heavier the damage he deals. The Torrent of Pain upgrade reduces Devour’s cost and cooldown, as well as mitigates self-damage from Dragon-Rage.
    Blood Frenzy N/A Gives Iron Bull a 5% damage boost for every 10% his health is missing. Additionally, he gains +3 Strength, which increases his attack power and guard damage.
    Fervor N/A Grants a 30% damage increase for 5 seconds when an enemy falls within 10 meters of Iron Bull. Also provides +3 Cunning, enhancing his critical hit chance and ranged defense.
    Rampage (Active) N/A Increases Iron Bull’s attack speed and damage and heals him with each hit for 10 seconds.
    Terrifying Fury N/A Critical hits have a 25% chance to panic enemies. In addition, Iron Bull gains +3 Cunning.
    Scenting Blood N/A Gives Iron Bull a 50% boost in movement speed and 10% critical hit chance against enemies below 35% health who are within 10 meters, and provides +3 Constitution which raises his health and melee defense.
    Devour (Active) Consume Iron Bull deals increased damage based on his health loss while healing for a portion of his lost health. With Ring of Pain active, the healing effect is doubled. The Consume upgrade raises Dragon-Rage’s critical hit chance by 25%.
    Dragon-Rage (Active) Ravage Costing health for each strike, Iron Bull does more damage when he’s low on health. Ring of Pain significantly boosts this damage. The Ravage upgrade increases damage further, decreasing the cooldown of Devour on each hit.
    • Total Skill Point Investment: 11
    • Total Strength Gain: 3
    • Total Cunning Gain: 6
    • Total Constitution Gain: 3

    Iron Bull’s Reaver abilities become crucial, mainly utilizing Devour and Dragon Rage when Ring of Pain is active. He can switch between Devour and Dragon-Rage, delivering monumental damage and constantly healing himself.

    Top Skills in the Two-Handed Tree

    Generally, Iron Bull’s remaining skills will be most impactful as passives that enhance his performance while he uses Reaver skills, though some active skills have their place as well.

    Skill Upgrade Description
    Mighty Blow (Active) Easy Target Damages and knocks enemies down. Extra damage is inflicted on enemies already down.
    Block and Slash (Active) Flawless Defense Counters the next incoming hit, dealing damage to the attacker. With the Flawless Defense upgrade, this counters with additional damage and grants Iron Bull 15% guard.
    Flow of Battle N/A Each critical hit Iron Bull lands reduces skill cooldowns by 1 second, providing an additional +3 Strength.
    Shield-Breaker N/A Critical hits lower an enemy’s armor by 20% for 6 seconds, also giving Iron Bull +3 Strength.
    Pommel Strike (Active) Lightning Jab Damages and stuns the target.
    Guard Smasher N/A Doubles damage to an enemy’s guard and gives +3 Strength.
    Clear a Path N/A Hits on multiple targets with a single swing restore 10% of Iron Bull’s stamina for each additional target struck. Also grants +3 Strength.
    • Total Skill Point Investment: 11
    • Total Strength Gain: 12

    Through the Two-Handed tree, Iron Bull gains substantial strength, increasing his damage output. Most skills here focus on stunning or incapacitating enemies. Since Iron Bull can get low on health, the ability to prevent enemies’ attacks is vital for his survival.

    This setup will not significantly boost Iron Bull’s guard, ensuring he takes damage to health, allowing him to deal greater damage while maintaining some defensive capability.

    Best Skills in the Battlemaster Tree

    With few skill points available for investment in the Battlemaster tree, the remaining points serve practical purposes.

    Skill Upgrade Description
    Crippling Blows N/A Landing a critical hit reduces an enemy’s damage by 15% for 10 seconds; this effect stacks. Iron Bull also gains +3 Strength.
    Combat Roll (Active) Roll With It Iron Bull can roll to quickly reposition himself rather than walking, and with Roll With It, he can evade most incapacitating effects, enhancing his survivability during stuns.
    Coup de Grace N/A Deals 30% more damage to stunned or knocked-down enemies, granting Iron Bull +3 Strength.
    • Total Skill Point Investment: 5
    • Total Strength Gain: 6

    The Combat Roll is particularly beneficial, allowing Iron Bull to escape from stuns, a frequent hazard due to his low health.

    Complete Low-Health High-Damage Iron Bull Build

    In total, this build requires 27 skill points and can unleash extraordinary damage, possibly the highest in the game. Iron Bull will have an impressive strength boost with this configuration, delivering massive damage even at low health while managing to keep himself alive without much trouble.

    The final Tactics slots will include:

    • Ring of Pain
    • Rampage
    • Devour
    • Dragon-Rage
    • Mighty Blow
    • Block and Slash
    • Pommel Strike
    • Combat Roll

    Alternative Builds for Iron Bull

    Iron Bull can also be effectively molded into a hybrid tank/damage dealer. Instead of pursuing the Battlemaster path, focus on the Vanguard tree and pick up War Cry among other skills. This configuration may sacrifice some damage output and requires adjustments in the Two-Handed tree, but with proper support, Iron Bull can take on this versatile role with ease.

  • Mastering Achievements: Your Guide to Dragon Age: Inquisition

    The Wrath of Heaven

    Complete the prologue.

    A trophy or achievement you cannot miss while playing through the main storyline.

    Opposition in All Things

    Close the Breach.

    A trophy or achievement you cannot miss while playing through the main storyline.

    In Your Heart Shall Burn

    Withstand an attack on the Inquisition.

    A trophy or achievement you cannot miss while playing through the main storyline.

    Wicked Eyes and Wicked Hearts

    Make your mark on the Orlesian court.

    A trophy or achievement you cannot miss while playing through the main storyline.

    Here Lies The Abyss

    Confront your fears in the Fade.

    A trophy or achievement you cannot miss while playing through the main storyline.

    What Pride Had Wrought

    Reach an ancient ruin before your foes do.

    A trophy or achievement you cannot miss while playing through the main storyline.

    On Burning Wings

    Recruit a powerful ally to tip the scales.

    During the main quest titled What Pride Had Wrought, you need to choose to drink from the well yourself rather than letting someone else take that action. Afterward, finish The Final Piece quest.

    Doom Upon All The World

    Eliminate the threat for good.

    A trophy or achievement you cannot miss while playing through the main storyline.

    The Brightest of Their Age

    Recruit all possible companions in a single playthrough.

    You can find nine companions to recruit. Cassandra, Solas, and Varric will join you right at the start. Here’s how to recruit the others:

    • Sera – After the opening cutscene in Val Royeaux, locate an arrow in the plaza. Investigate it, and you’ll be tasked with finding red items at three sites. Once you succeed, go to the Secluded Courtyard to meet and recruit Sera.
    • Vivienne – Soon after arriving in Val Royeaux, a messenger will attempt to catch your attention. Speak to them to activate the Ghislain Estate location on your map. Head there to recruit Vivienne.
    • Blackwall – After completing The Threat Remains quest, you can find Blackwall in the Hinterlands.
    • Iron Bull – At some point, Krem will show up in your camp. Talk to him, then travel to Storm Coast. You’ll find Iron Bull waiting on the beach, ready to join you.
    • Dorian – Depending on whether you ally with the Templars or the Mages, recruit Dorian during either the In Hushed Whispers quest or the From The Ashes quest.
    • Cole – Depending on your side, you can bring Cole into your group during either the Champions of the Just quest or the From The Ashes quest.

    They Who Stand

    Add a new companion to your team.

    Recruit a companion outside of the automatically gained ones mentioned earlier. See above for details on how to get them.

    Beloved and Precious

    Establish a romantic relationship.

    You can romance various characters based on your race and gender:

    • Cassandra
    • Iron Bull
    • Solas
    • Blackwall
    • Cullen
    • Dorian
    • Josephine
    • Sera

    Simply engage with them and flirt to solidify the romance, which will unlock this trophy or achievement.

    Speak Only the Word

    Gain access to a key city for the Inquisition.

    You will naturally visit several major cities as you progress through the main story, thus earning this automatically.

    Saddled Up

    Acquire five different types of mounts.

    First, convince Master Dennet to join the Inquisition. You can then begin purchasing horses from him. Obtain five different mounts to receive this trophy or achievement. There are also other means to acquire mounts.

    Well-Prepared

    Craft a weapon or piece of armor in single-player mode.

    You can find crafting stations in both Haven and Skyhold. The one in Haven is right next to the main gate, while in Skyhold, you’ll need to go to the Undercroft to craft.

    Customized

    Enchant or upgrade an item in single-player mode.

    You can upgrade your weapons outside the main gate in Haven and within the Undercroft at Skyhold.

    Commander

    Finish a timed mission on the War Table.

    Some missions on the War Table require you to send a member of the Inquisition. Many of these missions take time to complete, and once one is done, you will earn this achievement or trophy.

    Trailblazer

    Find a campsite and set up an Inquisition camp in any wilderness area.

    While exploring, you will come across various campsites. To unlock this achievement or trophy, just plant your flag in one of these sites.

    Sharp-Eyed

    Find and retrieve a shard identified by an ocularum.

    Ocularums are devices topped with a shiny skull. Interact with them to locate shiny spots on the ground, which are marked on your map. Retrieve a shard at one of those locations.

    Well-Read

    Discover a veilfire rune.

    Veilfire runes are hidden in dungeons, and you can only spot them using a veilfire torch. Once you have a torch, search the walls for runes.

    Skilled

    Upgrade any ability once in single-player mode.

    In the skill tree, some abilities show upgraded versions next to them. Simply spend a skill point on one of these to earn this achievement or trophy.

    Specialized

    Select a specialization class.

    At some point, you’ll receive a mission on the War Table named Specializations for the Inquisitor. This task involves inviting trainers to Skyhold. Once they arrive, interact with them to choose your specialization.

    Cavalier

    Obtain a mount.

    When you reach the Hinterlands, you will receive a quest about meeting Master Dennet. Visit him, and he will give you a horse. Riding it will earn you the trophy or achievement.

    Synergized

    Trigger a cross-class combo with a character you control in single-player mode.

    A cross-class combo occurs when an enemy is struck with a status effect followed by a detonator ability. If you and your companions effectively utilize your skills, this will happen naturally.

    Botanist

    Harvest 50 herbs from Skyhold’s garden in a single playthrough.

    When upgrading Skyhold, you can create a garden where herbs will grow. Keep harvesting them until you collect 50.

    Wyrmslayer

    Defeat a high dragon in single-player mode.

    Dragons are scattered throughout the game. You just need to successfully defeat one to earn this trophy or achievement. They are formidable foes, but if you’re at a decent level with good gear, it should be manageable.

    Decorator

    Purchase a new decoration item for Skyhold.

    After obtaining Skyhold, you can buy decorations for it. A reliable shop is located in Val Royeaux, across from the picnic tables. To earn this trophy, you must buy a decoration item, like a set of drapes.

    Belle Of The Ball

    Gain full approval from the Orlesian court.

    In the Wicked Eyes and Wicked Hearts quest, you need to earn the court’s favor, which you can track with an approval meter. Your aim is to keep your approval rating at 100 by interacting with characters in a way that pleases them and returning to the ballroom when instructed.

    Hard Hitter

    Deliver a single blow exceeding 1,000 damage in single-player mode.

    While it may seem tough to deal over 1,000 damage in one hit, it’s likely to happen as you progress through the game. Your damage output will increase with levels, making this achievement attainable with time.

    Master Builder

    Craft an item using Tier 4 materials in all non-masterwork slots in single-player mode.

    You can acquire Tier 4 crafting materials by defeating high dragons. Use these materials to craft an item in those slots to complete this achievement.

    Master Alchemist

    Upgrade your potions, grenades, or tonics 30 times in a single playthrough.

    In Haven, visit Adan for upgrades, and in Skyhold, you can do so in the Undercroft area. Simply gather the necessary materials for 30 upgrades to achieve this.

    Dragons’ Bane

    Defeat 10 high dragons in single-player mode.

    To earn this trophy, you’ll need to slay each of the dragons present in the base game. Locations include:

    • Fereldan Frostback – The Hinterlands
    • Northern Hunter – Crestwood
    • Abyssal High Dragon – The Western Approach
    • Gamordan Stormrider – Exalted Plains
    • Greater Mistral – Emerald Graves
    • Vinsomer – The Storm Coast
    • Sandy Howler – The Hissing Wastes
    • Hivernal – Emprise Du Lion
    • Kaltenzahn – Emprise Du Lion
    • Highland Ravager – Emprise Du Lion

    Herald

    Complete the single-player campaign on at least Hard difficulty without lowering it.

    Finish the game on Hard difficulty.

    Inquisitor

    Complete the single-player campaign on Nightmare difficulty without lowering it.

    Finish the game on Nightmare difficulty.

    Stargazer

    Unlock 15 astrariums in a single playthrough.

    While exploring, you will encounter various astrariums. Approach one and solve the small puzzle to connect the stars and form a constellation. Do this 15 times to earn this achievement.

    Focused

    Spend 10 points within a single ability tree of any one single-player character.

    Every character has multiple skill trees. Just allocate ten skill points in one of them to unlock this achievement or trophy.

    Well-Funded

    Accumulate 50,000 or more gold across all single-player playthroughs.

    Reaching 50,000 gold while playing isn’t overly challenging. Though it may take some time, you will collect that much gold just by progressing through the game. It’s important to note that you don’t need to have 50,000 gold all at once to earn this trophy—it’s a cumulative total.

    Keymaster

    Enter the heart of the Solasan temple.

    To achieve this, you must locate all the shards throughout the game. Once gathered, you can access the Solasan Temple found in the Forbidden Oasis region.

    Pathfinder

    Find a campsite and establish at least one Inquisition camp in 10 wilderness areas.

    Many campsites exist throughout the game. Plant your flag in ten of them to achieve this trophy.

    Liberator

    Liberty three keeps in a single playthrough.

    To liberate a keep, eliminate all enemies inside and plant the Inquisition flag. You can find keeps in Crestwood, the Western Approach, and Emprise Du Lion.

    High Commander

    Complete 50 missions or operations in a single playthrough.

    There are numerous operations available on the war map. Continue doing them throughout your journey until this achievement unlocks.

    Regal

    Fully upgrade one throne.

    To obtain this trophy, you’ll need to send your advisors on specific operations to gather Chasind Throne Accessories. Effective missions include Gather Coin, Hinterland Resources, and Fallow Mire Resources, aimed at acquiring both types of accessories, which may take time to drop.

    Persuasive

    Recruit 10 Inquisition agents in a single playthrough.

    You can recruit various agents throughout the game, primarily by locating and speaking with them. Sometimes, completing a task is necessary before they agree to join you.

    Veteran

    Reach level 20 in single-player mode.

    To level up to 20, focus on completing side quests and similar tasks. Hunting dragons can also help. However, you don’t need to complete every quest available to hit level 20.

    Peerless

    Level up the Inquisition to rank 10.

    Increasing the Inquisition’s rank involves acquiring agents, finishing quests, closing rifts, and establishing camps, taking some time but not too extensive to achieve rank 10.

    People Person

    Form friendships with at least three inner circle members in one playthrough.

    Though there’s no visible meter tracking approval levels, carry on engaging with your companions and assisting them until you develop friendships.

    Loremaster

    Gather 250 codex entries during your playthrough.

    Collect codex entries by reading books, scrolls, and other notes. Exploring each area thoroughly will uncover many entries. Be sure to read everything you can find.

    Demonslayer

    Defeat 1,000 demons in single-player mode.

    You’ll encounter numerous demons throughout the game, especially when closing rifts. If you pursue side quests alongside the main ones, this achievement will come naturally.

    Invincible

    Defeat 2,500 enemies in single-player mode.

    By completing side quests as well as main missions, you should be able to obtain this achievement naturally.

    Quartermaster

    Fulfill 20 requisition requests in a single playthrough.

    At Inquisition camps, interact with requisition officers to obtain requests. These involve gathering specific items and returning them. Complete this process 20 times to earn the trophy.

    Marked for Greatness

    Seal 75 rifts in a single playthrough.

    You’ll find numerous green rifts across various maps that you can close using the mark on your hand, which the game teaches you to use in the prologue. Aim to seal 75 to earn this trophy.

    Dragon Age: Inquisition Platinum Trophy

    Collect all trophies in Dragon Age™: Inquisition.

    To secure the Platinum trophy on PlayStation, you must collect every other trophy.

    Firestarter (Jaws of Hakkon DLC)

    Destroy all Winter Shards and ignite all fires in the Old Temple.

    During the Jaws of Hakkon DLC quest Ameridan’s End, you will enter an Old Temple. Here, your task is to locate and interact with unlit braziers and Winter Shards, totaling 15, with three being acquired during a boss battle.

    Legend-Marked (Jaws of Hakkon DLC)

    Win over the Avvar of Stone-Bear Hold and gain their trust.

    You can impress the Avvar clan by completing tasks for them. You don’t need to accomplish many to earn their friendship.

    Historian (Jaws of Hakkon DLC)

    Unveil the secrets surrounding a legendary figure.

    A trophy or achievement that cannot be missed when playing through the Jaws of Hakkon DLC story.

    Winter’s End (Jaws of Hakkon DLC)

    Dispel a myth from ancient times.

    A trophy or achievement that cannot be missed while playing through the Jaws of Hakkon DLC story.

    Deep Roads Commander (The Descent DLC)

    Complete a mission at the expedition table in the Legion of the Dead camp.

    Early in the DLC, you will gain access to the expedition table. Finish one mission from that table to secure this achievement or trophy.

    Giant Slayer (The Descent DLC)

    Defeat an ogre alpha.

    Early in the DLC, you will confront an ogre alpha. Defeating this foe will unlock the achievement or trophy.

    Fact Finder (The Descent DLC)

    Assist Shaper Valta in uncovering hidden dwarven history.

    A trophy or achievement that cannot be missed during the Descent DLC story arc.

    Shaper of Stone (The Descent DLC)

    Stop the earthquakes threatening the surface world.

    A trophy or achievement that cannot be missed while progressing through the Descent DLC story.

    Trial of the Hermit (Trespasser DLC)

    Defeat 10 great bears under the Grizzly End trial.

    Activate the ‘Grizzly End’ trial in the options menu, then seek out and defeat ten Great Bears found in the Emerald Graves and Emprise du Lion areas.

    Trial of Temperance (Trespasser DLC)

    Complete the Rest Easy trial in Emprise du Lion by claiming Suledin Keep.

    To earn this trophy, activate the ‘Rest Easy’ trial from the options menu, then visit Emprise du Lion to finish both the Take Back the Lion quest and the Capturing Suledin Keep quest.

    Trial of the Magician (Trespasser DLC)

    Complete the In Hushed Whispers quest under the Travel Light trial.

    Turn on the ‘Travel Light’ trial in the options, then complete the In Hushed Whispers quest.

    Trial of the Tower (Trespasser DLC)

    Slay the Hivernal high dragon under the Rub Some Dirt on It trial.

    Activate the ‘Rub Some Dirt on It’ trial from the options. Then, defeat the Hivernal high dragon found in the Emprise Du Lion region.

    Trial of the Emperor (Trespasser DLC)

    Defeat 20 foes under the Walk Softly trial.

    Engage the ‘Walk Softly’ trial in the options menu, then take down any 20 creatures.

    Trial of the Empress (Trespasser DLC)

    Slay a level 16 or higher Fereldan Frostback under the Even Ground trial.

    Activate the ‘Even Ground’ trial from the options, then confront and defeat the Fereldan Frostback found in the Hinterlands at level 16 or higher.

    Trial of the Fool (Trespasser DLC)

    Reach Skyhold at level 5 or less under the Take It Slow trial.

    Start a fresh playthrough while the ‘Take It Slow’ trial is enabled, and reach Skyhold by completing main quests while remaining level 5 or lower.

    Trial of the Lovers (Trespasser DLC)

    Enter Halamshiral with all companions present under the Fair-Weather Friends trial.

    Begin a fresh playthrough with the ‘Fair-Weather Friends’ trial activated. This challenge increases the disapproval rate from companions if you act against their preferences, so ensure they all remain part of the Inquisition before reaching the Wicked Eyes and Wicked Hearts quest.

    Forever Marked (Trespasser DLC)

    Progress the story to unlock.

    A trophy or achievement that cannot be missed while playing through the Trespasser DLC storyline.

    Lateral Thinker (Trespasser DLC)

    Unlock all caches overseen by ancient statues.

    There are four Fen’Harel statues (large wolf statues) in the DLC. You must solve each nearby puzzle to access the cache it guards. Here are the locations:

    • Eleven Mountain Ruins
    • Deep Roads
    • Shattered Library
    • The Darvaarad

    Coroner (Trespasser DLC)

    Find all the wearable items making up the Taken Shape armor set.

    Gather each of the four components of the Taken Shape armor set from hidden chests available in the following areas:

    • Hidden Hollow
    • Forgotten Tower
    • Abandoned Chateau
    • Ancient Jail
  • Crafting Varric’s Build in Dragon Age: Inquisition

    Crafting Varric’s Build in Dragon Age: Inquisition

    In Dragon Age: Inquisition, you have a variety of characters to join your party, each belonging to different classes and featuring unique skill trees. These skill trees not only define their combat styles but also make each character distinct.

    Varric, a Rogue like Cole and Sera, shares the common Rogue skill trees but also possesses his exclusive Artificer skills. This unique tree complements any Rogue build and can be tailored for a powerful, ranged setup.

    Key Skills for a Ranged Build

    We will focus on utilizing Varric’s special weapon, Bianca, which can be upgraded throughout the game to maintain its effectiveness as your character levels up. This build specifically emphasizes skills from the Artificer, Archery, and Sabotage trees. While you’ll have the opportunity to respec and explore different options, this guide lays out a solid framework for your character’s development.

    Note: This guide will not cover every skill required for tree progression, but these will still be included in the overall skill point total.

    Best Skills in the Artificer Tree

    The Artificer skills revolve around setting traps. Varric can outfit his surroundings with numerous traps to deter enemies and deal significant damage.

    Skill Upgrade Description
    Spike Trap (Active) Pyrotechnics A trap that explodes when an enemy approaches, launching them into the air. The upgrade expands its blast radius.
    Set Them Up N/A Increases trap damage by 25% and grants Varric +3 Willpower.
    Opportunity Knocks N/A Reduces cooldown time by half a second whenever an ally scores a critical hit, and grants Varric +3 Cunning.
    Hail Of Arrows (Active) N/A Fires every archery ability used in the next 12/25/40 seconds (based on focus) twice, amplifying damage output significantly.
    Elemental Mines (Active) Throw Everything Throws multiple traps with elemental effects until stamina is depleted, using one trap for every 5 stamina consumed.
    Fallback Plan (Active) N/A Places a lantern before starting combat, allowing Varric to jump back to it and regain health when he is low.
    And Take Them Down N/A Boosts all party members’ critical hit chance by 5% and grants Varric +3 Dexterity.
    Tricks Of The Trade N/A Increases the damage and duration of all status effects applied by allies by 10%, and grants Varric +3 Willpower.
    • Total Skill Points Needed: 10
    • Total Willpower Gain: 6
    • Total Cunning Gain: 3
    • Total Dexterity Gain: 3

    These skills will significantly enhance Varric’s effectiveness in utilizing the skills found in the Archery tree.

    Best Skills in the Archery Tree

    Skills in the Archery tree are designed to maximize damage with Bianca. These skills are straightforward, providing powerful options that contribute greatly to Varric’s overall performance, especially against tougher enemies.

    Skill Upgrade Description
    Death From Above N/A Grants up to 25% extra damage when attacking an enemy from a height.
    First Blood N/A Provides a 15% damage boost against enemies above 80% health.
    Long Shot (Active) Archer’s Lance Fires a shot that does increased damage the farther you are from the target, maxing out at 600% damage at 15 meters.
    Strafing Shots N/A Allows Varric to move faster while maintaining accuracy, granting an additional +3 Dexterity.
    Explosive Shot (Active) Chain Reaction Fires an explosive arrow that damages the target and surrounding enemies, with the damage increasing based on nearby foes.
    Pincushion N/A Each consecutive arrow fired at an enemy incurs a 5% damage increase, resetting every 10 seconds, while providing +3 Dexterity.
    Full Draw (Active) N/A Deals 1,600% damage to enemies at full health and half that to those below it.
    • Total Skill Points Needed: 11
    • Total Cunning Gain: 3
    • Total Dexterity Gain: 9

    These Archery skills will account for most of your active damage output, while damage from the Artificer skills will contribute passively.

    Best Skills in the Sabotage Tree

    While you may gain more skill points, many players typically stop around 27, leaving potentially six points for the Sabotage tree. All the desirable skills from this tree are located on one side, making it easier to include them in your build.

    Skill Upgrade Description
    Poisoned Weapons (Active) Infected Wounds Poisons an enemy with each hit, dealing ongoing damage. The upgrade allows for 25% extra damage while the effect is active.
    Fighting Dirty N/A Extends the duration of poison effects by 25% and grants +3 Dexterity.
    Explosive Toxin N/A Enemies who die while poisoned explode, inflicting damage over time to nearby foes and granting +3 Dexterity.
    • Total Skill Points Needed: 4
    • Total Dexterity Gain: 6

    Completed Varric Ranged Build

    In total, this build utilizes 25 skill points. It strikes a good balance between offensive and defensive capabilities through various traps and powerful Archery skills, such as Hail of Arrows.

    Your finalized Tactics slots will include:

    • Spike Trap
    • Hail Of Arrows
    • Elemental Mines
    • Fallback Plan
    • Long Shot
    • Explosive Shot
    • Full Draw
    • Poisoned Weapons

    By harnessing the defensive qualities of Artificer skills and the critical hit boosts provided, Varric can stay safe while dealing significant damage and enhancing his team’s effectiveness.

    Alternative Varric Builds

    For those interested in a different approach, Varric can also excel with a Double Daggers build, bypassing Bianca. In this setup, his traps will see more frequent use since enemies will engage him at closer range. This build heavily invests in the Sabotage and Double Daggers trees, increasing versatility and options in combat.

  • Quick Ways to Earn Gold in Dragon Age: Inquisition

    Quick Ways to Earn Gold in Dragon Age: Inquisition

    In Dragon Age: Inquisition, you step into the role of the chosen one tasked with saving the world from disaster. While that sounds heroic, it doesn’t come with a hefty paycheck. Throughout your journey, you’ll come across various merchants selling items that could bolster your chances of success.

    To afford what you need, you’ll have to find ways to earn some coin. While none of these methods will make you instantly wealthy, they can help you amass a fortune faster than simply playing through the game. Here are some effective methods to consider.

    Collect and Sell Everything

    One of the easiest ways to boost your funds in Dragon Age: Inquisition is to loot almost everything in sight and sell it. Unlike many games, nothing in this universe breaks, so there’s no need to hold on to extra weapons or gear.

    Keep certain items with specific damage types, like ice damage, for challenging creatures like high dragons. However, for the most part, sell anything you can’t use.

    Pro Tip: The Sterling Reputation Inquisition perk allows merchants to pay you 10% more for your items.

    Farm Snoufleur Skins

    In the Emprise du Lion area, you can locate Snoufleurs wandering around a small ice-covered region near the Sahrnia Camp. These passive creatures pose no threat, and when you eliminate them, they drop Snoufleur skins, which can sell for around 15 gold each.

    While that may not seem like a significant amount, remember that you can quickly gather a large number of these skins since they respawn regularly. Each Snoufleur can drop several skins at once, so by spending some time hunting in this icy area, you can build a solid collection to sell.

    Take Down Giants in the Emerald Graves

    Head to the central zone of the Emerald Graves where you’ll encounter giants. Although they are tough adversaries, defeating them yields valuable loot, including armor and weapons. These can be sold for a nice payout.

    Be cautious; giants are strong and come with a lot of health, so make sure you’re at a competent level before confronting them. Focus on taking out one at a time, and you’ll build a respectable stash of items to sell.

    Utilize the Gather Coin Operation

    Early in the game, you will unlock an operation called Gather Coin at the War Table. By assigning one of your advisors to this operation, you’ll earn some gold once it’s complete. While the amount isn’t substantial, what’s great is that you can repeat this process as often as you like.

    Over time, this method can serve as a reliable source of income without costing you much effort.

    Additional Operations: Completing other operations like All That Glitters, To Serve Any Master, and A Golden Opportunity can enhance your earnings from the Gather Coin operation.

    Sell Herbs from Your Garden

    Once you settle in Skyhold, you gain access to a garden where you can grow plants using seeds you discover in the wild. The advantage of these seeds is that they can be replanted, allowing for continuous harvesting.

    Though this isn’t a quick money-making solution, it maintains low costs since it only requires your time. If you cultivate this habit, you can earn money over the long haul by growing and selling these herbs.

    By following these strategies, you’ll be able to increase your earning potential, giving you more resources to succeed in your quest throughout Dragon Age: Inquisition.

  • Discover Where to Find Blank Runes in Dragon Age: Inquisition

    Discover Where to Find Blank Runes in Dragon Age: Inquisition

    In Dragon Age: Inquisition, there are many valuable items to collect, including impressive armor and strong weapons. Among these, blank runestones might not seem as exciting, but they play a crucial role in enhancing your combat skills.

    To use blank runestones effectively, you first need to find them. Unlike many items, you can’t just discover them while exploring. Instead, they’re available for purchase from specific merchants scattered throughout Thedas. Here’s a comprehensive guide on where to find these valuable runestones and how to utilize them once you’ve got them.

    How to Obtain Blank Runestones


    In the core game, you can find ten vendors who sell blank runestones. Here’s a rundown of each one:

    Some merchants may not have specific names and are listed simply as ‘merchant.’ For easier identification, we’ve labeled them by their locations.

    Merchant’s Name

    Location

    Bonny Sims

    Skyhold


    Bonny Sims can be found in the lower courtyard of Skyhold, close to the fast travel point. She appears shortly after you leave and return to Skyhold for the first time.

    Val Royeaux Merchant

    Val Royeaux


    This merchant is located in a building on the northwest side of Val Royeaux’s main level. They wear a mask and stand next to an armored skeleton. They only show up after you finish the Wicked Eyes and Wicked Hearts quest.

    Havel

    Val Royeaux


    Similar to the previous merchant, Havel is also in a building on the northwest side of Val Royeaux’s main level. Havel becomes available after you complete either In Hushed Whispers or Champions of the Just.

    Village of Crestwood Merchant

    Crestwood


    There’s one merchant selling blank runestones in the Village of Crestwood. You can find them near the fast travel point, and they become available after completing the Still Waters quest.

    Caer Bronach Merchant

    Crestwood


    Located near the southeast wall of Caer Bronach in Crestwood, this merchant will only trade once you have captured the fort.

    Griffon Wing Keep Merchant

    The Western Approach


    This vendor sells blank runestones on the ground floor of Griffon Wing Keep, close to the main entrance. You need to claim the keep for the Inquisition to access his stall.

    Master Taniel

    Exalted Plains


    Found in a Dalish camp in the southwest corner of the Exalted Plains, Master Taniel sells runestones. You need to gain their favor during the By the Grace of the Dalish quest before they’ll sell to you.

    Gertrude

    Emerald Graves


    You will come across Gertrude during the A Fallen Sister and Not Everyone’s Free quests. If you free her and the other captives, she will become a merchant. Depending on your choices, she will show up at either Argon’s Lodge or Watcher’s Reach.

    Suledin Keep

    Emprise Du Lion


    Inside Suledin Keep, in Emprise Du Lion, a merchant offers blank runestones. You can find them in the central area near a large statue, but you need to capture the keep and confront the demon Imshael first.

    The Canyon Merchant

    Hissing Wastes


    Near The Canyon Camp in the Hissing Wastes, there’s an unattended stall located at the bottom of a dry ravine.

    If you have the Trespasser DLC, you can also find blank runestones for sale at the merchant found in The Winter Palace.

    Uses of Blank Runestones


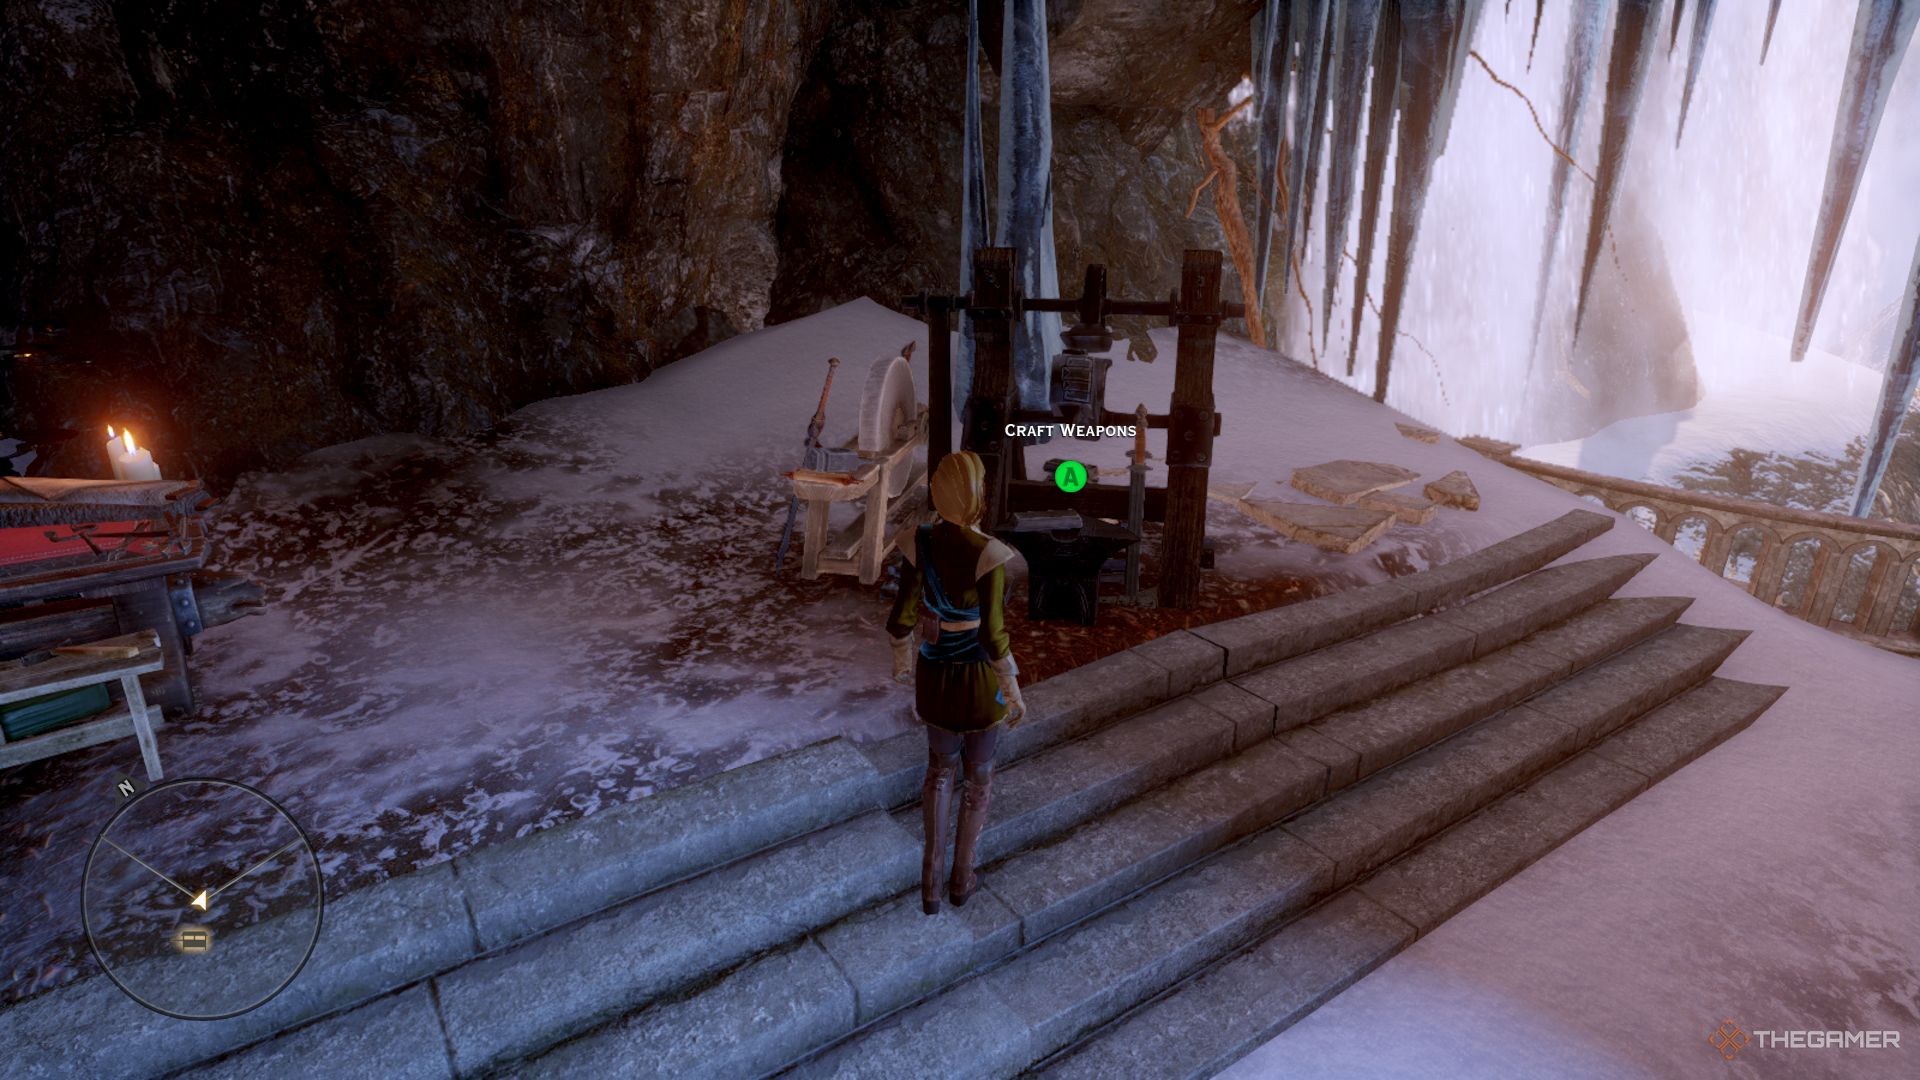
    Screenshot of the Inquisitor at the craft weapons station in Dragon Age Inquisition.

    Blank runestones are essential for creating runes that enhance your weapons. First, you need to recruit Dagna, the Arcanist, by completing the “Acquire the Arcanist” operation at the War Table.

    Once Dagna is in the Undercroft, you can craft runes at the Weapon Crafting station. Each rune requires a blank runestone along with different materials, which will allow you to customize your weapons for more formidable combat.

  • Maximize Your XP in Dragon Age: Inquisition Effortlessly!

    Maximize Your XP in Dragon Age: Inquisition Effortlessly!

    As an RPG, Dragon Age: Inquisition features a leveling system where you earn XP to progress. The absence of level-scaling means it’s crucial to maintain an appropriate level throughout the game.

    Jumping into tough battles against much stronger foes can end in swift defeat, leading to the failure of the Inquisition and the potential downfall of the mortal realm. To avoid such disastrous outcomes, it’s vital to stay at a robust level by actively seeking out opportunities to earn XP.

    Avoid Low-Level Areas

    Combat is a key source of XP in Dragon Age: Inquisition, but you’ll only benefit if you defeat enemies that are at your level or stronger. If you’re three levels above your opponent, you won’t earn any experience points.

    This situation can be frustrating for completionists who want to explore every area, as you can quickly out-level certain locations. To gain experience more efficiently, you may need to leave some areas unfinished for now; you can always return later when you’re ready to complete them.

    The Trespasser DLC offers the Even Ground trial, allowing enemy levels to match yours. This feature lets you farm XP from foes in previously ‘low-level’ areas since they will now present a proper challenge.

    Unlock Underworld, Arcane, Nobility, and History Knowledge Perks

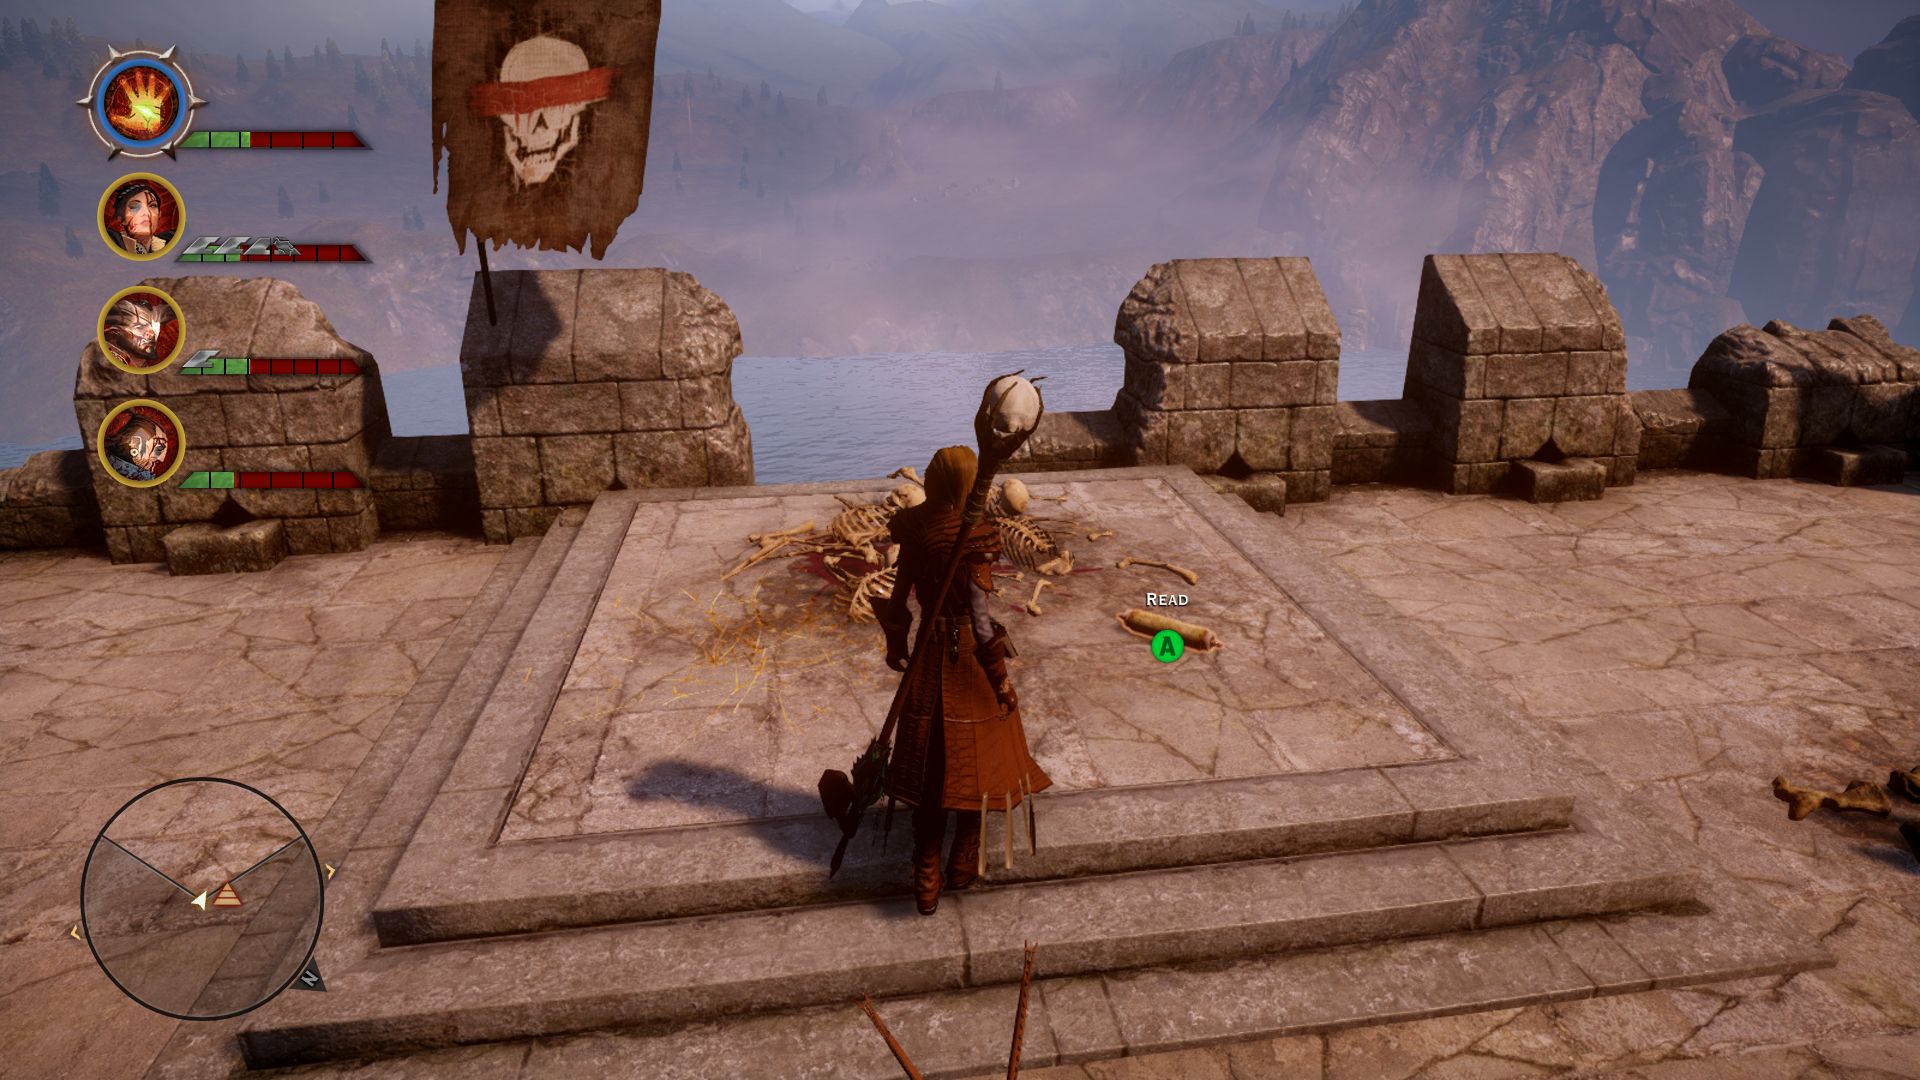
    Dragon Age Inquisition screenshot of Inquisitor looking down at a scroll.

    As you play, you’ll collect Inquisition Perk points by expanding your influence and discovering agents. These points can be used to gain various perks from the War Table.

    To enhance your XP gain, be sure to obtain the Underworld Knowledge, Arcane Knowledge, Nobility Knowledge, and History Knowledge perks. Each of these perks increases the XP earned from unlocking codex entries. Once you have them, read every letter, book, and scroll you come across to fill out your codex.

    Close Rifts

    Dragon Age Inquisition screenshot of Inquisitor closing a rift.

    Right from the start, you learn that your character can close bright green rifts in the sky using a special ability. Exploring the game reveals numerous rifts, and closing them provides a good amount of XP.

    However, closing these rifts often requires battling the creatures that emerge from them. If you’re facing enemies significantly stronger than you, it can be a tough fight. Whenever you encounter a rift surrounded by enemies of your own level, it’s a good idea to take the time to close it.

    Hunt High Dragons

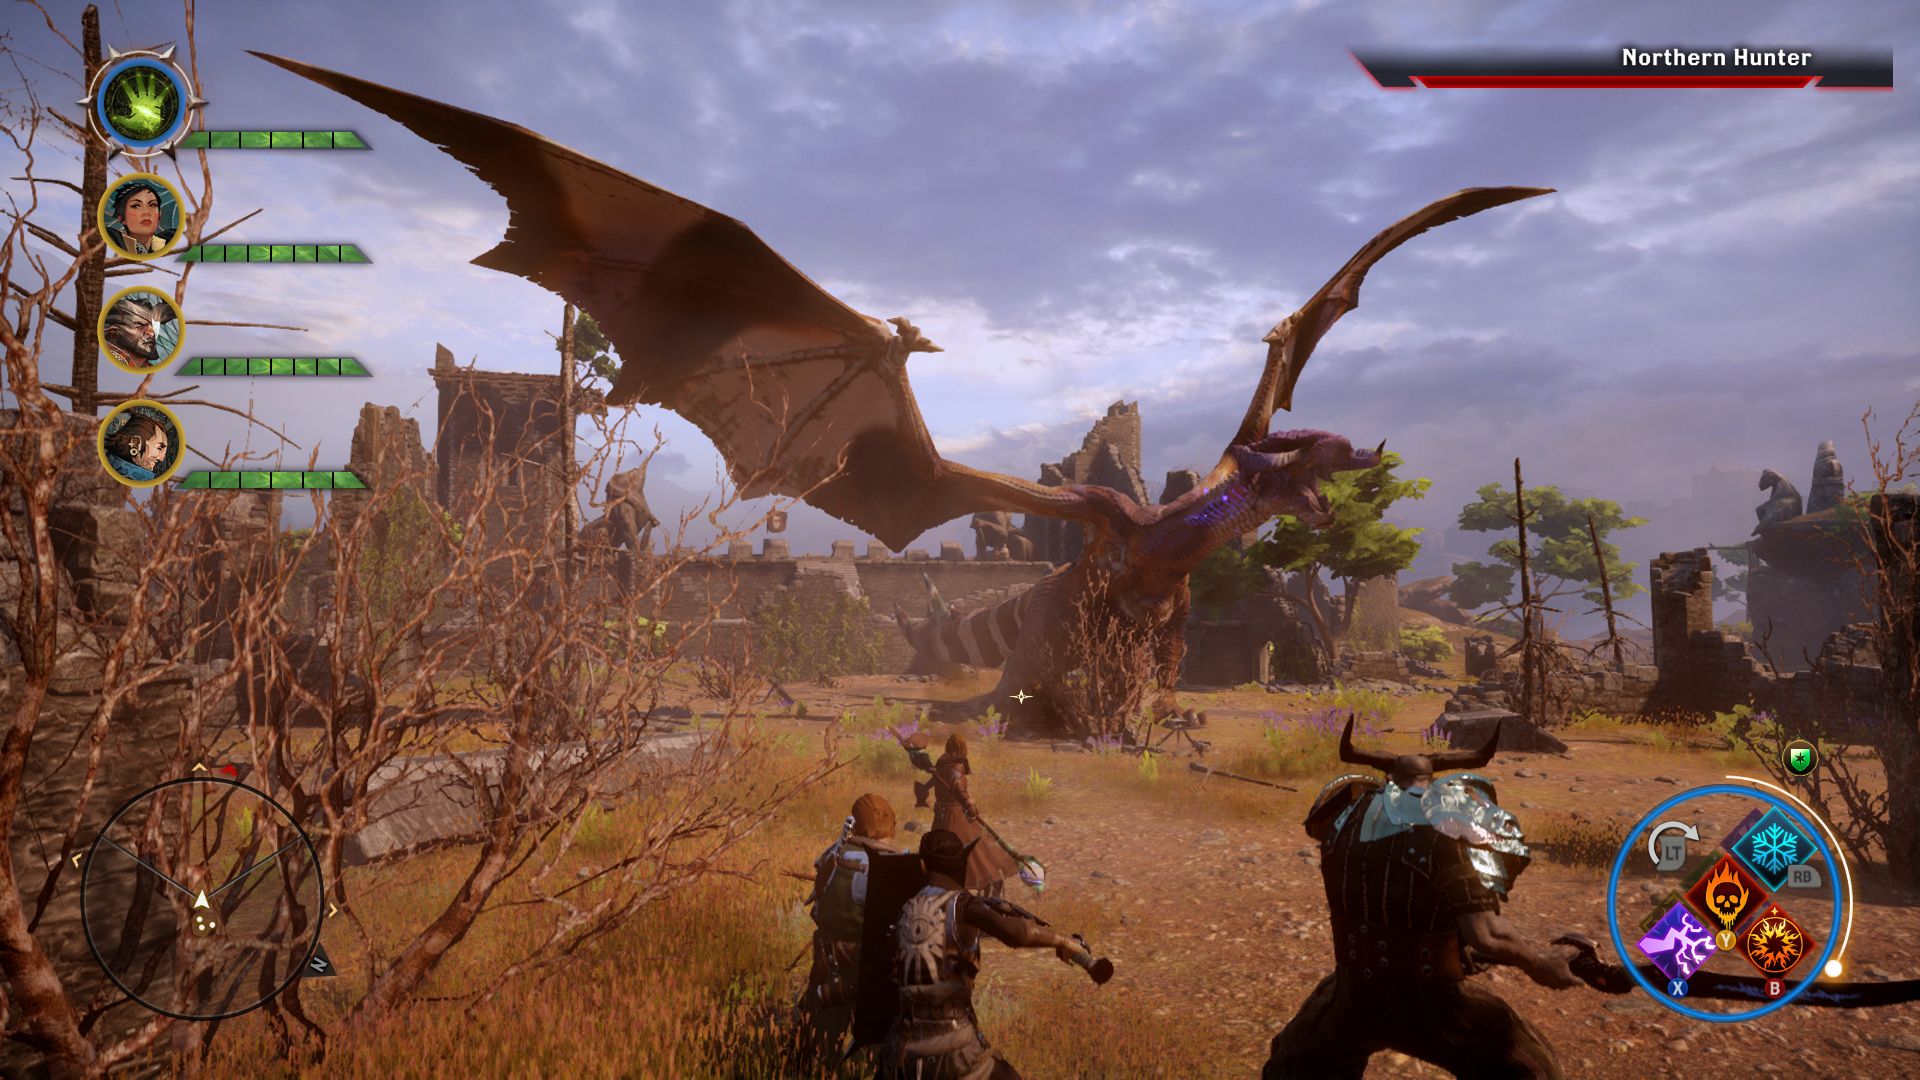
    Dragon Age Inquisition screenshot of party fighting the Northern Hunter dragon.

    Taking down high dragons is one of the most challenging yet rewarding ways to earn XP in Dragon Age: Inquisition. These massive creatures are scattered throughout the game, with ten available in the main campaign and two more introduced in the DLC.

    Each high dragon is a formidable adversary with substantial health and powerful attacks. It’s essential to prepare adequately before engaging one. Defeating these dragons grants significant XP, allowing you to level up quickly if you manage to hunt several of them.

  • The Best Sequence for Exploring Dragon Age: Inquisition Areas

    The Best Sequence for Exploring Dragon Age: Inquisition Areas

    In contrast to many role-playing games, Dragon Age: Inquisition does not feature one vast open world. Instead, you’ll navigate through a variety of expansive areas, each functioning like a mini open world. You unlock several of these locations early in the game, allowing you to visit them in any sequence. However, choosing the wrong order could lead to some serious challenges.

    Some areas become accessible long before your character is equipped to handle the dangers within. If you venture into these regions prematurely, you might quickly find yourself overwhelmed by tougher enemies. To avoid this predicament, it’s best to explore the locations in the most effective order. Below is that recommended sequence.

    Recommended Exploration Order for Locations

    This guide covers the larger locations worth your exploration, such as the Hinterlands and Storm Coast. It doesn’t include smaller places you only visit for specific quests.

    Location Recommended Level Description
    Haven
    • You begin your journey in Haven, as the game places you there after the initial quest.
    Hinterlands
    • The Hinterlands is your first scoutable area from the War Table, so it’s essential to visit after Haven.
    • This location offers numerous quests to complete during your first exploration.
    • Be cautious; some enemies may be level four to eight.
    • You can likely reach level four just from quests in the Hinterlands.
    • However, avoid the areas with level eight enemies until you’re better equipped.
    Val Royeaux
    • As part of the storyline, visiting Val Royeaux is suggested after the Hinterlands.
    • Combat is minimal here, making your level less critical.
    Storm Coast
    • 5 (first visit)
    • 7-11
    • 13-15
    • Scout the Storm Coast after the Hinterlands.
    • This area may require multiple visits due to varying enemy levels.
    Forbidden Oasis
    • 8 (first visit)
    • 5-15
    • 18-20
    • You can access the Forbidden Oasis after locating a shard in a different area.
    • This location isn’t critical for the main storyline, allowing flexible timing for your visit.
    • Complete access awaits you only after finding all shards.
    • It’s advisable to visit early to gather resources beneficial later.
    Fallow Mire
    • Access this area when seeking missing Inquisition soldiers from Ferelden by unlocking it via the War Table after the Hinterlands.
    • It may be risky, so approach with caution; at least level eight is recommended.
    • Be mindful that some sections have enemies too strong for your first visit.
    Skyhold
    • Transition to Skyhold after completing the In Your Heart Shall Burn quest.
    • This is your home base, so level isn’t an issue once you arrive. However, aiming for at least level 10 before the quest is wise.
    Crestwood
    • Crestwood becomes available shortly after arriving at Skyhold by completing the Find the Warden operation.
    • Enemy levels in this area are relatively balanced.
    Western Approach
    • Investigating the War Table for Grey Warden activity, which started in Crestwood, leads to the Western Approach.
    • There’s not much variance in levels between Crestwood and the Western Approach.
    Exalted Plains
    • Unlock this area through a quest shortly after Skyhold called Silence of the Plains.
    • The starting level is similar to Crestwood and the Western Approach, though expect some stronger foes in Exalted Plains.
    Emerald Graves
    • Scout the Emerald Graves after starting Fairbanks’ Trust side quest at the War Table, accessible soon after reaching Skyhold.
    • Though suggested to be level 12, a slightly higher level is prudent due to the formidable enemies present.
    Emprise Du Lion
    • Complete the Liberate Emprise du Lion operation at the War Table to explore this area, available after reaching Skyhold.
    • It’s advisable to be at least level 16 before facing the challenges in this location.
    Hissing Wastes
    • To access the Hissing Wastes, complete the Stop Venatori Activity in the West operation from the War Table.
    • This area is the highest-level location in the game, requiring at least level 16 to attempt, though level 19 is preferred.

  • Top Mage Builds to Dominate in Dragon Age: Inquisition

    Top Mage Builds to Dominate in Dragon Age: Inquisition

    Mages are a fascinating class to play in Dragon Age: Inquisition, offering three unique specializations that allow players to either unleash devastating damage or command the flow of battle. This class holds a significant place in the narrative of Dragon Age: Inquisition. Picking the mage class for your Inquisitor immerses you directly into the unfolding Mage/Templar conflict that dominates the early stages of the main storyline.

    In Dragon Age: Inquisition, there are three classes available, each with distinct benefits and drawbacks, allowing players to find the one that suits them best. Fortunately, this installment of the series has made all classes feel balanced and equally engaging, offering a great opportunity for players to experiment with different options. The Mage Class stands out for its access to diverse elemental abilities and enchantments that enhance equipment.

    What Mage Builds Can Do

    Sub-Classes and Options by Race

    When building a Mage character, it’s crucial to keep in mind the racial limitations. Only humans, elves, and Qunari can choose the Mage Class, while dwarves are excluded. At the game’s start, Mages can access four distinct skill trees: Spirit, Winter, Inferno, and Storm. Each tree provides a different branch of elemental magic, enhancing the Mage Inquisitor’s offensive capabilities alongside their special abilities.

    Once the Inquisition reaches Skyhold, players have the option to specialize their mage. The three specializations available are Knight-Enchanter, Rift Mage, and Necromancer. Knight-Enchanters can handle both ranged and melee combat, thanks to their spirit blade, which resembles a lightsaber. Rift Mages manipulate the Fade, the mystical realm from which Mages draw their power, allowing them to control the battlefield effectively. They complement the Inquisitor’s unique ability to seal rifts in the Fade.

    Necromancers excel at high damage output and can temporarily raise the dead as allies while instilling fear in their enemies. Each mage companion reflects one of these specializations: Vivienne is a Knight-Enchanter, Solas is a Rift Mage, and Dorian Pavus boasts Necromancer abilities. Even if the player opts for a different class, these companions can still be leveled up to become essential and formidable allies. For those looking to explore the intricacies of each specialization further, check out AbilityPreview’s detailed YouTube videos.

    Best Knight-Enchanter Build in Dragon Age: Inquisition

    Strong Spirit Blade Builds

    The most effective Knight-Enchanter build centers on utilizing the Spirit Blade when it reaches a high charge value. Players should quickly replenish the charge after discharging the blade by casting spells or using standard attacks with their staff. This build focuses on skills that facilitate rapid charge buildup, making Knight-Enchanters incredibly resilient due to the constant application of barrier effects from Fade Shield.

    Important abilities for this Knight-Enchanter build include:

    Skill Tree Recommended Abilities
    Spirit –
    Storm – Energy Barrage
    – Energy Bombardment (Upgrade)
    – Conductive Current
    – Static Charge
    – Static Cage & Lightning Cage (Upgrade)
    Inferno – Immolate
    – Flashpoint
    – Pyromancer
    – Clean Burn
    – Chaotic Focus
    – Fire Mine & Flaming Array (Upgrade)
    Winter – Fade Step & Energizing Step (Upgrade)
    Knight Enchanter – Spirit Blade & Amplified Blade (Upgrade)
    – Combat Clarity
    – Fade Cloak
    – Decloaking Blast
    – Fade Shield

    Optional Skills to Consider

    Players can enhance their builds with these optional skills if they have available points:

    Skill Tree Recommended Optional Skills
    Spirit – Guardian Spirit
    – Peaceful Aura
    – Rejuvenating Barrier
    Storm – Chain Lightning & chosen upgrade
    – Stormbringer
    Knight Enchanter – Veiled Riposte
    – Knight-Protector
    – Resurgence

    The Resurgence Focus Ability is a solid choice for Vivienne, while a Knight-Enchanter Inquisitor can spare points for Mark of the Rift to concentrate on damage output.

    Gameplay Strategy

    To maximize effectiveness, players should fill their skill bar with Spirit Blade, Fade Step, Fire Mine, Energy Barrage, Static Cage, Fade Cloak, and Barrier. Starting a fight with Barrier will safeguard the party. Following that, focus on dealing damage with Energy Barrage to build Spirit Blade charges close to or at 99.

    After engaging in melee with Fade Step, unleash the powered Spirit Blade to exploit all accumulated charges. Once the barrier is full, activate Fire Mine to leverage the extra damage from Chaotic Focus.

    Utilizing weaponry like the Blade of Tidarion, Seer Staff, and Razikale’s Staff will enhance your effectiveness as a Knight-Enchanter. Players should craft a blade and grip that emphasizes critical chance and damage for optimal performance.

    Best Rift Mage Build in Dragon Age: Inquisition

    Support and AoE Damage

    Rift Mages primarily excel in controlling the battlefield while providing substantial AoE damage when combined with the Inferno and Winter trees. Players can create devastating spell combinations that deliver significant damage.

    Skill Tree Recommended Abilities
    Spirit –
    Inferno – Immolate & Wildfire (Upgrade)
    – Flashpoint
    – Clean Burn
    – Pyromancer
    – Fire Mine & Flaming Array (Upgrade)
    Winter – Fade Step & Energizing Step (Upgrade)
    – Winter Stillness
    – Ice Mine & Chilling Array (Upgrade)
    – Ice Armor
    Rift Mage – Stonefist & Shatterstone (Upgrade)
    – Encircling Veil
    – Veilstrike & Punching Down (Upgrade)
    – Restorative Veil
    – Smothering Veil
    – Twisting Veil
    – Pull of the Abyss & Devouring Veil (Upgrade)

    This build allows players to maximize spell effectiveness while ensuring their team benefits from debuffs that weaken enemies. Combining these spells results in enhanced cooldown management, enabling frequent casting.

    Using Your Rift Mage

    If the Inquisitor is a Rift Mage, prioritize Mark of the Rift as the Focus Ability. If controlling Solas, ensure to add Firestorm to your arsenal. Key skills for the skill bar should include Immolate, Fire Mine, Fade Step, Ice Mine, Stonefist, Veilstrike, Pull of the Abyss, and either Firestorm or Mark of the Rift.

    Begin battles with Veilstrike to create openings for melee fighters. The most significant damage output occurs when using Fire Mines followed by Pull of the Abyss to group enemies together.

    Best Necromancer Build in Dragon Age: Inquisition

    High-Damage Output

    Known as the specifications with unparalleled high damage potential, Necromancers operate near the edge of blood magic, which many perceive as taboo. Skills from this specialization complement the Inferno tree nicely, maneuvering panic and horror into chaotic burning effects.

    Skill Tree Recommended Abilities
    Spirit – Barrier
    – Peaceful Aura
    – Dispel & Transmute Magic (Upgrade)
    Inferno – Immolate & Wildfire (Upgrade)
    – Flashpoint
    – Pyromancer
    – Fire Mine & Flaming Array (Upgrade)
    – Clean Burn
    – Wall of Fire & Wave of Flame (Upgrade)
    Winter –
    Necromancer – Horror & Terror (Upgrade)
    – Death Siphon
    – Blinding Terror
    – Power of the Dead
    – Simulacrum
    – Spirit Mark
    – Walking Bomb & Virulent (Upgrade)

    Using the Necromancer Class

    To leverage the Necromancer build effectively, focus on utilizing Fire Mine as the primary offensive spell. Use Spirit Mark and Walking Bomb near enemies on the verge of death to maximize AoE damage. Combining Horror with Wall of Fire creates panic, making enemies more vulnerable.

    Like with the Rift Mage, wearing the Ring of Doubt allows for automatic critical hits, enabling players to exploit opportunities rapidly.

    For optimal playstyle, equip a staff with strong DPS attributes, complemented by gear that boosts critical hit chances and damage. Players are also encouraged to incorporate masterworks that provide opportunities to trigger effects like Horror or Walking Bomb on hit.

    For more insights on the game, players can refer to videos by AbilityPreview on YouTube.