الوسم: DPS

  • Ultimate Arknights Party Setups for Each DPS Character: Endfield

    Ultimate Arknights Party Setups for Each DPS Character: Endfield

    In Arknights: Endfield, you’ll quickly notice that each team can have up to four characters. One of these is the active operator you control directly, while the remaining three stay close to help fight enemies that attack you. While it’s possible to assemble a team with any four random characters, your effectiveness later in the game depends heavily on team synergy. Choosing the right characters becomes crucial, especially after selecting your main damage dealer.

    Laevatain Team Composition

    The most powerful team features Laevatain, the game’s first limited character. Her team is considered the best because of her high AoE damage, which is vital since much of the game involves hitting multiple enemies at once.
    The team includes:

    • Laevatain
    • Akekuri
    • Wulfgard
    • Ardelia

    A typical rotation goes like this:

    • Gather at least two enemies and use Akekuri’s battle skill, which applies Heat Infliction and triggers Wulfgard’s combo skill.
    • Wulfgard’s combo inflicts additional Heat Infliction, setting the stage for Laevatain’s special skill.
    • Use Laevatain’s skill alongside Ardelia’s combo to build up her special skill. Repeat this cycle until Laevatain’s ultimate is ready to help stack Heat Infliction faster.

    Tip: If you’re fighting a single boss, replacing Akekuri with Antal can be advantageous because he helps build four Melting Flame stacks on a single target more quickly.


    Yvonne Team Composition

    Yvonne was introduced alongside other limited characters and will appear on a special banner later in the update. She’s an excellent damage dealer, especially against single enemies, but less effective for wiping out large groups due to her limited AoE damage in late game.

    A typical team setup includes:

    • Yvonne
    • Gilberta
    • Xaihi
    • Estella

    Rotation overview:

    • Use Gilberta’s skill to group enemies and apply Nature Infliction. Trigger Yvonne’s skill to consume these stacks.
    • Use Xaihi’s and Estella’s skills to apply Cryo Infliction, which Yvonne can also consume with her skill.
    • Repeat this process until Yvonne’s ultimate is ready to dish out significant damage to a key enemy.

    Last Rite Team Composition

    If you lack Yvonne, Last Rite offers a strong alternative with characters easily obtainable in the game. Both Fluorite and Estella are four-star units and can be maximized with minimal gacha pulls. Her ultimate deals the highest damage among all characters, making her highly satisfying to use.

    Team includes:

    • Last Rite
    • Xaihi
    • Fluorite
    • Estella

    Rotation strategy:

    • Start with Xaihi and Estella applying Cryo Infliction and Arts Amp to Last Rite without her taking damage.
    • Use Fluorite’s combo skill to increase Cryo stacks, just enough for Last Rite’s combo.
    • Trigger Last Rite’s skill, dealing a final blow to push her Cryo stacks to maximum.
    • When her ultimate is ready, unleash it for massive damage.

    Endministrator Team Composition

    With the reputation some have about Physical element damage in gacha games, Endfield’s Physical element is noteworthy. Enemies can have Vulnerability stacks that are applied and then consumed for high damage.

    The team includes:

    • Endministrator
    • Lifeng
    • Pogranichnik
    • Chen Qianyu

    Rotation overview:

    • Launch with Lifeng’s battle skill to apply Vulnerability and trigger Chen Qianyu’s combo.
    • Use Chen Qianyu’s skills to add more Vulnerability stacks, complemented by Lifeng’s Physical Susceptibility.
    • Trigger Endministrator’s skill to consume the stacks, causing massive damage and activating Pogranichnik’s combo.
    • Use any available ultimates to maximize output while maintaining a consistent rotation.

    Alternative: Da Pan can be used instead of Endministrator to utilize the same reaction mechanics.


    Avywenna Team Composition

    For players without high-star DPS units or those who haven’t obtained Endministrator, Avywenna provides a solid option. She’s an Electric DPS who is mostly self-sufficient, using her unique mechanics instead of relying heavily on reactions like others.

    Team includes:

    • Avywenna
    • Arclight
    • Perlica
    • Antal

    Rotation tips:

    • Start with Antal’s skill to apply Electric Susceptibility, then Perlica’s skill to inflict Electric damage.
    • Continue attacking until Avywenna’s final strike, which triggers her and Perlica’s combo skills, creating three Thunderlances and electrifying enemies.
    • Use Arclight’s combo to recover SP. Keep rotating through her skills, repeatedly activating Avywenna’s combo and ultimate for maximum damage.
    • Finish with Avywenna’s battle skill to deal heavy damage when enemies are positioned between her and Thunderlances.

    Note: Proper positioning is critical; enemies must be hit by Thunderlances to deal damage effectively.

  • How to Play DPS Rime in Fellowship: Completing and Solving Tips

    How to Play DPS Rime in Fellowship: Completing and Solving Tips

    When you begin in Fellowship, you must choose a character to play. While you can switch characters anytime, each one has unique traits, and you’ll likely develop a favorite after testing them all. No matter what challenges you face, Rime is a strong spellcaster to include in your team.

    We’ll guide you in building Rime for maximum damage in dungeons, helping your team succeed against tough monsters. Here’s everything you need to know to play Rime as a damage dealer in Fellowship.

    Best DPS Builds for Rime

    Rime specializes in dealing frost damage to enemies, aiming precise spells at targets. Her spells take some time to cast, so staying at a safe distance is best to avoid interruptions.

    As she fights, Rime collects Winter Orbs that boost her spell damage, allowing her to unleash even more powerful magic to eliminate enemies.

    Best Talents for Rime

    As you progress through dungeons, Rime unlocks new talents from her rewards tree. These talents grant new abilities and enhance existing ones. You can also earn skill points to unlock additional powers to improve your combat effectiveness.

    Here are some of the top talents and how to combine them for different playstyles:

    Row Talent Name Description Skill Point Cost
    1 Chilling Finesse Each tick of Freezing Torrent reduces the cooldown of Bursting Ice; Cold Snap reduces it further. 2
    Winter’s Embrace While Bursting Ice is active, Rime’s damage increases by 20%. 2
    Glacial Assault Cold Snap stacks, and four stacks allow instant spell casting for extra damage. 2
    2 Burstbolter Damage from Frost Bolt triggers Bursting Ice pulse, generating Anima. 1
    Supreme Torrent Extends Freezing Torrent duration slightly. 1
    Navir’s Keeper Grants extra Cold Snap charges with Flight of the Navir. 1
    3 Icy Flow Cold Snap grants Icy Flow, reducing cast times and increasing critical chance for certain abilities. 2
    Avalanche Ice Comet has a chance to strike enemies twice or thrice. 2
    Coalescing Frost Freezing Torrent infuses enemies, dealing additional frost damage after a few seconds. 2
    4 Tundra Guard Extends Frost Ward, healing Rime based on damage dealt. 1
    Greater Glacial Blast Increases Glacial Blast damage but lengthens its casting time. 1
    Magic Ward Reduces magic damage taken. 1
    5 Cascading Blitz Summons Frost Swallows during Ice Blitz for additional attacks. 3
    Frostweaver’s Wrath Critical chance triggers from Winter Orbs, causing powerful critical strikes. 3
    Soulfrost Torrent Grants a buff to increase critical or tick rate of Freezing Torrent temporarily. 3
    6 Biting Cold Boosts critical strike damage by 10%. 1
    Spirited Fortitude Reduces AoE damage Rime takes by 10%. 1
    Wisdom of the North Reduces cooldowns of key abilities based on Winter Orbs consumed. 1

    Critical Damage Focus

    For maximum damage in the shortest time, use talents that increase critical hit chances and critical damage:

    • Chilling Finesse
    • Coalescing Frost
    • Icy Flow
    • Frostweaver’s Wrath
    • Greater Glacial Blast
    • Glacial Assault
    • Talon’s Edict

    Pure Damage Focus

    If you want your spellcasting to be as effective as possible, prioritize talents like:

    • Burstbolter
    • Avalanche
    • Frostweaver’s Wrath
    • Wisdom of the North
    • Icy Flow
    • Greater Glacial Blast
    • Glacial Assault
    • Navir’s Keeper

    Best Equipment for Rime

    Choose gear that maximizes your damage output, cooldown reduction, and survivability. Recommended gear includes:

    Gear Name Stats Ability Description Suitable Dungeons
    Weapon Asha’s Chronoshift Spire Stamina, Intellect, Expertise, Spirit Creates an arcane anomaly for pulse damage while providing a protective barrier. All dungeons
    Staff Frozen Staff of An’zhyr Stamina, Intellect, Critical Strike, Haste Summons waves of icy projectiles, applying frost effects and curses. All dungeons
    Conduit Void-Touched Conduit Stamina, Intellect, Haste, Expertise Causes damage to be stored and then released explosively. All dungeons
    Relic 1 Ancient Wardstone Intellect, Haste, Expertise Dispels harmful magic effects from allies and Rime. All dungeons
    Relic 2 Sinbinding Stone Agility, Haste, Expertise Reduces damage taken for Rime and nearby allies. All dungeons

    Choosing the right relics boosts the power of your spells and survivability during tough fights, helping Rime deliver maximum damage while staying alive.

  • Completing the Challenge: Solving DPS Weapons in Destiny 2

    Completing the Challenge: Solving DPS Weapons in Destiny 2

    Bungie constantly evolves the meta in Destiny 2, refreshing the weapon landscape each season. This includes extensive balance adjustments, reworkings of Exotic weapons, new Artifact perks, and weapons that surpass earlier powerhouses in damage. For dedicated players, keeping up with what’s effective in the game can be quite demanding.

    This guide is designed to assist returning players in re-entering endgame PvE content by providing a snapshot of the current popular strategies and weapons. We’ll explore effective damage strategies, suggest solid DPS builds, and recommend the best weapons for endgame activities.

    Our focus here is on practical usability rather than theoretical damage figures. For those who want to dive into the numerical details, check out Aegis’ DPS spreadsheet for more in-depth statistics.

    Popular DPS Strategies

    Current Meta Weapons

    As of Episode: Heresy, the prevailing DPS meta in PvE mostly revolves around Linear Fusion Rifles outfitted with the Particle Reconstruction artifact mod. This mod applies up to a 29% weaken effect on targets and allows partial magazine refills, significantly enhancing sustained damage. Using the recently updated The Queenbreaker, which fires in a burst of three rounds, is arguably the simplest and most effective DPS strategy available. Just aim and fire.

    Another favorite this season is the Lord of Wolves. This shotgun delivers more damage than many heavy weapons. Approach your target closely and hip-fire; avoid aiming down sights. The hip-fire DPS is incredibly high and inflicts constant Scorch, leading to frequent Ignitions for more damage. If you pair this with a Storm’s Keep Barricade, you’ll trigger even more Bolt Charge detonations.

    This season, Hezen Vengeance from Vault of Glass has taken the DPS scene by storm. Its timed variant allows the player to double the rocket capacity after activating their Super for 20 seconds, basically offering an enhanced version of Clown Cartridge for free. Most players opt for Envious Arsenal combined with Bait and Switch (or Elemental Honing) to obliterate bosses by firing two rockets, swapping, and repeating. This setup achieves unmatched rocket DPS—no other launcher can compete.

    Meta DPS Builds

    Top Heavy Weapons

    Destiny 2 Hezen Vengeance

    This season, Hezen Vengeance stands out as the premier choice for Heavy DPS. This rocket launcher can essentially double its magazine size, allowing for remarkable damage output. When your Super ends, it stores two rockets for about 20 seconds, making it efficient when used with Envious Arsenal and Bait and Switch.

    For fights where precision damage is viable, consider using The Queenbreaker with the Particle Reconstruction mod. This combination provides a strong weakening effect simply through firing your Linear Fusion Rifle, and The Queenbreaker’s rapid fire rate generally surpasses many long-range DPS options.

    Weapon

    Source

    Notes

    Hezen Vengeance

    Vault of Glass raid

    Envious Arsenal + Bait and Switch (or Elemental Honing)
    Highest rocket DPS in the game. Origin trait doubles its magazine size.

    The Queenbreaker

    Exotic Engrams

    Combat Sights
    Highest DPS for a linear fusion rifle.

    VS Velocity Baton

    Vesper’s Host dungeon

    Envious Arsenal + Bait and Switch
    Best DPS for a grenade launcher. High burst damage but lower overall.

    Grand Overture

    Exotic Kiosk

    Shots charge a rocket barrage. Hold reload to fire the barrage.
    Outstanding burst DPS; good ongoing damage otherwise.

    Scintillation

    Nightfall reward

    Rewind Rounds + Bait and Switch
    Great alternative to Queenbreaker without using your Exotic slot.

    Gjallarhorn

    And Out Fly The Wolves quest

    Grants nearby rocket launchers Wolfpack Rounds, increasing DPS significantly.
    Essential for optimal rocket DPS in six-player activities.

    Winterbite

    Strider quest

    Melee attacks deal increased damage and inflict Slow.
    Great sword alternative for specific scenarios, such as Ecthar in Ghosts of the Deep.

    Top Special Weapons

    Guardian shooting Lord of Wolves in Destiny 2.

    Special weapon damage is surprisingly competitive in the current game environment. Lord of Wolves stands out here, capable of sustaining damage comparable to a rocket launcher while delivering even more total damage. If masterworked, it will also trigger Ignitions during damage phases, boosting overall damage output.

    Other solid choices include Cloudstrike for backup damage, Praedyth’s Revenge for more sustained performance, and Unvoiced for strong close-range DPS.

    Weapon

    Source

    Notes

    Lord of Wolves

    Exotic Engrams

    Increased damage when hip-firing, inflict Scorch with the catalyst.
    Outstanding close-range DPS.

    Cloudstrike

    Empire Hunts

    Rapid precision hits spawn a lightning strike.
    Effective as a backup DPS choice.

    Ergo Sum

    Pale Heart content

    Features random Exotic perks.
    Can provide nearby swords with Wolfpack Rounds.

    New Land Beyond

    Edge of Fate preorder bonus

    Damage scales based on precision hits.
    Strong overall damage output.

    Praedyth’s Revenge

    Vault of Glass raid

    Envious Arsenal or Fourth Time’s the Charm + Bait and Switch or Elemental Honing
    Best DPS among Legendary snipers.

    Unvoiced

    Sundered Doctrine dungeon

    Redirection + Bait and Switch
    Highest DPS from a Legendary shotgun with ramped Redirection.

    Izanagi’s Burden

    Exotic Kiosk

    Holding reload transforms the magazine into a high-damage shot.
    Excellent burst damage option.

    Still Hunt

    Wild Card quest

    Precision hits build energy, allowing you to load Golden Gun rounds.
    Good for Hunters with Celestial Nighthawk.

    Top Primary Weapons

    Destiny 2 Outbreak Perfected Exotic

    While primary weapons aren’t typically used for boss damage, there are cases where having one as a backup is advantageous. Lucky Pants enable Hunters to use 180 and 260 RPM hand cannons effectively in place of heavy weapons. Ignoring Exotic armor, standout options include Outbreak Perfected when used strategically within a team, and Barrow-Dyad with its Taken Ambition perk. The Final Warning is also a solid choice if you’re comfortable with its unique charge-up mechanic.

    Weapon

    Source

    Notes

    Outbreak Perfected

    Zero Hour Exotic mission

    Shots generate nanites that attach to targets, boosting damage.
    Effective DPS when multiple team members use it.

    Final Warning

    The Final Strand quest

    Rapid precision hits generate a lightning strike.
    Useful as a supplementary DPS option.

    Barrow-Dyad

    Episode: Heresy content

    Taken Ambition launches high-damage projectiles, charging with sustained damage.
    Effective DPS when paired with Peacekeepers.

    Malfeasance

    Gambit quest

    Shots embed in the target; five projectiles trigger an explosion.
    Good damage output when paired with Lucky Pants.

  • FFXIV DPS Class Rankings: A Complete Tier List

    FFXIV DPS Class Rankings: A Complete Tier List

    Final Fantasy 14 boasts an extensive selection of DPS classes, referred to as Jobs within the game, each providing unique gameplay styles. Whether you prefer ranged attacks, melee combat, magical spells, or physical strikes, there’s something for everyone. The choice of what class to play largely hinges on personal preference, as well as the class’s effectiveness in relation to updates and balancing changes that come with new patches.

    By evaluating and ranking the DPS classes, we aim to guide you in selecting the best option for tackling the Savage raids featured in Dawntrail, or to help you gauge the strengths and weaknesses of your chosen class.

    Understanding Tier List Rankings


    When ranking the DPS classes in Final Fantasy 14, it’s crucial to assess their damage output, but other factors also play a significant role. You might deal impressive damage, yet your team’s effectiveness hinges on your contributions to group dynamics during boss battles.

    For this evaluation, utility will also be factored in when measuring the quality of each class. Below is an overview of the tier classifications:

    • S Tier – These are the top performers regarding both damage and utility, balancing either attribute effectively.
    • A Tier – Strong classes that provide substantial contributions to the team, although their damage output may be somewhat limited.
    • B Tier – Reliable classes that are often complex or less effective compared to the superior options.

    This list is derived from analyzing each class’s performance in high-end content, including Savage raids, Extreme trials, and Ultimate challenges. While you might not be planning to engage in this challenging content, the disparities between classes often become noticeable in these environments.

    If you’re primarily engaging in casual content, like daily duty roulettes, you needn’t stress overly about which class performs better.

    S-Tier DPS Classes

    Pictomancer casting Striking Muse in Final Fantasy 14

    The S Tier features one top-performing class from each type. Classes within this tier are chosen based on their remarkable performance, especially in damage output, because success in a duty largely revolves around defeating bosses.

    However, a class may not excel alone but possesses the right tools to enhance the performance of teammates.

    Name

    Type

    Description

    Pictomancer

    Caster

    Exceptional damage output accompanied by strong team buffs.

    Viper

    Melee

    Delivers high damage and is user-friendly.

    Dragoon

    Melee

    Consistently high damage output paired with valuable buffs.

    Bard

    Physical Ranged

    Impressive damage and a variety of utility skills.

    Since the introduction of Pictomancer in Dawntrail, it has taken the lead in the DPS arena with its array of powerful spells complemented by useful abilities. One standout level 100 spell, “Star Prism,” not only deals massive damage but also heals allies within its range.

    Although occasionally outshined, Dragoon remains a long-standing melee DPS favorite, capable of inflicting significant damage. Recent adjustments have simplified its gameplay, making it more accessible. Don’t overlook Dragoon’s signature buff, Battle Litany.

    Despite the strengths of S-Tier classes, it’s essential to learn and study the mechanics of fights. You can’t fully leverage their power without understanding the right moments to deploy your skills.

    While Viper may not have dominated the raid scene as much as Pictomancer, this new melee class has earned its place as one of the strongest in the game. Its drawback is a lack of party-wide buffs, but the damage it delivers compensates for its limited utility.

    Conversely, the Bard class shines with its unique songs that provide raid buffs, alongside solid damage output and extensive utility, making it the best option among physical ranged DPS characters.

    A-Tier DPS Classes

    Monk using Riddle of Wind in Final Fantasy 14

    Final Fantasy 14 offers numerous classes that can handle endgame content. However, certain unique traits prevent them from reaching S-Tier status. A-Tier classes may approach the damage output of their superior counterparts, yet they tend to fall short in effectiveness.

    Name

    Type

    Description

    Dancer

    Physical Ranged

    User-friendly with great buffs but less powerful and flexible compared to Bard.

    Monk

    Melee

    Solid melee class with excellent raid buffs but has a rigid and punishing rotation.

    Samurai

    Melee

    Impressive burst damage, but challenging to master and doesn’t contribute to the group.

    Ninja

    Melee

    Provides valuable support to the party but lacks in damage output.

    Summoner

    Caster

    Easier to play with great party tools but falls short in damage.

    Red Mage

    Caster

    More complex but offers excellent utility along with reasonable damage.

    The Dancer is an attractive class due to its mobility and buffs, but it relies heavily on synergies with partners to make up for its lower damage, which can be challenging in endgame scenarios. While it’s more straightforward to play than Bard, it also adds extra responsibility for its companion.

    If you’re new to Final Fantasy 14 and want to try a DPS class, consider picking one from this tier. They will help you understand how to effectively play as a melee, caster, and ranged character.

    Meanwhile, classes like Monk, Samurai, and Ninja fall into this tier not because they are overly difficult to play but because they cannot outperform options like Viper and Dragoon.

    These classes excel in providing party buffs or dealing substantial damage, but specific limitations, such as complexity and adaptability during battles, hinder their effectiveness.

    Summoner and Red Mage share the A-Tier position for casters due to their similarities. Both classes provide excellent raid buffs—Red Mage’s Embolden and Summoner’s Searing Light—alongside skills capable of reviving fallen allies and healing. While Red Mage tends to be more mobile and easier to control, Summoner offers a more engaging and adaptable gameplay experience.

    B-Tier DPS Classes

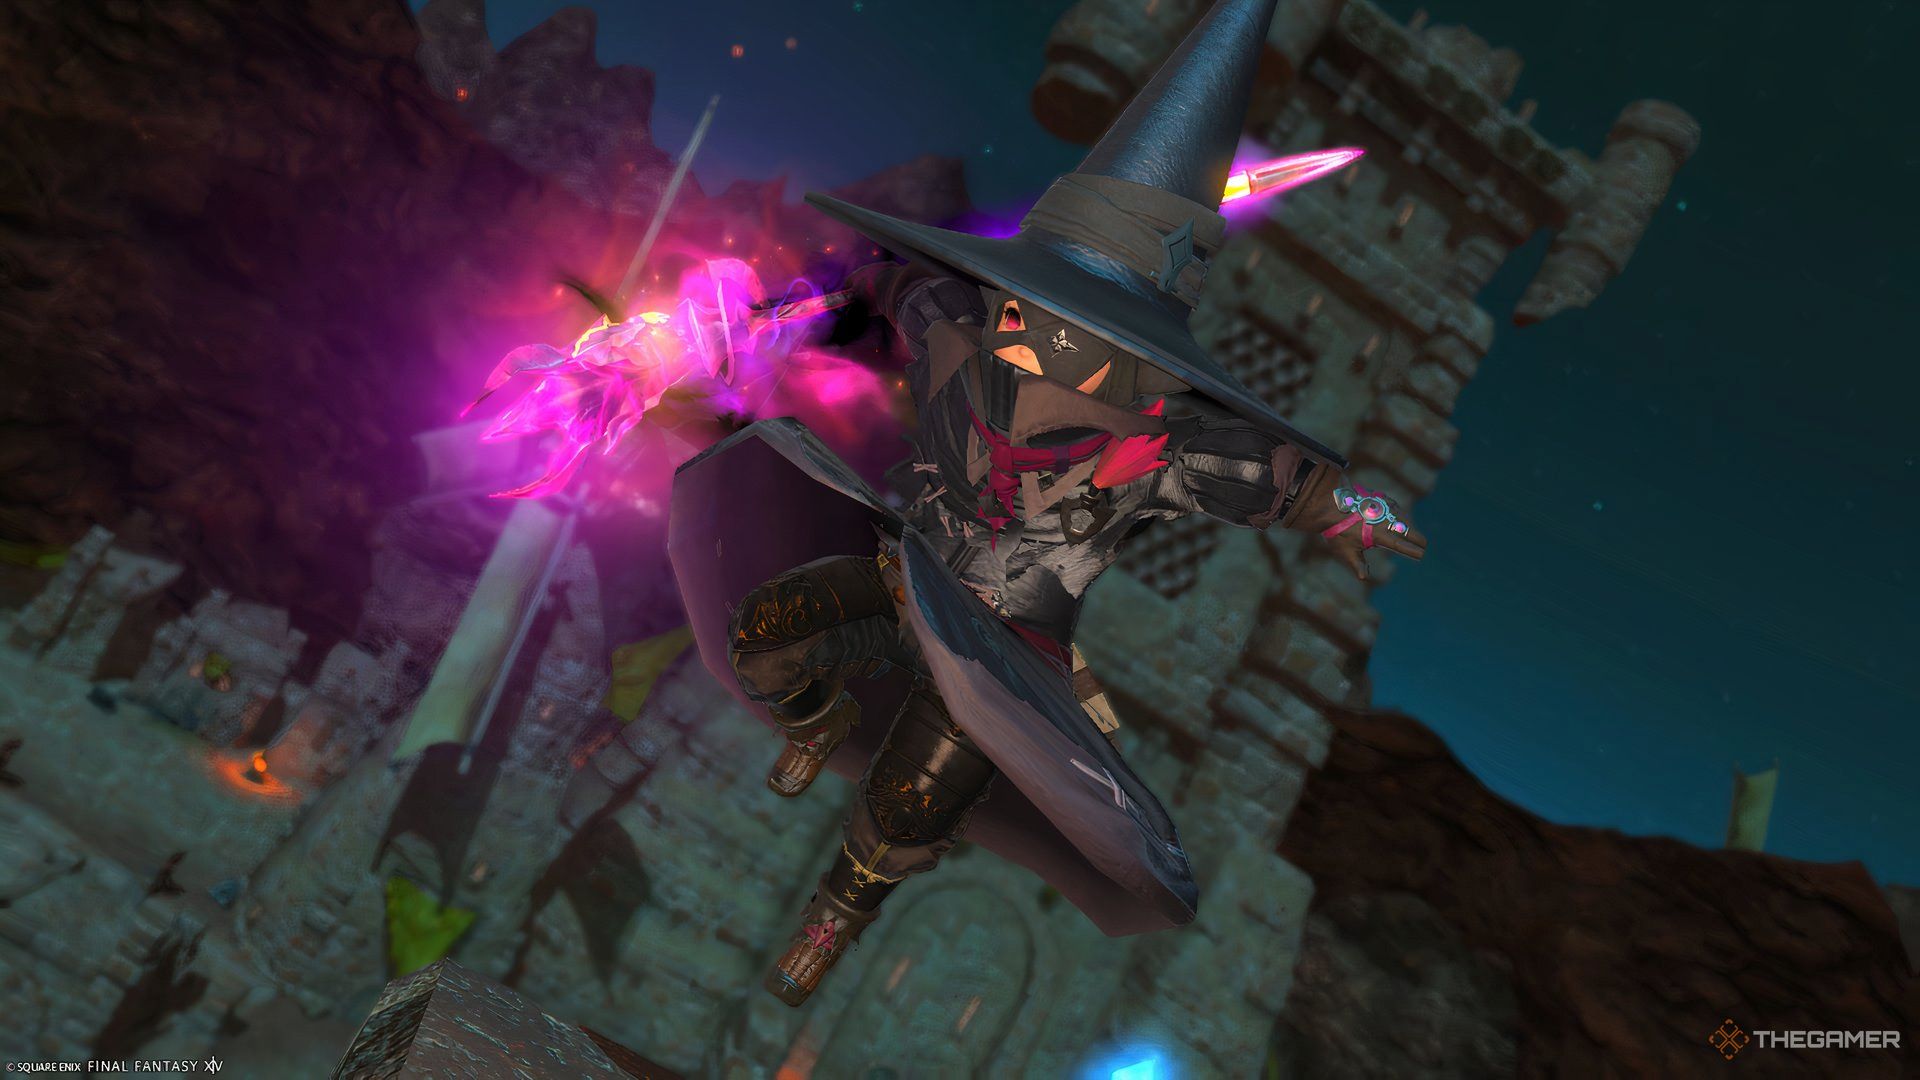
    Black Mage leaping from a building in Final Fantasy 14

    If you’re thinking about choosing a B-Tier DPS class, keep in mind that while these classes can successfully tackle endgame content, they represent a more challenging pathway. B-Tier classes can perform well if played flawlessly and mastered over time; however, the level of effort needed to achieve impressive damage often seems unjustified.

    Name

    Type

    Description

    Reaper

    Melee

    Less complex than Monk but lacks both damage and utilities.

    Machinist

    Physical Ranged

    Achieving its full potential requires flawless execution and minimal support for the group.

    Black Mage

    Caster

    A powerful class with no raid buffs; its gameplay is complex and challenging.

    The differences between Reaper and other melee options are slight, but enough to make it less optimal compared to Monk.

    Although Reaper offers powerful abilities with high damage, excelling at it requires adept preparation for short burst windows. While it does provide some utility by boosting party damage with Arcane Circle, this doesn’t fully offset its other challenges.

    Having the Machinist in the B-Tier may seem surprising, given its potential for damage output, yet executing it while maintaining consistent performance is its major hurdle due to the complexity and randomness of its burst damage.

    Lastly, the Black Mage, one of the most formidable caster classes in Final Fantasy 14, lands in this tier. Its pure damage potential is significant, especially through its focused single-target spells.

    However, it is also notably difficult to master, given its high dependence on positioning and execution of spells, while lacking any supportive abilities to aid the party. Mistakes are heavily penalized, making it challenging to justify its inclusion in group content.