الوسم: do

  • First Steps for Completing Hotel Architecture and Solving Design Challenges

    First Steps for Completing Hotel Architecture and Solving Design Challenges

    Managing sim games isn’t a new idea, but Hotel Architect offers a fresh experience by placing you in the role of a hotel owner. It provides both specific scenarios to manage and a sandbox mode where you can build the five-star hotel you’ve always dreamed of.

    You’ll need to oversee different types of staff, add amenities to satisfy a variety of guests, design and decorate each hotel floor, and do all this without falling into debt or running out of money. Whether you’re new to this game or the genre, here are some tips to help you understand the systems and ensure your hotel management journey goes smoothly.

    Upgrade Construction Crew Size and Worker Speed First

    In Hotel Architect, construction workers are essential—they build everything from new foundations and staff equipment to room decorations. However, construction takes in-game time; it’s not instant.

    You can make this process faster by upgrading your large construction crew and increasing worker speed. Investing in these upgrades boosts their speed by up to 140%, making it quicker to add new floors and zones. Although these upgrades cost more initially, they save time in the long run and help you unlock new facilities that increase your revenue.

    Avoid Building Big Sections Early On

    While expanding your hotel to accommodate more guests is tempting, it’s best not to rush into large-scale construction early in the game. If your larger crews aren’t yet unlocked or upgraded, building too much at once can slow down progress.

    Remember, new hotel areas are built gradually over time, not instantly. Focus on small, manageable sections to avoid missing important elements and to keep your operations running smoothly.

    Tip: Place a Material Supply near your main construction zone before starting major builds. This prevents delays caused by waiting for supplies and helps keep your project moving efficiently.

    Monitor Guest Review Scores

    Your goal is to develop a five-star hotel, which depends heavily on guest feedback. Positive reviews from guests and critics are crucial.

    You can view recent reviews by clicking on the thumbs-up icon next to your star level. The reviews are color-coded: green for ratings above 80%, yellow for around 60%, and orange or red for poor scores. Regularly checking these helps you identify areas needing improvement to boost your overall ratings.

    Note: Currently, the game doesn’t offer colorblind options. Hovering over review categories can show the exact percentage if you prefer precise information.

    Prioritize Staff Facilities Over Upgrades for Guests

    Each scenario in the game emphasizes certain guest types based on location. While it’s tempting to upgrade amenities based on guest needs first, it’s more effective to improve staff facilities early on.

    Upgrading staff equipment makes their tasks easier and faster, which helps maintain cleanliness and other standards—especially when you have many rooms. Faster staff performance prevents issues like towel shortages or trash buildup, which can impact guest reviews negatively.

    Check Your Notification Log Regularly

    With multiple floors and ongoing construction, it’s easy to overlook small issues. The in-game notification log, accessible via the paper and bell icon at the bottom right, details all occurrences—guest reviews, supply shortages, equipment failures, maintenance problems, and more.

    Staying on top of these notifications allows you to address problems early before they escalate, keeping your hotel running smoothly and maintaining high guest satisfaction.

    Use Sandbox or Free Play Modes for Practice

    Tutorial scenarios are helpful but often limited in scope and resources. To experiment freely, use the Sandbox or Free Play modes, which can be selected from the main menu.

    Sandbox mode lets you customize location, starting cash, and game settings, while Free Play offers a similar experience within a scenario’s environment but with more freedom. Just be cautious when saving, as Free Play files share the same save slot as scenarios, so avoid overwriting important data.

    Set Up a Maintenance Room Early

    Building your hotel from scratch in Free Play or Sandbox mode gives you full creative control, including room layout. However, setting up a maintenance room right away is vital.

    Without a dedicated maintenance space, you may find yourself running out of supplies for your restaurant, bar, snack machines, and linens. Properly staffed maintenance ensures your hotel runs without shortages, helping you avoid guest complaints and maintain a good review score.

    Spend Upgrade Points in Their Own Tier

    Players earn upgrade points from attracting specific guest types, which are used to upgrade various aspects of your hotel. The game has five tiers of upgrades:

    • Tier 1: Backpackers
    • Tier 2: Sports enthusiasts
    • Tier 3: Sunbathers and Business travelers
    • Tier 4: Young guests (Brats)
    • Tier 5: Upper-class guests

    Points can only be used in their respective tiers or lower ones. To maximize efficiency, spend points in the correct tier, as higher-tier points can’t be used for lower-tier upgrades, and misusing points cannot be reversed unless more guests of that type check out. Planning upgrades carefully ensures you get the most benefit from your points.

    Keep an Eye on Guest Feedback

    Your hotel’s success depends heavily on guest reviews. Use the review panel, accessed by clicking the thumbs-up icon, to see recent scores and comments. Green ratings (above 80%) indicate good performance, yellow (around 60%) suggest areas to improve, and red or orange highlight urgent issues.

    Regularly reviewing this feedback helps you pinpoint what needs fixing, whether it’s amenities, staff performance, or cleanliness, guiding your efforts to maintain a top-rated hotel.

  • How To Tame Pets in Crimson Desert and What Completing Can Do for You

    How To Tame Pets in Crimson Desert and What Completing Can Do for You

    During your travels through Crimson Desert’s Pywel region, you’ll find that stray cats and dogs are some of the most helpful allies. While they won’t fight enemies or soak up damage like weapons or armor, they save you plenty of time after battles. However, catching and keeping one requires patience and the right snacks to build trust quickly.

    Here’s everything you need to know about finding, taming, and making the most of these animal companions in Crimson Desert.


    How to Tame Cats and Dogs

    You can earn cats or dogs as pets by gradually building their trust through feeding and petting. Each animal has a trust meter starting at zero and needs to reach 100 to become your pet. Trust increases through daily limits on petting and feeding, which reset at midnight in the game. Patience is key.

    Getting Started:
    The first animals you’ll encounter are stray cats and dogs wandering Hernand, the city you arrive in early. This makes it easy to begin bonding before heading further into Pywel.


    Petting

    Petting increases trust by +5 points per interaction, with a daily cap of +25 trust. You can pet each animal up to five times a day.

    • For dogs: Walk up and hold the interaction button when prompted.
    • For cats: You need to pick them up first by holding the button, then press again to pet once they’re in your arms.

    Note that with a cap of +25 trust from petting per day, you’ll also need to feed your pets for faster taming.


    Feeding

    Dropping food near an animal is the quickest way to earn trust and unlock a new pet.

    • To feed: Open your inventory and discard a food item in front of the animal; it will come over and eat.
    • Each pet can only be fed three times per day, so choose your food carefully.

    Different foods provide varying trust boosts. Regular food grants +10 trust, but each animal has a favorite food that can give +35 trust per feeding—enough to tame a dog in a single day if you feed it three times and pet it five times.

    Best Locations and Favorite Foods

    Most cats and dogs can be found throughout Pywel, though each breed has preferred regions and foods. For example:

    • Cats: Found in Hernand (with squid as a favorite food) and desert regions (with eggs).

    • Dogs: Found near Hernand (with sweet potatoes) and Demeniss villages (with lean bird meat).

    Feeding pets at around 10 p.m. in game maximizes trust gain since counters reset at midnight, allowing you to speed up taming without wasting in-game days.


    Claiming Your Pet

    When trust hits 100, a prompt appears allowing you to claim the animal by holding the select button and choosing “Claim.” Your new pet is now part of your companions.

    You can keep up to 30 pets in total, but only one can be active and follow you at a time. Excess pets are stored at Greymane Camp, and you can unregister them via a menu—just remember, unregistering is permanent.

    A helpful tutorial for claiming stray dogs is available through the “The Greymanes’ New Fangs” quest from Chapter 4 onward, guiding you through the process with your companion Naira.


    What Pets Can Do for You

    While animals won’t attack enemies or draw aggression, they excel at looting. An active pet will automatically run across the battlefield and gather items from defeated foes, saving you time.

    However, pets have no loot filter—they’ll pick up everything they can reach, including junk, so you’ll need to monitor your inventory regularly.

    Pets aren’t combat fighters—they can take damage if enemies attack them, and if injured, they won’t be able to loot properly. To heal them, clear the area and use the Healing Force Palm skill.


    Dressing Up Your Pet

    Pets can be outfitted with cosmetic gear like hats, outfits, and armor, mainly for fun and aesthetics. These items are available at Pororin shops—one inside Pororin Forest Village (after completing the “The Unreachable Village” quest) and another in southeastern Demeniss.

    The gear doesn’t provide gameplay advantages; it’s purely for visual customization in photo mode or when collecting gear from defeated enemies.

  • What Should You Do With Benny in Vampire: The Masquerade? Completing or Solving?

    What Should You Do With Benny in Vampire: The Masquerade? Completing or Solving?

    As you explore Seattle in Vampire: The Masquerade – Bloodlines 2, you’ll find yourself repeatedly working as the go-to person for various tasks in the vampire world. As you advance in the game, new main quests keep opening up, each demanding different actions from you.

    Some quests may have multiple endings based on your decisions, which can influence how your playthrough concludes. One example is the Star Of Cold Aspect quest, where you get to choose what to do with Benny at the end.

    How to Start the Star Of Cold Aspect Quest

    To begin this quest, you need to progress quite far into the main story. It’s a main quest, so it’s impossible to miss. First, you must enter the Weaver Tower and climb to meet Prince Ryong. Once you gain her trust a bit, she’ll ask you to meet her at Makom Bar the following day. Before that meeting, rest at your haven and go through Fabien’s initial flashback. Once you finish the flashback, you’ll wake up at your haven, and the quest will start.

    Finding Benny and the mess he left behind

    After meeting Prince Ryong at Makom Bar, she will tell you about the mess Benny left near the back entrance of the building. She asks you to handle it. To locate the mess, take the path on the right where Ryong was sitting—this leads you to the same place where Fabien’s flashback happened, where you’ll find a corpse against a large truck. Interact with the body to pick up Benny’s scent, then use your heightened senses to track his trail. This trail leads you to the bottom of the map behind the Glacier Hotel, where you’ll have to fight some Anarchs.

    How to Find Benny

    After defeating the Anarchs near the Glacier Hotel, check a nearby dumpster with a marker to find another body inside. This person will tell you Benny is hiding at his haven, an auto repair shop marked on your map. Head to this location, which is the next step in your quest.

    Entering Benny’s Haven

    When you arrive at Benny’s haven, the front door will be locked. Use your heightened senses to see scratch marks leading to the roof of the shop, where you’ll find a window. Climb through this window to meet Max, who will tell you Benny’s location. You can also choose a dialogue option to comfort him by saying, “You are not to blame.”

    Reaching Benny’s Location

    Follow the quest marker to an area called the Western construction site. The site will be filled with Anarchs, but you don’t have to fight them all. Instead, sneak past and use distraction tactics, like throwing a bottle or using abilities to lure enemies away. Using a special ability that makes enemies’ blood boil and attracts others around them can be especially helpful here.

    Once you’ve diverted the enemies, get close to the door and trigger a dialogue. This will highlight Benny’s trail when you use your heightened senses, showing it in white.

    Reaching Benny in the Construction Site

    Follow the scent into the building, descending a few floors to find Benny trapped behind a cement wall. Several enemies will be present — the best approach is stealth. Use gas cylinders scattered around to take out multiple enemies at once if you can group them together. Against tougher enemies, these cylinders are your best bet.

    At the bottom of the building, you’ll confront Benny, who is covered in cement. Approaching him triggers a fight. Benny will be your first boss fight in the game, with his HP bar displayed at the top of the screen. You must reduce his health three times to defeat him. He mainly uses two attacks: a claw slash after a charging move and a jumping kick followed by a slash. Benny can also dash to your location if you’re too far away, so stay alert.

    To defeat him efficiently, look for blue objects like guns in the environment with your heightened senses. These can deal significant damage. When phase two and three begin, four Anarchs will spawn and attack. It’s wise to draw their focus onto Benny first, letting them weaken each other, and then deal with the remaining enemies. Benny’s third-phase stomp attack deals massive damage in an area, so keep your distance during this move.

    What to Do After Defeating Benny

    Once Benny is defeated, Katsumi will arrive and give you a choice: either take Benny to Ryong or leave him with Katsumi. Choosing to take Benny with you doesn’t lead to a fight with Katsumi, but she will become angry. Leaving Benny with Katsumi will disappoint Ryong, but your decision may influence the game’s ending. Regardless, you will become the Sheriff of Seattle. You can also choose to say, “Alright. Let us talk,” which will earn a positive reaction from Katsumi.

  • All Special Evolutions and How to Complete Them in Pokemon Legends: Z-A

    All Special Evolutions and How to Complete Them in Pokemon Legends: Z-A

    With over 200 Pokémon in Pokémon Legends: Z-A, completing the Pokédex can be quite challenging. Most Pokémon can be caught or evolved by gaining experience levels, but some require specific conditions to evolve. These requirements vary from simple tasks like using an evolution stone to more complex steps such as reaching a certain friendship level or even flipping your Nintendo Switch upside down. While these tasks aren’t necessarily difficult, Pokémon games don’t always clearly explain what’s needed for each Pokémon to evolve, so players often need a guide to find out.

    All Pokémon That Require an Evolution Stone
    Using an evolution stone is the easiest special evolution method. If a Pokémon needs a stone, you just buy or find it and then use it from your inventory. The Pokémon will evolve immediately once you do. Here is a list of Pokémon in Pokémon Legends: Z-A that need a stone to evolve:

    Starting Pokémon Evolution Stone Evolved Pokémon
    Pikachu Thunder Stone Raichu
    Roselia Shiny Stone Roserade
    Floette Shiny Stone Florges
    Staryu Water Stone Starmie
    Clefairy Moon Stone Clefable
    Doublade Dusk Stone Aegislash
    Weepinbell Leaf Stone Victreebel
    Pansage Leaf Stone Simisage
    Pansear Fire Stone Simisear
    Panpour Water Stone Simipour
    Kirlia (male) Dawn Stone Gallade
    Eevee Fire Stone Flareon
    Eevee Thunder Stone Jolteon
    Eevee Water Stone Vaporeon
    Eevee Leaf Stone Leafeon
    Eevee Ice Stone Glaceon
    Elektrik (Electrike) Thunder Stone Elektross
    Snorunt (female) Dawn Stone Frosslass
    Lampent Dusk Stone Chandelure
    Helioptile Thunder Stone Heliolisk

    All Pokémon That Must Be Traded to Evolve
    Trading is another common way to evolve Pokémon, especially those that don’t evolve through leveling or stones. Typically, this involves sending the Pokémon to someone else while holding an item, then trading it back to you. Since not everyone has someone to trade with, the game assigns special trade codes for each trade-evolved Pokémon. By inputting these codes during Link Play trades, you can trade for the Pokémon you need, and it will evolve once received. You won’t get the exact Pokémon sent out, but you’ll get a similar one that will evolve upon reception.

    Starting Pokémon Trade Code & Requirements Evolved Pokémon
    Kadabra 0063-0063 (Trade with code) Alakazam
    Haunter 0066-0066 Gengar
    Spritzee 0096-0096 (Must hold Sachet) Aromatisse
    Swirlix 0098-0098 (Must hold Whipped Dream) Slurpuff
    Machoke 0126-0126 Machamp
    Slowpoke 0139-0139 (Must hold King’s Rock) Slowking
    Scyther 0176-0176 (Must hold Metal Coat) Scizor
    Phantump 0182-0182 Trevenant
    Onix 0197-0197 (Must hold Metal Coat) Steelix
    Pumpkaboo 0204-0204 Gourgeist

    Most of these traded Pokémon require specific items that can be bought or earned through missions.

    All Pokémon That Require High Friendship to Evolve
    Friendship is a more subtle evolution method. You increase friendship by bonding with your Pokémon, mainly by adding them to your party and visiting a Café. When you order food and your Pokémon is the active one, you’ll sit at the same table—doing this three or four times usually is enough for the Pokémon to evolve.

    Starting Pokémon Additional Conditions Evolved Pokémon
    Budew Must be daytime Roselia
    Pichu Any time Pikachu
    Cleffa Any time Clefable
    Eevee Any time + know Fairy move Sylveon
    Eevee Daytime + not Fairy move Espeon
    Eevee Nighttime + not Fairy move Umbreon
    Buneary Any time Lopunny
    Riolu Must be daytime Lucario

    All Pokémon with Unique Evolution Conditions
    Some Pokémon have very specific evolution requirements that are unique to them. These conditions are usually based on individual traits or actions, such as flipping the Switch upside down or being in a certain weather condition.

    Starting Pokémon Unique Conditions Evolved Pokémon
    Inkay Level 30+, flip Switch upside down in handheld mode Malamar
    Sligoo Level 40+, raining Goodra
    Pancham Level 32+, have a Dark-type in party Pangoro
    Tyrunt Level 39, daytime Tyrantrum
    Amaura Level 39, nighttime Aurorus

    Note: When trying to evolve Inkay in handheld mode, your Switch must be in handheld mode with Joy-Cons attached and no other controllers connected. The upside-down motion must be recognized correctly for the evolution to trigger, even if no arrow icon appears.

    While some of these requirements can be a bit costly or tricky, completing all of them is necessary if you’re aiming to fill your Pokémon Legends: Z-A Pokédex. If you’re unable to meet certain conditions, trading with other players for fully evolved Pokémon is always an option.

  • How to Claim All Crests and Their Purpose in Hollow Knight: Silksong

    How to Claim All Crests and Their Purpose in Hollow Knight: Silksong

    In Hollow Knight: Silksong, crests are a key mechanic shaping how you explore, fight, and move around. Each crest provides a different set of moves, tools, and special effects, making them stand out in Pharloom’s most dangerous and isolated regions.

    Every time you find a new crest for the first time, you’re likely to want to try out its unique features. No crest is strictly better than the others, so each one offers something for different playing styles. If one crest doesn’t suit you, trying another might help sharpen your skills and discover what works best for your hunting approach.

    What Are Crests?

    Crests are special templates that influence various game mechanics. Learning what each crest does is vital for your success. Essentially, crests affect:

    • Your moveset
    • Your ability bindings
    • The types and slots of tools you can equip

    You can view and change your crests anytime while sitting on a bench. To do this, access the Tools menu, then press the button indicated on the bottom left of your screen to open the crest menu and switch between them.

    While a crest is active, you can unlock additional tool slots by using Memory Lockets. Hold down the interact button over a locked slot to use a Memory Locket and permanently unlock that slot.

    All Crest Effects

    There are seven crests, each with distinct movesets, load-outs, and effects. Major aspects like binding skills and pogo directions are important considerations when choosing a crest to leave a bench with.

    Crest Red Slots Blue Slots Yellow Slots Silk Skill Slots Charge Attack Damage Flintslate Damage Pogo Direction Moveset Changes Special Effects
    Hunter 2 2 2 1 58/70/76 88 Diagonal N/A Successive attacks boost damage on Needle attacks.
    Beast 2 – 2 1 52 78 Arc (Multi-Hit) Short-range claws, devastating appearance Attack heals with each successful hit during a short window; attacks deal more damage during binding.
    Reaper 2 2 2 1 65 100 Down Wider attack areas Attacks generate more silk after binding.
    Wanderer 1 2 3 1 52 78 Down Faster attacks Shorter nail; critical damage possible with 9+ silk stacks.
    Architect 3 2 2 – 65 100 Down (Multi-Hit) Spinning corkscrew moves Binding creates tools.
    Witch 2 3 – 1 102 156 Down (Multi-Hit) Wide silk arc; charge attacks hit multiple times Binding heal explodes to deal damage and restore health.
    Shaman – 2 – 3 42 N/A Diagonal Generates short-range projectiles Silk Skill damage greatly increased, but binding requires being on the ground.

    How to Obtain Each Crest

    You unlock each crest by completing specific challenges or exploring certain areas. Collecting all seven will earn you the achievement “Consumed,” and provides versatility in handling various challenges.

    • Witch & Shaman crests are ideal for boss fights.
    • Architect is useful against groups or multiple enemies.
    • Wanderer & Reaper are great for widespread exploration and long trips between benches.
    • Hunter serves well as a reliable all-rounder.

    It’s recommended to unlock all crests to see which suits your playstyle best, keeping in mind that flexibility can be a game-changer.

    How to Get the Beast Crest

    Early in the game, in Hunter’s March, on the far right above Deep Docks, you’ll find a hidden chapel. Inside, guarded by the formidable Savage Beastfly, this crest is yours once you defeat it. Be prepared for a tough fight, but winning grants access to the coveted Beast Crest.

    How to Get the Reaper Crest

    Easily located during normal exploration in Greymoor, just above the Moorwing fight on the far left side, this crest requires no fights. A simple platforming ascent will lead you to a chapel. Reaching it before the Moorwing fight is recommended, as its pogo boost makes that fight easier.

    How to Get the Wanderer Crest

    This crest is in a remote part of Bonegrave, away from all fights. After acquiring Cling Grip, head to Bone Bottom, take the elevator up to Moss Home, and follow the route to the Chapel of the Wayfarer:

    1. Head west toward Wormways.
    2. Drop down instead of exiting at the Wormways, use Drifter’s Cloak to glide left across ledges.
    3. Climb the wall and continue west to a lake.
    4. The chapel is on the west side of the lake. Opening the shortcut door on the east side is wise in case of enemies.

    How to Get the Architect Crest

    Found in the Underworks of the Citadel, just above the Cauldron area, the Twelfth Architect sells the Architect’s Key for 110 rosaries, provided you have enough red tools to barter with. Use the key to unlock the door above the Twelfth Architect to claim the crest.

    How to Get the Witch Crest

    This is the most complex crest to obtain, requiring you to finish the Pollip Heart quest in Shellwood. After that, you must locate the Twisted Bud in Bilewater and bring it to Greyroot’s home, infesting you with a parasite. This process prevents healing and may impede Silk Skills, but it unlocks interactions with NPCs and ultimately allows you to access the crest.

    How to Get the Shaman Crest

    Accessible only during Act Three, it requires descending into the Abyss with Silk Soar and reaching the Ruined Chapel where the Snail Shamans are. Use Silk Soar to navigate through hidden paths and find a breakable wall concealed behind what seem to be dead ends. Inside, the crest awaits at the very end.

    Upgrading Your Crests

    Progressively, Eva can enhance your crests, boosting their effects. These upgrades typically require rosaries and are accessible at the Weavenest Atla, located in Moss Grove. You need to disable the Twisted Bud infection first and reach her chamber to gain her blessings, including increased attack power and tool integration.

    Once all crests are gathered and upgraded, you can return to Eva, accept her final wish, and receive the Sylphsong. This ability allows passive Silk regeneration at benches, similar to the Blessing from Salubra in the original game.

  • What Does the Mushroom Man Do in No, I’m Not a Human? Completing and Solving

    What Does the Mushroom Man Do in No, I’m Not a Human? Completing and Solving

    There are ten different endings in “No, I’m Not a Human,” and figuring out how to unlock each one can be quite tricky. Since the game relies heavily on luck—such as which visitors arrive and what circumstances unfold—it becomes even more challenging to intentionally trigger the endings you want.

    To unlock the “Shroom or Doom” ending, you need to perform the mushroom ritual, which involves following the instructions given by the Mushroom Man, also known as the Mushroom Eater. Here’s what you need to do:

    How To Perform The Mushroom Ritual

    Get the Cat into Your House
    Before talking to the Mushroom Man, you must allow the Cat Lady into your house on the fourth night. She is a guaranteed visitor, but you will need to kill her the next day. Letting her in is the only way to get a cat inside. Having the cat in your home causes it to scratch up the carpet, revealing a basement door that is essential for this ending.

    Wait for the Mushroom Man to Visit
    The Mushroom Man has a chance of appearing on the sixth night, during which you’ll see the city burning through your peephole, and no other visitors will knock on your door. If he shows up, it’s definitely him knocking on the sixth night. After his visit, a piece of paper appears on your bedside table containing poem clues that guide you through the ritual.

    How To Get The Mushroom

    The day after the Mushroom Man visits, go into the basement. On your left, you’ll find a mushroom growing among the potatoes. Interact with it and mention that you put it in the fridge. Then, head upstairs, go into your kitchen, and select the mushroom from the fridge to eat it. Continue with your day as usual and wait until the next daytime.

    Where To Find The Apple

    The day after you eat the mushroom, return to the Hall (the room with the crucifix). On the shelf beside the toy, you’ll see an apple had appeared. Click on it to eat it automatically. Afterward, wait for the next day.

    Where To Find The Clock

    The day after eating the apple, go into your Bedroom. A clock will appear above your bed. Click to set the time to 12 o’clock. This is the final step indicated by the poem’s clues.

    Once you complete these steps, the Mushroom Man will visit you that evening to applaud your adherence to the instructions. The following night, he will ask if you’re willing to go to Mushroom Land. Agreeing to go will trigger the “Shroom or Doom” ending. Declining will allow the game to continue normally without this ending.

    Additional Notes

    The Mushroom Man’s appearance used to occur only after unlocking some other endings, but this was changed with a game patch. After he visits, a note appears on your bedside table with instructions in poem form, which you must follow precisely to progress. If you fail to follow his guidance, he will return later to scold you for ignoring his warnings.

  • Where to Find All Perks and What They Do in Reckoning for CoD: Black Ops 6 Zombies

    Where to Find All Perks and What They Do in Reckoning for CoD: Black Ops 6 Zombies

    The last Zombies map for Call of Duty: Black Ops 6 is now available. Called Reckoning, it wraps up the Zombies storyline and includes many secret Easter eggs and gameplay features. The map has two towers, which means you’ll need to use gravity pads and teleporters to move around.

    Finding the perks on this map can be challenging since the in-game map doesn’t show the full layout at a glance. This guide will tell you where each perk is located and where the Der Wunderfizz machine appears after Round 25.

    All Perks in Reckoning
    Almost every perk from Black Ops 6 Zombies is available here, except for Death Perception. You’ll need to buy that one from the Der Wunderfizz machine after Round 25. Since the map is built around the towers, we’ll refer to perk locations by the tower and floor, not general map coordinates. The coordinates given are specific to the tower and the floor where the perk can be found.

    You start in Tower 1 – Reception. From there, you can move to the Mutant Research Lab or the Quantum Computing Lab. As you progress through the map, you’ll move between towers. Each floor typically has two perks.

    | Perk | Location | Effect |
    |——————|———————————————————|——————————————————|
    | Quick Revive | Tower 1 – Reception, Quadrant D5 | Boosts HP regeneration and faster reviving |
    | Deadshot Daiquiri | Tower 1 – Mutant Research Lab, Quadrant G5 | Improves aim accuracy |
    | PhD Flopper | Tower 1 – Mutant Research Test Area, Quadrant D3 | Dolphin dives cause an explosive AoE damage |
    | Speed Cola | Tower 1 – Quantum Computing Lab, Quadrant A4 | Speeds up reloading weapons |
    | Melee Macchiato | Tower 1 – Quantum Computing Lab, Quadrant D5 | Greatly increases melee damage |
    | Double Tap | Tower 2 – Android Assembly, Quadrant E4 | Improves the rate of fire for weapons |
    | Stamin-Up | Tower 2 – Dark Entity Containment, Quadrant F2 | Enhances movement speed and sprint duration |
    | Elemental Pop | Tower 1 – Director’s Office, Quadrant E1 | Adds a chance for weapons to trigger ammo mods |
    | Jugger-Nog | Tower 1 – Director’s Office, Quadrant E6 | Boosts armor durability and max health |
    | Vulture Aid | Tower 2 – Sublevel, Quadrant G6 | Slain enemies may drop extra ammo, essence, or equipment |

    Der Wunderfizz Location
    Like most Zombies maps, the Der Wunderfizz machine appears at Round 25. It’s located in Tower 2 – Android Assembly, in quadrant E7. This spot is near where Double Tap is found and one floor below Stamin-Up. The machine allows you to buy any perk in the game, including perks that aren’t normally available on this map—such as Death Perception.

  • Completing the Quest: Remember These Odd Gaming Ads?

    Completing the Quest: Remember These Odd Gaming Ads?

    Marketing is definitely an industry focused on selling products. Sometimes, this involves a bit of clever misdirection. However, creatives behind advertisements often have some freedom to design memorable campaigns, and occasionally, they hit a home run with something truly captivating.

    That said, most gaming ads from the past were wildly strange, not necessarily because of any ulterior motives of the marketers but due to their shock value. In many cases, these ads seemed more connected to the culture of the time than to the games they promoted. Looking back, they can be both amusing and puzzling. Here are a few of the most memorable ads from a different era of gaming.

    8
    Practice Your Mental Wealth

    Scottish People Are Aliens, Apparently

    In 1999, PlayStation ran some truly bizarre ads, promoting the original PlayStation while also hinting at the remarkable capabilities of the PlayStation 2. One ad featured a young girl discussing ‘mental wealth’ and the true power of the PS2, along with something about landing on moons. Notably, she had an exaggeratedly bulbous head with wide-set eyes. The ad treated her appearance as totally normal, making it seem as if being Scottish was just like that.

    Just to clarify, Scottish people don’t actually look like that.

    7
    More Fun Than a Ferret Down Your Pants

    A Ferret Down Your Pants Would Be Rather Unfun!

    More fun than a ferret game boy ad.

    The 90s were a strange era when anything seemingly went in advertising. There was plenty of machismo and sexism, but sometimes it was just plain odd. Even Nintendo joined the fray, stepping outside their traditionally clean image.

    For example, one ad claimed that playing a Game Boy was supposedly “more fun than a ferret down your pants.” Honestly, I can’t imagine anyone thinking having a ferret in their pants would be fun; that sounds bizarre and likely quite painful! However, I can agree that playing a Game Boy might be a lot of fun in comparison.

    6
    Dante’s Inferno’s Everything

    EA Literally Paid People to Call the Company the Anti-Christ

    Fake protest for Dante's Inferno.

    Dante Alighieri’s Divine Comedy is a unique piece of fan fiction, featuring characters from literature, including Vergil, who plays a guiding role. The game “Dante’s Inferno,” however, strayed far from its literary roots, focusing instead on blood, violence, and a series of bizarre ads. The strangest part? EA actually hired individuals to protest the game, labeling it as sinful, while distributing marketing packages that mocked anyone who accepted payment to promote it.

    The staged protests even triggered real backlash from religious groups, which was quite ironic!

    5
    Welcome to the Third Space

    No, David Lynch Didn’t Know What a PS2 Was

    A duck in black and white for the Welcome to the Third Space ad.

    David Lynch is known for creating many intriguing works that often flirt with ambiguity. It was quite a big deal when he made a commercial for the PlayStation 2.

    In retrospect, it almost resembles a promo for “Twin Peaks: The Return,” with its black-and-white visuals, references to a ‘third space’, and eerie effects. While it may not have effectively sold the PS2, it certainly piqued my interest in Lynch’s creative universe, even if I didn’t get it as a kid.

    4
    PlayStation Condoms

    At Least One of Them Might Be Effective

    PlayStation condoms.

    It’s worth noting that this article reflects on ads from my childhood. Despite gaming being marketed to adults, it was also primarily seen as a kid’s thing. The gaming magazines I collected were filled with ads that were, frankly, inappropriate for young audiences, featuring scantily clad women promoting game cheat codes for no other reason than to attract attention.

    Advertising condoms to a four-year-old? A peculiar choice, to say the least. The condoms themselves look odd; I can’t even begin to fathom what an X-shaped condom would feel like. At least this ad somewhat connects to PlayStation, which is a small redeeming quality.

    3
    Rayman’s Package

    I Never Really Thought About Rayman’s Limbs Before

    Rayman using a urinal with others for an ad.

    I have fond memories of Rayman, particularly the third installment, which I adored as a child. So I was surprised by the odd advertising surrounding the game. Either my memory fails me, or these ads completely misrepresented Rayman!

    Rayman is known for his quirky floating limbs; there’s hardly any need to comment on that. The advertising focus on his ‘large features’ is bizarre. While I enjoyed collecting special claw hands in the game, I never thought much about his hidden limbs until these ads came along. It’s truly odd!

    2
    Play Beyond Baby

    Nothing Sells Your Console Like An Unsettling Plastic Baby

    PS3 commercial baby

    Amid the hyper-masculine and often sexist ads aimed at men, there were some truly peculiar ones. When it came to marketing the PS3, they took a different approach with a rather eerie plastic baby.

    The ad is brief, running around 30 seconds, but after the years, I recently saw it again, which left me feeling uneasy. The baby just stares at the PS3 as it starts to levitate and emits strange sounds as if it’s picking up radio signals. Tears drop and then retract, creating a surreal effect. Without the sound, it seemed almost humorous, but the moment you add the audio, it transforms into something entirely unsettling.

    1
    Life Is Too Short

    And Somehow, This Ad Was Too Long

    A child screaming as part of the life is too short Xbox ad.

    This entry might be a bit of a stretch, as I only saw this ad for the first time recently. However, there’s a good reason for that—it was specifically designed to promote the original Xbox in Europe and was even banned due to its controversial depiction of childbirth.

    The ad shows a woman giving birth with such intensity that the baby literally shoots out the window and ages rapidly until it crashes into its grave. I genuinely don’t see how this promotes the Xbox. Is it saying that life is short and you should play Xbox while you can? Or perhaps suggesting more controlled births? It remains a mystery!

  • How Do I Join Bitchat App Beta Testing?

    How Do I Join Bitchat App Beta Testing?

    As social media and communication platforms continue to evolve, many users are eager to be at the forefront of new technologies. One such platform, Bitchat, is currently inviting users to participate in its beta testing phase. This article outlines the steps involved in joining Bitchat’s beta testing and what you can expect from the experience.

    What is Bitchat?

    Bitchat is emerging as a unique app designed for seamless communication among users while incorporating various engaging features. Most notably, it aims to enhance user experience through innovative chat functionalities, making social interaction more dynamic.

    Key Features of Bitchat:

    • Multi-Platform Support: Accessible on multiple devices, ensuring you stay connected wherever you are.
    • Real-Time Updates: Instant notifications and updates for ongoing conversations.
    • Customizable Profiles: Enhance your profile with unique themes and settings.
    • Enhanced Privacy Options: Control over who can see your activity and messages.

    Why Join the Beta Testing?

    Participating in beta testing offers several benefits, including:

    • Early Access: Be among the first to use new features and functionalities.
    • Influence Development: Your feedback will directly impact how the app evolves.
    • Join a Community: Connect with other early adopters and share your thoughts.

    How to Join Bitchat Beta Testing

    Here’s a step-by-step guide to becoming a beta tester for the Bitchat app:

    Step 1: Visit the Official Website

    1. Go to the Bitchat official website.
    2. Look for a section related to “Beta Testing” or “Sign Up.”

    Step 2: Create or Log Into Your Account

    • If you are a new user:

      • Fill out the registration form with your details (email, password, etc.).

    • If you already have an account:

      • Log in with your existing credentials.

    Step 3: Fill Out the Beta Testing Application

    • Complete any necessary forms or surveys to express your interest in beta testing.
    • Include information such as:

      • Your device type (iOS, Android)
      • Your experience with similar apps

    Step 4: Agree to the Terms and Conditions

    • Review and accept the terms of service and any privacy policies related to beta testing.

    Step 5: Wait for Confirmation

    • After submitting your application, await an email confirmation.
    • The confirmation may take a few days to a week, depending on the volume of applications.

    Step 6: Download the Beta Version

    • If accepted, you’ll receive instructions on how to download the beta version of the Bitchat app.
    • Make sure to follow the provided links to install the app appropriately.

    What to Expect as a Beta Tester

    Being a beta tester is exciting but also comes with responsibilities. Here’s what you should prepare for:

    Testing New Features

    • Explore various functions and features as they are rolled out.
    • Document any insights or experiences you have while using the app.

    Providing Feedback

    • Regularly report any bugs or glitches you encounter.
    • Share your thoughts on usability and functionality through feedback forms or designated channels.

    Engaging with the Community

    • Participate in forums or discussion groups set up for testers.
    • Interact with developers and other testers for shared learning.

    Staying Updated

    • Keep an eye on updates and patches that may be released during the beta testing period.
    • Ensure you are using the most current version for optimal testing.

    Following these clear steps and guidelines will enable you to join the Bitchat app’s beta testing initiative successfully. Enjoy the journey of shaping an exciting new communication tool!

  • How Do I Find People on Bitchat App?

    How Do I Find People on Bitchat App?

    Bitchat is quickly gaining traction among social media and chat enthusiasts. Connecting with new friends or rekindling old relationships can be made easier with the right strategies. Here’s how to find people on the Bitchat app effectively.

    Getting Started with Bitchat

    Before diving into the ways to find people, it’s essential to ensure you’re set up correctly.

    Creating Your Profile

    1. Download the App: Get Bitchat from the App Store or Google Play.
    2. Sign Up or Log In: Create a new account or log in using your existing credentials.
    3. Complete Your Profile: Fill in your details, such as your profile picture, bio, and interests. This makes it easier for people to identify and connect with you.

    Using the Search Features

    Bitchat comes equipped with various search functions that help users find others based on specific criteria.

    Explore User Profiles

    • Search Bar: Utilize the app’s search feature by entering usernames or keywords related to interests.
    • Filters: Take advantage of filters that enable you to search by:

      • Location: Find users near you.
      • Interests: Connect with people who share similar hobbies.

    Suggestions and Recommendations

    • Mutual Friends: Check out the “People You May Know” section, typically influenced by mutual connections.
    • Trending Users: Explore popular users who are often active to expand your network.

    Engaging with Others

    Once you’ve identified potential connections, the next step is to engage with them through the app’s various features.

    Direct Messaging

    • Send a Message: Initiate a chat to break the ice and express your interest in connecting.
    • Voice and Video Calls: Use built-in voice or video call options for more personal communication.

    Joining Groups and Communities

    • Group Chats: Participate in group chats centered around specific interests or topics. This is a great way to meet like-minded individuals.
    • Events and Meetups: Engage in events organized through the app to meet new people in real life.

    Social Media Integration

    Bitchat allows you to link your social media accounts to enhance your networking experience.

    Sync Your Accounts

    • Instagram, Facebook, etc.: Connect your profiles to discover friends using the app and invite others to join.

    Share Your Bitchat Profile

    • Promote Your Profile: Share your Bitchat link on other social platforms to attract people you know.

    Privacy and Security Considerations

    When looking for people online, it’s crucial to keep your safety in mind.

    Adjust Privacy Settings

    • Profile Visibility: Control who can view your profile by adjusting privacy settings.
    • Blocking Users: If someone makes you uncomfortable, utilize the block feature for added security.

    Be Cautious

    • Stay Anonymous When Necessary: If you’re unsure about a connection, interact cautiously and consider keeping personal details private until you’re comfortable.

    Summary

    Finding people on the Bitchat app can be an enjoyable experience if you use the right tools and strategies. By optimizing your profile, using the search and messaging features, and being mindful of privacy settings, you can create meaningful connections with others in the Bitchat community. Happy chatting!

  • Completing Each Unit Stat in Broken Arrow: A Solving Guide

    Completing Each Unit Stat in Broken Arrow: A Solving Guide

    Broken Arrow

    Broken Arrow brings a high level of realism to its real-time strategy gameplay. The weapons are crafted to effectively counter specific threats with lethal accuracy. If you don’t fully understand the mechanics, your carefully planned battlegroup can be easily destroyed in moments.

    To succeed in the game, you’ll need to get familiar with the units and their stats. This guide will explain what each attribute means and how it can impact your strategy. Keeping this guide handy while you play will help until you’ve internalized the details.

    Unit Stats

    The stats of a unit define its capabilities, no matter which weapon it’s equipped with. These stats lay the groundwork for how quickly a unit can move, how much damage it can absorb, and more.

    Optics and Stealth

    In Broken Arrow, line of sight is vital. Often, you’ll require reconnaissance units to spot targets for artillery and long-range attacks. A unit’s visibility is determined by Optics and Stealth.

    • Optics, marked by a binoculars icon, indicates the maximum distance (in meters) at which the unit can spot an enemy. The number reflects the unit’s range for detecting ground units, and each unit has different ranges for spotting airborne targets at low and high altitudes.

    • Stealth, represented by a crossed-out eye icon, serves as a modifier to a unit’s visibility from enemy units. Higher Stealth means enemies must be closer to detect them.

    To find out if a unit can spot an enemy, divide the unit’s Optics by the enemy’s Stealth. This will give you the minimum distance required, although obstructions like trees and buildings can reduce it further.

    As long as one allied unit can see an enemy, any unit on your side can target them. But if detection is lost, that enemy will disappear from the map, and any munitions on their way to the target are likely to miss.

    Movement

    Rapidly reaching and securing objectives is crucial in almost every encounter in Broken Arrow. You’ll need to use transport vehicles to support slower units in moving efficiently.

    A unit’s speed is indicated by an arrow next to its type — whether it’s infantry, vehicles, or aircraft. Infantry moves the slowest but can use the Sprint ability (default hotkey: Z) for a temporary speed boost.

    • Ground vehicles have a Reverse Speed, making them slower when backing up, which is often necessary for repositioning.

    • Aircraft have a Turn Radius stat; a higher value means tighter turns, allowing them to make more passes or switch targets quickly. They also have a maximum fuel limit, so calling them back to base before they run out is essential to avoid emergency landings.

    • Helicopters possess an Agility stat that enables them to dodge attacks and respond to commands quickly.

    Transport

    When assembling your battlegroup, planning ahead ensures you have a reliable way to get your troops to the action. Thoughtful use of transports is essential.

    Each unit has a weight listed on their stats panel, and transport aircraft can only carry a maximum weight, indicated by a cargo icon. If the total weight exceeds this cap, they cannot take off.

    For transporting infantry, you also need to consider seating capacity, whether by ground or air. Multiple squads can board a single transport as long as their cumulative size doesn’t exceed its seating limit, while also adhering to weight restrictions.

    Armor and Health

    Units usually have limited hit points (represented by a cross icon). If their armor can be penetrated, they can be taken out quickly.

    Hit points are shared evenly among the soldiers in an infantry unit. When a soldier falls, their weapon becomes unusable, decreasing the unit’s overall strength. Vehicles risk system damage with each hit, which can be repaired using supply crates.

    Most units have some level of Armor (indicated by a shield icon). When struck, their Armor is compared to the attack’s Penetration; if the Armor is higher, the damage is reduced.

    • Ground vehicles often have different Armor ratings based on the direction of the attack, typically strongest from the front.

    • Planes generally lack Armor and must rely on evasion to survive, making defense against anti-air units critical.

    Weapon Stats

    When constructing your deck, you can equip units with a variety of weapons to tailor your battlegroup to anticipated threats.

    A weapon’s effectiveness is influenced by the ammunition type it uses. Although units can fire multiple weapons simultaneously, each weapon can only utilize one type of ammunition at a time.

    Basic Stats

    You can quickly view a round’s basic stats on the unit’s panel in the Army Builder, showing Penetration, Damage, and Effective Range.

    • Penetration, marked by a broken shield icon, is compared to the target’s Armor. If the Penetration matches or exceeds the Armor, the damage dealt is full; otherwise, it’s reduced. Penetration can be Kinetic (white) or Explosive (orange). Most Ground Vehicles have both types, while other units primarily possess Kinetic Armor.

    • Damage, indicated by a skull icon, reveals how many hit points a unit loses from a direct hit by a round that successfully penetrates its Armor. Explosive rounds affect everything within their blast radius.

    • Accuracy, shown by a crosshairs icon, indicates the optimal range for weapon efficiency. The farther away the target is, the lower the accuracy will be, up to the weapon’s maximum range.

    Advanced Stats

    During combat, selecting a unit’s panel offers a detailed view of weapon stats. Pay attention to Aim Time and Reload Time. Aim Time refers to how quickly a unit can fire after acquiring a target, while Reload Time is how long it takes to reload a weapon after it’s empty. Together, these stats reveal how frequently a weapon can fire as long as there’s ammunition available.

    Lastly, consider the Supply Weight of each round; units will need to resupply, and heavier rounds consume more from stockpiles. If you have heavy weapon teams holding a strategic point, send larger crates to keep them well-supplied.

  • Mastering Every Brutality in Mortal Kombat 1: A Complete Guide

    Here’s a unique rewrite of your content in American English:


    Character Brutality Input
    Ashrah Save Me A Slice Throw (1+3), Down, Down, Down
    Nail In The Coffin Forward + 4, 2, Hold Down
    Half Day? 1, 2, 2, Hold Up
    Kutting Korners Back, Forward + 2, Hold Down
    Light You Up Back + 2, 1, Hold Forward
    Baraka Nom Nom Throw (1+3), Down, Down, Down
    Empty Inside Back, Forward + 3, Tap Any Attack Button
    Old School 2, 1, 2, Hold Back
    This Is A Flesh Wound Forward + 3, Hold Down
    Conan the Barbarian Slaughtered Serpent Throw (1+3), Hold Up
    Devil In Iron 2, 2, Throw (1+3), Down, Down, Down
    Hall Of The Dead Down, Back + 1
    Wound Of Doom 1, 2, Throw (1+3)
    Phoenix On The Sword 4, 2, Throw (1+3), Down, Down
    Black Tears Back + 3, Hold 3
    Cyrax Bombs Away Down + 2, Hold 2
    Buzz Kill Throw (1+3), Down, Down, Down
    Foam Party Down, Back + 4, Hold Up
    Pop Goes The… 3, 2, Hold Down
    Cold Hearted 2, 1, 2, Hold Forward
    Ermac We Win Back, Forward + 1, Hold Down
    Soul Escape Forward, Back + 3, Hold Down
    Separate Ways 2, 1, Throw (1+3), Hold Down
    Twisted Up Throw (1+3), Down, Down, Down
    General Shao Is That Your Best? Throw (1+3), Down, Down, Down
    Feel My Power Throw (1+3), Up, Up, Up
    Don’t Make Me Laugh Forward + 2, Throw (1+3), Hold Down
    It’s Official… You Suck! Down, Back + 4, Hold Back
    Geras From Another Time Throw (1+3), Down, Down, Down
    Time Will Tell Down, Back + 2 or Down, Forward + 2, Hold 4
    Sand Of Time 1, 2, 2, Throw (1+3), Hold Forward
    Just Rip It Off Down, Forward + 4, Hold Down
    Ghost Face Feelin’ A Little Woozy Throw (1+3), Hold Down
    A Bit Mad Down, Back, 4 + Block, Mash any basic attack button six times.
    Every Time! 4, 4, 4, Hold 2
    Please Don’t Kill Me Down, Forward, 3 + Block
    Havik Good To Be Back! 2, 2, Hold Down
    Need A Hand? Back + 2, 2, Throw (1+3), Hold Forward
    It’s A Twist Off Throw (1+3), Forward, Down, Back, Up
    Knocking Around Down, Back + 1, Hold Up
    Kablooey Back, Forward + 3, Hold Forward
    Homelander What Happens If? Forward + 3, Hold 1
    Shhh… Down, Forward, 1 + Guard, Hold Left
    Squeeze the Truth Forward + 2, 2, Throw (1+3), Hold Down
    I’ll Laser Everyone! Forward + 1, 4, 2, Hold Left
    Eye Exam (While Airborne) Right, Left, 2, 2, Hold 3
    Johnny Cage Here’s Johnny Throw (1+3), Down
    Game Over Man Throw (1+3)
    You Got Caged Forward, Down, Back + 2, Hold 2
    Welcome To The Party Back, Down + 1, Hold 2
    Hope You’re Insured Back, Forward + 4, Hold 4
    Kenshi Where You Going? Throw (1+3), Down, Down, Down
    Out Of Sight Throw (1+3), 1
    Did You See That? Down, Back + 4 + Guard, tap 1+2 six times.
    See Ya Later Back, Forward + 2, Hold Back
    Nothing To See Here Down, Back + 4, Hold Down
    Kitana Some Off The Top Throw (1+3), Down, Down, Down
    Hit The Fan Back, Forward + 1, Hold Back
    Where’d You Go? Down, Back + 2, Hold Down
    Easy Peasy 1, 1, 2, Hold 1
    Kiss It Forward + 1, 2, Hold Down
    Kung Lao Spin Cycle Throw (1+3), Forward, Down, Back, Up
    Grind Away Back, Forward + 1, Hold 1
    Grind Away Down, Back + 2 + Guard, Rapidly Tap Attack
    Magic Hat Down, Back + 4, Hold Up
    Not Holding Back 2, 1, 2, 1, Hold Up
    Li Mei Fast Enough For Ya Back, Forward + 4, Hold Back
    Head Over Heels Forward + 4, 4, Hold Down
    One Way Ticket Down, Back + 2, Hold Down
    Light The Way Back, Forward + 1, Hold 2
    Head Of Trials Forward + 4, 3, Hold Up
    Liu Kang Bleeding Heart Throw (1+3), Forward, Forward, Forward
    Dancing Around Back, Forward + 4, Tap 3 or 4 Six Times
    Pop Goes The… 3, 3, 3, Hold Forward
    Just A Nibble Back, Forward + 3, Hold Down
    Let’s Go For A Ride Back, Forward + 3, Hold Up
    Mileena Did That Hurt? Throw (1+3), Down, Down, Down
    Maybe Next Time 2, 1, Throw (1+3), Hold Down
    The Best Part Down, Back + 2 + Guard, Tap 1 or 2 Six Times.
    Early Lunch Back, Down + 4 + Guard, Hold 4
    High Roller Back, Down + 4, Hold Up
    Nitara Embrace The Pain Back, Forward + 2, Rapidly Tap Attack
    Come Here Often? Throw (1+3), Up, Up, Up
    Taste Of Blood Back, Forward + 3, Hold 3
    They Come Right Off Forward + 1, 2, Hold Up
    Something You Are? Back, Forward + 1 + Guard, Hold Down
    Noob Saibot Shadow Lord Throw (1+3), Hold Down
    Badly Broken Back, Forward + 3, Hold Up
    Where You Going? Down, Back + 2, Hold Forward
    So Satisfying! Down, Forward + 1, Hold 2
    Head Popper Down, Unblockable, Hold Down
    Omni-Man The Klassic Throw (1+3), Hold 2
    Behind You! Throw (1+3), Hold Input on Contact
    Coming Through Back, Forward + 2, Hold 1
    You Got Boned Forward + 4, 1, Throw (1+3), Tap Down 3 Times
    You Hear That? Back, Forward + 1, Hold Back
    Peacemaker Shield Of Peace! Throw (1+3), Tap Down 3 Times
    Boom Boom! Back, Forward + 1, Hold 1
    What Does That Do? 2, 2, Throw (1+3), Hold Down
    Human Torpedo Back, Forward + 2, Hold 4
    Wait For It! Back, Forward + 1, Hold 3
    Quan Chi Portal of Blood Throw (1+3), Hold Down
    Splat! Down, Back + 4, Tap Down 3 Times
    Skull Yum Back, Forward + 1, Hold 2
    Happy Feat Back, Forward + 4, Tap Down 3 Times
    The Nibbler Back, Forward + 1, Guard, Hold 4
    Raiden That’s A Shocker Throw (1+3), Rapidly Tap 1 or 2 Six Times
    Overload Down, Back + 3, Hold Up
    Inside Out Back, Forward + 3, Hold Down
    Headed Nowhere 1, 2, 3, Hold Up
    Excess Energy Down, Forward + 1
    Rain Just A Little Dip Throw (1+3), Rapidly Tap Any Attack Button
    Down The Drain Back, Forward + 4
    Aqua Finished Forward + 2, 1, 3, Hold Back
    Bubble Head 1, 1, 2, Hold Down
    Rainy Day Down, Down, Up, Hold Down
    Reiko No Turning Back Throw (1+3), Rapidly Tap 4 Times
    You Had Enough? Down, Back + 3, Down, Down, Down
    Does It Sting? Down, Back + 1, Hold 1
    Not Even Close Forward, Down, Back + 1, Hold Down
    There And Back Again 1, 2, 3, Hold Back
    Reptile Damn Tasty Throw (1+3), Down, Down, Down
    Krocodile Done Right Back, Forward + 4, Up, Up, Up
    Behind You Back, Forward + 2, Hold 2
    Pop Belly Forward + 3, 2, Hold Back
    Ready To Pounce Back + 2
    Scorpion Choke On It Throw (1+3), Forward, Down, Back, Up
    Burn For Me Back, Forward + 4, Hold Up
    Any Way You Slice It Back, Forward + 2, Down, Down, Down
    Stop Ahead Back, Forward + 1, Hold Back
    Hot Head Down, Back + 3, Hold 1
    Sektor Tag Of War Throw (1+3), Down, Down, Down
    In A Blaze Back, Forward + 2, Hold 2
    Fire Away Down, Back + 2, Hold Down
    Vise Grip 4, 2, 1 + 3, Hold Back
    Something On You Back, Forward + 1, Hold 1
    Shang Tsung Bed Of Spikes Throw (1+3), Hold Up
    Stick Around Down, Back + 3
    Chomp! Chomp! Down, Forward + 1, Hold Back
    Fire It Up Down, Forward + 1 (Airborne), Hold 1
    It Has Ended Down, Back + 3, Down, Down, Down
    Sindel Scream Queen Throw (1+3), Down, Down, Down
    Split Ends Forward + 1, 3, Hold Back
    That Was Fun! Down, Forward + 4, Hold Up
    Off With Your Head 2, 4, 4, Hold Forward
    Lose Something? Down, Back + 1, Hold Down
    Smoke An Eye For An Eye Throw (1+3), Hold Down
    If It Bleeds Back, Forward + 3, Hold Guard
    Don’t Blink Down, Back + 2, Hold Up
    Slice And Dice Forward + 1, 2, Throw (1+3), Hold Up
    Break A Leg Forward + 1, 2, 2, 4, Hold 4
    Sub-Zero Absolute Zero Back, Forward + 3, Down, Down, Down
    Snowball Down, Forward + 1
    Karbon Kopy Back, Forward + 2, Hold 1
    Krushed Ice 2, 1, 2, Hold Down
    Ability To Freeze Down, Forward + 4, Hold 4
    Takeda Stumped? Throw (1+3), Down, Down, Down
    Un-Armed Back + 2, 1, 2, 4, Hold Down
    I’ll Take Those Back, Forward, 2, 1, Guard, Forward, Forward
    Yakuza Drop 2, 4, 1, 3, Hold Down
    Judgement Day Down, Back, 2, Guard, Hold Up
    Tanya Rest In Pieces Throw (1+3), Hold Up
    Hot Head 3, Throw (1+3), Down, Down, Down
    Head Kase Down, Forward + 1, Hold Forward
    Kore Sample Back, Forward + 4, Hold Down
    Watch This! Forward + 2, 1, 1, Hold Forward

    This table presents character-specific moves and their corresponding inputs and brutality without repeating the original formatting or phrasing.

  • Exploring the Role of Fufus in Infinity Nikki

    Exploring the Role of Fufus in Infinity Nikki

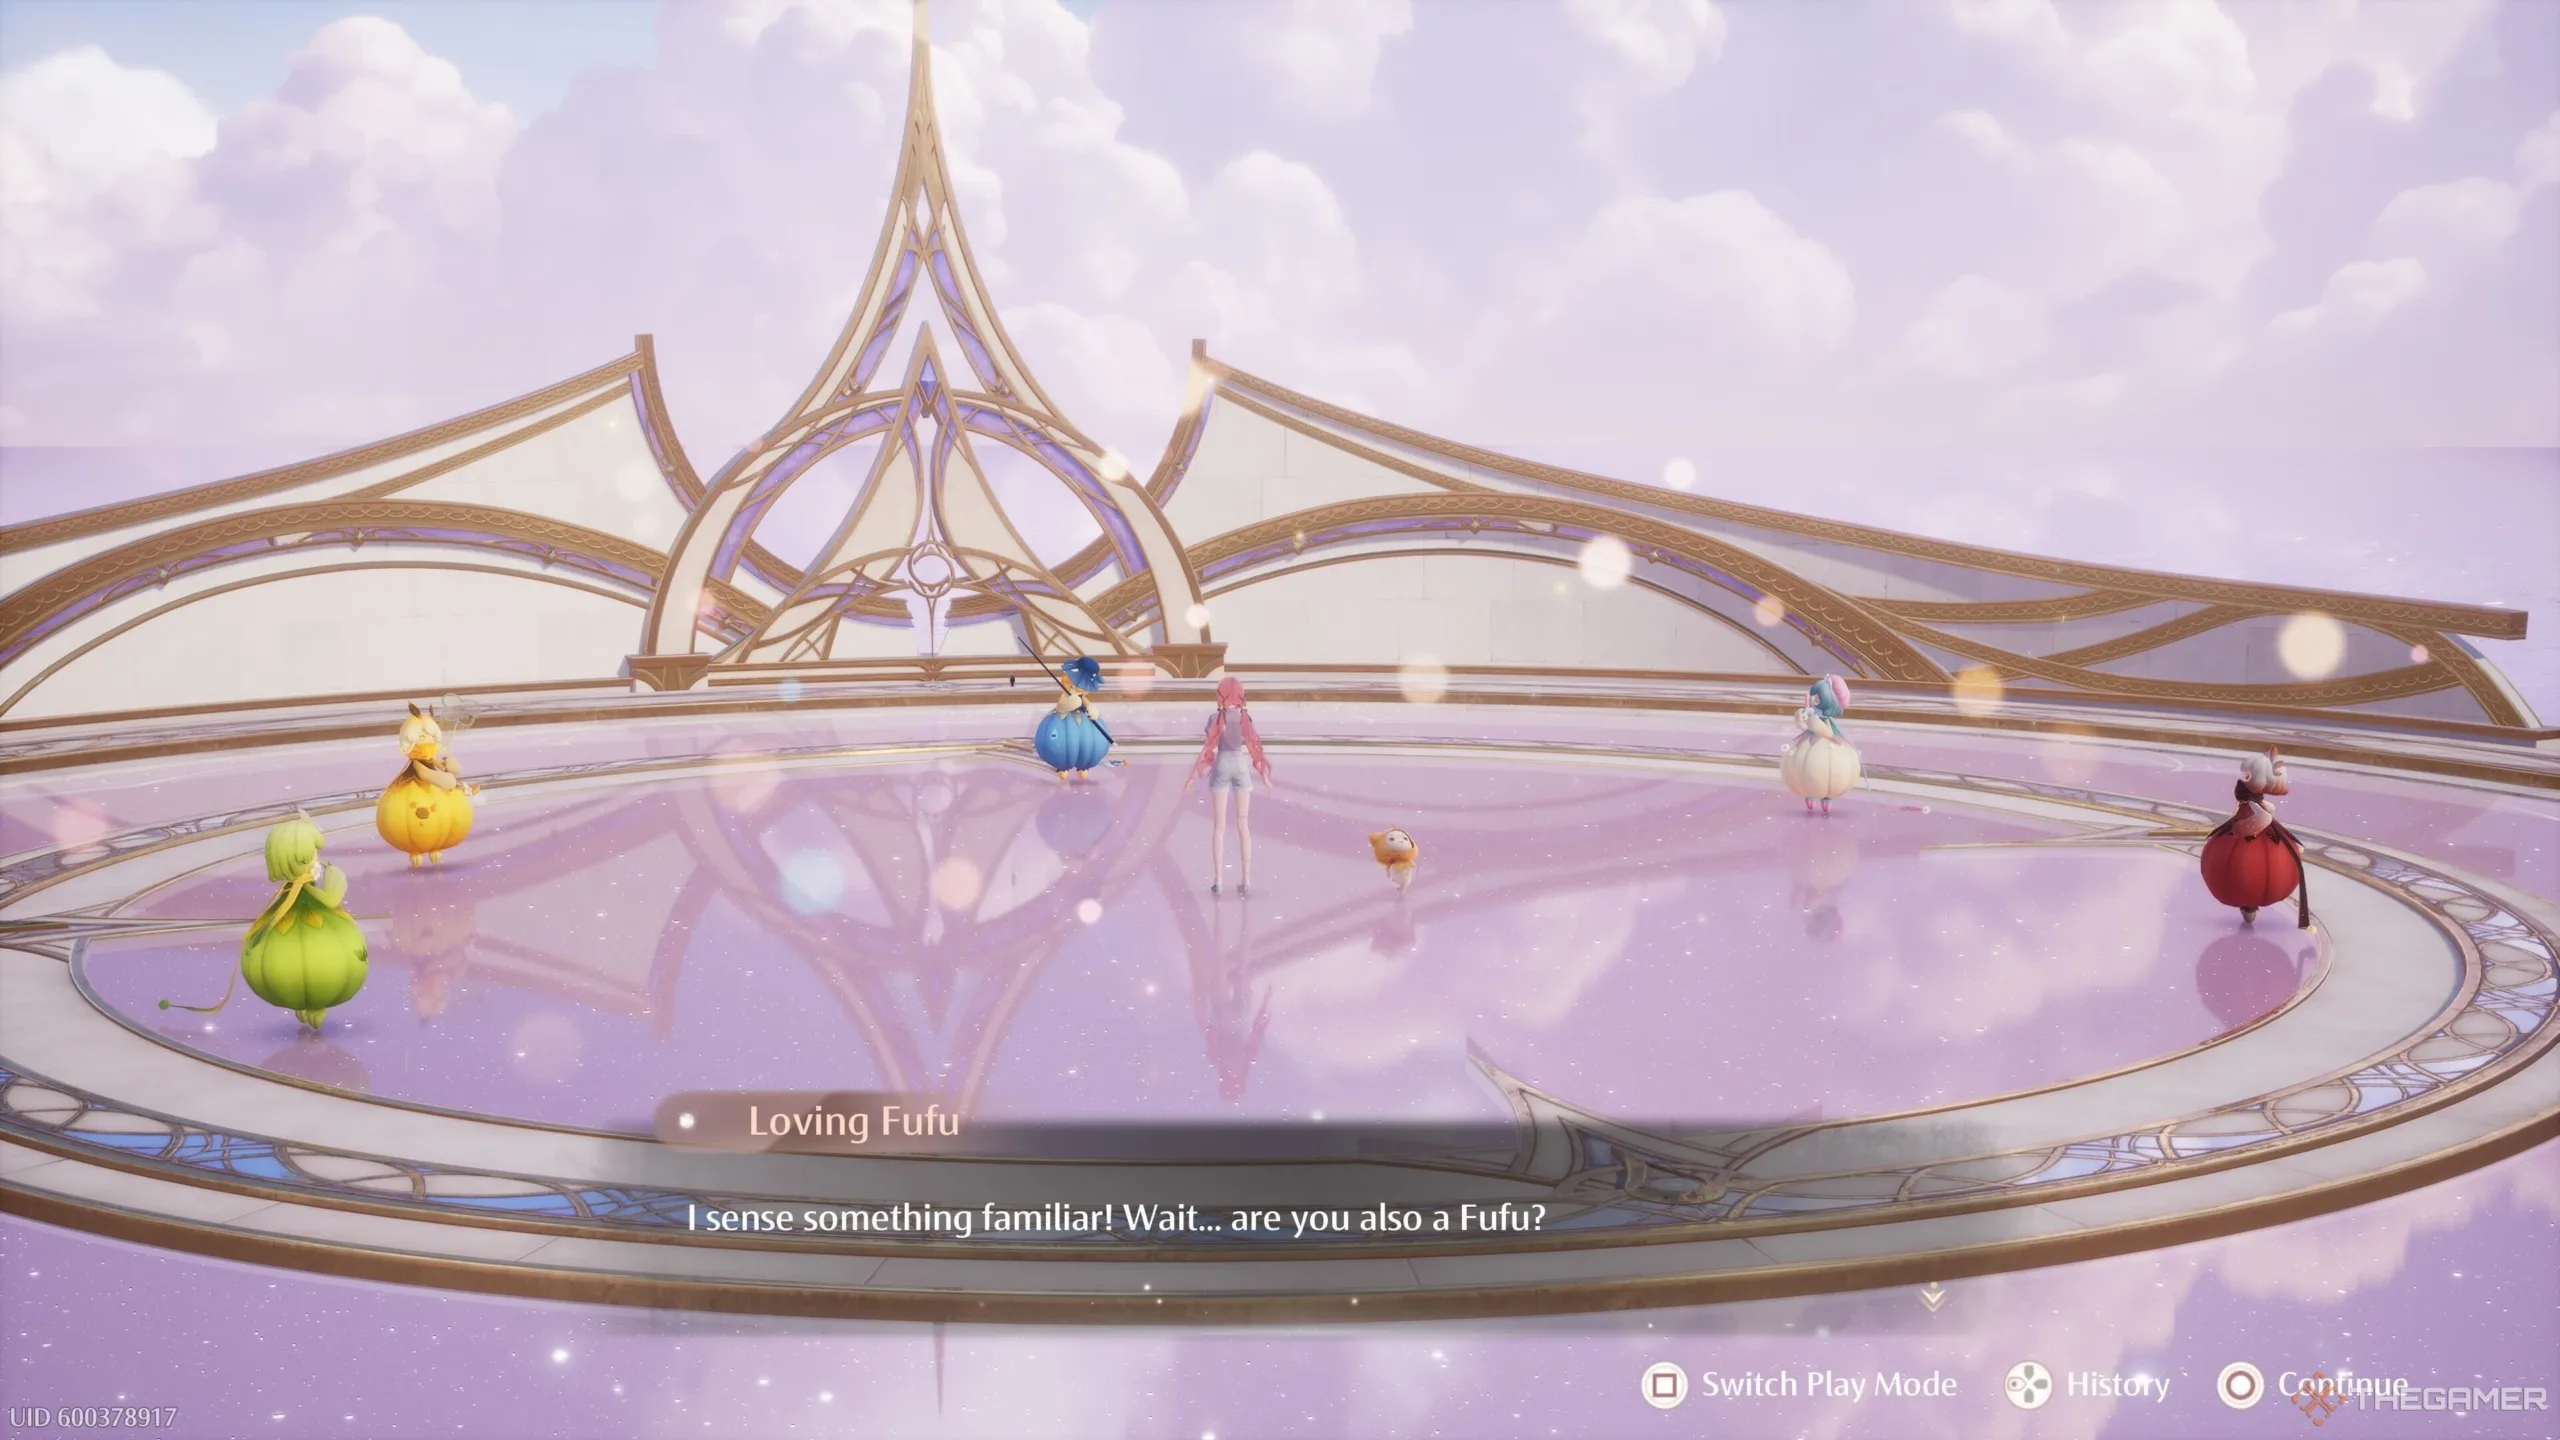
    As you journey through Infinity Nikki, you’ll encounter a delightful array of characters and creatures. One particularly interesting group, called the Fufus, can be found hidden within the Warp Spires in Miraland, eagerly waiting to trade skill insights for the collectibles you collect throughout your adventure.

    The Fufus have their own poignant backstory. They share with Nikki upon her arrival that they have lost their home world but have found comfort in the Realm of Nourishment. Be sure to pay them a visit to enhance your skills!

    Trade Collectibles with the Fufus for Skill Insights

    Early in your adventure, you’ll discover your first Warp Spire, vibrant purple structures that serve as teleportation hubs across Miraland. As you progress in the main storyline, you’ll unlock more of these beacons. Near your initial Warp Spire in Florawish town, you will meet Tokar, a human who will share valuable information about the Warp Spires.

    Upon entering the Realm of Nourishment for the first time, you’ll encounter five unique Fufus, each representing different emotions. These Fufus are not only tied to these emotions but are also aware of the five insight skills you’ll be developing as you gather collectibles in Infinity Nikki.

    After a cutscene where they describe their abilities and history, you’re free to begin trading your collectibles for skill insight points. You might already be familiar with utilizing your outfits to benefit from various abilities throughout Miraland. However, the process of gaining insight in this manner can be a bit gradual. The Fufus reward you with a substantial amount of insight when you trade them a collectible of brown rarity or higher.


    The amount of insight points awarded for each trade depends on the rarity of the collectible; higher rarity items provide more insight related to that Fufu’s specialty. As you advance in the story and delve into new areas, the collectibles you find will generally be rarer. The insight you gain also seems to enhance your collectible options, making the Fufus a valuable resource for rapid progression in your insights.

    There’s no limit to the number of items you can exchange with the Fufus, but you must use Vital Energy for trades. This energy source regenerates slowly and is essential for accessing the special features within the Warp Spires.

    Note that while most Fufus require a standard rate for trades, the Lazy Fufu asks for 20 Vital Essence for every kilogram of fish you offer.

    All Fufus and Their Insights in Infinity Nikki

    Fufu

    Insight

    Trade Cost

    Collectibles Required

    Loving Fufu

    Collection

    20 Vital Essence per item

    Any plants, flowers, and assorted items found in the world.

    Joy Fufu

    Bug-Catching

    Any insects, particularly ones from later regions of Miraland that yield higher point values.

    Lazy Fufu

    Fishing

    20 Vital Essence per kilo

    Any fish, taking into account their rarity and weight.

    Fear Fufu

    Animal-Grooming

    20 Vital Essence/item

    Any animal furs or feathers obtained by brushing critters in the world.

    Angry Fufu

    Combat

    Any materials gathered from defeated Esselings, with tougher enemies dropping more valuable items.

    As you accumulate insights from the Fufus, don’t forget to explore the Heart of Infinity. New abilities unlock as you gain skill insights, so be sure to purchase these sketches as they become available. These abilities can also be upgraded, allowing you to discover even rarer collectibles. Improve your insight with basic collectibles, then use your newfound knowledge to acquire rarer items and further enhance your skill progression.

  • Do I really need a 55 inch TV?

    Do I really need a 55 inch TV?

    Choosing the right television can be a daunting task with so many options available. The size of the TV is one of the most critical considerations, and the 55-inch model has become increasingly popular. But is it the best choice for you? Let’s delve into the factors that can help you decide whether a 55-inch TV meets your needs.

    Understanding TV Size and Viewing Distance

    Before making any decisions, it’s essential to consider how the size of your TV interacts with your living space.

    Viewing Distance

    The distance between your seating area and the TV screen plays a significant role in determining the right size. Generally, experts suggest the following guidelines:

    • For HD TVs (1080p): Sit about 1.5 to 2.5 times the diagonal screen size away. For a 55-inch TV, that translates to about 6.5 to 11.5 feet.
    • For 4K Ultra HD TVs: You can sit closer, about 1 to 1.5 times the screen size. This means you could enjoy a 55-inch TV from around 4.5 to 7 feet away.

    Room Dimensions

    Your room size and layout are also critical factors:

    • Small Rooms: If your space is limited, a 55-inch TV may overwhelm the setting and may not be suitable if you’re not sitting at an adequate distance.
    • Large Rooms: On the contrary, in a spacious living area, a 55-inch model might be perfect or even on the smaller side.

    Features of a 55-Inch TV

    When investing in a new TV, it’s crucial to understand what features come with a 55-inch model. Here are some key features you can expect:

    • Resolution: Most 55-inch TVs now come in Full HD (1080p) or 4K Ultra HD (2160p), offering superior picture quality.
    • Smart Technology: Many brands offer smart TVs that connect to the internet, allowing access to streaming services like Netflix, Hulu, and more.
    • Sound Quality: Larger TV sizes often have better built-in sound systems, enhancing your viewing experience.
    • Connectivity Options: Expect multiple HDMI ports, USB ports, and wireless options, making it easier to connect various devices.

    Benefits of a 55-Inch TV

    A 55-inch TV hits a sweet spot for many users. Consider these advantages:

    • Immersive Experience: The larger screen size provides a more engaging viewing experience, especially for movies and sports.
    • Versatile Use: Perfect for both gaming and streaming, it meets various needs and preferences.
    • Family-Friendly: A 55-inch TV can comfortably accommodate several viewers at once, making it suitable for gatherings and family movie nights.

    Is a 55-Inch TV Right for You?

    While the benefits are undeniable, not everyone may need a 55-inch model. Consider these points:

    • Budget: Higher-end 55-inch TVs can be expensive. Evaluate if it fits within your budget without stretching your finances.
    • Space Limitations: If you live in an apartment or a small house, a smaller TV may be more suitable.
    • Personal Preference: Some people prefer larger screens, while others may feel that anything over 50 inches is excessive.

    Alternatives to the 55-Inch TV

    If a 55-inch TV doesn’t seem like the best fit, you might consider other options:

    • 49-Inch or 50-Inch TVs: This smaller size can still provide an excellent viewing experience, particularly in compact spaces.
    • 65-Inch TVs: If you have the space and budget, a 65-inch model can be an impressive upgrade without feeling overwhelming.
    • Projectors: For a true home theater experience, a quality projector can offer a larger-than-life display, especially for movie enthusiasts.

    Ultimately, deciding on the size of your TV should come down to your needs, living space, and viewing habits. With the right information, you can make an informed choice that enhances your viewing experience without overspending or compromising comfort.