أعلنت شركة بليزارد مؤخراً عن إصدار لعبة ديابلو 5، والتي ستكون الجزء التالي من سلسلة ديابلو، خلال فعالية بلizzكون 2026، ومن المقرر إطلاقها في ربيع عام 2029. وفقاً للمُلخص الرسمي للعبة، فإن ديابلو قد انتصر، وترك السانتشاري في حالة خراب. وطبيعي أن يتساءل اللاعبون عما إذا كانت ديابلو 5 ستدعم اللعب الجماعي.
لحسن الحظ، أكد مدير اللعبة في بليزارد، جو شيلي، أن ديابلو 5 ستكون لعبة تدعم اللعب الجماعي بشكل كامل، وذلك في مقابلة مع مجلة PC Gamer حيث قال: “مثل ديابلو 4، فهي لعبة يمكنك أن تلعبها منفرداً أو مع أصدقائك كما تشاء، ويجب أن تتمكن من استكشاف جميع المحتويات مع أصدقائك.”
مع ذلك، لم تؤكد الشركة بعد ما إذا كانت ميزات العالم المشترك في ديابلو 4، مثل مواجهة لاعبين آخرين خلال فعاليات الجحيم، أحداث الفرقة، أو زعماء العالم، ستتكرر في ديابلو 5، أو إذا كانت اللعبة ستحتوي على نشاطات استكشافية بدون فريق.
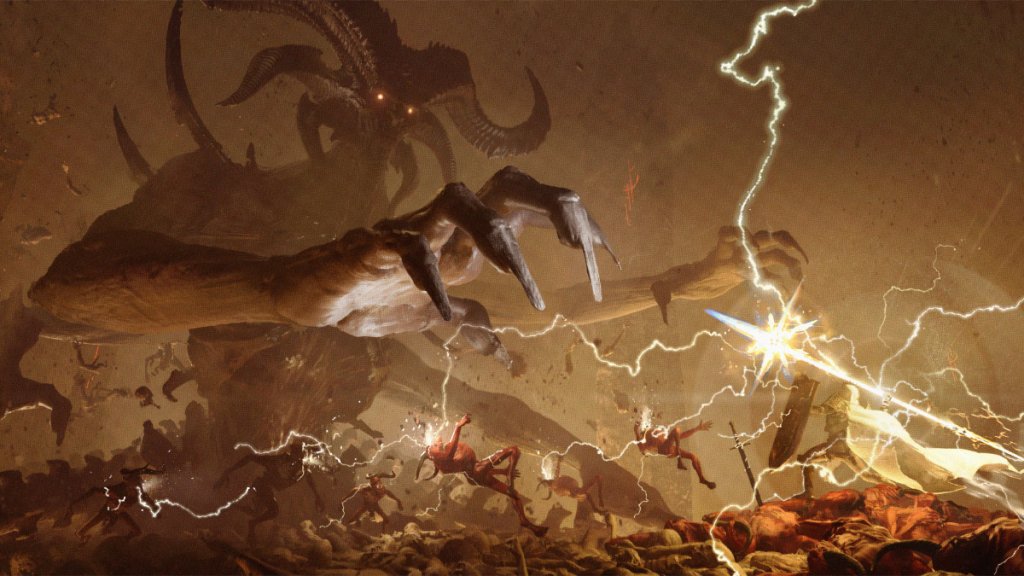
صورة للعبة تظهر أحد مشاهد اللعبة من خلال teaser trailer تحتوي على مشهد لمدينة السانتشاري المنهارة، والتي تعكس الأجواء المظلمة والدمار الذي حل بها، مع إمكانية ظهور شخصيات من عالم اللعبة أثناء استكشاف اللاعبين للبيئة بدون فريق.
أعلنت الشركة أنها ستكشف عن مزيد من التفاصيل حول دعم اللعب الجماعي في ديابلو 5 قبل موعد إصدارها المقرر في ربيع عام 2029، لذا من المتوقع أن ينتظر اللاعبون عدة سنوات للحصول على معلومات إضافية بعد بلizzكون 2026، وربما نظرة أخرى على محتوى اللعبة.
وفقاً لتقرير مجلة PC Gamer حول فعاليات بلizzكون 2026، ستعيد ديابلو 5 أسلوب الأبراج المُولدة بشكل عشوائي، بالإضافة إلى مناطق عالم مفتوح ديناميكية، مما يتيح للاعبين استكشاف تصاميم مختلفة في كل مرة يعيدون فيها اللعب. للتوضيح، فإن ديابلو 4 كان يمتلك أبراجاً مولدة بشكل عشوائي أيضاً، لكن عالمه المفتوح كان مُصَمماً بمناطق ثابتة يدوياً.
وأكدت بليزارد أن ديابلو 5 ستبني على التجارب والدروس المستفادة من ديابلو 4، مع بقاء الغموض حول عودة أنشطة مثل الحصون والزعماء العالميين، لكن من المتوقع أن يسافر اللاعبون برفقة قافلة من شخصيات غير قابلة للعب (NPCs) يلتقون بهم خلال حملة اللعبة، حيث يعملون على تطهير المدينة من فساد ديابلو، مما يجعل دعم اللعب الجماعي أكثر إثارة.
وبذلك، يتوقع أن يشعر كل لاعب أن رحلته عبر السانتشاري المدمرة والخارجة عن السيطرة فريدة ومميزة. فهل أنت متحمس لدعم multiplayer في ديابلو 5؟ اخبرنا في قسم التعليقات أدناه.
تعاونت شركة بلايزر وناتفليكس على تطوير سلسلة أنيميشن جديدة مستوحاة من عالم ديابلو، أعلن الرئيس خلال حفل افتتاح مؤتمر بلايزركون 2026. لم تكشف الشركة بعد عن موعد إصدار السلسلة أو studios المخرجة والطاقم الممثل، لكنها ألمحت إلى احتمالية أن تتلقى عناوين أخرى من بلايزر مثل وورلد أوف ووركرافت وأوفر فيتش نفس الاهتمام والتطوير.
في بيان صحفي حول المشروع الجديد، أُكد أن بلايزر تسعى بعد عقود من إحياء عوالم كاملة من خلال ألعابها، إلى توسيع نطاق القصص التي تروى عبر منصات متعددة، بالتعاون مع مبدعين كبار، لنحكي حكايات تتجاوز حدود الألعاب وتصل إلى شاشات جديدة.
حتى الآن، لم تصدر الشركة ملخصاً رسمياً عن سلسلة ديابلو، ولكنها أوضحت عبر مدونتها الخاصة بالديابلو أن الظلام يتسرب إلى ساحة سانكتشوري، وأن بلايزر وناتفليكس يعملان على سلسلة أنيميشن جديدة تدور أحداثها في عالم ديابلو، بهدف تقديم franchise إلى شاشة جديدة.
وفي الصورة أدناه، تظهر لقطات من لعبة ديابلو 4، وتحديداً مشهد للشيطان مفيستو في خلفية ملتهبة، مع جنوده على الأرض، مما يعكس جو الرعب والدموية في عالم اللعبة.
بالطبع، ستقوم بلايزر بنشر المزيد من التفاصيل لاحقاً، لكن من المتوقع أن تركز سلسلة أنيميشن ديابلو على أحداث الجزء الأصلي الذي أصدر عام 1996، والذي يتابع مغامرات بطل واحد يتجه تحت مدينة تريسترام ليواجه رب الرعب في عالم سانكتشوري.
ويأتي هذا التعاون في الوقت الذي يحتفل فيه ديابلو بمروره بذكرى تأسيسه الثلاثين، منذ إطلاقه الأصلي، ما يعزز فرصة توسيع عالم اللعبة وجذب جمهور أوسع، بحيث يتخطى التحكم عبر وحدات التحكم والكيبورد.
كما أن مؤتمر بلايزركون 2026 يُعد الأول بعد استحواذ مايكروسوفت على شركة أكتيفيجن بليزر بمبلغ 69 مليار دولار في عام 2023، ليصبح هذا الحدث احتفالاً ليس فقط بالديابلو، بل أيضاً بألعاب شركة بلايزر الأيقونية مثل أوفرواتش، وورلد أوف ووركرافت، ستار كرافت وغيرها.
وفي الوقت نفسه، كشفت الشركة عن لعبة ستار كرافت مفتوحة العالم و HERO جديد في أوفرواتش يُدعى دوكترون، من المقرر إطلاقها في نهاية هذا العام. إلا أن جميع هذه المشاريع، بما في ذلك سلسلة ديابلو الأنيميشن، لا تزال في مرحلة التطوير، ومن المتوقع أن يستغرق الأمر وقتاً قبل أن تكشف بلايزر عن مزيد من التفاصيل.
Yesterday, the Communications Workers of America announced that more than 450 developers working on the Diablo franchise at Blizzard have formed a union. This group now joins over 3,000 Microsoft employees who are seeking to improve their working conditions through collective organization.
This move comes after a series of widespread layoffs, the most recent of which occurred in July and led to the cancellation of several highly anticipated titles, including Perfect Dark and Rare’s Everwild.
Kelly Yeo, a Game Producer for Diablo’s Team 3 and a member of the organizing committee, shared her feelings: “With each new round of layoffs, I see the growing fear in my colleagues’ eyes. It’s as if no amount of effort can shield us from the instability.”
The industry’s struggles are well recognized, with many seeing these layoffs as a sign of deeper issues. Despite record sales numbers reported by many companies, thousands of jobs have been cut in recent years. Not just Blizzard, but others like Electronic Arts, Sony, and Ubisoft have also announced large-scale layoffs or shut down smaller studios permanently.
Skye Hoefling, a senior software engineer on Diablo, expressed her pride in working for Blizzard and her love for the game. “I’ve grown up playing Diablo, and I feel fortunate to be part of something that’s meaningful to both the gaming community and myself. But passion doesn’t shield us from job insecurity. Our union gives us a chance to focus on creating great experiences without constantly worrying about our employment stability.”
The union’s goal is to offer members greater job security, better working conditions, and a stronger voice in their workplace—especially in an environment still marred by uncertainty. Ryan Littleton, another Diablo designer, shared a personal story highlighting the pervasive atmosphere of fear. “The day after the third round of layoffs, I went to the office, and when I tried to get into the cafeteria, my badge was denied. For a moment, I wondered if that was how I’d find out I was let go,” he recounted.
The movement has gained considerable momentum, with many game industry workers banding together to form the United Videogame Workers union, advocating for better rights and protections across the sector.
In Diablo 4, pets serve as cosmetic companions that accompany your character throughout your adventures in Sanctuary. They do not provide any combat benefits or stat enhancements; their role is purely for visual flair, allowing players to express their personal style during gameplay. While there are several pets available, each with unique animations and characteristics, the selection is manageable enough that it doesn’t feel overwhelming when demonstrating your individuality.
The raven pet is particularly notable for those who want to showcase a more mysterious or dark persona. Ravens are often linked to themes of mystery, darkness, and omens, making them a fitting companion in the gothic fantasy world of Diablo 4. Having a raven as a companion has been highly anticipated, providing a striking aesthetic that enhances a player’s intimidating vibe. However, acquiring a raven is not as straightforward as getting some other pets.
To earn the Dorian the Raven pet in Diablo 4, players must complete the Season 7 Journey. This can prove to be more challenging than it seems, as it requires time and effort to achieve all the objectives. The Season Journey is divided into chapters, with various tasks that involve defeating certain enemies, completing specific quests, collecting resources like herbs and rawhide, or participating in activities such as Nightmare Dungeons and Helltides.
Each completed chapter rewards players with various items, including Favor, which helps level up the Battle Pass. While some rewards can be earned simply by completing chapters, Dorian will only be granted after you finish the final chapter. Therefore, while accumulating Favor through gameplay helps you progress in the Battle Pass, the pet unlocks solely through completing all the chapters of the Season Journey.
To receive Dorian, you must fully complete the Season Journey, as it is not achievable just through Battle Pass progress.
Once you’ve completed the Season Journey, Dorian will be added to your collection of pets in the game. You can find your new raven by checking your wardrobe, located alongside any other unlocked pets in Diablo 4. Keep in mind that this pet is exclusive to seasonal events, meaning if you don’t engage with the season, you won’t be able to obtain Dorian.
What Does the Raven Pet Do in D4?
Does the Raven Pet Help in Combat?
The raven pet, Dorian, is strictly for cosmetic purposes in Diablo 4. Unlike some pets in other games that might offer assistance in battle or provide stat boosts, Dorian is merely a visual companion. Don’t expect Dorian to contribute to fights or provide any gameplay enhancements. He simply watches as you play, without taking an active role.
As a small, animated raven, Dorian adds a delightful charm to your character as you traverse through Sanctuary. Think of him as an accessory rather than a helper. He doesn’t engage in combat, collect items, or provide any gameplay perks.
By the time you earn Dorian the Raven, you’ll have unlocked a variety of unique items, ensuring that your efforts don’t feel wasted. Essentially, Dorian serves as a badge of honor, signaling to other players that you have successfully completed the season. This makes for a commendable reward in Diablo 4, as it’s preferable to receiving an arbitrary item that might not pique your interest.
If you’re interested in finding and using the Heir of Perdition in Diablo 4, this guide will help you out. The Heir of Perdition is an Ancestral Mythic Unique item introduced in Season Six of Diablo 4. This helmet is versatile and can be equipped by any character class, making it a valuable addition regardless of your build. It comes with a special ability and some base enhancements for your stats.
Finding unique items like the Heir of Perdition can be quite challenging in Diablo 4 due to their rarity. However, knowing which bosses to target can significantly improve your chances of acquiring this helmet. Participating in other endgame activities such as The Pit of the Artificer can also facilitate obtaining the Heir of Perdition.
How to Obtain the Heir of Perdition Mythic Unique Helmet
Best Methods for Acquiring the Helmet: Boss Drops and Crafting
There are two primary methods to obtain the Heir of Perdition in Diablo 4. The first is as a loot drop. Certain bosses have a chance to drop this unique item, and the odds improve when playing at the highest Torment difficulty level. Additionally, using a Seething Opal equipment elixir can enhance the drop rate for Unique items. The following bosses can drop the Heir of Perdition:
Varshan
Lord Zir
Grigoire
Echo of Duriel
The Beast in the Ice
Echo of Andariel
The second method to obtain the Heir of Perdition is through crafting. You can attempt to craft this helmet by creating a random Mythic item at the Blacksmith, although this approach is risky since it consumes two Resplendent Sparks without a guaranteed result. Alternatively, you can create the Heir of Perdition using two Resplendent Sparks along with six Jah Runes, six Que Runes, and six Gar Runes at the Jewelcrafter. Gathering these materials might take longer than acquiring the helmet as a drop, but crafting guarantees you will get the item.
Understanding the Unique Effect of the Heir of Perdition
The Helmet Enhances Damage with Conditions
Equipping the Heir of Perdition instantly triggers its unique effect, granting you a stack of Mother’s Favor. For each stack, you inflict an additional 60% damage on enemies. Stacks can only be obtained by stealing them from other players when you outpace them in defeating nearby enemies. Beware, though—you can also lose stacks to them if they surpass your performance.
Beyond its unique effect, the Heir of Perdition also provides a buff, allowing you to deal 200% more damage to angels and demons. Interestingly, as of now, Diablo 4 lacks angel enemies, which may suggest that new enemy types could be introduced in future updates.
One of the standout features in Diablo 4 Season 7 is the introduction of Witch powers. However, to start unlocking these new abilities, you must first complete the quest called “Poison in the Roots.” This seasonal quest is essential for accessing the special mechanics of the Season of Witchcraft, allowing your character to connect with new magic through a dark ritual. Players may find the puzzles within this quest challenging to navigate.
Once you finish “Poison in the Roots,” you’ll be on your way to acquiring Lost Witchcraft powers in Season 7 of Diablo 4. While you need to create a new character for this seasonal content, you can quickly level up to enjoy these fresh gameplay elements. By gathering Grim Favors and Restless Rot, you can enhance your character’s abilities with unique Witchcraft skills that you can customize during your journey.
How to Solve the Brazier Puzzle
Start the Quest with a Complex Pattern
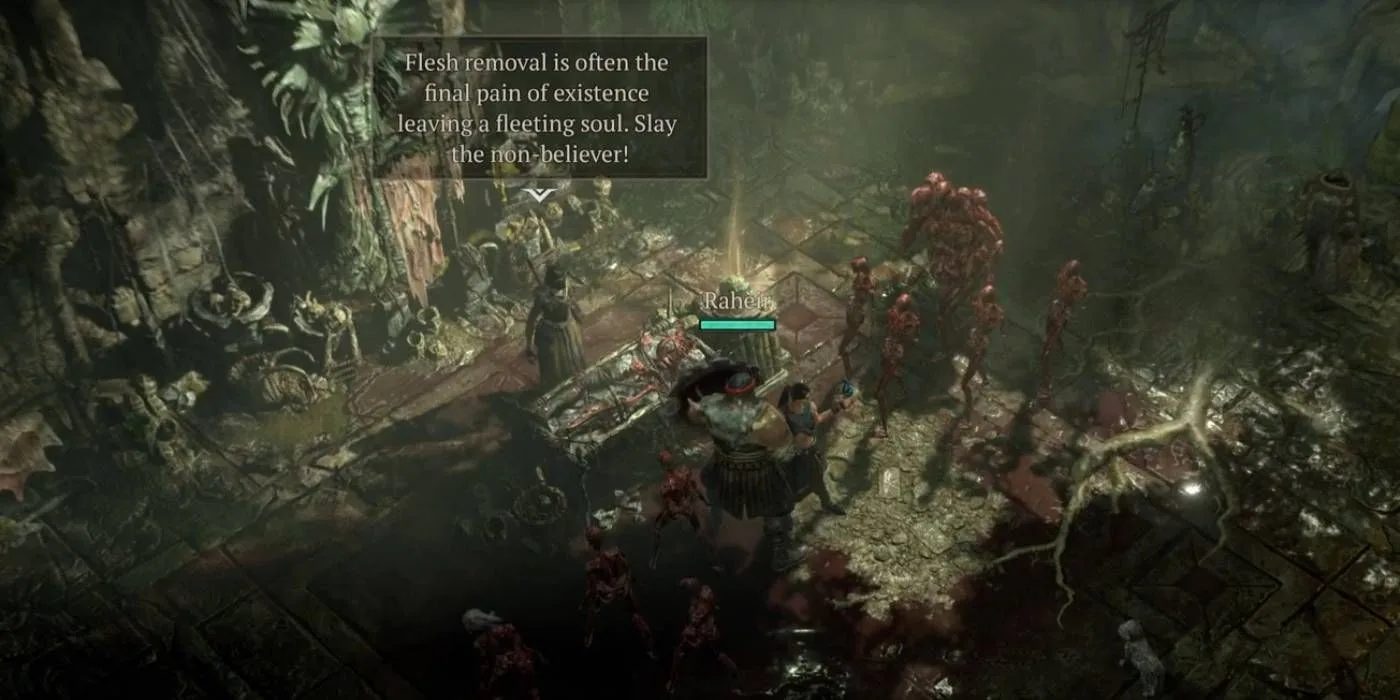
After gathering enough Grim Favors at the beginning of Season 7’s primary questline, you can dive into “Poison in the Roots.” This quest takes place at the Tree of Whispers, where three witches are attempting a ritual to help your character gain new powers. Upon arrival, the witches will have initiated the ritual but require your assistance to complete it.
To begin the “Poison in the Roots” quest, speak with Gelena once you arrive at the Tree of Whispers. Before you start the ritual, you can craft Occult Gems with this NPC if you have the necessary materials.
The ritual setup consists of three braziers and three writhing snakes placed by the witches. Your first task is to light the braziers in a specific order to call upon the Old Name of the Tree of Whispers. If you listened closely to the witches, you would have heard them mention parts of the Old Name in the correct sequence during their ritual.
The correct order for lighting the braziers is as follows:
Ayh – Bottom Left Brazier
Yew – Bottom Right Brazier
Oun – Top Brazier
Successfully solving this lighting puzzle will trigger the ritual, so prepare for an onslaught of enemies shortly after the final brazier is lit. One of the witches will inform you that you must protect the circle as soon as you complete the brazier puzzle. With the new class changes in Season 7, your character’s skills can efficiently defend the ritual circle.
How to Acquire & Use Nangri Blood
Make Sacrifices and Spread Blood in the Correct Area
As soon as you activate the last brazier, attack the snakes in the ritual circle to eliminate them quickly. These snakes drop Nangri Blood upon defeat, along with basic health potions to help fend off the waves of enemies. However, once you collect all three vials of this Blood, there are no explicit instructions on how to use it within the ritual.
You need to trace the blood around the edge of the ritual circle to proceed with the rite. Simply approach any of the lit braziers, and start walking in a circular motion to create a ring of blood around the ritual area. You’ll know you’ve successfully completed this step when one of the brazier flames extinguishes and the ground starts to tremble.
There’s no need to manually select Nangri Blood from your inventory to spread it around the ritual circle. Among the many new features in Diablo 4 Season 7, there is no unique mechanic related to using quest items in an unfamiliar manner.
Now that you’ve fulfilled all the necessary steps to initiate the true ritual, prepare yourself for an intense battle. Keep in mind that you will have additional tasks to accomplish while fending off waves of enemies.
How to Conclude the Poison in the Roots Quest
Defeat Waves of Enemies
Once you’ve spread the Nangri Blood, enemies will begin to spawn, invading the area and attempting to disrupt the Ritual of Cleansing. You must stop enemies from entering the ritual circle, as any remaining foes inside could spoil the process. A gray bar within the circle will slowly decrease as the ritual progresses, helping you track how long you need to defend.
With enemies coming from all sides, make sure to stay close to the ritual circle to guard it from every direction. This segment of the quest can be easier if your character is equipped with powerful AoE attacks that can wipe out small groups of enemies before they reach the circle. Some classes, like the Necromancer, can use their minions as buffers to deter enemies from getting through.
Eventually, these enemies will evolve into Elite versions, presenting different abilities that can vary greatly, so be ready to adjust your strategy as they appear.
During this phase, the witches are safe from harm and cannot be attacked, so you don’t need to worry about their survival throughout the ritual. Toward the end, a mini-boss will appear to lead the remaining minions, who will continue to spawn in large numbers until the ritual is complete. Once the gray bar in the ritual circle is depleted, all enemies on the field will instantly perish, granting you a range of rewards.
Upon leaving the ritual circle, you will engage in another dialogue with the witches, who mention that this could be just the first of many rituals. Completing the ritual rewards you with a Legendary Cache, giving you a chance to snag some impressive loot. You might even discover one of the new unique items from Diablo 4 Season 7 in that cache, although the gear you obtain will still likely be robust even if you miss out on a unique item.
As you advance through Season 7, continue to gather more Grim Favors to offer the witches in exchange for additional powers for your character. Anyone who completes the “Poison in the Roots” quest in Diablo 4 Season 7 will also move forward in the seasonal storyline, unlocking even more exciting rewards.
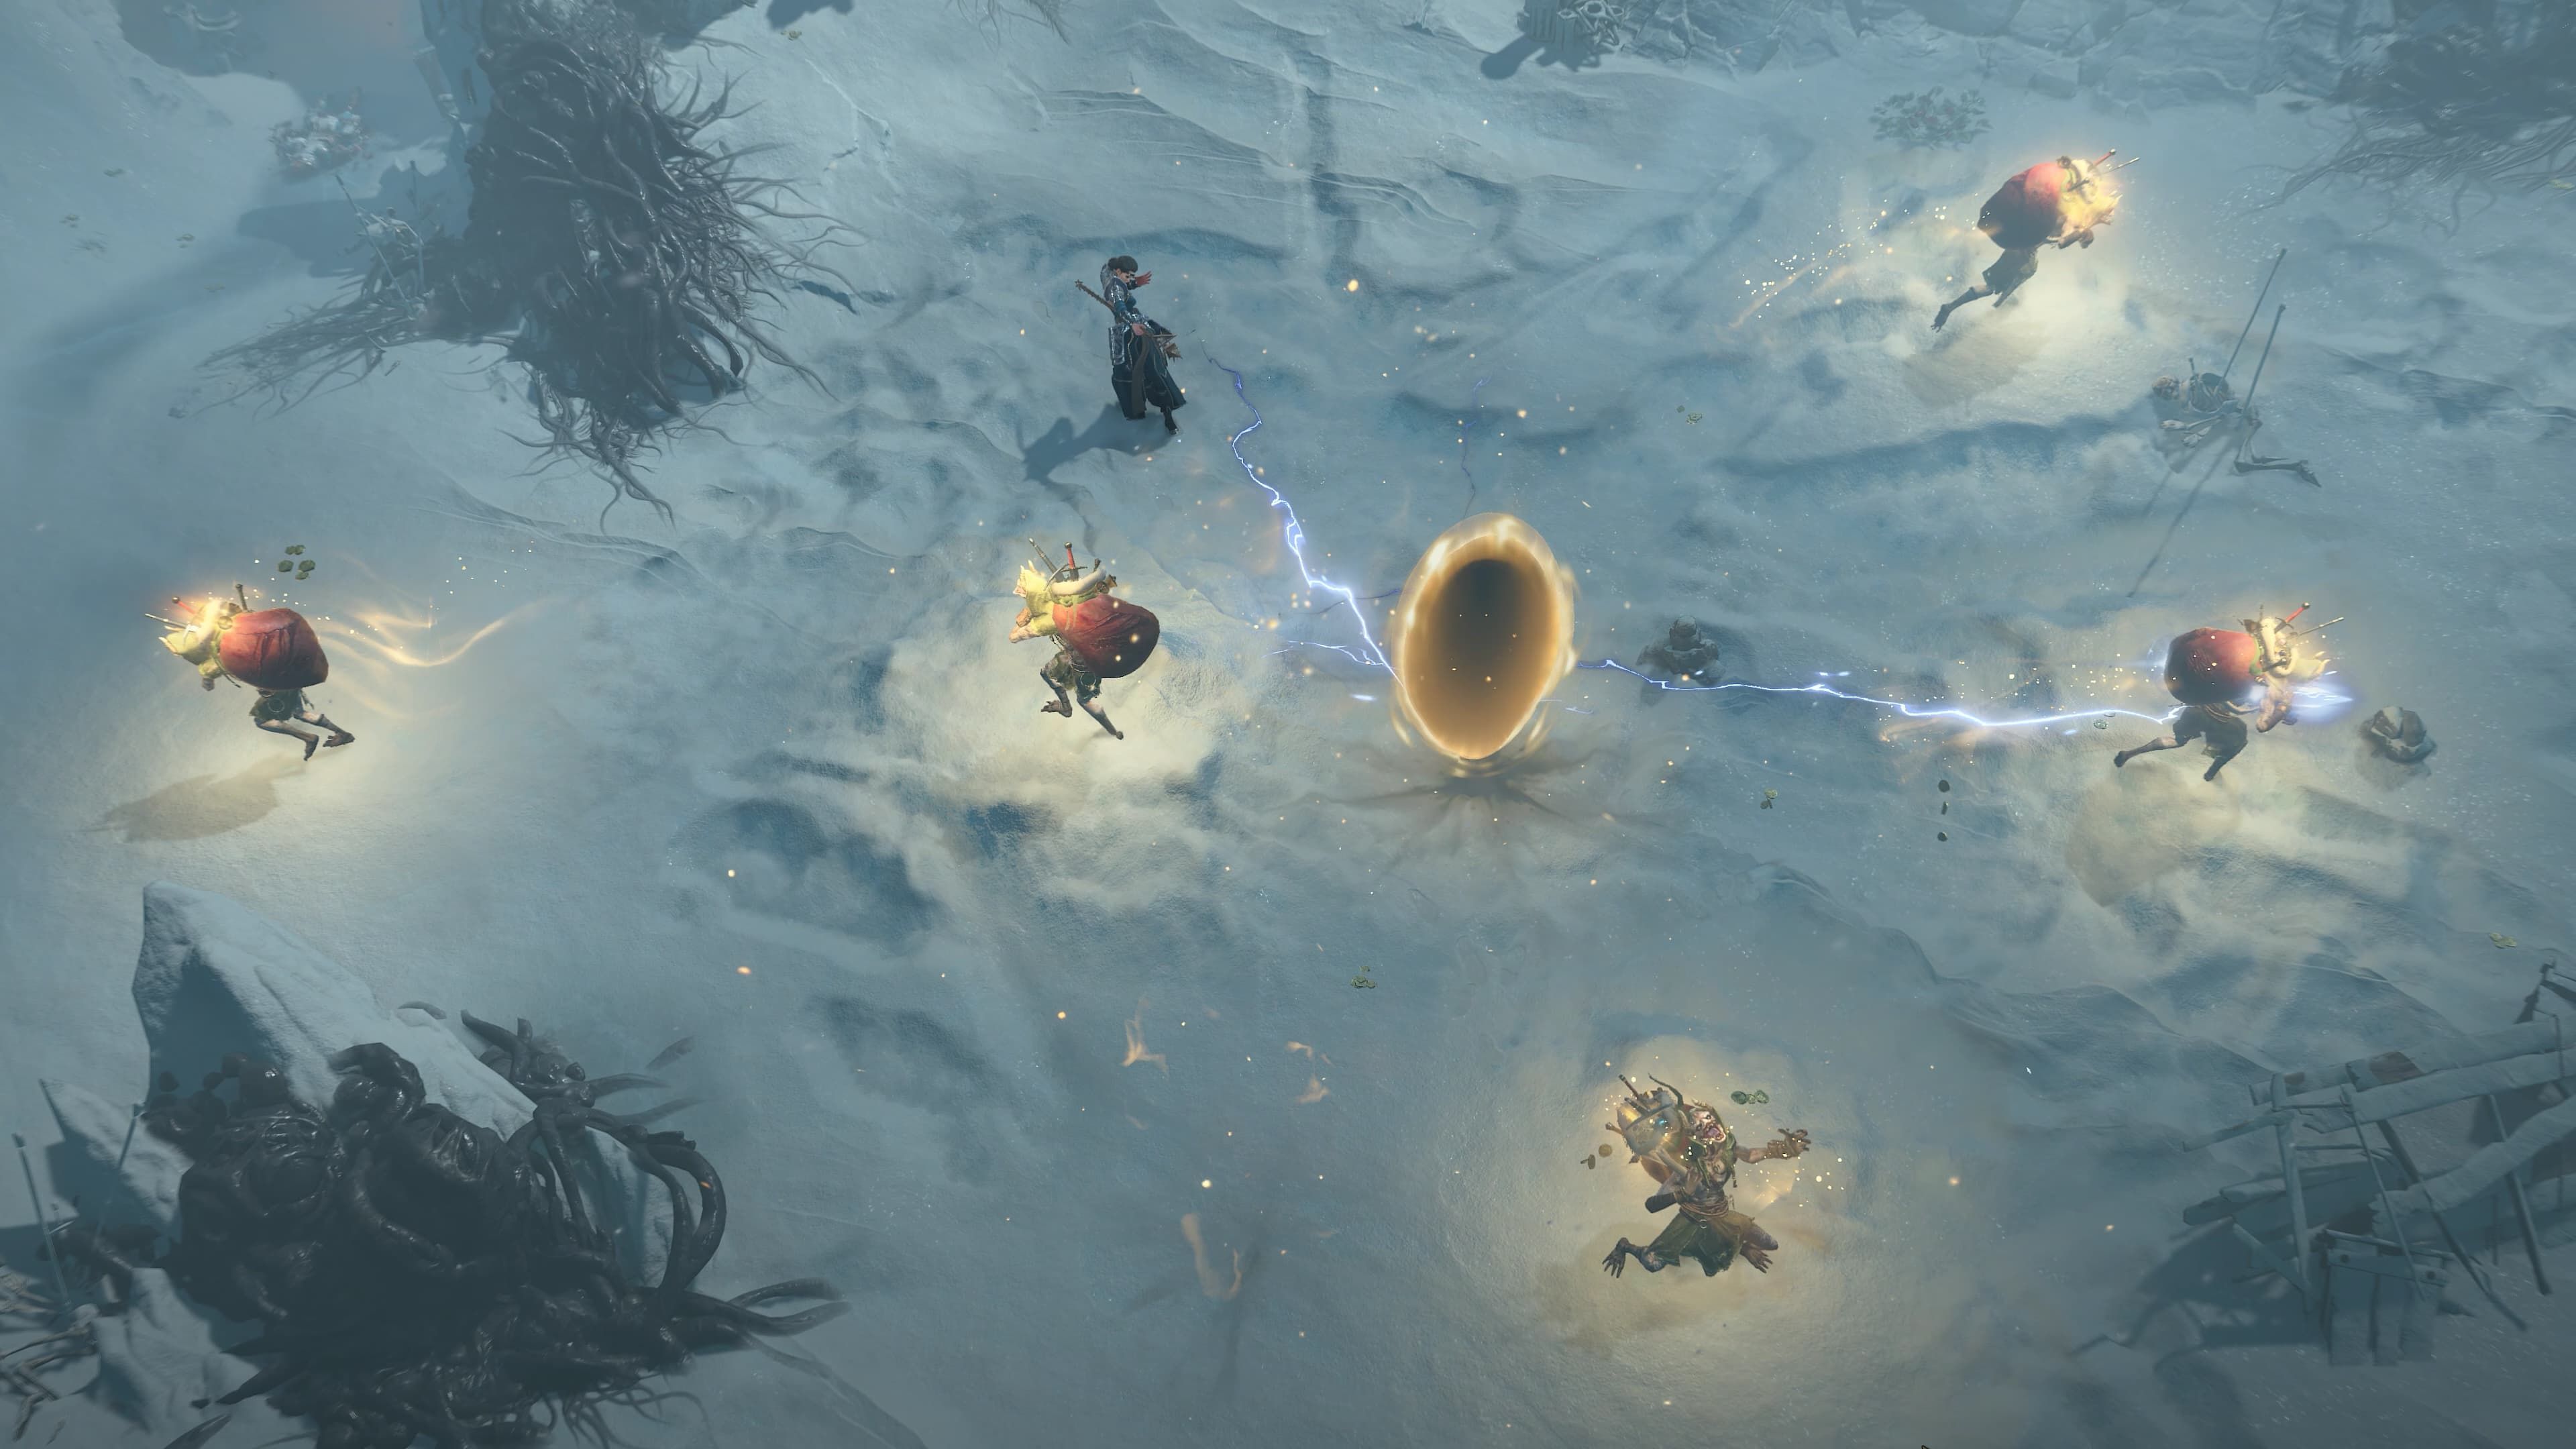
It’s that festive time of year when you can get involved in special holiday events for unique rewards, and Diablo 4 has introduced its winter event called Slay Ride to Hell. If you’re eager to hunt down Treasure Goblins and snag additional rewards for taking them out, this event is perfect for you. Fortunately, you won’t be alone in this endeavor. Every time a goblin is defeated, the kill counts contribute to a collective score for all players, making this a true community effort.
The Slay Ride to Hell event kicks off soon, giving players a couple of weeks to join in and help the community unlock rewards based on the number of Treasure Goblins defeated. Naturally, the more goblins you and others take out, the more powerful rewards you’ll gain. If you haven’t logged into the game for a while and are looking for a reason to return, this may be just the right opportunity for you.
The Diablo 4 Slay Ride to Hell event will take place from December 17, 2024, to January 2, 2025, providing two weeks of action to earn rewards. If you’re on the fence about purchasing the Vessel of Hatred expansion, which introduces the Spiritborn class, you’ll also want to note another window of opportunity; from December 19, 2024, to January 3, 2025, Spiritborn will be available for a free trial.
How To Start Slay Ride To Hell In Diablo 4
Prepare for the Hunt
Blizzard
Joining the Slay Ride to Hell event is straightforward in Diablo 4. Just log in during the event period and get ready to hunt and take down Treasure Goblins. Once a new reward tier is reached, you can collect your prizes at Goblin Square in Kyovashad before resuming your hunt. Understanding the best strategies for tracking down Treasure Goblins will certainly enhance your experience, and be prepared for the possibility of encountering goblins that evade capture.
Treasure Goblins tend to spawn at random intervals and locations, but there are a few tips to improve your chances of spotting them. Notably, Fractured Peaks’ Cellars and Novek’s Treasure Trove are areas known for higher goblin spawn rates compared to other locations.
You’ll likely have better luck finding Treasure Goblins in Nightmare Dungeons and Greed Shrines.
Chasing down Treasure Goblins can be tricky because they tend to flee. This means you may find yourself chasing them over long distances, increasing the risk of attracting other enemies that could interrupt your hunt. Staying persistent is key; remember that inflicting damage on a goblin will slow its escape.
Every Reward For Slay Ride To Hell
Rewards by Tier
The rewards for Slay Ride to Hell are separated into tiers, which unlock as a specific number of Treasure Goblins are slain. Players who have purchased the Vessel of Hatred expansion will also receive exclusive bonuses during this event. Here’s the breakdown of rewards across the tiers.
Tier 1: 5,000,000 Goblins Slain
Once the community collectively slays 5 million Treasure Goblins, all players will receive a Legendary Weapons Cache containing three Ancestral Legendary Weapons. For those who have Vessel of Hatred, the following additional rewards will also be granted:
A Legendary Rune and 2 Random Runes
A Random Undercity Tribute
Tier 2: 10,000,000 Goblins Slain
After 10 million Treasure Goblins are defeated, players will receive another Legendary Weapons Cache, along with a Unique Weapons Cache that includes an Ancestral Unique. Players who own the Vessel of Hatred will also receive:
A Legendary Rune and 3 Random Runes
A Random Undercity Tribute
Tier 3: 15,000,000 Goblins Slain
When the community successfully defeats 15 million Treasure Goblins, all players will earn a Legendary Weapons Cache and a Unique Weapons Cache that includes two Ancestral Uniques. Players can also obtain the Fruit of the Harvest Mount Trophy from the Diablo 4 shop. Those with Vessel of Hatred will receive:
2 Legendary Runes and 3 Random Runes
5 Undercity Tributes of Radiance
Tier 4: 25,000,000 Goblins Slain
After a total of 25 million goblins are dispatched, all players will be rewarded with three Ancestral Uniques and the chance to claim the Harvest Mare’s Totem Mount Trophy from the Diablo 4 shop. Players owning the Vessel of Hatred will receive:
3 Legendary Runes, 2 Rare Runes, and 1 Random Rune
Citadel Coins
Tier 5: 40,000,000 Goblins Slain
The final tier of rewards unlocks when the community has defeated 40 million Treasure Goblins, a significant achievement in the short event period. All players will receive eight Ancestral Legendaries and three Ancestral Uniques, plus a single Resplendent Spark, along with the option to claim the Harvest Mare’s Barding Mount Armor from the Diablo 4 shop. Players who have Vessel of Hatred will receive:
5 Legendary Runes, 2 Rare Runes, and 1 Random Rune
20,000 Citadel Coins
5 Undercity Tributes of Radiance
Once the event concludes, be sure to collect all the rewards available at Goblin Square in Kyovashad before the event ends, so you don’t miss out on what you’ve earned. Additionally, if you haven’t purchased the Vessel of Hatred expansion but want to explore the Spiritborn class, this event provides a unique chance to try it for free.
In addition, there’s a final bonus for everyone participating in Slay Ride to Hell. The Mother’s Blessing buff will be active throughout the event, offering increased experience and extra gold while you play—whether or not you’re hunting for goblins. So gear up and get ready to enjoy a goblin-filled adventure in Diablo 4.
The unique mechanic of the Necromancer’s Book of the Dead in Diablo 4 has undergone significant adjustments regarding specific stats and effects since the game’s release. Although the core system remains intact, the finer details have changed. This guide will discuss those updates and provide you with an overview of this mechanic to help you determine what works best for your playstyle.
The Necromancer continues to be a popular choice among players in Diablo 4, enabling you to rapidly summon a multitude of minions and inflict massive damage. The class has seen a number of enhancements, making it even more appealing. While it might not deal damage at the same scale as the Spiritborn or Sorcerer classes, it remains a potent choice that greatly benefits from the Book of the Dead.
Unlocking the Necromancer’s Book of the Dead Mechanic
What It Does & How It Works
Unlocking the Book of the Dead is straightforward, as it becomes accessible once you reach Level 5. At that point, you can find the menu next to your character menu, which outlines the available minions in three sections. These minions include Skeletal Warriors, Skeletal Mages, and Golems; however, Golems will not be available immediately at Level 5.
Each minion type has an additional three sub-types, which will gradually level up as you progress, requiring no active input beyond leveling up your character. At Level 25, you’ll unlock a special quest called Call of the Underworld, where you’ll venture to the Fractured Peaks to learn a ritual for summoning a Golem.
Minions not only inherit 30% of your stats but also gain any applicable buffs.
All of your minions will start with 30% of your stats, although there are exceptions. You can also upgrade each sub-type with optional enhancements. It’s crucial to note that not every Necromancer build focuses on summoning minions; some players choose to sacrifice them instead. However, if you want to summon minions, you need to have it set as one of your active skills.
Ensure the skills Raise Skeleton & Golem are on your skill bar if you intend to summon them.
If you’re looking for further details on utilizing the minions effectively, check out this video from YouTuber Goblin Inc. Essentially, Skeletons can serve as either close-range fighters or distant attack spellcasters, depending on whether you’re summoning Warriors or Mages, while Golems function as tanks. To craft an effective endgame Necromancer build, understanding how their stats operate is essential.
Top Necromancer Book of the Dead Summons, Bonuses & Upgrades
All Stats & What They Do
Updates to the Book of the Dead primarily focus on the individual stats for each Summon and their sub-types. Each summon features three sub-types so that you can select their specialization based on the role you wish them to fulfill. You can only choose one additional bonus, but if you opt for the sacrificial route instead, you’ll receive a permanent boost. Note that each minion has limitations to how many can be summoned, although certain unique Necromancer items—like Legendary Aspects—may allow for more.
During World Boss battles, minions will automatically respawn after being defeated.
Skeletal Warriors behave much like standard Skeleton foes, rushing into combat to attack enemies at close range. You can summon 4 initially, and their stats are as follows:
Skeletal Warrior Sub-Type
Base Ability
Optional Upgrades
Sacrifice Ability
Skirmishers
Deal 30% more damage but have 15% less health.
You can summon an additional Skirmisher.
Increase your Critical Strike Chance by 10%.
Each critical strike enables your Skirmisher’s next attack to crit as well, dealing 50% extra damage, usable every 3 seconds.
Defenders
15% more health.
Every 6 seconds, Defenders negate the next instance of damage they would take.
You gain 15% Physical Resistance.
Increase the Thorns they receive from you by 50%.
Reapers
Wield a powerful scythe with a special wind-up attack that deals heavy damage every 10 seconds.
Reaper attacks against immobilized, slowed, stunned, or vulnerable targets reduce their special attack cooldown by 2 seconds.
You deal 10% more Shadow damage.
Reapers have a 15% chance to carve flesh off enemies, creating a Corpse.
Skeletal Mages are ranged units that launch spells from a distance at enemies, and you can summon 3 of them initially. Their stats are as follows:
Skeletal Mage Sub-Type
Base Ability
Optional Upgrades
Sacrifice Ability
Shadow
Deals moderate Shadow damage.
Shadows have a 10% chance to stun for 2 seconds once per target every 5 seconds.
Your Maximum Essence is increased by 15%.
Shadows fire an additional Shadow Bolt every fourth attack.
Cold
Deals chill damage.
Every time Cold Mages hit with their primary attack, you gain 2 Essence.
You deal 15% more damage to vulnerable enemies.
Enemies frozen by Cold Mage’s primary attack are vulnerable for 4 seconds.
Bone
Utilize their bodies as projectiles, inflicting heavy damage at the cost of their own life.
Reduce Life cost of your Bone Mages’ attacks from 15% to 10%. After being alive for 5 seconds, they deal 40% more damage.
Your overpower damage is increased by 40%.
Each time a Bone Mage perishes due to its own attack, it creates a corpse and fortifies you for 20% of your base life.
As mentioned, Golems serve more as tanks, possessing high health to endure enemy attacks. You initially gain the ability to summon just one Golem, with their stats outlined below:
Golem Sub-Type
Base Ability
Optional Upgrades
Sacrifice Ability
Bone
Taunts enemies, drawing their attacks.
Every time your Bone Golem takes damage up to 20% of its Maximum Life, it sheds a corpse.
You gain 10% increased Attack Speed.
Bone Golem gains 10% Maximum Life and the Thorns they inherit from you increases to 50%.
Blood
Absorbs life from nearby enemies to recover and strengthen itself.
Blood Golem absorbs 15% of the damage that you would take.
Your Maximum Life is increased by 10%.
While healthy, the Blood Golem gains 25% Damage Reduction and 50% more damage output.
Iron
Inflicts stuns on enemies.
Every fourth attack from the Iron Golem creates a shockwave, dealing 30% damage to the primary target and those behind it.
You deal 30% increased Critical Strike Damage.
Golem’s slam attack will also make enemies vulnerable for 3 seconds.
Ultimately, players should tailor their summons to fit their desired playstyle. The Bone Spiritwave build remains a commonly favored option, sacrificing all three summons for a significant power boost. Feel free to experiment to discover what aligns best with your preferred approach. This will enhance your experience with the Book of the Dead as a Necromancer in Diablo 4.
Initially, there were concerns that Barbarian builds might struggle in the Season 6 meta for Diablo 4. However, despite significant nerfs, the Bleed Thorns build has returned and feels stronger than before. Fans of the Barbarian class will be excited to have a powerful endgame build once again.
While it may not be as dominant as the Spiritborn build, this build remains quite effective. It relies on several elements working in tandem, along with top-tier gear, but once you establish the essentials, you can confidently charge into battle with bosses without taking damage. Those who were eager for this build’s resurgence will not be disappointed.
Top Bleed Thorns Barbarian Build
Features & New Key Passive
This build has gained traction largely due to a new key passive for the class, which YouTuber Rob2628 explains in detail. This guide will follow his recommended setup, and you can find the full breakdown on the D4Builds website. While this build shares some similarities with other high-performing Barbarian builds, it is uniquely tailored as a Thorns build.
In contrast to many other popular builds, this one does not heavily utilize Earthquake and Dust Demon. Instead, it focuses exclusively on Thorns, aiming for optimal effectiveness in that area. While it may not clear areas as quickly as some alternatives, it is still capable of engaging bosses without suffering significant damage and is designed for tackling The Pit.
The new key passive Barbed Carapace significantly enhances this build. It increases your Thorns damage based on Fury expenditure. Additionally, it enables you to deliver all Thorns damage as physical damage to enemies that come too close every second for five seconds. This makes for a powerful setup, especially for clearing The Pit, and maximizes your Thorns potential.
Essential to this build is the Needleflare Horned Cudgel, amplifying your Thorns effects. Most of your gear should follow this synergy, so make sure to use Forgotten Souls in Diablo 4 to re-roll your Enchantments and maximize key stats.
Best Gear & Aspects for a Bleed Thorns Barbarian
Equipment & Suggested Skills
For this build, you’ll want to utilize some familiar gear that complements the Thorns mechanic. While there are various appealing new items in Diablo 4, the Barbarian benefits most from equipment that interacts with Thorns while occasionally adding Earthquake damage.
Active Skills & Runes
The choice of active skills is crucial, as they influence how your character triggers passive bonuses. Aim to have the best skills unlocked and leveled up for optimal performance. Suggested active skills include:
Bludgeoning Weapon
War Cry
Rallying Cry
Challenging Shout
Bash
This season, you won’t need to worry about Gems, but be mindful of the Active Runes on your gear. You want these runes to activate based on your existing skills or actions, enhancing your chances of succeeding in The Pit.
Yul (Legendary/Ritual) & Xal (Rare/Invocation)
Lith (Legendary/Ritual) & Tec (Rune Invocation)
The Lith/Tec combo provides Offering when you remain stationary, which is crucial for a Thorns Barbarian, allowing you to use Earthquake more frequently. The Yul/Xal combination triggers Offering when you use a cooldown skill, granting you 20% Maximum Life upon activation, thus boosting your survivability. Feel free to customize your setup, but given the nerfs and how this build doesn’t quite match the highest tiers of the meta, consider sticking with the recommended skills if possible.
Gear/Aspects
While there are multiple gear options available, some well-known choices remain the best for Thorns builds. Although certain pieces can synergize with Earthquake, your primary focus should be on amplifying your Thorns effects. Here are the recommended gear pieces:
Equipment Slot
Gear/Aspect
Helm
Harlequin Crest
Chest Armor
Razorplate
Gloves
Aspect of Inner Calm
Pants
Aspect of Bul-Kathos
Boots
Exploiter’s Aspect
Bludgeoning Weapon
Needleflare Aspect
Slashing Weapon
Ancients’ Oath
Dual-Wield Weapon 1
Aspect of Elements
Dual-Wield Weapon 2
Doombringer
Amulet
Aspect of Earthquakes
Ring 1
Bold Chieftain’s Aspect
Ring 2
Ring of Starless Skies
Needleflare and Razorplate provide substantial boosts in both Thorns and Thorns damage. With the right rolls, you might also increase your Earthquake uses.
Skill Tree Upgrades
Your Skill Tree should focus on maximizing base damage, Overpower, and survivability. While Bleed damage remains part of your build, it won’t be your primary focus due to the significance of the Barbed Carapace Passive Skill, which means you may forgo Gushing Wounds. Still, several skills will enhance Bleed Damage, with additional support available through the Paragon Board.
Skill
Suggested Rank
Upgrades To Skill
Bash
1
Enhanced Bash; Combat Bash
Hammer of the Ancients
1
Enhanced Hammer of the Ancients; Violent Hammer of the Ancients
With any luck, you should keep Fortify active nearly all the time, generating substantial amounts of Thorns while remaining nearly invulnerable against bosses with this optimized setup.
Paragon Board
For your Paragon Board, select Nodes that will focus on enhancing your base damage and providing bonuses for Thorns usage.
Starting Board, Rumble
Proceed to Ambidextrous (Carnage), moving both up and right
To the right, find Challenger (Blood Rage)
Above Ambidextrous, locate the Undaunted One (Decimator)
Continue progressing upward to reach Force of Nature (Revenge)
Blood Rage capitalizes on the bleed damage you will deal, adding further damage potential along with a Berserking bonus. There are numerous options to explore, so don’t hesitate to experiment.
The Rumble Glyph was notably impacted by nerfs, but it remains essential as it is the first glyph available on your Paragon Board.
Your build should now be optimized for your Bleed Thorns Barbarian as you venture forth to face more adversaries in the Eternal Realm of Diablo 4.
Forgotten Souls are a new crafting item introduced in the Diablo 4: Vessel of Hatred DLC. With various ways to utilize these materials in crafting, prioritizing their collection and farming has become crucial. However, players have expressed some frustration about the farming processes, making it essential to learn the most efficient methods for acquiring them.
If you’re eager to harness the power of the Spiritborn class in Diablo 4: Vessel of Hatred, understanding how Forgotten Souls function is key to maximizing this class’s potential. These items are relatively rare, so following the guide below can assist you in locating them and knowing when to use them effectively.
How to Farm Forgotten Souls
Participate in the Right Helltide Events
Forgotten Souls are a limited resource, and many players hope for changes from the developers regarding their acquisition methods, as noted by YouTuber Rob2628. You can find these materials by engaging in Helltides, but specific locations yield better results.
To increase your chances of gathering more Forgotten Souls during Helltides, consider raising your World Tier difficulty. If your character build is strong enough, Torment IV is the best level for farming these items, although they can also appear in lower tiers. Additionally, contributing to the ritual to summon and defeat the Blood Maiden during these events significantly increases your chances of receiving more Forgotten Souls.
During Helltide events, make sure to open smaller Tortured Gifts as they can also yield Forgotten Souls. While larger Tortured Gifts are an option, they require more resources to open and only provide the same amount of souls.
When the ritual is active, you can quickly gather Tortured Gifts before returning to deliver the final blow to the Maiden. Each time you do this, you will collect a small amount of Forgotten Souls, and you can repeat the process multiple times without much hassle—giving you the opportunity to return to town and stock up more if needed. This method is an efficient way to gather the Forgotten Souls necessary for enhancing your gear.
Other sources exist for acquiring Forgotten Souls, though they may be less effective. You can obtain them from Spoils of Material chests found in Infernal Hordes, but this method is time-consuming. Completing the Undercity of Kurast will yield some Forgotten Souls, although using additional tributes won’t increase your yield. Clearing the Dark Citadel is another option, but like the previous methods, it demands a significant time investment.
Lastly, you can barter with Mercenaries for Forgotten Souls, but you’ll need Pale Marks for the trade. It’s a viable option if you find yourself in a tough spot but should be considered a last resort.
How to Use Forgotten Souls
Use as Crafting Material
Once you’ve gathered some Forgotten Souls, you may be wondering how to put them to use. One of their primary functions is to enchant legendary items at the Occultist, allowing you to re-roll a specific affix for a potentially more beneficial property. This process will also require several other materials, with Forgotten Souls now playing an integral role.
You can also use Forgotten Souls to masterwork Ancestral or Mythic Unique gear. This endgame feature involves several steps: first, temper your gear at least once (or twice for Ancestral gear). Then, take your materials to a blacksmith to initiate the Masterworking process.
For non-Ancestral legendary items, you do not need Forgotten Souls to masterwork them; this requirement only applies to Ancestral and Mythic Unique items.
Masterwork ranks require a varying number of Forgotten Souls, starting from three for the lowest rank to as many as fifteen for the highest. Additionally, you have the option to reset the Masterwork rank on any item by clicking the red circle next to the rank and following the specific recipe.
Each rank enhances your gear’s affixes, making them more powerful. With the number of Forgotten Souls needed, starting your farm as soon as possible in Diablo 4 is essential to equip yourself for your battles.
For more insights, check out the YouTube video by Rob2628 for additional strategies and tips!
In the Diablo 4: Vessel of Hatred DLC, players can unlock and engage in a new endgame activity called the Dark Citadel. This extensive activity provides an opportunity to elevate your Paragon Levels even further, featuring three distinct wings to conquer.
The Vessel of Hatred DLC for Diablo 4 introduces a wealth of new features and mechanics that players can explore. This includes a new class, fresh Runes, and an array of new items and gear that accompany each season. To fully take advantage of what this DLC has to offer, players should thoroughly explore the map to discover all the new content and see how it impacts their gaming experience.
How to Access the Dark Citadel in Diablo 4
Prerequisites to Play
Before diving into the Dark Citadel, players need to make sure they’re eligible to enter. There are several criteria to meet before unlocking this new activity, and reaching the required level is essential.
To begin, players must complete the Crater of Lost Souls Priority Quest. This requires having also finished the story campaign for Vessel of Hatred, and thus you will need to own the DLC. This is why the Dark Citadel is classified as an endgame activity. Fortunately, you can accomplish this quest shortly after completing the campaign, assuming you’ve quickly reached your maximum level.
Keep in mind that the Dark Citadel is strictly a multiplayer dungeon. Solo play is not possible, and you cannot utilize Mercenaries for assistance.
Next, talk to Priestess Cualli, located near the World Tier Statue in Upper Kurast, to initiate the quest. It’s important to ensure you are operating on Torment Difficulty, as this is a requirement for both the quest and the Dark Citadel itself.
While at least two players are needed to tackle the Dark Citadel, you can gather a party of up to four. Once unlocked and your team is set, you’ll navigate through three wings to complete the activity, with your progress being saved at various intervals.
Walkthrough for Completing the Dark Citadel Dungeon
Navigating Each Wing
There are a total of three wings you must go through before reaching the dungeon’s conclusion. Each wing presents its challenges, but with a strong team, the journey can be significantly more manageable. For a visual guide, check out YouTuber Zizaran’s video. Below is a guide on how to navigate through all three wings:
Enclave of Strife (Left Wing)
In this section of the Dark Citadel, players must utilize Ward Stones and Sealing Wards to successfully complete the dungeon. You will need to defeat elite enemies known as Ward Guardians to obtain the Ward Stones, which can then be placed on the Sealing Wards located on the doors.
Additionally, stepping on colored tiles that correspond to nearby barriers is necessary to eliminate those barriers. Keep an eye out for Soul Siphons, which are areas that activate when you step inside. Remaining within their radius until they fully charge is essential to progress through this wing.
As you navigate the Dark Citadel, you’ll be building up a debuff called Impending Doom. To remove this debuff, look for Soul Dampeners, which will allow you to dispel the effects of Impending Doom.
Your goal will be to defeat the boss of this wing, Gorschak. One party member needs to enter the Spirit Realm by collecting Realm Shards from defeated enemies and using them at the Gateway. Subsequently, this player can teleport back while another remains to assist the rest of the team. If you are having difficulty with this encounter, consider using optimal builds for the season to help you succeed.
The member in the Spirit Realm will need to defeat Ward Guardians to acquire Ward Stones to deactivate Sealing Wards, which will then summon the elite enemy Fragmented Soul of Gorschak. Once you eliminate this enemy, you will gain the Soul Essence required to return, and make sure to utilize Soul Dampeners to manage your Impending Doom effectively.
Be prepared to wait for your teammates to reopen the Gateway when needed.
Once you’ve gathered enough Soul Essence, deposit it in the Conduit of Souls to make Gorschak vulnerable for the damage phase. Repeat these steps at each health threshold until you finally defeat Gorschak and proceed to the next wing.
Labyrinth of Souls (Right Wing)
Most of the mechanics used in the Left Wing will be present here as well, so keep that in mind as you venture into this part of the dungeon. In addition, you’ll encounter Sigil Rooms and Barrier Guardians. Make sure to take out the Barrier Guardians to gain access to the corresponding Sigil Rooms.
You will need to correctly match the Sigils to their respective rooms, which may require locating them near the defeated Barrier Guardians. As you progress, you’ll once again navigate through the Realm of Oblivion, managing Impending Doom with Soul Dampeners as you go.
Related
Diablo 4: Season 6 – All Uber Mythic Uniques & What They Do
Uber Mythic Uniques are the most powerful items available in Diablo 4, but each has restrictions on which classes they benefit due to their unique effects.
While progressing through the dungeons, you’ll encounter Faeroch, who possesses a powerful attack capable of wiping out party members. To avoid this, simply remain within the protective bubble that appears during the attack. After the threat has passed, you can counterattack and reposition as necessary.
The final encounter in this wing will be Lorzuul, the Gorger. Players must find additional Sigils and match them with corresponding markings around the battleground to make Lorzuul susceptible to damage. Once all Sigils are matched, Lorzuul will lose his immunity, allowing you to unleash your attacks until he is defeated.
Dominion of Zagraal (Center Wing)
This central wing’s primary mechanic revolves around taking down Spell Guardians to acquire a Counterspell Stone. This stone will enable you to repel Soul Orbs from the bosses, thereby unlocking a portal. Players must then activate the pedestals around the portals to negate a barrier. Within these portals, you will again collect Ward Stones and address Sealing Wards.
Eventually, you’ll arrive at the Exalted Cloister, utilizing many of the previously learned mechanics, such as stepping on pedestals and employing Ward Stones. You’ll confront the bosses Vorshok and Hurstt, along with more Spell Guardians for the coveted Counterspell Stones, which will allow you to deflect a Soul Orb from either boss.
Once that is accomplished, you’ll have the chance to enter the Spirit Realm to eliminate the boss you countered. After fighting that boss, return through the portal and repeat the process to bring down the other one.
Continuing on, you’ll face Zagraal, who merges various mechanics from prior boss fights. Initially, you’ll use portals to whittle down his health, but like other bosses, he will become impervious at times. Activate the pedestals to eliminate the barrier and then engage the conduit. Following that, you must charge all four Soul Siphons and place a Sigil on the corresponding Soul Siphon. Once this is achieved, a Spell Guardian will materialize, granting you a Counterspell Stone.
Utilize the Counterspell Stone as in previous instances to re-enter the damage phase. You’ll need to replicate these steps to eventually finish Zagraal. Upon his defeat, you’ll be granted the chance to collect rewards, including new armor cosmetics in Diablo 4.
Rewards Awarded for Each Wing
Enclave of Strife
Helm of Khazra Cosmetic; Legendary Cache
Labyrinth of Souls
Gloves of Khazra Cosmetic; Legendary Cache
Dominion of Zagraal
Severed Head of Zagraal; Khazra Armor Cosmetic; Legendary Cache
Overall, tackling the Dark Citadel will grant players a Weekly Cache, making it beneficial to run this dungeon once per week. Additionally, players will earn Citadel Coins, which can be redeemed for exclusive cosmetics tied to the Dark Citadel in Diablo 4: Vessel of Hatred.
With the arrival of the Vessel of Hatred DLC for Diablo 4, new Runewords have been introduced, putting a fresh spin on various gameplay mechanics. This DLC not only introduces an entirely new class but significantly alters gameplay strategies, requiring players to adapt their approaches. Runes serve as one of these exciting new features, and you’ll want to prioritize finding them, as they can greatly enhance your character’s power and equipment.
Like the newly included Spiritborn class, some of these Runes can provide considerable benefits. Runes are scattered throughout the game and players can fairly quickly acquire them based on their leveling pace. With a bit of luck, you can start discovering and crafting Runes just hours after leveling up your new character and tackling the Torment difficulties to secure the best loot.
What Are Runes In Diablo 4?
How They Work & What They’re Used For
The new DLC features a substantial selection of Runes—at least 45 new ones have been added. They fall into two categories: Runes of Invocation and Runes of Ritual. When combined, these Runes form Runewords that can be socketed into any weapon, item, or piece of gear that has two sockets.
Runes of Ritual produce a resource called Offering, which is necessary to activate the effects of Runes of Invocation. A sufficient amount of Offering is needed to trigger these effects, with more powerful Invocations requiring more Offering. Conversely, the harder the Rune of Ritual is to activate, the more Offering it generates and the stronger its effects become. These mechanics allow players to develop optimal builds for their characters in Diablo 4.
Important Notes:
Only players who purchase the Vessel of Hatred DLC will gain access to the new Rune system.
There is a mechanic called Overflow that lets Runes of Invocation take advantage of any excess Offering. This aspect encourages strategic consideration of how to utilize your Runes and how to effectively combine them into Runewords.
Keep in mind that regardless of the number of sockets available, you can have up to two Runewords equipped at any given time (a maximum of four Runes).
Rarity of Runes
There are three primary rarities of Runes, which boost the power and capabilities of Runes according to their rarity: Magic, Rare, and Legendary Runes, with Legendary providing the most potent effects when combined correctly.
How To Get More Runes In Diablo 4
Farming & Crafting Methods
There are numerous ways to acquire additional Runes in Diablo 4—some easier than others. Many methods involve randomness, but if you’re set on obtaining a specific Rune, trading with other players may be your best option.
World Drops
The simplest way to find Runes is through conventional looting methods. They often drop from enemies and chests, particularly in high-density enemy areas. You can farm locations like The Pit or Helltides, where greater enemy concentrations exist, providing a better chance to accumulate Runes quickly. Areas like Kurast Undercity are also ideal for encountering numerous enemies with decent loot.
Trading With Other Players
All Runes are tradeable, which allows you to obtain specific Runes through player interaction. However, be prepared to spend real money to get the Runes you want or to exchange for another valuable item. As with all trades, exercise caution when dealing with strangers.
Crafting Runes
Another method of obtaining Runes is through crafting. You can combine three Runes of the same rarity to create a new one, potentially of a higher rarity. This process can be done at the Jeweler whenever you have three Runes to meld.
Additionally, you can utilize crafting in a unique way to create a Mythic Unique with the proper ingredients:
Items
Amounts
Magic Runes
10
Rare Runes
10
Legendary Runes
10
Resplendent Spark
1
For most seasons, you can expect to secure three Resplendent Sparks: one from Lilith, one from a Tormented Boss, and one from reputation gains. This means you can potentially acquire three Mythic Uniques each season, gearing up your character comprehensively.
Regardless of how you choose to collect Runes, you can combine them to craft Runewords, greatly enhancing your character’s abilities. With a plethora of combinations between the two Rune types, feel free to experiment and find what suits your gameplay style. For excellent suggestions on the best Runewords in Diablo 4 this season, check out YouTuber Raxxanterax.
Before the release of the Vessel of Hatred DLC for Diablo 4, players had limited options for specifically farming unique items. The primary method involved battling Tormented Bosses, each of which had a chance to drop unique items from their loot tables. However, for the average player, gathering enough materials to summon these bosses often took a significant amount of time.
Fortunately, Diablo 4 Season 6 introduced a valuable resource: the Purveyor of Curiosities. This vendor has been part of the game since its launch but has received enhancements to how players can farm loot, particularly through activities like Infernal Hordes. Previously, the vendor’s drop rates for legendary items were disappointingly low.
Utilize the Purveyor of Curiosities
An Unexpected Comeback for the Vendor
Prior to Season 6, the Purveyor of Curiosities primarily offered Magic and Rare items, which weren’t particularly useful for endgame content. Now, however, this vendor has significantly improved drop rates for Legendary items and also has the potential to drop Unique items, making it easier for players to farm specific uniques from the Purveyor.
With the recent changes, players can use their Obols to purchase specific items for their builds. For instance, there are only two Unique Spiritborn Quarterstaffs available: the Rod of Kepeleke and Sepazontec. Spending Obols on Quarterstaffs gives players a 50% chance of acquiring their desired item. Both of these Unique Quarterstaffs play a crucial role in top-tier endgame builds, so it’s worth considering this strategy.
Tip: The Rod of Kepeleke is currently featured in the top build for Diablo 4, specifically in the Quill Volley Spiritborn setup.
While this farming technique can be effective, it’s crucial to maintain a steady supply of Obols. Players can farm Obols through activities like the Artificer’s Pit and Nightmare Dungeons, which also help them level up quickly.
Quick Guides for Gathering Obols
Efficient Farming in the Artificer’s Pit and Nightmare Dungeons
To collect enough Obols to make this method worthwhile, I recommend focusing on grinding the Artificer’s Pit. This location is much quicker than Nightmare Dungeons and has become a preferred spot for leveling up Glyphs, which have undergone a comprehensive rework this season. Additionally, the Artificer’s Pit drops Legendary items, which are scarcer now than they were in previous seasons.
Note: Ancestral Gear is now only available as a chance drop, regardless of the Torment Tier a player is facing.
It’s important to remember that while this approach is quite effective for obtaining specific Unique items during the midgame, it does not match the potential of farming Tormented Bosses, which offer a chance at Ancestral Unique items.
With Stygian Stones removed from the game, farming Tormented Bosses has become more accessible. The reworked gear system also ensures that all Ancestral items come with Greater Affixes, reinforcing that farming Tormented Bosses remains a dependable source for endgame loot in Diablo 4.
After defeating the final boss in the Vessel of Hatred expansion for Diablo 4, you’ll have the opportunity to embark on the “Tenets of Depravity” questline. This extensive set of side quests offers valuable rewards, including unique gear and experience points, making it worthwhile for enhancing your character’s abilities and inventory. However, with its various stages, the quest can get a bit tricky to navigate.
If you’re looking to dive into the seasonal content, one effective method is to create a new character and bypass the main campaign. When you choose your character’s Realm, opt for the Seasonal Realm to access the Vessel of Hatred quests in Season 6 of Diablo 4. Look for green leaf icons on your map, indicating where you can begin seasonal content once you’ve entered the appropriate world.
How to Start the Tenets of Depravity Quest
Talk to the Right Person to Get Started
The only way to initiate the “Tenets of Depravity” quest is by talking to the Guard located near the east side of Upper Kurast. This character becomes available only after you’ve started the “Deeds of a Champion” quest tied to the main storyline of Vessel of Hatred. Once you meet the prerequisites, engage the Guard about the deceased civilian nearby to begin your series of side quests.
Keep in mind, you cannot access seasonal content in Vessel of Hatred until you’ve completed Act 7 of the main campaign in Diablo 4 at least once. Once you do, feel free to create another character to bypass straight to the right side quest.
Other NPCs in Upper Kurast may mention Captain Kharov in addition to the guard, so don’t hesitate to explore for alternative ways to trigger the quest if necessary. When you receive the quest, a marker will appear on your map showing where to go next. Be sure to turn off any other active quest markers, including the “Deeds of a Champion” quest that may lead you elsewhere.
How to Complete the Tenets of Depravity Quest
Complete Four Different Missions
The “Tenets of Depravity” questline consists of four missions:
“Sacrament of the Faithless”
“An End to Suffering”
“Companion to Madness”
“Scion of Blasphemies”
While some of these missions may be straightforward, as they might only require a chat with another NPC or a trip to another location on the map, others can provide a greater challenge. Those who have explored the Season 6 areas might already have unlocked Waypoints for quicker travel to certain quest objectives.
How to Complete Sacrament of the Faithless
The first mission, “Sacrament of the Faithless,” kicks off when you learn about Captain Kharov. Travel to Faith’s Torch, located north of the Seven Stones, and talk to the NPC Priest Dmitriy for more insights into the twisted officer. You’ll find him trapped in a stockade, where you can pry for more details regarding the Knights in the area.
The Knights here are apparently afflicted by a vice known as the “Sacrament,” which a nearby Scribe enthusiastically endorses under the Captain’s orders. Defeat the Berserk Knight released by the Scribe, then speak to the Priest once more. Remember to pick up the Account of Captain Kharov’s Madness located near the Priest and report to the NPC Prava in Gea Kul up north to finish this segment of the quest.
How to Complete An End to Suffering
Afterwards, Prava will instruct you to seek out Captain Kharov at the Burned Knight Camp in Seven Stones, which is marked on your map. Go there and investigate the corpse of the Impaled Knight to uncover a hidden dungeon in Diablo 4 called “Faith’s Torch: Knight Command Quarter.” Prepare your character, as this area is fraught with danger.
Completing side quests in “Tenets of Depravity” will grant you experience and gold, both crucial for leveling up and acquiring better gear. Remember to enhance your skills and equipment before tackling subsequent quests in the series.
Inside this smaller dungeon, you’ll encounter a group of Kharov’s loyalists, who are burning Priest Dmitriy. Eliminate the foes within, then speak to the Priest again, who divulges that a person named Marzhan knows Kharov’s whereabouts. Unfortunately, Dmitriy succumbs after providing this critical information.
How to Complete Companion to Madness
You might recall Marzhan as the individual who imprisoned Dmitriy. Search the Burned Knight camp at Seven Stones to find Marzhan again, who will rush to assist you as a means of earning Kharov’s favor. Carefully follow Marzhan and clear out any enemies in the nearby arena eager to get an audience with the Captain.
As demonstrated in a video by YouTube user Akifini’s Gaming, speak to Marzhan once more to learn that Kharov resides in a location known as the Temple of the Profane. His followers are gathering for an event called the “Blood Pilgrimage,” and you’re invited with great enthusiasm. You can question Marzhan further, but the invitation marks the end of this part of the questline.
How to Complete Scion of Blasphemies
The final mission in this questline leads you to the Temple of Profane, now indicated on your map in Seven Stones. This location is a classic dungeon, but it remains locked until you’ve completed all the previous missions. Inside, you’ll find a series of gates that won’t open until you collect multiple Condemned Trophies from Elite enemies scattered throughout the dungeon’s corridors.
The new Spiritborn class in Diablo 4 comes equipped with plenty of tools to tackle foes in the Temple of the Profane, including Guardian Spirits capable of taking down hordes guarding the Trophies you need.
Once you unlock the gated areas, you can defeat the boss Captain Kharov to wrap up this questline. The drops from Kharov vary in rarity depending on the World Tier you’ve played at. Completing the “Tenets of Depravity” series in Diablo 4 will also reward you with guaranteed loot that greatly strengthens your character.