الوسم: Dead By Daylight

  • Top Dustin Perk Builds for Completing and Solving in Dead by Daylight

    Top Dustin Perk Builds for Completing and Solving in Dead by Daylight

    The highly anticipated second chapter of Stranger Things has been added to Dead by Daylight, introducing two new Survivors—Dustin Henderson and Eleven—and a new Killer known as The First, or Vecna. Each of these characters comes with three unique perks that players can use to build effective and enjoyable gameplay strategies.

    Dustin Henderson’s perks are designed to leverage his quick thinking and friendly nature to improve team performance. Here’s what you need to know about his perks and some suggested builds:

    Dustin’s Unique Perks

    • Bada Bada Boom: Allows you to set a trap at a window that slows the Killer when they vault. Activate it by repairing at least 20% of a generator, then placing the trap. The trap lasts for 60 seconds or until the Killer vaults the window, causing a 50% Hindered effect on the Killer for six seconds.

    • Change Of Plan: Lets you convert a toolbox into a med kit inside a locker. To use it effectively, pair it with perks like Built To Last to refill your toolbox multiple times. Use high-rarity toolboxes and add-ons, such as Engineer’s Toolbox with Socket Swivels and a Wire Spool, to maximize repair speed and versatility.

    • Teamwork: Full Circuit: Boosts repair speed and skill check zones when repairing with others. Teaming up with perks like Prove Thyself and De Ja Vu amplifies this effect, making your generator repairs quicker and more efficient.

    Combining Bada Bada Boom with trap perks like Chemical Trap, Wire Tap, and Blast Mine creates a trap-focused build. This combo is especially strong because all these perks activate during generator repair, allowing you to slow down the Killer while sanding a possible escape.


    Bada Bada Boom Build

    This build emphasizes setting traps and using tactical movement to slow down the Killer while providing an escape route. Pairing Bada Bada Boom with Chemical Trap increases your options to hinder the Killer during loops. Adding a perk like Champion Of Light, which blinds the Killer when using a flashlight, and Sprint Burst to quickly escape when needed, creates a versatile and disruptive setup.

    Perks:

    Perk Description How to Use
    Bada Bada Boom Place a trap at a window after repairing 20%; slows Killer. Repair at least 20%, then set the trap at a window.
    Chemical Trap Plant a trap on a generator after 20% repair; blinds Killer. Repair 20%, then place on generator.
    Champion Of Light Blind Killer when flashing light; gain speed boost. Use flashlight to blind Killer; benefit from speed boost.
    Sprint Burst Sprint for a short burst; gain Haste after starting to run. Use when Killer is slowed or blinded to create distance.

    Change Of Plan Build

    This perk enables you to turn a toolbox into a med kit when entering a locker, which can be strategically timed to maximize healing or disruption. To get the most out of the toolbox, pair it with Built To Last, which allows refilling the toolbox in lockers, and ensure you select high-rarity toolboxes, such as the Engineer’s with Socket Swivels and Wire Spool, for faster repairs.

    When your toolbox is used up, simply pull into a locker and activate Change Of Plan to swap it for a med kit. Use the med kit to heal yourself or teammates, and benefit from perks like Bite The Bullet, which silences any noise cues when healing.

    Perks:

    Perk Description Usage
    Change Of Plan Convert toolbox to med kit twice; includes all item add-ons. Use in lockers after repairing; increase flexibility.
    Built To Last Refill a used item in a locker multiple times over the match. Maximize toolbox usage with rare or high-quality add-ons.
    Bite The Bullet Healing is silent and full recovery; no noise cues. Heal self or others without alerting Killer.
    Blast Mine Set a trap that stuns and blinds the Killer when they kick generator. Activate after about 40% repair; plant on a generator.

    Teamwork: Full Circuit Build

    This setup focuses on increasing repair efficiency and teamwork. Pairing Full Circuit with perks like Stake Out and Fast Track allows your team to improve skill check success and gain bonus repair progress. Such synergy accelerates generator completion and keeps your team coordinated.

    Perks:

    Perk Description How it helps
    Teamwork: Full Circuit Increases skill check zones and repair speed when working with others. Enhances teamwork, leading to faster generators.
    Stake Out Gains tokens in Killer’s terror radius; converts to great skill checks. Improves skill check success during repairs.
    Fast Track Gains tokens per hooked teammate; boosts repair progress with tokens. Adds bonus repair speed when working on generators.
    Prove Thyself Boosts repair speed for teammates working nearby. Encourages team repairs, speeding up the process.

    These perks allow your team to work more effectively together, making it easier to repair generators quickly and stay ahead of the Killer’s pursuit.

  • How To Claim Twitch Drop Rewards for Dead By Daylight Bone Chill 2025: Completing & Solving

    How To Claim Twitch Drop Rewards for Dead By Daylight Bone Chill 2025: Completing & Solving

    During this festive season, Dead By Daylight teams up with Twitch to offer players free in-game currency and cosmetic items. From December 9, 2025, to January 6, 2026, players can watch streamers for between one and six hours to unlock special rewards.

    Here are the rewards available based on viewing time:
    – 1 hour: 200,000 Bloodpoints
    – 3 hours: Winter Crow Badge
    – 6 hours: Holiday Horse Banner

    To participate, you’ll need a Twitch account and a Behaviour account, both free to create. If you don’t have a Behaviour account, sign up at account.bhvr.com by linking your Facebook, Google, Twitch, or Discord accounts, or by using your email.

    To get your Twitch Drops, connect your Twitch account with your Behaviour account by visiting Twitch, going to Settings, then Connections, and linking the two. When you watch a Dead By Daylight streamer with “Drops!” in their stream title, your viewing time will be tracked. You’ll receive notifications when a reward is unlocked, which can be viewed in your profile under Drops & Rewards.

    Make sure to claim your rewards before they expire or appear only in your Bloodpoints total. The Drops & Rewards page shows your viewing progress and how close you are to earning the next reward.

  • Top Perk Builds for Vee Boonyasak in Dead By Daylight: Completing & Solving

    Top Perk Builds for Vee Boonyasak in Dead By Daylight: Completing & Solving

    A new survivor has joined the world of Dead By Daylight, bringing three fresh perks to help other survivors. Vee Boonyasak, a skilled drummer full of energy, is eager to leave her mark. Although her story has a tragic end, her adventurous spirit lives on through her perks, which showcase her determination and resilience.

    Vee’s perks are designed to help you recover faster from exhaustion, increase your chances of making skill checks for faster generator progress, and speed up healing when necessary. Here are some effective build strategies to maximize her abilities.


    Vee Boonyasak’s Unique Perks

    Vee arrives with three unique teachable perks: Ghost Notes, One-Two-Three-Four!, and Road Life. Both One-Two-Three-Four! and Road Life rely on skill checks, boosting your chances of successful checks during repairs and healing. While Road Life depends heavily on landing great skill checks, One-Two-Three-Four! serves as a helpful support perk, especially when paired with other skill check perks.

    Ghost Notes is a chase-oriented perk. It doubles the speed at which scratch marks fade and lowers exhaustion duration, making it ideal for survivors who enjoy losing killers quickly. Combining Ghost Notes with exhaustion perks is highly recommended to maximize its potential.

    Warning: While running, you won’t recover from exhaustion. Use walking, repairing, healing, or cleansing totems during this period until exhaustion depletes.

    Perk Description Guide
    Ghost Notes Your scratch marks fade 50% faster when exhausted and you recover 10% faster from exhaustion. Fading scratch marks quickly helps you escape, especially when paired with exhaustion perks.
    One-Two-Three-Four! Perform drums for 15 seconds with ongoing skill checks; after succeeding, your chance of skill checks increases by 20% for 90 seconds. Use during generator repairs or healing to get more skill checks naturally.
    Road Life When injured but not broken, gain a Token after each great skill check; with 6 Tokens, heal at 100% speed until healing stops. Situational, as it needs six great skill checks to activate but excels in prolonged healing scenarios.

    Best Build Combos and Strategies

    Vee offers one strong perk with two situational ones. Ghost Notes is likely to be a staple in many builds, especially for players who chase or loop around killers. One-Two-Three-Four! is valuable for boosting generator progress by ensuring multiple skill checks. Road Life is more niche, as it hinges on landing six great skill checks but can be effective in extended healing.

    Ghost Notes Perk Combos

    Pair Ghost Notes with perks like Sprint Burst for quick escapes at the start of chases. Reducing scratch mark visibility with Lightweight and improving recovery speeds with Vigil enhances ghosting and tactically losing the killer.

    Perk Effect How to Use
    Lightweight Scratch marks last 5 seconds less, and their pattern is irregular. Makes avoiding detection easier during chases.
    Sprint Burst Grants a 50% haste for 3 seconds when starting to run, causing exhaustion afterward. Combine with Ghost Notes to maximize evasive actions.
    Vigil Reduces the effects of exhaustion and other status effects by two-thirds within 16 meters. Helps recover from status effects faster, especially with Ghost Notes.

    Tip: Use exhaustion perks like Balanced Landing or Lithe with Ghost Notes for more effective chases.

    One-Two-Three-Four! Perk Combos

    While seemingly unimpressive on its own, One-Two-Three-Four! shines when paired with perks that trigger on skill checks, such as Bardic Inspiration, Autodidact, or Do No Harm. These perks enhance your ability to consistently generate skill checks, accelerating generator repairs or healing.

    Perk Effect Usage
    Bardic Inspiration During its active 15-second window, roll a D20 to boost skill check progress. Amplifies skill check success chances.
    Hyperfocus Grants a token on each great skill check, increasing skill check chances and progression. Use to maximize skill check gains.
    Stake Out Earns tokens when in the killer’s terror radius; these convert into great skill checks. Use in stealthy playstyles to maximize skill checks passively.

    Road Life Perk Combos

    Pair Road Life with One-Two-Three-Four! to increase the likelihood of landing skill checks, but consider supplementing with Iron Will to stay quiet while injured. Both perks revolve around skill check mastery, so combining them amplifies your opportunities for activations.

    Perk Effect Notes
    Hyperfocus Each great skill check grants a token, increasing skill check speed and progression. Build to consistently trigger skill check bonuses.
    Stake Out Ties into Hyperfocus by turning in-radius skill checks into great ones. Enhance passive skill check gains for sustained performance.
    Iron Will Reduces grunts of pain for stealthier injured play. Maintain silence during activations and escapes.

    Additional tip: Activate Road Life multiple times per game if you can land enough great skill checks; it’s a rewarding but resource-heavy perk.


    This setup makes Vee a versatile survivor who excels at skill checks during generator repairs and healing, with tools to evade killers effectively during chases. Combining her perks thoughtfully can create tailored strategies suited for fast-paced, unpredictable matches.

  • How To Play Rick Grimes in Dead By Daylight: Completing and Solving

    How To Play Rick Grimes in Dead By Daylight: Completing and Solving

    The growing horror universe in Dead by Daylight has expanded with the introduction of Rick Grimes from The Walking Dead. The former sheriff enters The Fog armed with survival skills and a strong instinct to sacrifice, much like he did during the zombie apocalypse—only now, facing Killers instead of walkers. His perks emphasize leadership, allowing you to repair broken pallets, hide teammates’ presence, and vanish while injured.

    If you’re aiming to lead your team, this guide provides all the details about Rick’s perks, ideal builds, and the best combinations to help you survive another night.

    Rick Grimes’s Unique Perks
    Rick’s perks focus on risky, reward-based strategies, making them perfect for players who want to support their team while remaining scrappy and unpredictable.

    Rick Grimes’s Unique Perks:

    • Apocalyptic Ingenuity
      Shows the auras of broken pallets within 24/28/32 meters. After searching or unlocking two chests, it allows you to rebuild broken pallets, which break instantly when dropped.
      Summary: Detect broken pallets and quickly rebuild them into fragile ones to control the map and create mid-game escape options.

    • Come and Get Me!
      After unhooking a teammate, crouch and activate to hide scratch marks, blood, and grunts of pain for all injured or dying teammates within 24 meters for 10/12.5/15 seconds. Rick will scream and reveal his aura for 5 seconds.
      Summary: Conceal your teammates after a rescue, but risk revealing yourself—great for high-stakes plays.

    • Teamwork: Toughen Up
      When injured, if another teammate within 24 meters stuns or blinds the Killer, you suppress your grunts of pain, blood, and scratch marks for 20/25/30 seconds.
      Summary: Stay hidden while injured after a teammate’s heroic act—useful for silent escapes or regrouping.

    Best Perk Combinations for Rick
    Rick’s perks are versatile yet team-oriented, with room for solo plays. Here’s how to build around each one:

    Rebuilding Loops with Apocalyptic Ingenuity Build:
    Turning broken pallets into escape routes can be game-changing. Use perks like Any Means Necessary to reset standing pallets, Appraisal to quickly find chests, and Windows of Opportunity to keep track of available pallets. This setup helps turn one-time loops into reliable escapes.

    Risky Rescue with Come and Get Me! Builds:
    Designed for daring plays and mid-match rescues, this combination makes Rick a distraction, giving allies a few seconds to hide. Perks like Off the Record grant silence and endurance post-rescue, Empathy helps track injured teammates, and Borrowed Time ensures they get an extra moment of safety after being unhooked.

    Team-Based Play with Toughen Up Builds:
    Ideal for chase resets and avoiding the Killer after getting hit, this build works best with brave teammates. Use Lucky Break to hide scratch marks and blood after being hit, Bite the Bullet for silent healing, and Overcome to gain a sprint burst when injured. Stick close to confident teammates for maximum effectiveness.

  • Top Perk Builds for Michonne Grimes in Dead by Daylight: Completing and Solving

    Top Perk Builds for Michonne Grimes in Dead by Daylight: Completing and Solving

    Dead by Daylight players have been eagerly awaiting the addition of Rick and Michonne Grimes ever since Behavior Interactive dropped subtle hints in the 2025 roadmap. These characters are straight from The Walking Dead: The Ones Who Live and are now part of the large list of playable Survivors. Each has three unique perks that influence gameplay.

    Once you level up Michonne’s Bloodweb to at least Prestige Three with Bloodpoints, you can use her perks on any Survivor. These perks can significantly change strategies and improve chances in matches.

    Michonne Grimes’s Unique Perks

    Michonne arrives with three fresh perks inspired by her character in The Walking Dead. Her perks allow her to get one more shot at surviving, stand up to the Killer, and help teammates escape.

    Here’s a look at her perks:

    Perk Description Guide
    Conviction Sometimes, a final push makes all the difference between dying and surviving. After healing yourself or another Survivor, Conviction activates. While in the Dying State, you can recover instantly after reaching 25% progress. You then remain broken and will re-enter Dying after 20/25/30 seconds.
    Last Stand When things get tough, your fighting spirit shines. Activates after being in the Killer’s terror radius without being chased for 90-120 seconds. Complete a rushed vault to stun the Killer for three seconds when they are within 2.5 meters. This perk only works once per game.
    Teamwork: Throw Down Empowering allies is key to turning the tide. From the start, blind the Killer or stun them at a pallet to grant all injured Survivors within 24 meters Endurance. This encourages close teamwork.

    Note: Michonne’s perks require being close to the Killer, so they might not be ideal for newer Survivors nervous about chases.

    Best Build and Perk Combinations for Michonne

    To maximize her strengths, use perks centered around survival, escape, and supporting teammates. The three perks work well together and can also help you earn the Adept Michonne achievement.

    It’s advisable to level her Bloodweb extensively to unlock general perks like Hope, Kindred, or Resilience. You can also unlock perks from other Survivors by reaching Prestige Three or buying them in the Shrine of Secrets.

    Suggested Perk Combos for Conviction:

    • Jonah’s Boon: Exponential — Creates a safe spot for self-recovery, allowing you to get out of the Dying State without aid. Pair with Small Game to locate Totems quickly and Mikaela’s Boon: Shadow Step to hide your scratch marks while healing.
    • Cheryl’s Soul Guard — Grants eight seconds of Endurance after self-healing from Conviction, especially useful in end-game scenarios. Since Conviction can be used multiple times, this combo keeps you alive longer.

    Last Stand and Perk Combinations

    Last Stand can be fun but requires you to hide within the Killer’s Terror Radius for about 90 seconds. Use these perks to make hiding and escaping easier:

    Perk Description Guide
    Nea’s Urban Evasion Allows quick crouch-walking to hide effectively. Useful for staying hidden when Last Stand is active.
    Kate’s Windows of Opportunity & Feng’s Lithe Know all window and pallet locations, then use high-speed vaults to escape. Keeps you mobile even after Last Stand ends.
    Kate’s Dance With Me Hide your scratch marks briefly to help escape. Good if you’re familiar with map layouts.

    Teamwork: Throw Down works well here too — blinding or pallet stunning the Killer grants injured teammates Endurance. Combining it with other perks like Last Stand or blinding perks like Jill’s Blast Mine can turn the tide against the Killer.

    Additional ideas include:

    • Yui’s Any Means Necessary — Allows quick recovery from dropped pallets, prolonging pallet usage.
    • Dwight’s Bond — Helps keep track of teammates’ positions based on their movements and actions, supporting coordinated efforts.
  • Current Dead by Daylight Codes for April 2025 Revealed!

    Current Dead by Daylight Codes for April 2025 Revealed!

    Introduction to Dead by Daylight

    Since its launch on June 14, 2016, Dead by Daylight has been a hit with horror game fans. Its thrilling gameplay and regular updates have ensured it remains a favorite in the survival horror genre. One exciting feature is the option to redeem codes for rewards like cosmetics and in-game currency.

    Rewards and Codes

    Players can access various rewards by using codes that the developers release from time to time. For fans of Dead by Daylight, these codes are an enjoyable way to enhance the gameplay experience, customize beloved characters, and showcase their gaming achievements. Since these codes are usually available for a limited period, it’s essential to act fast and redeem them.

    Quick Links

    Active Codes for April 2025

    This month brings a fresh opportunity to earn exciting rewards through in-game codes. The codes issued this month grant access to cosmetics, badges, charms, and in-game currency like Bloodpoints.

    You can find these codes shared on the official Dead by Daylight account on Twitter, on Reddit, and in the DBD Leaks Discord channel. Staying up to date with these official sources can help you catch the latest codes as they are announced.

    List of New Active April 2025 Codes

    April’s codes introduce new rewards to enhance your gameplay. If you’re keen on expanding your collection, here’s a look at the active codes for April:

    Code Reward
    IFLOOKSCOULDCHILL Cosmetic Reward
    REDDIT1MIL Cosmetic Reward

    These codes are carryovers from last month, providing two typical starter rewards: the Frosty Eyes Killer cosmetic and the 8-bit Crow badge. The Frosty Eyes cosmetic is often linked to new players, serving as an easy way to personalize your character. The 8-bit Crow badge was created to celebrate the r/deadbydaylight subreddit hitting 1 million members. Both items are strictly cosmetic and do not affect gameplay.

    Previously Active Codes (No Expiration Date)

    Over time, codes are frequently released during special events or collaborations in Dead by Daylight. Although many codes come with expiration dates, some are timeless. Here’s a list of active codes without known expiration:

    Code Reward
    BDGPRIDE Cosmetic Reward
    BDGPRG Cosmetic Reward
    BDGL Cosmetic Reward
    BDGM Cosmetic Reward
    BDGB Cosmetic Reward
    BDGP Cosmetic Reward
    BDGT Cosmetic Reward
    BDGGQ Cosmetic Reward
    BDGGF Cosmetic Reward
    BDGNB Cosmetic Reward
    BDGIS Cosmetic Reward
    BDGAG Cosmetic Reward
    BDG2S Cosmetic Reward
    BDGPA Cosmetic Reward
    BDGAS Cosmetic Reward
    BDGAR Cosmetic Reward
    BDGDM Cosmetic Reward
    POLYFLAG Cosmetic Reward
    DEMISFLAG Cosmetic Reward
    AROMFLAG Cosmetic Reward
    TWOSFLAG Cosmetic Reward
    FLAGL Cosmetic Reward
    MFLAG Cosmetic Reward
    FLAGB Cosmetic Reward
    FLAGP Cosmetic Reward
    FLAGT Cosmetic Reward
    ISFLAG Cosmetic Reward
    AFLAGG Cosmetic Reward
    GFLAGF Cosmetic Reward
    NBFLAG Cosmetic Reward
    GFLAGQ Cosmetic Reward
    AFLAGS Cosmetic Reward
    KINDRD Cosmetic Reward
    CAWCAW Cosmetic Reward
    PRIDE Cosmetic Reward
    PRIDE2022 Progress Pride Flag charm
    WARRIORPUPPERS Cosmetic Reward
    LETSROLL Cosmetic Reward

    All of the items listed above are cosmetic and don’t have significant impacts on gameplay, maintaining enduring popularity among the player base.

    Expired Codes

    The codes listed below were available for a limited time as part of special events or celebrations in Dead by Daylight but have now expired:

    Code Reward
    CARNANEVOA25 300,000 Bloodpoints, 30 Rift Fragments, Confetti Mask Badge
    HOOKEDONU Reward Expired
    LUCKYBP2025 Reward Expired
    ROLLD20 Reward Expired

    Recently, the code CARNANEVOA25 was available from February 28 and celebrated the Brazilian Carnival festival before it expired on March 3, 2025.

    How to Redeem Dead by Daylight Codes

    Simple Redemption Process

    To redeem codes in Dead by Daylight, start the game and go to the main menu. Click on the Store option and look for "Redeem Codes." In the top-right section of the Store screen, you’ll find a "Redeem Code" button. Clicking this brings up a text box for you to enter your code. Once submitted correctly, your account will receive the associated rewards immediately.

    Some codes provide permanent items, while others may offer temporary boosts or event rewards. For instance, you could receive Bloodpoints or Iridescent Shards for quicker leveling, or unique charms for character customization. It’s wise to keep an eye on Dead by Daylight’s updates for the latest codes and rewards.

    Stay Connected

    For the latest news on codes and rewards, follow updates from the official Dead by Daylight channels on Twitter, Reddit, and Discord.


    This enhances your experience in the game, so enjoy exploring Dead by Daylight and all the unique elements it has to offer!

  • Mastering Looping Killers in Dead by Daylight: A Guide

    Mastering Looping Killers in Dead by Daylight: A Guide

    Looping is a crucial skill in Dead By Daylight, essential for surviving chases and supporting your team. Mastering this technique means you can buy your teammates enough time to repair generators and find an escape route. However, looping isn’t merely about running in circles; it’s a strategic play that entails map awareness and quick thinking.

    Choosing the right moments to use pallets, vault, and manage your movements can be the deciding factor between getting caught or staying alive. This guide will explain what looping is and why it’s vital, and it will provide essential tips for effective looping, common mistakes new players make, and recommended perks to improve your chances of success.

    What Is Looping and Why Is It Important?

    Looping in Dead By Daylight involves maneuvering around obstacles to elongate a chase and evade the Killer. Skilled players who effectively loop can buy crucial time for their teammates, frustrate the Killer, and greatly enhance their team’s survival odds. Successfully confusing the Killer while looping also improves your chances of escaping the chase.

    Tips for Looping Effectively

    Here are some strategies to keep in mind if you find yourself being chased by the Killer.

    Understand the Map Layouts

    Familiarize yourself with the map designs and remember the locations of safe loops. Areas like jungle gyms, T-walls, and the Killer Shack offer strong looping options thanks to pallets and windows. The more you learn these layouts, the better you can react during a chase. Also, be mindful of dead zones—areas without pallets or vault options that can be fatal.

    Check Behind You While Running

    Once you’ve set your path, it’s essential to glance back occasionally to monitor the Killer’s position. Observing their movements helps you anticipate cuts or potential attacks. Look behind you, especially when you’re about to vault or drop a pallet; you won’t lose much ground in these moments.

    Keep the Killer in Sight

    For lower obstacles and pallets, keep your camera positioned so the Killer stays in the center of your view. When facing taller obstacles, raise your camera angle to maintain a clear view of their movements.

    Stay Close to Objects

    Always aim to run as close as possible to the obstacles you’re looping around. This allows you to access pallets and windows more quickly, maximizing your chances of extending the chase in your favor. Staying tight to loops also increases your likelihood of escaping.

    Don’t Vault Immediately

    Having the Killer right behind you can be nerve-wracking, but avoid the urge to vault right away. Reacting too quickly can result in an easy hit for the Killer, as they can anticipate your move. Stay calm and wait until they get close before vaulting.

    For example, when looping around the Killer Shack, observe whether the Killer enters or circles it. If they enter, vault through the window; if they circle, remain inside until they enter, then vault.

    Avoid Looping Near Generators

    Don’t loop near generators, especially those your teammates are fixing. Running near a generator can disrupt their progress and prompt the Killer to switch targets, putting your teammate in danger.

    Steer Clear of Hooks

    Avoid looping near hooks, particularly where a teammate is currently hooked. If caught, you’ll be hooked almost immediately, with no time for your teammate to stun the Killer and help you. Additionally, the Killer often hovers near the hook, complicating rescue efforts for your teammates.

    Be Aware of the Killer’s Bloodlust

    Bloodlust kicks in when a chase drags on, granting the Killer enhanced speed. The progression of Bloodlust occurs in three tiers, each increasing the Killer’s speed. To counter Bloodlust, you must force the Killer to break a pallet or stun them, which resets their speed boost and gives you a moment to regain an advantage.

    Choose Your Fall Spot Wisely

    The longer you can keep the Killer chasing you, the more time your teammates have to complete their tasks. When you know you’re about to be caught, be thoughtful about where you fall. Here are ideal spots:

    Position Reason
    The Edge of the Map Forces the Killer to carry you a long distance, boosting your chances to escape.
    Near a Window The Killer has blind spots in first-person view, giving you a chance to hide and escape.
    Near a Pallet The Killer may hesitate to pick you up, thinking a teammate could stun them.
    In Open Spaces An open area enables teammates with flashlights to help blind the Killer for your rescue.

    Loop Against Long-Range Killers

    For Killers with long-range attacks (like The Huntress or The Deathslinger), it’s best to stay out of sight by utilizing tall walls and obstacles. If they get too close, you can use pallets and windows to your advantage.

    Recommended Perks for Looping

    While practicing and learning maps is crucial for mastering looping, certain perks can give you an edge. Here are a few that can aid your survival:

    Perk Description
    Sprint Burst Provides a brief speed increase, allowing you to sprint at 150% speed for three seconds. Note, though, it does apply the Exhausted status.
    Fixated Increases walking speed by 20%, helping you recover from Exhausted faster while maintaining a good distance from the Killer.
    Vigil Reduces the duration of negative status effects, including Exhausted, by 30% for you and nearby teammates. This is particularly useful with Sprint Burst.

    Common Mistakes to Avoid

    To loop effectively, you should also be aware of mistakes that can jeopardize your chances:

    Mistake Consequence
    Not Watching the Killer Failing to monitor the Killer makes it difficult to anticipate their movements and react appropriately.
    Wasting Pallets Using pallets too early can deplete safe areas on the map, making it easier for the Killer to secure downs later on.
    Running in a Straight Line Panic might cause you to sprint straight ahead, but it’s typically not enough to outpace the Killer. Zigzagging is a more effective evasion tactic.
    Standing Too Close to Pallets Being too close to a pallet puts you at risk for getting hit before you can drop it. Maintain distance to time your drops accurately.

    With this knowledge, you can improve your looping skills, escape more effectively, and become a vital asset to your team in Dead By Daylight.

  • Your Ultimate Guide to the DnD Event in Dead by Daylight

    Your Ultimate Guide to the DnD Event in Dead by Daylight

    Many fans of Dungeons and Dragons share some common interests: they love rolling dice, exploring imaginative worlds, outsmarting terrifying monsters, and even taking control of those creatures at times. Exciting news, then, as Dead By Daylight is launching its latest event packed with all these fun elements!

    That’s right, Dead By Daylight is reviving the popular gameplay mode, Chaos Shuffle, from January 16 to 28. This event adds a Dungeons and Dragons twist, so gear up with your magical items, review your abilities, and prepare for some chaotic fun—Chaos Shuffle: Dungeons and Dragons is back!

    What Is Chaos Shuffle?


    If you’re new to this Modifier, here’s a quick overview: during Chaos Shuffle, neither Survivors nor Killers can select their Perks. Instead, everyone gets a random set of Perks at the start of each match.

    The exciting twist is that these Perks can come from any character, allowing you to try out perks you might never have used before. If you’re unfamiliar with certain Perks, you can always check the options menu and hover over them for descriptions.

    What’s In The Event Tome?


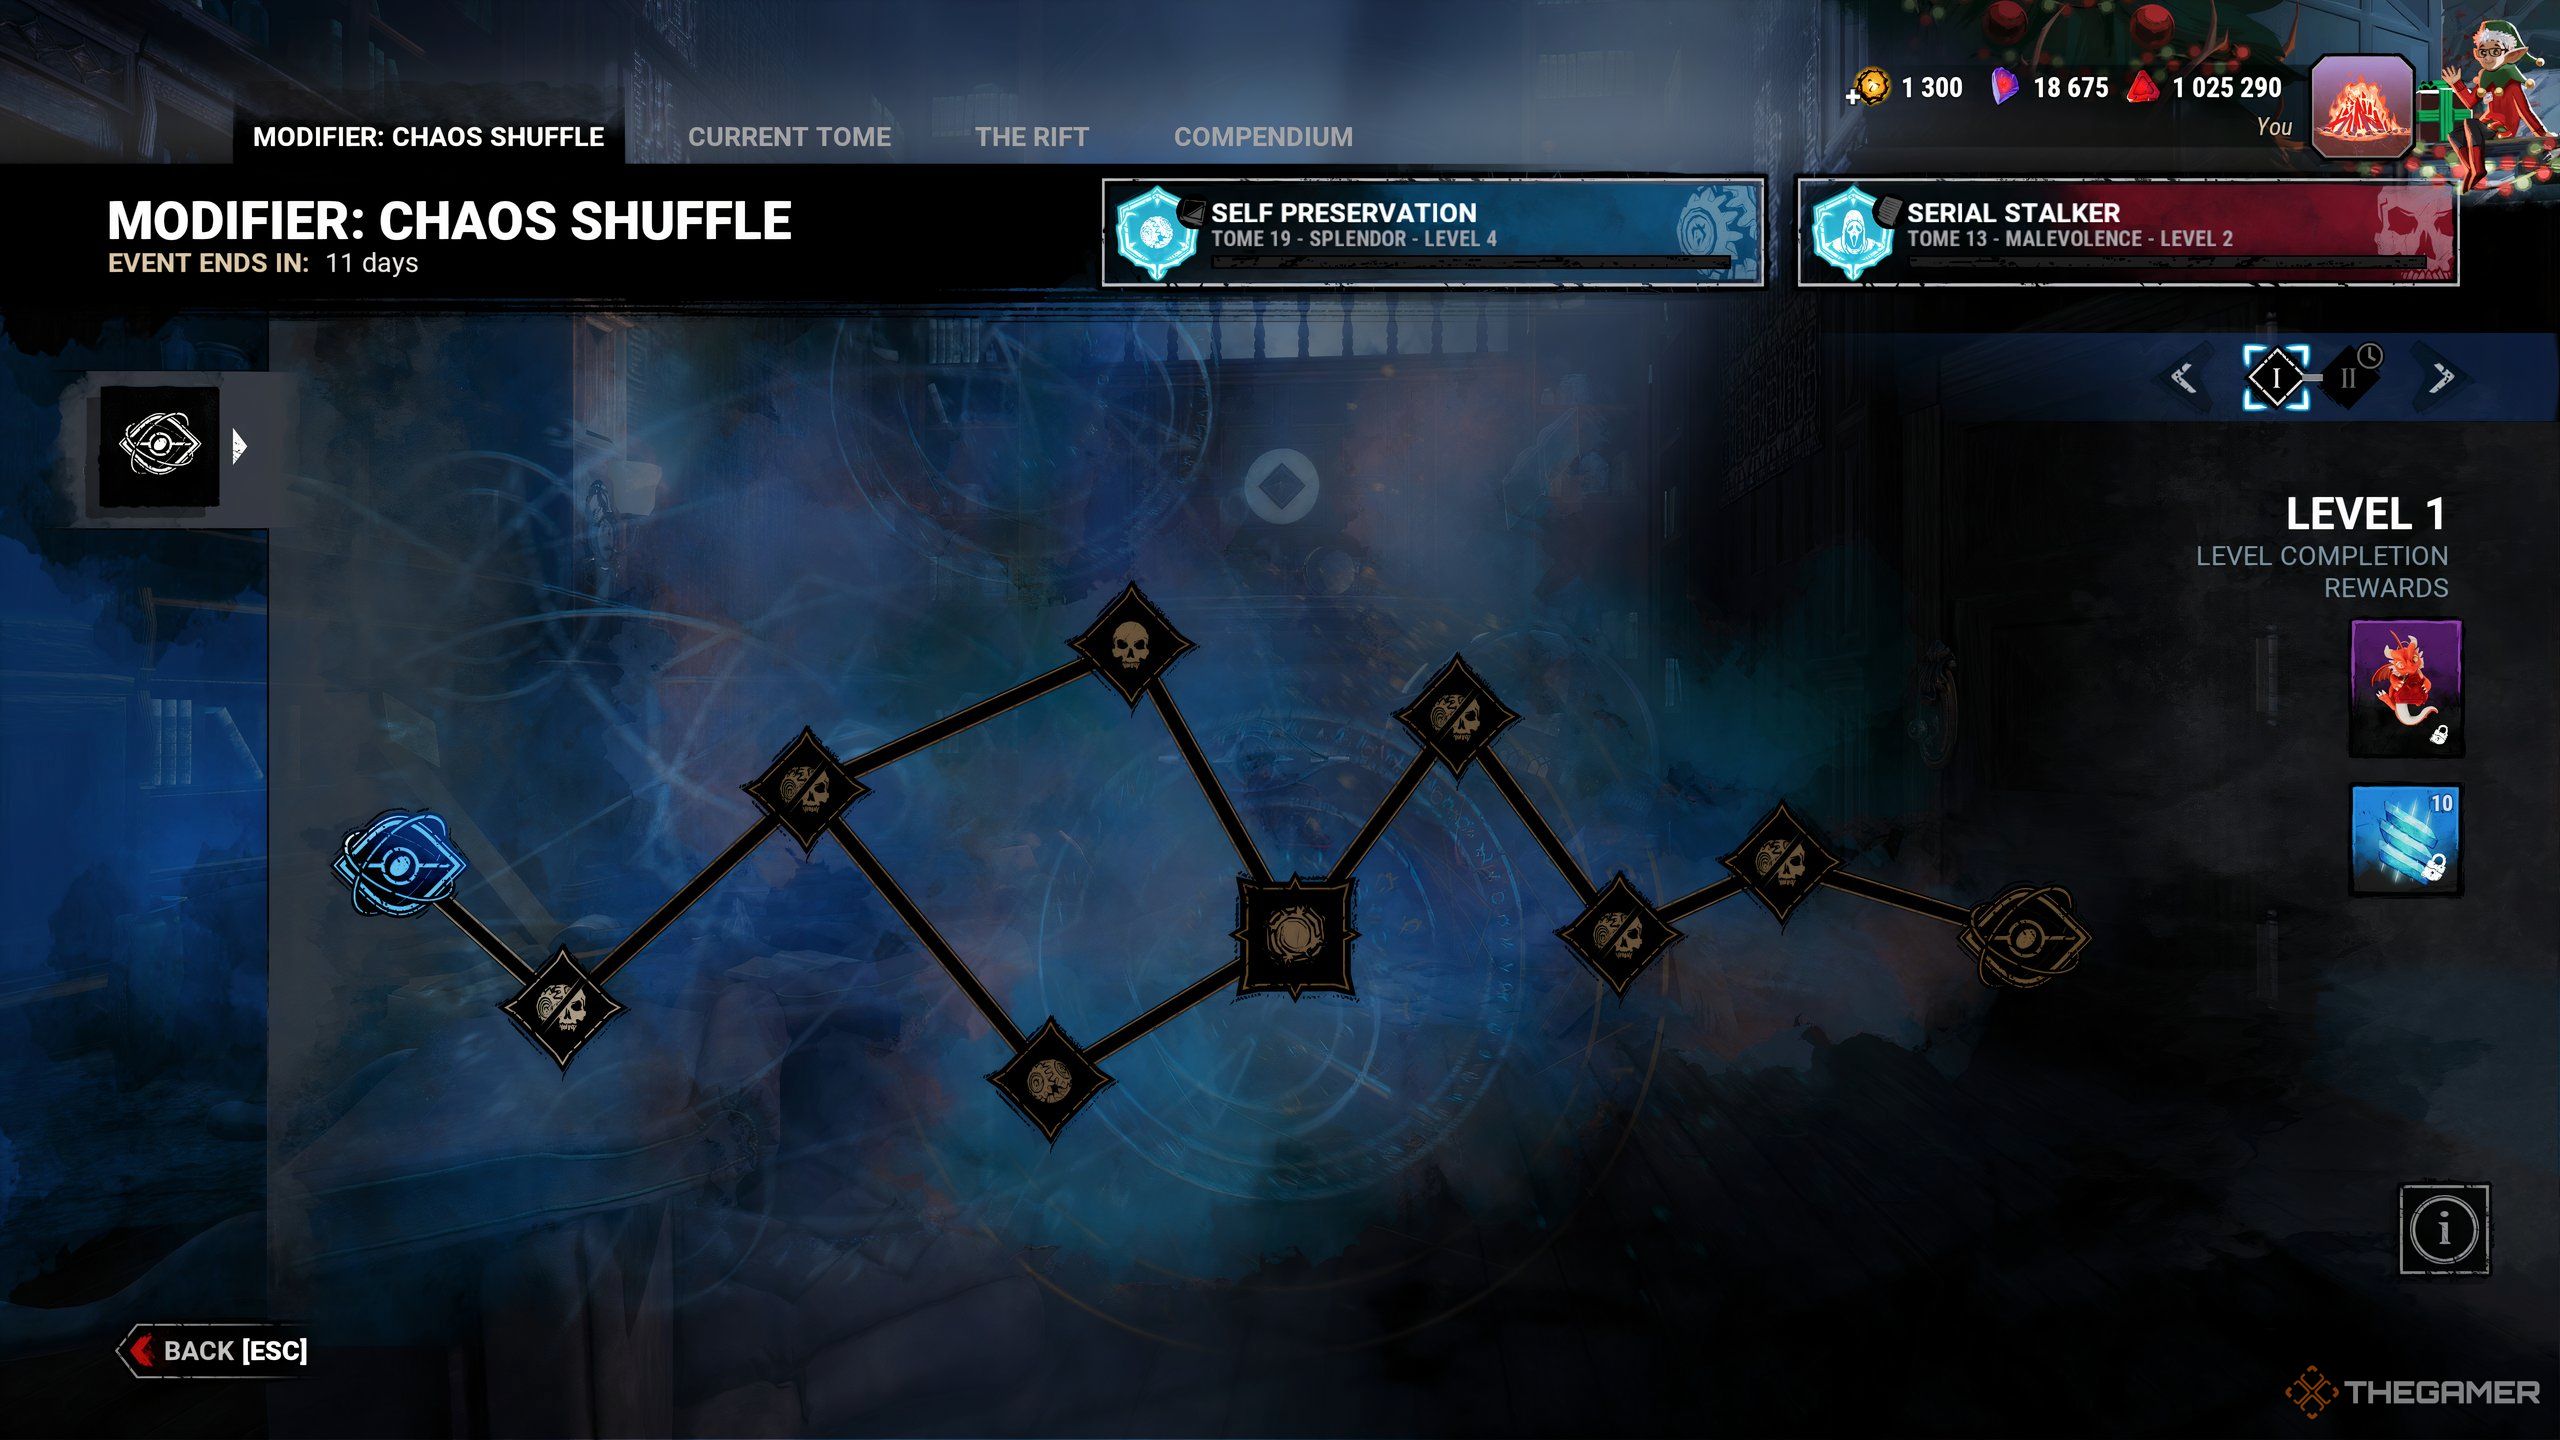
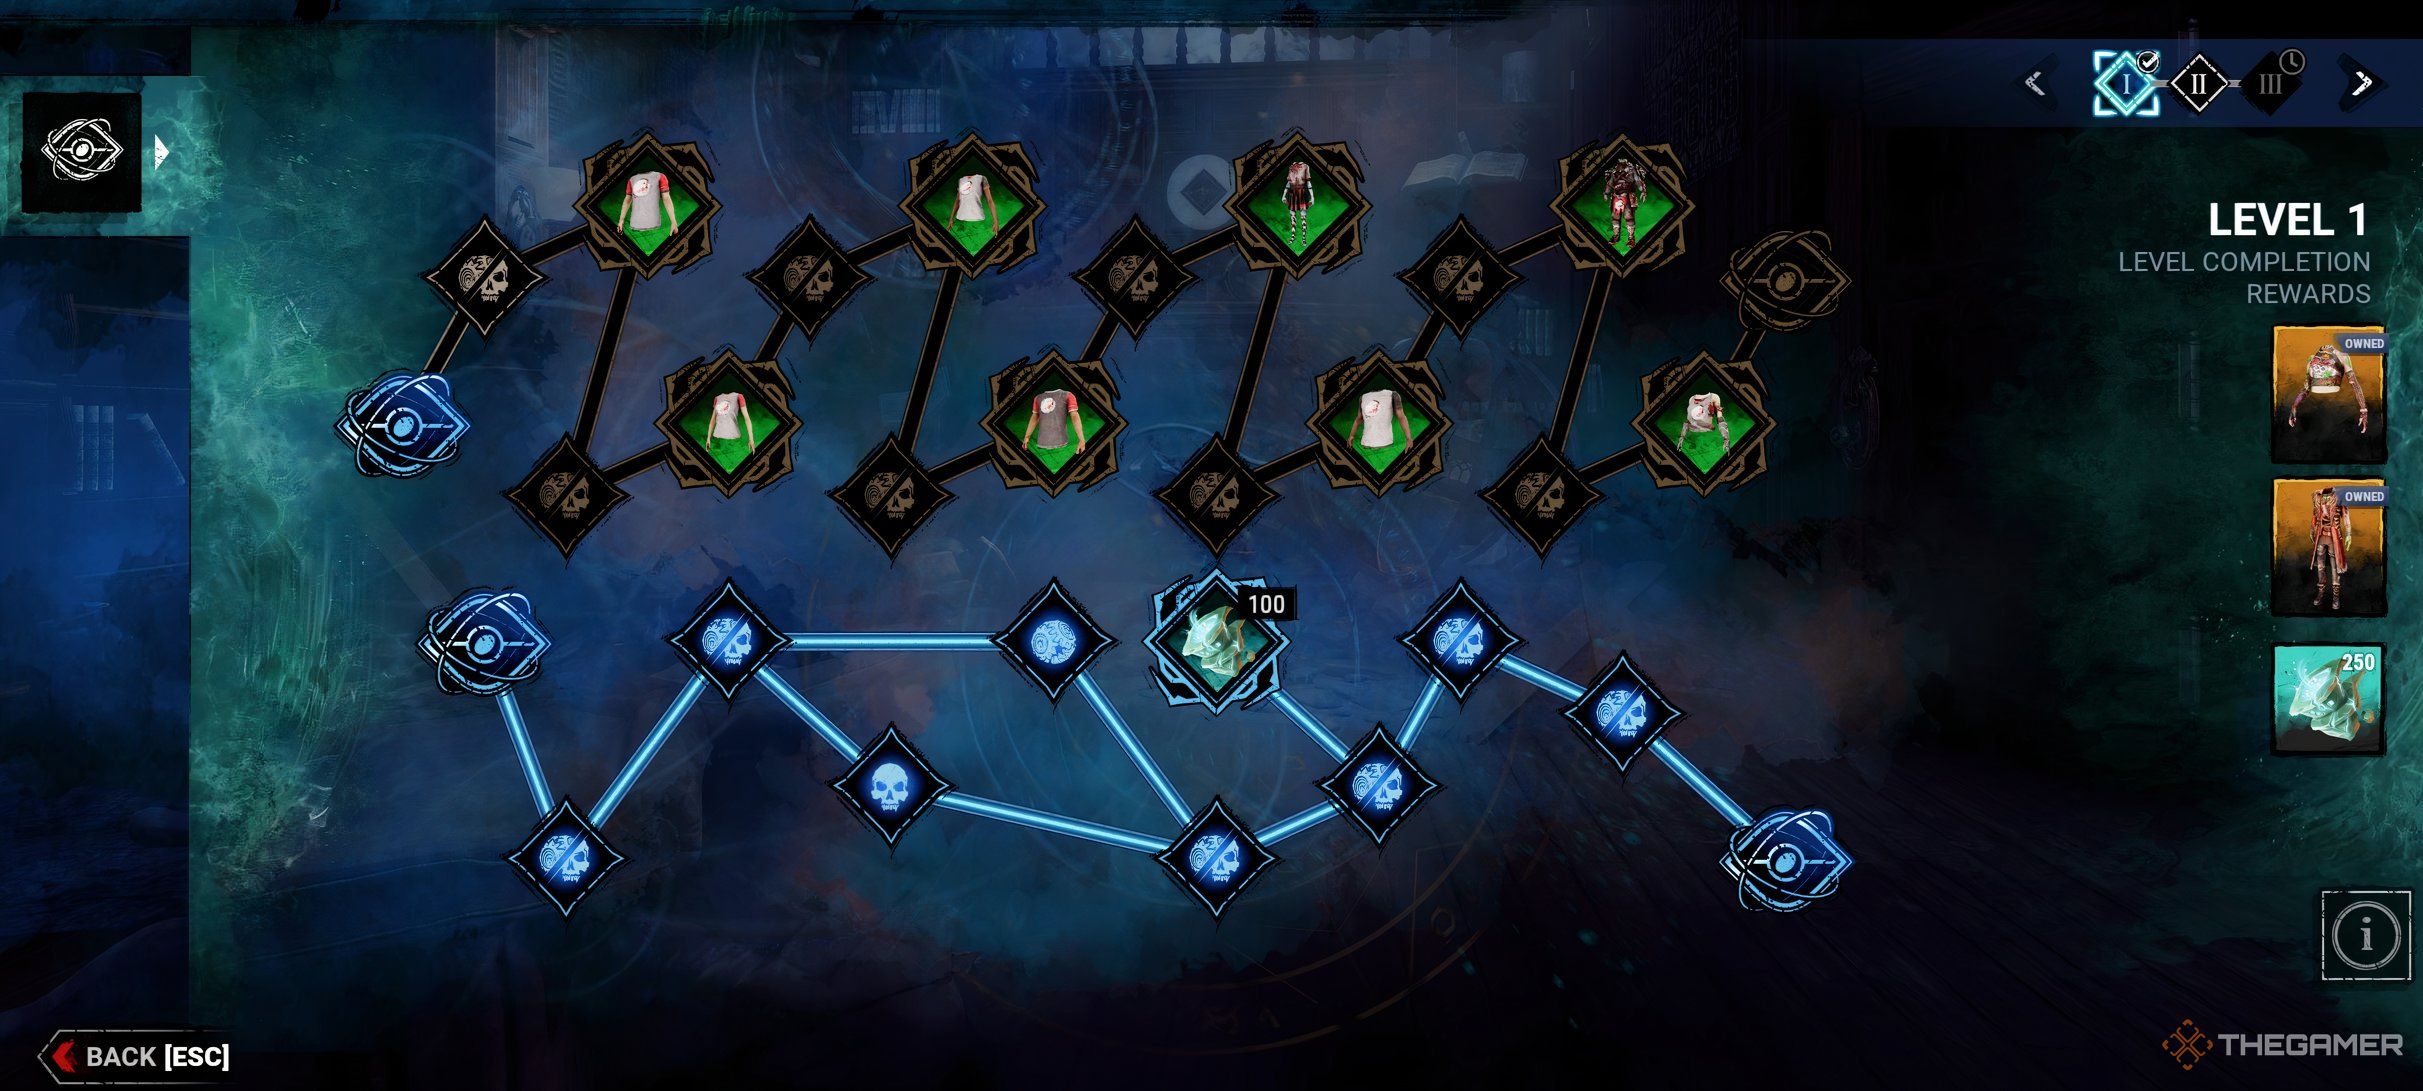
    The first level of the Dungeons and Dragons Chaos Shuffle Event Tome in Dead by Daylight.

    As always, this limited-time event features a unique Event Tome that you can complete by playing the related Modifier. The Challenges in the Chaos Shuffle: Dungeons and Dragons Event Tome include:

    Tome Level One

    Amateur Ornithologist

    Disturb 20 Crows.

    Salvation or Sacrifice

    Hook two Survivors or safely Unhook two Survivors.

    Escape Route


    (Survivor Only)

    Escape two Chases.

    Anger Management


    (Killer Only)

    Destroy six dropped Pallets.

    Glyph Seeker

    Commune with one Red Glyph.

    Patch or Dispatch

    Succeed at four Healing Skill Checks or down four Survivors.

    Silver Age

    Earn two Silver Emblems.

    Bloody Rewards

    Earn 50,000 Bloodpoints.

    Tome Level Two (opens January 21)

    Cat or Mouse

    Spend 60 seconds in a Chase.

    Bloody Rewards

    Earn 100,000 Bloodpoints.

    Reverent


    (Killer Only)

    Sacrifice three Survivors.

    Escape Artist


    (Survivor Only)

    Escape one Trial.

    Destroy or Rebuild

    Succeed at five Generator Skill Checks or Damage five Generators.

    Leap of Faith


    (Survivor Only)

    Vault a Pallet or Window while in Chase three times.

    Knockout


    (Killer Only)

    Down five Survivors.

    Glyph Pursuer


    (Optional)

    Commune with one Green Glyph.

    Silver Age

    Earn three Silver Emblems.

    When choosing between a Survivor Only Challenge or a Killer Only Challenge, you only need to complete one to move forward.

    Of course, you can attempt both to earn extra Bloodpoints and Rift Fragments.

    Event Rewards


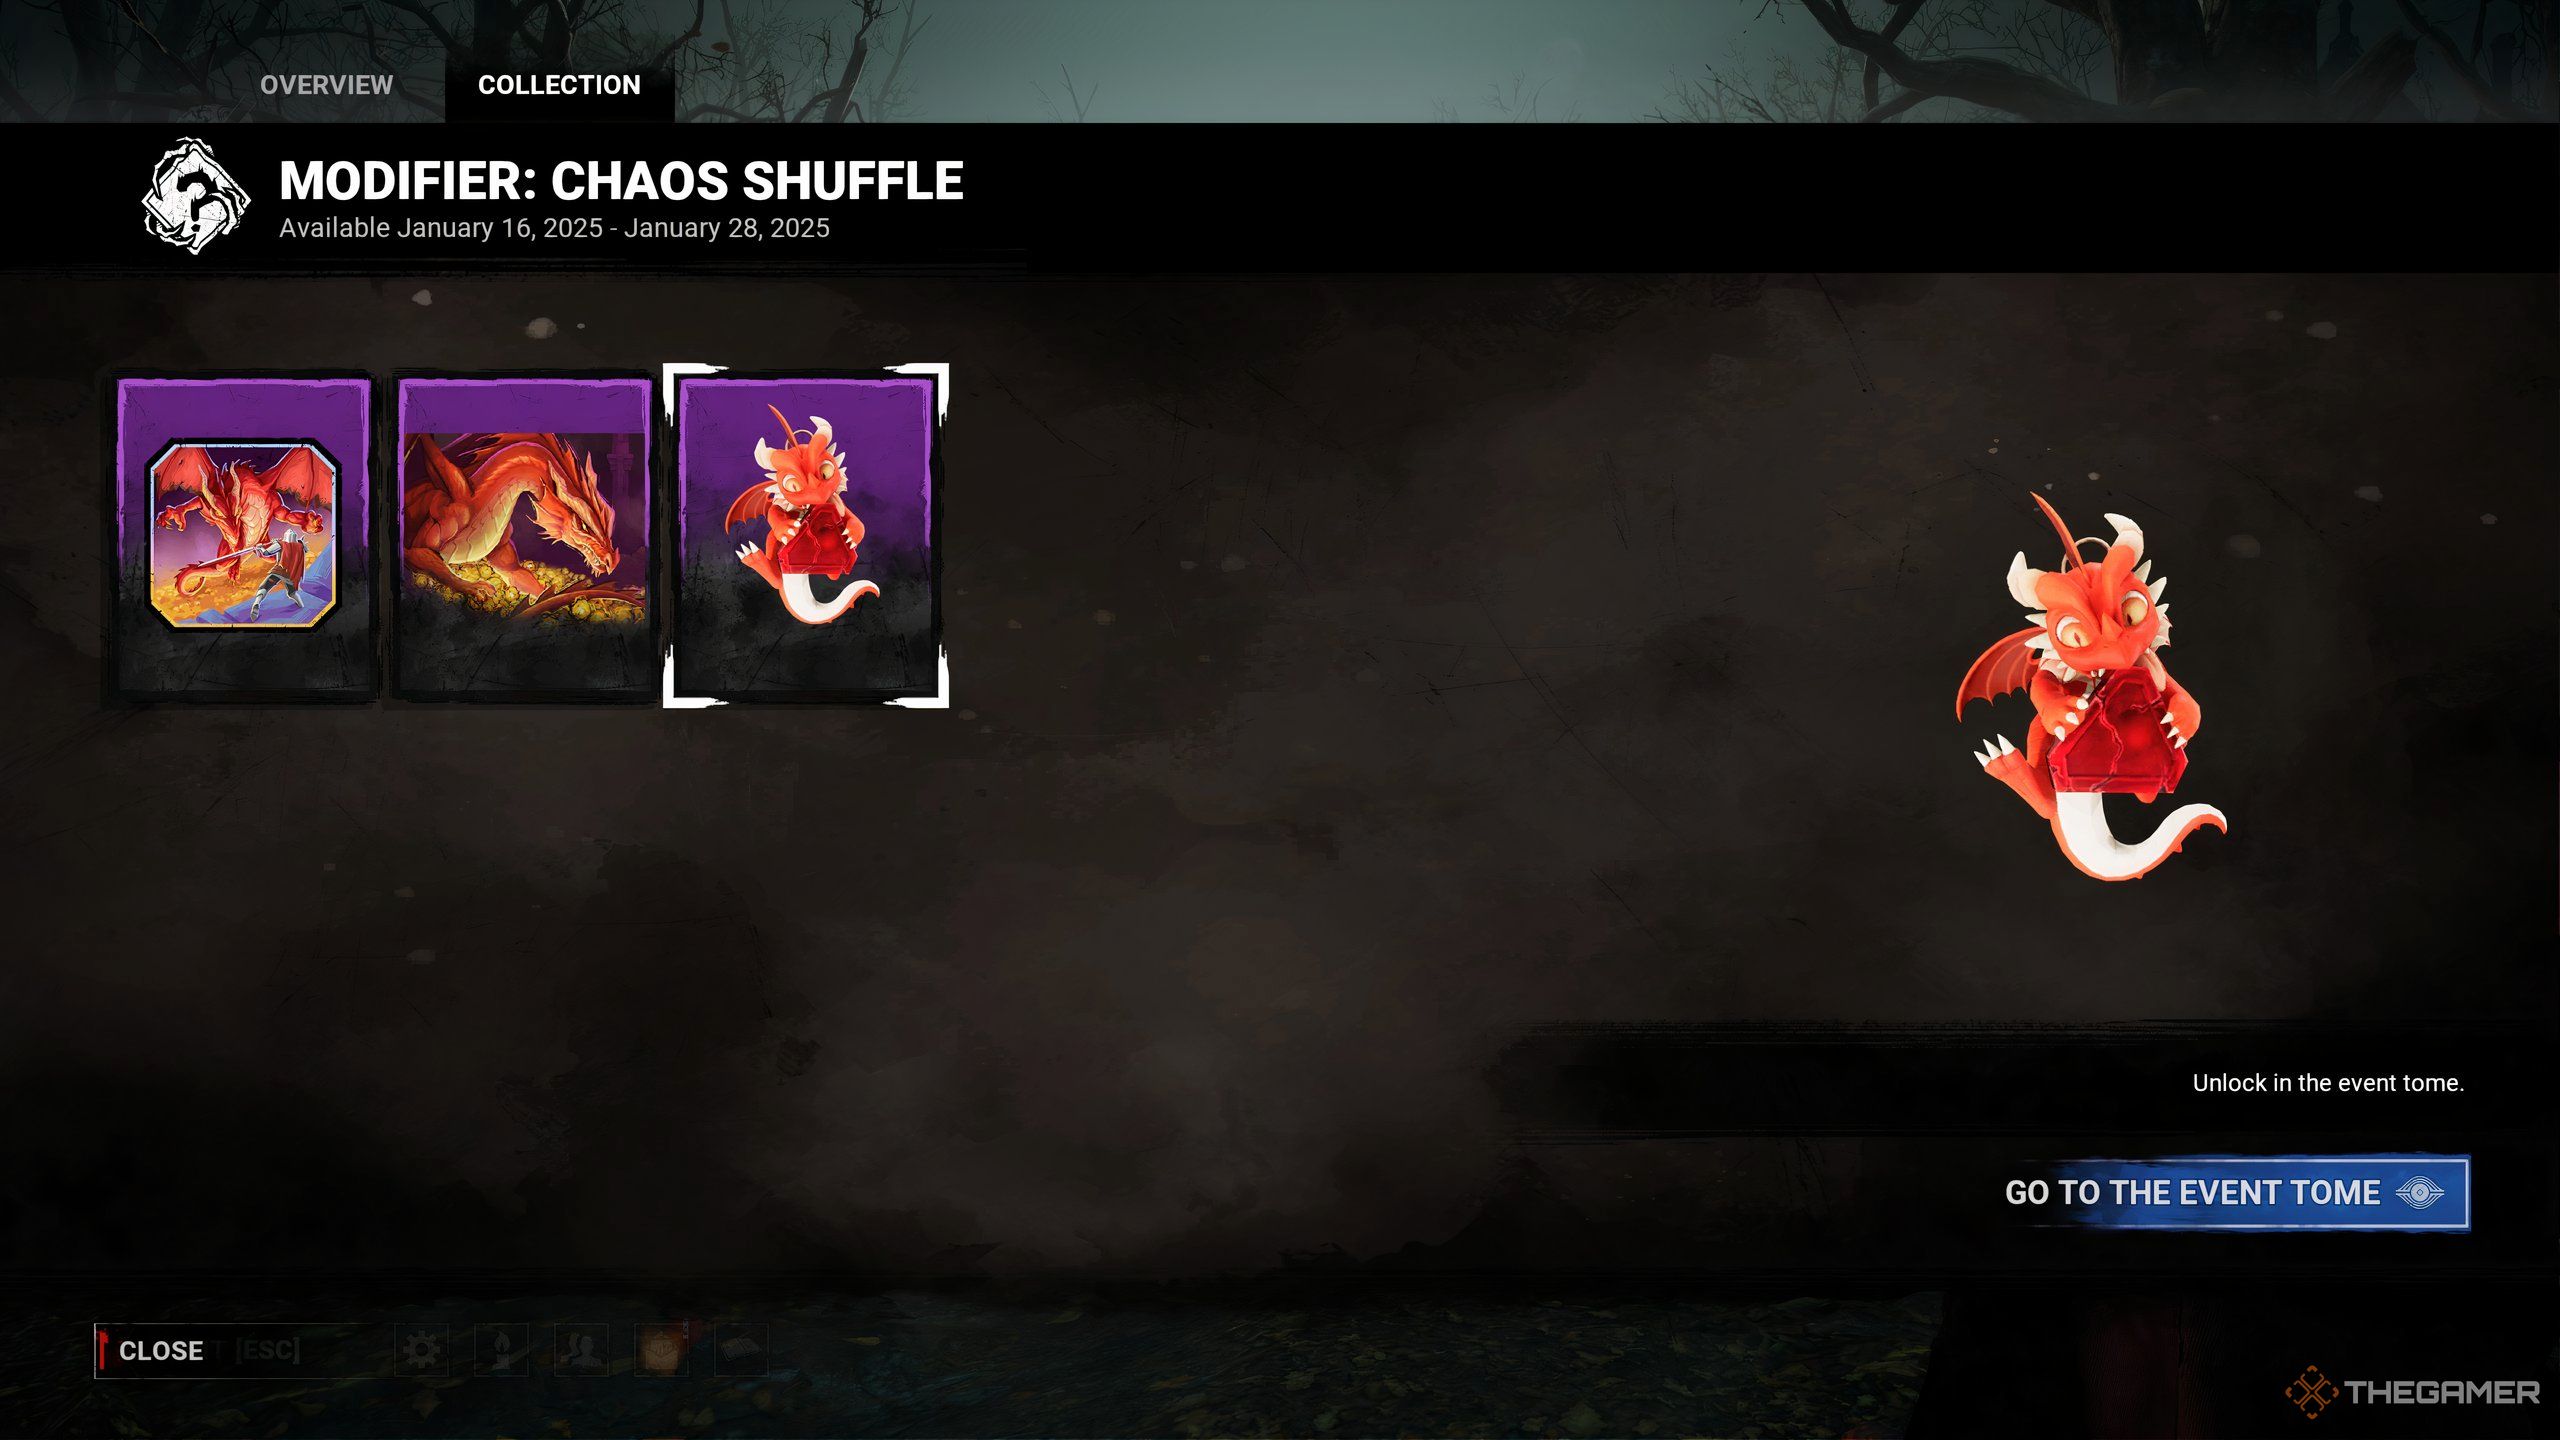
    Rewards from the Dungeons and Dragons Chaos Shuffle Event Tome in Dead by Daylight, featuring The Cuddly Dragon Charm.

    By accomplishing the Chaos Shuffle Event Challenges, you will earn the following items:

    Tome Level One

    Cuddly Dragon Charm

    Tome Level Two:

    Knight Vs. Dragon Badge, Greedy Dragon Banner

    For each level of the Event Tome you complete, you’ll also earn 10 Rift Fragments, aiding you in acquiring items from the current Rift.

    Bonus Bloodpoints


    The first January Advent Calendar reward during Dungeons and Dragons Chaos Shuffle in Dead by Daylight.

    In addition to gaining Bloodpoints from the Event Challenges, there will be a Bloodhunt from January 21 to 28, doubling your Bloodpoint earnings in all trials. Furthermore, from January 16 to 28, a free rewards Advent Calendar offers a total of 525,000 Bloodpoints by the end of the event. So dive in and let the dice determine your fate—you might find some unexpected treasures waiting for you in the Fog.

  • Exclusive Sable Ward Perks in Dead By Daylight Explored

    Exclusive Sable Ward Perks in Dead By Daylight Explored

    Quick Links

    In the popular asymmetrical horror game Dead by Daylight, players meet Sable Ward. She’s a Survivor with a love for the occult and horror, sharing her interests on her own radio show. Her journey led her to the Entity’s domain while she was looking into mysterious disappearances in her hometown of Greenville.

    Sable was very close to her friend Mikaela Reid, and they both worked at the Moonstone Café. After Mikaela vanished into a strange black fog during a Halloween event, Sable became determined to uncover her friend’s fate.

    Updated by Allyson Cochran on December 24, 2024: A few more perk combinations have been added to help you optimize your Sable build.

    Sable Ward’s Unique Perks

    Sable Ward brings three Unique Perks to Dead by Daylight, introducing a new perk type that centers around the Basement. These perks combine elements of risk and reward:

    1. Invocation: Weaving Spiders

      • "The place where fear festers and terror treads is also where those with the gift can reach across the veil."
      • An Invocation circle appears in the Basement that you can interact with, taking 120 seconds to complete. Other Survivors can see your aura and help you, boosting the speed of the Invocation. When finished, you’ll become Injured and receive the Broken status effect for the remainder of the match. Additionally, it reduces the maximum required generator charge for remaining generators. Completing this invocation disables that perk type for all Survivors.
    2. Strength In Shadows

      • "A chance for renewed power down where danger calls home."
      • While in the Basement, this perk allows you to self-heal without a Med-kit at 70% of the normal healing speed. After healing in the Basement, you can see the Killer’s aura for a limited time.
    3. Wicked
      • "They can try to hurt you. But you’re not going down so easily."
      • This perk ensures your self-unhook attempts in the Basement are always successful. Additionally, upon unhooking yourself or being unhooked, you’ll see the Killer’s aura for a short duration.

    Warning: Since all of Sable’s Unique Perks involve the Basement, be aware that Killers may use the perk Territorial Imperative, which reveals Survivors’ auras upon entering the Basement.

    Best Builds and Perk Combos for Sable Ward

    As you advance through Sable’s Bloodweb, you’ll unlock stronger perks. You can mix and match perks to create effective builds. Below are some tried-and-true suggestions you might find useful:

    • Dead Hard: After being unhooked, activate a brief Endurance status that helps you survive Killer attacks.
    • Déjà Vu: Highlights three remaining Generators while increasing your repair speed on them.
    • Distortion: Spend tokens to hide your aura from the Killer.
    • Lithe: After performing a fast vault, quickly begin running again.

    To earn the Adept Sable achievement, you must escape a trial using only Sable’s unique perks.

    While Sable’s three Unique Perks work well together, you can choose a fourth perk that complements her abilities.

    Invocation: Weaving Spiders Perk Combos

    The Invocation: Weaving Spiders perk promotes a trade-off between risk and reward. It enhances generator repair speed, especially in tight situations, but leaves the initiating Survivor Broken.

    A potential build could employ No Mither, which starts you off Broken but gives several advantages, including a suppressed blood pool, reduced pain sounds, and a faster recovery speed. With this combo, you can initiate the Invocation perk right at the start, benefiting all Generators early on.

    You may also consider perks like Resilience, which boosts interaction speeds when injured, or Déjà Vu or Prove Thyself, both of which improve generator repair times.

    Strength In Shadows Perk Combos

    Strength In Shadows allows you to self-heal and reveals the Killer’s aura. This perk pairs well with others that also expose the Killer, helping you navigate their location effectively.

    Some of the top perks to pair with this include:

    • Fogwise: Reveals the Killer’s aura after you succeed with a Great Skill Check during generator repairs.
    • Wiretap: After successfully repairing a Generator, it reveals the Killer’s aura if they come close.
    • Iron Will: Suppresses your pain sounds, making it harder for the Killer to track you while healing.
    • Desperate Measures: Increases your healing and unhooking speed for each injured, hooked, or dying Survivor.

    Wicked Perk Combos

    The Wicked perk, while useful for unhooking yourself in the Basement, also reveals the Killer’s aura when unhooked.

    Combining it with other perks can help you evade a possible tunneling Killer:

    • Aftercare: Reveals auras of Survivors that you’ve healed or unhooked, and vice versa.
    • Deception: Fakes entering a locker to mislead the Killer while suppressing your scratch marks and blood pools.
    • Lightweight: Reduces the duration of your scratch marks, aiding your escape.

    This perk also synergizes with other aura-revealing perks, providing you with valuable information to dodge the Killer effectively.

  • Houndmaster Slayer: Essential Tips, Perks, and Strategies

    Houndmaster Slayer: Essential Tips, Perks, and Strategies

    The Houndmaster has just been introduced as the latest killer in Dead by Daylight, and understanding the best build for this character can provide you with a competitive edge. Unlike the last two killers, Castlevania’s Dracula and Dungeons & Dragons‘ Vecna, the Houndmaster is a unique addition to the game’s universe. Similar to characters like the Knight and the Twins, the Houndmaster comes with a special companion, Snug the Dog.

    To become a proficient Houndmaster, it’s essential to effectively control Snug. It’s also crucial to apply perks that either amplify the Houndmaster’s distinct strengths or compensate for her weaknesses. Aiming plays a vital role for all killers, but you’ll need to focus on accuracy in particular when playing as the Houndmaster.

    Best Perks For The Houndmaster

    When selecting perks for the Houndmaster, it’s important to keep several key points in mind. First, the Houndmaster relies solely on basic attacks to hit survivors. Therefore, perks that benefit killers who excel in performing basic attacks are especially beneficial for her. Additionally, aura-reading perks can be quite useful, showing you where to direct Snug.

    Currently, players are combating the Houndmaster’s abilities by dropping pallets on Snug. To combat this, choosing perks that can help navigate these obstacles would be wise. For example, Brutal Strength allows you to break pallets more quickly.

    The Houndmaster possesses a unique perk called No Quarter, which complicates healing for survivors. If you want to make healing even harder for the survivors, consider adding other perks that hinder their recovery speed; for example, the Leverage perk can slow down their healing process.

    Houndmaster Perks

    Perk

    Effect

    All-Shaking Terror

    Increases the range of the killer’s Lunge Attack by 75% after falling.

    No Quarter

    Survivors healing must complete continuous skill checks after 75% health, becoming broken if they fail.

    Scourge Hook: Jagged Compass

    Certain highlighted hooks become Scourge Hooks. Hooking a survivor on these reveals the aura of the generator with the most progress.

    Perk

    Effect

    Save the Best for Last

    Reduces cooldowns for Basic Attacks while the killer’s obsession is alive.

    Starstruck

    Survivors become exposed within the killer’s terror radius while carrying a survivor. After the survivor is hooked, all nearby survivors remain exposed for a brief time.

    Rapid Brutality

    Stops the killer from gaining Bloodlust, but hitting a survivor grants them +5% Haste for a limited time.

    Grim Embrace

    Gains a token for each survivor hooked. After four tokens, generators become blocked temporarily, and the Obsession’s aura is revealed.

    Brutal Strength

    Increases the speed of breaking pallets and damaging generators.

    Leverage

    Decreases the healing speed of survivors after they unhook another survivor.

    Best Powers For The Houndmaster

    The Houndmaster’s abilities center around effectively commanding her dog, Snug. You can either issue a Chase Command or a Search Command, each having its own distinctive effects. Depending on the situation, one command may prove to be more advantageous than the other.

    Chase Command

    Dead by Daylight. Snug can make minor turns and jump over pallets or through windows. When Snug captures a survivor, a special interaction called Dog Grab occurs. While in the dog’s grasp, the survivor is pulled toward the Houndmaster for eight seconds, revealing their aura. They can escape by dropping a pallet on Snug or getting rescued by another survivor.

    After their release, the survivor is Hindered, losing 10% of their movement speed for five seconds. Additionally, Exit Gates remain blocked for the grabbed survivor for five seconds, giving the Houndmaster a better chance to knock them down before they can escape. This power is key for the Houndmaster to effectively capture survivors since she can only deliver damage through basic melee attacks.

    Search Command

    While Search Command is useful for locating survivors, many players will likely prioritize the Chase Command to capture them. Nonetheless, Search Command excels in scenarios with low visibility, helping to alleviate the frustration tied to finding survivors in hiding.

    Top Tips for Playing the Houndmaster

    Maximizing the Use of Snug to Offset the Houndmaster’s Limitations

    The Houndmaster is particularly vulnerable to being looped. Unlike killers like Dracula or the Xenomorph alien, who can hit survivors from a distance with special attacks, the Houndmaster relies solely on her basic attack for dealing damage. Timing Snug’s actions is crucial; holding him back until the survivor drops a pallet or vaults a window can allow the Houndmaster to close the distance and land a hit.

    Given the Houndmaster’s limited mobility compared to other killers, you should also send Snug to search when the location of survivors is unknown. Don’t hesitate to utilize Snug for both searching and chasing—waiting for the right moment may result in missing out on catching a survivor altogether. Additionally, you should practice aiming Snug effectively. While Dead by Daylight isn’t as precision-heavy as a first-person shooter, players might find it frustrating if Snug misses the targets they aim for.

  • A Guide to Mastering Taurie Cain in DBD

    A Guide to Mastering Taurie Cain in DBD

    Quick Links


    In Dead By Daylight, the Survivors come from various backgrounds. While some may have been educators, botanists, and architects, others have histories as bouncers, drifters, or ghost hunters. All of them share qualities like resilience and adaptability, willing to put everything on the line to escape the clutches of The Entity. But what if there was a Survivor raised not to oppose The Entity but to serve and amplify its presence?

    Enter Taurie Cain. Her family introduced her to a cult, The Disciples of the Black Talon, where she quickly became an eager participant in their grim rituals. Traveling the world for the Black Talon, she never anticipated finding herself caught in The Entity’s deadly games.

    Taurie Cain’s Unique Perks

    Given her distinctive training, Taurie’s perks reflect that uniqueness. Taurie’s abilities encourage you to take calculated risks for the sake of your team. If you excel at dodging the Killer’s attacks, you’ll thrive with her gameplay style.

    Perk Description
    Clean Break This perk activates after completing a healing action on another Survivor. While being healed by someone, you can activate a self-inflicted Broken condition for 60 seconds, after which you are restored to full health. This cannot be activated if you are downed.

    Healing can sometimes become a risky endeavor, especially if the Killer is nearby or has perks that counter healing. Clean Break can alleviate that pressure and save critical time for completing generators.

    Invocation: Treacherous Crows While in the basement, you can perform a 60-second ritual. Completing this ritual makes you Injured and Broken for the entire trial. Every time the Killer disturbs a crow within your Terror Radius, their aura is revealed to all Survivors for two seconds.

    This perk demands a daring approach, as being Injured throughout the trial can put you at risk. However, the information it provides can significantly assist your team.

    Shoulder the Burden Once per trial, if you have fewer than two Hook States, you can use this ability to unhook a Survivor near you. You take their hook state, scream, and become Exposed for 40 seconds. The Killer hears a unique notification indicating your action.

    This perk can effectively disrupt the Killer’s focus, allowing you to break their chase and help your teammates escape more easily, provided you’re quick enough to evade being Exposed.

    Tip: To achieve the Adept Taurie achievement, you must escape a trial using only her unique perks.

    Best Builds and Perk Combinations for Taurie Cain

    To navigate the challenges of being Injured, making sacrifices, and putting yourself at risk, having some strategic perks is essential for survival and regaining The Entity’s favor. Here are some recommended perks to complement Taurie’s unique abilities:

    Perk Description
    Wicked After being unhooked, you see the Killer’s aura for 20 seconds. If your first hook happens in the basement, you can unhook yourself.

    This perk provides an additional layer of protection if you’re in the basement, allowing you to know whether the Killer is returning to your location.

    Inner Focus You can see the scratch marks of other Survivors, and when the Killer causes a Survivor to lose health, you see the Killer’s aura for ten seconds.

    This allows you to be more aware of your surroundings and locate other Survivors more effectively.

    Sprint Burst Activate a 50% haste effect for three seconds at the start of your run, but you gain the Exhausted status for the next 40 seconds.

    This perk provides a quick escape route in tight situations when you are injured.

    Lightweight Create 60% fewer scratch marks and have them disappear five seconds sooner.

    This passive perk is great for evading the Killer’s attention, particularly when you’re vulnerable.

    Clean Break Perk Combinations

    To leverage Clean Break effectively, you need to ensure you can avoid the Killer’s detection while healing. Here are some perks that can enhance your effectiveness with Clean Break:

    Perk Description
    Iron Will While Injured, you do not make grunts of pain, allowing you to stay hidden from the Killer’s detection.

    This is critical for taking strategic actions while injured without revealing your position.

    Resilience While Injured, your action speeds increase by 9% for various activities (healing, repairing, vaulting, etc.).

    This perk lets you work more efficiently on generators or find yourself in a chase situation effectively.

    Invocation: Treacherous Crows Perk Combos

    As performing an Invocation comes with heightened risks, here are a couple of perks to complement it:

    Perk Description
    Calm Spirit You no longer alert crows unless you walk directly into them, and you interact with chests and totems silently.

    This perk helps you maintain stealthiness, increasing the activations of Treacherous Crows due to fewer disturbances.

    Eyes of Belmont After a Generator is finished, you can see the Killer’s aura for three seconds. The duration increases by two seconds for any additional aura readings.

    This extended visibility can give your team a significant edge during chases triggered by Treacherous Crows.

    Shoulder the Burden Perk Combos

    To maximize the ability of Shoulder the Burden, it’s essential to pair it with perks that mitigate risks involved with saving teammates:

    Perk Description
    Babysitter Upon unhooking a Survivor, you see the Killer’s aura for eight seconds and the rescued Survivor leaves no scratch marks, receiving a 20% haste boost.

    This ensures you know whether it’s safe to leave the area after a save.

    Vigil Reduces the duration of negative status effects like Exposed or Exhausted by 30% for all Survivors within proximity.

    This feature lowers the time you remain Exposed, enabling safer rescues for you and your teammates.

    By carefully choosing and combining these perks, you can elevate your gameplay with Taurie Cain, ensuring your survival while aiding your team in the thrilling world of Dead By Daylight.

  • Unlock All Haunted By Daylight 2024 Rewards in DBD

    Unlock All Haunted By Daylight 2024 Rewards in DBD

    October is here, and there’s no better way to embrace the Halloween vibe than by spending time with the spooky characters of Dead by Daylight. With eerie sights, frightening creatures, and the thrill of facing the unknown together, it’s truly a perfect representation of the fall atmosphere.

    Now is an excellent time to dive into the Fog, especially with daily login bonuses and significant discounts on nearly all characters. The Haunted by Daylight event has returned, featuring a unique gameplay mode filled with portals, ghosts, and enticing rewards waiting for you. However, to claim these rewards, you’ll first need to understand Dark Trinkets.

    How to Get Dark Trinkets


    To take advantage of the fantastic rewards offered in this year’s event, you’ll need to collect Dark Trinkets. This special in-game currency can only be earned while Haunted by Daylight is live, from October 17 to November 7, and will expire after the event concludes.

    You can earn 50 Dark Trinkets for each challenge completed in the Haunted by Daylight Event Tome, along with 250 Dark Trinkets for every level you finish. Additionally, there are occasional “free” rewards of 100 Dark Trinkets and a one-time reward of 100 Dark Trinkets just for logging in during the event.

    In total, you can gather up to 2,950 Dark Trinkets, which is enough to unlock every item in the Event Collection, plus you’ll still have 750 Dark Trinkets left over.

    Any Dark Trinkets that remain after the event wraps up on November 7 will be converted into Bloodpoints at a rate of 125 Bloodpoints per Dark Trinket.

    How to Unlock Event Items

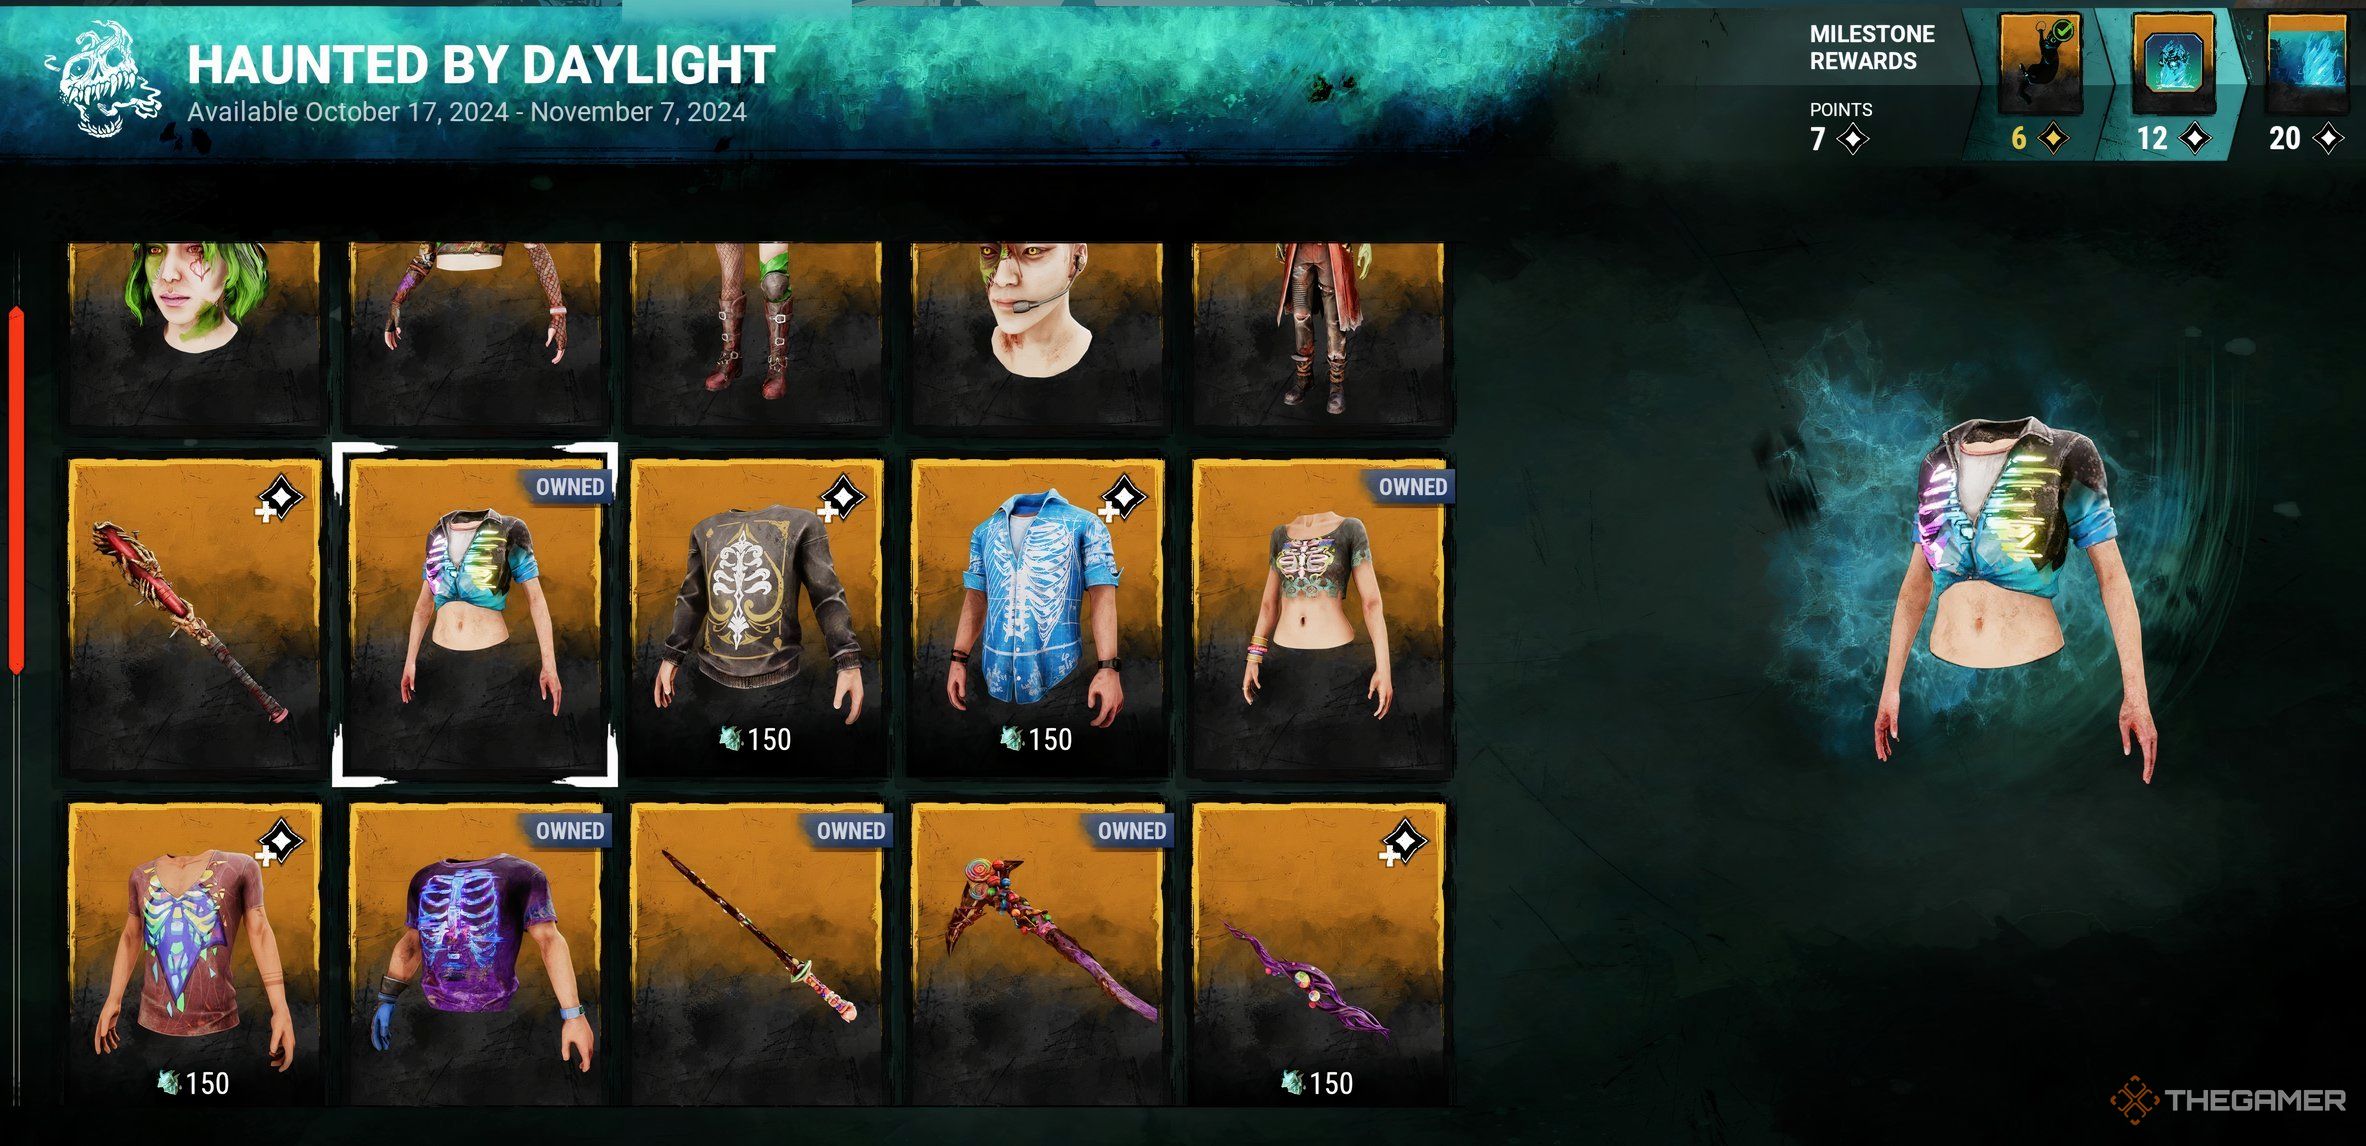
    The Haunted by Daylight Event Collection for 2024

    Once you’ve gathered enough Dark Trinkets, head over to the Event Collection page in the main menu. Here, you can spend your Trinkets to unlock a range of cosmetics, banners, and profile icons.

    Here’s a list of items you can obtain with your event currency:

    • Ace Visconti: Gambler Ribcage
    • Jonah Vasquez: Codebreaker Ribcage
    • Renato Lyra: Tactician Ribcage
    • Thalita Lyra: Competitor Ribcage
    • Gabriel Soma: Engineer Ribcage
    • Meg Thomas: Athlete Ribcage
    • The Artist: Sour Memory
    • The Blight: Sugar High
    • The Unknown: Sugary Twist
    • The Knight: Jawbreaker
    • The Spirit: Sweet Treat
    • The Singularity: C12H22011

    And that’s not all! For every level of the Event Tome that you complete, you will receive a piece of this year’s Halloween outfit for both Yun-Jin Lee and The Trickster:

    • Yun-Jin Lee: Danse Macabre Cameo
    • The Trickster: Danse Macabre Star

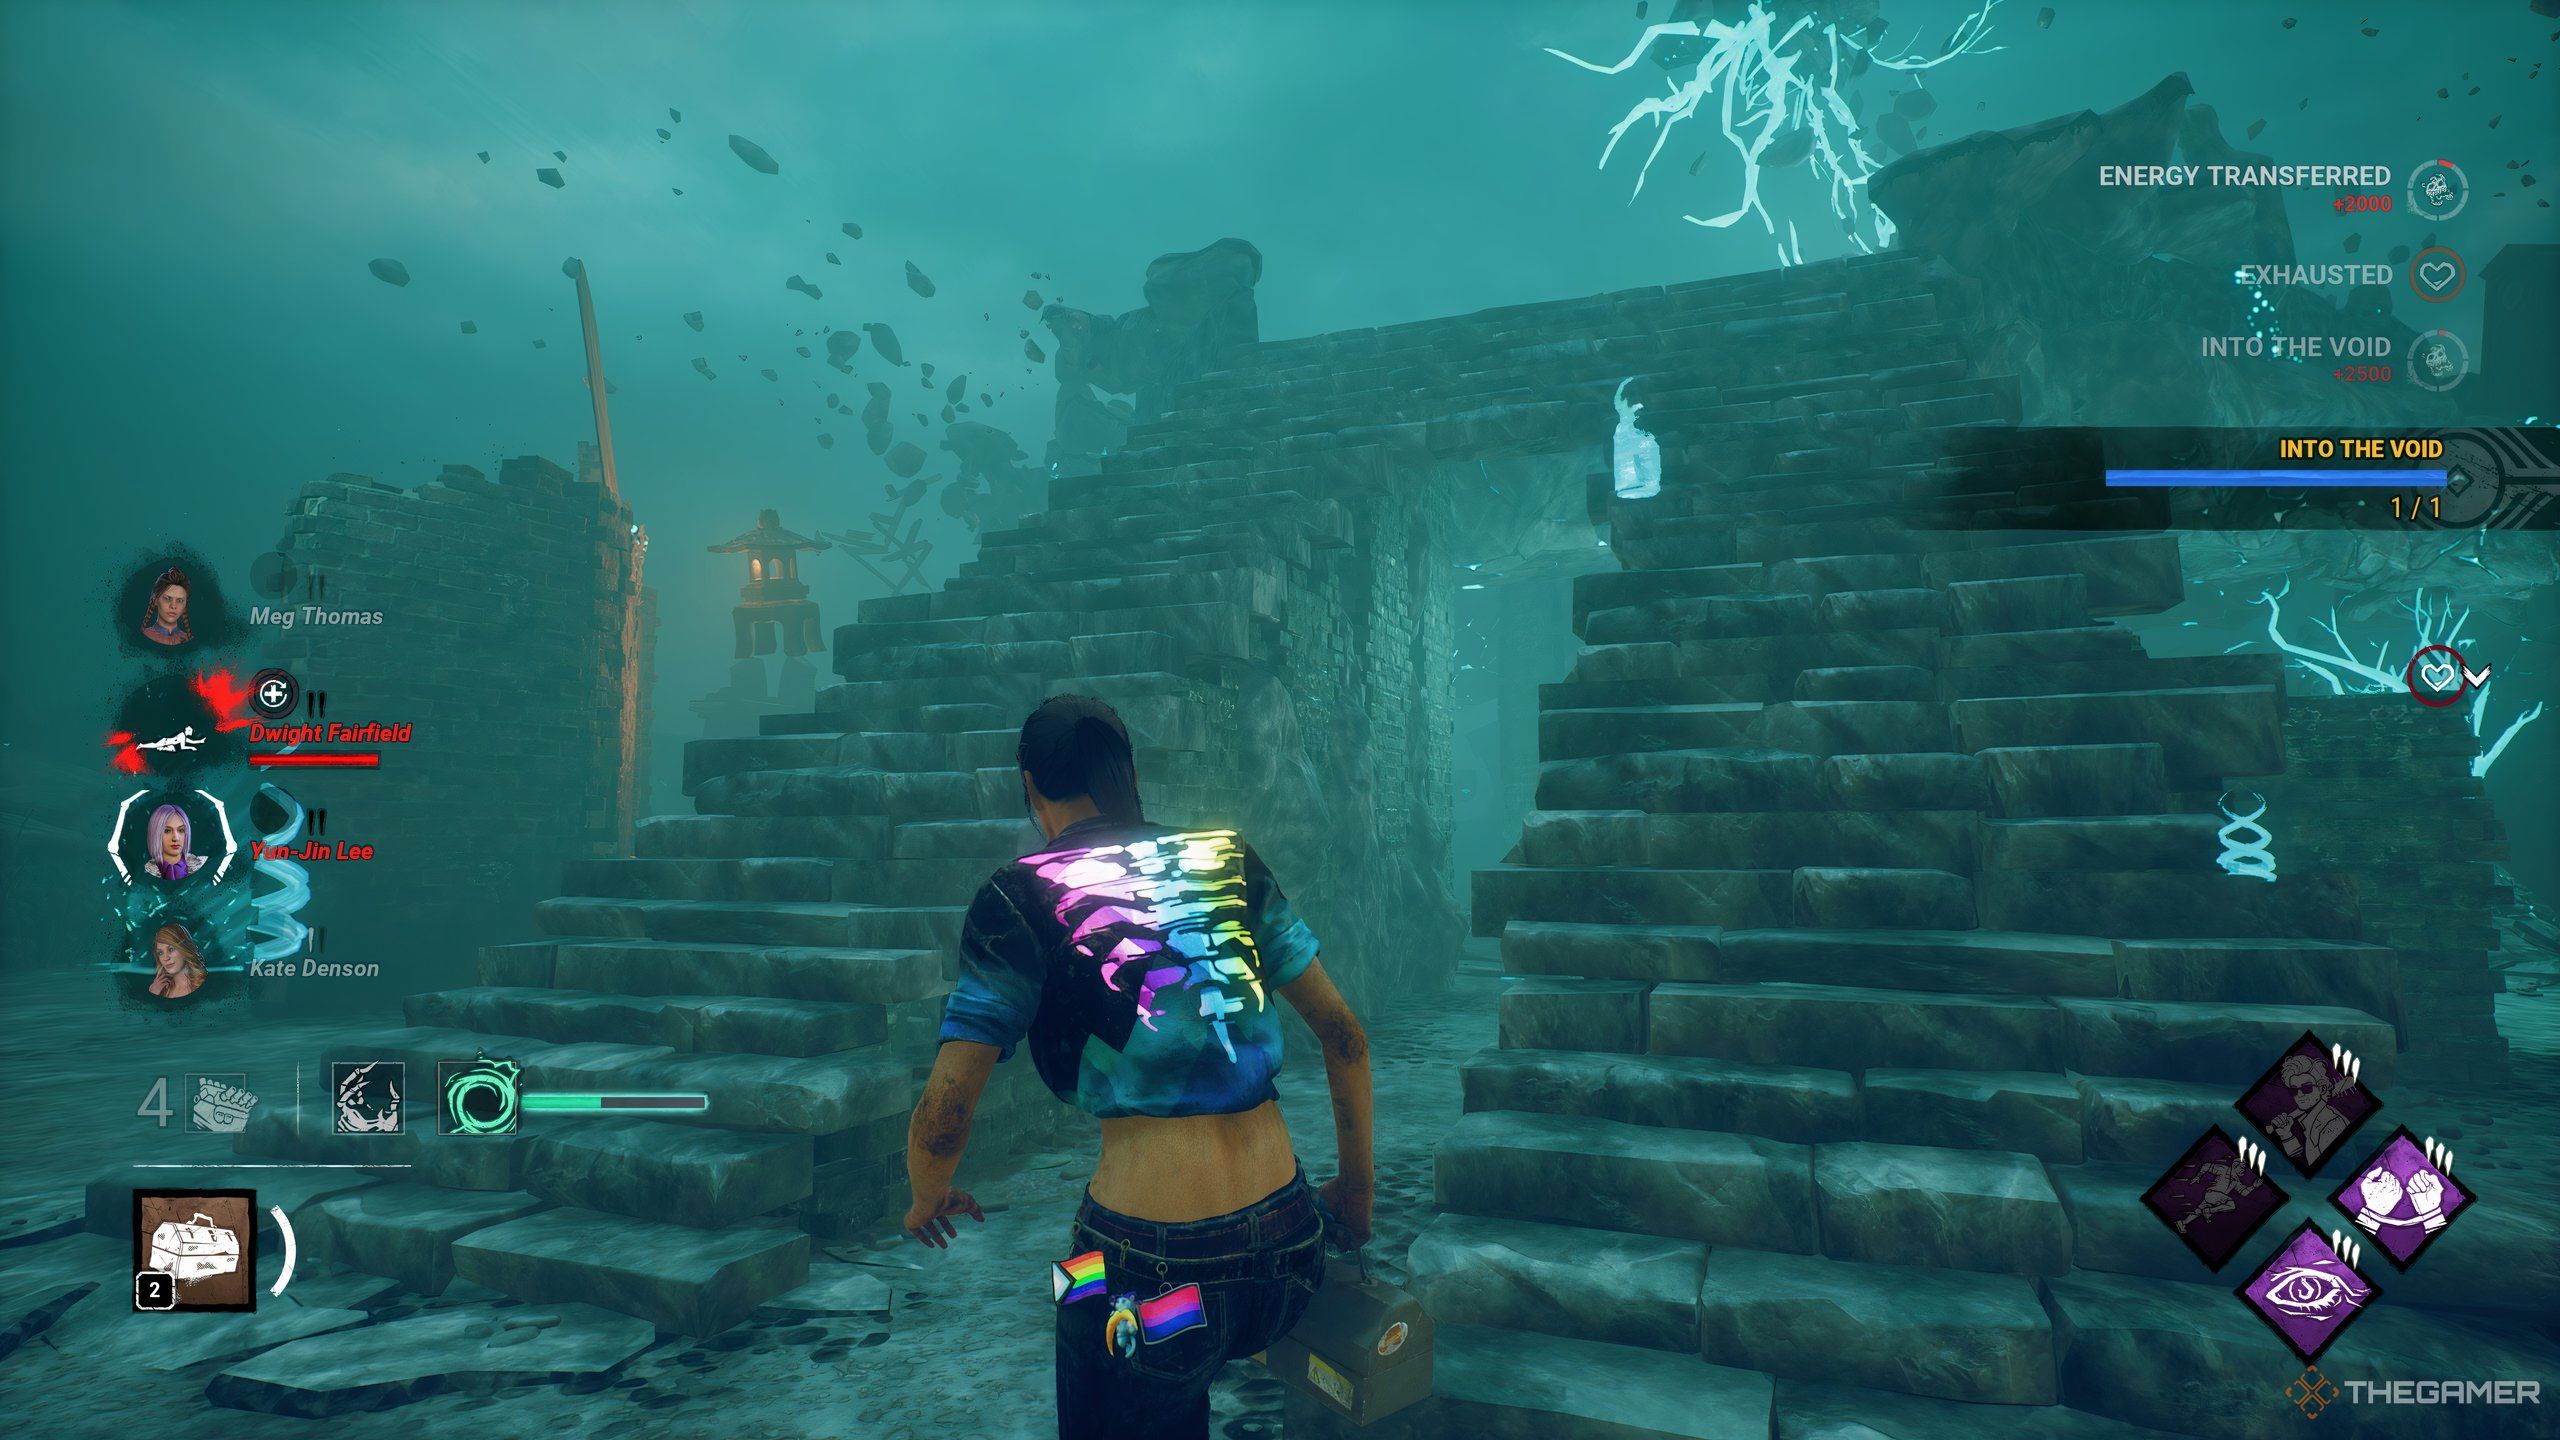
    How to Use the Void

    Meg in the Void during Haunted By Daylight 2024

    To earn those seasonal rewards through challenges, it’s essential to know how Haunted by Daylight operates. Each year, the event has its unique twist, so here’s what you need to know for 2024:

    At the beginning of a match, a Void Portal will open at a random location on the map. You can enter it anytime, but it’s particularly beneficial if you have Void Energy.

    While in the Void, Killers are undetectable, and Survivors leave no scratch marks. The Killer receives a notification whenever a Survivor enters the Void, and those who visit it acquire Exhausted and Broken conditions, which prevent them from healing or using certain perks until they exit.

    How to Collect Void Energy

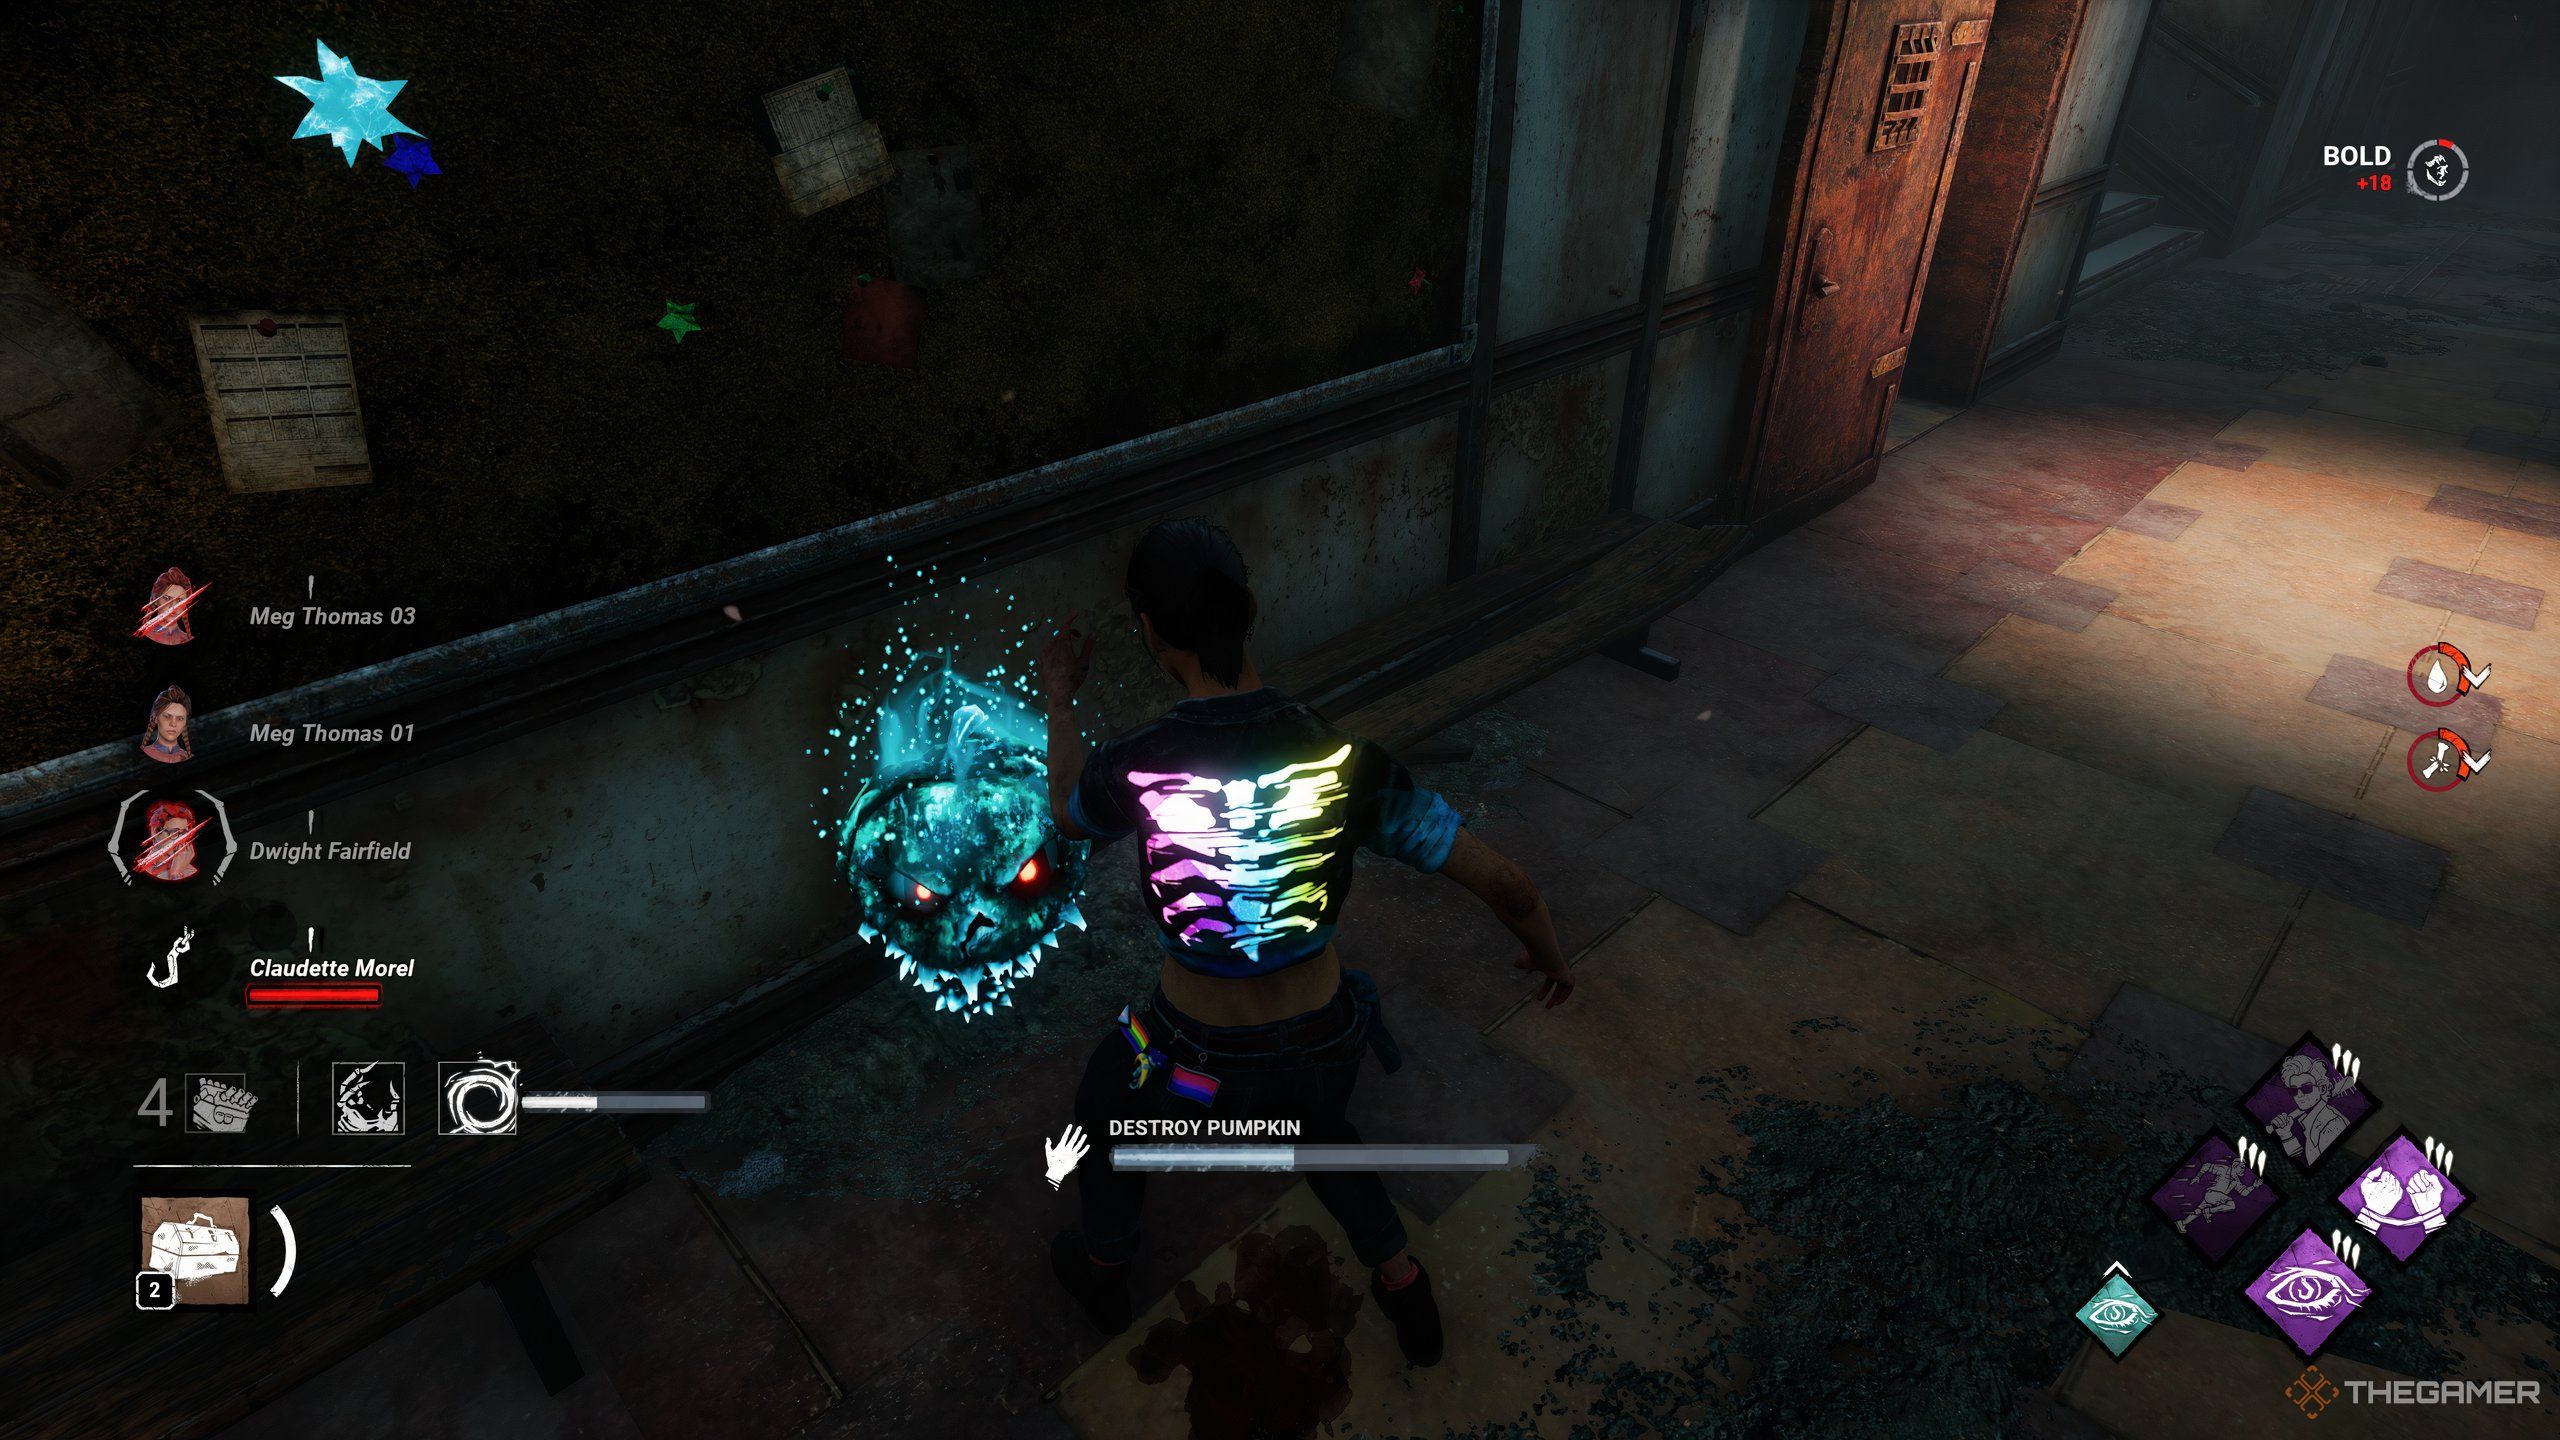
    Meg kicking a Void Pumpkin in Haunted By Daylight 2024.

    Everyone can gather Void Energy by doing the following:

    • Collecting Void Orbs.
    • Destroying Pumpkins.

    Survivors can also gain Void Energy by:

    • Repairing Generators.
    • Blinding the Killer.
    • Stunning the Killer.

    And Killers can collect Void Energy by:

    • Downing Survivors.
    • Hooking Survivors.

    Any Void Energy gained from Blinding, Stunning, Downing, or Hooking a player is deducted from that player’s total – if they have none left, you won’t get any.

    Spending Void Energy

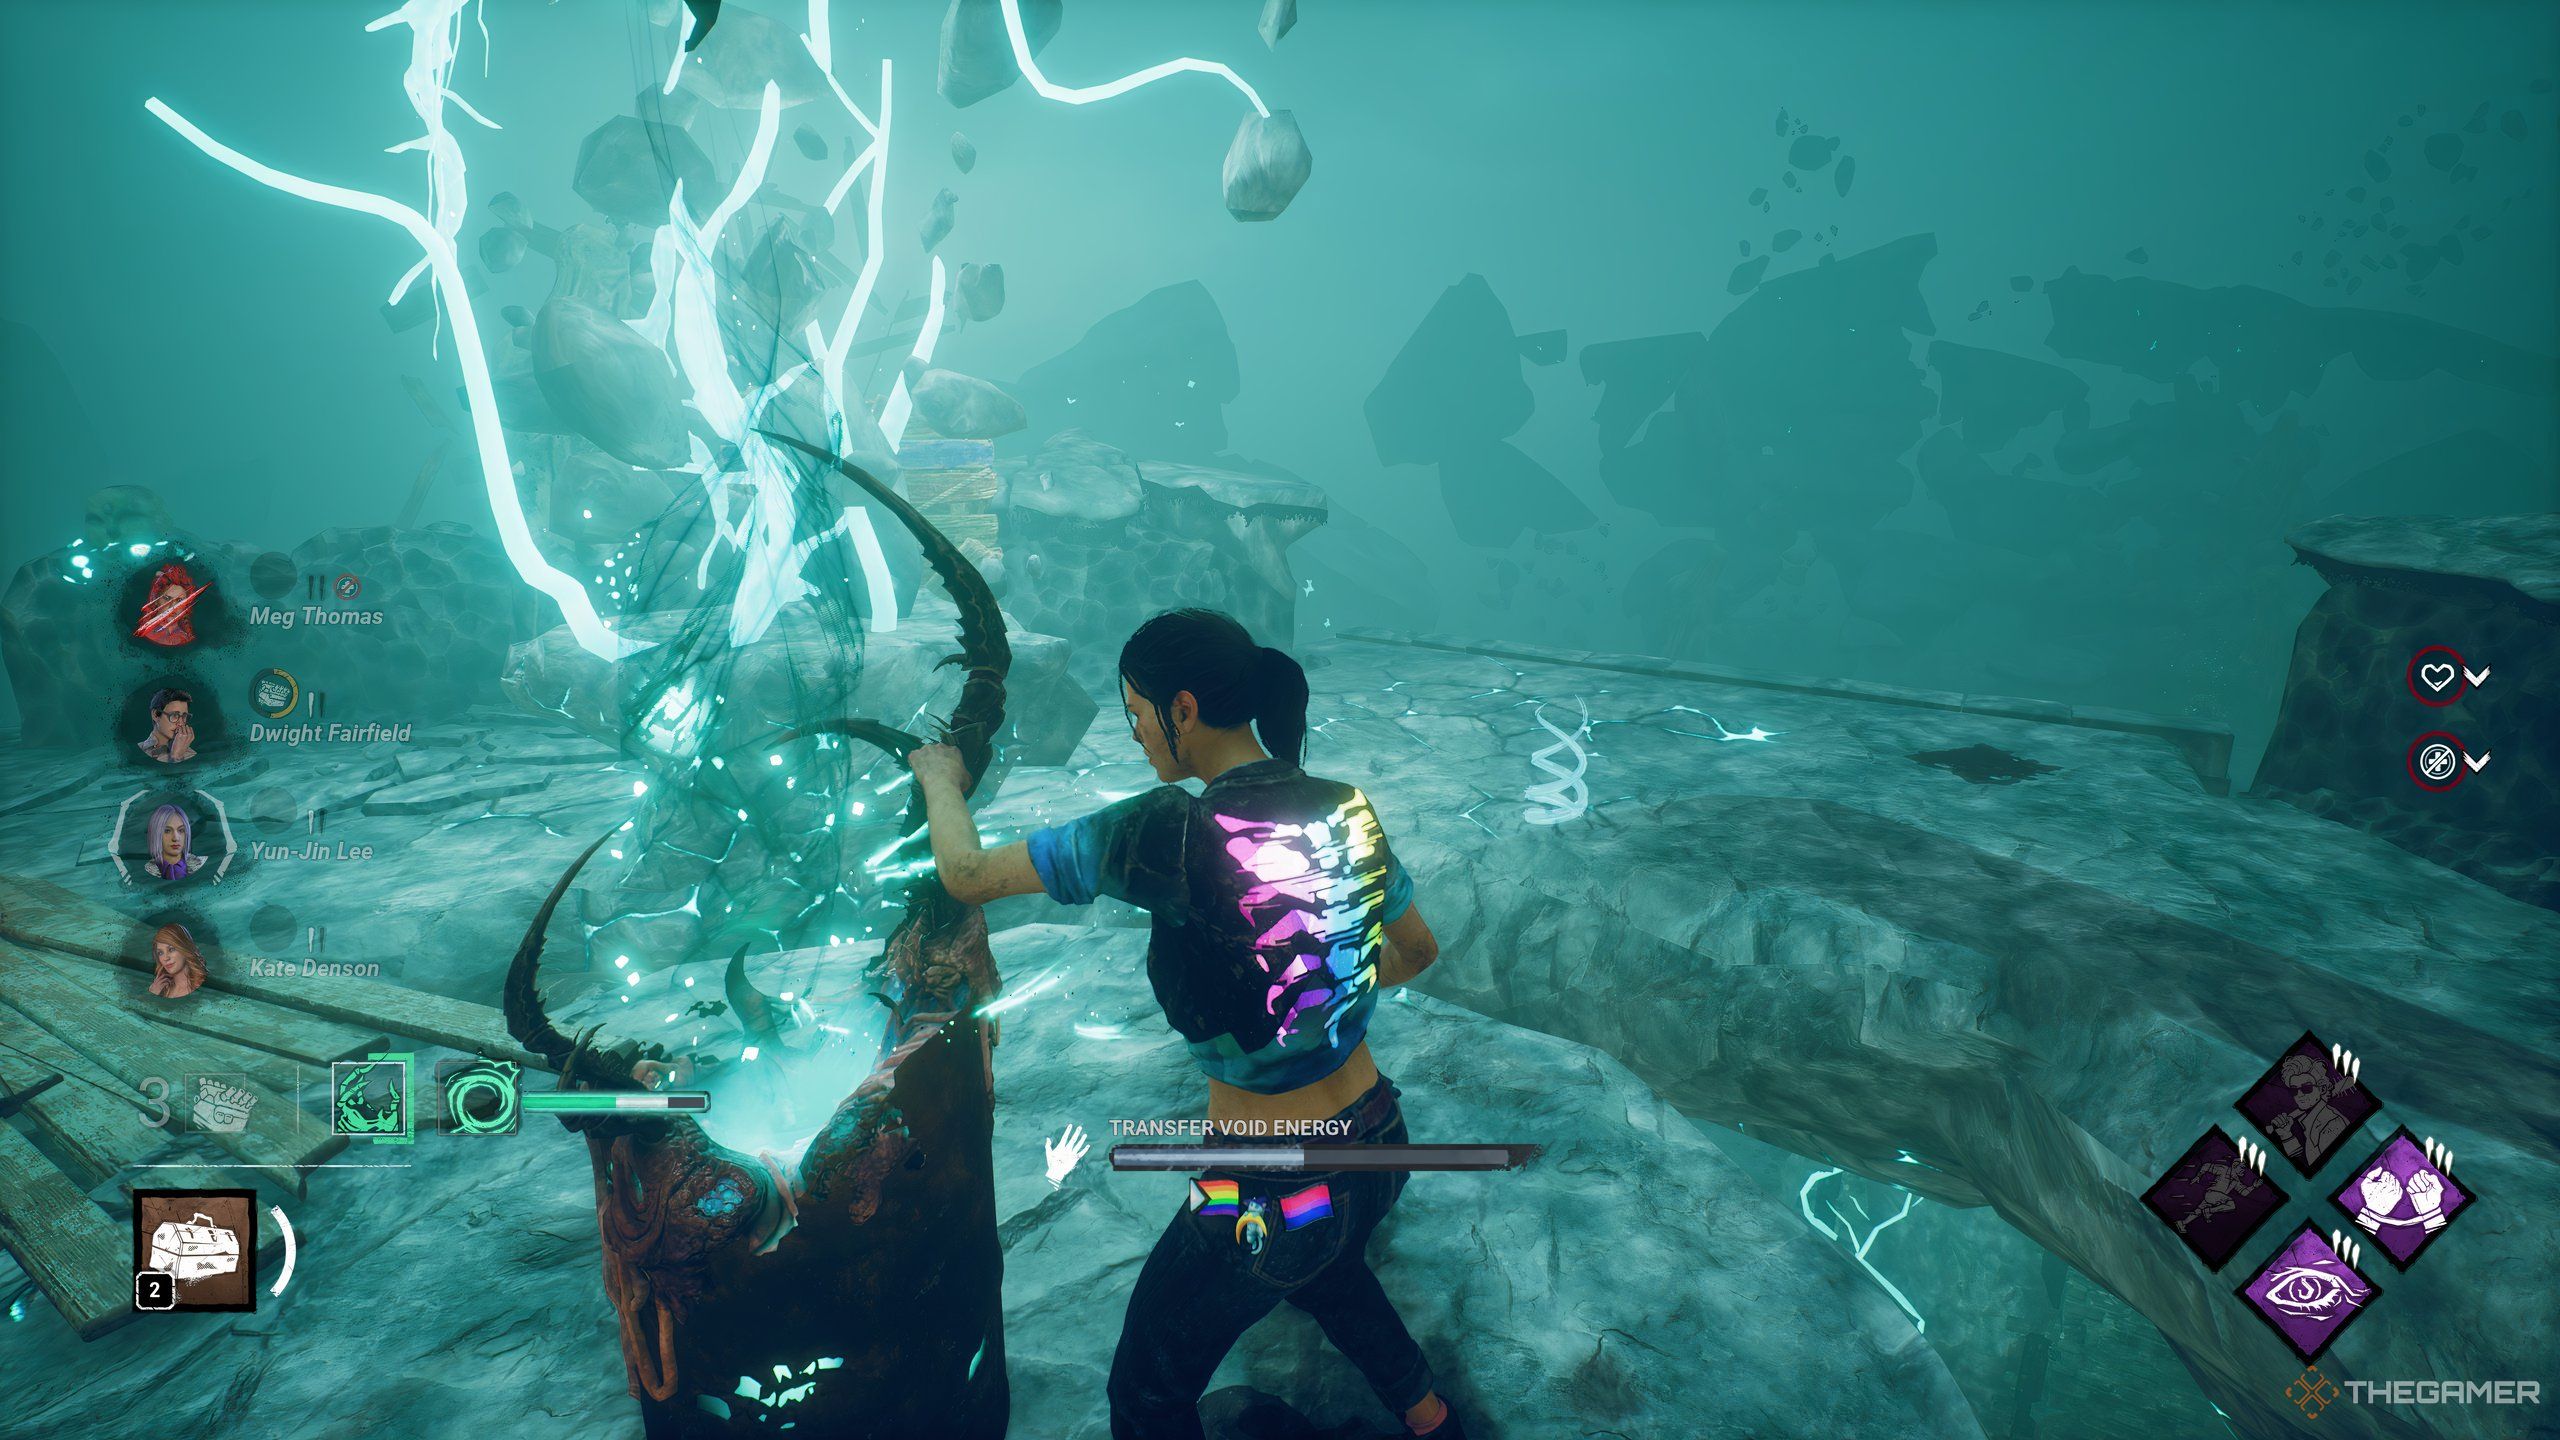
    Meg interacting with the Void Well in Haunted By Daylight 2024.

    Once you’ve collected some Void Energy, you can spend it in a couple of ways. You can use it to open a Dormant Portal, transforming it into a Void Portal that everyone can enter for the rest of the match, making it easier to access the Void later and offering cross-map transportation.

    While inside the Void, both Survivors and Killers can deposit Void Energy into the Void Well. Doing this grants each side a unique reward: Survivors receive a Void Crystal that works like a single-use smoke bomb, obscuring vision, muffling sounds, and concealing Scratch Marks.

    On the other hand, Killers receive a pair of Captured Haunts, a projectile power that travels straight, harming the first Survivor it hits and causing any nearby Survivors to scream.

    Bonus: DbD Day Rewards

    DbD Day Challenges in the Haunted by Daylight 2024 Event Tome.

    You may have noticed the additional Challenges in the Event Tome that don’t award Dark Trinkets. These are part of DbD Day, a memorial occasion in Japan. The Dead by Daylight community in Japan has been celebrating this day since 2022, and this year, Behaviour has added various free cosmetics for all players to earn.

    The DbD Day Challenges will be available for the same duration as Haunted by Daylight, allowing you to unlock cosmetics for characters like Dwight Fairfield, Meg Thomas, Claudette Morel, Jake Park, Yui Kimura, Adam Francis, The Spirit, and The Oni.