Tag: customize

  • How to Complete and Customize Sidekicks in Fortnite Chapter 6: The Simpsons

    How to Complete and Customize Sidekicks in Fortnite Chapter 6: The Simpsons

    The new locker feature, first introduced during Fortnite Chapter 6 Simpsons season, lets you bring a pet with you as you compete to win a Victory Royale. These Sidekicks don’t give you any gameplay advantage, but they are a fun way to personalize your locker and make your loadout feel more your own. Only you and your squad can see your pet, so it won’t reveal your location during fights. Here’s everything you need to know about Sidekicks in Fortnite, including how to get one and customize it.

    How to Get Sidekicks in Fortnite

    Sidekicks can be unlocked through the Battle Pass or bought from the item shop, usually costing about the same as other skins or outfits. Your first Sidekick, Peels the Dog, is available in The Simpsons Battle Pass starting November 1, 2025. More Sidekicks will be introduced later, ranging from tiny dinosaurs to furry friends and even fish! After purchasing or unlocking a Sidekick, you can select it from your locker by scrolling until you find the pet you want to take with you.

    Before taking your Sidekick into battle, you need to customize it. You can do this right after unlocking or buying it, or later by opening your locker and selecting your pet.

    How to Customize Your Sidekick

    Once you have your Sidekick, it’s time to set its look. Head over to your locker, select your pet, and click on ‘Customize.’ You’ll see several options to modify, like colors, patterns, and ear positions. Many Sidekicks have different features you can change, so have fun experimenting to find what looks best.

    Note: You can only customize a Sidekick once. Once the appearance is locked in, you can’t change the basic look again.

    For example, with Peels the Banana Dog, you can adjust how ripe it looks—ranging from green and under-ripe to fully ripe with brown spots. You can also move its ears from pointing straight up to flopping down. Lastly, you get to pick whether it’s slim or a little chubby.

    There are various extra cosmetics to unlock for each Sidekick by playing and interacting with your pet to earn Sidekick Points. The more you take your sidekick with you, the faster you earn points. Once you unlock these cosmetics and emotes, they are stored in your locker. You can equip each Sidekick with a style (outfit), a reaction (a small pop-up when you pet it), and an emote. The reaction is a tiny heart that appears when you pet your Sidekick.

    What You Can Do with Your Sidekick

    Your Sidekick will react to different situations—sad when you’re hurt, happy when you find loot, or focused during combat. You can also make it dance with you using emotes and pet it whenever you like. It’s worth noting that your pet only appears to you and your squad and cannot be seen or harmed by enemies, so it won’t give away your position. Your Sidekick can’t accompany you to most Creative maps but is allowed in modes like Battle Royale (solo, duo, trios, squads), Ranked Battle Royale, Zero Build, and many others including Party Royale and Save The World.

    As you play with your Sidekick, you earn Sidekick Points that let you unlock a variety of cosmetics, including loading screens, emoticons, outfits, banner icons, and dance emotes. Once you’re satisfied with how your Sidekick looks, lock in its appearance to make it your official Fortnite pet.

    Playing with Your Sidekick

    While in game, your Sidekick will respond to gameplay events. It might look sad if you get hurt, excited when you open chests, or focused during fights. When you perform an emote, it will dance alongside you, and you can pet it anytime. Since your Sidekick isn’t visible to enemies, it’s a safe, fun companion that doesn’t give away your location. Only you and your squad can see it, and you can pet or emote with it together.

    Keep an eye on the item shop for new Sidekicks, each coming with their own Sidekick Points and cosmetics to unlock through gameplay.

  • How To Make the Clock Bigger on iOS 26: A Simple Step-by-Step Guide

    How To Make the Clock Bigger on iOS 26: A Simple Step-by-Step Guide

    One of the first noticeable changes in iOS 26 is the redesigned user interface, which features transparent effects and a new approach to the lock screen clock. Instead of obscuring a subject like a loved one’s face, the clock now seamlessly transforms alongside your wallpaper, creating a more integrated and personalized appearance.

    The updated design allows the clock to expand and take up more space on the screen, making it easier to read at a glance. Similar to the home screen, you can resize the clock by using the handles located at the bottom-right corner. It can fill up to half of the display, but in larger modes, any widgets will only be accessible at the bottom of the screen.

    If you want to customize the font of the lock screen clock, here’s how you can do it:

    1. Press and hold on the Lock Screen, then tap Customize.
    2. When you see the handles in the bottom right, tap on the Clock face.
    3. The settings panel that appears offers several options:
    • Choose from six different fonts.
    • Use a slider to adjust the boldness of the font.
    • Select from 15 color presets, or use a full color wheel to find your perfect hue.

    At the bottom of the customization options, you’ll find a toggle between Glass and Solid effects. The Glass option makes the clock transparent, which can look sleek but might be less accessible for users with visual impairments. The Solid setting removes transparency, making the clock more visible but slightly less integrated with your wallpaper.

    Whatever your preference, customizing the iOS 26 lock screen clock is simple, allowing you to make it truly your own.

  • How to Customize Your Skate Character and Solve Gameplay Challenges

    How to Customize Your Skate Character and Solve Gameplay Challenges

    Skate isn’t just about landing tricks or pretending you’re Tony Hawk; it’s also about looking good while doing it. Every outfit, accessory, and deck detail is a chance to showcase your personal style. The customization system might seem simple at first, but look closer, and you’ll find options for everything from hair and facial features to grip tape patterns and wheel colors.

    If you want your skater to show off personality, this guide will help you make every choice count without turning your character into a test subject.

    ### How to Customize Your Character and Deck

    Skate provides a customization system that lets you change both your character’s appearance and your skateboard decks. To access these settings, open the in-game menu and go to the third tab with the skateboard and pencil icon. Here, you’ll find sections for apparel, accessories, costumes, gestures, appearance, and your board.

    Choosing any of these options will bring up the relevant options, so you can tweak your character or deck as you like. Whether you want a new outfit, a different hairstyle, or a fresh skateboard deck, this menu is where to do it.

    ### What Are the Customization Options?

    Below, we’ll go through the different ways you can customize your character.

    #### Apparel

    | Customization Option | Description |
    |————————|————–|
    | Tops | Shirts, jackets, hoodies, and other upper-body clothing |
    | Bottoms | Pants, shorts, skirts |
    | Shoes | Sneakers, boots, other footwear |
    | Outfits | Pre-made sets combining tops, bottoms, and dresses |

    #### Accessories

    | Customization Option | Description |
    |————————|———————————————-|
    | Headwear | Hats, beanies, helmets, and other headgear |
    | Eyewear | Glasses, sunglasses, goggles |
    | Socks | Visible sock styles |

    #### Board

    | Customization Option | Description |
    |————————|—————————————————————-|
    | Deck | The main skateboard deck underneath the grip |
    | Grip Pattern | Texture and design on the top surface of your deck |
    | Grip Color | Color of the deck’s top surface |
    | Trucks | Metal parts that connect the wheels to the deck |
    | Wheels | Colors and patterns of your wheels |
    | Stickers | Decorative decals you can add to your deck |

    #### Appearance

    | Customization Option | Description |
    |————————|—————————————————————————-|
    | Body | Skin tone, body type, and body shape |
    | Locomotion | How your character moves and skates |
    | Face Shape | Adjust the shape and structure of the face |
    | Hair | Hairstyles, length, and color |
    | Eyebrows | Shape and color of eyebrows |
    | Eyes | Eye shape, size, and color |
    | Nose | Shape and size adjustments |
    | Mouth | Lips and color |
    | Facial Hair | Beards, mustaches, stubble |
    | Voice | Pick a voice and tone that match your character |

    ### How to Unlock More Customization Options

    Expanding your wardrobe and deck choices takes a bit more effort. The game’s shop, found in the last tab of the menu, offers additional clothing, accessories, and deck gear.

    You can also locate the shop on the map by looking for the icon labeled “Extravert Shop.”

    Most of these items are obtained through loot boxes called “Boxes,” which you can buy with Rip Chips. Rip Chips are earned naturally by completing missions, so playing the game actively helps you unlock more customization options. Some items are also unlocked as you progress through missions.

    For players who want to bypass grinding or the luck of loot boxes, Skate offers a premium option. You can purchase customization items directly with San Van Bucks, the game’s real-money currency. This way, you can get exactly what you want without waiting or relying on chance.

  • How to Customize Your Armor in Wuchang: Fallen Feathers by Completing and Solving

    How to Customize Your Armor in Wuchang: Fallen Feathers by Completing and Solving

    Fashion and Style in Wuchang: Fallen Feathers

    Fashion is an important part of any game inspired by spirits or souls, and Wuchang: Fallen Feathers is no different. Fighting enemies and saving the world feels better when you wear cool, fierce clothing. Even if your character has some messy feathers, you can still look sharp while fighting.

    If you want to look good without sacrificing your combat abilities, there’s a feature called transmog. This lets you change how your armor looks while keeping all its details and stats the same. So, you can stay stylish and still be strong.

    How To Change Your Armor’s Look

    To change what your armor looks like without changing its strength, follow these steps:

    1. Have two armor sets: one with the stats you want, and one with the appearance you like.
    2. Select the armor set you want to keep using.
    3. Use the Alter Appearance option (press F on keyboard or Y/Δ on controller).
    4. Pick the armor piece you want it to look like and confirm your choice.

    This process will not delete any armor; both sets stay in your inventory. It also doesn’t permanently combine the two sets. You can change your armor’s look as many times as you want, free of charge.

    Note: Changing appearance doesn’t affect your armor’s stats or delete your original armor. You can switch back and forth anytime.

    Tips for Beginners on Clothing

    While fashion might seem tempting, it’s better not to spend your resources on clothing just for looks, especially early in the game. Wu Gang, a trader you meet before your first boss, Man-Raider, sells many clothing items.

    Many of these clothes are actually rare drops from common enemies. For example, early-game enemies often drop Golden Bandit gear. It’s usually smarter to wait and get these items from enemies rather than buying them from Wu Gang.

    Keep in mind: Some special clothing items from Tao Qing, another trader, have unique value and cannot be found anywhere else. Check his stock before deciding to buy from Wu Gang.

  • iOS 26 Accessibility: Customize Glass Effects for Better Visibility

    Apple’s dedication to accessibility has reached new heights with the unveiling of iOS 26. One of the standout features designed to enhance user experience is the customizable Glass Effects. This innovative tool aims to improve visibility for those with visual impairments, allowing a more personalized experience with their devices.

    What Are Glass Effects?

    Glass Effects provide an ambient background to text and user interface elements, ensuring clarity and readability alongside aesthetic appeal. This feature is particularly beneficial for individuals who may struggle with contrast or those looking for a softer visual appearance.

    Key Features of Glass Effects

    • Opacity Control: Users can adjust the transparency level, catering to their unique preferences for how much background detail should be visible.

    • Blur Options: Different levels of blur can be applied, allowing users to create a softer or sharper backdrop that suits their viewing comfort.

    • Color Filters: iOS 26 provides various color filters that can be combined with Glass Effects, enhancing visibility by altering the hue of background elements.

    How to Customize Glass Effects

    Customizing Glass Effects in iOS 26 involves several straightforward steps within the Accessibility settings. This commitment to user-friendly design means anyone can tweak these settings easily.

    Step-by-Step Customization

    1. Open Settings:

      • Launch the Settings app on your device.

    2. Navigate to Accessibility:

      • Scroll down and select "Accessibility."

    3. Select Display & Text Size:

      • Tap on “Display & Text Size” to explore visualization options.

    4. Enable Glass Effects:

      • Turn on the toggle for Glass Effects.

    5. Adjust Opacity:

      • Use the slider to set your preferred transparency level.

    6. Choose Blur Style:

      • Select from existing blur styles or customize one to your liking.

    7. Apply Color Filters:

      • Dive into “Color Filters” and pick a filter that enhances your visual experience with the Glass Effects.

    Tips for Best Results

    • Experiment with Settings: Take time to find a combination of opacity, blur, and color filters that feels comfortable and enhances visibility.
    • Contrast Matters: High-contrast settings often pair well with Glass Effects, aiding in text readability.
    • Test in Different Environments: Try using your device in varying lighting conditions to see how to best adjust your settings.

    Benefits of Using Glass Effects

    Implementing Glass Effects can profoundly impact the user experience, leading to several key benefits:

    • Enhanced Readability: By adjusting transparency and blur, text becomes clearer and easier to read.
    • Personalized Experience: Users have the ability to tailor their display according to their specific visual needs.
    • Aesthetic Appeal: Glass Effects not only serve a functional purpose but also enhance the overall visual style of apps and system settings.

    Who Can Benefit?

    • Individuals with Low Vision: Those who struggle with seeing text against distracting backgrounds can find improved comfort.
    • Users with Light Sensitivity: The ability to adjust glare and brightness can help mitigate discomfort from bright displays.
    • General Users Seeking Customization: Even users without visual impairments may enjoy tweaking these settings for a more pleasing experience.

    By embracing these customizable options, iOS 26 continues to prioritize accessibility, ensuring that individuals across various ability levels can enjoy the full potential of their devices. The Glass Effects feature exemplifies Apple’s mission to create a more inclusive digital landscape.

  • Completing Weapon Customization in Helldivers 2

    Completing Weapon Customization in Helldivers 2

    In Helldivers 2, weapon customization gives you the freedom to tailor your favorite armaments to suit your playstyle. Rather than grinding for Medals to acquire new firearms through Warbonds, you can enhance specific weapons, sometimes making them even more formidable than the most powerful options in your current inventory.

    This allows you to tackle battles against the Terminids, Automatons, and the Illuminate with greater ease. Having a weapon that feels unique enhances the overall combat experience.

    How to Level Up a Weapon


    Leveling up your weapon is straightforward in the game. Like many other shooters, just play Helldivers 2 to gain experience for your guns. However, a few steps can help you maximize this feature.

    First, this functionality only applies to primary weapons, such as the LAS-17 Double-Edge Sickle. You need to equip the weapon you want to upgrade, ensuring it’s a primary firearm.

    While you can customize your primary weapons, special ones, like those from the Killzone crossover event (e.g., the StA-11 SMG), cannot be modified. Ensure the weapon you’re using is from the main Helldivers 2 universe.

    Once you’re prepared, enter any match against any faction.

    Player shooting aliens in the distance in Helldivers 2. There is an orange light coming from a substance in front of the player.

    To earn the most experience points (XP), consider these approaches:

    • Complete optional objectives.
    • Ensure everyone on your team is extracted.
    • Attempt missions on a higher difficulty.

    How to Customize a Weapon

    Player looks onward at enemies as they approach him in Helldivers 2.

    Go to your Armory in the ship’s center. You’ll arrive at the loadout menu, where you can customize your entire setup before battle. Look for the Weaponry tab at the top.

    At the Armory menu with the primary weapon selected in Helldivers 2.

    Upon entering the Weaponry screen, you should be in the Primary weapon section. If not, select the Primary tab at the top left. Here, you can see all the weapons you can modify.

    The AR-23P selected in the primary weapon section in Helldivers 2.

    When you select Customize for your weapon, a new page will display all available attachments. Initially, most attachments will be locked until you reach certain levels.

    Even if you’ve reached the appropriate level for an attachment, you might still need to spend Requisition Slips to unlock the modification.

    After that, you can freely add or remove attachments for your selected weapon.

    You can also earn cosmetic patterns during this process. These will be found in their dedicated section for each weapon.

    You can save up to three configurations for the same weapon. It’s wise to experiment with different attachments and save those you like in each loadout.

    As mentioned, attachments impact weapon performance. For instance, an underbarrel attachment can reduce recoil, while a scope may improve the speed of aiming down sights. Pay attention to these effects as you customize.

    Lastly, remember that not every weapon offers the same mod options. Some might only let you change the appearance, while others might have a few functional modifications. Keep this in mind while customizing your arsenal.

  • Completing Your Character: Top Ways to Customize Spells in DND

    Completing Your Character: Top Ways to Customize Spells in DND

    Just because a Dungeons & Dragons spell outlines certain features, it doesn’t mean those abilities can’t be adjusted for your character. While your DM may set some boundaries on altering a spell’s core effects, there are still plenty of creative avenues to explore when personalizing spells.

    From changing the flavor text of a spell to making subtle adjustments to its effects, you can collaborate with your DM to ensure that spells reflect your character’s unique story. Here’s everything you need to know about customizing spells for your character.

    Which Spells Can Be Customized?


    Customized Spell via Wizards of the Coast

    The 2024 Player’s Handbook and other source materials provide players with a plethora of spells.

    These spells are generally categorized into three main types:

    Spell Category

    Description

    Examples

    Combat

    Spells that deal damage or assist during combat.

    • Fireball
    • Eldritch Blast
    • Ice Knife

    Utility

    Spells that modify the environment or allies, creating opportunities for your group.

    Support

    Spells that heal, restore, or provide benefits to allies.

    • Cure Wounds
    • Lesser Restoration
    • Resurrection

    In principle, any category of spell can be customized. However, combat spells are generally the easiest to personalize due to their visual aspects.

    It’s important to remember that the mentioned spell categories are not official material from Dungeons & Dragons.

    These categories are simply useful guidelines for players to structure their spell options.

    How Spell Customization Works


    A wizard casts Mind Sliver on an enemy in DND.
    Mind Sliver via Wizards of the Coast

    When customizing spells, the focus is typically on changing the spell’s aesthetic effects, often referred to as its flavor. You can also discuss with your Dungeon Master the possibility of tweaking the effects of a spell itself, but such changes are usually considered homebrew for your game.

    Be aware that many Dungeon Masters may not permit homebrewed content. If that’s the case, you’ll need to defer to their decisions regarding customization.

    Whether you’re customizing a spell’s flavor or its mechanics, keep these important guidelines in mind:

    Customization Element

    Details

    Character Concept

    Make sure the spell’s flavor aligns with your character’s concept. For example, if your wizard grew up as a street performer, you could adjust spells to fit that background.

    Cosmetic vs. Effect

    Ensure you and your DM agree on whether you’re making cosmetic changes or altering effects. Miscommunication on this can lead to unwanted complications.

    Spell Mimicry

    Avoid customizing a spell to closely resemble another spell, either in effects or visuals. For instance, don’t alter Eldritch Blast to act or look like Firebolt.

    Customizing Spell Flavor


    A student being punished at Strixhaven in DND.
    Detention via Wizards of the Coast

    Customizing a spell’s flavor is one of the most enjoyable aspects of making your spell unique. You usually have more freedom to make aesthetic changes.

    Most DMs are open to allowing cosmetic changes to spells since these modifications are surface-level.

    If for any reason they aren’t, try describing your spells creatively during play.

    Consider how to adjust spells to fit your character’s concept or a broader theme guiding your magic. Here are some examples of character concepts paired with customized spells:

    Character Concept

    Customized Spell

    Details

    Retired Soldier Cleric

    Spiritual Weapon

    When your cleric casts Spiritual Weapon, the weapon resembles one from a fallen comrade they fought alongside.

    Seafaring Sorcerer

    Magic Missile

    When your sorcerer casts Magic Missile, the projectiles take the shape of hook hands, reflecting their pirate past.

    Scribe Wizard

    Cloud of Daggers

    When your wizard casts Cloud of Daggers, the daggers look like book pages that slash at enemies from all directions.

    Customizing Spell Rules


    A wizard during a rooftop chase in Waterdeep in DND.
    Rooftop Chase via Wizards of the Coast

    Unlike cosmetic changes, adjusting spell rules can be more complex, and many DMs may not permit this. However, if your DM is open to it, you can make slight modifications to a spell’s effects.

    These changes should not disrupt gameplay and should primarily serve to enhance your character’s narrative.

    Here are some examples of minor adjustments to spell rules:

    Character Concept

    Customized Spell

    Details

    Prodigy Bard

    Suggestion

    Your bard is a musical prodigy with natural talent.


    When casting Suggestion, you can impart a touch of that talent to the targets, granting them an advantage on rolls made while under the spell’s influence.

    Stormbound Warlock

    Eldritch Blast

    Your warlock serves a storm deity.


    When casting Eldritch Blast, the beam resembles a lightning strike, creating a thunderous sound nearby.

    Undead Paladin

    Ceremony

    Your paladin was resurrected by a god.


    When casting Ceremony for a Funeral Rite, the target is not only preserved from becoming undead but you also gain insight into their death.

    These examples show how effects can be unique and engaging without breaking the original intent of the spell. They support the player’s character background while remaining functional for gameplay.

    If you’re unsure how to adjust your spell’s effects or appearance, chat with your DM. They might have great suggestions based on your character’s background!

  • Crafting Your Unique Character in Longvinter: A Step-By-Step Guide

    Crafting Your Unique Character in Longvinter: A Step-By-Step Guide

    In Longvinter, making your character stand out is all about showcasing your personal style. Whether you want to embody a rugged adventurer or don a vibrant pink outfit that captures attention, the game offers diverse character customization options to help you express yourself. There are numerous ways to tailor your in-game appearance, allowing for a unique touch.

    So, how do you access these customization features? And what are Vintercoins all about? If you’re eager to refine your character and broaden your wardrobe, this guide provides all the essential information you need to make your Longvinter avatar truly your own.

    How to Customize Your Character


    Character customization allows you to enhance your in-game identity with a variety of choices, including hairstyles and outfits. To start adjusting your character, simply go to the main menu and click the Shop and Customize button. This will open the customization options, where you can change features such as your hair type, hair color, skin tone, username color, hats, and clothing. Your choices will instantly appear on your character, allowing you to mix and match styles to capture the look you want.

    How to Unlock More Clothing Options

    There are several ways to unlock new clothes and accessories. One of the main methods is through Tackle Boxes found in the customization menu. To access their contents, you need to buy keys with Vintercoins that you’ve earned or purchased.

    As you play the game, you’ll receive Tackle Boxes over time.

    Furthermore, the shop provides a range of complete outfits, facial features, backpacks, and more that you can directly buy with Vintercoins. Another way to enhance your wardrobe is by acquiring Steam Items, which can be purchased through the Steam Community Market and correspond to in-game appearance items.

    How to Obtain Vintercoins

    The in-game shop requires Vintercoins for purchases. You can earn 500 Vintercoins by playing for around 30 minutes each day. If you prefer to get items faster, you can also buy Vintercoins with real money using your Steam Wallet. Here are the current price options for Vintercoins:

    Vintercoins

    Price

    Beanie Pack of 5,000 Vintercoins

    $3.99

    Backpack Pack of 12,000 Vintercoins

    $5.99

    Container Pack of 40,000 Vintercoins

    $11.99

    Boat Pack of 150,000 Vintercoins

    $19.99

  • Personalize Your Furniture in Hello Kitty Island Adventure

    Personalize Your Furniture in Hello Kitty Island Adventure

    Hello Kitty Island Adventure is brimming with furniture options. You can purchase items straight from My Melody, craft them yourself, or discover them scattered throughout the island. Moreover, certain characters will reward you with furniture as you enhance your friendship with them.

    When it comes to decorating your cabin, the options are extensive. You even have the ability to customize select furniture pieces! Thanks to My Sweet Piano, you can change the appearance and colors of your furniture. This guide will show you how to completely unlock furniture customization in Hello Kitty Island Adventure.

    Getting Started with Furniture Customization

    The quest that unlocks furniture customization is titled The Fun In Furniture. This quest is divided into two parts, but the second part doesn’t have any prerequisites besides finishing the first.

    To initiate The Fun In Furniture, you need to achieve friendship level five with My Sweet Piano. If you’re finding it challenging to give her gifts early on, consider gifting her the following items:

    Pro Tip: At TheGamer, we recommend giving her a bunch of Woodblocks until you can craft better gifts.

    Once you reach friendship level five, you can start the quest by chatting with her.

    Completing The Fun In Furniture: Part One

    The first part of the quest is straightforward; you simply need to provide My Sweet Piano with the following items:

    • Iron Ore – found around Mount Hothead
    • Woodblocks – can be crafted using Sticks
    • Mechanisms – can be made with Gizmos (obtained from Chococat)

    After you give her these items, you’ll need to wait a full day in real time before proceeding to the second part.

    Completing The Fun In Furniture: Part Two

    Now it’s time to tackle the final part! Speak to My Sweet Piano once more, and she will introduce you to the fun world of the Furniture Customizer. Initially, you’ll need to customize a Cottage Dining Chair.

    You must craft this chair first; the crafting plan is given to you when you reach friendship level four with My Sweet Piano. Head over to the crafting station to create the chair using the following materials:

    Note: Wool can be obtained from My Sweet Piano when you give her gifts. If you don’t have enough Wool, simply give her another gift or two.

    Once the chair is crafted, return to Small Gift Big Smile and interact with the Furniture Customizer. The interface is user-friendly; select the furniture item you want to customize, and then choose your preferred customization option.

    To customize your item, you’ll need the appropriate dyes. For this quest, feel free to select any color scheme. After customization, talk to My Sweet Piano, now joined by My Melody. After a brief chat, you’ll complete the quest! You can now use the Furniture Customizer at your discretion.

    What Can Be Customized?

    Not all furniture pieces are eligible for customization. Luckily, when using the Furniture Customizer, you’ll see which items in your inventory can be customized. If a furniture item is missing from the list, you will not be able to modify its look.

    How to Customize

    There are four types of furniture customization to consider, organized into different categories. These categories relate to the materials used in the furniture. For instance, the Antique Standing Lamp can be customized in terms of Wood and Fabric, while the Beanbag can only be customized in Fabric.

    Tip: If a furniture item has multiple categories, you can customize each one separately.

    You’ll find various color schemes for each category, so feel free to experiment until you find one that suits your style. You can preview the design even if you lack the required materials. If you don’t have enough materials, a circle with a line will appear next to the color option.

    Clicking ‘Craft’ will show you the exact materials needed, as well as which ones you still need to gather.

  • How to Customize Your Social Media by Finding and Creating Bluesky Feeds

    How to Customize Your Social Media by Finding and Creating Bluesky Feeds

    If you've started using Bluesky after moving from X, you might have come across the unique feature that differentiates it from its predecessor: feeds.

    Difficulty

    Easy


    Duration

    5 minutes

    What You Need

    • Bluesky (available on mobile app or web)

    • A smartphone or computer

    Feeds on Bluesky allow you to curate your timeline, similar to how X operated back in 2012—just a decade before Elon Musk acquired the platform for $44 billion. Unlike X, which automatically generated content, Bluesky enables users to craft and customize their own feeds for a more personal experience. Additionally, you can explore feeds created by fellow users and seamlessly integrate them into your homepage. Below, we'll walk you through the process of locating and creating these feeds to enhance your Bluesky experience.

    What are feeds?

    In Bluesky, feeds are user-created lists that help organize timelines and tailor the browsing experience. Users typically create feeds based on preferred topics—like music, sports, science, social justice, movies, and gaming—among many others. These feeds consist of users who post and discuss content related to these topics, ensuring you see more of what interests you while filtering out content you'd rather not see.

    The flexibility of feeds allows you to subscribe or unsubscribe freely, giving you the option to switch between different feeds from your Bluesky homepage. If your primary feed is boring you, you can quickly switch to a fun cat feed for a little distraction. Or if you’re following a hot news story, subscribe to a dedicated feed and easily let go of it once the story fades.

    How to find new Bluesky feeds

    Discovering new feeds on Bluesky can be done through either the mobile app or the web browser. Given that Bluesky is primarily a mobile platform, this guide will focus on the app version.

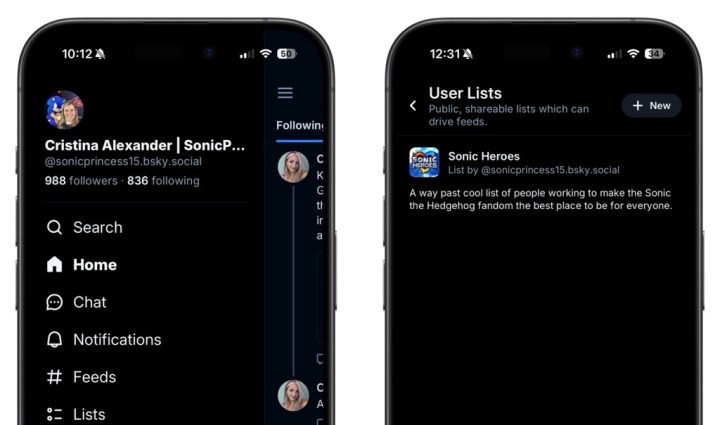
    Step 1: Tap on Feeds in the left sidebar of your homepage, or click on the hashtag icon located to the right of the blue butterfly logo.

    Cristina Alexander / Digital Trends

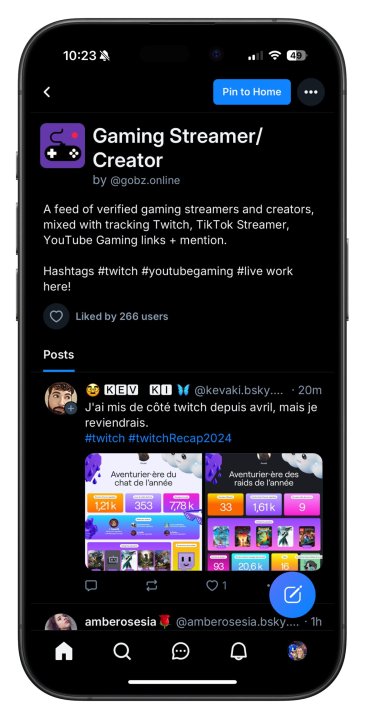
    Step 2: On the Feeds page, scroll down to the Discover new feeds section. Here, you can either select a feed from the recommended list or search for a topic that isn't featured.

    Step 3: Input the name of a particular topic to locate a feed that isn’t suggested (e.g., gaming). After your search, select a feed from the results displayed.

    Step 4: Once you've accessed the feed's page, click on Pin to home to add it to your Bluesky homepage.

    How to create a new Bluesky feed

    Creating your own feeds is just as easy as discovering existing ones. Here’s how you can set up a new feed.

    Step 1: To get started, click on Lists on the left side of your Bluesky homepage. Next, navigate to the User lists page and select New.

    Creating a feed on the Bluesky app.
    Cristina Alexander / Digital Trends

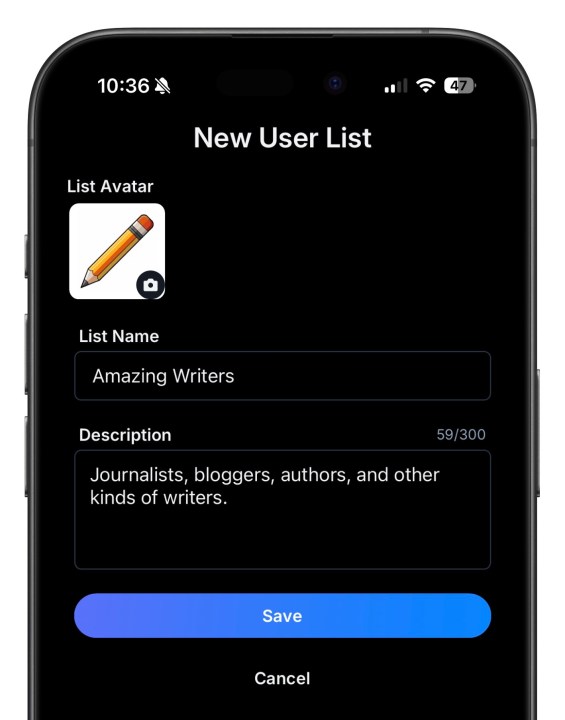
    Step 2: Assign a name for your new feed and add a description outlining the types of users whose content will be included in that feed.

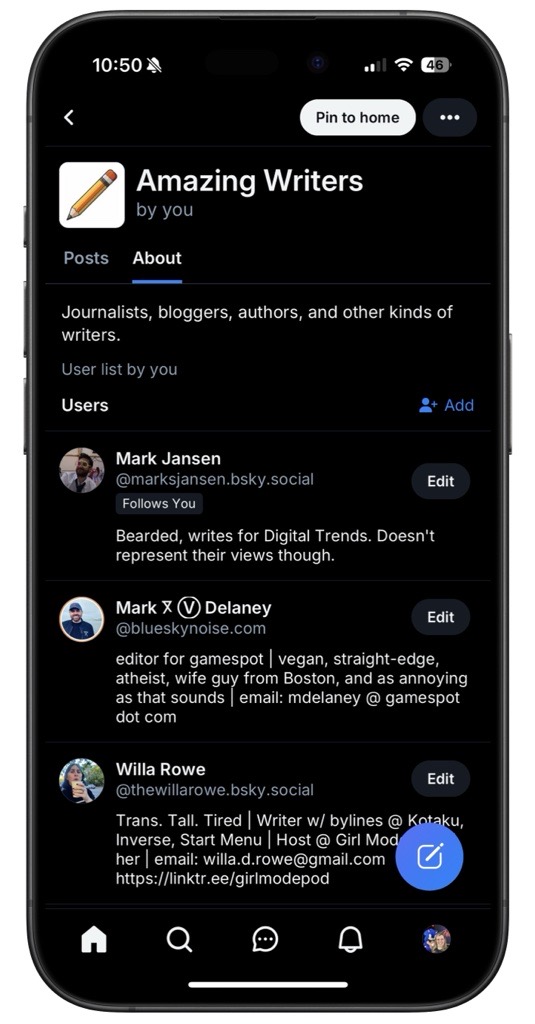
    Step 3: Search for users to include in your feed manually. After adding users, pin the feed to your homepage and share the link to the list within a Bluesky post or via messages to friends on other platforms.

  • Xbox Shutting Down Avatars But You Can Still Customize Yours

    Xbox Shutting Down Avatars But You Can Still Customize Yours

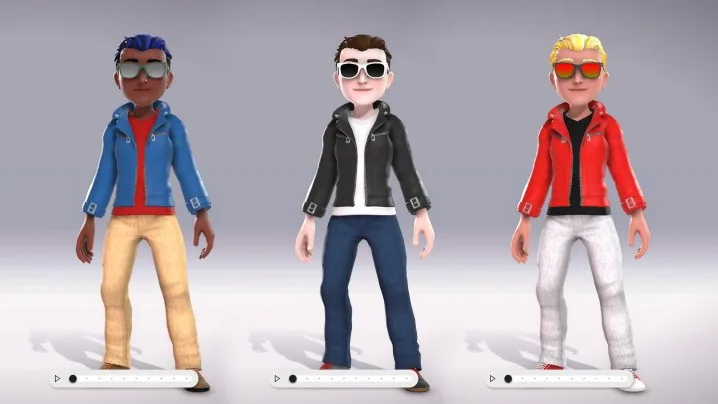
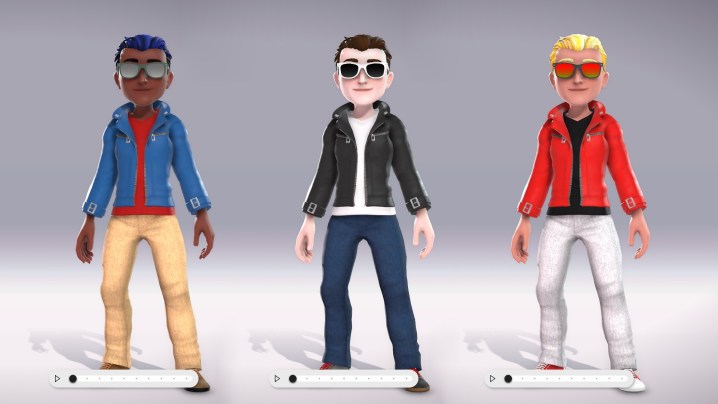
    Three Xbox avatars standing side by side, featuring a blue jacket, black jacket, and red jacket.
    Microsoft

    If you’ve enjoyed customizing your Xbox Avatar, you might want to take note: changes are coming. Xbox has discreetly revealed plans to discontinue the Xbox Avatar Editor, rendering most Avatar functionalities obsolete early next year.

    According to a statement on an Xbox Support page (spotted by Pure Xbox), the app that allowed players to design and modify their avatars using items purchased from the Xbox Store will officially cease operations on January 9, 2025. Microsoft cited “low engagement” and the need to refocus on other initiatives as reasons for this decision.

    “Users will still be able to personalize their consoles with dynamic backgrounds and profile colors. The Xbox Original Avatars, profile themes, and gamerpics will remain available for use on Xbox consoles and PCs,” Microsoft added. While players can retain their avatars to use as gamerpics, they will no longer be able to modify their appearance or access them through other platforms. Modifications will need to be conducted via the Xbox Original Avatars app.

    It’s worth noting that Xbox 360 titles that utilized avatars, such as 1 vs. 100, the two Doritos Crash Course games, and Kinect Sports, will not be impacted by this change. Additionally, Xbox will refund any purchases made for avatars since November 1, 2023.

    The Xbox Avatars—now referred to as Xbox Original Avatars—made their debut in 2008 alongside the Xbox 360. These avatars function in a manner akin to Nintendo’s Mii characters, allowing users to create a 3D representation of themselves. As reported by Kotaku, their development was overseen by Rare, which envisioned a system where avatars were integrated across various games and user accounts. The initiative gained immense popularity due to its widespread presence within the Xbox ecosystem at the time.

    Former lead artist Lee Musgrave remarked, “There are Avatars on the very front page of every dashboard on Xbox. When setting up a new console, creating an Avatar is one of the initial steps users are prompted to take.”

    The avatars received a facelift in 2018 for the Xbox One, introducing a range of inclusive customization options, including prosthetic limbs. However, as time passed, their significance began to wane. Although new users still need to select a gamerpic when registering, they now have more diverse art options. With the advent of Xbox Series X/S, the presence of avatars in the interface has diminished dramatically, so it’s understandable if some players have overlooked their avatars entirely.

  • Personalize Your Look in MySims: A Customization Guide

    Personalize Your Look in MySims: A Customization Guide

    Quick Links

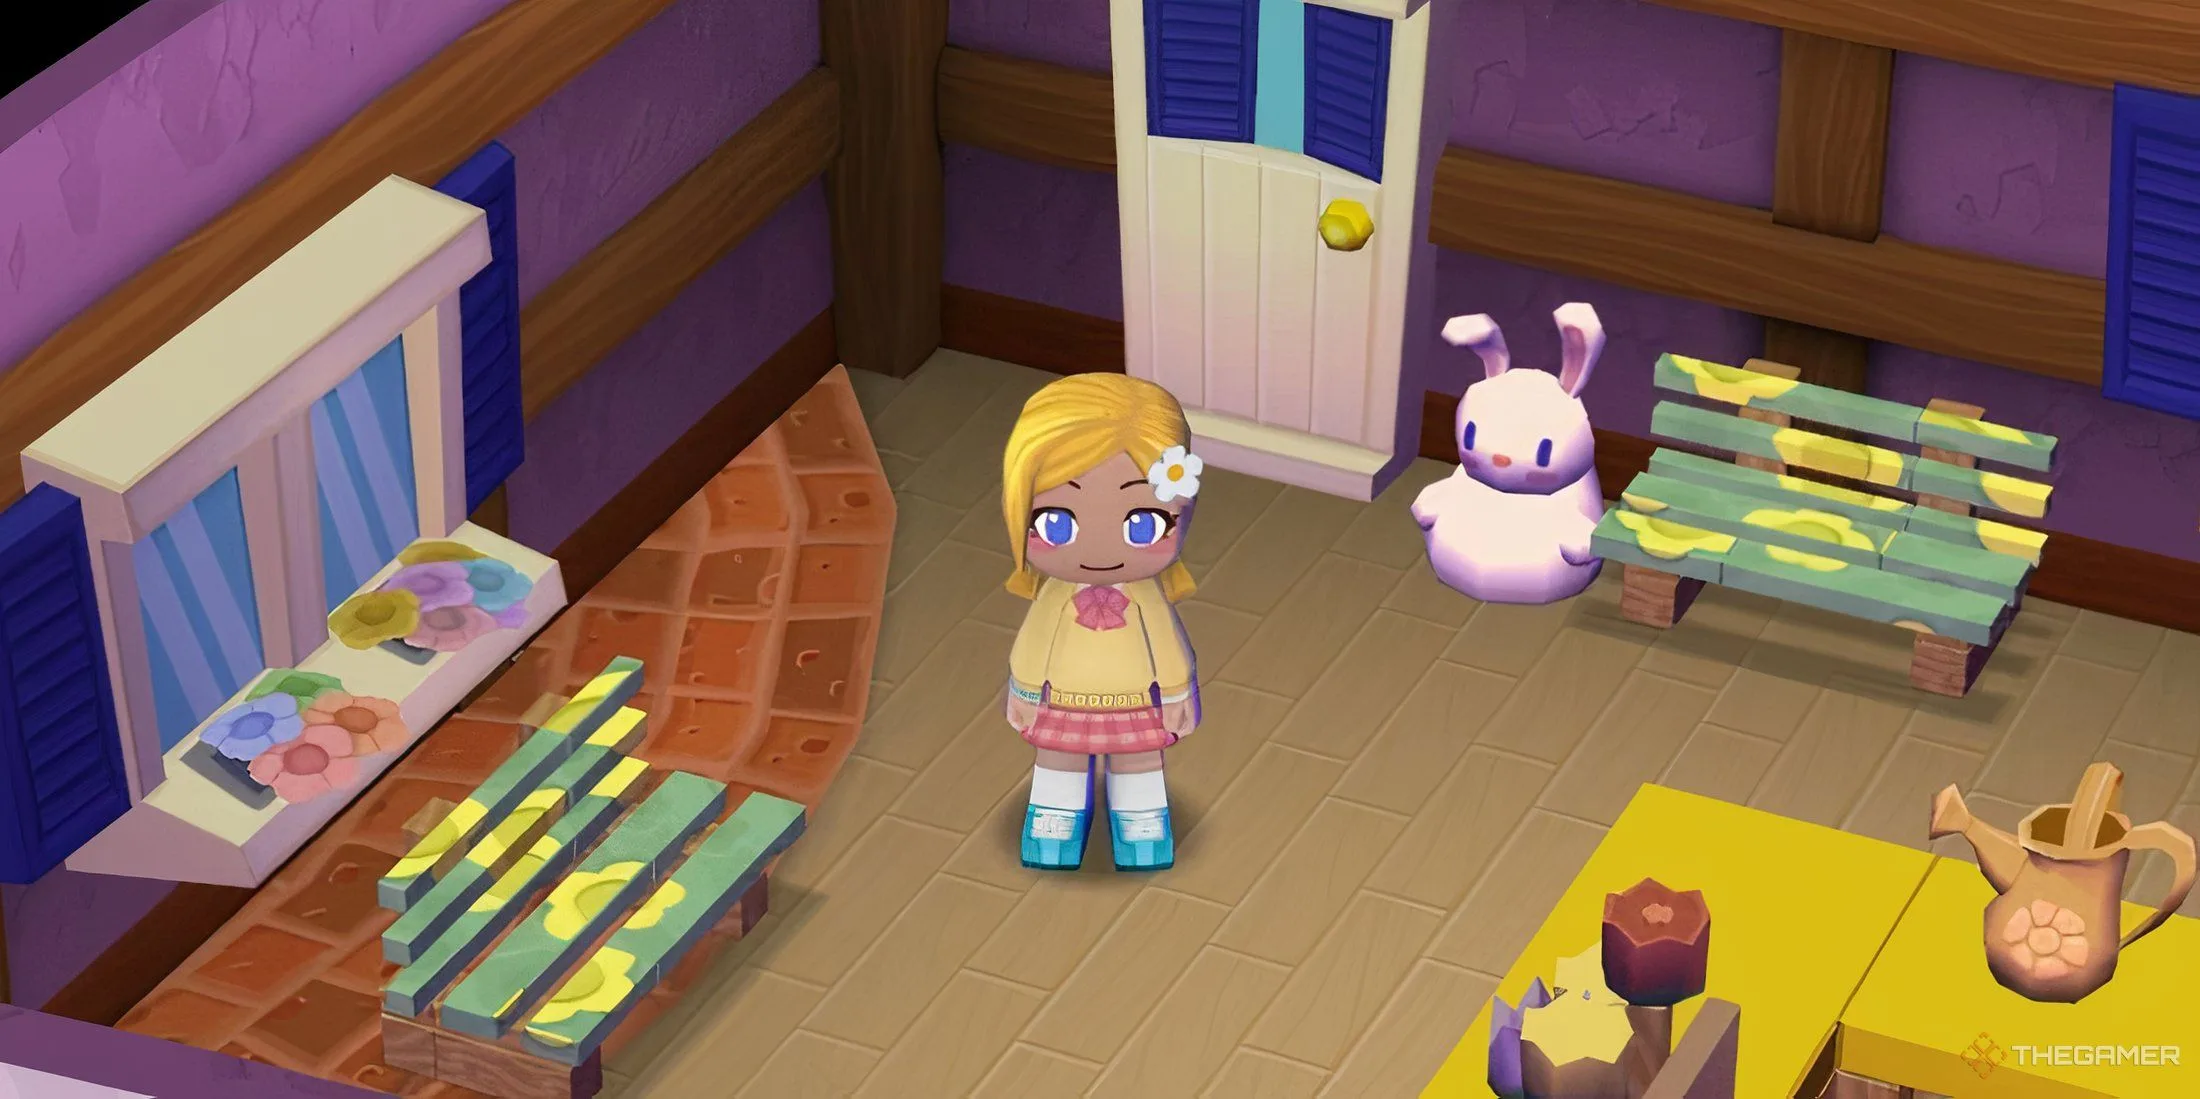
    In MySims, it’s all about crafting, building, and connecting with others, but looking great while doing it is just as important. If you’re feeling bored with your Sim’s look or just want to give them a fresh vibe, changing their appearance is super simple!

    You can customize everything from your Sim’s hair color to their facial expressions. Want your Sim to sound as awesome as they look? You can also change their voice. Keep reading to discover how to transform your Sim’s style quickly and creatively.

    How To Change Your Appearance

    To start, visit Poppy’s Flower Shop, located southwest of the Town Hall. When you step into the shop, go towards the back area where you’ll find a mirror. Approach the mirror and select ‘Change Look‘ by either tapping the button that appears or by pressing the ‘A’ key.

    Once you interact with the mirror, a customization menu opens up. This menu will let you tweak several elements of your Sim’s look, such as their facial features, hairstyle, clothes, and accessories. The menu is user-friendly, so you can browse through various styles, colors, and expressions easily by tapping on your Sim or using the buttons provided.

    You can also adjust your Sim’s voice. Just press ‘X’ and move the slider to pick a deeper or higher tone that matches your Sim’s new look.

    After you’re done customizing your Sim and you love the results, make sure to save your changes by clicking the ‘+‘ button. If you’re not happy with the adjustments, don’t worry! Just hit the ‘‘ button to revert back to the original look.