Prior to the 2025 update, copper in Minecraft didn’t hold much value. Many players discarded it due to its limited uses. However, the latest changes have made it essential. One of the exciting new features is the ability to create Copper Golems, helpful companions for your base. To further enhance their usefulness, you can craft copper chests. Keep in mind that to access the recipe for a copper chest, you first need to build a Copper Golem, which I’ll explain in detail below.
Mojang
How to Craft a Copper Chest
Once you’ve constructed a Copper Golem, it will produce one copper chest automatically. However, one chest won’t suffice for your needs! To create more, you’ll require copper ingots, a wooden chest, and a crafting table.
Step 1: Start by crafting a wooden chest of any type.
Step 2: Place the chest on your crafting table and surround it with copper ingots, as illustrated in the accompanying image.
Step 3: Remove the completed copper chest and place it wherever you’d like.
The fascinating aspect of the Copper Golem is its ability to take items you’ve placed in a copper chest and automatically sort them into your regular storage chests.
Additionally, thanks to the update, copper can now be fashioned into tools, weapons, and armor, providing you with ample opportunities to utilize this resource.
You’ve managed to tame a horse in Minecraft, but it’s still not responding to your commands. While enclosing it in a pen is fine, riding it doesn’t seem to work as you’d hoped. Horses are among the fastest means of transportation in the game—aside from flying—but to exert control, you’ll need a saddle. In the past, saddles couldn’t be crafted and had to be acquired through trading, exploration, or fishing. However, after much anticipation, crafting a saddle is finally possible, and we’re here to guide you through the process.
Difficulty
Easy
Duration
10 minutes
Materials Required
3 Leather
1 Iron Ingot
Mojang
Crafting a Saddle
Step 1: Gather three pieces of leather.
Step 2: Obtain one iron ingot.
Step 3: At a crafting table, position the iron ingot in the center of the bottom row, placing the three leather pieces around it as depicted above.
Step 4: Retrieve the saddle from the output area.
Step 5: You can now place your saddle on any compatible mount. Additionally, there's a new feature allowing you to safely remove a saddle from a pig without harming it. Simply use shears on the pig to collect the saddle for use on another animal.
Mojang
Trading for a Saddle
While crafting is the easiest route, you can also obtain a saddle through trading.
Step 1: Locate a village and find the leatherworker.
Step 2: Level up the villager to Level 3, as saddles won’t be offered until then. You can do this by trading emeralds, leather, rabbit hides, flint, or other items the villager desires.
Mojang
Step 3: Once the leatherworker reaches Level 5 (Master), your odds of receiving a saddle increase to 50%.
Mojang
Finding Saddles in Chests
If crafting isn’t your preferred method and you’d rather not invest time into leveling up a leatherworker, you can search for saddles in chests. While there are numerous places to explore, finding a saddle isn’t guaranteed. Below are some potential locations and their chances of containing a saddle:
Abandoned mineshafts (percentage unknown)
Desert temples (23.5%)
Dungeons (27.9%)
End Cities (13.3%)
Jungle temples (12.9%)
Nether Fortresses (35.3%)
Strongholds (2.5%)
Mojang
Fishing for a Saddle
This method is the least likely to succeed, with only a 0.8% chance. Simply fish as you normally would, hoping to reel in a saddle instead of a fish.
Mojang
Using a Saddle
You didn’t go through all that effort just as a decorative item! It’s time to put that saddle to good use!
Step 1: Ensure your hands are empty and approach the horse.
Step 2: The horse may try to buck you off. If that happens, repeat Step 1 until you’re able to stay on.
Step 3: While mounted, access your inventory. You should see the horse's inventory alongside yours. Move the saddle up to the square with the saddle icon. Once applied, the horse's icon will change.
With the saddle in place, you can now steer the horse wherever you want.
Advancing in Runescape: Dragonwilds involves uncovering new resources and creating various crafting stations. You’ll begin with basic stone tools and gradually progress to bronze and iron tools, which are faster and more efficient for gathering materials. Some resources can only be accessed through specific crafting stations.
One such resource is the Ash Plank, crucial for several in-game recipes, including crafting new stations and enhancing your base. Initially, the game doesn’t provide information on how to create Ash Planks; players must find them by activating a designated crafting station.
How to Unlock the Sawmill
To obtain Ash Planks, you must first unlock and construct a Sawmill. You can unlock the Sawmill recipe by either crafting or collecting Bronze Bars. Acquiring these bars will automatically enable the crafting of the Sawmill along with additional stations.
Unlike certain crafting stations, the Sawmill does not need to be housed in a building to function. Additionally, it operates without any fuel, setting it apart from furnaces or campfires.
Building the Sawmill requires the following materials:
18x Ash Logs
4x Bronze Bars
8x Stones
How to Craft Bronze Bars
To create Bronze Bars, you’ll need to use a furnace. Combine copper and tin ore along with some fuel in the furnace. You can find these ores in the Fractured Plains, which is beyond the Whispering Swamp. Make sure to gather them with a Bone Pickaxe.
How to Craft Ash Logs
After constructing the sawmill, you should place Ash Logs inside to craft Ash Planks. Every log yields two planks, which can be stacked up to 50. Since they are lightweight, you can carry a significant amount for when you’re preparing to build your base.
Ash Planks are essential for crafting mid-level crafting stations, such as the loom, necessary for creating materials for iron armor. They are also used to construct second-tier building components, like floors and walls, that have a more refined appearance than first-tier ones. Additionally, Ash Planks can be utilized to make furniture like chairs and tables to enhance the aesthetics of your base.
In Atomfall, crafting allows you to create the gear you need quickly. Although the process takes time and the game world keeps moving while you’re in the menu, finding a safe spot is essential. When you urgently require a bandage or a bomb, being able to make one on the spot can be a game-changer.
At the beginning of the game, you’ll start with just one crafting recipe. The rest will appear as you explore the Quarantine Zone. Numerous copies of most recipes are scattered throughout the game, and this guide outlines the simplest ways to find each one.
Crafting in Atomfall
Once you discover a crafting recipe, use it from your inventory or interact with it in the game world. After using it, the recipe will disappear, but you can now craft the associated item as long as you have the required materials.
To create an item, simply open the crafting menu, choose what you want to make, and hold the button until the progress bar completes. The item will automatically be added to your backpack. However, if your backpack is full, you won’t be able to craft it.
You can get the Crafting Manual from the Hardware Store in Wyndham Village, which includes a skill to significantly speed up crafting.
Complete Crafting Recipes in Atomfall
You’ll come across other copies of crafting recipes during your journey; feel free to leave them for trading. Once you’ve learned a recipe, additional copies won’t have any value.
Item
Recipe
Effect
Location
Antidote
Chemicals x3, Herbs x5, Cloth x4, Glass x3.
Cures Poison and boosts Poison Resistance.
Purchase from Mother Jago in Casterfell Woods.
Bandage
Alcohol x1, Cloth x4.
Heals wounds, stops Bleeding, and provides Bleed Resistance.
Given by the wounded scientist at the game’s start.
Burn Salve
Cloth x4, Iodine x1, Water x5, Glass x3.
Treats Burns and enhances Burn Resistance.
On the desk in the back left room of Wyndham Village Hall, near June’s Lockbox.
Combat Stim
Herbs x4, Water x3, Glass x3, Chemicals x2.
Temporarily increases melee damage.
In Bunker L9, the upper level has toxic gas. Use a Signal Redirector to power the ventilation system or consume an Antidote to dodge through. Enter through the window in the gas-filled office; above in the catwalk area, you’ll find a skeleton with a briefcase that holds the Combat Stim recipe.
Explosive Lure
Poison x4, Scrap x2, Spores x2, Gunpowder x2.
Timed explosive that attracts swarms before detonating.
Located inside the large wicker effigy in Casterfell Woods at 20.4E, 89.2N.
Makeshift Grenade
Gunpowder x4, Scrap x6, Glue x1, String x2.
Timed explosive; less powerful than military-grade grenades.
For sale from Reg Stansfield in the Slate Mine Caves.
Molotov Cocktail
Cloth x3, Alcohol x6, Glass x4.
Explodes on impact; causes Burn to affected targets and generates fire.
Buy the Metal Detector from Reg Stansfield, return to the starting bunker, and use it to find the recipe in the main area.
Nail Bomb
Scrap x10, Gunpowder x2, Gun Oil x1, String x5.
Timed explosive; causes Bleed to any targets caught in the explosion.
Can be found in Ilya’s hideout beneath Brinsop Manor on Skethermoor.
Painkillers
Iodine x1, Water x1, Glass x3, Herbs x4.
Offers temporary damage resistance boost.
Available from Morris at the Hardware Store in Wyndham Village.
Poison Bomb
Cloth x2, Poison x2, Glass x4, Spores x2.
Explodes on impact, releasing toxic gas that damages and causes Poison.
Found in the room with the lever to release prisoners in Skethermoor Prison. Check the case on the desk to the left.
Radiation Resistance
Iodine x3, Alcohol x2, Glass x3, Poison x1.
Boosts resistance to Radiation Fields.
Next to the body in the back left room of the Vehicle Depot Bunker in Skethermoor.
Shiv
Scrap x2, String x1
A weak melee weapon that causes Bleed.
Available from Molly Jowett in Slatten Dale.
Sticky Bomb
Gunpowder x3, Glue x6, Scrap x4.
Timed explosive that sticks to the first surface it hits after being thrown.
Obtain Agravaine’s Key from the helicopter wreck east of the starting bunker, and use it to open the box inside the Railyard Depot in Slatten Dale.
Strange Tonic
Spores x4, Chemicals x1, Glass x3, Herbs x5.
Temporarily enhances Infection Resistance.
On the apothecary workbench in the Druids’ Castle, in the same room as Mother Jago’s Book.
While it’s not necessary to learn every recipe, discovering ten will unlock the Homemade Achievement/Trophy. Prioritize crafting items that prevent status effects, like the Strange Tonic and Antidote, and have a couple of explosive options ready for those challenging moments.
Unlocking crafting materials begins early in The First Berserker: Khazan. However, it may take some time before you can utilize these materials effectively, and you’ll need to complete a few tasks first.
This guide will explain how to obtain Qazumaka, the blacksmith, find his hammer, and give you a rundown on crafting in The First Berserker. Additionally, we’ll also cover the weapon augmentation process, which is closely connected to crafting.
How to Unlock Crafting
To start crafting, you need to complete two essential steps. The first step is to defeat Aratra, who is the fifth boss you’ll face. After defeating him, Qazumaka will appear at the Crevice. Speak to him, and he will mention that he needs his hammer. This interaction will unlock the Blacksmith’s Heirloom side quest. Once you complete this quest, you will receive the hammer he requires. Afterward, return to Qazumaka to continue.
After you complete these tasks, you’ll have access to crafting weapons and armor. If you’re looking to create specific weapons or armor pieces, make sure to gather their blueprints first. These blueprints can be located throughout the game, often hidden in different stages, while some can be unlocked by accomplishing certain challenges.
For example, in the Forgotten Temple, you can obtain the Hunter’s Scroll by defeating the ‘epic’ miniboss. In Phraugh Village, the Ashen Wolf Scroll is located at the bottom of the hill where a boulder rolls down. You can also acquire the Forgotten Warrior’s Scroll by defeating the Lunatic Destroyer after executing 30 perfect guards.
Where to Find Rare Materials
Most materials can be acquired by dismantling unwanted gear. However, for certain armor sets, you’ll need unique ingredients that can only be obtained by defeating specific bosses repeatedly. This mechanic is reminiscent of Monster Hunter.
How to Augment Equipment
Although augmenting isn’t strictly part of the crafting system, it goes hand-in-hand with it. After completing the Kaleido side mission, which you can undertake following your victory over Aratra, Oksana will enable you to augment your gear. Augmentation allows you to enhance your equipment by sacrificing other items of the same type that are of a higher level. This is an effective way to utilize gear you collect that doesn’t provide set bonuses.
By following these guidelines, you’ll be well on your way to mastering crafting and augmenting equipment in The First Berserker: Khazan. Happy crafting!
In Lego Fortnite Odyssey, reaching milestones is essential to earn rewards and unlock new recipes. If you’re looking to upgrade your surroundings, you probably want to know how to create aesthetically pleasing homes for your villagers.
The game offers more than just basic shacks; you can unlock over ten house designs. This guide will explain how to unlock these various houses to enhance your creativity and decoration options.
Updated January 16, 2025 by Connie Watson: Since its release, Lego Fortnite Odyssey has introduced several updates, adding new pre-built designs achievable through Village Upgrades or Lego Passes. This guide has been revised to assist you in unlocking each one!
Complete Guide to In-Game House Crafting Recipes and Their Unlocking Methods
Lego Fortnite features five categories of pre-built homes, each with its own themed building options. You start with the Starter Shacks category upon entering the game, allowing you to shelter a bed and crafting bench before moving on to develop a Village Hub.
A Village Hub establishes your area as an official gathering spot for NPCs, enabling you to create a town and recruit characters.
As you unlock more categories, you will find options like the self-explanatory Log Cabin, the modern-style Pleasant Park houses, the grand Majestic Manor, and the traditional Shogun Palace, among others.
Pre-Build Category
Recipes
Starter Shacks
Log Lookout
Simple Shack
Double Shack
Roomy Shack
Porch Shack
Fishin’ Docks
Simple Dock
Dock House
Double Dock House
Deluxe Dock House
Log Cabin
Log Shed
Palisade Gate
Log Cabin
Log Watch Tower
Log Home
Jumbo Lodge
Lonely Lodge
Pleasant Park
Bungalow
Pleasant Pavilion
Detached Garage
Roomy Home
Spacious Home
Majestic Manors
Humble Manor
Manor Gates
Manor Stables
Tower Manor
Noble Manor
Grand Manor
Shogun Palace
Starter Palace
Palace Pavilion
Palace Gates
Tiered Palace
Palace Tower
Grand Palace
Imperial Survival
Imperial Outpost
Galactic Lodge
Imperial Castle
Rebel Survival
Rebel Castle
Rebel Lookout
Rebel Workshop
Rebel Farm
Rebel Command Center
Rebel Stables
Salty Seaport
Tudor House
Tudor Workshop
Tudor Tavern
Tudor Mansion
How to Unlock
To access these various house crafting categories, you need to establish a village across different biomes. The specific biome where your Village Hub is situated will influence the rewards when upgrading that hub, linking each hub to a unique category.
Upgrading your Village Hub provides multiple benefits, including the number of NPCs you can house or the crafting recipes you can unlock. For instance, recipes for Log Cabin houses are available only by upgrading a Village Hub located in the Grasslands.
To enhance a Village Hub, you must create a town and integrate new elements like additional housing and decorations. To unlock all pre-built crafting recipes, you’ll need a Level Ten Village Hub in nearly every biome.
Buildings
Village Hub Biome
Starter Shacks
Anywhere
Fishin’ Docks
Shore or Grasslands
Log Cabin
Grasslands
Pleasant Park
Grasslands
Majestic Manor
Dry Valley
Shogun Palace
Frostlands
Imperial Survival
Rebel Village
Rebel Survival
Rebel Village
Salty Seaport
Lost Isles
Comprehensive List of Lego Pass Building Crafting Recipes
The Lego Pass serves as Lego Fortnite Odyssey’s equivalent of a Battle Pass. While a Lego Pass is active, you can earn rewards using the Battle Stars you gain by leveling up during its duration.
Typically, each Lego Pass includes one or two exclusive house builds that you can unlock simply by playing the game and leveling up while the pass is active.
Be cautious! If you take too long and let the Lego Pass expire, you will miss out on those builds.
In Stardew Valley, along with farming basics and exchanging gifts with fellow villagers, one of the key elements you quickly discover is the significance of mining. If you wish to advance without using cheats, mining is essential for acquiring the materials needed to craft new and improved items. While Quartz can be easily found throughout the game, turning it into Refined Quartz requires a bit more effort. Once you grasp the process, it unlocks numerous crafting opportunities, so let’s dive into how to obtain Refined Quartz swiftly.
Obtaining Refined Quartz
ConcernedApe
There are three main methods to acquire Refined Quartz. The easiest and most dependable way involves using a furnace along with some standard Quartz and coal. If you don’t have a furnace yet, you can craft one using just 25 stones and 20 copper bars. Place your coal in the furnace, load it with Quartz, and let it work for half an in-game hour. Once the smelting process is complete, you will receive a bar of Refined Quartz. However, if you manage to obtain Fire Quartz and put it in the furnace, you’ll be rewarded with three bars of Refined Quartz instead of just one.
The second method involves a recycling machine in combination with two specific items: broken CDs and broken glasses. Recycling these objects in the machine will yield one bar of Refined Quartz.
Your final option revolves around Rare Quartz, which only appears under specific circumstances. You can sometimes find it within crystals in the Mines, or it may drop from Ghosts that reside between floors 51 and 79, as well as from Carbon Ghosts in the Skull Cavern. However, the drop rate is low—around 10%—so it’s advisable to focus on smelting for quicker results.
Refined Quartz proves to be quite versatile and can be utilized to create various items, such as crystal flooring, farm computers, quality sprinklers, solar panels, and much more.
In the vast universe of No Man’s Sky, certain resources are rarely needed, while others are essential. Copper stands out as a resource you will frequently seek for multiple reasons.
Copper serves various purposes and can be collected in numerous ways. Although you’ll need a significant amount, it’s relatively simple to gather large quantities at once if you know where to look and how to optimize your time effectively.
How To Get Copper
Copper is typically found on planets, provided those planets are consistent in one aspect.
Finding Copper on Planets Orbiting Yellow Stars
Copper is found specifically on planets that orbit yellow stars. Different star classes host different resources, so you won’t generally find copper on planets orbiting stars of a different category.
You can identify star colors using the Galaxy Map before jumping into another system.
If you need color-blind settings, go to Options > Accessibility > Galaxy Map Colour Filter to apply a suitable color filter.
When you land on a planet orbiting a yellow star, use your visor to scan for resource deposits. Once you pinpoint a deposit, mark its location on your HUD. Use your Terrain Manipulator in Mine mode to gather copper once you reach the deposit.
Purchasing Copper from Galactic Trade Terminals
Some Galactic Trade Terminals may sell copper for around 56 Credits. While this price is fairly low in less inflated systems, gathering copper yourself is generally more efficient unless you’re in a hurry.
Certain minerals, especially those found in caves, might also contain copper as a secondary resource. However, this method is not reliable or common since these occurrences are quite rare. When it does happen, it can provide a nice surplus of copper for your future needs.
To find out if a mineral contains copper, scan it with your visor. The scan results will show which elements it provides. With experience, you’ll quickly learn which minerals are valuable and which are not.
Automating Copper Collection
You can also collect copper using Autonomous Mining Units and Mineral Extractors. Each requires specific resource nodes to function, but both options allow you to accumulate copper passively while you focus on other tasks.
For the Mineral Extractor, you’ll need to locate a Deep-Level Mineral Deposit. Use the Survey modification on your Analysis Visor for this, which is different from gathering resources from the surface where Autonomous Mining Units can be utilized.
How To Create Copper in a Refiner
Copper can also be synthesized in a Refiner, although this method is not very practical. If you have an excess of chromatic metal and want to double your copper stock, you can use this recipe:
x1 Copper + x1 Chromatic Metal = 2x Copper
Chromatic metal tends to be more broadly useful than copper. In most cases, you’ll be better off picking up more copper rather than using your chromatic metal for this, unless circumstances make copper harder to find.
What Is Copper Used For?
Copper plays a role in many crafting recipes. You’ll use copper to upgrade specific modules on your suit or multi-tool, and also for creating unique items such as Bronze Statues and the initial AtlasPass.
You can refine copper into other materials; notably, you can convert copper into chromatic metal, or combine it with other similar metals for additional chromatic metal recipes.
Keep in mind that copper cannot be collected from asteroids like platinum and gold.
Crafting Recipes that Require Copper
Here are several crafting recipes that utilize copper:
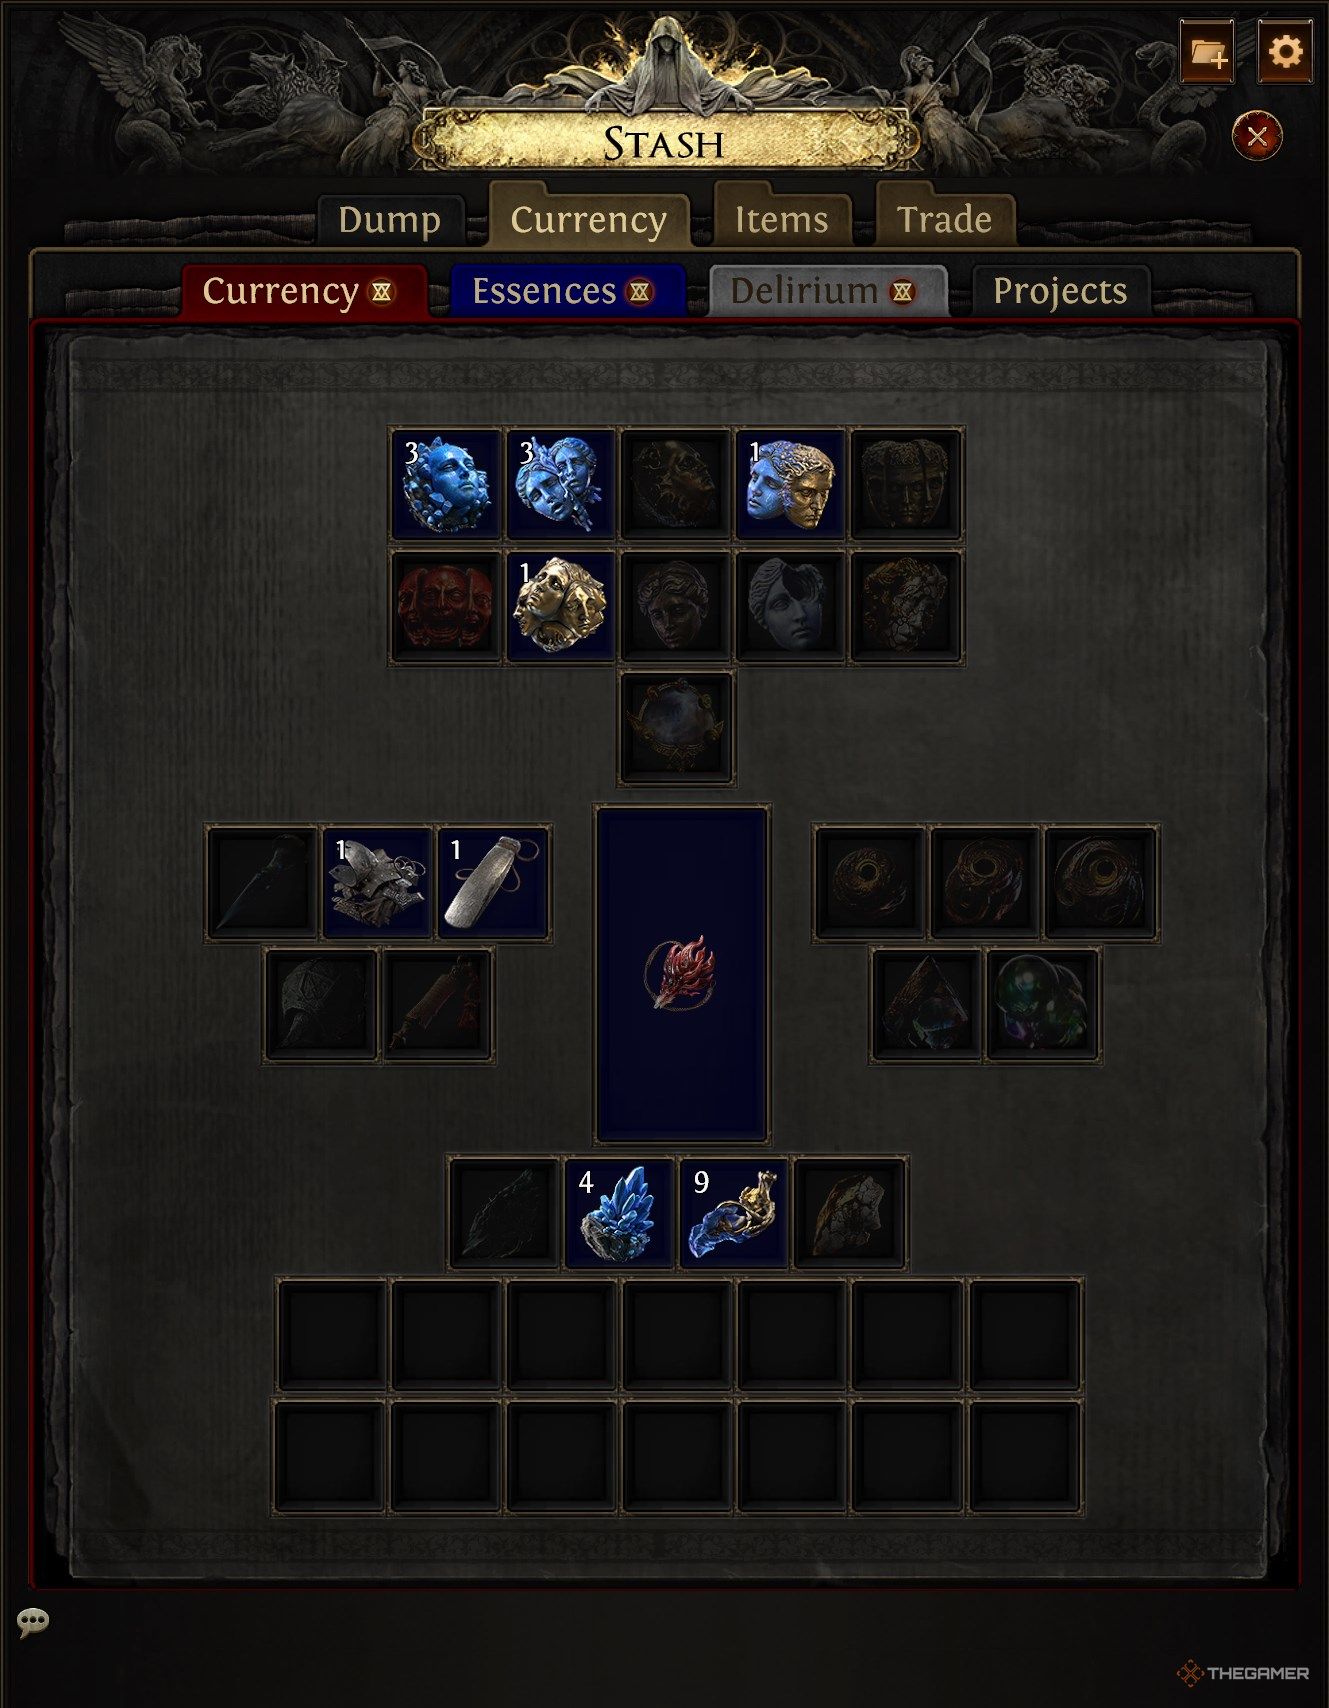
In “Path of Exile 2,” crafting plays a crucial role, but it’s been significantly simplified compared to the previous game. You won’t have to manage numerous league mechanics and extensive player trades to acquire the ideal item. With fewer crafting materials and stats to consider, now it’s much easier for all players to create valuable items.
However, this doesn’t mean that crafting lacks complexity. This guide will explain the crafting system in PoE2, outline how it differs from the original game, and provide a concise overview of how each crafting material functions.
Changes From Path Of Exile
No More Metacrafting. Crafting now relies primarily on currency orbs and a new category of items known as Runes, with the use of Essences for modifications.
Oils make their return.
Harvest, Fossils, Catalysts, and Recombinators are no longer in the game.
Currency orbs are now generally rarer. You’ll want to disenchant magic and rare items at vendors to gather currency orbs for crafting, as drop rates can be unpredictable.
Some Essences can upgrade magic items to rare ones with a specific affix, allowing you to pair a normal ⇾ magic Essence to enforce two desired affix types on an item.
How Crafting Works In Path Of Exile 2
Crafting in “Path of Exile 2” is a much more user-friendly process than in its predecessor. Almost any item you collect in Wraeclast can be enhanced using various crafting materials. The fundamental component you’ll use is currency orbs, which are consumables applied to gear to grant magical properties, known as affixes. These orbs are also vital to the game’s trading system, as their perceived value can vary among players.
Unlike many other action RPGs, forging items in Path of Exile focuses on refining existing gear instead of creating items from scratch. You’ll utilize crafting materials to enhance your equipment, making it necessary to have the items you wish to improve. Thankfully, virtually every non-unique item can be crafted, including common gear. The item’s rarity dictates how many affixes it may possess, categorized into prefixes and suffixes, which represent different stat pools.
On PC, you can press “Alt” while examining an item to see advanced statistics. This will reveal which stats are prefixes, suffixes, and their potential values.
How To Upgrade Items
Rarity
Prefix Limit
Suffix Limit
Common
0
0
Uncommon
1
1
Rare
3
3
Unique
N/A
N/A
By default, common items lack affixes, apart from their implicit values. Some items may contain intrinsic stats, like free spells for caster weapons or elemental resistances for rings. These are referred to as implicits, which remain unaffected by crafting materials unless specified.
To add affixes to a common item, you’ll need to use a material to increase its rarity, either to magic or rare status using an Orb of Transmutation or an Alchemy Orb, respectively. This will randomly assign affixes to the item. If the outcome isn’t desirable, you can either invest more currency to refine it or start anew with another item.
Essentially, this is the crafting procedure during the campaign. Locate a suitable base type, upgrade its rarity, and hope for favorable results. For more predictable crafting options in the endgame, you’ll need to adopt advanced techniques.
Every hub town features a vendor capable of disenchanting magic and rare items. This process yields currency orb shards instead of gold, with ten shards forming a functional currency type. We strongly advise disenchanting your items during the campaign rather than selling them.
Advanced Crafting Materials
As you progress through PoE2, you will acquire various advanced crafting materials that offer greater control over item modification. While currency orbs are often random with uncertain drop rates, Essences provide a more consistent approach, allowing you to guarantee a specific affix type such as mana, physical damage, or life. Employing two Essences on one item can significantly enhance your odds of obtaining desired attributes.
Introducing Runes, socketable glyphs that can be inserted into weapons and armor for moderate stat bonuses, ranging from increased damage to improved elemental resistance. Runes are a great asset for addressing any weaknesses in your build, so utilize them without hesitation once you find them, typically around Act 2.
Additionally, Oils from the Blight league return, allowing you to apply passive tree notables onto amulets through anointing. Only one anointment can exist on an amulet at any time. The specific drop locations for these oils remain unknown, as Blight isn’t part of PoE2; this section will be updated as more information becomes available.
Crafting Currencies
This section consolidates all known crafting currencies in “Path of Exile 2.” As we explore the game further and uncover new systems, we will keep updating this list.
Crafting Currencies
Currency Type
Rarity
Effect
Transmutation
Common
Turns a normal item into a magic item and adds one prefix or suffix.
Augmentation
Common
Adds an affix to a magic item. A magic item can have a maximum of one prefix and one suffix.
Alchemy
Uncommon
Transforms a normal item into a rare item, adding 4-6 random affixes.
Exalted
Uncommon
Adds an affix to a rare item. Rare items can contain up to three prefixes and three suffixes.
Regal
Uncommon
Turns a magic item into a rare item, adding one random prefix or suffix.
Jeweler’s
Uncommon
Adds a socket to a skill gem, with a maximum of six sockets.
Chaos
Rare
Randomizes a rare item with new modifiers and values, while retaining item implicits.
Vaal
Rare
Corrupts the item, altering it in unpredictable ways; it can no longer be modified afterwards.
Annulment
Rare
Removes a random affix from the item, preserving its rarity.
Divine
Very Rare
Rerolls the statistical values on an item; extremely rare, and best reserved for top-tier gear.
Mirror of Kalandra
Exotic
Creates a copy of a non-unique item; exceedingly rare, akin to a lightning strike in likelihood.
Quality Enhancers
Quality enhances the base stats of an item, improving damage on weapons and defensive stats on armor.
Diablo 4’s most sought-after items are Mythic Uniques, often referred to as Uber Uniques by players. During the Season of the Infernal Hordes, these items received a significant enhancement, boosting their effectiveness and making them top-tier choices for nearly every build. While they can simplify gameplay immensely, acquiring them is quite challenging.
The good news is the process of farming for Mythic Uniques is somewhat predictable. Due to a pity system, you can craft the Mythic Unique your build requires by using a rare currency called Resplendent Sparks. Let’s explore how the crafting system functions for Mythic Uniques, what it costs, and share some tips on farming for Resplendent Sparks.
Updated October 25, 2024, by Charles Burgar: Mythic Uniques have undergone slight modifications in the Vessel of Hatred. Players can now create these items through Runewords or random loot caches, offering new ways to build for the endgame. This guide has been modified to account for the new Rune Crafting system and all updated methods for acquiring Mythic Uniques in Vessel of Hatred.
How to Craft Mythic Uniques
As of now, there are two methods to forge Mythic Uniques in Diablo 4. Both require two Resplendent Sparks, which you can earn by dismantling Mythic Uniques or defeating tough bosses.
Blacksmith: Trade two Resplendent Sparks to create a random Mythic Unique.
Jeweler: Trade two Resplendent Sparks along with Legendary Runes to create a specific Mythic Unique.
This requires ownership of the Vessel of Hatred expansion.
Mythic Unique Cache
Every Blacksmith in the town can refine your Resplendent Sparks into a Mythic Unique Cache for a cost of two sparks and 50,000,000 Gold. The Mythic Unique you receive is random. This option is great for starting your Mythic Unique collection early in a season. However, if you’re aiming for something specific, you’ll need to utilize Rune Crafting.
This season, the best way to farm Gold is through the Infernal Hordes activity. Complete the highest tier that your build can handle. At the end of your run, deposit all your Aether into the Gold chest to earn over 10 million Gold each run.
Rune Crafting
A more reliable option can be found at the Jeweler. Select the “Rune Crafting” tab and navigate to the Mythic Unique section. This will display every Mythic Unique available for your class. Each Mythic Unique creation requires two Resplendent Sparks and a combination of Legendary Runes. The specific Rune needed will vary based on the item you want to create.
To use this feature, you need to own the Vessel of Hatred expansion.
To obtain those Runes, focus on completing runs in the Kurast Undercity, defeating Elite monsters, and tackling endgame content. Once you accumulate some Runes, you can combine them into rarer variants at the Jeweler using the Rune Crafting menu. Continue upgrading until you can create the desired Mythic Unique. You can also trade with other players if luck isn’t on your side.
How to Obtain Resplendent Sparks
As of the Season of Hatred Rising, there are four methods to acquire Resplendent Sparks
Dismantling Mythic Uniques: Each Mythic Unique dismantled at the Blacksmith yields one Resplendent Spark.
Currently, tormented bosses serve as the best source for obtaining Mythic Uniques, providing five chances (1.5% each) to earn a Mythic Unique.
Defeating your first Tormented Boss: Your first tormented boss kill in a season grants one Resplendent Spark. This cannot be repeated.
This rule applies to all pinnacle bosses you can summon.
You are limited to one Resplendent Spark per season through this method. Killing more tormented bosses will not grant additional sparks.
Defeating Uber Lilith for the first time: The level 100 version of Lilith drops a Resplendent Spark upon defeat. This is distinct from the campaign encounter and cannot be repeated.
Completing the Season Journey: Finishing the final set of Season Journey rewards gives you a Destroyer’s Cache, which contains one Resplendent Spark.
In general, we recommend farming tormented bosses to collect Resplendent Sparks. Each boss offers multiple opportunities to drop a Mythic Unique (with the chances enhanced based on Torment difficulty), and your initial kill guarantees one Resplendent Spark. Continue farming tormented bosses until you accumulate enough Mythic Uniques to craft the item you desire.
Manage Consent
To provide the best experiences, we use technologies like cookies to store and/or access device information. Consenting to these technologies will allow us to process data such as browsing behavior or unique IDs on this site. Not consenting or withdrawing consent, may adversely affect certain features and functions.
Functional
Always active
The technical storage or access is strictly necessary for the legitimate purpose of enabling the use of a specific service explicitly requested by the subscriber or user, or for the sole purpose of carrying out the transmission of a communication over an electronic communications network.
Preferences
The technical storage or access is necessary for the legitimate purpose of storing preferences that are not requested by the subscriber or user.
Statistics
The technical storage or access that is used exclusively for statistical purposes.The technical storage or access that is used exclusively for anonymous statistical purposes. Without a subpoena, voluntary compliance on the part of your Internet Service Provider, or additional records from a third party, information stored or retrieved for this purpose alone cannot usually be used to identify you.
Marketing
The technical storage or access is required to create user profiles to send advertising, or to track the user on a website or across several websites for similar marketing purposes.