الوسم: craft

  • How to Craft the Enhanced Kuku Cooler in Crimson Desert: Completing & Solving

    How to Craft the Enhanced Kuku Cooler in Crimson Desert: Completing & Solving

    A recent update for Crimson Desert has introduced a lot of new content to the game. This includes new difficulty levels, additional moves for Kliff, new quests, gameplay improvements, and a new storage system for specific items.

    Players can now store clothes, materials, quest items, and food in various storage chests found throughout the game world. One of these is the Kuku Cooler, a special chest designed to hold all your ingredients and meals without crowding your inventory.

    To access some of these chests, like the Kuku Cooler, you need to complete a short quest. Here’s how to get the Kuku Cooler and upgrade it so it can hold up to 1,000 food items.

    How to Get the Kuku Cooler

    First, finish the faction quest called “A Special Blueprint.” You’ll find the quest giver just northwest of Howling Hill at Hernand’s Bloomwood Ranch. Talk to the soldiers outside the ranch, then go northeast to the Kilnden Workshop.

    Speak to the artisan outside the small house, who will give you a Kuku Pot and the blueprint for the cooler. The recipe requires five Iron Ore, three Copper Ore, and one Azurite. If you already have these materials, you can skip collecting them.

    How to Craft the Kuku Cooler

    Now, head to the Kilnden Workshop, talk to Grimnir, and open his crafting menu. Select the Kuku Cooler and craft it — it will be added instantly to your inventory. You can then place it in your house at Howling Hill.

    Before returning home, talk to the artisan again to get the blueprint for the upgraded version, the Enhanced Kuku Cooler, which offers more storage capacity.

    How to Craft the Enhanced Kuku Cooler

    The upgraded cooler requires more late-game materials: one Kuku Cooler, three Brimstone, three Mercury, three Rubber, and two Electrical Components. It’s best to wait until you’re further along in the game to attempt this.

    To find Brimstone, travel to the Deadfire Mountains in northern Demeniss. In the mountain’s crater, called the Brimstone Springs, you’ll encounter a Hexe Brimstoneback Crab and gaseous Brimstone deposits. Defeating the crab usually nets 2–3 Brimstone. To get the gas from the deposits, strike the nodes with the Healing Palm technique to block some of the gas flow, then use the Nature’s Snare skill to cause Brimstone pieces to launch into the air.

    For Mercury, go north into Pailune, just above the W in Wolf on the map. Search for a small pool of liquid Mercury. Use a bow with a Frost-imbued Charge Shot to freeze chunks of Mercury, then break the ice with a pickaxe or drill to harvest the material. Expect to get around 12–15 pieces.

    Collecting Rubber involves visiting Rubber Trees east of Beardtree Gorge. Seal the discolored cuts on the trees with Healing Palm, which causes them to glow with sparks. Wait six in-game days for the Rubber to form, then return to harvest it.

    Electrical Components are obtained by battling mechanical enemies southeast of Delesyia. Look for large mechas with drills or buzzsaws around the roads south of the Eastern Hills. Take them down using powerful or ranged attacks, then loot the Electrical Components from these enemies. Note that you may need to fight multiple Mechas to collect two parts for your upgrade.

    Final Steps

    After gathering all the necessary materials, go back to Grimnir at the Kilnden Workshop, speak to him, and select the option to craft the Enhanced Kuku Cooler. After a short cutscene, you’ll receive the storage chest to place at your house in Howling Hills.

  • How to Craft and Use Gunpowder in Windrose: Completing and Solving

    How to Craft and Use Gunpowder in Windrose: Completing and Solving

    As you explore the islands in Windrose, you’ll quickly realize that a pirate needs more than just a sword to survive. When you come across guns that could help you, they’re useless unless you have gunpowder to load them.

    We’ll guide you to early locations where you can find gunpowder and explain how to craft it later, so you don’t run out. Check out our tips below to make sure you gather enough materials to find and craft gunpowder regularly.

    Where to Find Gunpowder

    When starting out, you won’t have the ingredients needed to craft gunpowder. Luckily, some supplies can be found at pirate camps. You’ll need to explore the islands fully to locate points of interest.

    If you come across a Blackbeard Pirate Camp, be sure to clear it out and check every chest. Gunpowder is most often found here, especially in supply drops. Open these crates to pick up small amounts of gunpowder and start building your stockpile.

    How to Make Gunpowder

    Before crafting gunpowder, you need a millstone at your camp. With the millstone, you can combine sulfur and ash to produce homemade gunpowder.

    Tip: You’ll need 10 sulfur and 20 ash to make 10 units of gunpowder. Make sure to gather enough materials so you can produce larger amounts later.

    You won’t find sulfur and ash easily until you clear the Coastal Jungle region and reach the Foothills. To get sulfur, you’ll need an iron pickaxe—iron is only available in the Foothills. Ash can be gathered from a charcoal kiln, so collecting it isn’t difficult.

  • How to Solve a Tassel and a Tale in Where Winds Meet

    How to Solve a Tassel and a Tale in Where Winds Meet

    The enchanting world of Where Winds Meet is full of magic and discovery, blending mythical adventures with rich RPG gameplay. As with other parts of the map, the sandy desert area called Hexi offers many paths to follow the main story.

    You can focus on completing quests one after another or take your time to explore and learn more about the world around you. For example, the side quest titled “A Tassel and a Tale” is just one of many smaller stories you can pursue, and completing it unlocks additional content.

    How to Get the Red Tassel

    While exploring the Ayisu area in the Jade Gate Pass region of Hexi, you’ll come across a side quest called A Tassel and a Tale. It becomes available as you explore the Squarewall Hold Ruins Boundary Stone. Here, you’ll meet a man named Li, sitting just in front of the Boundary Stone. He talks about red tassels that need collecting but says he will only give his to someone called Granny Pan.

    Although you’ll ask Li for the tassel multiple times, he won’t hand it over. If you back away far enough so he can’t see you and then position yourself behind him, you can use a special skill called “Celestial Sieze” to quietly take the tassel from his pocket without him noticing. After that, you can deliver the red tassel directly to Granny Pan.

    Note: Be cautious if you venture too deep into the Squarewall Hold Ruins village—there are aggressive Utuk Raptors nearby that you won’t be able to defeat yet.

    How to Find Granny Pan

    To locate Granny Pan, head northeast from the Boundary Stone in Squarewall Hold towards the Heroic Tomb. There, you will find Granny Pan and Young Yichao among the red flowers. They will share the story behind the red tassels and explain how collecting them honors the departed.

    Granny Pan's location in Where Winds Meet

    After speaking with them, Granny Pan will ask you to hang the tassel onto a spear nearby. Doing this begins the quest called The Final Retreat, which takes place back in the Squarewall Hold Ruins village. Completing this quest helps remove the dangers blocking access to the area, making it safer to explore.

  • Where To Find Dyes in Where Winds Meet: Completing & Solving Guide

    Where To Find Dyes in Where Winds Meet: Completing & Solving Guide

    In the expansive world of Where Winds Meet, your character’s look is just as important as their fighting skills. While the game features stunning scenery and detailed martial arts, it’s essential to express your personality to fully enjoy the experience—whether that means looking authentic to the Song Dynasty or simply standing out in style.

    Whether you prefer the bright, flowing silks of a traveling merchant, the subdued tones of a secretive assassin, or a bold new hair color, customization plays a big role. Luckily, the game offers a comprehensive dyeing system that lets you personalize your outfits and hairstyles in great detail.

    How to Get Dyes

    To change your hair or clothing colors in Where Winds Meet, keep in mind a few key points:

    • There are four different dyes in the game—two for hair and two for clothes.
    • Using dyes will consume these items, so be sure you’re happy with your color choices before finalizing.
    • Many hairstyles and outfit options, especially those you unlock for free, can’t be dyed.

    The three dyes available are:

    Dye Item Purpose How to Get It
    Softweave Dye Powder Dyes clothing Costs 20 Echo Beads per piece at the shop; also found in loot and different locations shown in tooltips
    Rosycloud Dye Powder Dyes clothing Costs 100 Echo Beads per piece at shops; also available in loot and other spots shown in tooltips
    Inkshade Hairdye Dyes hair Costs 50 Echo Beads per item; can also be found in loot and other locations in tooltips
    Timeless Hairdye Dyes hair Requires 1 Harmonic Core for 5 items from the Draw Shop

    It’s important to note that the less expensive, more common dyes can only give your clothes and hair “enduring colors,” which means bright and vivid shades require the more costly dyes.

    How to Use Dyes

    To apply dyes, go to your Character menu and choose the Appearance section. Select the hair or outfit you want to dye. If it’s dyeable, a button will appear at the lower right corner of the screen, opening the dyeing menu. If you don’t see this option, that item can’t be dyed.

    Once in the dye menu, you can change the colors of different parts of your outfit, such as the hemline, outer coat, or boots, with options separated by fabric and accessories.

    The dye menu defaults to “Advanced Dye,” which uses the more expensive dyes. You can switch to the “Basic Dye” section, which shows only cheaper colors that don’t require the costly dyes. This option has fewer color choices but is easier and less expensive to use.

    When you’re satisfied with your look, click the Dye button in the bottom right, assign your design to a slot, and then select Apply. This final step will consume the dyes and lock in your new look.

  • How to Complete and Upgrade Weapons and Items in Arc Raiders

    How to Complete and Upgrade Weapons and Items in Arc Raiders

    The starting weapons in Arc Raiders are not very powerful, but you can quickly upgrade them as you gather scrap and resources. You might find weapons while exploring the world, but this method isn’t always reliable. Luckily, the first upgrades are inexpensive and can significantly improve your weapons.

    Like everything in Arc Raiders, upgrading your weapons involves some risk. If you invest resources into upgrading but get shot while looting, your weapons could be lost to another Raider. However, early upgrades give you a competitive edge, making them worth the effort.

    This is a work-in-progress guide; all blueprints and weapon enhancement levels will be added as discovered.

    How to Upgrade Your Weapons
    To upgrade weapons, you’ll need to build the Gunsmith workbench in your hideout. It costs 20 Metal Parts and 30 Rubber Parts, which can be obtained by recycling resources. Once built, you can craft new weapons or right-click any gun in your inventory or stash to upgrade it. Upgrades also require Metal Parts and Rubber Parts; for example, upgrading the Rattler I to Rattler II needs 10 Metal Parts and 10 Rubber Parts.

    You can upgrade weapons up to level IV. Upgrading improves various stats like durability and reload speed, providing you with better performance in the field.

    All Weapon Upgrades

    Rattler Upgrades:
    | Weapon | Upgrade Level | Material Cost |
    |———|—————-|—————–|
    | Rattler I | — | — |
    | Rattler II | 2 | 10 Metal Parts, 10 Rubber Parts |
    | Rattler III | 3 | Cost not specified |
    | Rattler IV | 4 | Cost not specified |

    Ferro Upgrades:
    | Weapon | Upgrade Level | Material Cost |
    |———|—————-|—————–|
    | Ferro I | — | — |
    | Ferro II | 2 | Cost not specified |
    | Ferro III | 3 | 9 Metal Parts, 1 Simple Gun Part |
    | Ferro IV | 4 | 1 Mechanical Component, 1 Simple Gun Part |

    Ferro is a great early-game weapon—it’s affordable and packs a punch.

    Images and further details
    The upgrades are visually represented in images, showcasing improvements like increased power and stats. The Ferro upgrade, in particular, stands out as a cost-effective choice with a significant impact.

  • How to Craft Phantom Weapon Relics in Final Fantasy XIV: Completing and Solving

    How to Craft Phantom Weapon Relics in Final Fantasy XIV: Completing and Solving

    Introduced in Patch 7.25 of Final Fantasy 14, Phantom Weapons are the new Relic Weapons added with the Dawntrail expansion. Like past Relic Weapons, these are powerful, visually impressive weapons that require a lot of effort to obtain. New steps in upgrading them are released periodically during endgame patches of the expansion.

    To start creating your Phantom Weapon, you must explore the Occult Crescent, a Field Operation that was added alongside these weapons. Below, you’ll find everything you need to know about unlocking and upgrading your own Phantom Weapons.


    How to Unlock the Phantom Weapons Quest

    First, you need to unlock the Occult Crescent. This begins by speaking to the Expedition Messenger in Tuliyollal (X:17.1, Y:11.8) and starting the quest One Last Hurrah. Follow the quest chain until you complete Unfamiliar Territory, which grants access to exploring the South Horn of the Occult Crescent. Afterward, accept the quest Arcane Artistry from Lydirceil in the Phantom Village (X:6.6, Y:7.1) to begin the first step.


    Phantom Weapon Penumbrae (Level 745)

    Once you start, you’ll need to gather Demiatma, which are special items dropped during Fates and Critical Encounters in the South Horn of the Occult Crescent or in Dawntrail zones.

    The first step, Arcane Artistry, rewards you with a Phantom Weapon Penumbrae (Level 745). This involves collecting three of each of six different Demiatma types, totaling 18. The Demiatma can be obtained from specific Fates and CEs depending on the location.

    South Horn Fates/CEs:

    • Azurite Demiatma: from “A Prying Eye,” “Rough Waters,” and others.
    • Verdigris Demiatma: from “A Delicate Balance,” “Sworn to Soil,” etc.
    • Malachite Demiatma: from “An Unending Duty,” “Flame of Dusk,” etc.
    • Realgar Demiatma: from “Brain Drain,” “The Winged Terror,” etc.
    • Caput Mortuum Demiatma: from “Serving Darkness,” “Company of Stone,” etc.
    • Orpiment Demiatma: from “Fatal Allure,” “King of the Crescent,” etc.

    Dawntrail Zones:

    • Azurite Demiatma: from Urqopacha zone.
    • Verdigris Demiatma: from Kozama’uka zone.
    • Malachite Demiatma: from Yak T’el zone.
    • Realgar Demiatma: from Shaaloani zone.
    • Caput Mortuum Demiatma: from Heritage Found zone.
    • Orpiment Demiatma: from Living Memory zone.

    Diatma drops are rare, so it can take about an hour or two to collect all 18. Luckily, you only need to do this step once. Any extra Demiatma you collect after the first are useless and can be safely discarded.


    Forging The Phantasmal

    After collecting all 18 Demiatma, return to Gerolt to complete the Arcane Artistry step. Next, you’ll need to craft three pieces of Arcanite, which can be bought from Ermina in Phantom Village (X:6.9, Y:7.3) for 500 Tomestones of Heliometry each, totaling 1,500 Tomestones.

    Hand over the Tomestones and Demiatma to receive your Phantom Weapon Penumbrae. You can repeat this process for future weapons.


    Phantom Weapons Umbrae (Level 760)

    Once again, gather Demiatma and return to Gerolt. Next, accept the quest Wrought by Hands Phantasmal, where you’ll buy three Waxing Arcanite from Ermina for 500 Allagan Tomestones of Heliometry each. Exchange these alongside your Penumbrae to get your new Phantom Weapon Umbrae.

    To upgrade more weapons, just repeat this quest. The preceding quests, Keeping The Old Ways Alive and Aether, Aether, Everywhere, only need to be completed once. Each additional Umbrae costs 1,500 Tomestones.

  • How to Complete and Craft Trinkets in Grounded 2

    How to Complete and Craft Trinkets in Grounded 2

    Items known as Trinkets in Grounded 2 are small but powerful accessories you can unlock and craft. They provide passive bonuses like increased resistance to damage or boosting your damage output with certain weapons. These Trinkets are crucial for survival, especially during challenging bug battles in the garden.

    To improve your skills and effectiveness, you’ll want to unlock some Trinkets. Here’s how to obtain different ones and what you need to craft them.

    How to Obtain Trinkets in Grounded 2

    Trinkets are either crafted or found by looting creatures or candy items. However, looting has a low chance of dropping Trinkets, so you’ll need to loot many bugs or candies before they appear. Crafting recipes become available once you analyze specific ingredients using the Resource Analyzer or reach certain Brainpower levels.

    Your Brainpower increases as you analyze new resources at the Ranger Station Resource Analyzer. The higher your Brainpower, the more recipes you can unlock. Focus on analyzing every new resource you come across to raise your Brainpower.

    Tip: Pay attention to the buffs each Trinket offers. Choose only those that complement your current build to maximize benefits.

    Once you unlock a recipe, you can find the corresponding Trinket in your weapons and armor menu under the SCA.B 2K section. Before equipping, you’ll need to gather the necessary resources, which range from common plants to rare items obtained by fighting bugs.

    All Trinkets Recipes and Effects

    Below is a list of available Trinkets, their effects, how to get their recipes, and the resources needed:

    Trinket Tier Effect How to Get Recipe Resources
    Astonishing Acid 1 Boosts the damage of the final hit in a three-hit combo. Analyze an Acid Gland in Resource Analyzer. 5 Acid Glands, 2 Sap, 2 Larva Spikes
    Nifty Needle 1 Fully charged bow shots deal more damage. Analyze a Thistle Needle in Resource Analyzer. 1 Thistle Needle, 2 Sap, 3 Gnat Fuzz
    Sturdy Shell 1 Reduces friendly fire damage and enemies prefer attacking you. Analyze an Acorn Shell at Resource Analyzer. 1 Acorn Shell, 2 Sap, 3 Grub Hides
    Blistering Boiler 2 Final hit in a three-hit combo releases a blastwave. Defeat a Bombardier Beetle. N/A
    Eco Exploitation Token 2 Increases carrying capacity and reduces damage from spiders. Search a dead employee in Spider Den. N/A
    Fancy Fletching 2 Faster charge for bow shots. Break a Crow Feather with Omni-Axe II. N/A
    Fluffy Dandelion 2 Allows infinite gliding in the air. Chop a Dandelion using Omni-Axe I. N/A
    Myrmecologist Token 2 Increased damage to ants but reduced overall damage resistance. Search a dead employee in Snackbar Anthill. N/A
    O.R.C. Nullifier 2 Short-term damage reduction against O.R.C. creatures. Reach Brainpower level 6. 2 O.R.C. Receivers, 1 Lingonberry Leather, 2 Gum Nuggets, 1 Roach Head
    Roach Rage 2 Increased attack damage when health is low. Kill the General Berserker Cockroach. N/A
    Shivering Scale 2 Causes enemies to chill and freeze with melee attacks. Kill a Blue Butterfly. N/A
    Spectacular Spicy Shard 2 Adds extra damage to melee attacks with a spicy effect. Break a Spicy Candy with Omni-Hammer II. N/A
    Stabby Stinger 2 Adds venom to the final hit in a melee combo. Kill a Northern Scorpion. N/A
    Suspicious Mint 2 Adds fresh damage to melee attacks. Break a Fresh Mint with Omni-Hammer II. N/A
    Volatile Capacitor 2 Adds shock damage and overloads O.R.C. creatures with charged strikes. Reach Brainpower level 9. 3 O.R.C. Receivers, 4 Unstable Goo, 3 Bug Rubber, 1 Praying Mantis Head
    Cleaving Claws 3 Greatly increases critical hits with low-health creatures (two-handed weapons). Kill a Praying Mantis Nymph. N/A
    Everlasting Hogstopper 3 Keeps your hunger bar full over time without eating. Defeat Cockroach Queens or Billy Hogs. N/A

    These items can greatly enhance your combat capabilities and survivability, making them valuable tools in the garden’s dangerous world.

  • How To Craft a Gas Mask: Completing and Solving the Process

    How To Craft a Gas Mask: Completing and Solving the Process

    Grounded 2’s park is full of dangers, and not all of them are creepy bugs. Besides bugs, you have to watch out for drowning, falling, hunger, and thirst, as well as the environment itself. When you’re at full size, an overflowing trash bin is just a little gross, but when you’re tiny like an ant, it can quickly cause suffocation.

    Luckily, you can craft a gas mask to stay safe in these nasty-smelling areas. It only requires a few common ingredients, a bit of luck, and fighting a very large and angry bug. Pretty straightforward.

    Unlocking the Gas Mask

    The gas mask is your only way to survive toxic zones, like near the trash bin or inside the toxic Ant Cave. To get it, you need to unlock the crafting recipe by reaching Brainpower level four. You do this by using the Resource Analyzer at any Ranger Outpost to scan materials you find around the park. Just find and scan everything, and you’ll level up quickly.

    Keep in mind, each Resource Analyzer has a limited number of scans before it needs to recharge. You can wait for it to be ready or visit other Ranger Outposts, moving between them until you hit level four.

    Crafting the Gas Mask

    Once you reach level four, the Gas Mask will unlock automatically. To craft it, you’ll need:

    • Weevil Nose
    • 4 Gnat Fuzz
    • 2 Crude Ropes
    • Stinkbug Part

    Weevil Nose

    Weevil Noses are dropped randomly when you kill weevils, which are common and harmless bugs throughout the park. To get the nose, it’s best to use your fists to kill them, as using a weapon might decrease your chances of getting the nose and instead give you raw meat. Weevils are easy to find and won’t attack you.

    Gnat Fuzz

    Gnat Fuzz drops from gnats, tiny bugs found in moist areas like near puddle oases. Gnats fly out of reach sometimes, making them tricky, but they usually drop fuzzy bits with just one or two hits. Sometimes, a gnat drops more than one fuzz, so you might only need to kill a few to gather what you need.

    Crude Rope

    You probably have already crafted crude rope for bandages before, but if not, just gather plant fibers by picking up small plant pieces or chopping down grass and their stumps. Crafting crude rope doesn’t need a workbench and can be done in your inventory. However, you’ll need a workbench to make the gas mask itself.

    Stinkbug Part

    The hardest part of the mask is getting a Stinkbug Part. Stinkbugs are found mainly in the Statue Ascent, Fire Pit, and on the dry bricks running vertically on the map’s left side. They attack with a gas that the mask is designed to protect against, so engaging one without a mask is dangerous. They become aggressive as soon as you approach, so bring a good weapon and plenty of healing items.

    It’s best to have a friend or a buggy to help fight a Stinkbug, as their gas causes damage over time. You can also bait them into attacking other insects like ladybugs or cockroaches, which won’t attack you and can distract the bug. Ladybugs and cockroaches are good allies—they have a lot of health and won’t attack you once the Stinkbug is defeated.

    Defeating the Stinkbug

    Stinkbugs are weak to stabbing weapons, especially if aimed at their face to stun them. Be ready to parry or dodge their jumping attacks, and retreat to heal repeatedly from the gas damage. Once you have all the parts, go to a workbench to craft your new gas mask.

    Gas Mask vs. Roach Helmet

    Another option is the Roach Helmet, which also offers gas resistance but has some key differences. It requires a Roach Head, a Roach Chunk, and a Stinkbug Gas Sack—these are tougher to find, but the helmet won’t degrade as long as you’re taking damage. It functions like any armor piece, breaking down when you take damage, and provides more protection than the gas mask.

    However, the major downside of the Roach Helmet is that you still take damage from gas—just less than without one. You can’t explore or fight stinkbugs safely with it, because gas damage still affects you. Also, damage from gas stops bandages from healing you, so you’ll need to carry more expensive healing supplies.

    Use the Roach Helmet sparingly—if your gas mask is almost broken and you’re in a gassy area, swapping to the helmet might give you enough time to escape.

  • How To Craft a Computation Brick in Abiotic Factor by Completing and Solving

    How To Craft a Computation Brick in Abiotic Factor by Completing and Solving

    Surviving After the Abiotic Factor Crisis

    With GATE in chaos following the incident at Abiotic Factor, you’ll need to survive using whatever tools you can find. You might make arrows out of pens and use parts of decks as weapons. Since you’re a new employee, you also have less access than others, making things harder.

    Most of the scientists are gone or missing, so you’ll have to build makeshift technology to escape the facility. A crucial part is taking the Security Bot CPU, but to get it, you’ll need to destroy Security Bots. These robots don’t like having their parts taken and can be dangerous to fight.

    How to Kill Security Bots

    To get a Security Bot CPU, you must destroy a Security Bot, but they can be very dangerous. In the early game, they can kill you in four or five hits even if you wear decent armor.

    Security Bots become active from 9 PM to 6 AM when the power goes out. During these hours, they patrol their assigned areas. When the power comes back in the morning, they go back to their stations and stay inactive.

    You can find Security Bots in the Office Sector and Manufacturing West. The easiest one to reach is in the Cafeteria of the Office Sector, just below the Security Station with Warren.

    Other easy locations include:

    • Level Three of the Office Sector, looping through areas near Alice Mayfield and the large Executive Office.
    • The office area past Reception, which they patrol in a circle near their station on the wall.

    Security Bots’ headlights turn red when they see you or enemies, and they have good sight from a distance. However, because they walk slowly, you can outrun them by hiding or preparing to fight.

    Security Bots have three types of attacks: a melee punch that stuns briefly, an electrical tackle that stuns and has short range, and a spin attack with high knockback that hits multiple enemies. They prefer to use the spin attack when they are surrounded.

    ![Player near Security Bot in Abiotic Factor](https://static1.thegamerimages.com/wordpress/wp-content/uploads/wm/2025/07/abiotic-factor_20250726223422.jpg)

    The easiest and safest way to kill them early is to set a Shock Trap in their path and then shoot them with a Makeshift Crossbow loaded with around 30 to 40 bolts, depending on your accuracy. Once they see you, walk backward so they step onto the Shock Trap and get stunned for a few seconds. Hit them with bolts while backing up and circle around near the trap to keep them stunned.

    Materials to Craft Items

    Item Materials Needed
    Shock Trap Energy Brick x1
    Stapler x1
    Coil x1
    Makeshift Crossbow Desk Leg x1
    Rubberband Ball x3
    Plastic Scrap x2
    Stapler x1
    Makeshift Crossbow Bolts Pens x1
    Metal Scrap x1

    Place a Shock Trap in its path before the bot wakes up, then fire your bolts while it is stunned. Keep repeating this process, reactivating the trap as needed, until the Security Bot is destroyed. Including damage from the trap, it should take about 25 to 30 bolts. Without the trap, closer to 40 bolts.

    Natural electrical hazards, like electrified water on Level Three, can also stun and damage Security Bots, making them easier to kill.

    After defeating a Security Bot, it will drop a few sodas. You can use a Kitchen Knife to butcher it like an alien, but the process takes longer.

    They always drop Robot Oil and one Security Bot CPU, a vital resource. Sometimes, they also drop Metal Scraps, Coils, Glass Scrap, and Tech Scrap. Setting up automated farms for Security Bots can help you gather large amounts of Metal Scraps without breaking many cabinets.

    What to Do With Security Bot CPUs

    Crafting menu showing components for a Computation Brick.

    The main use for Security Bot CPUs is to craft Computational Bricks. These are essential for creating several key items: the Controller, Infrared Emitter, and the LCD Screen, which are used to make the Keypad Hacker.

    Component Amount Needed Materials Required
    Controller 1 Computation Brick x1
    Keyboard x2
    Desk Phone x2
    Box Of Screws x1
    LCD Screen 1 Computation Brick x1
    Tech Scrap x3
    Glow Stick x1
    Box Of Screws x1
    Infrared Emitter 1 Circuit Board x1
    Computation Brick x1
    Glass Shards x2

    The Keypad Hacker is needed to progress in the game, unlock areas like Security Rooms, and access crucial items like the Power Cell. All recipes for its parts can be discovered by crafting the Computation Brick, and then unlocking advanced components at a workbench.

    To get all the recipes at once, it’s easiest to visit Alice Mayfield, a GATE researcher on Level Three, who can give you the full list of components and recipes.

    How to Find Alice Mayfield

    Player at the entrance to a computer room with Alice Mayfield.

    To reach Alice Mayfield, go left from Reception toward the Security Office, follow the path to the office, and use an Energy Brick to open the nearby shutters. This unlocks a shortcut back to Manufacturing West and a lift to Level Three.

    Ride the lift to a small research area with radiation warnings, then go to the portal at the end of the catwalk to reach Anteverse II. This area offers key resources like Anteverse Wheat and fights with Exor enemies for their Hearts, which can upgrade your workbench.

    Follow the path through Anteverse II to another portal leading back to Level Three. Cross the pipes, jump over electrified water, and head toward Silo Three.

    Remember to unlock the elevator across from where Alice is located; this will give you a shortcut back to the main entrance, making travel easier in the future.

    Alice Mayfield is in an unlocked room near the entrance of Silo Three. She will provide the recipe for the Keypad Hacker, all the parts needed, and some hints on how to use it effectively.

  • Completing the Crafting of Lubricant in Dune: Awakening

    Completing the Crafting of Lubricant in Dune: Awakening

    Lubricant is a vital resource on Arrakis, essential for various processes in Dune: Awakening. You can craft two types of lubricant in large quantities: low-grade lubricant and industrial-grade lubricant, each requiring different resources.

    If you’re curious about how to find or create lubricant in Dune: Awakening and its uses, you’ve come to the right place. This guide covers everything you need to know about gathering the resources for crafting lubricant and how to employ it in the game.

    What Is Lubricant Used For?

    Lubricant is an essential resource for powering your sub-fief.

    After you’ve researched turbine technology in Dune: Awakening, you can build these machines to keep your base powered without needing to constantly refuel with fuel cells.

    This allows you to leave your base unattended for extended periods, as long as you continue crafting lubricant.

    How To Craft Lubricant

    To create lubricant, it’s crucial to know which type you need and the resources required for each. There are two kinds of lubricant in Dune: Awakening:

    1. Low-Grade Lubricant – Used for omnidirectional turbines.
    2. Industrial-Grade Lubricant – Used for directional turbines.

    How To Craft Low-Grade Lubricant

    Making low-grade lubricant is quite straightforward. You’ll need the following resources:

    • Fuel Cells: 2
    • Water: 4
    • Silicone Block: 1

    You can create low-grade lubricant in either a small or medium chemical refinery. Using a medium refinery cuts down on the required resources and quickens production time.

    Fuel cells and water can be located throughout the map using your cutteray and blood harvester.

    You’ll also need to refine Silicone Blocks from Flour Sand, found in specific areas.

    Look for white dust clouds over the sand and use a Static Compactor to harvest them.

    How To Craft Industrial-Grade Lubricant

    Crafting industrial-grade lubricant is slightly more complex, as this lubricant requires spice.

    Here are the resources you’ll need:

    • Fuel Cells: 8
    • Water: 15
    • Silicone Block: 4
    • Spice Residue: 5

    You can also create industrial-grade lubricant in either a small or medium chemical refinery. As before, using a medium refinery reduces both production time and resource costs.

    To get Spice Residue, you’ll need to set up a Spice Refinery and refine Spice Sand into Spice Residue.

    This process may take longer if you haven’t accessed the Deep Desert, as spice sand deposits are less common in the Hagga Basin.

  • Completing the Vortex Beater Crafting in Palworld

    Completing the Vortex Beater Crafting in Palworld

    Palworld is continuously introducing exciting new features, and the recent crossover update with Terraria has added a slew of items, pals, and locations inspired by the popular game. One of the highlight additions is a formidable ranged weapon from Terraria’s advanced collection: the Vortex Beater.

    With its rapid-fire capabilities and explosive projectiles, this weapon packs a punch, ideal for taking down enemies and raiders. Below, we’ll guide you on how to obtain the Vortex Beater and the materials you’ll need.

    What Is the Vortex Beater?

    The Vortex Beater automatically launches homing missiles along with standard ammunition. It boasts a 66% chance of not consuming ammo with each shot. Unlike traditional guns that utilize magazines, this weapon draws directly from your inventory, which can make it quite resource-intensive but extremely efficient.

    This weapon comes in five quality levels, from common to legendary, showcasing an attack power between 300 and 450 and durability ranging from 3000 to 6000. While its damage might fall short compared to some top-tier weapons, the automatic missile feature and no-reload design truly set it apart as a powerful choice.

    How to Obtain Vortex Beater Schematics

    To get your hands on the Vortex Beater schematics, venture into the Sealed Realm of Terraria dungeon. You can find it at coordinates (-421, -786) on a small island southeast of Fisherman’s Point, close to the Eternal Pyre Tower in the Mount Obsidian area. The quickest way to get there is by fast traveling to Fisherman’s Point and then using a flying or swimming Pal. Once you land on the island, don’t forget to activate the nearby fast travel point.

    Additionally, Legendary Vortex Beater schematics can drop from the chests located at the end of the dungeon.

    In total, there are nine lootable chests scattered throughout the Sealed Realm of Terraria. While most hold schematics for rare weapons and armor, the last two chests can contain some of the strongest and most unique weapon schematics, including the Vortex Beater.

    What You’ll Need

    You can craft the Vortex Beater at a Weapon Assembly Line (or better) once you have the schematic. To unlock a Weapon Assembly Line, you need to reach technology level 32, which requires 100 Ingots, 50 Wood, 20 Nails, and 10 High-Quality Pal Oil. Once you have it set up, you’ll need these materials to create the Vortex Beater:

    • 40x Hallowed Bars
    • 20x Pal Metal Ingots
    • 5x Electric Organs

    Hallowed Bars

    Hallowed Bars can be acquired within the new Terraria dungeon by breaking clay pots, defeating Pals, destroying golden walls, and opening chests. Notably, Palworld dungeons have no cooldown timer, allowing you to gather materials as frequently as needed.

    Pal Metal Ingots

    To forge Pal Metal Ingots in Palworld, you first need to build an Electric Furnace, which becomes available at Level 44 in the Technology menu. It requires 50 Refined Ingots, 10 Circuit Boards, 20 Polymer, and 20 Carbon Fiber. Once built, gather at least four Ore and two Paladium Fragments per ingot from around the map, then use your Electric Furnace to smelt them.

    Electric Organs

    These crafting materials can drop from defeated electric Pals or can be purchased from Wandering Merchants for 200 coins each. While battling with Pals like Menasting, Menasting Terra, or Cryolinx Terra, you’ll have an increased chance of acquiring more materials from defeated foes.

    How to Craft the Vortex Beater

    Once your Weapon Assembly Line is operational and powered by an electric Pal, select a Pal with strong Handiwork skills to create your weapon. Open the Assembly Line interface and locate Vortex Beater near the bottom of the page.

    Tip: Utilize Pals with the Transporting trait to automatically transfer the finished weapon to a chest.

    If you have all the necessary materials, hit Start Production, and your Pals will get right to work crafting your new endgame weapon.

  • Completing Dagath in Warframe: Your Guide to Solving Gameplay

    Completing Dagath in Warframe: Your Guide to Solving Gameplay

    Introducing Dagath: The Horsewoman of the Apocalypse in Warframe

    Dagath is a formidable character in Warframe, known for her Viral damage and powerful arsenal that includes scythes, stampeding Kaithe, and impressive weapon boosts. If you’re seeking to build a dominant weapon platform or a strong spellcaster, Dagath is an excellent choice.

    One of her standout features is how accessible she is to craft and master. After leveling up your syndicates and joining a clan, you can easily acquire Dagath’s complete kit and dominate the Star Chart with ease. Here, we’ll cover how to obtain Dagath, explain her abilities, and provide an effective build to help you tackle Steel Path and beyond.

    How to Obtain Dagath

    To acquire Dagath’s components, you need to access the Dagath’s Hollow lab in your clan dojo. If you’re not already part of a clan, you’ll need to join one to gain entry to this lab, which allows you to research and replicate all of Dagath’s components.

    What sets Dagath apart is that many of her crafting materials require Vainthorn, which you can collect from Abyssal Zone Extermination missions. To access these missions, purchase Abyssal Beacons from syndicate factions; you’ll need to be at least Rank 2. Each beacon costs 5,000 Standing and is consumed upon use, awarding you 6-8 Vainthorn, or 8-12 on Steel Path.

    Components Breakdown

    Dagath Blueprint

    Drop Source Dagath’s Hollow (Clan Dojo)
    Crafting Costs 30,000 Credits, 1 Dagath Neuroptics, 1 Dagath Chassis, 1 Dagath Systems, 1 Orokin Cell
    Crafting Time 72 Hours

    Dagath Neuroptics

    Drop Source Dagath’s Hollow (Clan Dojo)
    Crafting Costs 15,000 Credits, 34 Vainthorn, 2,000 Alloy Plate, 3 Neurodes, 3 Neural Sensors
    Crafting Time 12 Hours

    Dagath Chassis

    Drop Source Dagath’s Hollow (Clan Dojo)
    Crafting Costs 15,000 Credits, 34 Vainthorn, 1,500 Salvage, 4 Morphics, 2 Argon Crystals
    Crafting Time 12 Hours

    Dagath Systems

    Drop Source Dagath’s Hollow (Clan Dojo)
    Crafting Costs 15,000 Credits, 34 Vainthorn, 1,000 Circuits, 5 Control Modules, 4 Gallium
    Crafting Time 12 Hours

    Dagath’s Abilities

    Stats:

    • Armor: 125
    • Energy: 225
    • Health: 666
    • Shields: 250
    • Sprint Speed: 1.1

    Passive Ability

    Dagath has a 35% chance for Energy and Health orbs to be 300% more effective for her. This bonus applies to all types of orbs, not just health and energy. If partnered with Amber Archon Shards that enhance orb effectiveness, this passive becomes extremely powerful, especially when paired with guaranteed orb generation sources.

    Main Abilities

    Wyrd Scythes

    Dagath summons scythes that surround her and chase nearby enemies, slowing them down while dealing Viral damage with guaranteed status effects. Each scythe slows enemies by 35% and has a damage output of 500 Viral for spinning attacks and 1,000 Viral for throws.

    Doom

    This ability inflicts a curse on enemies, returning a portion of the damage Dagath deals back to her enemies. The strike will deal 500 Viral damage and reflects 35% of damage received back to the attacker.

    Grave Spirit

    This grants Dagath a critical damage boost and makes her momentarily invulnerable. While active, all her weapons gain a 50% critical damage increase, doubling against Doomed enemies. If Dagath faces a lethal blow, she can become invulnerable for 10 seconds.

    Rakhali’s Cavalry

    Summoning phantoms of the Kaithes to charge at enemies, this ability inflicts 30,000 Viral damage and strips 35% of defenses from Doomed targets. Notably, casting this ability grants invulnerability for its duration.

    Dagath Builds

    For Dagath’s build focused on maximizing her damage output and survivability, consider using the Spectral Spirit augment. This allows her to assume a spectral form, keeping her invulnerable for extended periods while enhancing her damage.

    Recommendations:

    • Focus School: Madurai provides a free 40% Strength buff.
    • Use Equilibrium for energy management paired with her third ability to maintain flexibility.
    • For mods, prioritize Ability Duration to expand her invulnerability time and enhance her damage output.

    Utilizing Equilibrium will also help manage energy effectively since it pairs well with Health Orbs spawned by her abilities.

    Conclusion

    Dagath is a robust Warframe that excels in both damage and survivability, making her an asset in various game scenarios. With the right build and effective use of her abilities, players can significantly brighten their battles in Warframe.

  • Completing the Craft of Wool Thread in RuneScape: Dragonwilds

    Completing the Craft of Wool Thread in RuneScape: Dragonwilds

    In any Early Access survival game, what seems essential today may just be the beginning of a much larger journey in the future. At launch, however, Padded Cloth stands out as one of the main materials you’ll need in Runescape: Dragonwilds, particularly for crafting advanced gear.

    Acquiring Padded Cloth, however, can be quite the challenge. Our guide will outline the necessary steps to create it. The crafting process itself isn’t overly complicated; the real hurdle lies in meeting the demanding prerequisites. Once you have those sorted, you’ll be able to produce it relatively quickly.

    Getting a Loom Harness

    To craft Padded Cloth in Runescape: Dragonwilds, you’ll first need to significantly strengthen your character. Attempting to gather the necessary materials without adequate protection can lead to multiple defeats at the hands of formidable enemies.

    Access to a Loom is crucial, and this Loom must have two slots. By default, Looms only come with one slot, which means you’ll also need a Loom Harness to add that vital second slot.

    The downside? Crafting a Loom Harness requires you to gather Ram Horns, Iron Bars, Ash Planks, Oak Logs, and Wool Thread.

    To get Ram Horns, you’ll need to hunt Rams in the Stormtouched Highlands, a dangerous Level 4 zone located west of the Fractured Plains. This area is also the only place to find Iron deposits, so be prepared for some intense encounters while you gather these materials.

    Ash Planks require a Sawmill for crafting, but luckily, you won’t face tough challenges when looking for them. Oak Logs should be familiar to you by now, and we’ll cover Wool Thread shortly.

    Creating Padded Cloth

    A character stands beside a crafted wooden wall in Runescape Dragonwilds.

    Once you have the Loom Harness, you can utilize the two Loom slots to combine Rough Cloth and Wool Cloth. Let’s break these down.

    Rough Cloth

    1. Gather three Coarse Animal Fur from small woodland animals or collect one Flax from the Bramblemead Valley.
    2. Use your chosen ingredient at a Spinning Wheel to create Coarse Thread.
    3. Then take the Coarse Thread to a Loom to craft your Rough Cloth.

    Wool Cloth

    1. Collect three Soft Animal Fur from wolves or similar creatures, or obtain one Fleece from Rams or Sheep, commonly found across the Fractured Plains.
    2. As with Rough Cloth, use your ingredient at the Spinning Wheel to make Wool Thread. Keep in mind that some Wool Thread is also needed for the Loom Harness!
    3. Finally, use the Wool Thread at the Loom to produce Wool Cloth.

    For both types of cloth, you will only need to use one Loom slot. However, once you have both Rough Cloth and Wool Cloth ready, combine them in the Loom to create Padded Cloth. You’ll need plenty of this material for crafting iron-tier gear, so get comfortable with the spinning and looming processes!

  • Completing Anima-Infused Bark to Solve Wild Anima in RuneScape

    Completing Anima-Infused Bark to Solve Wild Anima in RuneScape

    Runescape: Dragonwilds requires you to gather various materials to enhance your journey. One essential item you need is Wild Anima. To obtain this, you’ll need Anima-Infused Bark and access to a Kiln.

    Without these items, you won’t be able to create Wild Anima. This resource is vital for improving your chances of survival, as it allows you to craft special tools and boosts your chances against formidable foes, including dragons. In this guide, we’ll show you how to acquire Wild Anima.

    The game is currently in Early Access, so this guide’s content may be updated in the future.

    How to Find Anima-Infused Bark

    To start, you need to collect Anima-Infused Bark. Head east of the Fractured Plains, specifically north of the Bloodblight Swamp. Follow the road east until you reach a pond, and just a bit further, you will see some distinct trees.

    These trees will have bluish leaves, and you’ll find plenty of Anima-Infused Bark scattered around them. Gather as much as you can, then return to your base, as it’s time to make Wild Anima.

    How to Make Wild Anima


    Now that you have the necessary ingredients, you’ll also need a kiln. If you haven’t unlocked it yet, gather clay from either the west or east side of Whispering Swamp. To build a kiln, you will require eight Ash Logs, 20 Stone, six Clay, and ten Fire Runes.

    If you lack Fire Runes, you can mine Rune Essence. Keep in mind that you need to be at skill level 13 to craft Fire Runes.

    You can also enhance your skill level by crafting other types of runes.

    Once your kiln is ready, place all the Anima-Infused Bark you collected inside it and wait for it to transform into Wild Anima.

  • Completing the US0830 Dozer Skell in Xenoblade Chronicles X

    Xenoblade Chronicles X: Definitive Edition features a wide variety of Skells for you to control throughout the vast world of Mira, with each model boasting its own strengths. After finishing Chapter 12 of the main storyline, you unlock several exciting new Skell designs to create and experiment with.

    Among these newly accessible Skell models is the US0830 Dozer Skell, which closely resembles and operates like the construction Skells commonly seen in New Los Angeles. This guide will provide you with the details on where to gather the materials needed to craft your own US0830 Dozer Skell.

    Materials Needed for the US0830 Dozer Skell

    Crafting screen for the US0830 Dozer Skell in Xenoblade Chronicles X: Definitive Edition.

    To begin crafting this Skell model, it’s essential to first complete the affinity mission titled Boze’s Ignorance, which is the third and final mission for Boze. Successfully finishing this mission will unlock the file needed to incorporate this Skell into the Skell Frames menu at the Develop New Gear section of the AM Manager console in Armory Alley.

    The US0830 Dozer Skell requires the following materials for crafting:

    Material

    Quantity

    Acquisition Method

    Advanced Thruster

    1

    This material is frequently dropped by Puges in Sylvalum and Cauldros. Note that not all Puges yield this item; primarily, only the dark ones found in these regions do. They can also be purchased at the material market for 15 material tickets each.

    New Cylinder

    1

    These rare materials can be obtained from Pugiliths in Noctilum, Sylvalum, and Cauldros. Not every Pugilith will drop them; look for those with green lights in the mentioned areas. Additionally, they can be bought in the material market for 25 material tickets each.

    Standard Sensor Part

    1

    Commonly dropped by Zig enemies throughout Mira, these parts can be primarily found near Ganglion strongholds in Oblivia, Sylvalum, and Cauldros. They might also be located in parts of Primordia and Noctilum. Alternatively, they can be acquired at the material market for 5 material tickets each.

    Boiled-Egg Ore

    2

    These rare precious materials can be mined using FrontierNav and mining probes. Specifically, you will find Boiled-Egg Ore at FN Site 312, FN Site 318, FN Site 319, FN Site 417, and FN Site 418.

    Miranium

    10,000

    Miranium can be collected by placing mining probes at various locations on FrontierNav. To gather 10,000 Miranium, you will also need several storage probes.

    Once you have gathered all the necessary materials, head over to the AM Manager in Armory Alley. Select the Develop New Gear option followed by Skell Frames, and you will find the US0830 Dozer Skell listed as the fourth-to-last item available for crafting.

  • Completing the Crafting of Smooth Stone in Minecraft

    Completing the Crafting of Smooth Stone in Minecraft

    Minecraft isn’t a game that lays everything out for you. While it offers more guidance now than it used to, there are still many things you have to discover on your own. One of these tasks is crafting smooth stone.

    Smooth stone is one of the most visually appealing blocks in the game. It definitely stands out compared to other stone blocks. If you’re planning to construct homes or other structures out of stone, using smooth stone is a great choice. Additionally, you can create a blast furnace using smooth stone, which makes it useful as well. Of course, it’s only helpful if you know how to make it, and this guide will show you how.

    How to Make Smooth Stone

    First things first, you need to gather regular stone. Regular stone is abundant underground, typically found in caves. However, if you mine it with a regular pickaxe, it will produce cobblestone instead.

    Using a silk touch pickaxe allows you to collect stone directly instead of cobblestone, making this step easier.

    If you don’t have a silk touch pickaxe, you can turn cobblestone into stone by placing it in a furnace along with some coal or another fuel source. This process will smelt the cobblestone into regular stone.

    To craft a furnace, you will need to arrange eight cobblestones (or any other stone-type block) around your crafting grid.

    Next, once you have regular stone, you’re close to making smooth stone. Just place the stone in the furnace along with some fuel, and this will yield smooth stone. This material is not only great for building aesthetically pleasing structures but can also be crafted into smooth stone slabs or even used to create blast furnaces.

    Another benefit of smooth stone is that when you mine it with a pickaxe, you actually get the block back. This means there’s no worry about losing a block if you place it incorrectly while building.

  • Completing the Wind Organ of Wildness in Core Keeper: A Guide

    Completing the Wind Organ of Wildness in Core Keeper: A Guide

    With Azeos, Omoroth, and Ra-Akar defeated in Core Keeper, their powers have transferred to you. Now, it’s time to tackle the next challenges dwelling within The Core. Each of the central biomes is guarded by powerful Titans that represent their respective lands, and defeating them is essential to progress.

    Druidra represents the fierce nature of Azeos’ Wilderness, while Crydra symbolizes the chilling depths of the Sunken Sea. Both of these Titans must be vanquished in order to face the mightiest Elemental Titan, Pyrdra. Be ready, as they will not yield easily.

    Preparing for Druidra and Crydra

    Both Druidra and Crydra boast power on par with that of the Atlantean Worm, but there’s no need for vehicles – these battles are strictly land-based, even Crydra, despite its aquatic nature.

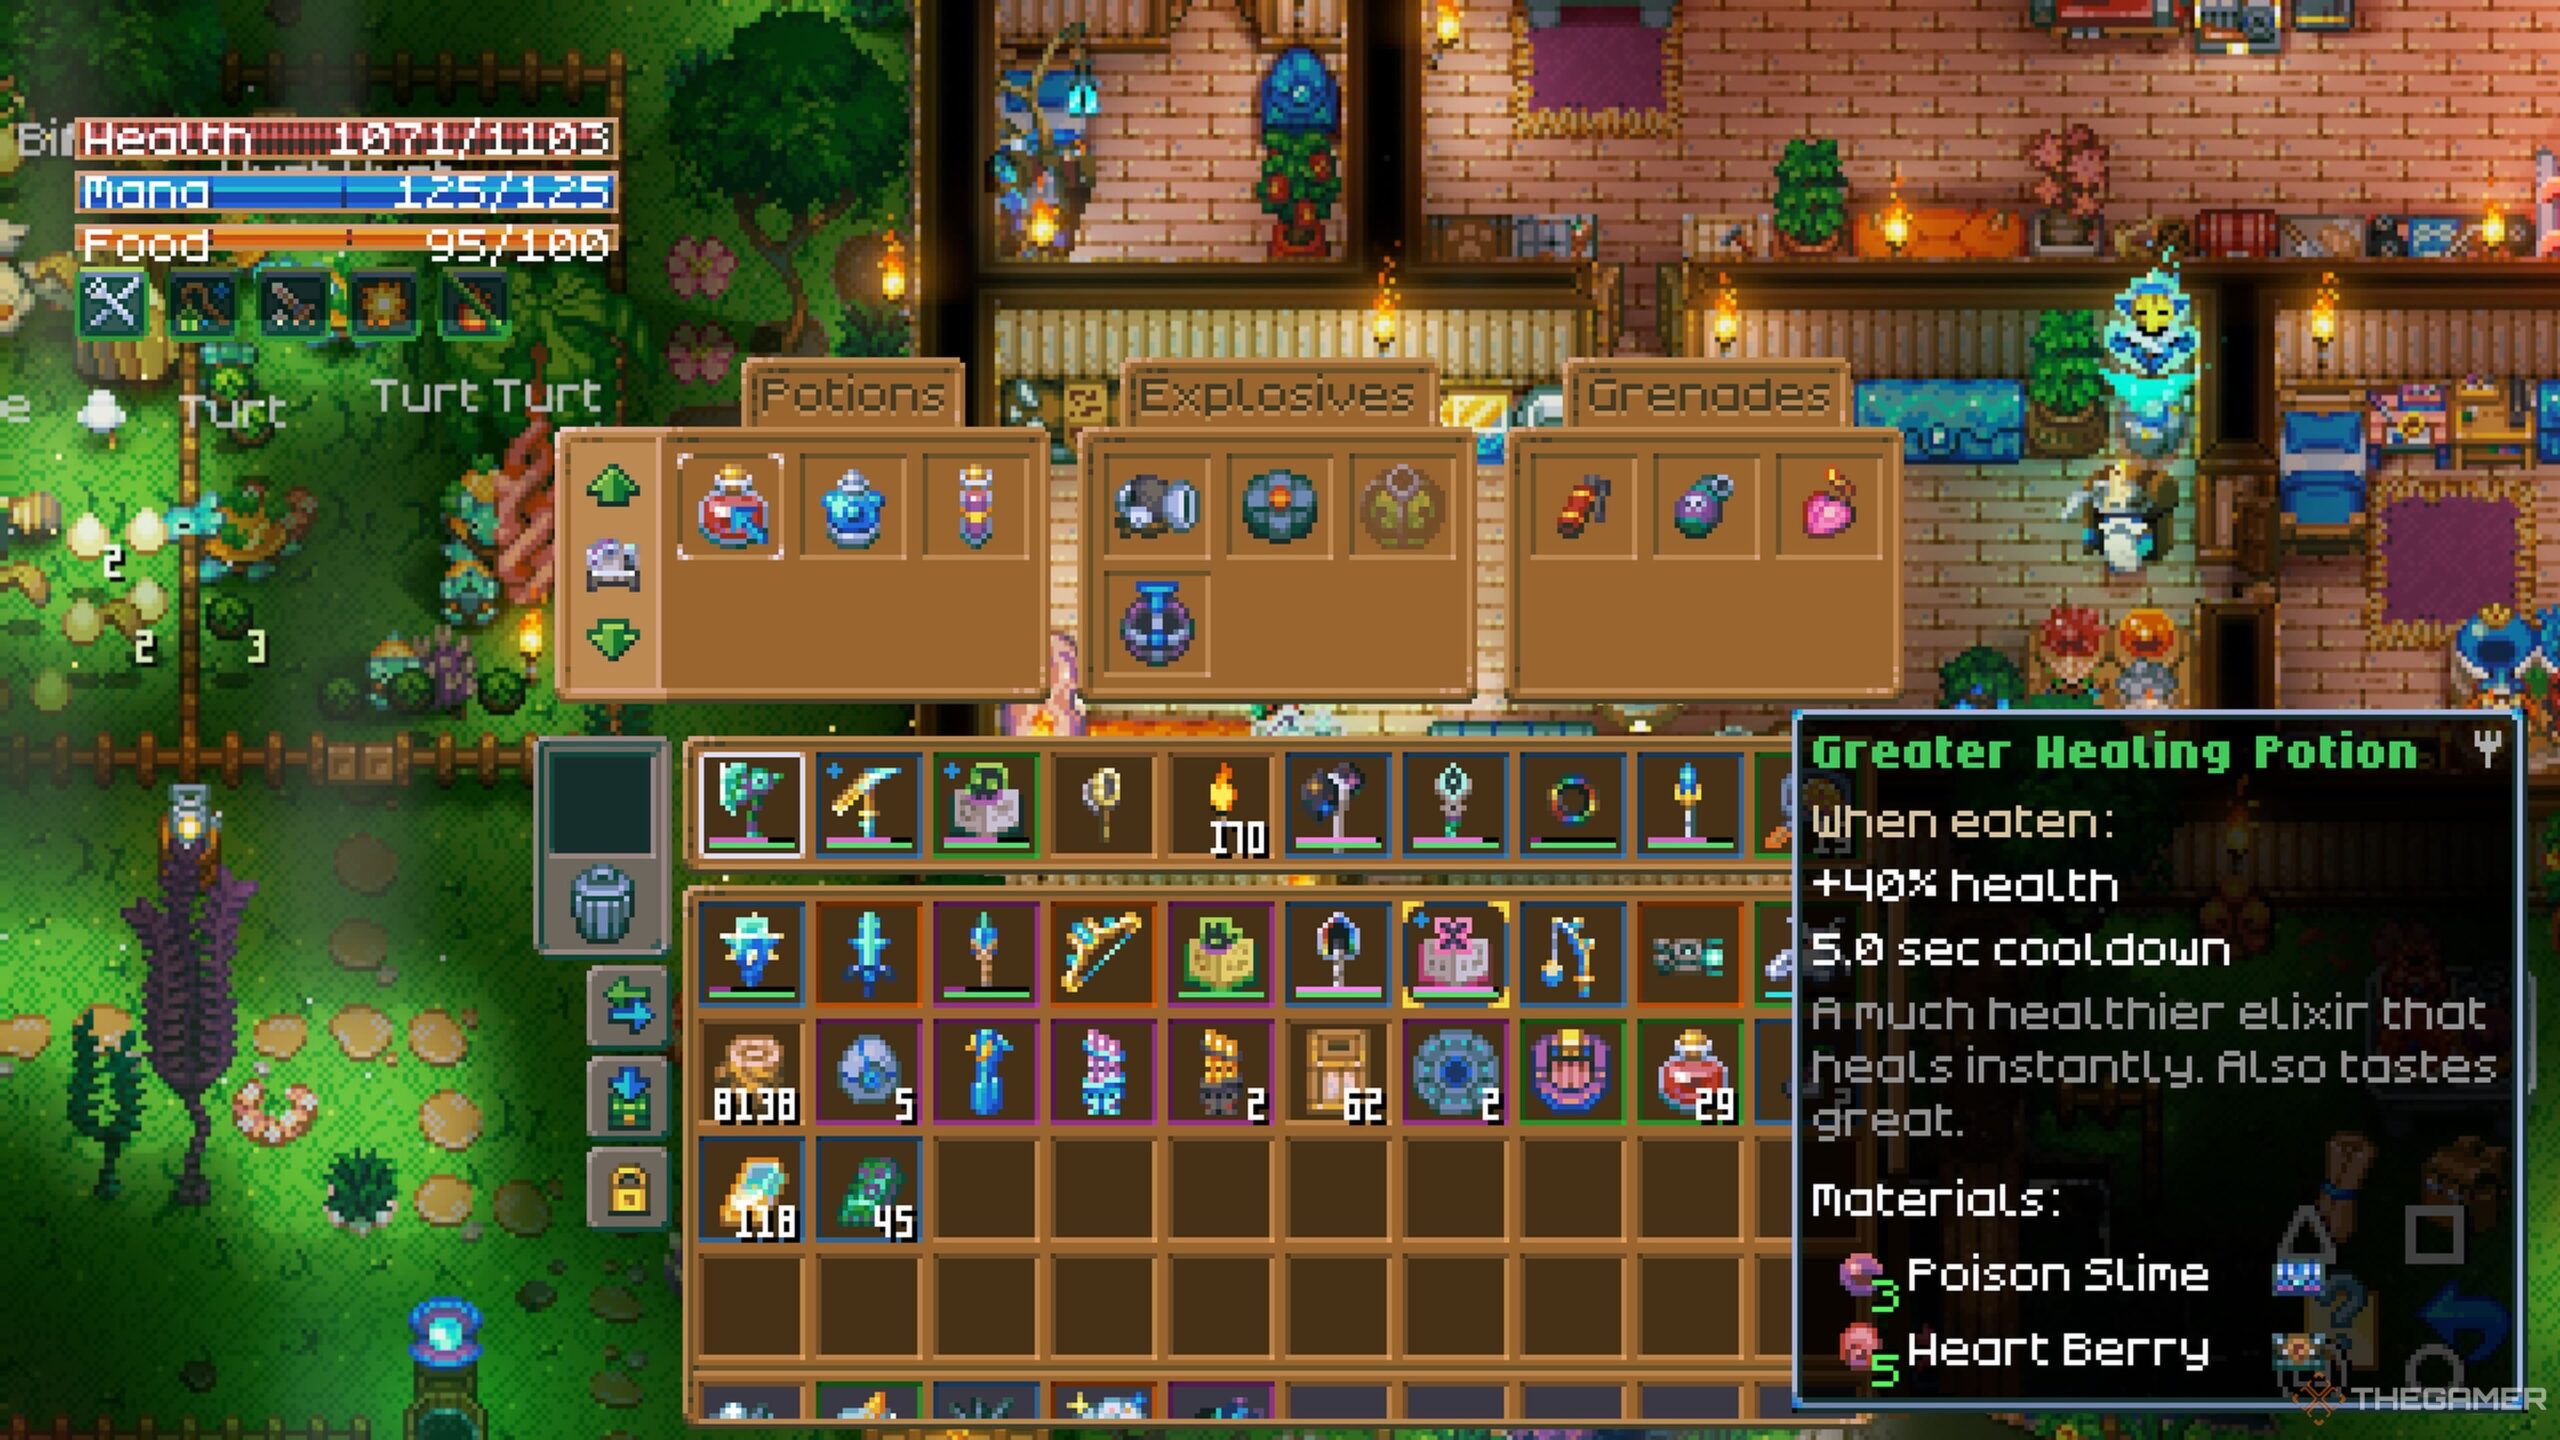
    As with previous bosses, you’ll want to stock up on Healing Potions; aim for around 15 to 20 for both encounters, depending on the difficulty level, since these bosses unleash potent moves that can pin you down. While Regular Healing Potions suffice, Greater Healing Potions—crafted from three Poison Slime and five Heartberries at a Laboratory Table—are your best bet.

    Ensure to reinforce your armor and weapons at the Repair Table for added durability and a slight damage boost.

    You’ll also need a solid amount of food, preferably crafted from mid-to-late-game crops and fish, like Pinegrapples, Bloat Oats, Golden Darts, Dark Lava Eaters, or Sunrice. Looking in the Sunken Sea, Shimmering Frontier, or the Molten Quarry sub-biome can yield the best food for health restoration and gradual healing at this point in the game.

    Tips for Melee Characters

    When gearing up for the fight, prioritize Galaxite and Solarite armor for optimal defense. These sets are not only strong but also relatively easy to acquire. While alternative armor sets like Omoroth’s Armor Set, Godsent King Set, and Magma Set offer better damage bonuses, they require more exploration or boss farming.

    Older armor sets, like the Hivebone Armor, can still work, but you’ll need to upgrade them significantly at an Upgrade Workbench, which is resource-intensive but sometimes worth it.

    For your weapon choice, you will have plenty of options since the terrain won’t pose a challenge. Weapons like the Anchor Axe and Crystal Shard Club stand out for their high damage output, while the Prehistoric Crystal Spear also delivers solid performance if you have it. Crafted weapons such as the Solarite Sword provide good stats and the ability to activate boss soul skills.

    Tips for Ranged Characters

    If you’re focusing on ranged damage, you have various armor options available. The Tassel Set offers significant damage at the expense of armor, while the Godsent King Set and Cosmos Armor provide excellent defense paired with damage boosts. The Omoroth’s Armor Set is another viable choice.

    The Scarab Armor can be paired with Thorns-giving accessories for a nice mix of offense and defense, but ensure that you’re benefitting from the three-piece set bonus to maximize the Thorns Damage applied to your Ranged Damage.

    Due to the wide-open spaces in the battle arenas, weapons that rely on walls for maximum effect, like the Galaxite Chakram, might not be as effective. Instead, focus on using the Solarite Bow, Bubble Gun, or Phantom Spark for better damage output.

    Tips for Magic Characters

    For mages, one of the best armor sets at this stage is the Arcane Monk Set, obtainable from enemies and breakable objects in the Shimmering Frontier. If you still possess older sets like the Scholar Set or Lilypad Set, you can upgrade them as they can rival the late-game sets.

    For weaponry, both the Scholar Staff and Zealot’s Scimitar are excellent choices due to their high damage and ease of access. However, if you’ve progressed to the Passage biome, acquiring Pandorium Ore and using a Rift Statue will allow you to craft the Chaos Staff, which has better damage potential.

    Tips for Summoner Characters

    "Grim Set," which you can find by breaking items, opening Smoldering Chests, or defeating "Igneous the Molten Mass" in the Molten Quarry sub-biome, is currently the top choice for enhancing Minion Damage and Count.

    The Nimruza, Queen of the Burrowed Sands, provides a more advanced minion-related armor set but is intended for late-game players and will require tougher preparations.

    For Summoning characters, you will also have a range of options, as the lack of water means any type will perform well. Notably, the Tome of the Dead and Tome of the Deep are top choices for damage.

    How to Track and Summon Druidra and Crydra

    As roaming bosses, the best strategy to locate Druidra and Crydra is to craft their Scanners at an Ancient Hologram Pod and use them to monitor their movements in their designated biomes. You will need the same materials to create both: Ancient Gemstone, Mechanical Parts, and specific bars depending on the Titan.

    How to Craft the Hydra Altar

    While the Scanners are made at the Ancient Hologram Pod, the summoning items for Druidra and Crydra are crafted using the Hydra Altar. Start by gathering Solarite Ore and Gleam Wood, refining them, and upgrading your Galaxite Workbench into a Solarite one.

    How to Make Druidra Surface

    To prompt Druidra to surface, you must create the Wind Organ of Wilderness at the Hydra Altar.

    How to Make Crydra Surface

    After defeating Druidra, you can summon Crydra by creating the Wind Organ of Ice using the Pink Hydra Eye obtained from Druidra’s reward chest.

    Strategy for Battling Druidra

    Druidra is the least challenging of the Elemental Titans, and you’ll learn the combat mechanics necessary for defeating the rest. Start by reducing its Shield Bar to stun it, allowing you to deal damage to its health.

    Druidra demonstrates several attacks, including beam charges, AOE damage, bites, summoning thorns, and windstorms that create hazardous areas. Managing your distance, utilizing fallen blocks, and strategically dodging are key to minimizing damage.

    Strategy for Battling Crydra

    Similar to Druidra, Crydra requires you to deplete its Shield Bar to stun it. However, Crydra introduces more complexity with the addition of a clone, necessitating close attention to both.

    Be prepared for Crydra’s ice blasts and the dangers that come with them, as they can significantly deplete your health. Clever movement and the usage of shields or teleporting devices are fundamental to staying alive during this fight.

    Once victorious, defeating either Titan will reward you with their respective souls and a variety of other valuable loot, pushing you further along in your adventure through The Core.