الوسم: Commander Deck

  • Completing the Multiverse Reforged Commander Deck: The Ultimate Solving Guide

    Completing the Multiverse Reforged Commander Deck: The Ultimate Solving Guide

    Magic: The Gathering Commander decks have had a fantastic year so far, and Reality Fracture is expected to keep up that momentum with a bold four-color deck that aims to make a big splash at the end of the year from the story’s perspective.

    Since the storyline is heading in a certain direction for this set, it’s no surprise that Jace will be the leader of the upcoming Commander preconstructed deck. We’re especially eager to see how the rest of the deck shapes up, particularly after being teased with 18 new Commander cards that have never been seen before.

    The Multiverse Reforged Commander deck will be released on October 2, 2026. This date aligns with the full launch of the Reality Fracture set. A limited number of products will be available during prerelease a week earlier, but the Commander decks won’t be part of this early release.

    Since this is the only Commander deck from the set (aside from the Foundations Starter Decks), it’s a good idea to pre-order to avoid missing out or facing a rush for stock closer to the release date. Sometimes, if your local game store has early stock and you have a good relationship with them, you might be able to buy the deck before official release, but only if you pre-ordered.

    The deck’s box art suggests that Jace will be the face of the Multiverse Reforged deck, which makes sense since he will be central to the set’s story. No other characters are shown on the box, but a backup Commander will likely be included once the full deck list is revealed.

    While there’s no official info yet on the deck contents, predictions can be made. It’s expected that this deck will feature a strong storyline similar to the one in the Teenage Mutant Ninja Turtles crossover. Because the set will have only one main precon, it’s likely to be a more extensive product. The new booster pack mechanic will probably feature here, with both Multiverse and Echoverse versions of characters—something already hinted at with Chandra so far. It’s reasonable to expect more cards with alternate universe versions, some exclusive to this deck.

    As for reprints, it’s likely that high-value ones will be included. Given the 18 new Commander cards, the rest of the deck might have fewer reprints overall, but some will be especially valuable and highly sought after. This could be both exciting and frustrating, since reprints tend to lower the value of older copies of those cards. For example, in the Secrets of Strixhaven set, cards like Land Tax and Faerie Mastermind dropped in price after reprints, with Legend editions of Land Tax falling below $22, despite a market value over three times that.

    Regarding strategies, based on the box art and hints from the set, this deck will probably focus on token generation. The phrase “warp reality to power up” suggests mechanics around the Warp ability, which allows you to cast a card for less mana, with the card being exiled afterward and only castable again at its full mana cost later. Warp cards usually have abilities that trigger upon playing them—like Quantum Riddler, which draws a card when it enters the battlefield, even if played using Warp. How this mechanic might be used to enhance creatures remains a mystery, and more details are expected to be revealed during upcoming previews.

  • Complete Breakdown of the Doom Prevails Commander Deck in MTG: Solving Strategies

    Complete Breakdown of the Doom Prevails Commander Deck in MTG: Solving Strategies

    A new wave of Magic: The Gathering Commander preconstructed decks is coming soon, and this guide focuses on the Doom Prevails set. We’ll share what is known so far and what hints might help fill in the gaps.

    This Marvel Super Heroes deck features Connive, a mechanic first introduced in Streets of New Capenna. When combined with life drain effects and potential graveyard interactions, this deck could become one of the strongest in the upcoming release.

    We don’t have the full list of cards yet, but thanks to an early leak, we know the main Commander is Doctor Doom, King of Latveria. Expect the entire Marvel Super Heroes lineup to be revealed in early to mid-June, alongside other set previews.

    The deck’s key card, Doctor Doom, leans heavily on the Connive mechanic. Connive allows you to draw a card, discard a card, and then put a +1/+1 counter on the creature that activated the ability if the discarded card is not a land. If you discard land cards, each opponent at the table loses two life as long as Doctor Doom is on the battlefield. This makes discarding land harmful to your opponents and rewards you no matter what kind of card you discard.

    Additionally, at the start of combat, a Villain creature you control gains menace until the end of the turn and connives. An alternative Commander expected in the deck is Loki, God of Lies. His ability lets you control a target creature until the end of the turn, untap it if needed, and grant it haste.

    The release date is set for Friday, June 26, 2026.

    The deck box image shows Doctor Doom’s prominent role. His ability to connive depends on discarding nonland cards, which boosts creatures with the mechanic. When discarding land, he causes opponents to lose life, making each discard impactful. Before combat, Doom grants menace to a Villain creature and causes it to connive, adding strategic options.

    Loki, the alternative Commander, can take control of a creature until the end of the turn, untap it, and give it haste. This offers flexible combat tactics and control.

    Based on the packaging, connive will be a major feature in this deck. Since only about 35 cards had the keyword as of the Secrets of Strixhaven release, it suggests there will be notable reprints or new Marvel-themed connive cards in this set.

    Connive typically involves discarding nonland cards to buff creatures, but the deck is likely to include graveyard interactions to balance this effect. Psychic Pickpocket from Streets of New Capenna serves as an example of a card that connives and can retrieve spells from your graveyard.

    The box also mentions “Drain Life,” a straightforward life-drain mechanic. Interestingly, combining connive with life drain is unusual, as the mechanics are not typically linked, which makes how these elements work together in this precon particularly intriguing.

  • Strixhaven Witherbloom Pestilence: Completing Commander Deck & Upgrades

    Strixhaven Witherbloom Pestilence: Completing Commander Deck & Upgrades

    Witherbloom is one of the most intriguing colleges at Strixhaven because of its conflicting beliefs. These contrasts are clearly shown in the Witherbloom Pestilence Commander pre-con deck. Out of five new Magic: The Gathering pre-constructed decks, this one stands out if you’re interested in balancing life gain with sacrifice mechanics.

    Led by a Dryad Druid named Dina, this green and black Commander deck focuses on strengthening creatures just to sacrifice them for a greater purpose. Here’s what we know so far about the deck and some ideas for improvements.

    Witherbloom Pestilence Deck List

    As with most Secrets of Strixhaven pre-cons, aside from Prismari Artistry which was leaked, detailed information about the Witherbloom Pestilence deck remains limited. We’ll keep you updated once more spoilers are available.

    Sample Cards in the Deck Include:

    • Dina, Essence Brewer — a legendary creature costing 1 black, 1 green, and 1 colorless.
    • Sol Ring — an artifact costing 2 colorless.
    • Arcane Signet — another artifact costing 2 colorless.
    • Talisman of Resilience — an artifact costing 2 colorless.

    Commander Breakdown

    Dina, Essence Brewer, serves as the deck’s Commander. Her main ability allows you to draw a card each time you sacrifice a creature, but only once per turn. This means you can sacrifice creatures on your opponent’s turn to draw cards if you prefer.

    Additionally, for two mana and tapping Dina, you can sacrifice a creature and gain X life while putting X +1/+1 counters on another creature you control. For example, sacrificing a 4/4 creature grants four life and adds four +1/+1 counters to a different creature.

    Deck Themes & Strategy

    The college’s conflicting beliefs stem from Dean Lisette, who promotes nurturing and protecting all life, versus Dean Valentin, who sees death and decay as natural and essential. This duality is reflected in the deck’s mechanics, which pair life gain with sacrifice.

    Expect cards that focus on gaining +1/+1 counters, interacting with the graveyard, and draining opponents’ life totals. The deck is likely built around developing strong creatures to deal big damage, then sacrificing them to maintain high life totals or activate other battlefield effects that harm opponents.

    Upgrades

    While specific cards haven’t been identified for removal, updates will be provided once the full deck list is revealed. Some cards may be reprints included in the deck, which could be swapped out if necessary. Expect the complete deck list to be available in late March or early April.

    Dina, Soul Steeper

    It’s notable that many cards from Strixhaven are useful in this new Commander deck, including Dina, Soul Steeper. This 1/3 legendary creature drains one life from each opponent whenever you gain life. Its ability to sacrifice other creatures and add their power to Dina until the end of turn makes it a valuable component of the deck.

    Infuse With Vitality is a common instant spell that complements the deck’s themes. It grants a creature deathtouch and allows it to return tapped to its owner’s hand when it dies. This lets you sacrifice small creatures in combat, knowing they will return afterward, and also triggers life gain.

    Tend the Pests fits well too; it sacrifices a creature and produces X pest tokens, where X is the sacrificed creature’s power. These tokens are pitiful on their own, but when they die, you gain extra life.

    Diregraf Rebirth is a versatile sorcery costing five mana that gets cheaper as creatures die during the turn. It allows you to return a creature from your graveyard to the battlefield, with a flashback option for seven mana, providing flexibility for resurrection strategies.

  • Strixhaven Prismari Artistry: Completing and Solving MTG Commander Decks

    Strixhaven Prismari Artistry: Completing and Solving MTG Commander Decks

    If you’re part of Prismari, the Strixhaven College, you’ll likely want to check out the Secrets of Strixhaven Commander pre-constructed deck. This deck focuses on red and blue mana, emphasizing spellcasting and generating elemental creatures to attack your opponents.

    This deck appears ideal for aggressive players who want to flood the board with spells and creatures to overwhelm their opponents. If this matches your style, let’s go over its main themes and some ideas for upgrades.

    Prismari Artistry Deck List

    While some cards in this deck have been leaked, and we expect to see more revealed as spoiler season continues, the current list includes several key cards. According to a leak, more cards are confirmed, but additional cards like Prismari Pianist, Gleaming Shallows, Renegade Bull, and a card ending with Flocking are expected but haven’t been fully revealed yet. Until we see these cards, we won’t include them in the official list, especially since names and abilities could change.

    Here’s some of the confirmed cards expected in the deck:

    Card Name Type Cost
    Rootha, Mastering the Moment Legendary Creature 1 Blue, 1 Red + 2 Colorless
    Talisman of Creativity Artifact 2 Colorless
    Sol Ring Artifact 2 Colorless
    Cursed Mirror Artifact 1 Red + 2 Colorless
    Arcane Signet Artifact 2 Colorless
    Archmage Emeritus Creature 2 Blue + 2 Colorless
    Brazen Borrower / Petty Theft Creature / Instant 2 Blue + 1 Colorless / 1 Blue + 1 Colorless
    Brudiclad, Telchor Engineer Legendary Artifact Creature 1 Blue, 1 Red + 4 Colorless
    Curiosity Crafter Creature 1 Blue + 3 Colorless
    Goldspan Dragon Creature 2 Red + 3 Colorless
    Fabled Passage Land N/A
    Frostboil Snarl Land N/A
    Hall of Oracles Land N/A
    Creative Technique Sorcery 1 Red + 4 Colorless
    Dance With Calamity Sorcery 1 Red + 7 Colorless
    Surge to Victory Sorcery 2 Red + 4 Colorless
    Twinflame Sorcery 1 Red + 1 Colorless
    Volcanic Salvo Sorcery 2 Red + 10 Colorless

    Note: These are the reprints suggested by the leak, but the final deck may include additional or different cards, including the aforementioned new ones. The specifics on those new cards are yet to be fully known.


    Commander Breakdown

    The commander for this deck is Rootha, Mastering the Moment. She is an Orc Sorcerer who, at the start of combat, creates a red/blue elemental with flying and haste. Its power and toughness are equal to the highest mana cost of a spell (instant or sorcery) you cast during your first main phase.

    Rootha only displays red and blue mana symbols, so the deck must include only red, blue, or hybrid mana cards. For example, if you cast a 12-mana Volcanic Salvo during your first main phase, Rootha will create a 12/12 elemental token with flying and haste. Opponents will need to be ready for sudden large attacks whenever Rootha is on the battlefield.


    Deck Theme & Strategy

    This deck revolves around casting spells early to trigger Rootha’s ability, then either protecting your tokens or flooding the board with elemental creatures to maximize damage. Cards like Goldspan Dragon help generate treasure tokens, ensuring you have enough mana to cast expensive spells and summon formidable elemental tokens.

    The game plan involves repeatedly casting spells during your first main phase to grow your elemental army quickly while using treasures to manage mana costs, thus maintaining a relentless attack.


    Suggested Upgrades

    Since the full list isn’t finalized, we won’t recommend removing any cards but will suggest some thematically fitting and synergistic additions.

    • Vivi Ornitier: This strong card from the Final Fantasy set fits well with the deck’s spell-casting theme. It adds red and blue mana equal to its power and gains a +1/+1 counter when you cast a noncreature spell, helping it grow while fueling your spells.

    • Twinflame Travelers: An elemental from Lorwyn, this creature triggers the abilities of other elementals an extra time. Pairing it with powerful elemental creatures can double their effectiveness.

    • Galvanic Iteration: A two-mana instant that copies your next spell and allows you to choose new targets. Its flashback ability lets you cast it again from the graveyard for three mana before exiling it.

    • Sorcerer Class: An enchantment that helps with card draw and mana generation. When it levels up, it allows you to tap creatures for red or blue mana or deal damage based on the number of spells cast that turn, increasing your damage output during combat.


    Note: This deck emphasizes casting spells early, activating Rootha, and then maintaining pressure by either protecting elemental tokens or flooding the field with additional creatures. With cards like Goldspan Dragon to generate treasures, you’ll have the resources to keep your spells and constructs flowing, making for a dynamic and high-impact gameplay style.

  • Top MTG TMNT Commander Deck Upgrades for Completing and Solving

    Top MTG TMNT Commander Deck Upgrades for Completing and Solving

    While the pre-constructed Commander decks for Magic: The Gathering are a good starting point, they’re not perfect. There are many ways to improve each deck, no matter your budget.

    The Teenage Mutant Ninja Turtles (TMNT) Commander deck includes six different Commanders, each representing one of the five mana colors. This makes the deck feel somewhat disorganized and unfocused at times. However, you can make adjustments to give it a sharper, more aggressive style.

    The WUBRG Problem

    Since this deck is built around all five mana colors, you must choose a Commander that has all five colors on the card. According to Commander rules, your deck can only include the colors found on your Commander, but that doesn’t mean the casting cost has to match exactly.

    To satisfy the WUBRG requirement, you can pick the “Heroes in a Half Shell” card or choose Leonardo, the Balance, and pair it with another Commander that features the Character Select ability (a variation of partner). Leonardo has all five mana colors listed on his card, making the deck legal with this choice. Using him as your Commander, pairing him with Raphael the Muscle, and focusing on +1/+1 counters will create a powerful strategy. The mana base of this deck is already strong, so no changes are needed there.

    Creature Changes

    Out: Biogenic Ooze
    This costly creature produces two Ooze tokens and adds counters to them each turn. It can also create more tokens using its mana ability, but at five mana to activate, it’s too expensive to be practical. Better options exist for this deck.

    Out: Shredder, Shadow Master
    Although Shredder is a dangerous card, it’s high-cost and likely to be interrupted by opponents. If focusing on counters and brute strength, it’s better to leave this card out.

    Out: Krang, the All-Powerful
    This high-cost creature doesn’t add enough value to justify its price in this particular build. Its +1/+1 counters are self-contained, and compared to other creatures like Leatherhead, Iron Gator, it’s less effective.

    In: Ouroboroid
    This creature ramps up your counters early in combat, adding X +1/+1 counters to all your creatures based on Ouroboroid’s current power. It costs around $42.

    In: Raphael, the Nightwatcher
    This card acts as a stepping stone towards activating Raphael, the Muscle. It’s a cheap, three-mana spell that grants double strike to all attacking creatures. Its impact is immediate and significant.

    In: Evolution Witness
    This creature allows you to bring cards back from your graveyard whenever it gets +1/+1 counters. It can also put counters on itself for just two mana, making it versatile and useful. It can be found for less than 30 cents.

    Spell Changes

    Out: Continue
    While returning creatures from your graveyard is useful, it’s limited to creatures put in the graveyard that same turn. Replacing it with moves like Together Forever, which can bring back creatures more effectively, makes your deck more powerful.

    Out: Vanquish The Horde
    This spell is more defensive and suited to control decks. Since the current focus is on aggression, it’s better replaced with something more fitting.

    In: Teferi’s Protection
    This spell offers a critical shield, protecting your entire board by phasing everything out for a turn. It’s effective for safeguarding your setup if you need to pause or prevent disruption. The cost varies from $40 to $90 depending on the version.

    In: Vampiric Tutor
    A staple in Commander decks, this instant allows you to search your library for a card and put it on top. Playing it before your turn minimizes interference. It costs roughly $50, though some versions can reach nearly $500.

    Enchantment & Artifact Changes

    Out: Mole Module
    Vehicles like Mole Module can generate tokens but don’t align well with an aggressive strategy. Replacing it with an enchantment that boosts your attacking potential is preferred, especially to avoid milling or crewing complications.

    Out: Uncivil Unrest
    This enchantment grants haste or +1/+1 counters to creatures entering play and doubles damage dealt by creatures with counters. It’s costly at five mana but can create a threatening board presence and cause immediate danger for opponents.

    In: Embercleave
    A powerful equipment card, especially with multiple attacking creatures. It grants +1/+1, double strike, and trample. It can be cast at instant speed with flash and is affordable, usually costing less than $20.

    Making these adjustments will help focus the deck on a stronger, more aggressive game plan while maintaining its core theme.

  • How to Build a Spider-Ham Commander Deck in MTG Using Completing and Solving

    How to Build a Spider-Ham Commander Deck in MTG Using Completing and Solving

    A pig dressed in red and blue pajamas might seem like a crazy idea, but it’s just another day in Marvel’s Earth-8311. This setting isn’t far from the world of Magic: The Gathering, where angelic cows and evil rabbits battle with friendly ponies and mysterious monsters.

    Earth-8311 is Marvel’s cartoon parody world, full of animal versions of popular Marvel heroes, from Captain Americat to Goose Rider. Spider-Ham, a friendly neighborhood pig hero, wants to bring his zany animal team to your next Commander game. Grab a pizza slice and get ready to go wild!

    Sample Decklist

    Spider-Ham, Peter Porker, by Jim Cheung & Jay David Ramos

    Commander

    Spider-Ham, Peter Porker

    Creatures (37)

    Ancient Adamantoise

    Arasta of the Endless Web

    Arbor Adherent

    Birds of Paradise

    Bloodroot Apothecary

    Bloodspore Thrinax

    Bramble Familiar // Fetch Quest

    Cemetery Prowler

    Champion of Rhonas

    End-Raze Forerunners

    Froghemoth

    Gilded Goose

    Goreclaw, Terror of Qal Sisma

    Hollowhenge Overlord

    Honored Dreyleader

    Jedit Ojanen of Efrava

    Keeper of Fables

    Owlbear Cub

    Pawpatch Recruit

    Poison Dart Frog

    Prowling Serpopard

    Quina, Qu Gourmet

    Rampaging Yao Guai

    Rampant Frogantula

    Sazh’s Chocobo

    Scrapshooter

    Scurry of Squirrels

    Spider-Man, Miles Morales

    Spinner of Souls

    Spore Frog

    Surrak and Goreclaw

    Thornvault Forager

    Toski, Bearer of Secrets

    Trailtracker Scout

    Twitching Doll

    Valley Mightcaller

    Wilson, Refined Grizzly

    Sorceries (7)

    Cultivate

    Harmonize

    Kodama’s Reach

    Nature’s Lore

    Rampant Growth

    Shamanic Revelation

    Three Visits

    Instants (5)

    Arachnogenesis

    Archdruid’s Charm

    Beast Within

    Heroic Intervention

    Return of the Wildspeaker

    Artifacts (6)

    Arcane Signet

    Chocobo Racetrack

    Emerald Medallion

    Maskwood Nexus

    Sol Ring

    The Great Henge

    Enchantments (8)

    Beastmaster Ascension

    Garruk’s Uprising

    Guardian Project

    Killer Service

    Sylvan Anthem

    Sylvan Library

    Sylvan Scavenging

    Utopian Sprawl

    Lands (36)

    Castle Garenbrig

    Desert of the Indomitable

    Evendo, Waking Haven

    Forest (27)

    Mosswort Bridge

    Myriad Landscape

    Oakhollow Village

    Slippery Karst

    The Shire

    Yavimaya, Cradle of Growth

    This deck is in Core: Bracket 2, but it’s a fun way to play with all creature types.

    The Commander

    Image of Spider-Ham card, from Magic: The Gathering's Spider-Man set.

    Just like Spider-Man was an ordinary guy bitten by a radioactive spider, Spider-Ham is a regular spider bitten by a nerdy radioactive pig. This odd accident gave him pig-like qualities and a smart brain. His backstory involves Aunt May Porker trying to make a nuclear-powered hair dryer. His origin is pure fun.

    Spider-Ham came into the main spotlight during the 2018 movie Spider-Man: Into the Spider-Verse, and that’s the version you see in Magic. He’s a 2/2 Spider Boar Hero that costs one green and one generic mana to summon, and he enters with a Food token.

    A Food token from Magic: The Gathering's Unfinity set.

    Although Spider-Ham is a team player, his universe features Captain America as a house cat, Thor as a dog, and Ant-Man just as an ant. He provides a +1/+1 boost to 18 different creature types you’d expect in a forest, such as Spiders, Boars, Wolves, Rabbits, and Lizards.

    Some creature types supported by Spider-Ham, like Bats and Rats, aren’t typically shown with a single-green buff.

    He doesn’t buff himself and can’t imitate web-slinging to avoid blockers. This means he might not win many battles directly, but his boosts make all your other creatures stronger, threatening your opponents’ boards.

    How to Build Spider-Ham’s Commander Deck

    Spider-Ham, Peter Porker is pretty straightforward yet versatile enough to build a fun deck around. He works well in a Food-themed deck, but he also provides a broad boost to 18 creature types and encourages creative deck building. You can focus on specific creature types if you want, but the deck is more about using the types as a pool of options to create a powerful, coordinated army.

    The deck mostly features mana-generating creatures and small lords that buff themselves and others, creating a snowball effect. It’s like playing Slivers, but with a pig and farmyard friends.

    MTG Maskwood Nexus card with the background art.

    One card that may seem unnecessary at first is Maskwood Nexus because your entire deck shares creature types supported by Spider-Ham. But it’s useful because it allows you to treat all your creatures as all creature types, making abilities like Thornvault Forager’s more flexible—especially for searching your library for specific types.

    With Maskwood Nexus, you can also generate tokens that match Spider-Ham’s supported types. Several cards in the deck create creature tokens, helping you build a strong board without relying solely on your hand.

    Ramp

    Since this deck is mono-green, you can rely on classic land tutors to quickly increase your mana instead of mana rocks. You also have mana dorks that fit the theme and boost your mana production, especially if you plan to maximize Spider-Ham’s abilities.

    The top choice is Birds of Paradise, which costs one green mana and can tap for mana of any color. Llanowar Elves might be slightly cheaper, but only tap for green, while Ttrailtracker Scout taps for one mana and gets the buff from Spider-Ham.

    Another useful creature is Twitching Doll. When you tap it for mana, it gets nest counters. Later, you can sacrifice it to summon a 2/2 Spider with reach for each counter, turning an early mana source into a swarm of spiders late in the game.

    Twitching Doll’s second ability counts any type of counter, making it a good target for +1/+1 counters.

    The Gilded Goose card from Magic: The Gathering's Throne of Eldraine.

    This deck doesn’t focus heavily on Food cards, but it includes some that let you generate Food tokens. The Gilded Goose can turn Food into mana, and can store mana by creating Food tokens to use later for mana, health, or to create Rhino Warrior tokens via Killer Service.

    The Cemetery Prowler card from Magic: The Gathering's Crimson Vow.

    Cemetery Prowler doesn’t produce mana, but it helps lower the costs of other spells by exiling cards from graveyards. Each exiled card of a certain type (creature or enchantment) makes spells of the same type cheaper, which is handy for graveyard strategies. For example, exiling a creature reduces the cost of all your creatures, and exiling an enchantment reduces the cost of your enchantments.

    Note that only cards with a single type are fully affected. For example, only Arasta of the Endless Web, which is an enchantment creature, gets its cost reduced twice because Cemetery Prowler’s effect only applies to colorless mana, not colored mana in multi-type creatures.

    Image of Evendo, Waking Haven card from Magic: The Gathering.

    Instead of Gaea’s Cradle, which would be perfect but is very expensive and on the Reserved List, the deck uses Evendo, Waking Haven. It enters tapped and taps for one green mana. Once your creatures reach a total power of 12 or more, you can pay one green and tap Evendo to generate one mana for each creature you control.

    Drawing Cards

    Green isn’t known for strong card draw, but there are ways to turn your creatures into a reliable draw engine. Toski, Bearer of Secrets, is a small squirrel that’s indestructible, and whenever a creature deals combat damage to a player, you draw a card. Swing wide or trample over defenses to get more cards.

    Guardian Project makes you draw a card whenever a non-token creature enters the battlefield, with the only limit being that the creature must have a unique name. Since more than a third of your deck is creatures, it will keep your hand full.

    Garruk’s Uprising lets you draw a card whenever a creature with power four or more enters. Many of your creatures, especially with Spider-Ham in play, meet this threshold. It also grants trample to your creatures, making it a good combo with Toski.

  • How to Play Inspirit Flagship Vessel Commander Deck in Magic: The Gathering

    How to Play Inspirit Flagship Vessel Commander Deck in Magic: The Gathering

    Inspirit, Flagship Vessel is the main figurehead of the Magic: The Gathering’s Counter Intelligence preconstructed Commander deck. Like many recent pre-made decks, Counter Intelligence works well straight out of the box, and Inspirit is a solid commander choice. However, Inspirit shines brightest when used to lead a unique Commander deck rather than just in the Counter Intelligence setup.

    An Inspirit, Flagship Vessel commander deck primarily focuses on artifacts, especially supporting those that benefit from charge counters. The best color combination for this theme is Jeskai—blue, red, and white—because it allows you to include all the top support cards needed to build a powerful and competitive Commander deck.

    —

    ### Decklist
    The deck includes 30 creatures, five sorceries, eight instants, 19 artifacts, three enchantments, and 34 lands. Most creatures are artifact creatures, and the non-creature spells mainly support proliferating counters or interacting with opponents.

    —

    ### Key Cards

    #### Inspirit, Flagship Vessel
    Inspirit is a spacecraft that you want to quickly fill with eight charge counters. Once it reaches this maximum, it protects all your other artifacts, forcing opponents to deal with Inspirit before attacking your other permanents. It’s important to note that Inspirit grants hexproof and indestructible only to other artifacts—not to itself, meaning it can still be targeted and destroyed. If Inspirit is removed, it’s fairly easy to reassemble with additional charge counters. Because you can only tap one creature at a time to place charge counters, having a creature with high power, like an 8/8, allows you to instantly activate Inspirit’s full potential.

    #### Lux Artillery
    While Lux Artillery can give your artifact creatures sunburst—adding counters when they enter the battlefield—its real strength lies in its ability to deal 10 damage to all opponents at the end of each turn. To activate this effect, you need to spread 30 counters among your permanents, which the deck facilitates with cards that allow you to put counters on multiple permanents easily. As a result, without opponents removing it or gaining life, you can use Lux Artillery to gradually burn all opponents out over a few turns.

    #### Alibou, Ancient Witness
    Alibou supports artifact strategies by giving your artifact creatures haste and dealing additional burn damage. Since you will be attacking with many artifact creatures, Alibou’s ability allows you to match a high X-value for dealing massive damage and helps you scry cards from the top of your library. A key tip is to tap artifact lands before regular lands if Alibou is on the battlefield, because they count toward its effect. It’s important to note that Alibou’s effect triggers even if it doesn’t attack itself—attacking with at least one artifact creature is enough. It also affects all tapped artifacts you control, including artifact lands and mana rocks, adding to its power.

    #### Simulacrum Synthesizer
    This card is a research staple in artifact decks, including Inspirit-based ones. It helps flood the battlefield with large artifact creatures by letting you put artifacts—costing three or more mana—directly onto the battlefield. The effect is triggered just by entering the battlefield, not necessarily being cast, which means you can play artifacts directly from your hand or other ways, and gain a creature token as a bonus. This helps ramp up your board presence significantly.

    —

    ### How To Play The Deck

    #### General Game Plan
    The main goal is to get as many artifacts onto the battlefield as possible, while quickly filling Inspirit with charge counters to activate its protective abilities. Once your artifacts are in play, you can boost them with various counters using permanents like Tezzeret’s Gambit, Inexorable Tide, or Kilo, Apogee Mind—spreading counters easily through your deck. It’s best to build up multiple counters before proliferating.

    Since Jeskai isn’t naturally fast for ramp, most of the deck relies on artifacts to reduce mana costs and get ahead. Cards like Enthusiast Mechanist, Etherium Sculptor, and Foundry Inspector help discount the cost of your artifacts, letting you cast them more quickly and get your board developed.

    Initially, the deck develops slowly—focusing on setting up your battlefield rather than rushing to play big creatures. Once established, it can snowball and secure victory through overwhelming combat, burn damage, or alternative win conditions.

    #### Win Conditions And Flaws
    Winning largely comes through combat by making your artifact creatures powerful enough to attack directly to drain your opponents’ life totals. Alternatively, you can win with the Darksteel Reactor, which needs 20 or more charge counters during your upkeep. You can also secure victory through burn damage with Alibou, Ancient Witness, or Lux Artillery, which complements your combat strategy.

    A major drawback is the deck’s speed; Jeskai is a slow color combination and might leave you vulnerable early on. You’ll typically have a weaker defense in the opening turns, making it hard to block against aggressive decks. However, the deck’s late-game can be very explosive, allowing you to stabilize quickly and come out on top—especially against slower opponents. Surviving the early game is crucial for your combination of setup and powerful finish.

  • Building a Zack Fair Commander Deck in MTG: Completing the Challenge

    Building a Zack Fair Commander Deck in MTG: Completing the Challenge

    Zack Fair, one of the enigmatic figures in *Final Fantasy 7*, accomplished everything Cloud Strife aspired to before bequeathing the renowned Buster Sword. In his debut within *Magic: The Gathering*, his goal remains unchanged: he is destined to perish, enabling someone else to take the lead.

    Zack Fair’s knack for easily passing on counters and Equipment keeps opponents on their toes, often forcing them to devise strategies to counter your moves rather than advancing their own game plans. Just because he has a noble name doesn’t mean you have to play by the rules.

    Sample Decklist

    Commander

    Zack Fair

    Creatures (24)

    Aerith Gainsborough

    Auron, Venerated Guardian

    Bastion Protector

    Beatrix, Loyal General

    Cid, Freeflier Pilot

    Cloud, Midgar Mercenary

    Codsworth, Handy Helper

    Dusk Legion Duelist

    Elena, Turk Recruit

    Esper Sentinel

    Grateful Apparition

    Lae’zel, Vlaakith’s Champion

    Lion Sash

    Luminarch Aspirant

    Luminous Broodmoth

    Metastatic Evangel

    Puresteel Paladin

    Reluctant Role Model

    Rosa, Resolute White Mage

    Squall Leonhart

    Stoneforge Mystic

    Sun Titan

    Urdnan, Dromka Warrior

    Venat, Heart of Hydaelyn // Hydaelyn, the Mothercrystal

    Sorceries (5)

    Austere Command

    Damning Verdict

    Open the Armory

    Sevinne’s Reclamation

    Unfinished Business

    Instants (8)

    Dispatch

    Generous Gift

    Path to Exile

    Reprieve

    Restoration Magic

    Stroke of Midnight

    Swords to Plowshares

    Ultimate Magic: Holy

    Artifacts (18)

    Andúril, Narsil Reforged

    Arcane Signet

    Buster Sword

    Caduceus, Staff of Hermes

    Colossus Hammer

    Conformer Shuriken

    Extraplanar Lens

    Hammer of Nazahn

    Lightning Greaves

    Pearl Medallion

    Pip-Boy 3000

    Ring of Thune

    Skullclamp

    Sol Ring

    Swiftfoot Boots

    Sword of the Animist

    Sword of Truth and Justice

    The Ozolith

    Enchantments (8)

    Abiding Grace

    Forge Anew

    Land Tax

    Resourceful Defense

    Sigarda’s Aid

    Smile at Death

    SOLDIER Military Program

    Together Forever

    Planeswalkers (2)

    Elspeth Resplendent

    The Aetherspark

    Lands (34)

    Eiganjo, Seat of the Empire

    Emeria, the Sky Ruin

    Idyllic Grange

    Karn’s Bastion

    Minas Tirith

    Monumental Henge

    Nesting Grounds

    Rogue’s Passage

    Snow-Covered Plains (25)

    War Room

    The Commander

    At first glance, Zack Fair seems like more of a solid support card than a leading commander. He’s a 0/1 Human Soldier costing one white mana and enters with a +1/+1 counter. You can then sacrifice him to transfer his +1/+1 counter and one Equipment to another creature.

    That’s pretty much his role: Zack has no built-in way to gain more counters, establish Equipment synergy, or evade attacks. Like in *Final Fantasy VII*, his primary purpose is to die and pass on his legacy to another character.

    What elevates Zack Fair as a valuable commander is his identity within white mana. Although white might not excel at accruing counters (that’s generally the realm of green), reanimation (typically black), or equipment strategies without red, it does a commendable job at all three, allowing you to construct a powerful deck around Zack.

    An essential aspect of Zack’s second ability is that it doesn’t require tapping. This allows him to attack or block and still pass on his counters and Equipment when an opponent tries to destroy or block him. If you team him up with an Equipment that accumulates counters over time, you can create a winning strategy.

    Moreover, Zack’s ability is not restricted to the +1/+1 counter he initially receives. If you provide Zack with flying counters, trample counters, or other keyword counters, he can transfer those to another creature as well.

    Building The Deck

    While Zack Fair is designed to sacrifice himself to pass on counters, a single +1/+1 counter may not suffice to deal with the escalating commander tax in repeated cycles of casting and sacrificing him. However, you can amplify the benefits by accumulating additional counters and mitigate costs by sending him to the graveyard for reanimation.

    Though he’s not positioned for a Voltron strategy due to a lack of evasion and supportive capabilities, you can still build up counters on Zack and then swing wide, sacrificing him to shift all his counters and crucial equipment to a selected creature that goes unblocked.

    Once you send Zack to the graveyard instead of the command zone, reanimation effects like that of Sun Titan can bring him back onto the field or into your hand, allowing you to reinitiate the gameplay loop and continuously stack counters on your creatures.

    It’s important to note that the game does not track individual counters, meaning that abilities like Zack Fair’s create new counters on the target instead of moving existing ones. If you have effects that retain counters even after a creature’s demise, this can lead to an increase in total counters upon Zack’s death, making his endgame both entertaining and advantageous.

    Finally, be sure to include a mix of Equipment and ways to tutor or deploy them. Cloud, Midgar Mercenary, is a prime addition to this deck since he not only helps find Equipment but also serves as a host for Zack’s counters and Equipment.

    Ramp

    This deck features a low mana curve, with 55 out of the 66 cards at three mana or less. This largely alleviates the need for mana acceleration, yet having extra mana opens up more chances to attach Equipment and activate abilities.

    Sword of the Animist and Land Tax are instrumental in getting additional lands onto the battlefield while also helping to thin your deck to expose more key cards for your strategy.

    You can utilize Land Tax to search for lands and then opt not to play them, allowing you to retrieve three more next turn. This tactic can significantly enhance the chances of drawing vital cards!

    The Aetherspark is a fantastic Equipment for Zack, granting him +1/+1 counters each turn. If you successfully accumulate ten loyalty counters, you can remove them for a ten-mana gain. Typically, this isn’t necessary, but it can also provide card draws if you have a surplus of mana.

    Draw

    A low mana curve means you could easily deplete your hand unless you have several draw options.

    Buster Sword is an extremely thematic draw option. When any creature equipped with it deals combat damage to a player, you get to draw a card. Additionally, you can cast a card from your hand for free, provided its mana value matches or is lower than the damage dealt. Given this deck’s mana curve, that will often encompass almost any spell!

    Esper Sentinel serves as white’s counterpart to Rhystic Study. As your opponents cast spells, they trigger Esper Sentinel’s ability, granting you card draw unless they pay mana equal to her power. If she receives an Equipment or a few +1/+1 counters, your card draw increases, but it could also make her a target.

    In a build that spreads +1/+1 counters, Dusk Legion Duelist becomes a solid draw engine. Every time you place a +1/+1 counter on it during a turn, you can draw a card, allowing it to grow while you fill your hand simultaneously.

    Venat, Heart of Hydaelyn is a stellar choice as she provides early draw opportunities and later transitions into card draw, removal, and +1/+1 counters, synergizing excellently with your strategy.

    Keeping Counters

    It can be frustrating to consolidate all your counters on a single creature only to have it destroyed. Fortunately, several cards can help retain those counters, even post mortem.

    The Ozolith is a key player in this capacity, as it stores counters from any creature that leaves the battlefield. At the beginning of your combat, you can shift those counters onto another creature of choice.

    A similar effect is found with Reluctant Role Model, which directly moves counters onto another creature when one dies, generating +1/+1, lifelink, and flying counters. It also works in tandem with The Ozolith: if you sacrifice Zack with one +1/+1 counter, his effect sends one counter to Reluctant Role Model, The Ozolith retains the counter, and the latter’s effect also bestows an additional counter to itself.

    Whereas Reluctant Role Model limits movement to between creatures, Resourceful Defense lets you transfer counters to any permanent. While this means you can store +1/+1 counters on a land after a board wipe, it also allows mobility of loyalty counters between planeswalkers!

    Although this deck lacks many lifegain options, Aerith Gainsborough could excel by receiving counters before her demise. Upon her passing, she shares all her +1/+1 counters among your legendary creatures, which could afford you numerous +1/+1 counters for minimal investment.

  • Complete Your Strategy with This Titanic Commander Deck in MTG!

    Complete Your Strategy with This Titanic Commander Deck in MTG!

    The sinking of the RMS Titanic stands as one of history’s worst maritime disasters. Interestingly, there was a close call with a spaceship sharing its name, which almost crashed to commit insurance fraud. In the world of Magic: The Gathering, you can use the fictional RMS Titanic to cause chaos and reap rewards, much like what Max Capricorn attempted.

    With Vehicles now eligible to be commanders, it’s the perfect time to make the legendary cruise ship the centerpiece of your next deck. We’ll guide you through creating a winning strategy with the RMS Titanic!

    Sample Decklist

    Commander

    • RMS Titanic

    Creatures (23)

    • Academy Manufactor
    • Anger
    • Bloodshot Cyclops
    • Crime Novelist
    • Daretti, Rocketeer Engineer
    • Dynamite Diver
    • Foundry Inspector
    • Glóin, Dwarf Emissary
    • Goblin Welder
    • Goldspan Dragon
    • Hedron Detonator
    • Hellkite Tyrant
    • Ingenious Artillerist
    • Iron Myr
    • Kediss, Emberclaw Familiar
    • Professional Face-Breaker
    • Quicksmith Genius
    • Reckless Fireweaver
    • Speedway Fanatic
    • Sunset Strikemaster
    • Syr Ginger, the Meal Ender
    • Twinflame Tyrant
    • Xorn

    Sorceries (7)

    • Blasphemous Act
    • Faithless Looting
    • Insult // Injury
    • Isengard Unleashed
    • Seize the Spoils
    • Trash for Treasure
    • Vandalblast

    Instants (12)

    • Abrade
    • Big Score
    • Bolt Bend
    • Bulk Up
    • Chaos Warp
    • Demand Answers
    • Fatal Frenzy
    • Fling
    • Kazuul’s Fury // Kazuul’s Cliffs
    • Unexpected Windfall
    • Unleash Fury
    • Untimely Malfunction

    Artifacts (14)

    • Arcane Signet
    • Assault Suit
    • Cursed Mirror
    • Dowsing Device // Geode Grotto
    • Fire Diamond
    • Idol of Oblivion
    • Lightning Greaves
    • Mind Stone
    • Ruby Medallion
    • Sol Ring
    • Swiftfoot Boots
    • The Fire Crystal
    • The Reaver Cleaver
    • Two-Handed Axe // Sweeping Cleave

    Enchantments (6)

    • Alchemist’s Talent
    • City on Fire
    • Fiery Emancipation
    • Gratuitous Violence
    • Rain of Riches
    • Rising of the Day

    Planeswalkers (2)

    • Chandra, Spark Hunter
    • Daretti, Scrap Savant

    Lands (35)

    • Buried Ruin
    • Command Beacon
    • Mech Hangar
    • Mountain x28
    • Rocky Roads
    • Rogue’s Passage
    • Spinerock Knoll
    • War Room

    This deck operates comfortably within a Core deck framework. Although the commander sacrifices itself when it deals damage, this deck cleverly provides several avenues to circumvent the challenges posed by RMS Titanic’s limitations.

    The Commander

    The RMS Titanic, inspired by the beloved Doctor Who series, is a space-faring version of the iconic cruise ship. It boasts 7/1 stats, flying, trample, and a crew cost of 3, requiring three generic and one red mana to cast.

    Notably, upon dealing combat damage to a player, you must sacrifice the Titanic, but you gain a number of Treasure tokens equal to the damage dealt. With its impressive power, you can generate enough Treasures to recast it during your second main phase and still have some left over for future plays.

    Deck Building Strategy

    Having seven base power means RMS Titanic can potentially eliminate a player with commander damage swiftly, provided it survives combat. The aim is to bring your commander back into play without incurring extra costs while boosting its damage and earning rewards for creating Treasures.

    Red’s artifact recursion is a significant component of this deck. You’ll want to keep RMS Titanic in your graveyard instead of the command zone whenever possible. This helps you leverage spells like Trash for Treasure to bring it back for less.

    Increasing the damage output of RMS Titanic is also vital, as it aids in finishing off opponents while generating extra Treasures. While equipment isn’t the best fit, numerous spell effects can amplify damage, making Titanic hit like a powerhouse.

    Creating an effective strategy is essential; while attacking with your commander can work, a backup plan is wise. Red token decks often lean towards creature-based strategies, but don’t overlook creatures like Reckless Fireweaver that can offer benefits tied to artifacts.

    Ramp and Card Draw

    The deck doesn’t require much ramp beyond the typical mana rocks, as the commander costs just four mana and generates lots of Treasures. However, certain mana rocks like Cursed Mirror serve multiple purposes, allowing you to copy creatures for added utility.

    In terms of card draw, while red isn’t renowned for it, key pieces like Idol of Oblivion and War Room enhance your options. Additionally, one-time spells like Big Score and Unexpected Windfall help you dig deeper into your deck for critical cards.

    A special mention goes to Academy Manufactor, which maximizes your Treasure tokens, generating additional Clue tokens for card draws whenever you create them.

    Ping & Fling Strategies

    As you churn out Treasures and repeatedly resurrect RMS Titanic, consider adding cards that can deal damage whenever you create artifacts. Ingenious Artillerist and Reckless Fireweaver are solid choices, dealing damage on entry and fast-tracking your Treasure generation.

    More interestingly, the Treasures created by RMS Titanic aren’t reliant on it being sacrificed—meaning you can use abilities to sacrifice it for additional effects. Cards like Fling allow you to deal damage equal to Titanic’s power while also triggering its Treasure generation ability.

    Final Note

    Your strategy should include methods to protect and effectively crew your commander while maximizing the potential of Treasure tokens. This deck offers exciting possibilities for players eager to use the RMS Titanic in their games. Happy crafting!

  • Completing a Kefka, Court Mage Commander Deck in MTG

    Completing a Kefka, Court Mage Commander Deck in MTG

    The Magic: The Gathering crossover with Final Fantasy introduced a variety of characters, including the infamous Kefka, the main villain of Final Fantasy 6. Kefka is renowned as one of the most iconic antagonists in the franchise. Like many beloved characters, he boasts numerous cards and unique artworks.

    One of the main Kefka cards available is Kefka, Court Mage. As a Grixis (blue/black/red) character, Kefka specializes in forcing opponents to discard cards while enabling you to draw multiple cards, keeping your hand stocked while depleting your foes’. His gameplay is highly controlling, preventing opponents from executing their strategies.

    Decklist

    Commander: Kefka, Court Mage // Kefka, Ruler of Ruin

    Liliana of the Veil

    Archfiend of Ifnir

    Archon of Cruelty

    Baleful Strix

    Sheoldred, Whispering One

    Bone Miser

    Dauthi Voidwalker

    Displacer Kitten

    Fate Unraveler

    Fell Specter

    Harmonic Prodigy

    Kefka, Dancing Mad

    Kroxa, Titan of Death’s Hunger

    Kuja, Genome Sorcerer // Trance Kuja, Fate Defied

    Magus of the Wheel

    Nicol Bolas, the Ravager // Nicol Bolas, the Arisen

    Phyrexian Metamorph

    Psychosis Crawler

    Rankle, Master of Pranks

    Sangromancer

    Scrawling Crawler

    Spark Double

    Tinybones, Bauble Burglar

    Tinybones, Trinket Thief

    Y’shtola Rhul

    Afterlife from the Loam

    Blasphemous Act

    Dark Deal

    Irenicus’s Vile Duplication

    Molten Psyche

    Poison the Waters

    Reanimate

    Rise of the Dark Realms

    Syphon Mind

    Toxic Deluge

    Whispering Madness

    Windfall

    An Offer You Can’t Refuse

    Arcane Denial

    Chaos Warp

    Espers to Magicite

    Essence Flux

    Laughing Mad

    Saw in Half

    Terminate

    Arcane Signet

    Commander’s Sphere

    Conjurer’s Closet

    Fellwar Stone

    Geth’s Grimoire

    Panharmonicon

    Sol Ring

    Talisman of Dominance

    Talisman of Indulgence

    Thought Vessel

    Animate Dead

    Bandit’s Talent

    Court of Ambition

    Liliana’s Caress

    Megrim

    Oppression

    Painful Quandary

    Raiders’ Wake

    Waste Not

    Command Tower

    Crumbling Necropolis

    Dragonskull Summit

    Drowned Catacomb

    Exotic Orchard

    Geier Reach Sanitarium

    Haunted Ridge

    x5 Island

    x4 Mountain

    Reliquary Tower

    Riptide Laboratory

    Rogue’s Passage

    Shipwreck Marsh

    Shivan Reef

    Smoldering Marsh

    Stormcarved Coast

    Sulfur Falls

    Sulfurous Springs

    Sunken Hollow

    x7 Swamp

    Underground River

    This deck list features one planeswalker, 24 creatures, 12 sorceries, 9 instants, 10 artifacts, 9 enchantments, and 34 lands. Many cards here force your opponents to discard, while also supporting reanimation tactics.

    Key Cards

    Kefka, Court Mage // Kefka, Ruler of Ruin

    Kefka, Court Mage is a prime method for forcing your opponents to discard cards. When they discard, you can draw even more cards than they lost, depending on the types of cards they send to the graveyard. While you also discard, you will always draw at least one card.

    For commander damage calculations, it tracks the card itself rather than just the name. Attacks with either side of Kefka count towards the 21 damage needed to eliminate an opponent with commander damage.

    By paying eight mana, you can transform Kefka into his other form, Kefka, Ruler of Ruin. This version allows you to continuously refill your hand every time an opponent loses life. Given the frequent forced discards, the ability to draw cards with Ruler of Ruin is invaluable, ensuring you never run out of your best cards.

    Y’shtola Rhul

    MTG Y'shtola Rhl card with the art in the background.

    Y’shtola Rhul is a special creature that can blink any creature you control at the beginning of your end step. This ability lets you repeatedly blink Kefka, enabling you to leverage his enter-the-battlefield effect time and again.

    Keep in mind that if you blink a transformed card, it will revert to its original form when it returns to the battlefield.

    Y’shtola can blink a creature twice, providing an extra end step for additional blinks. However, this benefit only applies to the first end step, preventing you from stacking Triggers.

    Oppression

    MTG Oppression card with the art in the background.

    Oppression turns any spell cast into a discard effect. It functions as a pseudo-stax piece, potentially locking opponents out from casting spells if they lack cards in hand. However, it affects all players, so expect to discard as well to play spells. Fortunately, Kefka can help maintain your card advantage.

    If a player tries to cast a spell without any cards in hand, they can still do so; Oppression does not counter spells but adds a tax to their casting cost. If a player can’t meet the cost, the spell still resolves. The real power of Oppression lies in its ability to drain hands while your numerous draw effects keep you safe.

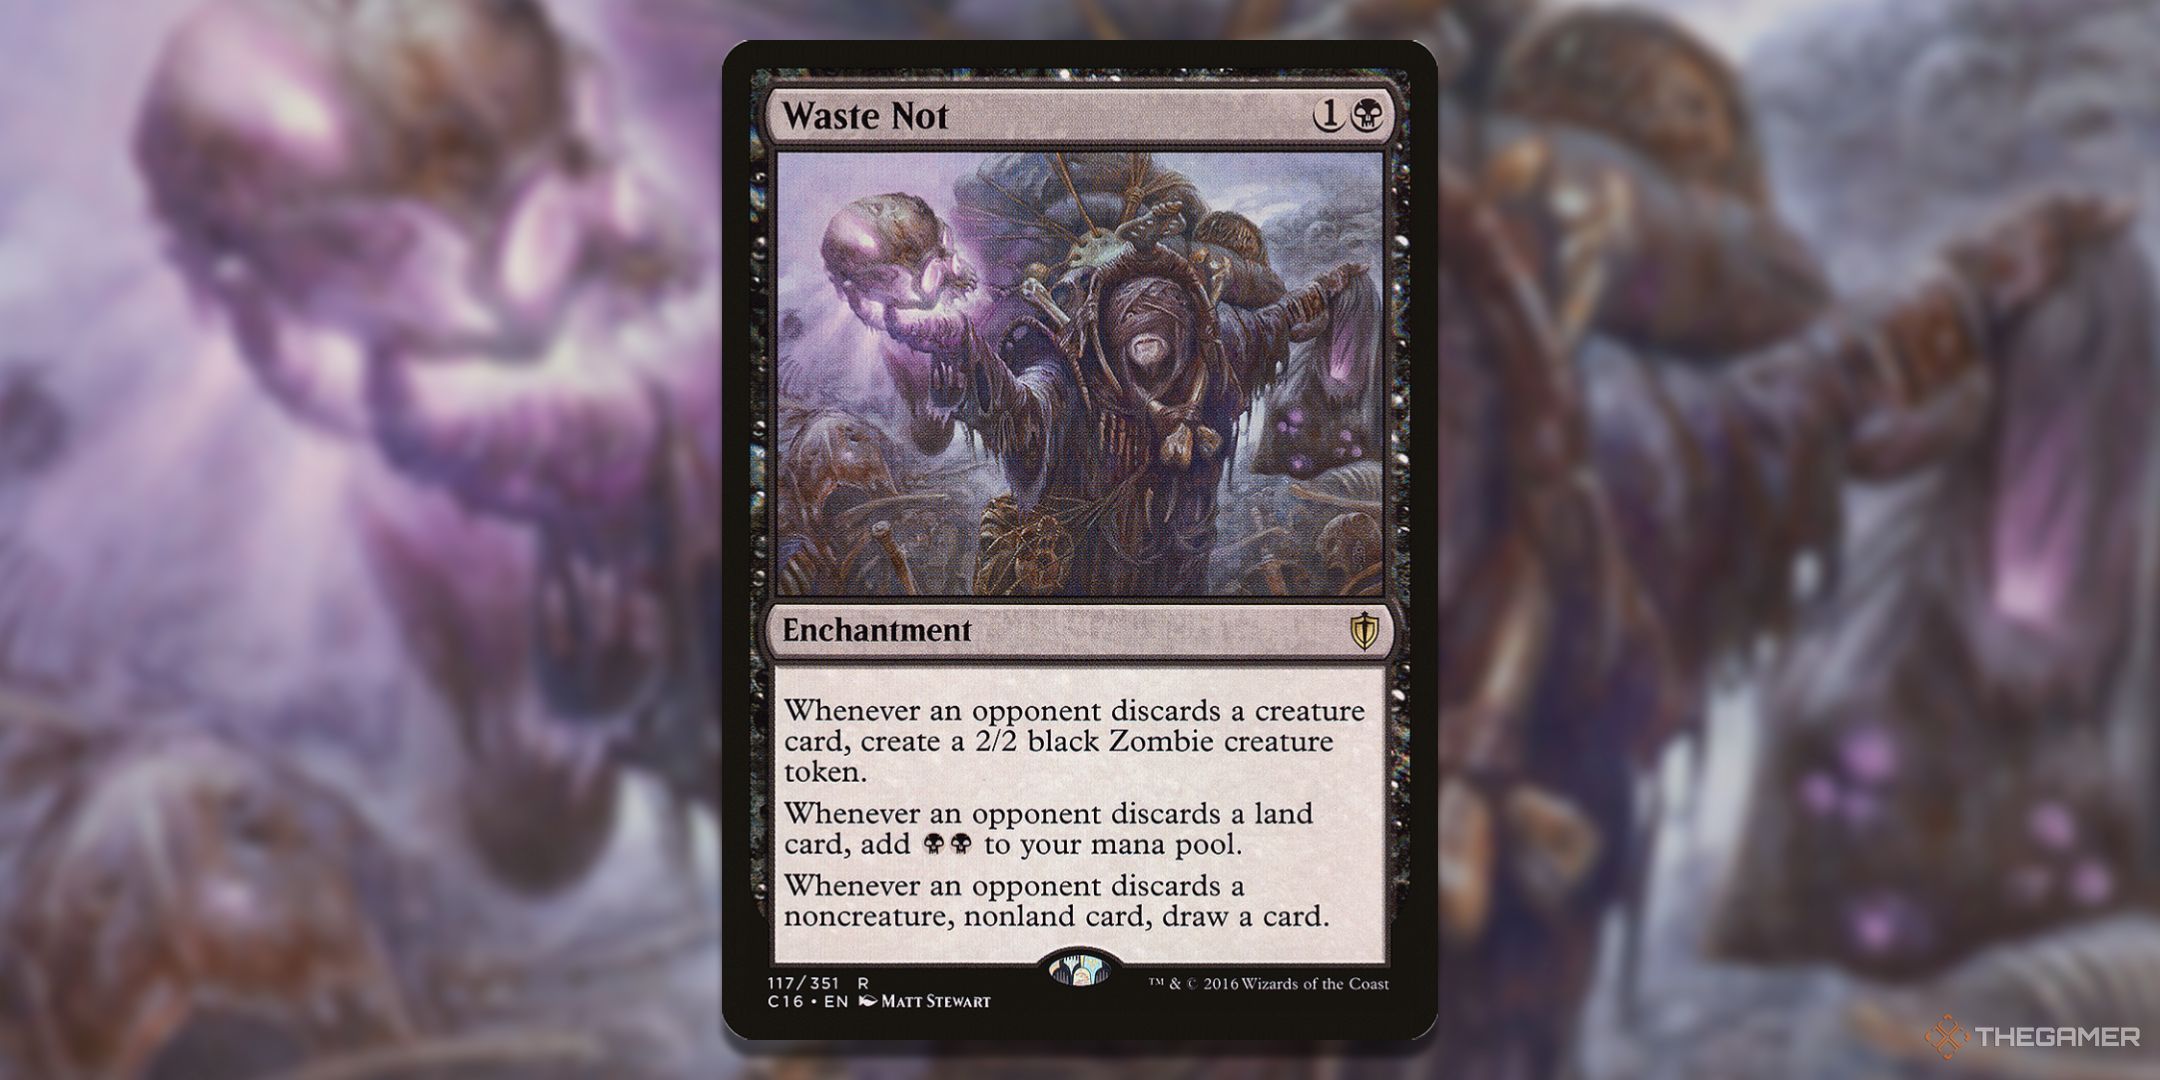
    Waste Not

    MTG Waste Not card with the art in the background.

    Your opponents will frequently be forced to discard cards, making Waste Not especially powerful in this deck. Depending on what gets discarded, it generates one of three effects: you could create tokens, gain black mana, or draw cards.

    Another creature with a similar effect to Waste Not is Bone Miser. If both are on the battlefield, they will trigger independently, effectively doubling your benefits.

    Waste Not serves as the greatest asset in your deck. A common pitfall of discard-heavy strategies is running out of steam; Waste Not compensates for this by providing various forms of card and mana advantage.

    How to Play the Deck

    General Game Plan

    MTG Laughing Mad card with the art in the background.

    Using a Kefka, Court Mage Commander deck involves continually forcing your opponents to discard their hands. Your goal is to remove their options and keep them in a “top-deck mode,” where they can only play the cards they draw each turn.

    Since much of the forced discard affects you too, cards like Waste Not, Bone Miser, Bandit’s Talent, and Kefka, Ruler of Ruin are crucial for maintaining a full hand.

    The deck emphasizes a control strategy, featuring board wipes and counterspells to deter your opponents from deploying significant threats. The forced discard helps eliminate their best cards, especially when they must discard multiple cards at once.

    Because opponents will be frequently discarding, the deck contains a reanimation sub-theme. Cards like Rise of the Dark Realms, Reanimate, and Animate Dead allow you to bring creatures from any graveyard to the battlefield under your control, letting you utilize your opponents’ best cards if they find their way into the graveyard.

    Win Conditions and Flaws

    MTG Poison the Waters card with the art in the background.

    The deck’s main strategy focuses on combat victories. Kefka is a formidable card, capable of draining resources while dealing massive damage. You’ll typically want to transform Kefka when you’re ready to start closing out games, as he becomes a more evasive threat in his second form.

    The biggest drawback of this strategy is its dependency on Kefka. Forced discard can hurt all players, and if you don’t have Kefka to draw cards and refill your hand, you may run low on resources just like your opponents. Waste Not and Bone Miser can act as backups, but without them, relying on forced discard becomes risky.

  • “Completing a Final Fantasy Kuja Commander Deck Guide in MTG”

    “Completing a Final Fantasy Kuja Commander Deck Guide in MTG”

    Kuja, Genome Sorcerer is a notable creature in the Magic: The Gathering Final Fantasy set. He serves as the main villain in Final Fantasy IX, orchestrating chaos that influences the game’s storyline. One of Kuja’s unique abilities is to generate Black Mage tokens from mist, showcased in his power to create black Wizard tokens.

    If you’re interested in building a deck centered on Black Mages—0/1 Wizard tokens that inflict burn damage when you play noncreature spells—then Kuja, Genome Sorcerer can be your ideal commander. Kuja combines control and burn mechanics, making him an excellent choice if that playstyle appeals to you.

    Decklist

    Commander

    • Kuja, Genome Sorcerer // Trance Kuja, Fate Defied
    Creature Creature Creature Creature Creature Creature
    Black Waltz No. 3 Coruscation Mage Firebrand Archer Guttersnipe Harmonic Prodigy Judith, Carnage Connoisseur
    Kefka, Dancing Mad Mysdian Elder Queen Brahne Roaming Throne Rockslide Sorcerer Solphim, Mayhem Dominus
    Storm-Kiln Artist Torbran, Thane of Red Fell Tor Wauki the Younger Young Pyromancer Blasphemous Act Boltwave
    Circle of Power Cornered by Black Mages Faithless Looting Feed the Swarm Haze of Rage Light Up The Stage
    Strike It Rich Toxic Deluge Abrade Aphotic Wisps Big Score Chaos Warp
    Cremate Crimson Wisps Dark Ritual Deadly Dispute Desperate Ritual Dismember
    Go for the Throat Infernal Grasp Lightning Bolt Play with Fire Pyretic Ritual Seething Song
    Shock Terminate Transpose Unexpected Windfall Village Rites Withering Torment

    Key Creatures and Cards

    • Kuja, Genome Sorcerer // Trance Kuja, Fate Defied: Provides consistent generation of Black Wizard tokens essential for your strategy. The sooner you can get Kuja into play, the quicker you can maximize his abilities. Upon transforming into Trance Kuja, all your Wizards deal increased damage, benefiting not just Black Mage tokens but all Wizards you control.

    • Harmonic Prodigy: Amplifies the effects of your Wizards and Shamans, like doubling the damage dealt by multiple Black Mage tokens when you cast a noncreature spell.

    • Whip of Erebos: Grants lifelink to your tokens, so when they deal damage, you gain life in addition to inflicting burn damage on your opponents. This is crucial for staying in the game, as your defenses can be low.

    • Storm-Kiln Artist: Generates Treasure tokens every time you cast or copy an instant or sorcery spell, helping you ramp up your resources while creating a token for each spell cast.

    Playing the Deck

    This deck is all about overwhelming your opponent with Black Wizard tokens and casting numerous noncreature spells to maximize burn damage output. You have potent spell options like Lightning Bolt and Boltwave to deal direct damage.

    You might have fewer creatures, so consider utilizing cards like Young Pyromancer to create more tokens when needed. While it’s essential to protect your life total, your primary objective is to reduce your opponents’ life points dramatically through burn.

    Win Condition and Challenges

    Your main strategy involves inflicting burn damage using numerous Black Wizard tokens. You’ll want to chain spells to maximize damage output, as many of your spells are low-cost.

    However, a key vulnerability of this deck is its lack of sturdy defenses. The strategy relies heavily on burn damage rather than combat damage, making it crucial to manage your life total and respond to opposing threats effectively.

    In summary, this unique deck revolves around Kuja’s ability to generate tokens and burn down opponents quickly, offering a distinct playstyle that’s engaging for any player looking to combine thematic elements from Final Fantasy with the mechanics of Magic: The Gathering.

  • Completing the Terra: Solving the Magical Adept Commander Deck

    Completing the Terra: Solving the Magical Adept Commander Deck

    Every character from Final Fantasy makes an appearance in the **Magic: The Gathering** crossover set featuring the Final Fantasy universe. While Final Fantasy 6 received an entire preconstructed Commander deck, the Terra card in the main set has some unique differences. Terra, Magical Adept stands out as one of only two commanders with access to all five colors introduced in this Final Fantasy set.

    Terra, Magical Adept focuses on enchantments, which all summon creatures are categorized as. Being an Esper (the summons from Final Fantasy 6), Terra, Magical Adept fits perfectly as a commander for summon creatures in Magic. With access to all five colors, you can include any summon in your deck.

    Deck Overview

    Commander: Terra, Magical Adept // Esper Terra

    Anikthea, Hand of Erebos

    Birds of Paradise

    Clive, Ifrit’s Dominant // Ifrit, Warden of Inferno

    Faeburrow Elder

    Garnet, Princess of Alexandria

    Ject, Reluctant Guardian // Braska’s Final Aeon

    Jill, Shiva’s Dominant // Shiva, Warden of Ice

    Joshua, Phoenix’s Dominant // Phoenix, Warden of Fire

    Jukai Naturalist

    Narci, Fable Singer

    O’aka, Traveling Merchant

    Ondu Spiritdancer

    Rydia, Summoner of Mist

    Sanctum Weaver

    Scholar of New Horizons

    Sigurd, Jarl of Ravensthorpe

    Summon: Anima

    Summon: Bahamut

    Summon: Brynhildr

    Summon: Choco/Mog

    Summon: Esper Ramuh

    Summon: Esper Valigarmanda

    Summon: Fat Chocobo

    Summon: Fenrir

    Summon: G.F. Cerberus

    Summon: G.F. Ifrit

    Summon: Ixion

    Summon: Knights of Round

    Summon: Kujata

    Summon: Magus Sisters

    Summon: Primal Garuda

    Summon: Primal Odin

    Summon: Shiva

    Summon: Titan

    Summon: Valefor

    Summon: Yojimbo

    Sythis, Harvest’s Hand

    The Master of Keys

    Tom Bombadil

    Weaver of Harmony

    Wildsear, Scouring Maw

    Yenna, Grand Summoner

    Yuna, Hope of Spira

    Zur, Eternal Schemer

    Blasphemous Act

    Dance of the Manse

    Esper Origins // Summon: Esper Maduin

    Extinguish All Hope

    Farseek

    Nature’s Lore

    Rampant Growth

    Three Visits

    Path to Exile

    Swords to Plowshares

    Arcane Signet

    Chromatic Lantern

    Commander’s Sphere

    Crystal Fragments // Summon: Alexander

    Fellwar Stone

    Power Conduit

    Sol Ring

    Talisman of Unity

    Timeless Lotus

    Sphere of Safety

    Canopy Vista

    Cascading Cataracts

    Cinder Glade

    Clifftop Retreat

    Command Tower

    Exotic Orchard

    x2 Forest

    Glacial Fortress

    Hall of Heliod’s Generosity

    Hinterland Harbor

    Ishgard, the Holy See

    Island

    Isolated Chapel

    Jungle Shrine

    Karn’s Bastion

    x2 Mountain

    Nesting Grounds

    Overgrown Farmland

    x2 Plains

    Prairie Stream

    Rockfall Vale

    Sandsteppe Citadel

    Seaside Citadel

    Smoldering Marsh

    Starting Town

    Sunken Hollow

    Sunpetal Grove

    Swamp

    The World Tree

    Than Quarry

    Woodland Cemetery

    This deck is made up of **45 creatures, eight sorceries, two instants, one non-creature enchantment,** and **34 lands.** Most of the creatures are summons, represented as Saga enchantment creatures, with non-summon creatures primarily offering support for enchantments and Sagas.

    Notable Cards

    Terra, Magical Adept // Esper Terra

    With Terra, Magical Adept, you can draw a summon from the top five cards of your library, while the others are pushed to the graveyard. **This isn’t the best approach,** as you may need other effects to retrieve them since Terra can only bring back one enchantment from the cards it discarded upon entering. **You should aim to transform Terra into Esper Terra,** as that’s the main advantage of using Terra as your commander.

    When Terra undergoes transformation, it is exiled first before reappearing on the battlefield. Since it leaves the battlefield, it will be unable to summon creatures immediately, meaning you won’t be able to flip Terra into Esper Terra during the same turn it returns.

    Esper Terra **creates copies of any non-legendary enchantments you control.** You’ll often target your Saga creatures, allowing you to utilize the Saga’s effects by allocating lore counters, with a choice between one to three. Before reverting back into Terra, you can unleash a flurry of spells for a powerful turn.

    Yenna, Redtooth Regent

    MTG Yenna, Redtooth Regent card art.

    Yenna, Redtooth Regent is a pivotal card in this deck. For only two mana, you can **duplicate any enchantment you control**, making the copies non-legendary to avoid sacrificing them. With summons, **you can create token copies that persist even after the last lore counter is placed.**

    This becomes particularly valuable for high-cost summons, allowing you to bypass their mana costs. You can also **duplicate Esper Terra** to create even more summons and retain token copies of Esper Terra while continuously transforming the original.

    Tom Bombadil

    MTG Tom Bombadil card art.

    Your summons will inevitably reach their final chapters, and this is where Tom Bombadil shines. **Whenever a Saga completes its last chapter, Tom Bombadil can exchange it for a new Saga from your library.** This process is unaffected by casting costs, meaning a low-cost summon can turn into a powerful high-cost one (and vice versa).

    Since you will likely have Sagas on the field, **Tom Bombadil often enjoys hexproof and indestructible status.** His effect is entirely passive, requiring you only to keep him on the field to gain its benefits.

    Garnet, Princess of Alexandria

    MTG Garnet, Princess of Alexandria card art.

    Garnet, Princess of Alexandria is one of the best ways to ensure your Saga creatures remain effective. While she must attack to activate, if multiple lore counters are lost simultaneously, Garnet can gain significant stat boosts.

    The true power of Garnet lies in how quickly she can accumulate +1/+1 counters. Lore counters on Sagas are added during your draw step, so Garnet can ensure that your Summons don’t reach their final chapters as long as she’s attacking every turn.

    Playing the Deck

    Overall Strategy

    MTG Summon Yojimbo card art.

    The strategy for a Terra, Magical Adept deck revolves around playing numerous summons and keeping them in play by managing their lore counters or continually creating copies of them to “reset” as needed. There are 23 summons in the deck, including transformed cards not categorized as summons on their front.

    To get your permanents into play quickly, you have many options to remove counters from them, such as Power Conduit, O’aka, Traveling Merchant, and Garnet, Princess of Alexandria. Generally, **you want to prevent your Sagas from being sacrificed,** so removing lore counters is crucial.

    Some creatures can return Saga creatures with finality counters attached, which cause them to exile instead of going to the graveyard. Permanents capable of removing any counters can also eliminate these finality counters, allowing your Sagas to return to the graveyard and be revived later.

    Keep in mind that **Terra, Magical Adept will mill a handful of your summons.** You have several options to bring them back. For instance, Yuna, Hope of Spira can reanimate them for free by placing a finality counter, while Rydia, Summoner of Mist can reanimate them at their mana cost. The Master of Keys also grants your enchantments escape, offering yet another path to reanimation.

    Winning and Challenges

    MTG Summon Bahamut card art.

    The **main path to victory for this deck is through combat.** Permanents that enhance your enchanted creatures are particularly effective, like Zur, Eternal Schemer, and Yuna, Hope of Spira. Additionally, **Sphere of Safety can offer protection,** making it more difficult for opponents to attack you while you establish your summon chains.

    The **biggest drawback of this deck is its mana requirements.** As it utilizes all five colors, accessing the right colors can sometimes be problematic. Permanents that let your lands generate any color, such as Chromatic Lantern and The World Tree, help alleviate this issue, but lacking access to these early on may leave you stuck with mismatched lands for your hand.

  • Completing a Sephiroth Deck: Solving the Fabled SOLDIER Challenge in MTG

    Completing a Sephiroth Deck: Solving the Fabled SOLDIER Challenge in MTG

    In the Magic: The Gathering crossover set featuring Final Fantasy, the iconic antagonist from Final Fantasy VII, Sephiroth, makes a significant appearance. Players will find multiple cards featuring Sephiroth, with Sephiroth, Fabled Soldier being the standout card of the set.

    Sephiroth, Fabled Soldier serves as an excellent mono-black commander, embodying an “aristocrat” strategy. This style of deck thrives on sacrificing your own creatures for advantageous effects, a key tactic for any Sephiroth-led deck. By sacrificing creatures, you can effectively execute your game plan while embracing the role of the villain.

    Decklist


    Commander: Sephiroth, Fabled SOLDIER // Sephiroth, One-Winged Angel

    Liliana, Dreadhorde General

    Accursed Marauder

    Al Bhed Salvagers

    Ayara, First of Locthwain

    Blood Artist

    Bloodghast

    Butcher of Malakir

    Carrion Feeder

    Doomed Dissenter

    Drivnod, Carnage Dominus

    Endrek Sahr, Master Breeder

    Felsh bag Marauder

    Gravecrawler

    Gray Merchant of Asphodel

    Greedy Freebooter

    Jadar, Ghoulcaller of Nephalia

    Marionette Apprentice

    Nether Traitor

    Ophiomancer

    Pawn of Ulamog

    Pitiless Plunderer

    Plaguecrafter

    Priest of Forgotten Goods

    Reassembling Skeleton

    Sheoldred, Whispering One

    Sifter of Skulls

    Syr Konrad, the Grim

    Venerated Stormsinger

    Viscera Seer

    Vraan, Executioner Thane

    Warren Soultrader

    Yawgmoth, Thran Physician

    Zodiark, Umbral God

    Zulaport Cutthroat

    Damnation

    Feed the Swarm

    Mutilate

    Toxic Deluge

    Consuming Corruption

    Deadly Dispute

    Defile

    Infernal Grasp

    Nasty End

    Tragic Slip

    Village Rites

    Withering Torment

    Arcane Signet

    Ashnod’s Altar

    Bontu’s Monument

    Commander’s Sphere

    Fellwar Stone

    Jet Medallion

    Mind Stone

    Phyrexian Altar

    Skullclamp

    Sol Ring

    The Darkness Crystal

    Thought Vessel

    Bastion of Remembrance

    Bitterblossom

    Black Market Connections

    Dictate of Erebos

    Dreadhorde Invasion

    Grave Pact

    Barad-dur

    Castle Locthwain

    Fountainport

    Mirrex

    x27 Swamp

    War Room

    Witch’s Cottage

    This deck comprises one planeswalker, 34 creatures, four sorceries, eight instants, 12 artifacts, six enchantments, and 34 lands. Many permanents create creatures to sacrifice or gain benefits from sacrifices.

    Key Cards

    Sephiroth, Fabled SOLDIER // Sephiroth, One-Winged Angel

    MTG Sephiroth, Fabled SOLDIER card with the art in the background.

    As the commander, Sephiroth, Fabled SOLDIER is your main source of burn damage and lifegain, dealing damage to opponents with every creature that dies. You’ll need to quickly trigger this ability multiple times to switch to the reverse side of Sephiroth.

    The reverse side of Sephiroth grants an emblem that retains the effect of Sephiroth, Fabled SOLDIER. Since emblems are impervious to removal, even if Sephiroth is taken out, you can still deal damage through opponent creature deaths.

    Every time Sephiroth transforms into One-Winged Angel, you gain an emblem, which can stack for multiple triggers.

    Drivnod, Carnage Dominus

    MTG Drivnod, Carnage Dominus card with the art in the background.

    The deck features numerous death triggers allowing Drivnod, Carnage Dominus to double the effects triggered by creatures dying. Note that this only applies to death triggers, not sacrifices made for cost. Drivnod makes it easier to deal quick damage and finish off opponents.

    This card can also gain indestructibility by exiling three creatures from your graveyard, which is practical with an aristocrat deck that consistently has creatures in the graveyard. Additionally, Drivnod’s ability can be activated at instant speed by sacrificing four life, offering flexibility to use resources for other actions while keeping it safe.

    Gravecrawler

    MTG Gravecrawler card with the art in the background.

    Gravecrawler is an essential card for aristocrat decks as it can be easily recast after being sacrificed multiple times in a turn. As long as another Zombie is on the battlefield, this is the most consistently re-playable creature in the deck.

    Its main perk lies in its ability to set up potential infinite combos with sacrifice outlets. The combo is straightforward to execute, promising limitless burn damage. Here’s how you can set it up:

    Prerequisites: Gravecrawler, another Zombie creature, and Phyrexian Altar on the battlefield.

    Step 1: Sacrifice Gravecrawler via Phyrexian Altar to gain one black mana.

    Step 2: Cast Gravecrawler from your graveyard, since you control another Zombie.

    Step 3: Repeat steps 1-2.

    Results: Infinite sacrifice triggers, infinite death triggers.

    Black Market Connections

    MTG Black Market Connections card and art background.

    Black Market Connections provides options for card draw, treasure token ramp, or generating creature tokens that you can sacrifice. The creature tokens are changelings, making them usable for creatures that require specific types, like Gravecrawler.

    The real value of Black Market Connections lies in its flexibility. It effectively compensates for the usual weaknesses of mono-black, albeit at the cost of losing life. Remember, you must select at least one effect each turn, which might impact your life total if all three effects are utilized continuously.

    How To Play The Deck

    MTG Zodiark, Umbral God card with the art in the background.

    In a Sephiroth, Fabled SOLDIER Commander deck, you’re consistently sacrificing your own creatures, allowing them to fuel burn effects that target your opponents. Embrace the inevitability of your creatures dying; even blocking with less powerful creatures can lead to significant damage.

    Multiple permanents will each deal damage when a creature dies, giving you individual triggers. Hence, if a creature dies while both Sephiroth and Blood Artist are on the battlefield, you’ll inflict two damage instead of one.

    This deck features a low mana curve, enabling more frequent spell casting without heavy mana commitment. Being mono-black, cards like Bontu’s Monument and The Darkness Crystal allow for effective spell casting while holding mana for counteractions or interactions.

    Since not every creature can return from the graveyard, it’s crucial to have permanents that generate tokens. These tokens often appear at upkeep or in response to a creature’s death, providing you with ample fodder for your sacrifice outlets. Key options for token generation include Black Market Connections, Bitterblossom, and Ophiomancer, which should enter play as soon as possible.

    The primary win condition is to deal damage using burn effects. Although your creatures may not have high stats for combat, the capacity for direct damage makes this drawback minimal. Rather than relying on combat prowess, you can adversely affect your opponents by delivering consistent burn damage.

    Control the game by forcing opponents’ sacrifices using Dictate of Erebos and Grave Pact, which compels them to sacrifice when your creatures die. This tactic allows for other minor combat damage to add up over time.

    One notable downside is the deck’s dependency on multiple permanents to function effectively. You need both a sacrifice outlet and creatures to sacrifice to maximize utility. Consequently, if key cards are removed, it can become detrimental.

    Methods for retrieving permanents from the graveyard are limited, making lost cards seldom recoverable. Thankfully, a variety of permanents provide similar benefits, so even if one is lost, you might draw into another suitable option.

  • Completing the Norin the Wary Commander Deck in MTG: A Guide to Solving It

    Completing the Norin the Wary Commander Deck in MTG: A Guide to Solving It

    Norin the Wary stands out as one of the more intriguing commanders in Magic: The Gathering. Its main feature is its elusive nature, rarely remaining on the battlefield. Instead, it continually enters and exits to bewilder opponents and deal damage.

    What sets Norin the Wary apart is the diverse ways to construct a Commander deck around it. In this guide, we’ll explore a hybrid approach combining burn and stax strategies. The aim is to disrupt your opponents’ deck utilization while gradually reducing their life totals, utilizing Norin the Wary’s ability as a blink effect.

    Decklist


    Commander: Norin the Wary

    Chandra, Awakened Inferno

    Agate Instigator

    Birgi, God of Storytelling // Harnfel, Horn of Bounty

    Dragonmaster Outcast

    Gimli of the Glittering Caves

    Grinning Ignus

    Iron Myr

    Irreverent Gremlin

    Krenko, Mob Boss

    Magus of the Moon

    Molten Gatekeeper

    Ojer Axonil, Deepest Might // Temple of Power

    Purphoros, God of the Forge

    Rose Room Treasurer

    Silent Arbiter

    Solemn Simulacrum

    Solphim, Mayhem Dominus

    Sunset Strikemaster

    Terror of the Peaks

    Torbran, Thane of Red Fell

    Twinflame Tyrant

    Witty Roastmaster

    Blasphemous Act

    Chain Reaction

    Disrupt Decorum

    Faithless Looting

    Ruination

    Chaos Warp

    Lightning Bolt

    Tibalt’s Trickery

    Wild Magic Surge

    Arcane Signet

    Chaos Wand

    Commander’s Sphere

    Crawlspace

    Cursed Mirror

    Fellwar Stone

    Fire Diamond

    Genesis Chamber

    Hazoret’s Monument

    Meekstone

    Mind Stone

    Panharmonicon

    Ruby Medallion

    Sol Ring

    Thought Vessel

    Tome of Legends

    Urabrask’s Forge

    Wayfarer’s Bauble

    Blood Moon

    Burning Earth

    City on Fire

    Confusion in the Ranks

    Descent into Avernus

    Dictate of the Twin Gods

    Fiery Emancipation

    Furnace of Rath

    Impact Tremors

    Mechanized Warfare

    Outpost Siege

    Price of Glory

    Smoke

    Spiked Corridor // Torture Pit

    Warstorm Surge

    Cori Mountain Monastery

    Kher Keep

    Mines of Moria

    x28 Mountain

    Myriad Landscape

    Valakut, the Molten Pinnacle

    War Room

    The deck features one planeswalker, 22 creatures, five sorceries, four instants, 18 artifacts, 15 enchantments, and 34 lands. The strategy revolves around generating tokens, dealing damage upon creatures entering the battlefield, and enhancing damage output.

    Key Cards

    MTG Norin the Wary card with the art in the background.Norin The Wary

    Once you cast Norin the Wary, it will likely leave the battlefield soon. This is due to its tendency to be exiled more often than not, particularly as spells are commonly cast in Commander, triggering Norin almost every turn.

    The only time Norin the Wary may remain on the battlefield is early in the game when opponents might not have plays for their first turn. Seize this chance to attack with Norin for some initial damage.

    If Norin the Wary does manage to stay in play when it’s your turn again, be sure to attack with it before casting any spells. If you cast spells first, it will be exiled once more, costing you that free damage opportunity.

    Gimli Of The Glittering Caves


    MTG Gimli of the Glittering Caves card with the art in the background.

    With Norin the Wary consistently entering and exiting the battlefield, you’ll be able to trigger Gimli of the Glittering Caves’ ability multiple times. In a single turn cycle, you could potentially accumulate three +1/+1 counters on Gimli, and even more if you cast other legendary creatures.

    These counters are valuable due to Gimli’s double strike ability. If an opponent lacks blockers, they’ll face significant damage while you enjoy the bonus of Treasure tokens.

    Gimli generates a Treasure token every time it deals combat damage to a player. Since it possesses double strike, both of its attacks will trigger this ability, creating two Treasure tokens in total.

    Krenko, Mob Boss


    MTG Krenko, Mob Boss card with the art in the background.

    Krenko, Mob Boss serves as your primary tool for generating an army of creatures. Although it may start off slow, just a few Goblin tokens can lead to the creation of countless Goblins for both offense and defense.

    In addition to aiding in token generation, Krenko also provides extra triggers for your enter-the-battlefield burn effects. Given the sheer number of creatures Krenko can produce in a single turn, it can result in devastating burn damage, especially when paired with cards that amplify damage.

    Grinning Ignus


    MTG Grinning Ignus card with the art in the background.

    Grinning Ignus is easily recastable, allowing for consistent burning of opponents through its enter-the-battlefield triggers. Even in combat, it can effectively block large threats while allowing you to avoid damage by returning it to your hand.

    The main allure of Grinning Ignus lies in its infinite combo potential with Birgi, God of Storytelling. This allows you to recast Grinning Ignus indefinitely, potentially generating infinite colorless mana and enabling you to draw your entire deck. Below is how the combo works:

    Prerequisites: Birgi, God of Storytelling on the battlefield. Grinning Ignus either in hand (with enough mana to cast) or on the battlefield (with one red mana available).

    Step 1 (only needed if Grinning Ignus isn’t on the battlefield): Cast Grinning Ignus, triggering Birgi and adding a red mana.

    Step 2: Activate Grinning Ignus, returning it to your hand, and add two colorless and one red mana to your mana pool.

    Step 3: Repeat steps 1 and 2.

    Results: Infinite enter-the-battlefield triggers, infinite colorless mana (if Hazoret’s Monument or Ruby Medallion is on the battlefield), infinite draw and discard (if Hazoret’s Monument is on the battlefield).

    How To Play The Deck


    MTG Disrupt Decorum card with the art in the background.

    A Norin the Wary Commander deck is built to hinder opponents with stax elements while inflicting damage through permanents that trigger when creatures enter the battlefield. Once Norin the Wary is on the field, it becomes difficult to remove due to its exile ability whenever a spell is cast, allowing for ongoing burn triggers.

    The main source of damage comes from cards that deal damage when creatures enter, like Agate Instigator, Terror of the Peaks, and Impact Tremors. It’s crucial to deploy these permanents quickly.

    Most of the damage output is fairly minor, accumulating slowly and potentially giving opponents time to counter your stax pieces. To increase this damage, consider including cards like Fiery Emancipation or City on Fire, which can significantly boost your burn potential.

    This deck can take some time to secure a win since it is generally not aggressive. It operates passively, employing stax elements like Smoke, Blood Moon, and Ruination to delay opponents. As they focus on dealing with these pieces, you can gradually build up your battlefield while applying burn damage.

    The primary victory condition is through dealing burn damage. The deck lacks many heavy-hitting creatures, so relying on combat for victory is less likely (though still possible). Combat becomes more viable over time if Urabrask’s Forge gains many counters, or if Krenko, Mob Boss generates numerous tokens.

    A significant downside to this strategy is the tendency to become a target. The moment you play your first stax piece, your opponents may prioritize you to prevent further disruption. Given the deck’s nature and lack of defenses outside of stax elements, there’s little to be done about this. Hence, it’s advisable to hold off on casting stax cards until you are better prepared against your opponents’ counterattacks.

  • Completing a Commander Deck with Tarkir’s Felothar the Steadfast

    Completing a Commander Deck with Tarkir’s Felothar the Steadfast

    Felothar the Steadfast serves as the commander for the Magic: The Gathering Abzan Armor preconstructed Commander deck. While this preconstructed deck is solid right out of the box, customizing it specifically for Felothar makes it even better.

    This deck emphasizes creatures with defender and high toughness, creating a robust defensive line that makes it tough for opponents to attack while using little mana. If you enjoy establishing a sizable force of creatures that can withstand aggressive plays, or if you like the idea of attacking with defenders, then a Felothar the Steadfast Commander deck is an excellent choice.

    Decklist


    Commander: Felothar the Steadfast

    Huatli, the Sun’s Heart

    Arbor Adherent

    Axebane Guardian

    Baldin, Century Herdmaster

    Bedrock Tortoise

    Betor, Kin to All

    This deck includes one planeswalker, 38 creatures, 11 sorceries, four instants, six artifacts, five enchantments, and 34 lands. Most of the creatures rely on their defender ability, or allow others to deal damage based on toughness instead of power.

    Key Cards

    Felothar the Steadfast

    Felothar is crucial for the deck’s strategy. It enables your defender creatures to attack, filling a significant need in a deck filled with defenders. Felothar makes it so that the creatures’ power matches their toughness, enhancing their effectiveness.

    A creature with defender typically can only block and might not have power. While all Wall creatures are defenders, cards like Felothar allow them to attack, changing the dynamic of play.

    Felothar also serves as the deck’s primary card draw engine. You can sacrifice a creature to draw cards, needing to discard as many cards as its power. However, since many creatures have low or no power, this cost is often minimal.

    Betor, Kin to All

    Betor acts as a secondary commander, encouraging you to maximize your collective toughness. Aim for a total of 40 toughness to trigger effects that let you draw cards, gain life, or deal significant damage to an opponent.

    With a solid stat line, Betor can be threatening in combat. You can choose to keep it back if attacking would compromise its utility, allowing its benefits to trigger without risk.

    Assault Formation

    This is a standout enchantment in the deck. You want to get Assault Formation into play early. While your defenders can stand strong, they don’t threaten opponents. With this enchantment, you can start dealing damage through your defenders.

    In the late game, if Felothar is unavailable, Assault Formation offers a way for your defenders to attack. It can also increase their toughness to help them survive combat or maximize damage output.

    Tree of Perdition

    As the strongest defender in a Felothar deck, Tree of Perdition boasts a significant 13 toughness, allowing it to become a formidable 13/13 with the right cards in play. It’s a powerful asset, especially when paired with effects that allow creatures to deal damage based on toughness.

    Tree of Perdition also has a potent activated ability: you can tap it to reduce any opponent’s life total to 13. This ability can significantly speed up your chances of winning by requiring less damage to close out games.

    How To Play The Deck

    In a Felothar the Steadfast Commander deck, the goal is to fill the battlefield with defenders, maintaining a solid defense until you summon Felothar. From there, you can switch to an offensive strategy. Using cards that let defenders deal damage equal to their toughness is essential.

    This deck plays a defensive game initially, creating a board state that discourages opponents from attacking, as they may be unable to deal damage. In the late game, you can turn up the aggression, especially with cards like MacCready, Lamplight Mayor and Sidar Kondo of Jamuraa that make it harder for your opponents to block effectively.

    It’s crucial to remember that patience is key. Felothar the Steadfast doesn’t offer instant wins; instead, it goes for a gradual build-up leading to key plays with unblockable creatures.

    The deck mainly wins through combat. Once you have either Felothar or Assault Formation in play, you can swing with your defenders for huge damage. If the situation allows, there are also options for direct burn damage through cards like Betor, Kin to All and Jaws of Defeat, which can eliminate opponents directly.

    The biggest challenge for this deck lies in its need for key permanents to remain on the battlefield. Without the ability to allow defenders to attack or deal damage, the deck simply acts as a defensive wall. Once your key cards are in play, however, you can start gaining momentum, but it’s essential to ensure those cards stay effective.

  • Completing a Zurgo Stormrender Commander Deck in MTG: A Guide

    Completing a Zurgo Stormrender Commander Deck in MTG: A Guide

    Zurgo Stormrender serves as the commander for the Magic: The Gathering Mardu Surge preconstructed Commander deck. Although the original deck is strong, Zurgo truly shines when leading a deck designed specifically around him.

    A Zurgo Stormrender Commander deck is highly aggressive, generating numerous tokens and allowing them to be sacrificed for card draws or burn damage. Unlike many combat-oriented decks that seek to keep their creatures alive, Zurgo thrives when his creatures die. If you’re interested in a token-based Commander deck with a unique strategy, a Zurgo Stormrender deck might be your ideal choice.

    Decklist

    Commander: Zurgo Stormrender

    Adeline, Resplendent Cathar

    Agate Instigator

    Ainok Strike Leader

    Anim Pakal, Thousandth Moon

    Avenger of the Fallen

    Bartolome del Presidio

    Blood Artist

    Bone-Cairn Butcher

    Caesar, Legion’s Emperor

    Commissar Severina Raine

    Cruel Celebrant

    Dalkovan Packbeasts

    Dualcaster Mage

    Elas il-Kor, Sadistic Pilgrim

    Enduring Courage

    Garna, Blood of Keld

    Goldlust Triad

    Goldnight Commander

    Hero of Bladehold

    Kambal, Profiteering Mayor

    Legion Warboss

    Loyal Apprentice

    Mirkwood Bats

    Ogre Battledriver

    Pitiless Plunderer

    Purphoros, God of the Forge

    Redoubled Stormsinger

    Thalisse, Reverent Medium

    Twilight Drover

    Venerated Stormsinger

    Viscera Seer

    Blasphemous Act

    Molten Duplication

    Ruinous Ultimatum

    Chaos Warp

    Corrupted Conviction

    Deadly Dispute

    Generous Gift

    Grand Crescendo

    Path to Exile

    Saw in Half

    Swords to Plowshares

    Village Rites

    Will of the Mardu

    Arcane Signet

    Ashnod’s Altar

    Blade of Selves

    Fellwar Stone

    Idol of Oblivion

    Infantry Shield

    Skullclamp

    Sol Ring

    Talisman of Conviction

    Talisman of Hierarchy

    Urabrask’s Forge

    All-Out Assault

    Assemble the Legion

    Bastion of Remembrance

    Divine Visitation

    Goblin Bombardment

    Impact Tremors

    Rabble Rousing

    Warleader’s Call

    Within Range

    Battlefield Forge

    Castle Ardenvale

    Caves of Koilos

    Clifftop Retreat

    Command Tower

    Dalkovan Encampment

    Dragonskull Summit

    Exotic Orchard

    Fetid Heath

    Haunted Ridge

    Isolated Chapel

    Minas Tirith

    x3 Mountain

    Nomad Outpost

    x4 Plains

    Rogue’s Passage

    Rugged Prairie

    Shattered Sanctum

    Smoldering Marsh

    Sulfurous Springs

    Sundown Pass

    x4 Swamp

    Tainted Field

    Tainted Peak

    Vault of the Archangel

    Windbrisk Heights

    This decklist features 32 creatures, three sorceries, ten instants, 11 artifacts, nine enchantments, and 34 lands. Most permanents either generate tokens or gain advantages from tokens entering or leaving the battlefield.

    Key Cards

    Zurgo Stormrender


    Zurgo Stormrender provides a lot of value to the deck. Whenever a creature leaves the battlefield while attacking, you draw a card. Mardu, being a combination of red, white, and black, often lacks sufficient card draw options, making this ability extremely useful for maintaining a full hand.

    Creatures are considered attacking throughout the entire combat phase once declared as attackers. Even after damage is dealt, there’s a window before the next main phase begins where you can sacrifice them, and they’re still treated as attacking.

    Alternatively, Zurgo Stormrender can deliver significant burn damage. This deck creates a vast quantity of tokens, allowing you to sacrifice them for considerable damage bursts to bring games to a quick conclusion.

    Elas il-Kor, Sadistic Pilgrim


    MTG Elas il-Kor, Sadistic Pilgrim card with the art in the background.

    Throughout a game, you’ll have many creatures die and enter the battlefield. Elas il-Kor, Sadistic Pilgrim is a fantastic way to leverage this. Whenever a creature enters, you gain life, and when one dies, your opponent loses life, perfectly aligning with your deck’s strategy.

    Elas il-Kor aids in recovering from early attacks and playing a role in finishing games with burn damage. Its effect triggers for every creature entering or leaving the battlefield, so if several creatures change zones at once, Elas il-Kor will trigger for each one individually.

    Dualcaster Mage


    MTG Dualcaster Mage card with the art in the background.

    If you’re searching for a straightforward route to victory, look no further than Dualcaster Mage. This card can create combos leading to an infinite number of tokens, which can be combined with other permanents for a direct win.

    You only need Dualcaster Mage and either Saw in Half or Molten Duplication to set up the combo, which is straightforward to execute. In the case of Saw in Half, it can even be done at instant speed. Here’s how the combo plays out:

    Prerequisites: Have Dualcaster Mage and Saw in Half/Molten Duplication in hand.

    Step 1: Cast Saw in Half/Molten Duplication on a creature.

    Step 2: After casting, hold priority and cast Dualcaster Mage, targeting Saw in Half/Molten Duplication with its enter-the-battlefield trigger.

    Step 3: Target Dualcaster Mage with the copy.

    Step 4: New copies of Dualcaster Mage enter; copy Saw in Half/Molten Duplication again.

    Step 5: Repeat steps 3-4.

    Results: You create an infinite number of token copies of Dualcaster Mage, triggering countless enter-the-battlefield effects and infinite death triggers if you use Saw in Half.

    Mirkwood Bats


    MTG Mirkwood Bats card with the art in the background.

    Mirkwood Bats significantly enhances your ability to deal damage to all opponents. Every token sacrificed or created inflicts one damage to each opponent. While that may not seem substantial at first, when you generate a large number of tokens each turn, it accumulates quickly.

    If a token is removed without being sacrificed, such as those created through myriad, it’s advisable to sacrifice them to a sac outlet to ensure Mirkwood Bats’ burn trigger activates when they die.

    Mirkwood Bats will only trigger its burn effect if the creature is sacrificed and not if it simply dies. Creatures created from mobilize and other permanents that are sacrificed during the end step will ensure Mirkwood Bats deals maximum burn damage.

    How to Play the Deck


    MTG Within Range card with the art in the background.

    A Zurgo Stormrender Commander deck revolves around generating numerous tokens and dealing damage while sacrificing them for extra value or burn. This deck is explosive, capable of hitting all opponents with massive damage in a single turn.

    Thanks to its relatively low mana curve, you can bring impactful permanents onto the battlefield quickly.

    Creatures consistently enter and leave the battlefield. Cards that deal burn damage when creatures enter, such as Agate Instigator, Impact Tremors, and Warleader’s Call, are essential to this deck’s strategy.

    Many tokens created in the deck come with haste, allowing for immediate attacks that can quickly reduce your opponents’ life points. Since several token generators produce increasing numbers of tokens, you become a larger threat as the game progresses.

    Your two main paths to victory involve combat and burn damage. With a plethora of attacking creature tokens, you have a strong chance of eliminating opponents through traditional attacks. Additionally, Zurgo Stormrender and burn cards like Mirkwood Bats and Warleader’s Call can deliver significant damage if your opponents are overwhelmed by creatures.

    The major drawback of this deck is its heavy reliance on creatures. Being in Mardu limits your options for protecting permanents. A well-timed board wipe can disrupt your game plan and hinder your progress since the deck lacks easy ways to bounce back from such setbacks.

    Permanents that regularly produce tokens, like Assemble the Legion and Urabrask’s Forge, do help mitigate this, but they serve primarily as temporary fixes. The deck also struggles with ramping up, so you might find yourself casting only one spell per turn. However, the low mana curve minimizes the impact of this issue.

  • Completing a Zurgo, Thunder’s Decree Commander Deck in MTG

    Completing a Zurgo, Thunder’s Decree Commander Deck in MTG

    Zurgo, Thunder’s Decree is a standout commander from the Magic: The Gathering set titled Tarkir: Dragonstorm. This version of Zurgo serves as the Mardu faction leader (red/white/black) within the game’s storyline and follows various representations of him in Magic’s history.

    From a gameplay perspective, Zurgo, Thunder’s Decree is an ideal choice if you’re interested in crafting a deck centered on the mobilize mechanic, first introduced in Tarkir: Dragonstorm. If you enjoy mobilizing creatures and attacking with them, Zurgo provides everything you would want in a commander, capable of building momentum swiftly if your opponents are too slow to respond.

    Decklist

    Commander: Zurgo, Thunder’s Decree

    Agate Instigator

    Avenger of the Fallen

    Blood-Chin Rager

    Bone-Cairn Butcher

    Brutal Hordechief

    Caesar, Legion’s Emperor

    Chief of the Edge

    Combat Celebrant

    Dalkovan Packbeasts

    Devilish Valet

    Gornog, the Red Reaper

    Hardened Tactician

    Herald of Dromoka

    Iroas, God of Victory

    Isshin, Two Heavens as One

    Kargan Warleader

    Kiki-Jiki, Mirror Breaker

    Lovisa Coldeyes

    Mindblade Render

    Mirkwood Bats

    Neriv, Heart of the Storm

    Orthion, Hero of Lavabrink

    Redoubled Stormsinger

    Reigning Victor

    Starry-Eyed Skyrider

    The Master, Multiplied

    Venerated Stormsinger

    Voice of Victory

    Zurgo Stormrender

    Zurgo’s Vanguard

    Blasphemous Act

    Gift of Estates

    Ruinous Ultimatum

    Toxic Deluge

    Chaos Warp

    Deadly Dispute

    Generous Gift

    Path to Exile

    Swords to Plowshares

    Will of the Mardu

    Arcane Signet

    Blade of Selves

    Commander’s Sphere

    Dolmen Gate

    Fellwar Stone

    Helm of the Host

    Idol of Oblivion

    Infantry Shield

    Skullclamp

    Sol Ring

    Talisman of Conviction

    Talisman of Hierarchy

    Talisman of Indulgence

    All-Out Assault

    Cathars’ Crusade

    Echoing Assault

    Goblin Bombardment

    Impact Tremors

    Legion Loyalty

    Renewed Solidarity

    Shared Animosity

    Warleader’s Call

    Windcrag Siege

    Within Range

    Battlefield Forge

    Castle Embereth

    Caves of Koilos

    Clifftop Retreat

    Command Tower

    Dalkovan Encampment

    Dragonskull Summit

    Exotic Orchard

    Fetid Heath

    Haunted Ridge

    Isolated Chapel

    Minas Tirith

    x4 Mountain

    Nomad Outpost

    x4 Plains

    Rugged Prairie

    Silent Clearing

    Smoldering Marsh

    Sulfurous Springs

    Sunbaked Canyon

    Sundown Pass

    x4 Swamp

    Tainted Field

    Tainted Peak

    Vault of the Archangel

    Windbrisk Heights

    This decklist has 30 creatures, four sorceries, six instants, 13 artifacts, 11 enchantments, and 35 lands. Given that the strategy is heavily combat-focused, creatures are the star of the show, with supporting cards designed to enhance their performance in battles.

    Key Cards

    Zurgo, Thunder’s Decree


    The essential card in this deck is Zurgo, Thunder’s Decree. It prevents your Warrior tokens from being sacrificed, allowing the tokens you generate through mobilize to remain in play.

    However, it’s important to note that Zurgo only prevents your Warrior tokens from being sacrificed at the end step. Other effects might force the tokens to be sacrificed during or after combat, and in those cases, Zurgo’s ability won’t apply.

    Costing only three mana, you can get Zurgo onto the battlefield as early as turn two. It’s wise to play Zurgo as soon as possible to fill the board quickly with Warrior tokens, making it easier to overwhelm your opponents.

    Isshin, Two Heavens As One


    MTG Isshin, Two Heavens as One card with the art in the background.

    Isshin, Two Heavens as One acts as a secondary commander in your strategy. Since all your mobilize effects are triggered abilities, Isshin causes them to activate twice. This is particularly powerful with cards that produce multiple tokens through their mobilize abilities.

    Typically, you should only bring Isshin onto the battlefield when you already have a few mobilize creatures in play. On its own, Isshin doesn’t do much without any combat triggers activated. If it gets removed, it can be quite challenging to get it back, so time your play wisely.

    Bone-Cairn Butcher


    MTG Bone-Cairn Butcher card with the art in the background.

    Bone-Cairn Butcher is like a friend to your tokens, turning them into serious threats by giving them deathtouch. Normally, opponents wouldn’t care much about a 1/1 creature, but Bone-Cairn Butcher makes sure they think twice before blocking, as they risk losing a creature in the process.

    Keep in mind that your tokens will only gain deathtouch while they are attacking, so it’s not a permanent effect.

    Since Bone-Cairn Butcher has mobilize, it can also generate threatening tokens. You don’t need to attack with Bone-Cairn Butcher for its effect to activate, so if attacking puts it at risk, you can hold it back and let your tokens handle the heavy lifting.

    Mirkwood Bats


    MTG Mirkwood Bats card with the art in the background.

    Thanks to the abundance of tokens, Mirkwood Bats can dish out significant burn damage. It triggers whenever a token is created or sacrificed​​, so if Zurgo is not in play, mobilizing will yield two triggers per token created.

    The strength of Mirkwood Bats comes into play especially when Zurgo is not on the battlefield. However, even if Zurgo is present, you can still get burn damage from the tokens you generate. Mirkwood Bats is crucial in quickly reducing opponent life totals, paving the way for victories through combat.

    Cathars’ Crusade


    MTG Cathars' Crusade card with the art in the background.

    Cathars’ Crusade is one of the most powerful cards you can include in a Zurgo, Thunder’s Decree deck, assuming you’re willing to keep adding counters to your creatures. Every token created through mobilize results in all your creatures receiving a +1/+1 counter.

    Importantly, Cathars’ Crusade triggers for every creature that enters the battlefield. So if you attack with a creature that has mobilize three, each of your creatures will gain three +1/+1 counters. This can result in massive swings in damage and elevate even your weakest creatures into significant threats with just a few activations.

    How to Play the Deck


    MTG Will of the Mardu card with the art in the background.

    The goal of a Zurgo, Thunder’s Decree Commander deck is to keep attacking, especially with creatures that have mobilize. The strategy floods the battlefield with numerous creature tokens, which should consistently be sent into battle. This is a very aggressive Commander deck where attacking is fundamental.

    While mobilize is crucial, keep in mind that the creatures with it can be delicate. Cards like Dolmen Gate and Iroas, God of Victory are helpful as they prevent damage to your attacking creatures, keeping your assault safe.

    You can also create tokens through various means beyond mobilizing. Some cards generate creature copies that sacrifice at the end step, but with Zurgo on the battlefield, these copies can remain in play permanently. Although you typically can’t copy legendary creatures, there are many powerful nonlegendary options available.

    The primary win condition for this deck is through combat. With mobilize and Zurgo, you can fill the battlefield with tokens to consistently attack each turn. Cards like Starry-Eyed Skyrider can grant your attacking tokens flying, while Bone-Cairn Butcher offers deathtouch, making them more difficult to block. You also have numerous ways to deal damage through burn effects, such as sacrificing tokens with Goblin Bombardment or using Mirkwood Bats.

    A significant weakness of this deck lies in the low toughness of your creatures. While the mobilizing strategy is effective, the resulting tokens are still 1/1 creatures. Thankfully, cards such as Shared Animosity, Cathars’ Crusade, and Renewed Solidarity can enhance their stats, transforming them into bigger threats. You might also find it challenging to generate mana, as Mardu lacks many strong ramp options.