الوسم: choices

  • All Choices and Outcomes in Episode 4 of Directive 8020: Completing and Solving

    All Choices and Outcomes in Episode 4 of Directive 8020: Completing and Solving

    After collecting a sample of the alien substance for the crew to analyze in The Dark Pictures Anthology: Directive 8020, the fourth episode begins with Simms still missing somewhere near the crashed Cassiopeia. The crew continues searching for her, and at least one of your team members has already died, possibly more.

    Several factors in episode four, called Dragnet, will vary based on the choices you’ve made previously. Your decisions and the lives you choose to save or not will significantly influence the story progression during this part of Directive 8020.

    Ghost – The Growth

    During the first part of episode four, you are again trying to hide from Williams, this time as Cooper and Anders. Your immediate goal is to scan the door beyond Williams to distract him, allowing you to sneak past once it’s safe. Anders recognizes that she can use nearby security cameras to guide Cooper, making her insight valuable. This kicks off the Overwatch scene.

    Wait for Williams to go into the room you just opened, then quickly slip behind him. Be cautious to stay out of sight from the windows ahead, as Williams will look through them regardless of how fast you are. Once he leaves, head through the door on the right of the locked one he’s peering into and enter the vents. Proceed to the end, but don’t exit yet — wait for Williams to pass again, as he opens the vent cover and might spot you if you’re not behind the wall.

    When he’s gone, leave the vent and run toward the kitchen, prepared to hide. Duck behind the desk to the left of the door and wait for Williams to pass, then enter the kitchen. Exit through the window as Anders advised, and be ready to hide again behind the desk when you emerge, since Williams will be nearby. He’ll check the far right and left sides before leaving, giving you a clean shot to override the door on the left and allow Anders inside.

    Follow Anders as she moves through the open door to finish this scene by reaching the elevator and returning to the present. Several potential outcomes for the Overwatch scene depend on your earlier decisions:

    • If you manage to escape without being caught and Stafford is alive, you’ll leave this scene unscathed, unlocking the Escaped path.
    • If you’re caught by Williams and Stafford is dead from the Tau Ceti F crash, she will fight him and find a way to escape, unlocking the Defend path.

    Both scenarios lead to Eisele providing a damage report on the Cassiopeia, and your choices here will influence character traits, helping to shape their destinies.

    Trap – Fight

    Based on a strategy meeting, Simms is known to be in the maintenance tunnels. Most of the crew are hesitant, but Eisele has designed the system to help trap Simms by sealing the tunnels gradually. You’ll control Young, checking the comms unit for optional conversations that can affect her traits. Your main task is to move between checkpoints in the vents and locate three waypoints to corner the enemy.

    If you saved Simms earlier in the game, her body will be found here. After Young emerges from the vents, Eisele notes she still senses movement, even though no one appears to be caught. Suddenly, Young is attacked from behind and falls to a lower level. Cooper tells her she needs to extend the drawbridge to escape her attacker.

    The monster wakes up and continues to attack, pushing you into the Drawbridge scene. In this dark, tight space, escaping requires careful navigation and constant checks of your waypoint and scanner. You’ll have to run around behind yourself, loop back to the stairs, and follow the waypoint to the Bridge Control panel.

    Restore power to the panel by visiting the battery box marked on your map. Then, override the sealed door while keeping enough distance from the monster. If it catches you, you’ll trigger the Spotted outcome; if not, you’ll proceed further.

    During the fight scene where Young defends herself, success depends on quick reaction to QTE prompts. You have a limited number of chances to stun the monster, making timing crucial. If you’re caught, the scene will end differently depending on your choices—either young escapes unharmed, or she gets injured, such as losing an eye.

    The chapter concludes with a message from Eisele, who reports on the ongoing situation, and your decisions here will continue to influence character development and the unfolding story.

  • All Choices and Outcomes in Episode 2 of Directive 8020: Completing and Solving

    All Choices and Outcomes in Episode 2 of Directive 8020: Completing and Solving

    No matter if Carter managed to send a message in the previous part of Directive 8020, the fifth game in the Dark Pictures series, you’ll start the second episode with the rest of the Casseopeia crew waking up without Carter and Simms. They’re confused about what stopped them from waking properly.

    Explore different parts of the ship and get to know the crew a little better. The choices you make for your crew members will influence their personalities and how their stories unfold in this second chapter.

    BIRTHDAY – 0 DEATH
    [Image of Eisele sharing her concerns with Stafford]

    The second chapter of Directive 8020 introduces you to Brianna Young, a new astronaut on the mission to Tau Ceti F, and Nolan Stafford, a veteran commander heading out on his last mission before retirement. Stafford used to work with Brianna’s father. The first main scene celebrates what would have been Bill Young’s birthday.

    EYES OPEN
    You’re back on the Casseopeia as Brianna is woken from deep sleep by Laura Eisele. Laura is frantic because the ship’s computer, Oracle, woke her up unexpectedly, instead of Carter and Simms. Throughout the episode, Laura expresses her concerns, and Brianna’s mission is to talk with Stafford at the far end of the ship and wake Mitchell as best as possible.

    Along the way, Stafford and Eisele discuss Eisele’s irritation that the Sleep Crew didn’t wake them up. She suggests checking security cameras. Stafford might try to persuade her either way. Then the scene shifts to Little Faith, where Mitchell asks Stafford how he feels about Anders, the science officer called in to replace a crew member whose situation remains uncertain. This moment is a key turning point for the game.

    [Image of approach decision]: You can choose how to approach a conversation about the new recruit:

    – Trust: Convince Stafford to dismiss suspicions about Anders and trust the ship’s system.
    – Doubt: Reassure Mitchell but express some doubts about the new crew member.

    Afterward, control returns to Young, who and Eisele head to the Reactor Room to restore power in the scene called Ship Shape.

    When restoring power, you’ll decide whether to cut power to the Fire Control systems or the Landing Computer, affecting how the ship’s systems respond. This choice triggers the second major turning point of the episode, where Oracle suggests shutting down one system before fully restoring power. Either action will complete the power check.

    Stafford and Eisele discuss Young and Mitchell, with Eisele again questioning Carter and Simms. She considers reviewing their logs. You can agree or dismiss her concerns, impacting Stafford’s traits:

    – Accept her proposal but remind her everyone is on the same team.
    – Dismiss her suspicion and focus on fixing the ship.

    Next, the scene titled 0 Death begins with Mitchell and Young discussing what to do if they die in space. Mitchell jokingly asks if she’d open the airlock and send him floating out. You can choose to disapprove or joke along, which updates their characters’ traits.

    Once finished, the episode moves into the Evidence – Booster Ring scene. No matter how you handled the earlier scenes, Eisele checks security logs, reviewing footage from the previous episode. She notices anomalies in the recordings, which vary depending on who survived the last episode—Simms or Carter. Eisele then shares her suspicions with Stafford.

    You have options here:

    – Question her suspicions: Leads to a trait change later.
    – Accuse her: Opens more dialogue options and opportunities for trait updates.

    In the scene called Radio, Simms reports interference affecting communication. This is followed by Booster Ring, where Eisele explains the ship’s approach to Tau Ceti F’s orbit. Mitchell prefers landing as scheduled, but Stafford emphasizes their operational priorities. The scene ends with the booster ring detaching from the ship.

    SLEUTH – DEAD WEIGHT
    [Image of exploring crew quarters]

    Eisele again controls the story and decides to investigate the Sleep Technician’s Quarters, despite Stafford’s orders. She searches for clues that might confirm her suspicions about the crew. The investigation involves exploring the crew quarters, including the second floor, which overlooks a statue in the center of the area. Unlocking the locked door involves scanning a lockdown panel; inside, you can find secrets like the code to Carter’s computer or collectible notes.

    In Carter’s quarters, find her computer and enter the birthday on the calendar—August 28, or 0828—to access her files. There are 11 secrets scattered throughout the quarters plus a recording from Simms.

    As Eisele, you can choose to Question or Accuse her. Questioning offers paths to gather more details, while accusing may lead to different reactions and traits.

    [Image of Eisele approaching the vent]

    Eisele then attempts to leave through the door Simms used, but she’s quick to lock it and shut down the airlock in an effort to kill her. You have Quick Time Events (QTE) where you can plead, threaten, or stay silent. The outcome depends on your choices. If successful, Eisele escapes, heading toward a vent system to contact the crew.

    Once outside, she finds an obstacle blocking the vent. She must identify the source of the obstruction to finish the episode. Moving through the vent system, she eventually reaches a point where she must act fast to avoid being caught or suffocated.

    Finally, after making her way out, Eisele encounters an obstruction that needs to be cleared from the vent to proceed. The episode closes with her efforts to contact the ship’s crew and survive.

  • How Other Players Completing and Solving Impact Your Gameplay in Tides of Tomorrow

    How Other Players Completing and Solving Impact Your Gameplay in Tides of Tomorrow

    If you’re a long-time gamer, you’ve probably played many choice-based games like Tides Of Tomorrow. In some of these games, your decisions don’t affect the story much, while in others, they can change the ending completely. However, this game stands out because of one key feature.

    This difference comes from its online story-linking system. With this feature, you select a previous player to follow to a specific island. Not only do your choices influence what happens to you, but the choices made by the player you’re following also affect your game’s outcome. It’s important to understand how this works.

    How Online Story-Linking Works

    When you start a new game in Tides Of Tomorrow, after choosing your character, you also select a player to follow. Once you’ve picked them, you’ll see their avatar swimming ahead of you. From the very beginning, their decisions will shape what you experience.

    For instance, if the player you’re following took a bottle of Ozen from Nahe, you won’t have the chance to take it yourself. Conversely, if they didn’t take it, the next player following you might have the chance. Throughout your journey, you’ll encounter similar situations where the previous player’s choices influence your options.

    You can change the player you’re following after every story segment—whenever you leave an island.

    Aside from influencing choices, the Tidewalker (the previous player) also helps you navigate puzzles. When you’re on an island, you can activate your special sight to see visions of the Tidewalker’s past actions. There are two types of visions:

    • Yellow visions: These show the main story, like the Tidewalker’s interactions with characters or solutions to puzzles.
    • Purple visions: These reveal the Tidewalker’s path, helping you avoid getting lost. They also show their emotes, or gestures, at various points.

    In addition, you might come across “glitched” visions, which display the outcomes of certain choices. These help you decide what to do by providing insight into different options.

    How to Choose Your Story-Link Partner

    After each story segment, you get to choose a new player to follow. This decision is very important because it can influence your entire run or even end it prematurely if you select unwisely. When you pick your next destination, you’ll see the person you’ll be following at the bottom of the screen.

    You can change your follower by pressing a button. On the selection screen, you’ll also see what items are in the yellow chest at that destination if you follow that person. It’s usually best to choose someone who left both Ozen and scrap, especially prioritizing Ozen, since it’s more crucial.

    In the late parts of the story, finding a run with Ozen available in the chest can be quite challenging.

    If you have multiple options with Ozen and scrap, you might want to choose a Tidewalker partner whose traits match your goal. For example, if you’re aiming for a run that favors humanity, choosing someone with similar traits could make your journey easier.

  • Should You Complete Wyll’s Contract or Seek Solving in Baldur’s Gate 3?

    Should You Complete Wyll’s Contract or Seek Solving in Baldur’s Gate 3?

    Completing Wyll’s personal storyline in Baldur’s Gate 3 can take up almost the entire game. Each companion has small story threads early on that lead to a big choice in Act 3. Wyll is no different.

    When you reach the outskirts of Baldur’s Gate, Wyll will get a chance to break his pact with Mizora for good. But this choice isn’t free; it’s part of a crucial scene. This guide explains how to trigger that scene, the benefits and drawbacks of each option, and how to get the best result for Wyll and the city.

    Note: This guide contains spoilers for Act 3 and Wyll’s story. Specific quest details are saved for the final section of this guide.

    Updated March 31, 2026:
    This guide now includes the latest updates. It explains how to achieve a win-win situation for Wyll.


    How to Break Wyll’s Contract

    You’ll have a chance to free Wyll from Mizora’s hold early in Act 3. Three conditions must be met:

    1. Talk to Gortash during the Archduke ceremony in Wyrm’s Crossing.
    2. After the ceremony, speak to Duke Ravengard with Wyll in your party. Wyll will mention that something isn’t right with his father. Follow up with him at the camp later.
    3. Enter the lower city of Baldur’s Gate.

    When these three are done, Mizora will visit your camp after your next long rest. Make sure you camp inside Baldur’s Gate so she appears.

    During that conversation, Mizora will say the real Duke Ravengard is being held somewhere you’ll never find. She offers to help if you give her Wyll’s soul forever. This is true whether you freed her earlier or not.

    If you sign her contract, she reveals the Duke’s location, allowing your party to plan a rescue. If you refuse, the Duke will die — at least, that’s what she claims.

    The catch is, Wyll actually has a way to have his cake and eat it too, but only if you choose carefully. Wyll doesn’t make the final decision; you do. There are no checks or dialogue choices that let him decide himself.

    Important:
    You can rescue the Duke without witnessing Mizora’s scene, but doing so will prevent you from choosing to break Wyll’s pact later. If you stumble upon the rescue opportunity early, wait until you’re ready.


    What Happens If You Sign the Contract

    If Wyll signs Mizora’s new pact, she will tell you where Duke Ravengard is located in the “Should You Break Wyll’s Contract” section below. The map will update with this information. Most party members will agree with Wyll’s decision, even Wyll himself, despite his connection to Mizora.

    There are no gameplay penalties for this choice. Wyll’s combat abilities and powers stay the same, and you don’t get any extra rewards. It’s generally not a good option, since you can probably find the location yourself just as easily.


    What Happens If You Break the Contract

    Breaking Mizora’s pact frees Wyll from his deal, but this doesn’t happen until the very end of the game. Mizora will say that Ulder Ravengard’s life is forfeit, but Wyll is free.

    Note: This is a bluff. Duke Ravengard does NOT die immediately. Breaking the contract only makes it harder to rescue him later. You’ll need to track down his location through other clues.

    Most party members will have mixed feelings—some will praise Wyll for standing up to Mizora, others will feel conflicted about losing Ulder Ravengard.

    Despite ending the pact, Wyll retains his powers and can still be used as a Warlock for the rest of your game. The side quest regarding Duke Ravengard’s location will be affected, but that’s the only change.


    Should You Break Wyll’s Contract?

    Yes, since it’s possible to break Mizora’s pact and still rescue Ulder Ravengard in a single playthrough. To do this, look for clues at the docks or in the sewers of the Lower City, often near a “greasy climb-up” point. A spellcaster friend can make finding the location easier.

    For the detailed steps:
    Mizora won’t tell you where the Duke is. Instead, you need to find the Iron Throne — a submerged prison. Head to the east of Baldur’s Gate docks, inside the Flymm Cargo Warehouse (coordinates X: -161, Y: -141), and use the basement hatch.

    Here’s a map for reference:

    • [Map of the Iron Temple submarine location and prison entrance]

    Once there, persuade or fight the owner of the submarine, then use it to reach the Iron Throne prison. Keep in mind that boarding the submarine triggers a timer— the prison is exploding. Everyone has five turns to escape after the door closes.

    Your goal is to save Duke Ravengard. Focus on rescuing him first. Use spells like Misty Step, Freedom of Movement, or Haste to move quickly.

    To free prisoners, interact with the levers near their cells—either up close or from a distance. Most prisoners are not vital, but one important character is Omeluum. He might be behind other prisoners and can teleport himself and one ally directly to the submarine if you reach him quickly.

    Once the Duke is free, lead him to the submarine before the time runs out. He’ll follow, but beware of potential enemies blocking the exits.

    After rescuing him, either leave or attempt to save more prisoners, including Omeluum if possible.

    Once aboard the submarine, you can decide to escape or continue searching for other prisoners. The main priority is Ulder Ravengard to advance Wyll’s story. After rescuing him, speak to the Duke back at camp for storyline progression and possible character interactions. Mizora’s dialogue will also change afterward but won’t affect gameplay much.

    This route is the most fulfilling, leading to the best ending of Wyll’s quest with no long-term downsides. You’ll also see that Wyll is no longer controlled by Mizora, and Duke Ravengard is safe.


    Note: The next section reveals Duke Ravengard’s location and how to finish this part of Wyll’s story. If you want to discover it yourself, stop reading now and try to piece together clues from the hints above.

  • Should You Kill or Save Shadowheart’s Parents in Baldur’s Gate 3?

    Should You Kill or Save Shadowheart’s Parents in Baldur’s Gate 3?

    If you decide to follow the dark path of the Dark Justiciar, you’ll find Shadowheart’s parents hanging in the House of Grief after defeating them. Lady Shar will then demand that Shadowheart execute her own parents. This is definitely the evil route.

    Allowing Shadowheart to kill her parents results in their death, but it has deeper consequences. Their souls are sent into eternal torment in Shar’s dark afterlife, forever separated from her worship. The only silver lining is that Shadowheart’s memory will be wiped again as she gains more power, meaning she won’t remember her parents and won’t believe you if you tell her what happened. You’re left with the burden of this decision.

    Choosing this route also boosts Shadowheart’s power. Any remaining Justiciars in the previous room will come under her control and fight alongside you in the final battle. However, be careful not to kill all the Justiciars in that room, as you’ll need some of them to join your team during the last fight. Without allies, you’ll miss out on key benefits of this choice.

    —

    If instead you follow the Sune path, after defeating Mother Superior, Shar will still appear in the House of Grief and push Shadowheart to kill her parents. Killing them here is a very different story. If Shadowheart walks the light of Selune, she can choose to spare her parents. Both options will lead to her parents being rescued and joining your camp for the rest of the game.

    To convince her to make this decision herself, you can trigger some memories in the Lower City that remind her of her past life. There are three spots where these memories can be unlocked:

    1. Allister Marnley’s Grave (X: 24, Y: 14)
    2. Graffiti on a wall near the Baldur’s Gate waypoint (X: -214, Y: -32)
    3. Shadowheart’s hidden spot in the Night Orchid cave, the basement of the House of Grief

    You only need two of these memories to motivate her, but high approval with Shadowheart is helpful. Even if you don’t revisit these places, you can still persuade her to save her parents by supporting her emotionally and encouraging her to make her own choice.

    If you decide to save her parents, they will be brought back to camp and have a chance to live out their days peacefully. Emmeline, Shadowheart’s mother, will still suffer from severe memory loss and declining health but will offer wisdom and comfort. Arnell, her father, will consistently give advice, and both will help lift Shadowheart’s mood throughout the story.

    However, keep in mind that her curse remains. It is mysterious but causes her intense nightly pain and torture that will continue for her entire life. Despite this, if she survives, Shadowheart will eventually accept her loss and offer to stay with you, moving on despite her guilt. In romantic endings, she might openly admit her longing to reconnect with her parents, revealing her deep feelings and regrets.

    —

    In a different scenario, if you betray Shar and choose to save Shadowheart’s parents, both routes (Shar or Selune) will lead to her parents being freed and joining your camp. To ensure this, support her in making her own decision when the moment comes. You may also want to trigger specific memories in the Lower City to strengthen her resolve—visiting places like Allister Marnley’s Grave, the graffiti near the waypoint, or her secret spot in the Sombre Embrace basement can help. These prompt her to comment and then speak with you, reinforcing her choice.

    Just be aware: her parents will survive, but her curse remains. She will continue to suffer nightly pain, a burden that will likely persist, and her memory of her past will stay intact. Still, she might eventually settle down with her parents near you, living out her days, even as she endures centuries of the curse.

    If you are romancing Shadowheart, she might express a desire to reconnect with her family, saying she would have given anything to speak with them again, even if it meant continuing her curse. Supporting her in saving her parents aligns with her true feelings and may lead to a bittersweet, emotionally rich ending.

    —

    Throughout all choices, significant relationships and pivotal decisions shape Shadowheart’s fate. Whether she bears her curse in silence or finds peace with her past, the route you choose leaves a lasting mark on her story.

  • All Choices and Possible Outcomes in Episode 8 of Dispatch: Completing and Solving

    All Choices and Possible Outcomes in Episode 8 of Dispatch: Completing and Solving

    In the final episode of Dispatch, a lot unfolds. The city of Los Angeles is burning as Shroud’s attack reaches a peak. Only Robert and the Z-Team can stop the chaos, but they are missing some key heroes. Everything you’ve prepared for leads up to this moment, and we’ll guide you through the best choices to ensure a positive outcome. Here’s everything you need to know to get the Z-Team back into action and defeat Shroud once and for all. If you can’t stop Shroud now, no one ever will.


    Dispatch Shift Choices

    With the Red Ring causing chaos throughout the city, all heroes are on high alert. There aren’t enough superheroes to handle everyone, so you can tell Blonde Blazer to fight the villains—she’s not just for desk duty anyway. When you log into your computer, only three heroes are available: Golem, Punch Up, and Prism. The others will join as they receive calls during the shift, but for now, you must make do with what you have.

    Golem may be less reliable because he took a gummy to sleep and is feeling high.


    First Shift Choices

    After your first call, Blonde Blazer will notice the Torrance meter at the top left of your screen. This meter shows how much of the city remains safe; you don’t want it to run out. Manage your resources carefully to keep the bar as full as possible until you can assemble the full team again.

    If the meter hits zero, your shift ends early, and every failed mission contributes to this.

    Emergency Missions Overview

    Emergency Stats Hero(es)
    Return to Crypto Night Combat, Vigor Golem
    Evacuation Order Charisma, Intellect Prism
    Capture Experiment 1067 Combat, Vigor Punch Up, Golem
    Bomb Threat Intellect, Vigor Prism, Golem
    Locate the Tracker Hacking —
    Rescue Flambae Vigor Golem
    Help Brainbook Intellect Prism
    Shopping Spree Combat, Mobility Punch Up, Golem
    S-S-S-S-Sewer Bomb Intellect Sonar
    Rescue Sonar/Coupe Mobility Flambae, Malevola
    Help Sweetalker Charisma Prism, Punch Up, Coupe, Sonar
    Rescue Phenomaman/Waterboy Mobility, Vigor Golem, Malevola, Flambae, Coupe
    Return of the Kaiju Combat, Mobility Punch Up, Phenomaman
    Witch Hunt Combat Phenomaman, Flambae, Punch Up
    Boom! Mobility Waterboy, Punch Up
    Escape Artist Vigor Golem, Prism, Malevola
    The Summoning Mobility, Vigor Flambae, Malevola
    Lockdown Hacking —
    The Torrance Terrors Combat, Vigor Golem, Punch Up, Flambae
    Attack Coupe/Sonar All Stats Strongest heroes + Blonde Blazer
    Attack of the Mole People Combat, Mobility Golem, Punch Up, Flambae
    Hospital Takeover Vigor Golem, Phenomaman, Blonde Blazer
    Return of the Delivery Bots Intellect, Combat Sonar, Flambae, Blonde Blazer, Punch Up
    Defeat Wormheart Combat Flambae, Phenomaman, Blonde Blazer, Punch Up

    Tip: Focus on attacking the Red Ring meter often. Keep an eye out for familiar faces hiding around the city. Use your attacks wisely—only strike when success is certain.


    SDN Office Choices

    Once you take down a familiar enemy, the power suddenly cuts out at the SDN office. Royd heads off to check on Chase and retrieve the Mecha Man suit. Meanwhile, Royd is fighting an invisible foe, which he ties to a table to keep from escaping. The office is overwhelmed by the Red Ring, and with no incoming calls, you’re limited to the resources inside the building, including Invisigal.

    Should You Untie Invisigal?

    • Go It Alone: It’s risky to trust Invisigal, and Royd specifically told you to keep her tied up. If you refuse her help, you’ll have to face the Red Ring villain with just a taser, and Invisigal might not assist.

    • Untie Invisigal: Without powers, your chances against the Red Ring decrease, especially with a former Z-Team member hunting you. Letting her go could give you a better chance at success.


    The Fight with Shroud Choices

    Inside, Robert is inside the mech suit, holding the Astral Pulse and the prototype. Once the battle concludes, teams of heroes will unite at SDN to fight the swarming villains. Your combat style and word choices matter here, especially in the final face-off against Shroud.

    Should You Give Shroud the Astral Pulse?

    • Hand Over the Astral Pulse: Shroud gets exactly what he wants. Instead of walking away, he’ll try to kill you, knowing all possible outcomes and plans.

    • Hand Over the Prototype: If you give him the prototype instead of the real Astral Pulse, you can keep the real one safe. The prototype looks identical, so Shroud won’t realize until he tests it.

    • Give Both: If you offer both the Pulse and the prototype, you give Shroud the chance to be duped. They look the same, and only testing reveals which is which.

    Should You Kill Shroud or Show Mercy?

    • Show Mercy: This option reflects heroism. It allows Robert to spare Shroud, fulfilling a hero’s trait of mercy and ending his arc on a compassionate note.

    • Kill Shroud: Choosing this means exacting vengeance. Robert can beat Shroud into submission, which feels deserved but raises questions about heroism.

    Note: If your relationship with Invisigal is strained, you might not be given this choice.


    The Aftermath

    After victory, depending on your choices, you’ll have either mentored Invisigal into the team or let her walk away for good. Whatever the outcome, you can decide the fate of Coupe and Sonar, who you may have previously cut off:

    • Forgive Them: Give them another chance, welcoming them back onto the Z-Team for another shot at heroism.

    • Forget Them: End their story as villains, cutting ties permanently.

    Once everything wraps up, you can spend time with the Z-Team and your romantic partner—either Blonde Blazer or Invisigal. Although the SDN office is left in ruins, you’ve saved the city, and now it’s time to rest.

  • All Choices & Possible Outcomes in Episode 5 of Dispatch: Completing & Solving

    All Choices & Possible Outcomes in Episode 5 of Dispatch: Completing & Solving

    It’s time to connect with your team in Dispatch, whether you feel like it or not. Everyone is settling into their roles, with one original member gone and a new one stepping in. Building relationships with your new teammates is a good way to strengthen your team and keep everyone working well together.

    But, things won’t always go smoothly. As heroes now, the Z-Team will face some harsh surprises from their villain friends. We’ll guide you through this challenging part of the story so you can make the best choices in Dispatch episode five!

    Opening Choices
    At the start of the episode, Robert hits the gym at SDN to work out before his shift. While there, he runs into Flambae and they share some witty remarks. Feel free to say what you like here, as the outcome remains the same, giving you a sneak peek of what’s ahead in this episode.

    Depending on who you went out with last episode, you’ll get to review the night and confirm your relationship with them. If it’s Blond Blazer, you’ll meet in the locker room to plan a real date. If you spent the evening at the movies with Invisigal, you’ll recap the film and share some jokes before heading back to your cubicle.

    Dispatch Shift Choices
    Robert quickly gets to work at his desk, with a full team supporting him this time. This helps you avoid many early problems faced when you were short-handed last episode. Keep an eye out for these options:

    First Shift Challenges
    | Emergency | Stats | Hero(es) |
    |————–|——–|———-|
    | Talent of Torrance | Charisma | Prism, Punch Up, Malevola, Phenomaman |
    | Rescue Transit Workers | Mobility, Combat, Vigor | Invisigal, Punch Up, Phenomaman, Sonar |
    | Talent of Torrance Throwdown | Charisma | Prism, Punch Up, Malevola, Phenomaman |
    | Aliens Among Us | Intellect | Sonar, Phenomaman |
    | Stalker Stalking Film Shoot | Intellect | Sonar, Malevola, Coupe |
    | Anti-Bullying Seminar | Charisma | Sonar, Prism, Malevola |
    | Your Big Break, Kid | Charisma | Sonar, Prism, Malevola |
    | Sewage Clog/Sewage Spill | Intellect, Charisma, Vigor | Punch Up, Golem, Sonar, Phenomaman |
    | Performance Art | Intellect, Vigor | Malevola, Sonar, Golem |
    | Refinery Explosion | Vigor, Mobility | Phenomaman, Invisigal, Punch Up, Golem |

    Lunch Break
    In the break room, Prism and Malevola ask about Robert’s past as a hero. You can tell them anything you want—they won’t figure it out alone. After a funny moment, you’ll meet Chase in the lab to work on the Mecha Man suit. Chase asks about Shroud and whether you’re ready to kill him or if you’ll show mercy—either way, the game’s storyline continues, and it’s something to think about as you go further.

    Second Shift Challenges
    | Emergency | Stats | Hero(es) |
    |————–|——–|———-|
    | Lost Pet | Mobility, Charisma | Invisigal, Prism, Coupe, Sonar, Phenomaman |
    | East Torrance Power Outage | Hacking | N/A |
    | Central Torrance Power Outage | Hacking | N/A |
    | West Torrance Power Outage | Hacking | N/A |
    | Power Outage Looting | Mobility, Combat, Vigor | Phenomaman, Prism, Punch Up, Flambae |
    | Missing Teens | Mobility | Sonar, Malevola, Invisigal |
    | Multi-Car Pile-Up | Vigor | Phenomaman, Golem, Invisigal, Malevola |
    | The Wheelies | Mobility, Charisma | Prism, Invisigal, Sonar, Malevola |
    | Evacuation Assistance | Charisma, Mobility | Invisigal, Prism, Coupe, Sonar, Phenomaman |
    | Thwart Graffiti Vandals | Mobility, Charisma | Invisigal, Prism, Coupe, Sonar, Phenomaman |
    | Stabilize Experiment | Mobility, Intellect | Invisigal, Sonar, Coupe, Malevola, Phenomaman |
    | Vandlabs | Combat | Invisigal, Malevola, Phenomaman, Sonar |
    | Air/Ground Rescue | Mobility (Flying Heroes), Vigor | Sonar, Phenomaman, Coupe, Golem, Malevola, Prism |
    | Senior Home Check-Up | Charisma, Intellect | Prism, Sonar, Malevola, Punch Up |
    | Repairs Required | Vigor, Mobility | Golem, Punch Up, Coupe |
    | Super Tantrum | Charisma, Vigor | Phenomaman, Malevola, Punch Up, Sonar |
    | Shipment Robbery | Mobility, Combat | Flambae, Invisigal, Phenomaman |

    Should You Reveal Your Identity?
    After your shift, you hang out with the Z-Team at their favorite spot. Use this time to bond, but be ready if things go wrong and a fight breaks out.

    Once things settle down, you regroup to share a meal and possibly deepen your relationship by revealing your superhero identity.

    Tell Them the Truth:
    If you reveal that Robert is Mecha Man, they will be shocked and impressed. Flambae might get angry and try to attack you—but the others will hold him back. Still, this makes the team trust you more.

    Keep It Hidden:
    If you choose not to share your secret, that’s okay too. The team will support your choice and even calm Flambae down. It’s a fresh start for now, giving you space to decide your next move.

  • All Choices and Possible Outcomes in Dispatch Episode 3: Completing or Solving

    All Choices and Possible Outcomes in Dispatch Episode 3: Completing or Solving

    As you navigate the paperwork and procedures of the SDN, you’ll learn how to send heroes to save the day in Dispatch. Things aren’t always easy, and the Z-Team is barely a team. That’s where you come in, as Robert Robertson.

    Getting ready for a new day with a ragtag group of villains-turned-heroes takes courage, and making them work together makes it even more challenging. With some luck, you can get everyone to team up and complete the assignments you give them. Here’s everything you need to know to get started.

    Opening Choices

    In the beginning, you’ll chat with Royd while moving the wrecked Mecha Man suit from Robert’s apartment to Royd’s lab. Feel free to ask questions to learn more about Royd and the suit. Once that’s done, you’ll head to the office.

    Inside, Golem bumps into you and knocks your phone into the trash. You can choose to ignore it or call him out. Telling him to watch where he’s going might seem assertive but can make it harder later to motivate him. It’s better to let it go—it could just have been an accident.

    Blonde Blazer Meeting Choices

    When you arrive at your desk and hand over Beef to Chase, Blonde Blazer calls you into her office to plan what’s next. Things can’t go on like this or the Z-Team will never improve. Her solution is to cut the bottom performers by the end of the day.

    Options include:

    • I Like It Response: Reassures Blonde Blazer that she’s making the right call and shows you’re serious about improving the team.
    • It’ll Scare Them Response: Shows understanding of the stakes but keeps a neutral tone, emphasizing that tough decisions are necessary.
    • You Sure About That? Response: Challenges her decision, which might make her question her plan but won’t change the outcome. She’ll remember your challenge later.

    Dispatch First Shift Choices

    Starting your first shift, Sonar is already in trouble, chained in the gym. The other team members aren’t taking the threat seriously. Throughout the day, emergencies will arise that you need to handle, and team disagreements might happen.

    Be aware, your team members may try to sabotage each other during missions. Pay attention to key words in conversations to help defuse conflicts and keep the missions running smoothly.

    Emergency scenarios include:

    • Beach Clean Up with Prism, Golem, Punch Up (Charisma)
    • Undercover Drug Bust with Sonar, Malevola, Coupe (Intellect)
    • Trouble at the Tailgate with Flambae, Malevola (Combat)
    • Learning About SDN Scammer with Prism, Punch Up, Sonar (Charisma and Intellect)
    • Assault on the Drug Base involving Punch Up, Sonar, Flambae, Golem, Malevola (Combat, Vigor)
    • Landslide with Sonar, Coupe (Intellect, Vigor)
    • Saving the Mascot in Peril with Flambae, Malevola, Sonar, Coupe (Mobility, Vigor, Combat)
    • Parking Lot Backup with Prisma, Malevola, Sonar (Intellect, Charisma)
    • Runaway Train with Golem, Coupe (Vigor, Mobility)
    • Hacking the Scammer (Hacking skill)
    • Burglary in Progress with Malevola (Mobility)

    Tip: You can reassign heroes from calls easily by selecting “close” to reset all choices and pick again.

    Conference Room Team Meeting Choices

    After a tough shift filled with sabotage and lack of coordination, it’s time for a team meeting with the Z-Team. Unfortunately, they’re disrespectful, ignoring Robert and not understanding the importance of their roles, with Golem causing a scene.

    You can decide whether to:

    • Throw Golem Out: Removing him from the meeting shows you mean business. He will remember this.
    • Give Him The Chair: Offering Golem a chance to sit down and talk humorously gives him an olive branch and might encourage better behavior. He’ll joke about it later.

    Generally, it’s better to motivate the team rather than punish Golem. Before returning to work, deliver a motivational speech—whether comparing the Z-Team to a legendary phoenix or to their burnt nest—to keep morale high.

    Dispatch Second Shift Choices

    When your second shift begins, everyone’s refreshed. Here are some upcoming emergencies:

    • Personal Shopper (Combat, Vigor): Flambae, Punch Up, Malevola
    • Line Cutter (Charisma): Sonar, Prism, Malevola, Punch Up, Coupe (with special options)
    • Ritualistic Solicitation (Intellect, Charisma, Combat): Sonar, Prism, Malevola, Punch Up, Coupe
    • Underground Fight Ring (Combat, Vigor): Punch Up, Malevola, Flambae, Sonar
    • Personal Security (Combat, Vigor): Flambae, Sonar, Coupe, Malevola
    • Fight in the Tournament / Shut Down the Tournament (Combat, Vigor): Punch Up, and others
    • Flight School (Hero Training): Flambae, Coupe, Sonar
    • Security 2: The Ride (Combat, Vigor): Flambae, Sonar, Coupe, Malevola
    • Debate the Bone Zone (Charisma, Intellect): Prism, Malevola, Punch Up, Sonar
    • Lightningstruck Strikes Again (Mobility, Combat): Flambae, Golem, Coupe, Sonar
    • Bank Robbery (Mobility, Combat, Vigor): Coupe, Sonar, Malevola, Punch Up

    Invisigal’s Fate Choices

    After the shift, Invisigal leaves to a playground. She reflects on her role as a supervillain and her powers. You can choose dialogue that encourages her to try harder, reminding her she controls her destiny. You might also suggest she chase one last crime, which could impact whether she’s cut or gets a second chance.

    Deciding Who Gets Cut

    At the end of the day, you must decide whether to cut Coupe or Sonar. Both are capable heroes, but one has to go. Your choice will influence the next episodes.

    Note: If you don’t make a choice, a random decision will be made, so choose carefully.

    Should You Cut Sonar or Coupe?

    • Get Rid of Coupe: She’s strong in combat and very mobile. Cutting her might upset Punch Up, who works well with her.
    • Get Rid of Sonar: He reacts poorly to rejection and doesn’t handle setbacks well. Removing him damages the relationship with Malevola, who’s close to Sonar.

    Your choice is final and will affect future storylines. Consider who you want to lose.

  • How Your Choices Shape the Ending in The Alters: Completing the Puzzle

    How Your Choices Shape the Ending in The Alters: Completing the Puzzle

    The Alters requires players to make numerous decisions throughout its narrative. Many of these choices are immediate and personal, influencing the survival of the mobile base and its crew. However, some of the significant choices, especially in the latter half of the game, play a crucial role in determining the conclusion of Jan’s story.

    This guide outlines key decisions players must consider and how each affects the game’s ending. Sometimes a small choice can lead to a major difference, while other endings necessitate a full replay to uncover.

    This guide contains spoilers. It’s best to complete the game at least once yourself before diving in.

    Rapidium

    The first significant factor that influences the ending is the amount of Rapidium you collect before the rescue ship arrives. You can create up to five Rapidium Arks during the game: one at the start and one for each Base Expansion upgrade you complete. The more Rapidium Arks you create, the more successful Project Dolly will be and the larger positive impact it will have on life back on Earth… in most scenarios.

    Due to Rapidium’s unstable quantum state, only Rapidium stored in Arks survives the journey back to Earth. The total amount you’ve stored in standard storage doesn’t count—only the number of Rapidium Arks matters by the end of the game.

    In nearly every ending except for Maxwell’s (which you can read about below), most of the Rapidium will end up with Ally Corporation, which hoards it for research. If you manage to bring back a significant amount, they allow licensed franchisees to innovate technology with it, reducing the global food crisis. If Lucas helps during your escape, he ensures that additional Rapidium reaches independent startups that begin addressing the food shortages immediately.

    Check in with Lucas each time you create a Rapidium Ark; having him on your side by the end of Act 2 is crucial, and making Arks is essential for that. Aim to complete at least three before activating the Neutralizer Towers if you want his support later.

    Maxwell Versus Agatha

    Jan Dolski's Ally Corp ID badge on a desk in The Alters.

    In the first two acts, Maxwell insists that no one on Earth can learn about the Alters. By keeping this secret from Lena, which means relying solely on Maxwell’s treatment for the Alters’ brain problem in Act 2, Maxwell remains your supporter in Act 3. However, if Lena discovers the Alters and creates the neural implants, she reports Maxwell to the board and has him removed, forcing you to work with Agatha, the COO of Ally Corporation, from that moment on.

    In terms of gameplay, Act 3 proceeds similarly under both characters, but there’s one critical difference: the Technician and any Alters who leave the base will only return if you used the neural implants. Consequently, siding with Maxwell means permanently severing ties with them. During the ending sequence, though, your patron threatens you should you attempt to save the Alters by deviating from the extraction plan. You can either sabotage the rescue mission to save the Alters or let the soldiers proceed, ultimately surrendering the Alters to Maxwell or Agatha.

    Maxwell’s Ending

    If you permit Maxwell to guide the rescue operation as arranged, he will take all the Rapidium you’ve collected to revive his neuroscience project, Project Elah. This worsens the global food crisis, and the Alters become subjects for testing. Lucas abandons Maxwell’s plan to focus on humanitarian efforts, while Jan assumes a new identity and a comfortable life but remains tied to Maxwell indefinitely.

    Agatha’s Ending

    If you let Agatha and the Corporation execute the rescue plan without obstruction, Lena receives a promotion to Head of Rapidium Technologies but cuts Jan out of her life as he betrayed the Alters. The corporation uses Jan as the public face of its latest propaganda, while the Alters vanish without a trace. Although it suggests they may have been killed, Jan receives a mysterious coded email just as he leaves his apartment, implying otherwise; ultimately, the fate of the Alters remains uncertain.

    Saving The Alters

    Postcards from the crew on Jan's desk at the end of The Alters.

    If you’re willing to defy Maxwell or Agatha, you can save the Alters by sabotaging the rescue team, as the crew discusses before triggering the beacon. Regardless of your intent to save them, you must make them believe you’re prepared for the rescue team’s arrival by getting ready:

    • Constructing a false Rapidium Ark.
    • Creating either four Explosive Charges or a Sleeping Gas Canister and Suit Mask Upgrade.
    • Making either an Autopilot System or, with Lucas’ assistance, a Remote Access Terminal.

    You can prepare every possible option, but you can only select one when the rescue team arrives. Having all alternatives ready makes it easier to load your save and explore other outcomes.

    No matter how you approach the situation, neutralizing the guards and commandeering the rescue ship means Jan will return to Earth as a criminal, but it guarantees the Alters’ safety.

    Should You Use Explosive Charges or Sleeping Gas?

    The Explosive Charges are less expensive to make and don’t require additional upgrades for research. If you place them around the base before meeting the rescue team, you can detonate them to eliminate the soldiers. However, doing this will worsen Jan’s sentence, adding four counts of murder during his trial.

    On the other hand, using Sleeping Gas takes longer to implement, so if you’re running against the game’s time constraints, you may not have a choice. But there’s no penalty for putting the guards to sleep. The mainly compelling reason to use explosives is to earn the Achievement/Trophy associated with it.

    Should You Trust Lucas?

    If you’ve built trust with Lucas, he will offer to guide the rescue ship to a safe location via the Remote Access Terminal. Accepting his help not only ensures fair distribution of Rapidium back on Earth but also provides you with an alibi. Lucas will claim that the idea to hijack the ship was his or shift the blame to Maxwell, helping Jan reduce his overall sentence.

    If you use the Autopilot System to redirect the ship on your own, Lucas cannot cover for you, and Jan will have to factor in the hijacking when negotiating his plea deal.

    The Botanist

    The botanist in the greenhouse in The Alters.

    If you’re collaborating with Agatha and have finished the Botanist’s storyline by Act 3, he will ask to speak with you towards the game’s end. If you engage, he will suggest swapping places at the last moment, sending the Botanist to Earth as Jan Dolski while Jan Prime escapes with the Alters.

    If you do not dismiss the idea, the Botanist will always be the last Alter you bid farewell to when the crew prepares for cryosleep. At that moment, you’ll have the chance to switch roles, playing as the Botanist during the concluding scene.

    The Botanist won’t have access to any of the dialogue choices that Jan Prime can make from Lessons Learned. Other than that and his different voice, the sequence involving the soldiers remains unchanged.

    Betrayal

    If you don’t take action against the soldiers while controlling the Botanist, he will take Jan’s place in court, revealing his identity solely to Lena. He’ll receive a light sentence thanks to her influence and his cooperation with Agatha. However, Lena will call him to inquire about the real Jan. Regardless of his response, Lena realizes what the Botanist has done and demands transparency, which he obliges before ending the call.

    Trading Places

    Agatha will follow through on her threat to fire Lena since “Jan” didn’t cooperate, and the Botanist converses with Lena while preparing for his sentencing. They talk about the possibility of a future together and wonder what Jan Prime is experiencing in his new life.

  • Superman Struggles With Choices In Emotional Trailer

    Superman Struggles With Choices In Emotional Trailer

    In the latest glimpse from DC Studios, Superman emerges as a hero grappling with inner conflict. Unlike in previous adaptations where he speaks to Lois Lane (Rachel Brosnahan) as his civilian persona, the character, played by David Corenswet, engages in a candid interview as Superman.

    “Lately, you’ve faced a lot of criticism,” Lois tells him. To which Superman responds, convinced he prevented a war, only for Lois to challenge him, pointing out that he unlawfully crossed into another nation. Faced with the heavy implications of his actions, Superman exclaims, “People were going to die.”

    The poignant trailer captures Superman’s emotional struggles throughout the film. His well-meaning decisions carry repercussions that ripple through the world. While many see these choices as burdens, Jonathan Kent (Pruitt Taylor Vince) perceives them as blessings.

    “Your choices and actions define who you are,” Jonathan shares with Clark during an intimate moment at their family home.

    Additionally, the trailer spotlights Superman’s nemesis, Lex Luthor (Nicholas Hoult), who is troubled by the fact that an alien has become the planet’s most crucial asset.

    “He’s not a man,” Luthor declares in the footage. “He’s an ‘it’ that has inexplicably become the centerpiece of global discourse.”

    Joining the cast of Superman are Edi Gathegi, Anthony Carrigan, Nathan Fillion, Isabela Merced, Skyler Gisondo, Sara Sampaio, María Gabriela de Faría, Wendell Pierce, Alan Tudyk, Frank Grillo, and Neva Howell.

    Written and directed by James Gunn, Superman marks the inaugural film in the new DC Universe. Peter Safran, co-CEO of DC Studios alongside Gunn, takes on the role of producer.

    The stakes for the DC Universe are high with Superman at the forefront. Its critical and commercial success is pivotal for the franchise’s future. Gunn’s track record for delivering hit films, such as transforming Guardians of the Galaxy into a multi-billion-dollar franchise, gives fans hope.

    Superman is set to soar into theaters on July 11.


  • Completing the Choice: Give the Ring to Savlian or Keep It?

    Completing the Choice: Give the Ring to Savlian or Keep It?

    The Castle Kvatch storyline in The Elder Scrolls 4: Oblivion Remastered features multiple quests. The first quest, Breaking The Siege Of Castle Kvatch, launches you into the Oblivion portal, where your mission is to close the gate and halt the relentless onslaught against the castle.

    Now that the Oblivion gate is shut and you’ve established a presence back in Kvatch, it’s time to reclaim the castle. This task will require some effort, and you might encounter a bug along the journey.

    Speak To Savlian

    This quest begins inside the chapel in Kvatch. Speak with Savlian and let him know you’re ready to help take back the castle. He will lead the way out of the chapel toward the castle gates.

    As you move forward, expect to encounter some creatures. However, with everyone pressing ahead together, they shouldn’t pose any significant threat.

    How To Unlock The Gates

    Upon arrival, you’ll discover that the gates to the castle are locked from the inside. Savlian will tell you that you need to return to the chapel to get the key and access the guardhouse. The guardhouse has a tunnel leading into the castle, allowing you to unlock the gate and let everyone in.

    The Chapel Undercroft And The Tower Tunnel

    Head back to the chapel and speak to Berich Inian. He will join you on your way to the guardhouse, passing through the chapel’s undercroft and then towards the tower at the city’s northern wall.

    Along the journey, two Imperial soldiers will also join you, meeting you inside the chapel.

    Follow Berich as you fight alongside him and the two soldiers.

    If Berich falls during this battle, you will have to take the key from him. If he survives, he’ll unlock the passage for you so you and the soldiers can enter.

    Once inside the tunnel, proceed to the end and climb the ladder. Once at the top, pull the Gate Lever.

    How To Clear The Courtyard

    With the gate opened, it’s time to enter the courtyard and assist Savlian and the other soldiers in eliminating the enemies. Be prepared, as you’ll face a number of foes, and there’s a chance you might experience a common bug here.

    Even after you’ve cleared the courtyard, Savlian may still behave as if more enemies remain. This can hinder your quest progress, but you can still safely proceed without him.

    How To Clear Castle Kvatch

    If you encounter the bug, figuring out your next steps inside Castle Kvatch might be challenging. Fortunately, the process is straightforward.

    Inside the castle, your goal is to eliminate the remaining monsters and navigate to the Count’s Quarters, located on the opposite side from your entry point. If your Imperial soldiers are still alive, they’ll assist you here, though be cautious as they may not survive the encounter.

    Where To Find The Ring In The Count’s Quarters

    Once you’re in the Count’s Quarters, make sure to search Count Goldwine’s body. He will have a Colovian Signet Ring that you need to collect and return to Savlian.

    Return To Savlian

    Savlian and his soldiers stand in a darkened courtyard in Oblivion Remastered.

    After securing the ring, head back to Savlian. You’ll have two choices:

    Give Savlian The Ring

    In exchange, he will give you his Kvatch Cuirass. This armor piece improves your attributes and is a solid piece of early-game gear.

    Keep The Ring

    You can opt to keep the ring, which is worth 200 gold.

  • Every Option Explored in Chapter 8: Bloom & Rage Reunion

    Every Option Explored in Chapter 8: Bloom & Rage Reunion

    In chapter eight of Lost Records: Bloom & Rage, titled "Reunion," players delve deeper into Swann’s character and her relationships with her new friends—Nora, Autumn, and Kat.

    During this part of the game, Swann speaks into her camcorder while ordering drinks and having a candid talk with Autumn. Players make decisions that shape the outcome of this chapter. This guide will walk you through all the choices available and highlight which options lead to positive, negative, or neutral responses. After testing every option by saying nothing during timed choices, we’ve determined that the outcomes remain neutral regardless of the selection made.

    Talking to the Bartender

    At the start of the chapter, Swann is at a bar, trying to catch the bartender’s eye. Upon her second attempt, he approaches her and asks how the reunion is going. Here, you have two choices:

    Response Result
    I’m a bit nervous… Neutral
    I’m happy to see her. Neutral

    The bartender then asks what drink you’d like to order. Your first order is for Autumn, giving you a chance to demonstrate your attention from the previous chapter:

    Drink Option Result
    Whiskey and Coke Neutral
    Beer Neutral
    Rum and Coke Neutral but may create a positive interaction with Autumn later.
    Vermouth Neutral

    Next, it’s time to order for Swann. There are initially two options, but if you delay your response while the bartender talks, a third option, a gin and tonic, becomes available:

    Drink Option Result
    Frostbite Cocktail Neutral but can lead to a discussion about alcohol with Autumn.
    Local Soda Neutral but raises questions about Swann’s choices around drinking.
    Gin and Tonic Neutral but like Frostbite may spark a discussion on the topic.

    After placing your order, a song starts playing. You can look up towards the speaker and begin to reminisce.

    The Swann Show

    In a flashback to 1995, Swann talks to her camcorder and must choose a name for her show. You can select from options like "The Swann Show," "As The Swann Turns," or "The Swann Files." This decision will carry weight later in the game, though nothing has hinged on this choice just yet.

    Following that, Swann’s mother calls for dinner. The responses to this call yield neutral outcomes.

    Now, Swann opens up about her feelings regarding her three friends. The game monitors how you perceive them, reflecting various emotional tones—romantic, platonic, or negative.

    About Nora:

    Response Result
    Nora’s really funny. Positive (platonic)
    Nora’s so pretty. Positive (romantic)
    Nora’s kind of annoying. Negative

    About Autumn:

    Response Result
    Autumn’s so cool. Positive (platonic)
    I feel drawn to Autumn. Positive (romantic)
    Autumn seems a bit uptight. Negative

    About Kat:

    Response Result
    Kat seems really smart. Positive (platonic)
    Kat’s really passionate. Positive (romantic)
    Kat’s sort of a show off. Negative

    After contemplating her feelings about her friends, Swann reflects on herself, and her options all receive a neutral response. Before the flashback ends, she faces one last choice:

    Response Result
    Moving sucks… Neutral
    I hope we stay friends. Positive

    Back to the Present

    Fast forward to 2022, when Swann’s and Autumn’s drinks are ready. Choosing to pay now or open a tab leads to neutral outcomes. Shortly after, a woman named Pam enters the scene and tries to strike up a conversation with Swann. Players can choose to stay and chat or exit the conversation at various points.

    Response Result
    Hi, I’m Swann. This will be remembered.
    I should get back. Neutral, exits chat.

    When the bartender addresses Swann and Autumn as "young women," Swann can respond in two ways:

    Response Result
    We’re not that young. Neutral
    I’m here with my friend, Autumn. Neutral

    Pam’s small talk with Swann includes another set of options:

    Response Result
    Nice meeting you! Neutral, exits chat.
    Are you from around here? This will be remembered.

    Catching Up with Autumn

    Afterward, you return to Autumn, and you’ll select a drink. Most options yield neutral results except for rum and Coke, which can lead to a positive response if you explain, “Thought I’d surprise you with an old favorite.”

    If you chose alcohol, Autumn will ask if you drink. If birch beer is chosen, she’ll inquire about that as well. Each choice will earn you a plant icon indicating that it will be remembered.

    After toasting, even seemingly negative options can yield positive outcomes:

    Response Result
    To being old hags. Positive
    To our reunion. Positive

    If you remain silent, Autumn will awkwardly raise her own toast and express surprise at your presence. You can respond in two ways:

    Response Result
    I missed you. Positive
    I almost didn’t come. Neutral

    As Autumn reflects on the past, Swann has the option to show support or downplay the moment’s importance:

    Response Result
    I’m sorry – I understand. It’s a lot. Positive
    It’s fine. The past is the past. Negative

    Next, you can let Autumn know you’ve “been trying to remember that summer.” This leads to a positive reaction if you convey the thought; letting it time out remains neutral.

    When asked about her life, you can indicate where you live:

    Response Result
    My place is across the lake. Positive
    Autumn, what is this about? Neutral, exits conversation.

    Swann can share about her life in Canada with two neutral options. When Autumn mentions her son, you will have a mix of responses with a third option appearing after a brief wait:

    Response Result
    I’m sorry about your divorce. Neutral (timed option).
    You have a son. That’s wonderful. Positive
    Wow, I can’t imagine having kids. Neutral

    After discussing Swann’s love life (which is also neutral), you can note that “It’s good to catch up” for one last positive response before the chapter wraps up with a mysterious twist.

  • Nvidia Likely Won’t Change Its VRAM Options

    Nvidia Likely Won’t Change Its VRAM Options

    According to recent leaks regarding the RTX 50-series, Nvidia may continue to limit VRAM for its most sought-after GPU. Reports suggest that the RTX 5060 will feature an 8GB memory configuration paired with a 128-bit bus. This raises the question: will the RTX 5060 manage to stand tall among the elite graphics cards? Not necessarily.

    The publication draws on its sources to disclose some specs for Nvidia’s budget-friendly GPUs, which range from the RTX 5070 Ti down to the RTX 5060. While there are some shifts, it appears Nvidia is mostly content with its video memory strategy — especially as titles like Indiana Jones and the Great Circle consistently test these limits. As newer AAA games continue to demand more memory, Nvidia’s more affordable GPU might lag behind in this aspect, although the remaining lineup appears to be improving. Let’s explore the specifications.

    Reports indicate that both the RTX 5060 Ti and RTX 5060 will utilize the PG152 printed circuit board along with the GB206 GPU die. Furthermore, it’s anticipated that all RTX 50 models will transition to the newer GDDR7 memory, significantly enhancing bandwidth despite their different memory configurations. While both GPUs are said to have a 128-bit memory bus, the RTX 5060 will only incorporate 8GB of memory, whereas the RTX 5060 Ti will feature 16GB of VRAM.

    Nvidia already adopted a similar approach with the RTX 40-series, where the RTX 4060 and one of its Ti adoptions stuck with 8GB of VRAM, while another variant of the RTX 4060 Ti came equipped with 16GB. Unfortunately, that particular card didn’t yield much of a performance enhancement due to its narrow bus and subsequently limited bandwidth.

    The restricted VRAM is disappointing for mainstream gamers, particularly with alternatives like Intel’s B580 offering 12GB at a comparable price. However, the future looks a bit brighter when considering reports about the RTX 5070 Ti and RTX 5070.

    Wccftech anticipates that the RTX 5070 Ti will feature the same GB203 GPU as the upcoming RTX 5080, which constitutes an improvement since the RTX 4070 Ti did not share the same GPU with the RTX 4080 until the Super version was released. The anticipated total board power (TBP) for the RTX 5070 Ti is projected to reach 350 watts, with the GPU expected to come with 16GB of memory linked to a 256-bit bus. This marks an enhancement compared to its predecessor, as the RTX 4070 Ti only boasted 12GB of VRAM. With memory clocked at 28Gbps, we can anticipate the 5070 Ti achieving around 896GB/s in bandwidth. The RTX 5070 is expected to come equipped with 12GB of GDDR7 memory and a 192-bit bus.

    As always, it’s important to approach these rumors with a healthy dose of skepticism since they are not confirmed. For instance, well-known leaker kopite7kimi has raised questions concerning the power consumption figures. We will have a clearer picture on January 6 when Nvidia unveils its next-generation GPUs.

  • The Impact of Answering Loretta in Life Is Strange: Double Exposure

    The Impact of Answering Loretta in Life Is Strange: Double Exposure

    In classic *Life Is Strange* style, Life Is Strange: Double Exposure is packed with critical choices that shape the narrative. One of the first significant choices comes toward the end of Chapter 1, just a few days after Safi’s tragic passing.

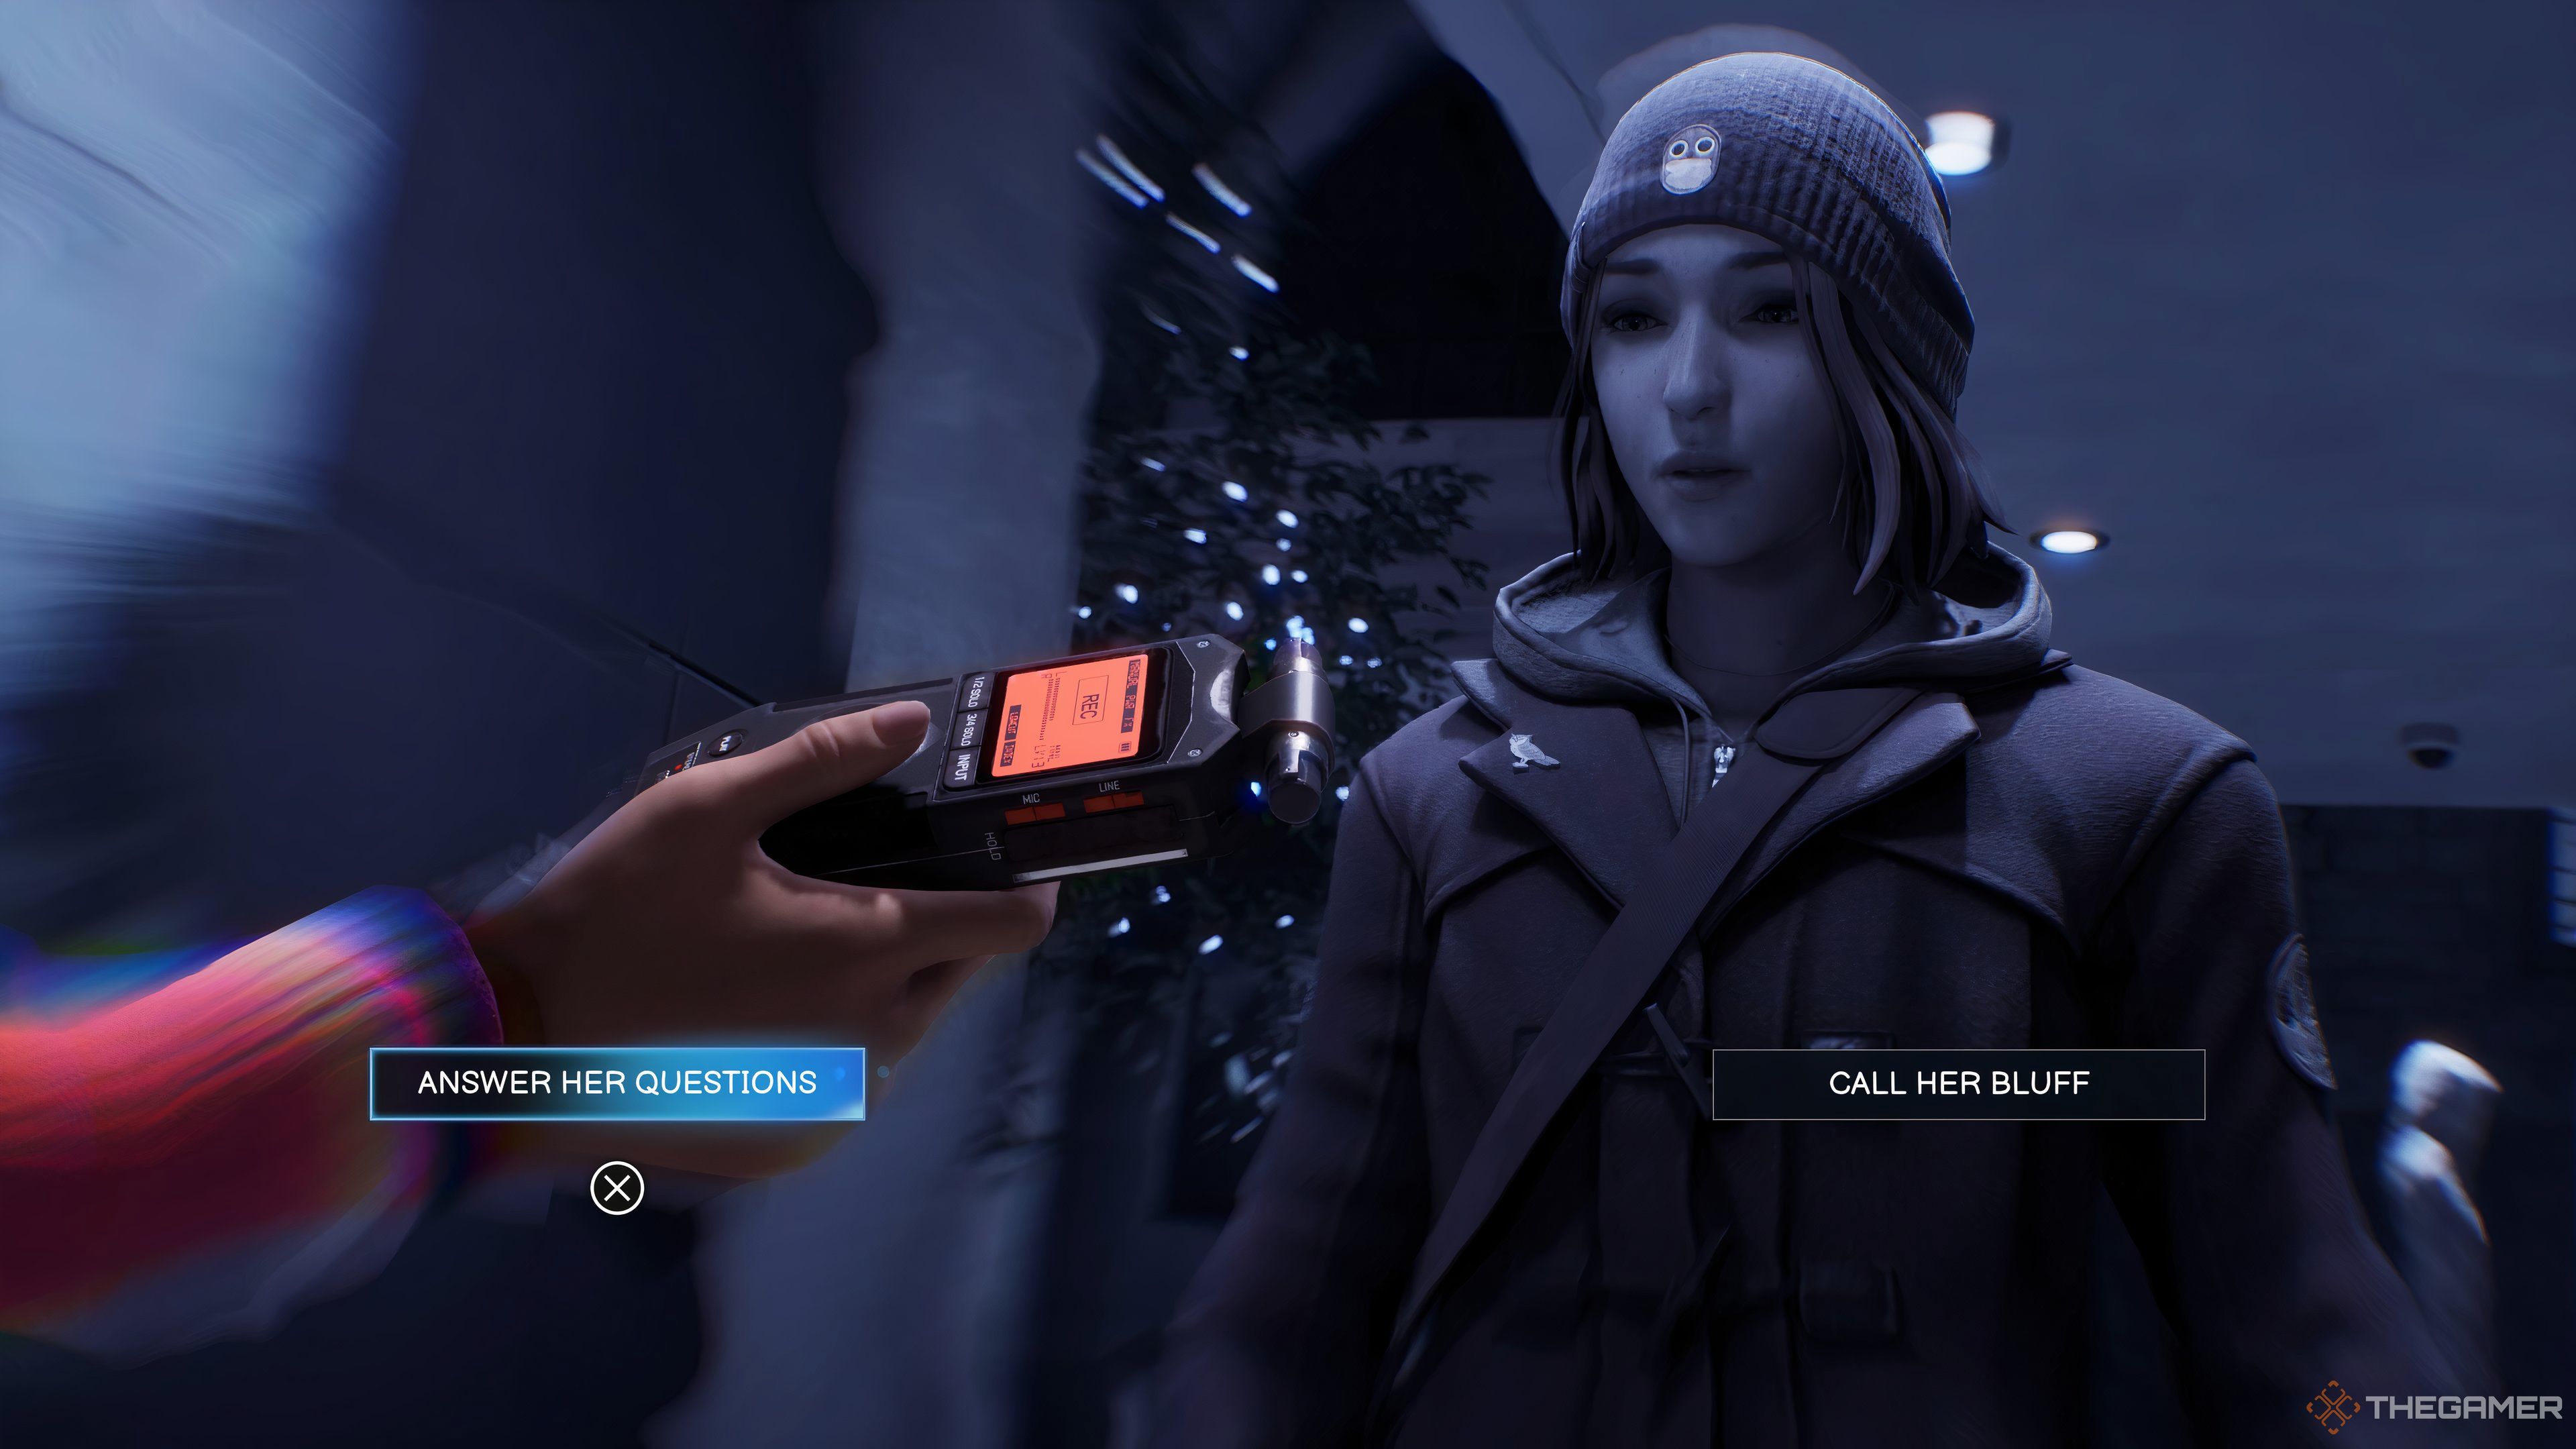
    When you first enter the Fine Arts Building following your conversation with Yasmin, Safi’s mother, Max overhears a phone call from Gwen Hunter. Loretta, the local true crime podcaster, discovers you eavesdropping. You face a choice: do you respond to her questions or call her bluff, letting her inform Gwen about your snooping?

    This choice only arises due to Safi’s death and will solely influence your interactions with Dead World Gwen.

    What Happens If You Call Loretta’s Bluff?

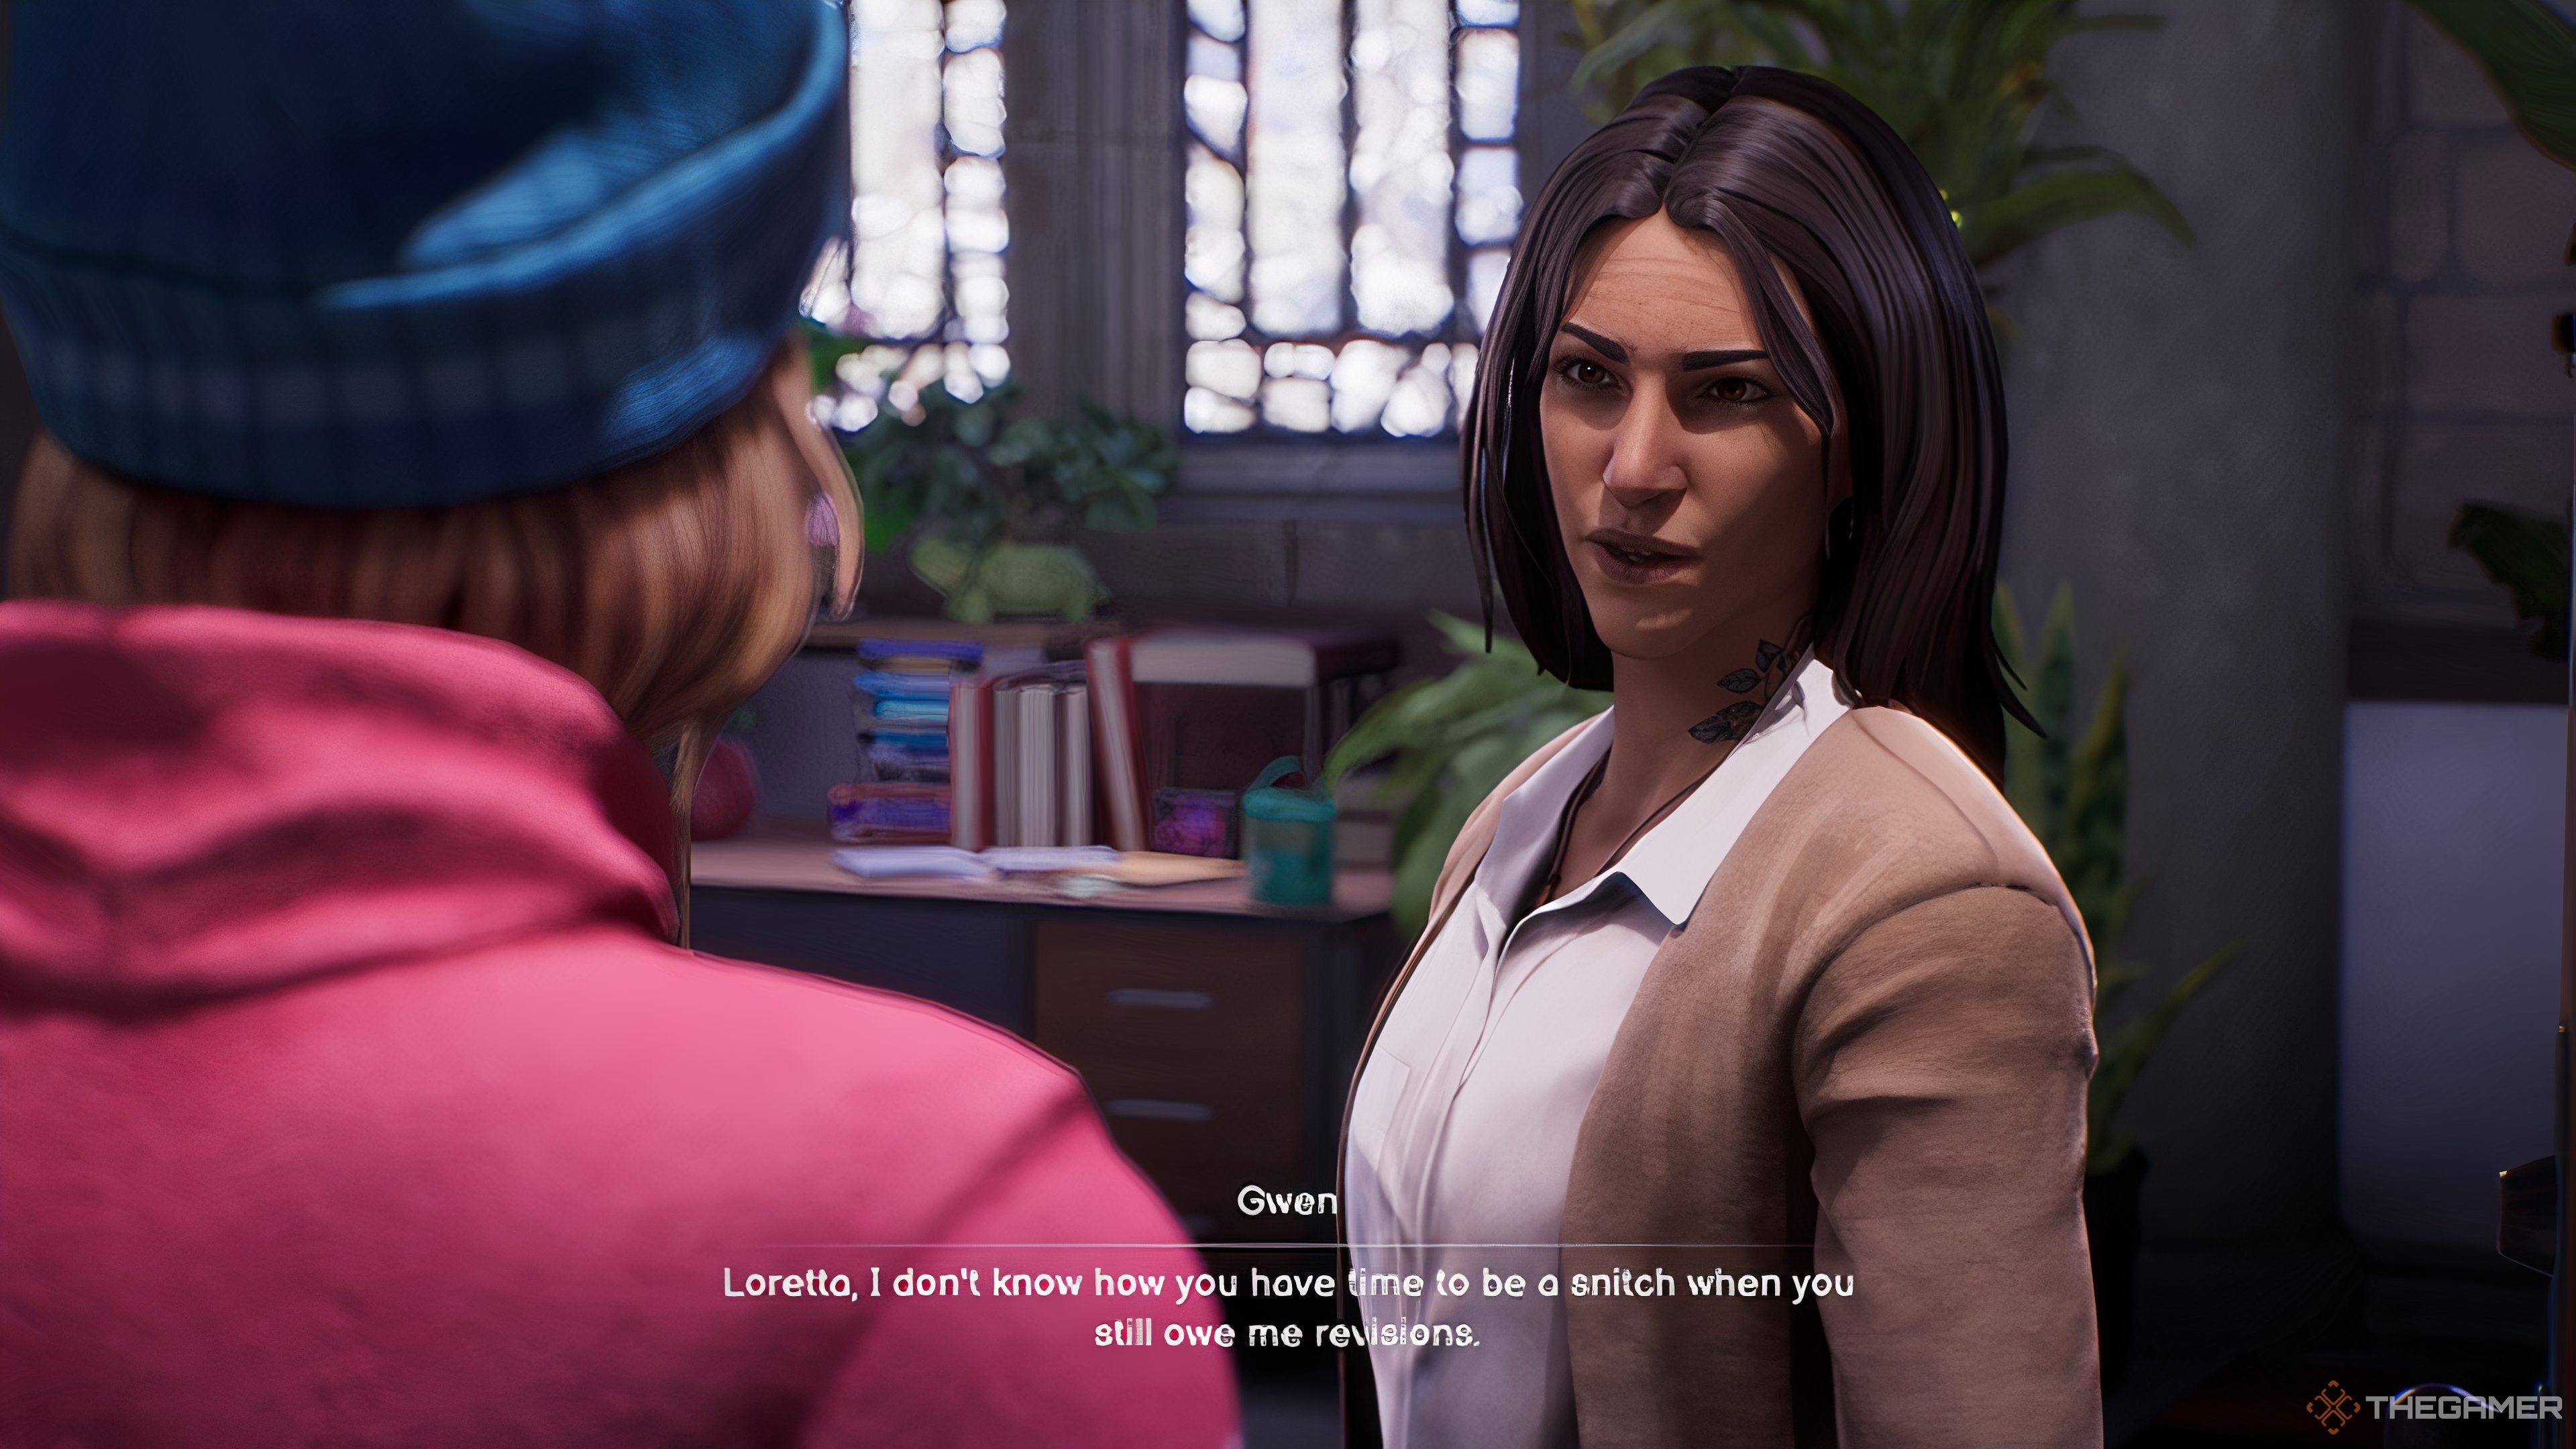
    If you choose to call Loretta’s bluff, she hurries to Gwen’s office and reveals that you were eavesdropping. Gwen quickly dismisses Loretta’s claim, yet once Loretta steps out, she questions you about your eavesdropping. Regardless of your response, she will express disappointment and ask you to keep your distance from her.

    Gwen Shooting Loretta Down In Life Is Strange: Double Exposure.

    <p_Later, in Chapter 3, when you arrive at Gwen’s office, she greets you with, “No conversations for you to conveniently overhear this time” and reluctantly agrees to discuss Safi’s book and Maya Okada with you. However, she will not let you read Safi’s manuscript when asked.

    To access Safi’s manuscript from Gwen, you’ll need to shift into Living World Gwen’s office, which is empty, and retrieve the manuscript from the drawer you saw Dead World Gwen use.

    While exploring Gwen’s office, you can snap a photo of her vintage record player and share it on your Crosstalk page. If you previously called Loretta’s bluff and Gwen knows about your eavesdropping, she’ll comment on your post, noting that she didn’t give you permission to rummage through her belongings.

    What Happens If You Answer Loretta’s Questions?

    Choosing Answer Loretta's Questions In Life Is Strange: Double Exposure.

    If you decide to engage and answer Loretta’s questions, you might tell her that you really don’t know much and suggest she speak to someone who has known Safi longer than six months.

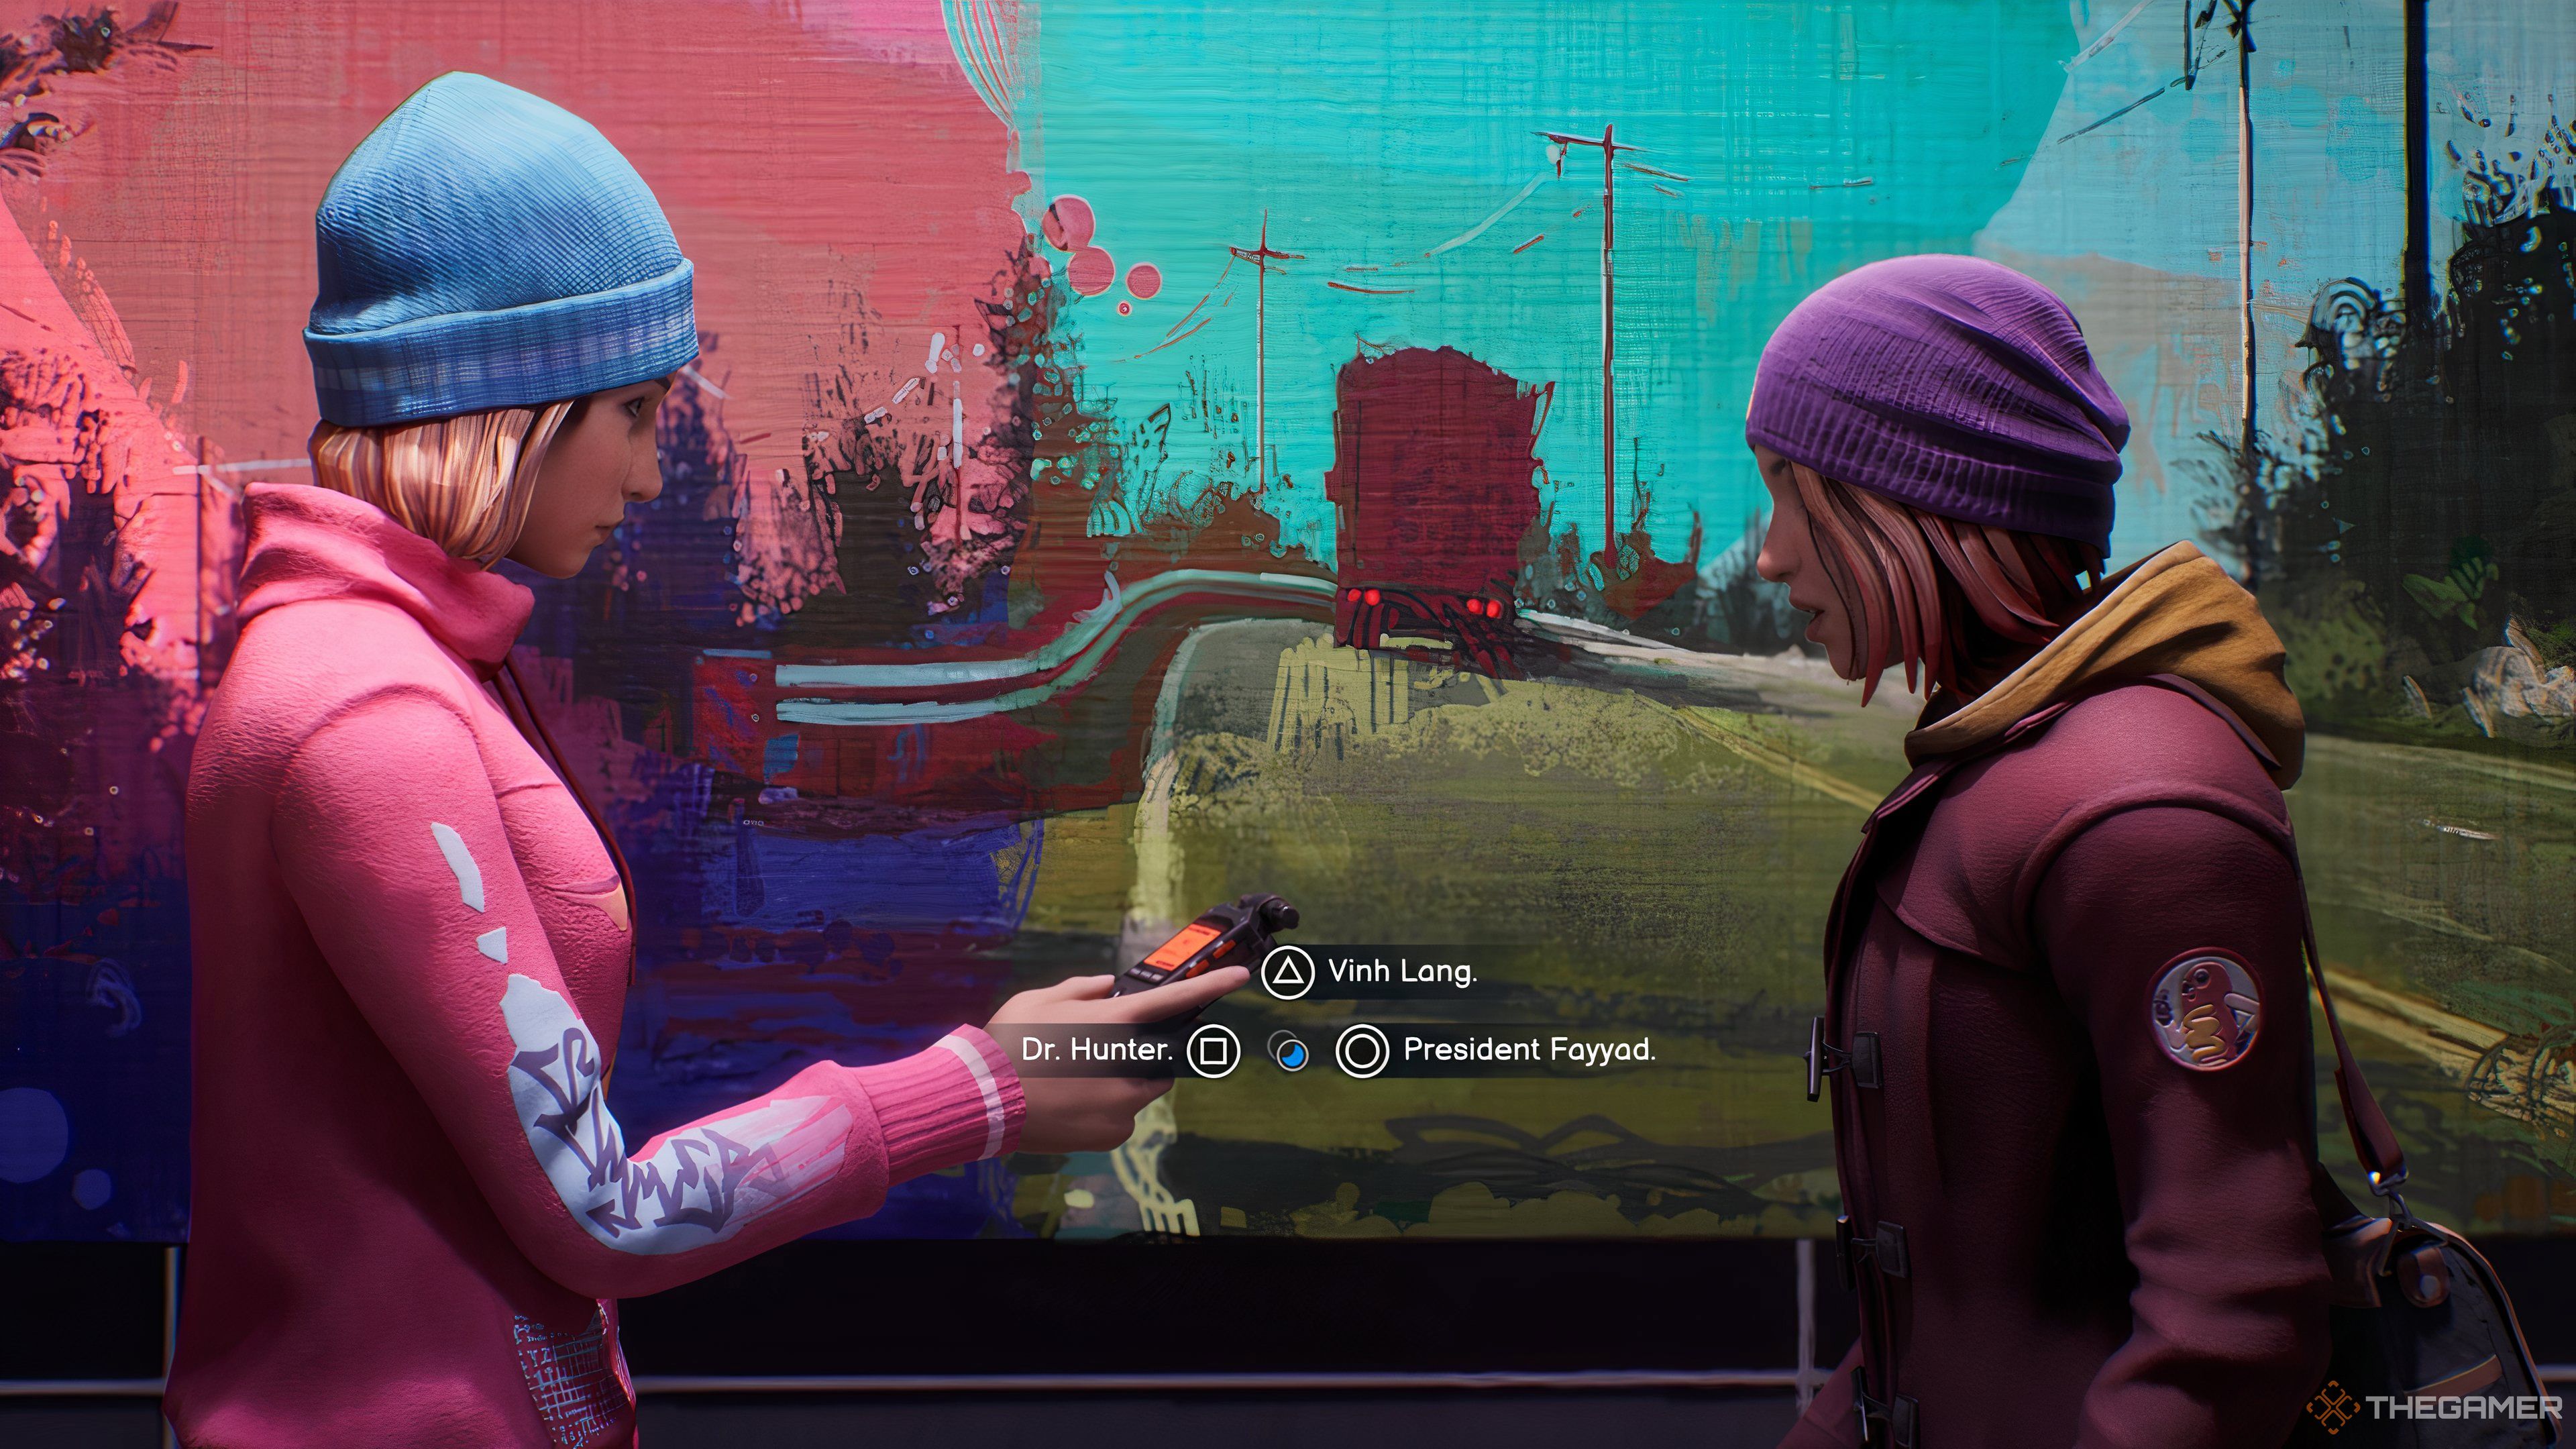
    Choosing What Name To Give To Loretta In Life Is Strange: Double Exposure.

    Loretta will then request a lead on who else to interview, with options including Gwen, Safi’s mother, or Vinh. No matter which name you provide, Loretta will express gratitude and leave.

    Gwen Letting You Read Safi's Manuscript In Life Is Strange: Double Exposure.

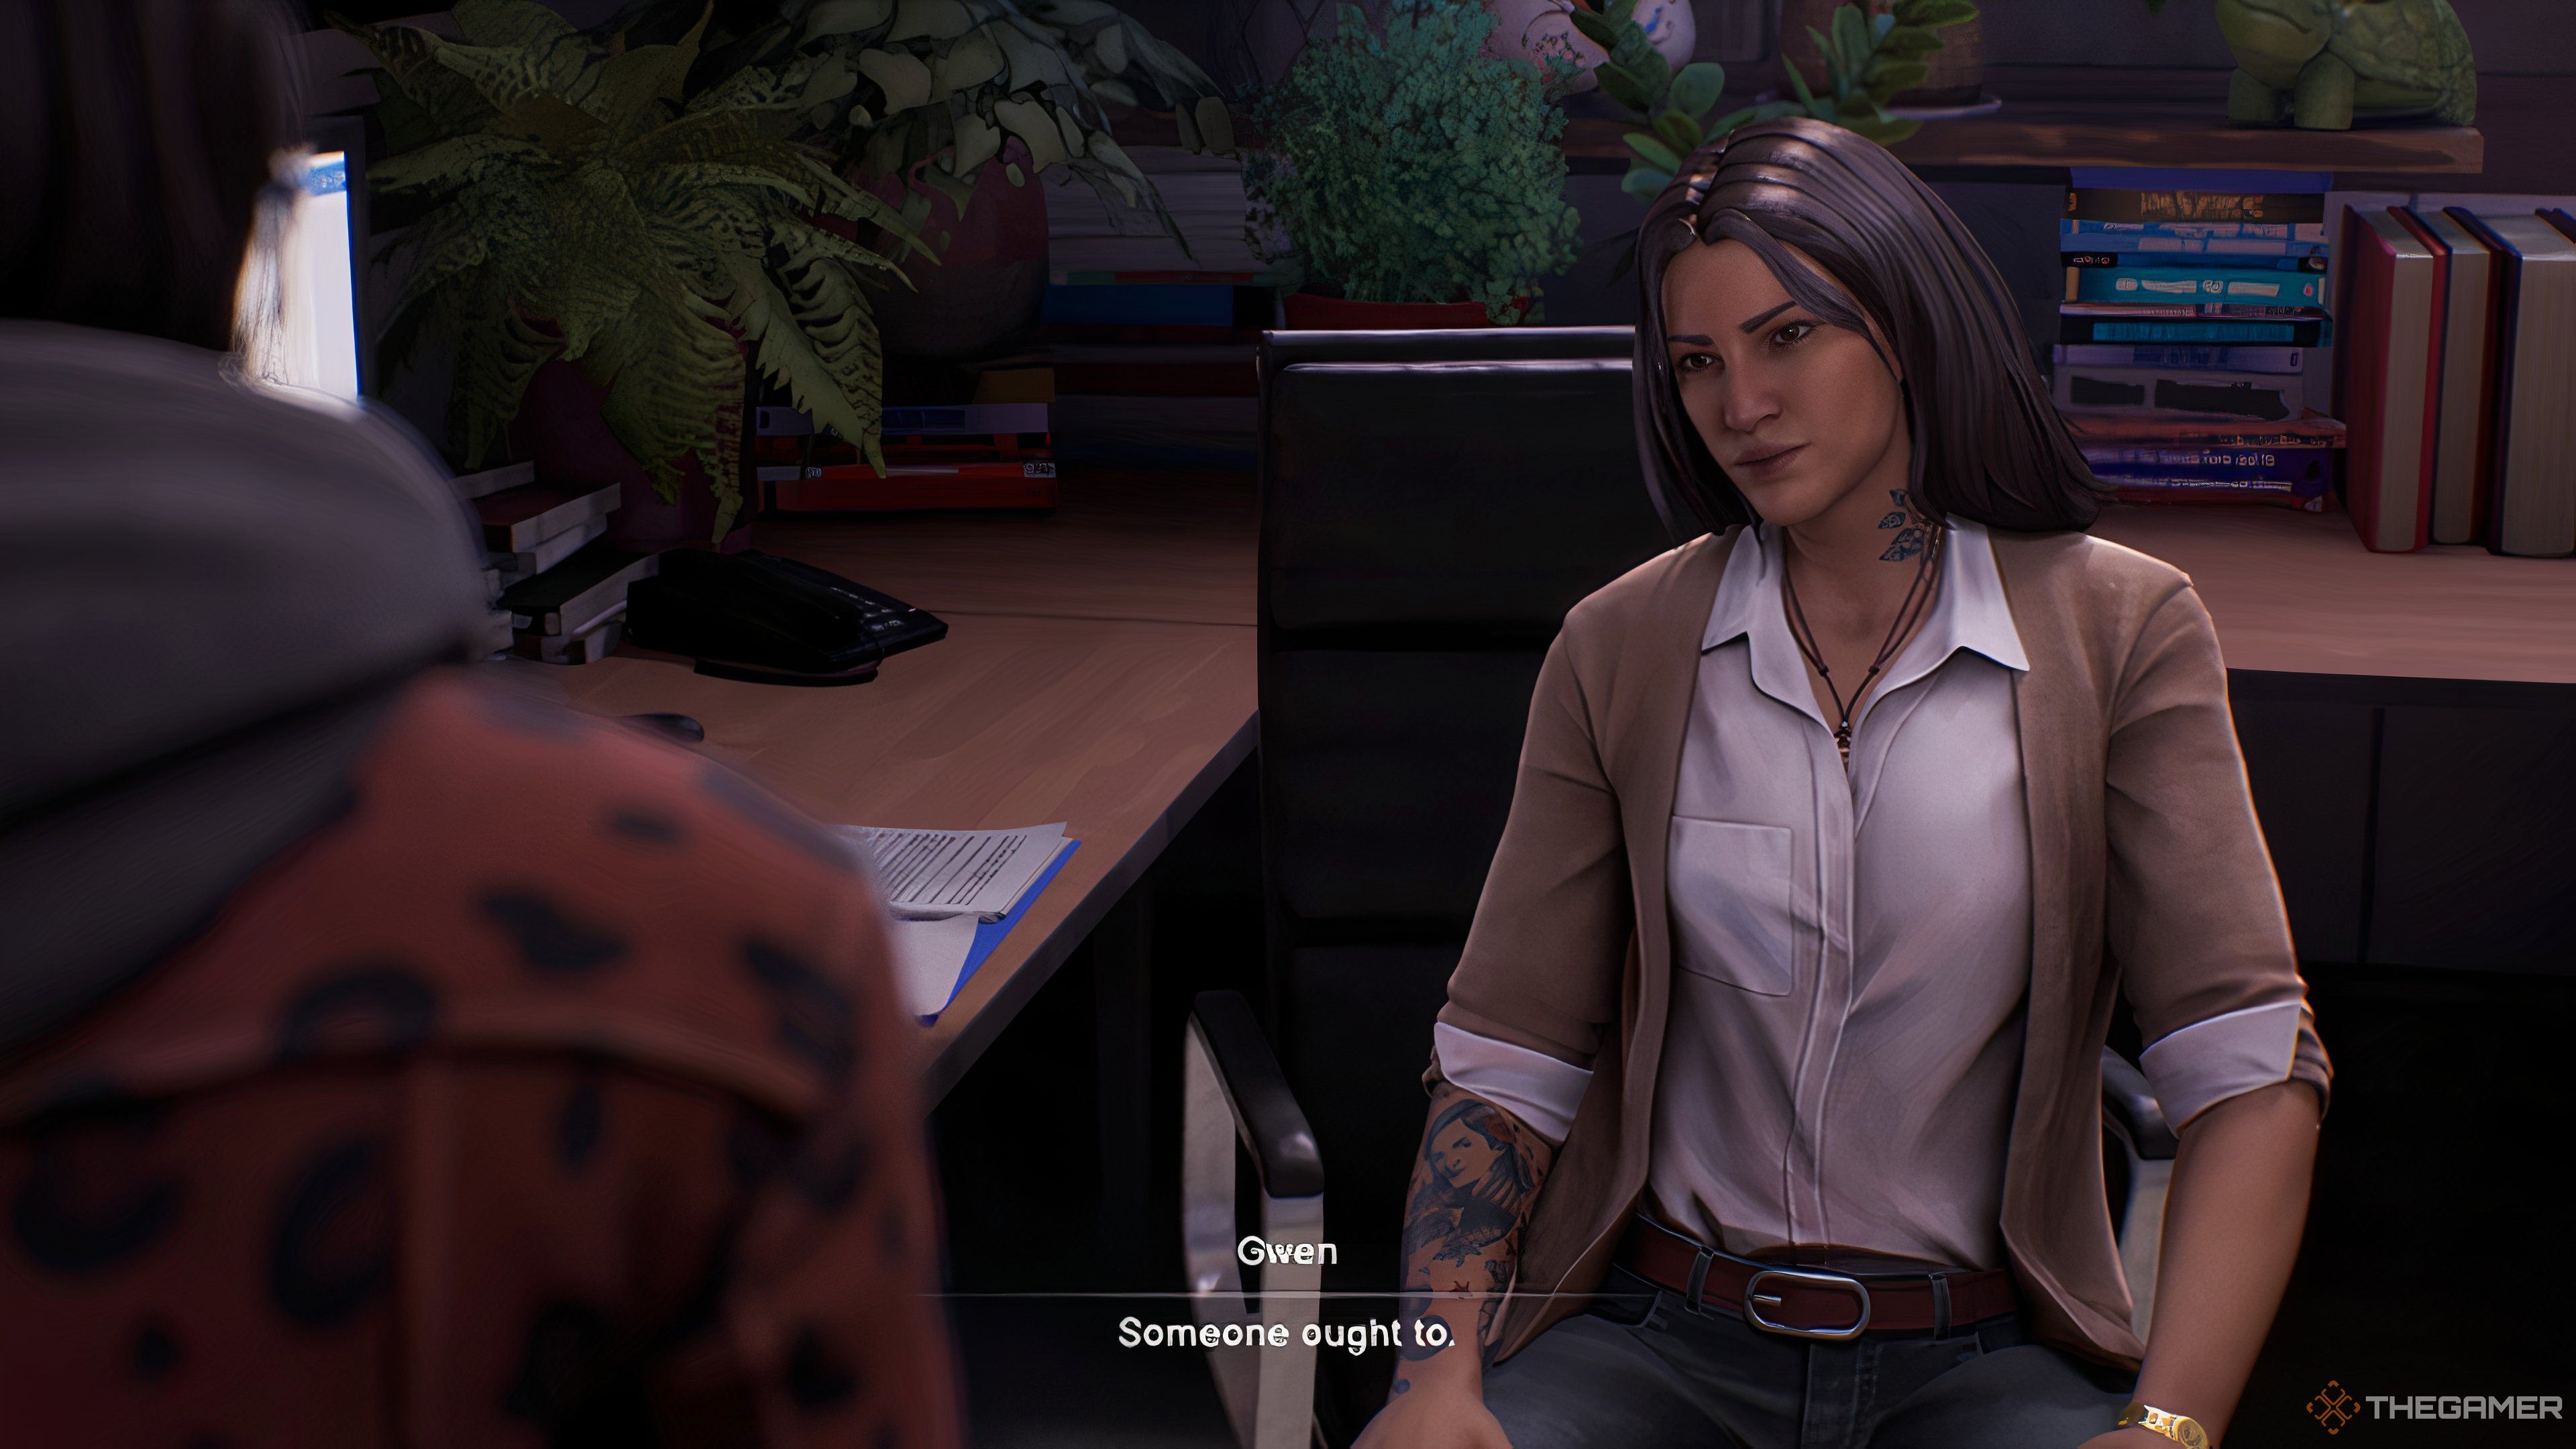
    Later in Chapter 3, Dead World Gwen will surprisingly welcome your arrival when you inquire about Safi’s work and Maya. She’ll permit you to read Safi’s manuscript, stating that “Someone ought to.”

    If you choose to post a snapshot of her vintage record player in this instance, she’ll leave a positive comment for you.