الوسم: Chests

  • Complete Your Quest: Solving Every Chest in Qingbo Stockade, Arknights

    Complete Your Quest: Solving Every Chest in Qingbo Stockade, Arknights

    Qingbo Stockade is a new area added to the Wuling region in Arknights: Endfield. It’s situated between Jingyu Valley and Wuling City, serving as the home of Tangtang’s clan and their large waterwheels. In this area, there are 36 secret chests filled with valuable resources like Oroberyls. Here’s a guide to help you find each one.

    Skyhold Ridge

    At the entrance to Jingyu Valley, near the bridge.
    On the waterwheel platform, jump quickly to the nearby path on the left.
    Near the edge of the water, close to a foe.
    On a water platform, reachable by jumping.
    Use zipline elevators or ramps to reach the second level, then head east along the path to find the last chest.

    Causeway Trail

    At the end of the path, next to an enemy.
    Start at the teleport point; instead of using the zipline elevator, jump onto the machinery nearby to reach the platform with the chest.
    Wait for the bridge to turn east-west, then cross it. The chest is on the right side.

    Bladewoods

    Defeat enemies in the Energy Alluvium to claim the chest.
    Follow the yellow butterflies up the stairs and along the path.
    Near the cages in the area.
    Take the zipline elevator down to the level below.
    Use the zipline elevators and follow the path again to find the chest.
    Defeat enemies to claim the chest.

    Main Fort

    Head west past the frogs and take the zipline up.
    Align the fourth and fifth frogs to get the bug to appear, then use it to make the chest visible.
    Utilize Fluid Pumps and Fluid Tanks to drain sewage and reveal the chest. Two tanks are necessary.
    Follow the yellow butterflies on the path.
    On a platform near a zipline.
    Close to some cages.
    On the edge of a platform by the waterwheel.
    Use the lift with the up/down arrow, spray the device to power the elevators, and ride up to the big waterwheel. Wait for it to rotate to an open side, then ride it to the top.
    From the same lift, spray the device again to power the elevator and follow the path west.
    During story progression, after rescuing Tangtang, climb the cages to pass through the wall gap.
    Gather three keys located in different parts of the area to unlock a chest.
    To the left after entering from the north.
    Use the same lift again, collect keys on the platform and in the northern room, then open the chest.
    Cross the bridge from the Bladewoods teleport point, then descend to the cave’s north path.

    Ancestral Spring

    From the teleport point, jump into the cave below and head to the pond beyond a building. The chest sits nearby.
    This is the only chest in this area, found by descending from the teleport point into the lowest level and exploring the pond area.

    This guide covers all the chest locations in Qingbo Stockade, helping you gather resources efficiently for your journey.

  • All Chests in Origin Lodespring: Completing and Solving Guide in Arknights

    All Chests in Origin Lodespring: Completing and Solving Guide in Arknights

    The Origin Lodespring is the fifth map in Valley IV of Arknights: Endfield and was once home to the massive Originium Oak Tree. This expansive area is filled with collectibles that help you upgrade your Operators and improve Endfield’s presence in Valley IV.

    There are 65 treasure chests in Origin Lodespring, each holding valuable Oroberyls, which are used to summon new Operators. Below are the locations of every chest on this map:

    Landbreaker Camp

    • Jump down to the platform below, then use the jump pad to reach the platform with the chest.
      Image:
    # Location Description
    1 Jump down to the lower platform, then use the jump pad to arrive at the chest.

    Mountain Passage

    • In Alluvium: Defeat the enemies to make the chest appear.
    • Defeat the enemy to claim the chest.
      Image: Mountain Passage Chest Locations
    # Location Description
    1 Defeat enemies in Alluvium to spawn the chest.
    2 Defeat the enemy here to earn the chest.

    Mining Camp

    • In shipping containers.
    • On the walkway.
    • Between two houses in a small area.
    • Climb up the nearby boxes.
    • From chest 4, drop down to the lower area and find the chest in a dark corner to the west.
    • From chest 5, go east a little and locate the chest between two shipping containers.
    • Jump up the boxes, then turn east behind more boxes to find the chest.
    • In a covered area right of the boxes used to reach chest 7.
    • Behind some breakable boxes after chest 7.
    • On top of the area after chests 7 and 9.
    • Inside the Workers’ Canteen at the back.
    • Follow the path behind the house west of the fenced area.
    • On the walkway above the area.
    • Climb the stone steps to the top of a small cliff.
    • Drop into the cave below through the ground hole, then find a vent at the back to reach the chest and a Delta bot.
    • Navigate along the cave platforms.
    • Behind a fence; jump over caution barricades.
    • Along the cliff from chest 17 to a vent.
    • Power the Nexus to open the gate, then use an explosive to destroy a crate.
    • At the cliff’s edge.
    • Next to a tipped-over container.
    • Enter the fenced area from the south via a staircase, then head up a ramp to the chest.
    • Outside the fenced-in area north of the stairs, on the top floor.
      Images and detailed steps available in game guides.

    Temporary Stockpile

    • Defeat summoned enemies in Alluvium to make the chest appear.
    • Find a locked chest with keys on a crate east, across an inactive Blight pillar.
    • Outside the fence, southwest of the Recycling Station.
    • Lower the cargo after repairing the console to reveal a ground hole; jump down and go west a short distance.
    • Rest on the truck bed to access the chest.
    • Destroy a crate in a shipping container with explosives.
    • Use the jump pad to reach a locked chest, requiring key collection from north-east or east by adjusting cargos.
    • In the lower area among Aggeloi enemies.
    • Take the first zipline down from chest 10, then proceed right.
    • Destroy a Blight Core near the Recycling Station and jump onto the shipping container.
    • Defeat enemies near a small house to access the chest.
    • Inside a truck bed near chest 12.
    • Destroy a Blight Core near the Recycling Station, then jump to the top of a shipping container.
    • Located behind a building close to enemies.
      Images and step-by-step instructions are in specific game guides.

    Blightcliff Observation Post

    • Complete the quest “Emergency Rescue” to unlock this area. The chest is on a table near the entrance.
    • Follow the west path, then south, using the zipline elevator after destroying the Blight Core.
    • From chest 2, jump along rocks to a mountain wall platform.
      Images: Observation Post Chest Locations
    # Location Description
    1 Area accessible after quest completion; chest on a table.
    2 Follow path west, then south, use the zipline, and jump up boxes to reach the area.
    3 From chest 2, jump on rocks to a mountain wall platform.

    Cliffside Mining Area

    • Power the Nexus to open the door.
      Image: Cliffside Mining Chest Location
    # Location Description
    1 Power the Nexus to access this area.

    Meteorological Station

    • Progress through the “Emergency Rescue” quest to unlock. After defeating the Chief Landbreaker, this chest becomes available.
      Image: Meteorological Station Chest
    # Location Description
    1 Complete the specified quest and defeat the boss to unlock this chest.

    Containment Zone Intersection

    • Complete the quest to open this zone. The chest is sitting on a table near the entrance.
    • Follow the path west, then south, using the zipline to jump into the fenced-in area. Scan and destroy the Blight Core, then jump onto boxes to reach the roof.
    • From chest 2, jump along rocks to a platform on the mountain wall.

    Image: Containment Zone Chest Location

    # Location Description
    1 Chest on a table after quest completion.
    2 Use the zipper elevator after destroying Blight Core, then jump on boxes to the roof.
    3 From chest 2, jump along rocks to a mountain wall platform.

    Old Mines

    • Behind some machinery.
    • Inside a storage container.
    • Proceed east, then south into another container, using boxes to climb up to the top area.
    • Stand on rubble with Aurylene and drop into the cave below, climbing a short ramp.
    • A bit north of the destroyed Ankhor.
    • On a rock along the path.
    • Take the elevator to the second floor inside the mine; the chest is behind some boxes.
      Image: Old Mines Chest Locations
    # Location Description
    1 Behind machinery.
    2 Inside a storage container.
    3 Use boxes or climb to reach top.
    4 Drop into cave through rubble; progress accordingly.
    5 Near the destroyed Ankhor.
    6 On a nearby rock.
    7 Inside a second-floor container, behind boxes.

    This guide should help you find every chest across the map, gathering the Oroberyls you need to upgrade and expand your operations in Endfield.

  • How to Find All Knee Deep in Earth Chests Through Completing Of Ash and Steel

    How to Find All Knee Deep in Earth Chests Through Completing Of Ash and Steel

    Many side quests are available in “Of Ash And Steel,” so talking to every NPC you encounter is helpful. One such character is Mix, a calm-sounding guy who hangs out in the forests inhabited by wolves and giant rats.

    Mix is among the first NPCs you meet on your way to the city. He offers a quest that involves a treasure hunt, digging into the ground for gold and resources. Here’s everything you need to know to complete the “Knee-Deep In Earth” quest.

    How to Complete the Knee-Deep In Earth Quest

    Before heading out from Nerest to find Mix, thoroughly search Nerest’s house for items you can pick up. Since the quest requires shovels, make sure to take any available in Nerest’s house, camps, and other buildings during your exploration.

    You can find Mix down the path from Nerest’s house. Head straight, pass a large puddle, then take a left. Mix will be leaning against a stone wall among the ruins on the left side of the trail. Explore the nearby ruins for additional resources and useful items, such as a claymore sword.

    Tip: If you’re attacked by giant rats or wolves, lead them to the nearest NPC, who can easily defeat them.

    Mix will tell you about three buried chests he wants you to find. Two are easy to locate, while one might be a bit tricky:

    • One is inside a cave in a hollow.
    • Another is near the windmill by the abandoned village.
    • The last is in the ruins close to the Woodcutter’s Camp.

    Be sure to bring at least three shovels. When you reach each location, dig in the bare dirt spot; the chest should appear. If not, try digging nearby spots until you find it.

    Chest Location 1: Cave in a Hollow

    This chest is guarded by a large woodwalker insect. You can fight it or lure it away. The cave is near Mix’s location: from facing Mix, go left along the path, then inside the hollow. Inside, you’ll find the woodwalker attacking on sight. Lead it to Mix to defeat it, or fight it yourself. Inside the cave, you’ll see a pile of human bones. Dig in the bare patch of earth nearby to find the chest, containing 30 gold, some torches, and camp supplies.

    Chest Location 2: Near the Abandoned Village

    From Mix, face him and then head to the right along the trail. Cross the wooden bridge into the village, move straight ahead, then left past the hut with purple light until you reach the windmill. Defeat any bugs or wolves you encounter. Behind the windmill, near the cliff edge, find a bare patch of earth and dig to uncover the chest. Inside are two lockpicks and 50 gold.

    Chest Location 3: Ruins Near the Woodcutter’s Camp

    This final chest is more challenging due to nearby creatures. It’s located in the ruins to the left of the woodcutter’s camp, guarded by a large creature and a few giant rats. From the windmill, follow the path to the right, then left at the fishing spot, crossing a wooden bridge, and continue along the trail until you reach a boardwalk. Cross it, then jump to the other side, and follow the path to the woodcutter’s vicinity.

    Head left from the camp to the ruins. Here, you’ll meet Rover, a large beast that charges and headbutts you. You can’t take him down alone, so lure him back to the woodcutter’s camp. Help the woodcutters defeat Rover, and deal the final blow for extra experience and rewards, including 10 raw meat.

    Back in the ruins, defeat any giant rats present. Near Rover’s area, the dig spot is commonly found, often with a rat nearby. Dig at this spot to find the last chest, which contains 5 Peasant Lass and 100 gold. Returning to Mix after this quest grants you 300 experience points and an additional 90 gold.

  • How to Open Locked Chests in Where Winds Meet by Completing & Solving

    How to Open Locked Chests in Where Winds Meet by Completing & Solving

    In the game Where Winds Meet, you get to explore a vast open world and live out your martial arts dreams in this Wuxia action RPG. You can learn fighting skills that help you defeat any enemy, whether big or small. Your main goals may be to seek revenge for fallen loved ones or choose to commit crimes—your decisions shape your story.

    One challenge you’ll face are locked treasure chests. These can be tricky for beginners, but there are multiple ways to open them. Finding treasure can be a game-changer, enhance your exploration, and even save your life.

    Where To Find Locked Chests

    Once you reach Kaifeng, you’ll discover a new city filled with many hidden treasures, most behind locked chests. You can find these chests guarding the riverbanks or along lesser-used roads with traveling merchants. You’ll know a chest is locked when it shines with a gold glow and can’t be opened without a lockpicking mini-game.

    How To Lockpick Chests

    To unlock a chest, you’ll need to play a puzzle mini-game. Be careful not to get seen while lockpicking. If NPCs notice you, they might tell you to leave or even fight you. When you’re in position and interact with the lock, the puzzle begins.

    The lockpicking puzzle involves aligning pieces of the lock’s tumblers to form a picture. The difficulty increases with your level. When all pieces seem to fit together, listen for a soft click—it confirms you’re on the right track. When the picture aligns perfectly, the chest unlocks. Be quick to loot the contents before anyone catches you!

    You might see patterns like:

    • The Tiger
    • The Serpent
    • The Dragon
    • The Horse

    If you’re stuck, look for hints or clues left by other players around the area to solve the puzzle.

    Note: If sneaking isn’t your style, you can also eliminate NPCs guarding the chest. Just be aware that this might increase your bounty, leading to future trouble.

    Opening Guarded Chests Without Lockpicking

    For heavily guarded chests or dangerous locations, you can avoid lockpicking altogether by using a martial arts ability called Celestial Seize. This technique allows you to remotely retrieve items from the chest, confusing the guards.

    To learn Celestial Seize, head to Qinghe at Heaven’s Pier and complete the Foul Play quest. During a drinking contest, you must steal a vial hidden on some crates. Successfully doing this unlocks the martial art, which you can then use at your discretion.

    Warning: Not all locked chests can be opened this way. Some will require the mini-game, especially if the chance to use Celestial Seize is zero percent.

  • How to Find and Open Golden Chests in Borderlands 4: Completing and Solving

    How to Find and Open Golden Chests in Borderlands 4: Completing and Solving

    The golden chest has returned in Borderlands 4 and works similarly to earlier versions. If you have some golden keys, you can open the golden chest in major hub towns to get valuable items.

    Because of the open-world design in Borderlands 4, there are now several golden chests scattered throughout the game. The process to unlock them is the same as before, so experienced players will find it familiar. For newcomers or those who haven’t played Borderlands in a while, here’s a quick explanation of what the golden chest is and how to unlock it.

    What Are Golden Chests?

    Golden chests are a special, reusable source of loot in Borderlands 4. In each main hub town, you can spend golden keys to open these chests, which always drop high-quality gear. Items from these chests are at least of Epic quality. Similar to Borderlands 3, there’s a decent chance of getting Legendary items from the world loot pool when opening these chests.

    All types of items you normally find in red chests are available here—guns, shields, ordnance, and class mods. Items from the golden chest always match your character’s level. This makes it a good way to gear up while leveling or to improve your gear after reaching the level cap for endgame challenges.

    Golden Chest Locations

    Town Location Map
    The Launchpad The Howl, The Fadelands
    Carcadia Ruined Sumplands, Carcadia Burn Map
    Belton’s Bore The Low Leys, Terminus Range Map
    The Lockaway Carcadia District, Dominion Map

    How To Get Golden Keys

    Golden keys are earned using Shift Codes. Gearbox sometimes posts these codes on social media, which you can redeem in-game for free golden keys and cosmetic items. Keep in mind, golden keys are single-use for your entire account, so use them wisely.

    If you want to collect more keys, check out the Borderlands 4 Shift Codes guide for all active codes and tips on how to redeem them.

  • How to Get Kitsune Chests and Solving Corrupted Zen Crates in Grow A Garden

    How to Get Kitsune Chests and Solving Corrupted Zen Crates in Grow A Garden

    Roblox’s Grow a Garden: Zen Event Update

    The Grow a Garden game on Roblox has received a new update for its Zen Event. The update introduces the Corrupt Channeller, who has his own special tree to grow. Unlike the regular Zen tree, this one works differently. You need to complete requests for different fruits or sheckles to grow it.

    Now, you can trade both Corrupt and Tranquil fruits with the Kitsune to get extra rewards. Here’s everything you should know about how to earn all the new rewards from this latest update.

    How To Grow The Corrupt Channeller’s Tree And All Rewards

    The Corrupt Channeller doesn’t want Corrupt mutation fruits. Instead, he requests Tranquil mutation fruits. He will ask for one item at a time, either a set amount of sheckles or a specific Tranquil fruit by weight. Each time you fulfill a request, you will receive a corrupted reward.

    Tip: You can pay 29 Robux to skip a request if you don’t think you can complete it.

    You can increase the tree’s corruption level up to ten; once it reaches full growth, the tree is completely grown. However, whether you fully grow it or not, the tree resets to zero every hour when the Zen or Corrupt Zen weather effects occur. This also resets the Corrupt Channeller’s request.

    The more you grow the tree, the more Corruption orbs will be released during the next Corrupt Zen Aura event. These orbs will spread corruption to fruits in your garden, giving them the mutation.

    Possible Corrupt Channeller Requests

    • Sheckles (usually between 70-130 million)
    • Tranquil Strawberry (0.3kg)
    • Tranquil Tomato (0.5kg)
    • Tranquil Blueberry (0.2kg)
    • Tranquil Orange Tulip (0.2kg)
    • Tranquil Corn (2kg)
    • Tranquil Daffodil (0.2kg)
    • Tranquil Bamboo (4kg)
    • Tranquil Apple (3kg)
    • Tranquil Coconut (14kg)
    • Tranquil Pumpkin (15kg)
    • Tranquil Watermelon (10kg)
    • Tranquil Cactus (10kg)
    • Tranquil Dragon Fruit (20kg)
    • Tranquil Mango (16kg)
    • Tranquil Grape (3kg)
    • Tranquil Mushroom (25kg)
    • Tranquil Pepper (7kg)
    • Tranquil Cacao (15kg)

    Possible Corrupted Rewards

    Item Odds
    Zen Egg 17.39%
    10x Chi 17.39%
    Corrupted Zen Crate 13.04%
    Corrupt Staff 8.7%
    Mutation Spray Tranquil 8.7%
    Mutation Spray Corrupt 8.7%
    Tranquil Staff 8.7%
    Zen Seed Pack 8.7%
    Corrupted Kodama 4.35%
    Enkaku (Seed Multi-Harvest) 4.35%

    Possible Corrupted Zen Crate Rewards

    Corrupted Zen Crates can give one of six cosmetics.

    Item Odds
    Zen Fan 30%
    Corrupted Garden Light 20%
    Corrupted Bamboo Fence 20%
    Mounted Katanas 13%
    Corrupted Bridge 13%
    Corrupted Well 4%

    How To Get Kitsune Chests

    Player beside the Kitsune in Grow a Garden

    The Kitsune has moved to the center of the map. It now has two wheels next to it: one for tracking corruption and the other for tranquility. To get a Kitsune Chest, you must trade five Tranquil fruits and five Corrupt fruits to fill both wheels. Once both wheels are filled, you’ll receive a Kitsune Chest as a reward.

    Tip: If the fruit you trade has both Corrupt and Tranquil mutations, it will fill a segment on both wheels.

    Possible Kitsune Chest Rewards

    Reward Odds
    Maneki-neko

    (Pet)

    34.5%
    Dezen

    (Seed – Single Harvest)

    34.5%
    Kodama

    (Pet)

    14.5%
    Lucky Bamboo

    (Seed – Multi-Harvest)

    14.5%
    Corrupted Kitsune

    (Pet)

    1%
    Tranquil Bloom

    (Seed – Multi-Harvest)

    1%
  • Completing Copper Tools, Armor, and Chests in Minecraft

    Completing Copper Tools, Armor, and Chests in Minecraft

    In Minecraft, tools have remained pretty consistent, especially in the early stages of the game. Players typically progress from wood to stone, then to iron for tools, while armor jumps from leather to iron as well.

    However, the recent copper update has introduced exciting changes. Copper tools now fill the gap between stone and iron tools, and copper armor fits between leather and iron as well. This makes the early game experience significantly different and adds to the excitement of discovering copper in your adventures.

    This new update is currently available in the Minecraft Preview, which you’ll need to download to experience the changes until the official release.

    Copper is a common resource that can be found at elevations above Y-coordinate zero. You typically get more than one copper ore per block, and smelting each ore yields one copper ingot. To mine copper, make sure to use a stone pickaxe; using a wooden one will destroy the ore.

    The crafting method for copper tools mirrors that of other tools, using copper instead of iron or other materials.

    Tool Recipe
    Copper Pickaxe Three Copper Ingots + 2 Sticks
    Copper Sword Two Copper Ingots + 1 Stick
    Copper Shovel One Copper Ingot + 2 Sticks
    Copper Axe Three Copper Ingots + 2 Sticks
    Copper Hoe Two Copper Ingots + 2 Sticks

    Copper pickaxes can’t mine materials like diamonds, but they do work faster and last longer than stone pickaxes. They’re a great option for tasks like digging through a lot of stone without wasting iron or diamonds.

    To create a full set of copper tools, you’ll need a total of 11 copper ingots.

    How to Craft Copper Armor

    Copper armor offers more protection than leather armor but less than iron armor. Since copper is easier to find than iron, crafting a full suit of copper armor is much more accessible.

    However, when you acquire enough iron, most players will likely prefer to use iron armor instead of sticking with copper since armor typically lasts longer than tools.

    Armor Recipe
    Copper Helmet Five Copper Ingots
    Copper Chestplate Eight Copper Ingots
    Copper Leggings Seven Copper Ingots
    Copper Boots Four Copper Ingots

    To make a complete set of copper armor, you will need a total of 24 copper ingots.

    How to Craft a Copper Chest

    A Copper Chest is essential if you plan to use the new Copper Golem in your crafting setup. The Copper Golem collects items from a Copper Chest and distributes them to nearby chests, potentially creating an automatic sorting system.

    There are two methods to create a Copper Chest:

    • Build a Copper Golem by placing a Carved Pumpkin on top of a Copper Block, creating a Copper Golem above a Copper Chest.
    • In a Crafting Table, surround a regular chest with Copper Ingots, requiring eight ingots in total.

    Copper Golems will look for any nearby Copper Chest, and you can also craft a double chest using copper.

  • How To Make Copper Chests in Minecraft: A Step-by-Step Guide

    How To Make Copper Chests in Minecraft: A Step-by-Step Guide

    Prior to the 2025 update, copper in Minecraft didn’t hold much value. Many players discarded it due to its limited uses. However, the latest changes have made it essential. One of the exciting new features is the ability to create Copper Golems, helpful companions for your base. To further enhance their usefulness, you can craft copper chests. Keep in mind that to access the recipe for a copper chest, you first need to build a Copper Golem, which I’ll explain in detail below.

    Mojang

    How to Craft a Copper Chest

    Once you’ve constructed a Copper Golem, it will produce one copper chest automatically. However, one chest won’t suffice for your needs! To create more, you’ll require copper ingots, a wooden chest, and a crafting table.

    Step 1: Start by crafting a wooden chest of any type.

    Step 2: Place the chest on your crafting table and surround it with copper ingots, as illustrated in the accompanying image.

    Step 3: Remove the completed copper chest and place it wherever you’d like.

    The fascinating aspect of the Copper Golem is its ability to take items you’ve placed in a copper chest and automatically sort them into your regular storage chests.

    Additionally, thanks to the update, copper can now be fashioned into tools, weapons, and armor, providing you with ample opportunities to utilize this resource.


  • Palworld: Feybreak – Unlock Chests Key-Free Guide

    Palworld: Feybreak – Unlock Chests Key-Free Guide

    Palworld is an expansive open-world game focused on survival and crafting, featuring adorable creatures known as Pals. There are various items you can craft, but some blueprints are hidden in chests. These chests are often locked and need keys, which can be a hassle to carry around.

    Fortunately, the game allows you to create lockpicking tools, helping you save inventory space by eliminating the need for multiple keys. Here’s how to acquire these lockpicking tools so you can avoid dealing with keys altogether.

    There are three types of lockpicking tools available, each designed to unlock specific types of chests. You only need to carry one of each. These tools can be unlocked at various levels in the Technology menu and require Ancient Technology Points to access.

    Lockpicking Tool Set

    Name Level Ancient Technology Points Crafting Requirements Chest Type
    Lockpicking Tool v1 16 1
    • 10x Ingot
    • 10x Paldium Fragment
    • 5x Nail
    Copper
    Lockpicking Tool v2 26 2
    • 20x Ingot
    • 20x Paldium Fragment
    • 10x Nail
    Silver
    Lockpicking Tool v3 51 3
    • 30x Pal Metal Ingot
    • 30x Paldium Fragment
    • 20x Nail
    Gold

    You’ll need to unlock the previous tool sets before accessing the next ones. If not, you’ll encounter a “Prerequisites not met” message in the Technology menu, blocking you from unlocking the desired item.

    You only need to craft each type of lockpicking tool once. They are classified as Key Items, which means they won’t appear in the regular inventory and won’t occupy any storage space.

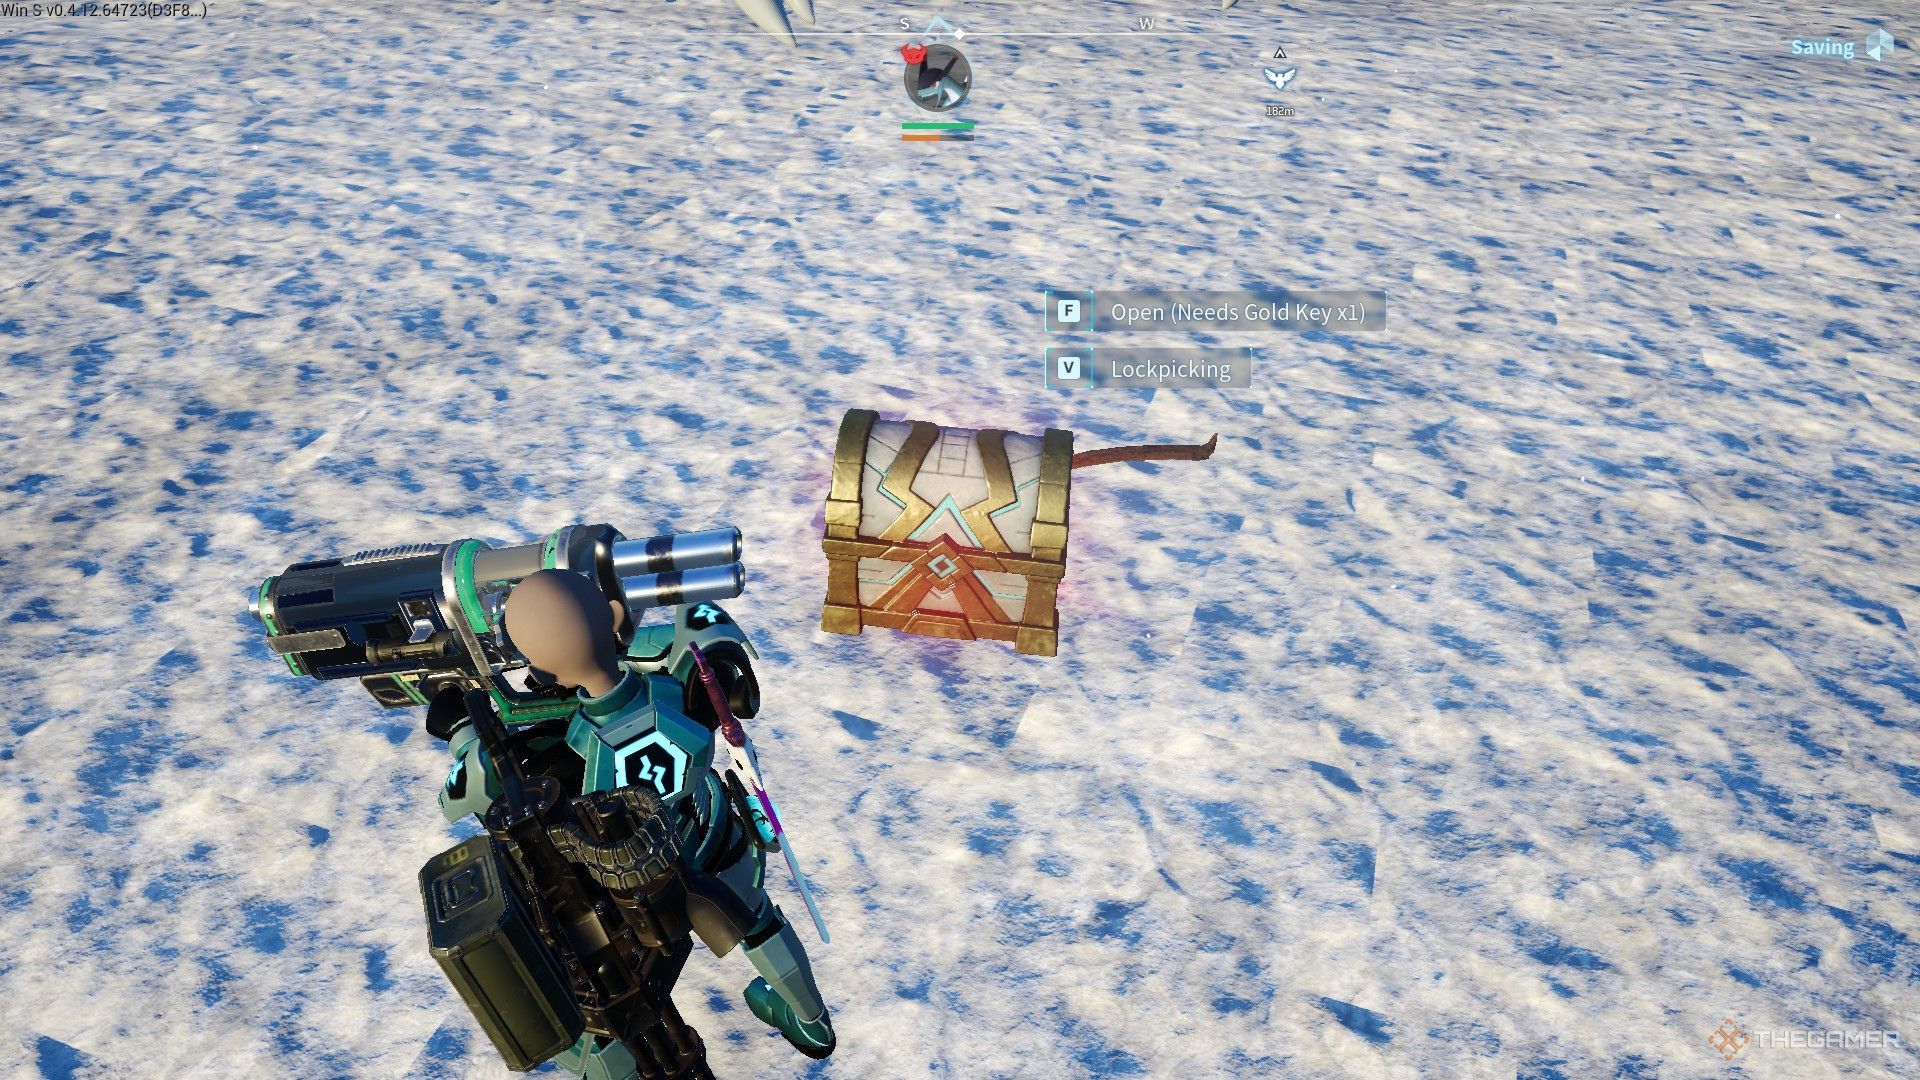
    A player stands in front of a chest requiring a Gold Key in Palworld.

    You must first unlock the earlier tool sets to progress to the advanced ones. Otherwise, you’ll see the message indicating “Prerequisites not obtained” in the Technology menu.

    Unlocking a chest works much like using a key. Approach the chest and you’ll see two options: unlock it with a key or try lockpicking. You can choose the lockpicking option even without any keys in your inventory.

    Once you begin the lockpicking process, you can attempt as many times as necessary to master it. There are no penalties for failing, allowing you to try various angles until you get it right.

    Understanding the Lockpicking Mechanism

    The player attempts to unlock a chest requiring a Gold Key but has failed and is trying again in Palworld.

    The game provides you with two tools to use at the same time. One is a pick, which you can rotate between 0 and 180 degrees, and the other is a knife used to turn the lock after the pick is in position.

    To unlock the chest, you need to rotate the pick and then use the knife to turn the lock. If your angle is right, the lock will turn completely to the left, granting access to the chest. If the angle is incorrect, the lock will shake, causing the pick to break and requiring you to restart the process.

    The rarity of the chest affects how challenging it is to unlock. Gold chests pose the greatest difficulty, and it may take time to locate the perfect lock position, but don’t be afraid to adjust the picks slightly until you find the spot that clicks into place.

    Keep trying different angles with the pick until you can turn the lock further to the left. If the lock barely turns left and the pick breaks, you’re close to finding the right angle. Just make a tiny adjustment to the pick’s position.