الوسم: chapter

  • Discovering the Woman in a Wellspring of Hope: The Solving Chapter of Where Winds Meet

    Discovering the Woman in a Wellspring of Hope: The Solving Chapter of Where Winds Meet

    A Wellspring of Hope is a side quest in the Jade Gate Pass area of Hexi in Where Winds Meet. It takes place deep in the desert, where a mysterious woman is working to find water by tending to dried-up wells.

    This quest follows her journey and the efforts of the people in Horsehelm Village to secure water. Below is a step-by-step guide on how to start and finish this quest.

    How to Start A Wellspring of Hope

    The quest marker will appear on the map near Horsehelm Village. Follow the marker and head to the village to begin this Lost Chapter.

    A Wellspring of Hope Walkthrough

    At Horsehelm Village, go to the large Rainbone Flower and observe it. Suddenly, a monster appears, attacking you and knocking you into an abandoned village to the west, where you meet a mysterious woman.

    Talk to her, then go to sleep. When you wake up, head northeast and find her sitting beside a wagon. Speak to her again, then reverse the damaged well. After the conversation, jump into the well to continue.

    Inside the well, follow the path ahead. Use Cosmic Reversal to clear fallen rocks blocking your way. Then, use reversal again to lift floating wood over a gap, making a path forward. Slide down the tunnel to proceed.

    In the next chamber, use reversal to hang baskets, then use Cloud Step to climb onto the ledge. Continue along the path until you reach a pit filled with Rainbone Flowers. Defeat them, then reverse the lift and other objects to access the next area. Stand on the lift, wait for reversal to end, and ride it up.

    Reverse another blocked entrance and continue along the path, defeating enemies as you go. Use reversal to clear rubble and keep heading forward.

    In a large open room, stand on the wooden platform closest to the back wall. Use Cosmic Reversal until the wood is level with the cliff edge—be careful not to go too far, or you’ll fall.

    Next, reverse to create a pathway and explore the right side for a chest. Return to the main path and take the left fork to continue. Move past Rainbones into a room where two Skeletal Blooms attack. Defeat them, then reverse the rubble to clear a hole in the ground.

    Jump down and then use reversal along with Cloud Step to leave the room. Follow the path back to the lift and proceed as before.

    After sliding down a sandy incline, use Cosmic Reversal several times to clear rubble. Climb up a rope and sit on top of a rock. Use reversal again to restore an oil lamp.

    With the oil lamp in hand, go back along the path out of the cave and speak to the woman one last time. This completes the quest.

  • All Quests & How to Solve Them in Fortnite: Chapter 7, Season 1

    All Quests & How to Solve Them in Fortnite: Chapter 7, Season 1

    There are many new quests to complete in Fortnite Chapter 7, Season 1, and each one rewards you with a significant amount of bonus XP. Finish your quests and gather your XP to unlock your favorite skins in this season’s battle pass.

    The Weekly quests and The Bride quests introduce new items, weapons, and points of interest on the island. The Battle Bus Quests give you more insight into the Fortnite story. Additionally, there will be new Battle Pass quests that help you unlock fresh styles for your cosmetics.

    How to Complete All Weekly Quests

    Week 1

    • Travel 500 meters while flying in a Wingsuit. Jump, glide, or float over several matches if needed, but ensure you accumulate 500 meters of flight time.
    • Land in a named location three times from a Hot Air Balloon. Find a Hot Air Balloon on the mini-map, hop on, and stay until you arrive at a named location.
    • Travel 500 meters while boosting in a vehicle. Boost up hills or off cliffs across matches until you reach 500 meters of boost time.
    • Outlast 40 players without storm damage. Stay away from storm edges and monitor storm movements, as there are no more audio warnings.
    • Eliminate 3 opponents with the Iron Pump Shotgun or Grenades. These weapons can be found in chests, vending machines, or on the ground.
    • Travel 250 meters while sprinting with an assault rifle equipped. Make sure to have an AR in hand when running between locations.
    • Break 10 glass windows in towns or cities in one match.

    Week 2

    • Defeat 3 bosses by collecting their tokens. Use the map guide to locate bosses quickly.
    • Destroy 15 objects with explosions, such as fences, trees, or shelves, using grenades or other explosives.
    • Eliminate 5 opponents with Twin Hammer Shotguns—these can be NPCs or players.
    • Collect three different weapons at Painted Palms, ensuring they are not the same as those you just dropped.
    • Blow up a vehicle and then sprint away before it explodes.

    Week 3

    • Complete all quests for Cat Holloway in two parts; the first half in week 3, the rest in week 4.
    • Meet with Cat Holloway in Humble Hills to start her weapon practice.
    • Eliminate opponents using hired characters three times at Latte Landing, Battlewood Boulevard, Humble Hills, Bumpy Bay, or Painted Palms.
    • Search 15 ammo containers for Cat Holloway across matches.
    • Hit Shooting Gallery targets at Wonkeeland 15 times for a loot bonus.
    • Deal 500 damage to opponents while aiming down sights with sighted weapons.

    Week 4

    • Finish all Week 3 and 4 quests for Cat Holloway.
    • Collect 10 rare or better weapons for her (blue or purple).
    • Use a Self-Revive device while knocked out, which is easy in solos by getting downed in the storm after collecting one.
    • Mark healing items, including medkits, shields, bandages, and Self-Revive kits, for your squad.

    Week 5

    • Talk to two fans and sign autographs at TIPTOP Terrace, Lethal Labs, Classified Canyon, or Painted Palms.
    • Build or destroy five objects in ten seconds, achievable by smashing small items or quick building in build mode.
    • Hit opponents 10 times while hiding in a bush—can be one person repeatedly or multiple players.
    • Ride the Ferris wheel at Wonkeeland for fun and extra points.
    • Headshot an opponent with a sniper rifle in a single shot, easiest against NPCs.

    Week 6

    • Defeat five players after they become bosses by following their map markers.
    • Deal 200 damage to opponents within five seconds of using Stealth Splash.
    • Land at Painted Palms or Ripped Tides and interact with NPCs three times, possibly over multiple matches.
    • Scout three new locations for Kingston marked on your map, such as south of Clawsy Lodge or east of Classified Canyon.
    • Search 15 chests before the first storm closes for quick loot.

    Week 7

    • Destroy 100 objects in the Reboot Van while in a Duo or Squad game by driving around and hitting objects.
    • Travel 500 meters in a vehicle in one match.
    • Hire three new talent NPCs by visiting their marked locations.
    • Hit five opponents with a sniper shot.
    • Spread five newspapers about Kingston’s new movie—find these at designated locations and visit multiple spots.

    Week 8

    • Complete all quests for Carina to uncover her story.
    • Deal 250 damage while airborne, such as jumping or falling from high places.
    • Survive ten storm circles without taking damage by avoiding confrontation early on.
    • Emote near or as Human Bill for an extra style.
    • Eliminate a Henchman, whether following or summoned by a boss.

    Week 9

    • Hit opponents 50 times with a Holo Rush SMG, either repeatedly against the same target or different ones.
    • Destroy 25 objects at Tip Top Terrace, using vehicles or built structures.
    • Reboot a teammate or hit a player with a Reboot Van.
    • Deal 500 damage with epic or better weapons, especially from rare blue chests or bosses.

    Week 10

    • Help Jones by completing all his quests.
    • Eliminate five opponents with a Lock-On Assault Rifle, including NPC enemies.
    • Land in a hot air balloon from the bus for a quick and fun descent.
    • Purchase three items from vending machines, ensuring you have enough gold.
    • Use an Ascender or Zipline in two different matches, commonly found at Battlewood Boulevard.

    Week 11

    • Destroy 20 objects at the landing site in Classified Canyon to make room for new allies.
    • Deal 250 damage to opponents while under low gravity effects, like using special items or environmental effects.
    • Complete three job board quests at any named locations.
    • Hit opponents 10 times within ten seconds after landing in a Wingsuit, either one opponent repeatedly or multiple targets.

    How to Complete All Battle Bus Quests

    These quests involve assisting Dummy in rebuilding the Battle Bus, which typically transports players from spawn to the main map. Completing quests grants bonus XP, a Lil’ News Van emote, and shiny decals for your vehicle.

    Each quest rewards 10,000 XP, with six quests available initially and more released within the first week.

    • Destroy 35 objects while in a vehicle, either as driver or passenger, using any vehicle, preferably a 4×4.
    • Collect four Battle Bus wheels from Pump N’ Run gas stations, located east of Wonkeeland, south of Sandy Strip, west of Innoloop Labs, and east of Ripped Tides.
    • Hit an opponent from above in a hot air balloon, accumulating damage from NPCs or players.
    • Find and collect 20 Bus parts from loot containers like chests, supply drops, or ammo boxes.
    • Talk to Dummy at Ripped Tides about the broken Battle Bus.
    • Destroy three dumpsters outside buildings to gather custom Battle Bus parts.
    • Thank the Bus Driver by pressing the interact button while on the bus before landing.
    • Deal 100 damage to opponents from below, preferably from high ground, using weapons or environmental angles.
    • Travel 200 meters while airborne in a vehicle, boosting over cliffs for maximum distance.

    How to Complete All Bride Quests

    These quests revolve around The Bride NPC.

    • Visit six different named locations while seated in a vehicle, meaning you don’t need to drive, just stay onboard.
    • Obtain a Forsaken Vow Blade from a Rift and defeat Gogo and Yuki at that location.
    • Defeat ten opponents using the Forsaken Vow Blade, employing its slash and dash attacks against NPCs or players.
    • Hit six opponents with the Vengeance Dash ability.
    • Survive in the top 25 players across four matches.
    • Purchase a service from The Bride at her spot in Sandy Strip to complete her questline.

    How to Complete All Battle Pass Quests

    By completing Battle Pass quests, you unlock extra cosmetics for Carter Wu via Fortnite Reload and additional styles for Cat Holloway via Blitz Royale. Bonus rewards like the Dark Voyager (Reality Redacted) costume generally unlock around level 85 and are tied to Battle Royale quests.

    First, unlock all items in the Battle Pass character pages. Once done, the special quests for each mode will be available, allowing you to earn extra styles.

    Cat Holloway Blitz Royale Quests

    • Emote at six different named locations across three matches.
    • Collect three Mythic or Exotic weapons from defeated players, which may require compromising and third-party elimination.
    • Enter a Rift within ten seconds of hitting a player.
    • Keep items of four different rarities (gray, green, blue, purple, gold).
    • Deal 1,500 damage with a mythic or exotic weapon within 15 meters.
    • Headshot ten players with Epic or higher rarity weapons.
    • Achieve a Victory Royale to complete the set.

    Carter Wu Reload Quests

    • Hit three players within 15 meters after bursting through a door.
    • Eliminate two players within ten seconds of mantling.
    • Deal 500 damage to players while airborne or sliding.
    • Score ten headshots while aiming down sights.
    • Deal 2,000 damage with shotguns or SMGs over multiple matches.
    • Eliminate two opponents consecutively without reloading.
    • Place in the top ten without using Rebooting.
  • Where Is the Secondary Cannon Target in Chapter Six of Reanimal? Completing and Solving

    Where Is the Secondary Cannon Target in Chapter Six of Reanimal? Completing and Solving

    Having finally rejoined your friends, it’s time to move on and see what new dangers await in the next area of the terrifying world of Reanimal. After defeating Mother and some Spider Kids she brought along, you need to find a way out of this place.

    This part of the game takes you through some of the scarier sections of Reanimal. You will need to operate a massive cannon, clear a sea monster blocking your way, and explore the wreckage of a ship.

    Flee and Fire

    Just after the fight with Mother, you’ll exit through the left door and find yourself at the front entrance of the clock tower—the same one that was locked when you first got off the bus. The friends you’re searching for are behind a truck near the upper fence, but soldiers are guarding them heavily.

    Quickly run to the boxes near the trucks and duck behind them to avoid the armed soldiers. Sneak around to the back of the truck to continue your escape. Watching a cutscene, the truck you’re in crashes, leading into the next part of your journey.

    Climb out of the wrecked truck and approach the camera to reveal a large open pipe on the right side of the screen. Crawl through this pipe, cross a bridge, and follow the path to reach a control room. It’s not powered yet, so climb onto a box and flip a switch nearby to open the front window, revealing a built-in stationary cannon outside.

    However, you need power first. Exit through the right door and team up with the female orphan to use the generator and restore electricity. Once powered, go back inside to solve the puzzle and activate the cannon. You’ll need to enter the pattern you saw from the binoculars into the control panel—matching the lights by flipping switches—then flip the final switch to confirm.

    A loud rumble outside will open the previously locked left door. Head out and climb down the ladder to return to the beach where you first arrived. If you knocked down a box near the generator earlier, a creature can be found and fought for a mask on the beach below when you arrive.

    Ready, Aim, Fire

    Jump into your boat with your friends and sail toward the cannon. While your friends stay with the boat, the two orphans will operate the cannon during this section.

    Before heading to the cannon, notice a small cave on the right side of the rocky path. Inside, you’ll find a bloated body that needs to be cleared—this is also one of the hidden masks you can find to unlock extra content.

    Climb the supply crate with the white parachute to carry a missile up to the cannon. Inside the open cannon, hit the switch to open the window, which allows you to see what the cannon will hit. Load the missile, then use the levers to fire. Use the wheel to re-aim the cannon if necessary, to target the enormous sea monster blocking the way.

    When you fire, the sea monster will sink, clearing a path for your boat through the water. Remember, if you’re collecting achievement medals, there’s a hidden statue near the ruins on the right that counts toward the Non-Cannonical trophy when shot.

    Return to your boat and navigate through the newly accessible route into the area where the sea monster once was, advancing further into the ruins.

    Exploring the Shipwreck

    Sail through a dark, mine-filled shipwreck until you reach open waters. Ahead is a large military ship blocking your path, obstructed by something fleshy. Dock beneath the ship and exit the boat to find a way forward.

    There’s a hidden mask in the rocky cove on the right, near the ship’s side—blow up the naval mines, then gather the mask from a crate on the small beach. As the orphans climb up the beach, they will need to defeat a flock of attacking seagulls and climb a wall to reach the ship’s upper level.

    Climb the large black chain to the ship’s anchor, then enter through the hull. Use a shipping crate to jump down to the ship’s interior. Inside, move ahead to find a metal girder that lets you cross a gap into the ship’s interior.

    A hidden poster worth unlocking concept art is pinned on a red buoy before you proceed—check the left side of the ship before continuing.

    Diving to Find the Sea Monster’s Eye

    Hoist the female orphan up onto a half-wall to access a large wheel, which you can rotate to open the door ahead. Inside, you’ll see a whale missing its eye—the cause of its blockage. To fix this, lift the girl onto the platform to re-enter the room with the wheel.

    At the end of the platform, find a scuba helmet on the left of a control panel. Interact with it to put on the suit, then press the switch to summon a scuba cage. Step inside, and the cage will lower you into the water beneath the ship.

    Navigate through submerged ruins, avoiding naval mines and debris, until you reach a narrow, trap-filled hallway. Carefully jump across obstacles and proceed through the ship’s interior, heading toward the remains of the sea creature you shot earlier. Its eye socket is accessible—climb onto the creature and remove the eyeball.

    As you leave, beware: the sea monster will chase you. Sprint underwater back through the hallways and mines, escaping to the surface, where you return to the cage. Bring the eyeball back to the whale, and insert it into the eye socket to animate the whale, which will clear the blocked path, allowing you to continue.

    Before advancing, pick up both diving masks—the orphan’s helmets count separately—and be sure to have both to unlock hidden masks and unlock extra content.

    Run up the ramp on the right to escape the ship through the hull and reunite with your friends on the beach. Push the boat into the water and sail through the open passage created by the whale’s movement to proceed with your adventure.

    Into the Breach

    Sail into the ruins of a city, visible above the water, a glimpse from your underwater dive. Touching the area triggers the Into the Abyss trophy. Turn left at the glowing red streetlight, but keep your harpoon ready—bodies floating in these waters may attack your boat.

    Advance toward a bridge where an enemy stands observing you. Eliminate the enemies ahead, then blow up the naval mines blocking a cave entrance. Clear more enemies and mines, then find an opening on the right wall of the rocks to access a hidden statue in the game.

    Sail onward through flooded, narrow canals, avoiding debris and enemy attacks, until you reach a dark, residential area with a tile hallway where you can dock your boat. Climb the stairs for a cutscene, then follow the creature seen in the hallway through the window, progressing into the final chapter of the game.

  • Hiding from Sniffer in Chapter One of Reanimal: Completing the Challenge

    Hiding from Sniffer in Chapter One of Reanimal: Completing the Challenge

    In Reanimal, a scary game from Tarsier Studios—the creators of Little Nightmares—you play as two orphaned kids trying to save their friends from mysterious monsters. The story starts with you controlling the male orphan, who is in a small wooden boat. He practices steering and accelerating in open waters, guided by buoy lights, toward a girl orphan floating nearby. Once you rescue her, you continue navigating through narrow rocky passages, using her lantern to look around while steering carefully to avoid damaging naval mines outside an abandoned factory in a forested waterway. After docking on a beach, you control the male orphan and explore the area, finding a key inside suitcases on the beach to open a door leading inside the factory.

    You then enter a sewer system, crawling through grates and moving past dark tunnels until reaching the factory’s upper levels. Outside, you witness a shadowy figure closing a garage door—later identified as Sniffer, the first antagonist—who is dangerous and will attack if he catches you. You slip inside the factory, climbing ladders, crossing high platforms, and solving puzzles involving rotating pipes and power boxes. During this exploration, you find collectibles like masks and posters, and encounter another child who warns you to leave. Moving through broken floors and dark rooms, you rescue the female orphan, using teamwork to cross hazardous areas.

    Progressing further, you climb a high wall with the mechanic’s help, and encounter a boy who tells you to leave. You then find a missing rail cart wheel by a desk, which you attach to restore the cart. As skin suits—hostile enemies—begin to chase you, you work quickly to escape back outside, pushing the cart along the tracks to leave the factory behind.

    Next, you head into the train yard, entering through a crack in the wall near a bathroom where you grab a toilet plunger to retrieve a key. You avoid Sniffer, who is actively hunting you, hiding behind suitcases and crates while carefully moving in crouch mode to stay hidden. Reaching the train, you use levers with your partner to start moving the train out of the yard. Sniffer chases you, forcing a frantic escape by running across bridges and through the environment until you finally get outside with the rail cart wheel.

    In the following chapter, “Into the Forest,” you jump down onto the ground and follow a path through woods, using the orphan’s flashlight to see in dark areas. You’re chased again by skin suits, which you outrun by taking alternate routes, including across logs and fences, until you reach a clearing with Sniffer’s ice cream van, which begins chasing you downhill. You and your friend manage to escape by jumping over a ledge, but Sniffer captures your other friend, ending the first chapter of Reanimal.

  • Completing All South Park Born in Chaos Rewards in Fortnite: Chapter 7, Season 1

    Completing All South Park Born in Chaos Rewards in Fortnite: Chapter 7, Season 1

    South Park has now appeared in Fortnite, along with the free Born in Chaos Pass. This pass is available at no cost, so you don’t need to spend V-Bucks. By completing various quests, you can earn 13 rewards, including themed items from South Park.

    For detailed information on which items you can unlock, how to earn Cred and Memberberries, and the steps to complete each quest, you’re in the right place. Here’s everything you need to know.

    Updated January 26, 2026: This article now includes the latest quests.


    How Long Does the Born in Chaos Pass Last?

    The Born in Chaos Pass is available from today, January 9, until February 5, 2026. After this period, you won’t be able to complete the quests or earn rewards. Make sure to finish all quests and claim your rewards before time runs out.


    All Born in Chaos Rewards

    The pass offers a variety of rewards such as emotes, sprays, banners, and more. Here’s what you can earn:

    Reward Cred Required
    Rest Well, Kenny Emoticon Emote 1,000 Cred
    Level Up (Season Level Increase) 2,000 Cred
    South Park Banner Icon 3,000 Cred
    Backpack of Cred Back Bling 4,000 Cred
    Level Up (Season Level Increase) 5,000 Cred
    Awesom-o Attack Spray Emote 6,000 Cred
    Born in Chaos Loading Screen 7,000 Cred
    Level Up (Season Level Increase) 8,000 Cred
    Towelie! Emoticon Emote 9,000 Cred
    Cheesy Poofs Rocketship Emote 10,000 Cred
    Awesom-o Spray Emote 11,000 Cred
    Terrance and Phillip Pickaxe 12,000 Cred

    How to Earn Cred

    Cred is earned by completing the quests in the Born in Chaos Pass. Completing these quests will unlock the rewards listed above.


    How to Unlock the Imaginationland Airship Glider

    To unlock the Imaginationland Airship Glider, you need to collect all six Memberberries by completing specific quests. The event will be broken into six parts, each adding new quests over the next five weeks.

    How to Get Memberberries:
    Each week, new quests will be added, and one of these will reward a Memberberry once four quests are completed. It’s likely that each week’s Memberberry quest will be the same, requiring completing four of that week’s new quests.


    All Born in Chaos Quests and How to Complete Them

    The quests are divided into parts, each with multiple objectives. Here’s a breakdown of the first set:

    Part 1 – Friendly Faces Everywhere:

    • Complete four batch quests to earn a Memberberry.
    • Ride five different rides or eliminate players at Cartmanland.
    • Hit 100 opponents with SMGs.
    • Be knocked down and then eliminate a player.
    • Defeat a boss.
    • Use portable toilets (Flushers) in three different matches.
    • Deal 200 damage to opponents within ten seconds of swimming.

    Part 2 – Sweet!

    • Complete four part 2 quests to unlock a Memberberry.
    • Spray or emote near Cartman’s statue.
    • Eliminate five with assault rifles.
    • Complete two matches without using ziplines or ascenders.
    • Emote on the stage at Cartmanland.
    • Maintain vehicle speed below 40 for 30 seconds.
    • Use the Stick of Truth.

    Part 3 – You Know I Learned Something Today:

    • Complete four part 3 quests to unlock a Memberberry.
    • Search containers or destroy objects at Classified Canyon.
    • Spray or emote near Cartman’s statue.
    • Eliminate five with assault rifles.
    • Complete two matches without ziplines or ascenders.
    • Restore health or shields.
    • Deal damage to bosses.

    More quests will be released weekly, and this guide will be updated with new objectives as they are added.

    Part 4 – Looks Like You’re About To Get Pwned
    Complete four quests from the previous list to earn a Memberberry, like jumping from Sunset Falls, damaging opponents in water, or eliminating opponents while in water.

    Part 5 – Mph Mmmph Mhh Mmph
    Complete four “Pwned” quests to unlock more incentives, such as visiting specific locations or performing specific actions like turning left in a vehicle or destroying objects in certain areas.


    Additional Notes

    More quests will be introduced over the coming weeks, with new objectives added each week. Keep an eye out for updates, and complete all quests before the deadline to maximize your rewards.


    Bonus: South Park Items in Fortnite Store

    South Park-themed items are available in the Fortnite store now, including skins, Back Blings, and a Towelie Sidekick. Be sure to check it out for the latest skins and accessories from South Park.

  • How to Complete the Stick of Truth in Fortnite Chapter 7, Season 1

    How to Complete the Stick of Truth in Fortnite Chapter 7, Season 1

    The late 1990s are making a comeback as South Park returns in Fortnite. Along with the free Born in Chaos Pass, which lets players earn rewards by completing quests, there are new South Park items available in the game store. You can also find South Park-themed items while exploring the island during gameplay.

    There are three new items: the Stick of Truth, Cheesy Poofs, and Kenny’s Respawn Token. All of these items are very helpful. Here’s how to find and use them in Chapter 7, Season 1.

    How to Find and Use All South Park Items

    Item How to Use
    Stick of Truth This item lets you control the Storm, causing it to shrink and circle around you for the final part of the match. It can only be used once per game.
    Cheesy Poofs You can throw these at opponents to heal yourself (by pressing R2) or damage them (by pressing L2). You can use it multiple times.
    Kenny’s Respawn Token If you have this, you will automatically come back to life after being eliminated. It’s a one-time-use item, but multiple tokens can appear in a single match.

    Note: the Rift Anomaly that grants the Stick of Truth Mythic appears to be quite rare. The banner in Fortnite indicates when it shows up, so players should watch out for it.

    How to Find South Park Items

    Some items can be found in loot chests or dropped on the ground. The Cheesy Poofs seem to be the most common of the three items. The Stick of Truth and Kenny’s Respawn Token are rarer, with the Mythic version of the Stick of Truth appearing through a Rift Anomaly. This Rift appears at certain locations, such as Cartmanland, right in front of the main stage where there’s a picture of Kenny dressed as Princess Zelda. However, Epic Games hasn’t clearly specified where or how this Rift spawns, leaving it a mystery whether its location changes each time or if it’s just very rare. It might spawn randomly or in different places each time, and it’s uncertain if players have found it yet because it’s so uncommon.

  • How to Find and Defeat All Bosses for Their Medallions in Fortnite Chapter 7, Season 1

    How to Find and Defeat All Bosses for Their Medallions in Fortnite Chapter 7, Season 1

    In Fortnite Chapter 7, Season 1, there are four main bosses to defeat, each offering a unique ability, a mythic weapon, and a special medallion kit. While these bosses have similarities to previous NPC bosses, they also come with some key differences.

    Before chasing after them, it’s helpful to know if the battles are worth your effort. Here’s everything you need to find and defeat each boss in Fortnite Chapter 7, Season 1.

    How to Find and Beat Boss NPCs in Fortnite

    Similar to last season, bosses will appear randomly at specific locations across the map. These locations change with each match. Watch for a boss skull icon on the map that signals their presence. Additionally, when in the Battle Bus, look for a streak across the sky where a meteor is falling—that indicates a boss is nearby, leading to guaranteed encounters.

    This season, bosses can be found at least nine different spots:

    • Ripped Tides
    • Classified Canyon
    • Peelian Swamp (west of Painted Palms)
    • Paws Inn (east of Wonkeeland)
    • Sunset Falls (south of Wonkeeland)
    • Sus Studios
    • Innoloop Labs
    • Battlewood Boulevard
    • Humble Hills

    Each boss is accompanied by two NPC henchmen and wields a mythic weapon. It’s often easier to focus fire on the boss rather than the henchmen. Knowing what weapon each boss has allows you to plan your attack carefully to minimize damage.

    When defeated, bosses drop healing items, their mythic weapon, and a boss medallion kit. Picking up the medallion kit takes some time, so decide if you really want to hold onto it. Each kit grants a power specific to that boss, along with extra health and shields. Unlike previous boss medallions, these take up inventory space and cannot be dropped.

    The medallion kits now show the exact location on the map with a skull icon, rather than just a vague outline, making it easier to locate them.


    How to Find and Defeat Human Bill

    Human Bill, the blue alien (sorry, human), carries a mythic Arc Lightning Gun, his unique power, and a Chug Jug. To take him down, keep your distance and use mid to long-range weapons. Avoid the short-range Arc Lightning attacks, which are most deadly in close combat. His henchmen aren’t too tough, but be mindful of other players who might hear the fight from afar and try to steal your loot.

    Defeating Human Bill awards you with his mythic Arc Lightning Gun, his medallion kit—which gives a boost to health and shield—and the ability to use the Low-Gravity Power. This power helps you avoid fall damage and traverse the map more easily.


    How to Find and Defeat Beach Brutus

    Beach Brutus, holding the mythic Twin Hammer Shotguns, is a tough opponent. He also drops a Chug Jug and his special medallion kit that grants the Automatic Shield Regeneration ability.

    To beat Brutus and his two henchmen, attack from a distance because his weapons excel at short-range. Focus your fire on Brutus; once he’s down, his henchmen will fall too. Defeating him yields the mythic Twin Hammer Shotguns, which have fast reload times and increased damage, along with his medallion kit.


    How to Find and Defeat Hush

    Hush wields the mythic Deadeye Assault Rifle and a few grenades. She drops her mythic rifle, a Chug Jug, and her medallion kit after defeat. She is flanked by two henchmen as well.

    Winning against Hush requires mobility since she’s highly accurate with her mid-range rifle. Stay out of her line of fire and avoid getting hit by grenades. Her mythic AR has a boosted headshot multiplier, making it a strong weapon for skilled players. Her medallion kit grants the Zero Point Dash ability, allowing swift movement across the map.


    How to Find and Defeat Yule Trooper

    Yule Trooper appeared during the Winterfest 2025 event on December 18, 2025. He throws Chiller Grenades, creating ice whirlwinds that cause damage, and wields the mythic Holo Rush SMG. When defeated, he drops his SMG, a Chug Jug, and his medallion kit.

    It’s best to keep your distance when fighting Yule Trooper, since his SMG is powerful and optimal at mid-range. Dodge his icy grenades and avoid the whirlwinds. Use weapons like assault rifles or the Arc Lightning Gun to deal damage safely. His medallion kit transforms you into the Yule Trooper, providing permanent stamina and a health boost. It also grants a low-gravity power to prevent fall damage and help you move around the island more easily.

  • How to get the Hoppa Sack Back Bling Twitch Drop in Fortnite Season 1, Chapter 7

    How to get the Hoppa Sack Back Bling Twitch Drop in Fortnite Season 1, Chapter 7

    Fortnite’s latest season features a lot of flashy cosmetics in the Battle Pass, but the real highlight right now is a free item you can get without using V-Bucks. The Hoppa Sack Back Bling is a small backpack with a funny little face and some plushies hanging off it, looking adorable and playful—just the sort of fun thing Fortnite is known for.

    You can only get this item through Twitch, and the offer ends on December 13 at 10:59 pm CST. If you want this cute backpack to hop into your Fortnite collection, here’s exactly how to get it before the deadline.

    How to Get the Hoppa Sack Back Bling Twitch Drop

    To earn the Hoppa Sack Back Bling in Fortnite Chapter 7, Season 1, you need to participate in Twitch Drops. It’s simple: just watch an eligible Fortnite stream on Twitch. Look for a stream with the “Drops Enabled” tag, or you can watch directly on this channel: CouRageJD’s Channel.

    You need to watch for a total of 30 minutes. You can keep track of your progress on Twitch by visiting your Drops Inventory page. When the reward is ready, Twitch will notify you to claim it manually—just click on the notification, or it might appear at the top of your screen.

    Make sure your Twitch account is linked to your Epic Games account in the Settings under the Connections tab. Without this link, the item won’t transfer into Fortnite.

    The Hoppa Sack Back Bling will be in your Fortnite locker once you’ve completed the steps. Remember, you only have until December 13 at 10:59 pm CST to grab it.

    If the Drop Isn’t in Your Fortnite Inventory

    If you’ve claimed the drop but don’t see the backpack in your game, first verify that your Twitch and Epic accounts are properly linked. Check your Twitch Drops Inventory to confirm it shows as “claimed.”

    Since rewards don’t always appear immediately, it might take some time for the item to arrive, especially if there are many claims or if Epic Games is processing deliveries. Logging out and back into Fortnite can sometimes help trigger the delivery.

    Be sure to stay updated on your account’s claim status and check your inventory regularly until the item appears.

  • Woven With Malice Lost Chapter Quest: Solving in Where Winds Meet

    Woven With Malice Lost Chapter Quest: Solving in Where Winds Meet

    The side quest “Woven with Malice” involves uncovering the secrets surrounding the Celestial Silk Garment, which is said to be as light as silk but as strong as steel. Here’s how to start and complete the quest step by step.

    Starting Woven with Malice
    Go to the northeast of Buddha Fort in Sundara Land, Qinghe, and speak with the Scholar. After talking to him, wait one in-game day for the quest to activate.

    Quest Walkthrough

    After waiting, return to the Scholar and speak with him again. Then, wait another full day. He will be trapped inside a bell; talk to him afterward, and he will direct you to a nearby village. Follow the quest marker and speak with Little Needle there. Collect a blue dye, red dye, and charcoal ash, then give these items to her. Wait one in-game day for her to finish her work, and then bring the finished garment back to the Scholar.
    Listen in on his conversation, approach the bell to assess his condition, and pick up a handkerchief. Watch the cutscene that follows, then head south to meet Monk Tranquillus.

    Confronting the Monk and uncovering the truth
    Speak with Monk Tranquillus, then engage in a duel against him twice. Afterward, find the second handkerchief a short distance northwest and show it to Monk Tranquillus. Talk to Little Needle, then burn the vines blocking the cave entrance with a fire arrow and speak with her again. Inform Monk Tranquillus about the trap, hide and wait for the right moment.

    Chase the mysterious woman, then hurry back to Monk Tranquillus to receive a letter from him. Speak with Little Needle again, and then proceed to the Northern Bamboo Grove, which can be accessed using the Bamboo Grove Boundary Stone for quicker travel. Once there, speak with Little Needle, then with the stranger. Show him your handkerchiefs, then talk to him again. Steal the Boss’s Secret Letter from the stranger’s cart using Celestial Seize and investigate the ruins by breaking through the floor with Mighty Drop.

    Eavesdropping and the final steps
    Investigate the nearby cliff wall, using Wind Sense in the forest to spot some gawking passersby. Find the glowing spot nearby and stand there to eavesdrop on their conversation. Run to warn Little Needle, but be prepared—you’ll be knocked out. Upon waking, listen to the Pavilion Owner’s advice and press the button during the quick time event to warn the others of the ambush.

    Watch the subsequent cutscene, thank the strangers for helping you, then speak with Little Needle one last time to complete the quest.

  • How to Play as Ryu in Every Chapter of Ninja Gaiden 4 by Completing and Solving

    How to Play as Ryu in Every Chapter of Ninja Gaiden 4 by Completing and Solving

    Getting through the main campaign of any Ninja Gaiden game can be tough, but true fans know the real challenges start after the credits roll. Ninja Gaiden 4 has plenty of hidden content and unlockables that players can access once they’ve finished Yakumo’s story. This includes additional content for those who feel Ryu didn’t get enough spotlight during the game.
    How to Unlock Master Ninja Difficulty, Trials, and Chapter Replay

    After completing all 19 chapters of Ninja Gaiden 4 for the first time, you’ll unlock bonus modes under “Challenge Mode.” The first of these is the Master Ninja difficulty, which is the game’s hardest challenge and will require a lot of practice to beat.

    You can start a fresh game on Master Ninja difficulty, but finishing the game for the first time also unlocks Chapter Replay. This mode allows you to replay any chapter on any difficulty with all your gear and moves unlocked. If you prefer a true challenge, starting a new game on Master Ninja might be the way to go. However, Chapter Replay offers an easier way to practice and master difficult sections on the hardest level.

    The last bonus you’ll unlock after completing Ninja Gaiden 4 is Trials Mode. Similar to the Tag Missions in Ninja Gaiden 2 Black, in Trials Mode, you can take part in special combat challenges or fight bosses on any difficulty without having to finish a full level first.

    Note: I cleared Ninja Gaiden 4 on Normal difficulty during my first run, but I believe these bonus modes are also available on Hero difficulty.

    How to Play as Ryu in Every Chapter

    The real reward with these unlockables is the ability to play as Ryu in all chapters. Both Chapter Replay and Trials Mode let you choose whether to play as Yakumo or Ryu, giving you the option to experience Ninja Gaiden 4 entirely as Ryu.

    Playing as Ryu isn’t exactly the same as playing as Yakumo. Ryu isn’t made for most of the story scenes and dialogue, so many cutscenes are skipped when you choose him. Still, it’s a great way to spend more time as the Master Ninja. To do so, simply pick Ryu instead of Yakumo when you start Chapter Replay or Trials Mode for the first time.

  • How to Raise Your O.X.R. Rank and Enter O.X.R. Bunkers in Fortnite: Chapter 6, Season 4

    How to Raise Your O.X.R. Rank and Enter O.X.R. Bunkers in Fortnite: Chapter 6, Season 4

    O.X.R. Ranks have replaced the Hero Ranks from the last Fortnite season, offering multiple ways to increase your rank and unlock powerful buffs and items. To stand a better chance of dominating against bugs, you’ll want to level up quickly.

    Raising your O.X.R. Rank not only improves your chances of getting top-tier loot but also grants extra skills, access to Bunkers, and Boons. That’s why leveling up is crucial in this season of Fortnite.

    ## How to Increase Your O.X.R. Rank

    Increasing your O.X.R. Rank in Fortnite can be straightforward if you focus on the actions that give the most Rank XP. While defeating players can earn some points, you’ll mostly improve quickly by completing larger, bug-related objectives.

    | Objective | Reward |
    |——————————–|————|
    | Destroy Swarmer Bug Nest | 30 XP |
    | Eliminate Bomber Bug | 50 XP |
    | Destroy Hive Stash | 60 XP |
    | Knock Player | 75 XP |
    | Eliminate Player | 75 XP |
    | Defeat Queen Bug | 200 XP |
    | Claim Capture Point (Outpost) | 250 XP |
    | Open O.X.R. Bunker | 400 XP |

    The best way to level up your O.X.R. Rank is by landing at an Outpost and taking out every Bomber and Swarmer you see. Once you capture an Outpost, a couple of Drop Pods will arrive, bringing high-rarity weapons, items, and Boons. Afterward, head toward the nearest bug nest, eliminate bugs, and destroy nests and Hive Stashes. If the Queen still stands, defeating her will give you an extra 200 XP. Moving systematically from Outpost to Hive while clearing bugs will help you rank up faster.

    ## O.X.R. Rank Rewards

    Ranking up will not only boost your pride but also grant access to a Drop Pod each time you advance a rank and unlock an O.X.R. Bunker. When your rank increases, a Drop Pod drops nearby, containing high-rarity items like Wrecker Revolvers, Bug Blasters, Leadspitter 3000, Slurp Juice, and more. The higher your rank, the better the loot.

    You’ll also earn a Super Soldier Boon exclusive to ranked players. As your rank climbs, the effects of this boon intensify.

    | O.X.R. Rank | Rewards | Boon Effect |
    |————–|———————————-|—————————————————|
    | Rank B | Rare Weapons, Super Soldier Boon B | Reduces your energy drain when sprinting. |
    | Rank A | Epic Weapons, Super Soldier Boon A | Boosts the previous effect and increases reload speed. |
    | Rank S | Legendary Weapons, Super Soldier Boon S | Adds reduced recoil and less spread. |
    | Rank S+ | Mythic Weapons, Super Soldier Boon S+ | Increases sprint speed with unlimited energy. |

    ## O.X.R. Bunker Locations and Loot

    Once you reach Rank A, you gain access to any of the four bunkers on the island. Be quick, as others will also try to claim them. Inside each bunker, you’ll find common and rare chests, ammo boxes, and an O.X.R. chest with exotic weapons.

    | Bunker Location | Loot |
    |——————————–|—————————————-|
    | West of Foxy Floodgate | Shock ‘n Slow Shockwave Launcher |
    | North of Shiny Shafts | Double Trouble Shotgun |
    | South of Utopia City | Marksman Wrecker Revolver |
    | South of First Order Base | Eradicator O.X.R. Rifle |

    Once you reach Rank A, you’ll see a nearby Drop Pod falling, containing high-rarity gear. Inside, you might find weapons like Wrecker Revolvers, Bug Blasters, or the Eradicator O.X.R. Rifle, depending on the bunker. You’ll also get a chance to use the O.X.R. Bunkers and their specialized loot to gain the upper hand in your battles.

  • Rocket Ship Password for Chapter Three of No Sleep for Kaname: Completing and Solving

    Rocket Ship Password for Chapter Three of No Sleep for Kaname: Completing and Solving

    Isekai Elevator Trap and Escape Room Challenge

    In the third chapter of No Sleep for Kaname Date, your group accidentally completes a ritual that traps Ota in an isekai elevator. To save him, you need to work as Iris and Moma to free him before it’s too late.

    Solving the Entry Code to the Rocket Ship

    You must figure out the code to unlock the rocket ship on Iris’s level. Then, identify which Iris is real when you take control of Moma in this part of the escape room. Use the clues on Iris’s level to help solve the puzzle.

    How To Enter The Rocket Ship

    After placing the buttons in the correct slots on the elevator, the trap completes — the elevator transports Ota to another world. You accidentally completed the code by pressing all the buttons.

    To prevent this, head to a locked rocket ship in the back corner of Iris’s level, near the sky screen used earlier to study constellations. The ship requires a six-letter code to unlock.

    Go to the green planet display on Iris’s floor. There, you’ll see a tiny hole at the top. You have a needle from earlier, used during a record-playing scene, so remember that you also used a paper cup and needle to play a record just before this. Use this method again.

    However, Iris has the needle, and Moma has a paper cup left from removing a sticker earlier in the chapter. Moma is on a different floor, so you’ll need to be creative in sending the cup to Iris.

    Sending the Cup to Iris

    Iris using the cup and string on the planet puzzle to open the rocket ship in No Sleep for Kaname Date.

    Remember the item exchanges between Ota and Iris during the green warp portal scene. Red portals send items between certain locations: red sends to green, blue to red. Moma’s floor has a blue portal, while Iris’s has a red portal. As Moma, throw the cup into the blue portal to send it down to Iris.

    As Iris now has the cup, use your inventory’s combine mode to combine the cup and needle. Then, go to the green planet display and interact with the top of the case. You can now lower the needle into the display to listen to a broadcast from the planet.

    The broadcast reveals the rocket ship code: MUNDUS. Return to the locked ship as Iris, enter this code, and get inside the rocket.

    Determining Which Iris Is Real

    After Iris boards the rocket, it moves to another level, where you switch control to Moma. He witnesses five rocket ships with images of Iris on their doors descend from above, among the moons where you previously shot a lizard moon in the eye.

    Moma’s goal is to shoot the fake Iris ships to save the real one. To start, you should get behind the gun and aim at the sky. Identify and shoot down the obvious fakes: the leftmost ship, the middle, and the rightmost one.

    The second and fourth Iris images look identical. To find out which is the real Iris, switch control back to Iris and examine the ship closely.

    Look out the window of Iris’s ship. You will see the lizard moon to Iris’s right. Using this, and knowing what the real Iris can see, shoot down the rightmost Iris.

    However, leaving the last ship alive causes a new puzzle involving the Third Eye. Iris mentions seeing a “beautiful moon,” but since you previously shot the eye on the lizard moon, you realize Iris isn’t in that ship either. Shoot the remaining ship to finalize the puzzle.

  • Completing the Witch Toy Collectible in Doom: The Dark Ages’ Abyssal Forest

    Completing the Witch Toy Collectible in Doom: The Dark Ages’ Abyssal Forest

    The Abyssal Forest is a rather straightforward stage in Doom: The Dark Ages, but it has its unique features. About two-thirds of the way through, you’ll stumble into a large arena that sets the stage for an epic battle. Once you defeat all the demons, you’ll notice that most of the level’s secrets are hidden right in this area.

    We’ll outline where to find these secrets and guide you through solving the puzzles. With our help, you won’t have to wander around a fiery room searching for a way to activate a large cage. We’ve done the hard work for you!

    Secrets

    9

    Gold

    183

    Rubies

    2

    Demonic Essence – Armor

    1

    Codex

    1

    Toy

    1

    The Life Sigil Above the Yellow Key

    Follow the main path and take the first right when it appears. Continue up the trail, jump across the gap, take out a Shield Soldier, and watch out for a few Stone Imps. You’ll find the first Life Sigil at the end of this route.

    Getting the Yellow Key

    The Yellow Key in The Abyssal Forest of Doom The Dark Ages.

    After your first encounter with the Whiplash demon, check the left side of the arena for a spot where you can drop down. Follow the path through a stone corridor where you’ll find two Shield Soldiers and an Arachnotron. Climb up the wall, and you’ll reach the room containing the Yellow Key.

    As soon as you grab the Yellow Key, chaos will erupt. You’ll face Whiplash Demons, Nightmare Imp Stalkers, Mancubuses, Shield Soldiers, Arachnotrons, Stone Imps, and Revenants. So make sure you’re well prepared before picking it up!

    The First Ruby

    The first Ruby in The Abyssal Forest of Doom The Dark Ages.

    Open the yellow gate, clear out the Cyberdemon and Imps, then, while facing the entrance of this area, look to your right for a path that runs beneath this space. Follow it forward until you find some water.

    Jump up to a platform with a launch pad, but before using it, leap across the water to the climbable wall, where you can collect a stash of gold. After taking the launch pad up, defeat a Hell Knight, and grab the Ruby. Break through the gate and you’ll find yourself back in the area where you fought the Cyberdemon.

    The First Codex

    The Codex page in The Abyssal Forest of Doom The Dark Ages.

    Proceed down the path until you encounter a group of Shield Soldiers. Take them out, then look to your right for a root-covered wall that you can break through. You’ll find yourself in a room containing the Codex.

    Treasure Chest

    The first treasure chest in The Abyssal Forest of Doom The Dark Ages.

    After executing a shield jump over a large gap, look to your right. There’s another breakable wall that leads to a treasure chest. Use your Shield Charge to break through.

    Demonic Essence Health Increase

    The health upgrade in The Abyssal Forest of Doom The Dark Ages.

    After passing the Sentinel Shrine, you’ll find yourself in a large arena where another swarm of demons awaits. This battle includes nearly every demon you’ve encountered so far, culminating in a fight with a Pinky Rider Champion. Defeating them grants you a permanent health boost.

    Second Treasure Chest

    The second chest in The Abyssal Forest of Doom The Dark Ages.

    After defeating the arena enemies, return to the entrance, take a right up the slope, and break the chain holding the large bell. This will cause a hole to form. Jump down into the hole and deal with the Imp Stalkers. Climb the wall to access the Treasure Chest.

    From the treasure room, turn right and circle around the corner. You’ll notice a heated chain with a barrier rotating in front of it. Wait for the gap, then strike the chain with your shield throw. After breaking it, head back to the cliffside. Jump down, and you’ll face a massive gate. Look up and left to find another chain to break, which will raise the gate. Collect the gold inside, but be ready for a fight with a Whiplash demon.

    Continue straight and climb two walls. At the top, search for gold piles on the scaffolding. Head to the tower’s corner, where you’ll spot a trail of gold. Jump from platform to platform to collect the gold. Once you turn the corner, you’ll spot the second Ruby.

    Witch Toy

    Move to the corner of the arena, where you’ll find a path that loops around. Follow it, collecting gold along the way. Prepare to battle a Hell Demon and two Imp Stalkers. Be cautious of fire jets as well. In the central room, you’ll find the toy in a cage.

    Position yourself between the two fire jets aimed at the center, look up through the window, and you’ll see a chain you can cut. After severing it, throw your shield into the glowing gears in the adjacent window. This will lift the cage, allowing you to claim your toy.

    The Second Life Sigil

    The second Life Sigil in The Abyssal Forest of Doom The Dark Ages.

    Near the spot where you obtained the Witch Toy, look for a block and a climbable wall. Once you’ve located them, platform your way up to reach the Life Sigil above.

    The Gold Under The Cliff

    The gold under the tree in The Abyssal Forest of Doom The Dark Ages.

    When you’re ready, head through the gate you blew open with the turret and jump off the cliff. After dealing with any demons nearby, turn around to discover two piles of gold beneath the platform you just jumped from. Follow the path to the end, defeat the Arachnonoid there, and take the elevator down.

    Treasure Chest

    The final treasure chest in The Abyssal Forest of Doom The Dark Ages.

    In the area where you obtain the Grenade Launcher, you’ll notice a treasure chest behind a gate. For now, continue forward. A bit down this tunnel, you’ll find a corpse that allows you to perform a shield jump. Use this to leap upward and follow the tunnel. Jump over the first gap and down the second to reach the cell with the Treasure Chest.

    The Final Life Sigil

    The final Life Sigil in The Abyssal Forest of Doom The Dark Ages.

    When you reach the section where you drop down onto an old rail line, turn around to find a Life Sigil in a shaft. Your only task left is to move forward and face the large melee that wraps up the Abyssal Forest chapter.

  • Chapter Four Guide: The Gate of Saint Jerome in Stone of Madness

    Chapter Four Guide: The Gate of Saint Jerome in Stone of Madness

    In the last chapter of The Stone of Madness campaign, The Gate of Saint Jerome, you encountered Shadow and learned about her tragic history. After Mother Superior found out about her love, Shadow was locked away in a cell with her infant until she passed away.

    You said goodbye to Shadow by either killing Mother Superior or giving her baby’s toy. In return, she handed you the emblem. However, it was damaged, and now you must find a great fire to fix it. This chapter marks the start of your quest for that fire. If you’re ready, the final part of the campaign lies ahead.

    How to Repair the Emblem

    Your first task in this chapter is to repair the emblem given to you by Shadow. To do this, you’ll need a strong fire. There are two potential fire sources: the central fire in The Cells or the kitchen oven in the Refectory. If you choose the fire in The Cells, a cutscene will trigger when you approach it, revealing that the fire has extinguished and an inmate is trapped there.

    First, talk to the Doctor about the situation. To free the inmate, use Alfredo’s Investigate skill to follow the tracks next to the jailed inmate. The tracks will lead you to a first-floor cell in the north, ending near a mirror. Interact with these tracks to unlock the barred door where the inmate is held.


    Once the inmate is free, press the button again to close the door. Next, go up to the second floor of the western section of The Cells and activate the switch. This will reignite the fire that the inmate was previously held near.

    Finally, activate the fire area, then hand over the emblem to either Eduardo or Agnes, and interact with the fire to finish your objective and trigger a cutscene.

    Alternatively, you can utilize the oven in the Refectory. However, to do this, you first need to secure a key from the friar working in The Great Wall area.

    Where to Find Three Moonshine Barrels

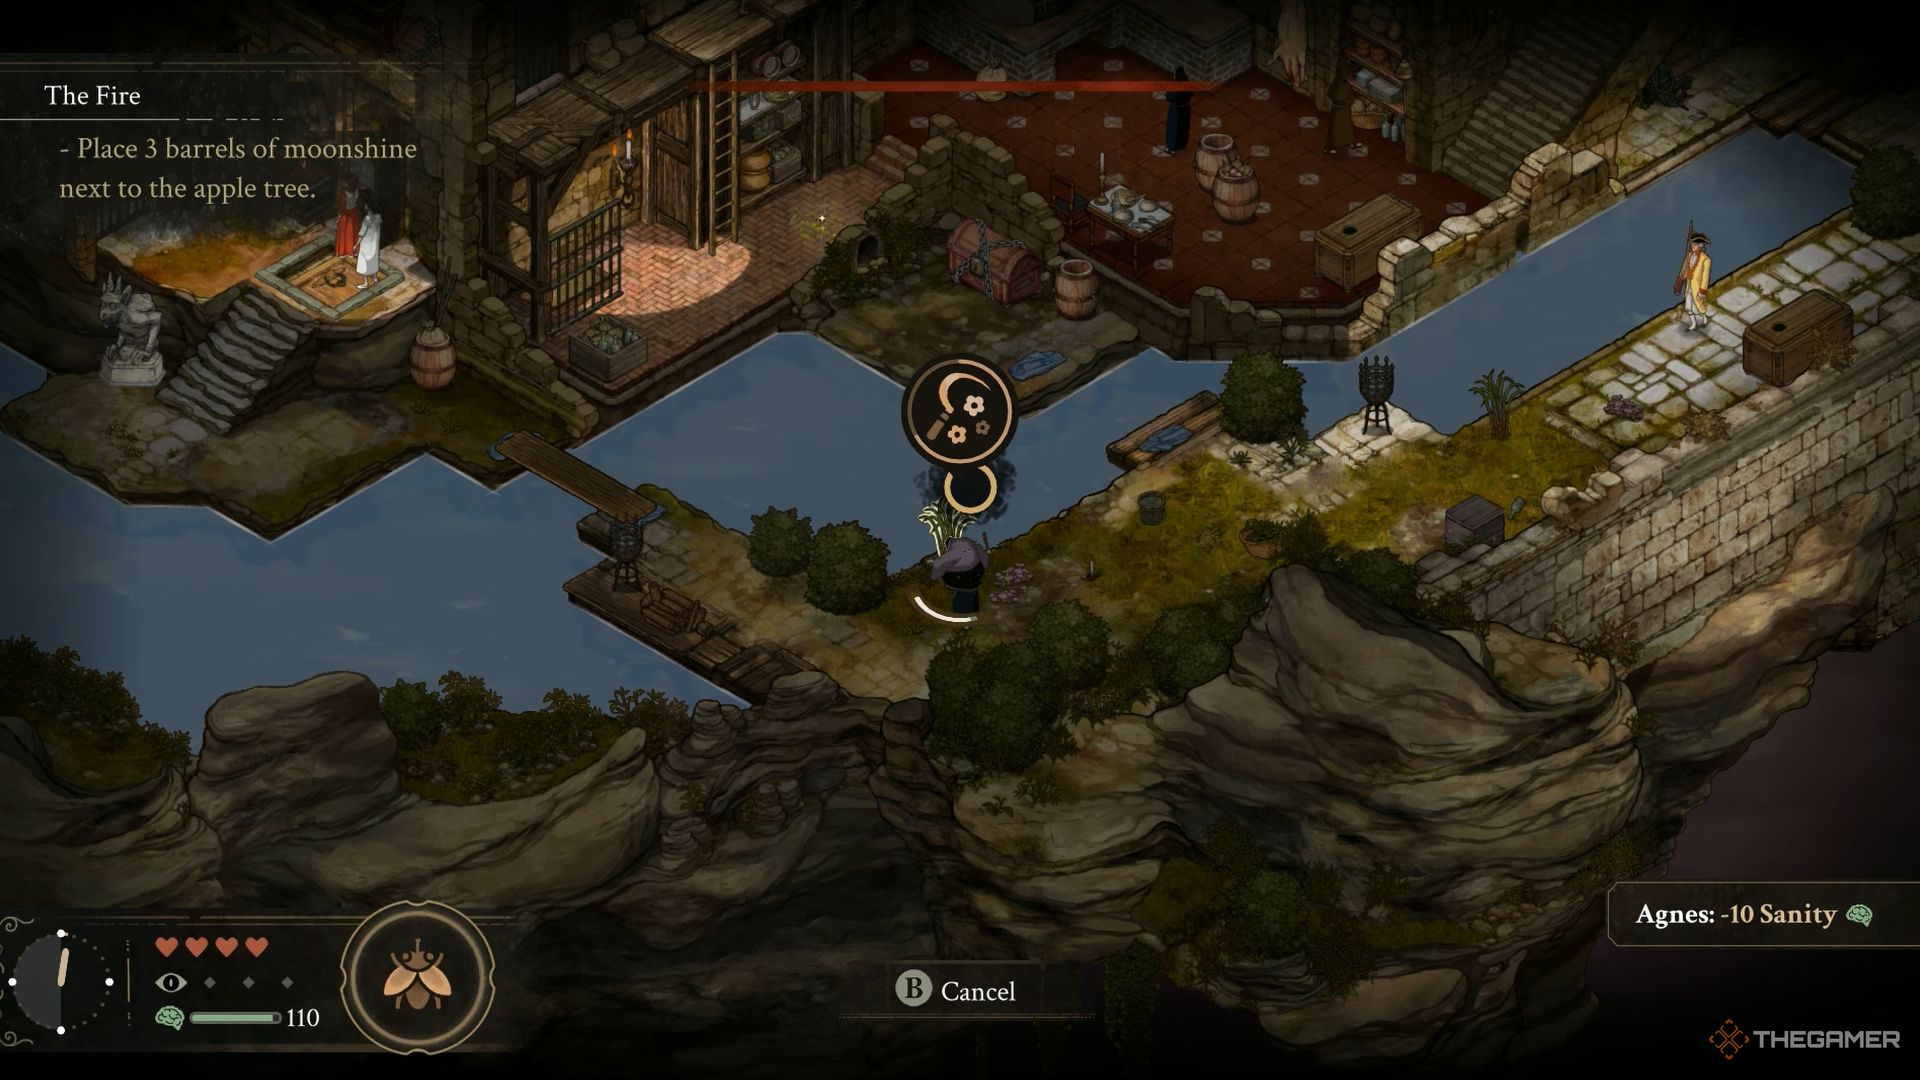
    Your next goal is to create a distraction for your escape by lighting the large apple tree in The Great Wall area. To accomplish this, you need to collect three Moonshine Barrels and bring them to the apple tree. You can either hunt for barrels or gather sugar cane to make moonshine.

    You can craft Moonshine Barrels at night in your cell using Agnes’s Witches Cauldron skill combined with the sugar canes you’ve collected.


    Agnes collects sugar canes next to the river in The Stone of Madness.

    To gather sugar cane, look for it near the river east of the Refectory. There are two sugar canes here—use Agnes to collect them while avoiding the Nun and the soldier. After that, go to the Shed cellar door in The Great Wall, descend the stairs, and find two more sugar canes near the river.

    Across the river, you’ll see another sugar cane, but Eduardo will need to place a plank across the water to reach it. You can also find sugar cane in The Cells’ Apothecary area, specifically in the room on the west side with vases.


    Alfredo investigates the tracks next to the river in The Stone of Madness.

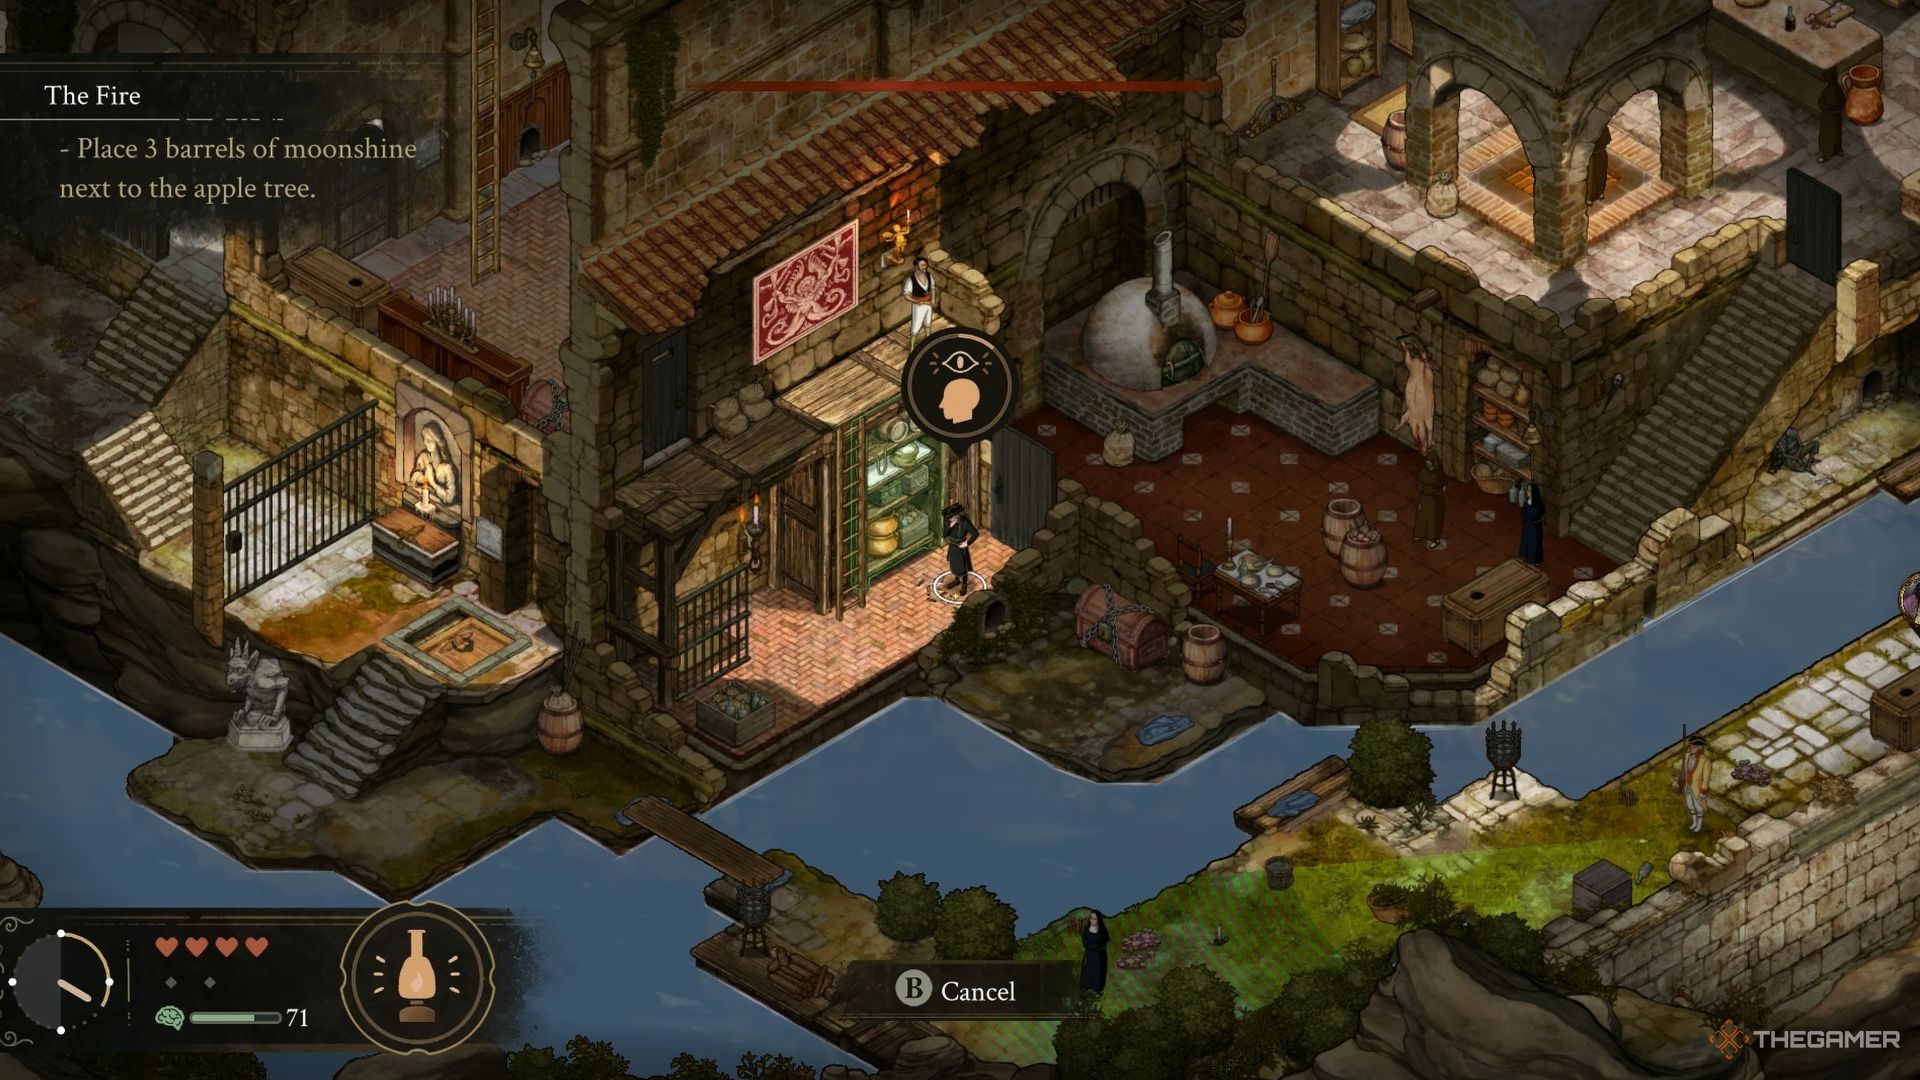
    One Moonshine Barrel is located in the Pianist’s room, and another can be found in the Refectory’s kitchen. To locate the one in the kitchen, employ Alfredo’s Investigate skill to follow the tracks on the lower floor. They will lead you to a hidden barrel behind a wall crack.

    Once you gather all three Moonshine Barrels at the apple tree, your mission will be complete.

    How to Rescue Alfredo

    While attempting to ignite the fire, Alfredo was captured, and your current mission is to rescue him. He’s imprisoned in the Inmate Courtyard, where a cutscene plays when you arrive.

    First, buy the Silver Key from Panecillo for 50 coins. You can find him near the stairs in the northern section of The Cells.

    Next, ascend the stairs and unlock the large wooden door to gain easy access to Mother Superior’s office.

    Alternatively, you can skip getting the key from Panecillo by starting from the cellar door in the Old Storeroom. This method lets you reach Alfredo directly without needing the key.


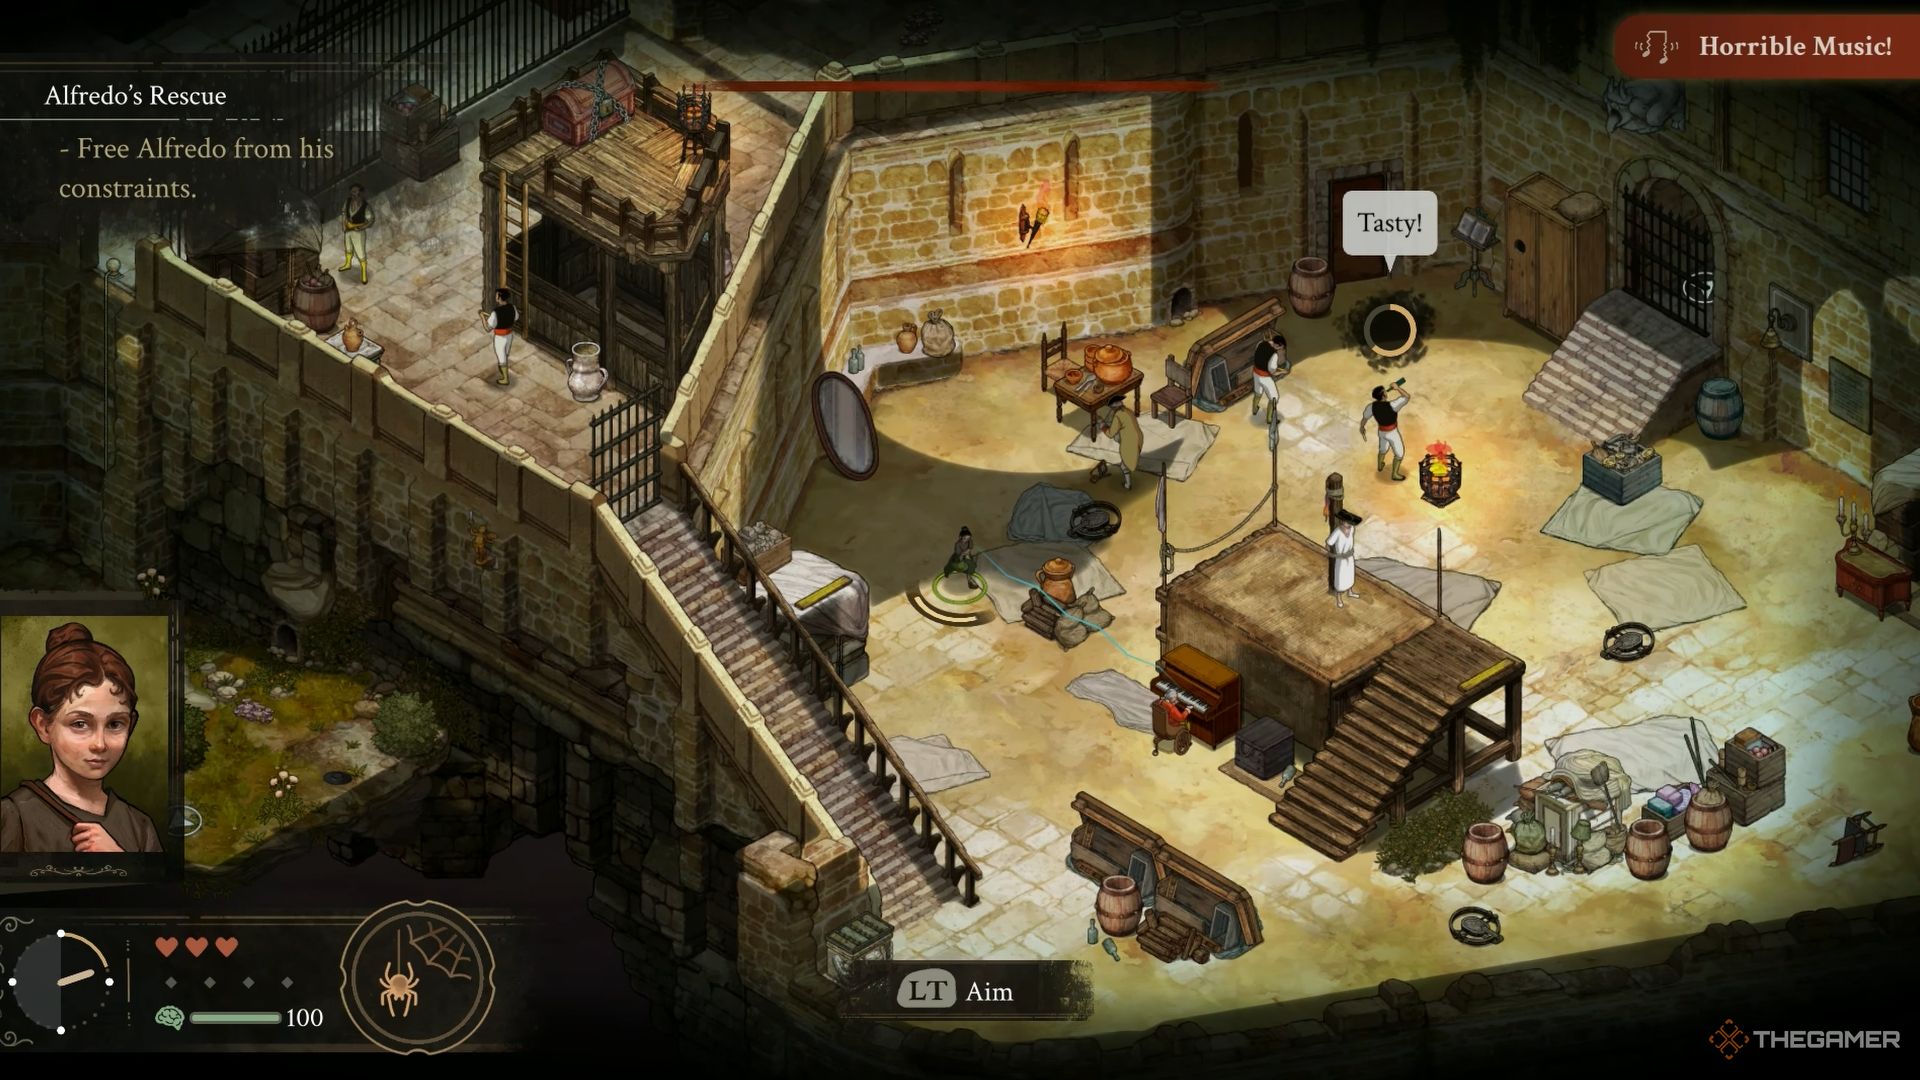
    Guards capture Alfredo inside the inmate courtyard area in The Stone of Madness.

    In the garden outside Mother Superior’s office, look for a place to tie a rope. Lower Amelia down using the rope, then help her navigate through the hole to Alfredo’s location. Use shadows and barrels strategically to guide Amelia towards Alfredo.

    A guard will periodically patrol the wooden platform where Alfredo is being held. Hide behind the barrel near the bear trap when the guard moves down. Use Sleeping Chocolate to put regular guards to sleep and distract the soldier with a Mousetrap. While they’re occupied, free Alfredo. Once you rescue him, this task will be accomplished.

    How to Escape the Monastery

    Your ultimate mission is to escape the monastery. To do this, all three characters must exit through the large gate at The Great Wall. First, eliminate the guard positioned at the top of the stairs with Leonora. Next, take care of the armed soldier and the other guard near the metal gates—if you can, use Agnes’ Goetia skill to eliminate them.

    Once the patrolling guards are dealt with, climb the ledges on the wall using Leonora and take down the soldier posted there. After interacting with the switch on the wall, guide Leonora and Agnes to the gate. Finally, escort Alfredo, disguised as a priest, to the gate without alerting Mother Superior.

    Alternatively, access the gate via the area where you previously interacted with Shadow. For this, have Eduardo break the planks in the dark passage, then use the switch inside to lift the bars. This will allow you to guide each character to the gate one by one.

  • Chapter Three Guide: The Church’s Corruption in Stone of Madness

    Chapter Three Guide: The Church’s Corruption in Stone of Madness

    In the last chapter of The Stone of Madness, Brother Guillermo revealed that the Inquisitor was performing horrible experiments on individuals—surgically altering their brains while searching for the Stone of Madness. Outraged by these cruel actions, the group resolved to put an end to these appalling practices.

    This led you to the monastery’s Wine Cellar, where the group systematically destroyed the tables used for these heinous experiments to foil the Inquisitor’s plans. Just as you were about to rejoice in your victory, Sister Elvira brought alarming news: the Abbot has been poisoned. In this chapter, let’s determine whether you can eradicate this corruption for good.

    Accessing the Library

    Your primary goal in this chapter is to enter the Library. Start your journey in the Cloister area. In the northeast corner of the Cloister, you will find a room with a green door that you need to open. This room is situated to the right of the one where Brother Guillermo inspected the mirror in the initial chapter.

    To avoid detection by the monks, have Alfredo don the priest robes. Then, use the other door in the area to access the Library. Upon entering the Library, you’ll encounter a doctor dressed in green. Typically, this area is off-limits, but staying close to the doctor will activate the ‘Protection of the Doctor’ effect, turning it into a safe zone.

    This means you need to stay near the doctor while completing your task. If Alfredo is wearing the priest robes, you can wander freely without relying on the doctor’s protection.

    Finding the First Large Volume

    On the first floor, your objective is to shatter the mirror. Utilize Leonora for this task. Wait until the doctor is on the first floor, then quickly break the mirror and hide Leonora. Use Alfredo to retrieve the key hidden behind the shattered glass. This key will grant access to the chapel area on the west side of the Library, near the staircase leading to the second floor.

    You’ll also discover a cellar door in this location, making future visits easier. Next, take down the guard who patrols near the stairs to the second floor. Either knock him out or eliminate him using Leonora, and then drag his body to the small section with red curtains. Open the iron-barred door adjacent to the stairs, then deal with the guard behind those bars.

    Descend the ladder, and without attracting the soldier’s attention, activate the switch. This will create two shortcuts leading to the soldier’s room: one from the cellar door area and another from the main Library hall. Lastly, read the volume found in the soldier’s room to advance your objective.

    Locating the Second Large Volume

    To find the second volume, exit the Library’s first floor. Look up near the armed guard outside to identify a spot where you can throw a rope. Climb up using the rope, and then use a lockpick or crowbar to open the balcony door above. Next, have Alfredo ascend to the second floor via the rope.

    For added safety, make sure Alfredo is dressed in the priest robes while you explore the upper level.


    You can also access the second floor from within the Library by moving a large wooden crate on the first floor with Eduardo, though this method carries more risk.

    Once on the second floor, read the volume found in the southernmost part. Use the switch here to create a bridge that acts as a shortcut to the opposite side of the second floor. After this, you won’t have any tasks pending except to advance to the next day. For the following day, your first task will involve gathering several materials, which include:

    • Two Mandrakes
    • Two Gold Teeth
    • Five Medicines

    Obtaining Two Gold Teeth


    An orange circle shows the location of the first gold tooth in The Stone Of Madness

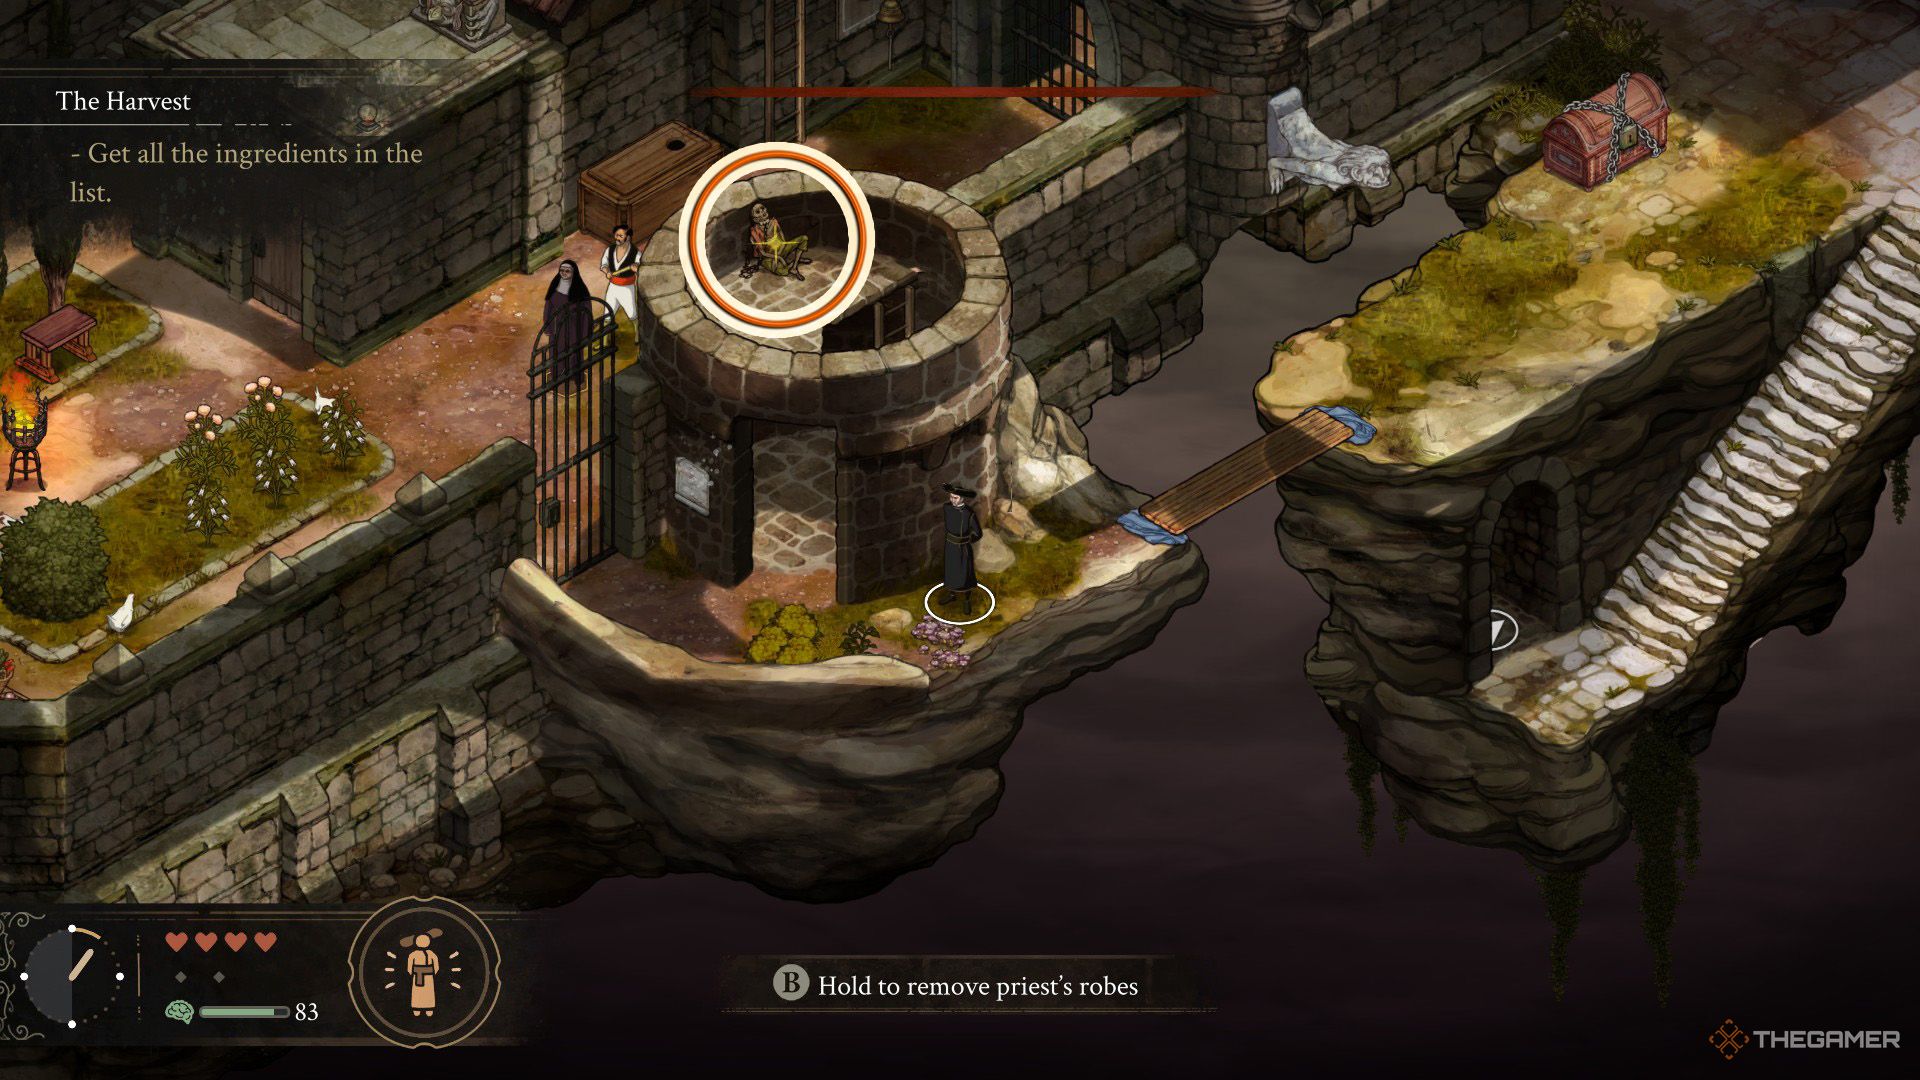
    The first Gold Tooth can be found in the Nuns’ Garden, just east of the Laundry area. Here, you’ll notice a corpse at the top of the tower near the barn where you previously saw Brother Guillermo. However, the Nuns’ Garden presents challenges since Mother Superior is actively patrolling the area.

    To avoid detection, enter the Nuns’ Garden from the Wine Cellar (Latrines). This way, you can access the upper level of the tower without being seen and find the first Gold Tooth.

    The second Gold Tooth is situated in the area above the Wine Cellar, just south of where the guard is stationed. You’ll notice an iron gate there, which triggers a cutscene. Have Amelia sneak through the iron bars to activate the switch that opens the gate.

    After that, bring Eduardo to this area and push the wooden crate towards the hanging cage that contains a skeleton. If any inmates obstruct your path, use Leonora to knock them out with a plank and drag them away.

    Collecting Two Mandrakes

    To find the first Mandrake, head over to the Cloister and descend the right staircase in the southern section. There, you will see a statue of a woman holding a vase on her head. Use Eduardo to move the statue to the opposite side of the room.

    It would be wise to subdue or eliminate the nearby guard to make this process easier.

    Once the statue is repositioned, use Leonora to throw a rope to the higher section nearby. Climb up and examine the vase atop the statue’s head to collect the first Mandrake.

    The second Mandrake can be found near the entrance of the Wine Cellar, where you will also meet the Doctor. As you approach, a cutscene will reveal the Mandrake’s position. While near the Doctor, you are still under his protection. Your first task is to eliminate the two guards around him. Then, have Eduardo move the large crate southward.

    Once it’s in place, get Agnes to climb onto the crate. Since the guards may interrupt your plans, it’s advisable to deal with them first. After Agnes is on the crate, push it over the spikes and use a sickle to gather the Mandrake. If you lack a sickle, Panecillo, situated near the Nuns’ Garden, will provide you with one for free.

    Also, to craft five Medicines, use Agnes’ Witches Cauldron skill at night. After you’ve gathered all your materials, wait for nightfall to proceed.

    How to Access the Laboratory and Create the Medicine

    The next day, start by talking to the Doctor located on the second floor of the Cloister. He’s situated in the room near the red-carpeted area, but you’ll need to unlock the door with either Eduardo or Leonora. Be careful of the Inquisitor and the armed guard on patrol during this operation. When you enter the room, ensure Alfredo is in his priest robes.

    The Doctor will instruct you to find the laboratory keys, which are hidden in the Cloister’s garden. Check the weeds near the locked chest to locate the key. After that, head to the library, where chickens will have taken over the place. Go up the stairs by the cellar door and take out the guard there.

    Speak with Tia del Nido; she will divulge the laboratory’s location in exchange for an egg. She’ll also inform you that the secret door to the laboratory can only be unlocked using the Inquisitor’s ring, which one of her chickens has swallowed.

    To retrieve the Inquisitor’s Ring, throw a rope with Leonora to the area above the cellar door inside the library, and then climb up with Amelia. Crawl through the gap to reach the space above Tia del Nido. Proceed carefully and use Amelia’s Pickpocketing skill to steal the ring from the chicken.

    Reaching the laboratory is simple. Go to the entrance of the Wine Cellar and head south to find it. A cutscene will reveal its location once you’re within the Wine Cellar. Just be careful of Mother Superior, who will be close to the entrance. The easiest way to distract her is to have Amelia throw chocolate, giving you the opportunity to slip into the laboratory.

    Enter the laboratory with either Alfredo or Agnes. Be cautious of the guard inside, and create the medicine without being caught.

    How to Administer Medicine to the Abbot

    Your next task is to deliver the medicine to the Abbot, who is located in the red-carpeted area on the second floor of the Cloister. You can use Eduardo to place a plank as a shortcut to reach this area. Alternatively, bring Leonora to the room across from the red carpet, where the prisoners and the doctor were previously met. Eliminate the guard in this area.

    Wait for the Inquisitor to move out of the way from the red carpet, and then unlock the iron-barred door leading to that area. Quickly enter the Abbot’s room and administer the medicine. This will provide him some relief, and he will outline the next steps in the strategy to stop the Inquisitor. With this, the chapter comes to a close.