Tag: Call of Duty: Warzone

  • Advantages and Disadvantages of Call of Duty Warzone’s Casual Mode

    Advantages and Disadvantages of Call of Duty Warzone’s Casual Mode

    Call of Duty: Warzone’s Casual Mode: A Fresh Start for New Players

    Since its launch in 2020, Call of Duty: Warzone has evolved, but new players often find themselves overwhelmed by its complexity. The game welcomes many newcomers who have no experience with Warzone or even battle royale games in general, yet Activision hasn’t always prioritized making the entry process easier for them.

    Fortunately, this has changed with the introduction of Warzone’s casual mode. This option offers an improved onboarding experience, allowing players to jump into several rounds without the pressure of competing against seasoned veterans. By including a mix of AI opponents alongside real players, casual mode enables new players to learn the game mechanics at a comfortable pace, minimizing the chance of instant elimination upon landing.

    What to Expect in Warzone’s Casual Mode

    In Call of Duty: Warzone’s casual mode, you’ll join a battle featuring a total of 148 players: 28 real competitors and 120 AI soldiers. Whether you prefer to go solo or team up, your goal is to eliminate the opposing players and earn victory. The high presence of AI fighters helps to ensure that you won’t be taken out immediately after dropping into the game. Instead, you can take your time exploring the map, mastering the game mechanics, and becoming familiar with how Warzone operates.

    A Place for Exploration and Learning

    Casual mode is perfect if you haven’t played Call of Duty: Warzone in a while and want to ease back into the game. It presents a more relaxed environment that promotes exploration and experimentation, contrasting sharply with the intense competition often found in other game modes. This makes it suitable for both solo players and groups, especially if you’re helping a friend or family member return to the game.

    Should casual mode remain a staple in future updates, it offers an excellent way to familiarize yourself with new maps, even if you’re already a seasoned player. Developers often tweak returning maps, so having a solid understanding of the layout can give you a significant advantage.

    It’s also a great opportunity to experiment with different loadouts—especially as game seasons and metas shift. Even for those who are experts on the Verdansk map, mastering every weapon type can be challenging, especially when you aim for victory every time. Consider trying out a loadout you’ve always wanted to test in this low-pressure environment; this knowledge can prove beneficial in other game modes or beyond Warzone itself.

    When to Skip Casual Mode

    While casual mode is a fantastic way for newcomers to get acclimated, it may not resonate with those who are already veterans of Warzone. If you possess a thorough understanding of the game and its mechanics, you might find the casual experience less engaging. Opting for the standard game mode can be a better fit for seasoned players who seek a more competitive atmosphere.

    Another drawback to consider is potential matchmaking issues. There may be instances where highly skilled players join casual mode, which could lead to frustrating matches for those still learning the ropes. Activision is aware of this issue and may implement measures to address it in the future. If you find yourself getting outmatched, don’t hesitate to take a break and return later.

    Overall, Warzone has become significantly more accessible, inviting a broader range of players to join the battle while preserving the intense challenge that core modes provide.

  • Optimal Sniper Support Loadout for Warzone: Top Choices

    Optimal Sniper Support Loadout for Warzone: Top Choices

    Call of Duty: Warzone has reintroduced its classic battle royale setting, Verdansk, prompting players to dust off their beloved sniper rifles for new loadouts. Verdansk features a unique gameplay style compared to the prior map, Urzikstan, with numerous vantage points, expansive landscapes, and a noticeable absence of redeploy drones and balloons.

    Despite the slower pace of gameplay following Verdansk’s return, players should remain vigilant, as enemy teams can still close in rapidly. It’s essential to have a reliable weapon for close-quarters encounters. Because sniper rifles can be punishing in situations other than long-range, the most effective sniper support weapons are customized assault rifles that excel in shorter-range combat.

    The Ideal Firearm for Sniper Support

    After the launch of Warzone Season 3, the AK-74 from Black Ops 6 stands out as the top choice for a sniper support build. With an impressive time-to-kill of 552 milliseconds—faster than many SMGs—it’s the ideal weapon for handling opponents who get too close to your sniping position.

    You can enhance the AK-74’s damage range by equipping it with the monolithic suppressor and other attachments, ensuring that its rapid kill time is effective over larger distances. However, the AK-74 requires precise attachments to be manageable—making it best suited for sniper support rather than a primary long-range weapon.

    Optimal Attachments for AK-74 Sniper Support

    To maximize the AK-74’s potential as a sniper support firearm, utilizing a compensator and vertical foregrip is critical for minimizing both vertical and horizontal recoil. The AK-74 boasts one of the best kill times in the game, but its effectiveness hinges on your ability to consistently hit your targets. Although the gun has user-friendly iron sights, a reflex sight can significantly aid in controlling recoil and reducing muzzle flash during firing.

    AK-74 Sniper Support Loadout

    Attachment Slot Name
    Optic Kepler Microflex
    Muzzle Compensator
    Underbarrel Vertical Foregrip
    Magazine Extended Mag II
    Rear Grip Commando Grip

    The Commando Grip enhances the AK-74’s aim-down sight speed and sprint-to-fire speed—crucial attributes when facing aggressive enemies. It also lessens the drawbacks of the Extended Mag II, which offers 50 rounds, allowing you to engage multiple foes without needing to reload.

    Best Perks for AK-74 Sniper Support

    Perk choices in Warzone have remained reliable since the integration of Black Ops 6. For Perk 2, Tracker is highly recommended as it provides insight into enemy movements, allowing you to tag foes with your sniper and gain an advantage even if you haven’t downed them. While Ghost is typically favored for Perk 3, Tempered is a better fit for a sniper support build, as it allows you to spend less time applying armor plates, leading to more time shooting.

    Best Equipment for AK-74 Sniper Support

    The equipment in Warzone can be largely situational, with their utility often reflecting your playstyle and build. For a sniper support setup, the smoke grenade can offer essential cover for reviving teammates or moving strategically between locations. The Semtex is perfect for aggressive tactics, effectively forcing enemies from their hiding spots or finishing off downed foes.

    The AK-74 is currently among the strongest weapons in Warzone. After testing it as both a primary firearm and sniper support weapon, it’s apparent that it excels in the latter role, particularly in close to medium-range encounters. If you find the AK-74 challenging to control, consider the CR-56 AMAX assault rifle as a solid alternative for a sniper support setup in Call of Duty: Warzone.

  • Ultimate Akimbo Snakeshot Loadout for Call of Duty: Warzone

    Ultimate Akimbo Snakeshot Loadout for Call of Duty: Warzone

    Call of Duty: Warzone Season 3 Overview: The Akimbo Snakeshot’s Comeback

    In Season 3 of Call of Duty: Warzone, players are reacquainted with a beloved gameplay style reminiscent of Modern Warfare 2: the Akimbo Snakeshot. When equipped with the optimal loadout, the dual TYR pistols reign supreme in battles due to their incredible short-range damage output. Utilizing them in Akimbo mode can swiftly eliminate foes, setting you on the path to victory.

    This season also reintroduced the Verdansk map, accompanying a comprehensive update that revamped various aspects of Call of Duty‘s battle royale experience. With the comeback of classic weaponry and fresh game modes, Season 3 of Modern Warfare 3 seems to celebrate cherished content from earlier installments. However, it’s worth noting that the enhanced power of the Akimbo Snakeshot might be unintended and could be adjusted in future updates.

    Best Attachments for an Akimbo Snakeshot Loadout

    To optimize your Akimbo Snakeshot setup, it’s essential to select the right attachments for your choice of pistols. The optimal build is typically achieved using the TYR Handguns. Start by attaching the "Akimbo" version of the rear grip to enable dual-wielding, allowing you the advantage of handling two firearms simultaneously.

    Once you’ve secured the "Akimbo TYR" rear grip, focus on other attachments that enhance damage and range. This combination not only boosts your one-shot potential against adversaries but is critical for maintaining control in Warzone battles.

    The Akimbo Snakeshot build is named after both the "Akimbo" rear grip and the powerful Snakeshot ammunition, known for its high firepower at close range. Here’s a summary of the best attachments to use for this build:

    Attachment Type Attachment Effect
    Barrel ZIU-16 Heavy Long Barrel Extends the bullet range for both pistols.
    Laser CS15 Scarlet Mounted Laser Reduced sprint-to-fire time for quicker aiming.
    Rear Grip Akimbo TYR Enables dual-wielding of TYR Handguns.
    Ammunition 12.7x55MM Snake Shot Significantly enhances bullet damage.
    Trigger Action Ullr’s Fury Increases fire rate while using Akimbo pistols.

    Together, these attachments amplify the damage, fire rate, accuracy, and recoil control of your TYR pistols, resulting in potent firepower at close engagement distances.

    Best Perks for an Akimbo Snakeshot Loadout

    Before heading into matches, you get to equip three perks that complement and refine the strengths of your Akimbo Snakeshot setup. Certain perks may be better suited for specific maps, emphasizing speed or firepower as needed.

    Here are some recommended perks to enhance your Akimbo Snakeshot loadout:

    • Scavenger: Start with maximum reserve ammo for your primary weapon and resupply ammo from fallen foes.
    • Dexterity: Decrease weapon motion while jumping, sliding, and diving, and reduce fall damage.
    • Sprinter: Maintain tactical sprinting indefinitely.
    • Cold-Blooded: Stay off enemy AI targeting and thermal optics while disabling some enemy recon effects.
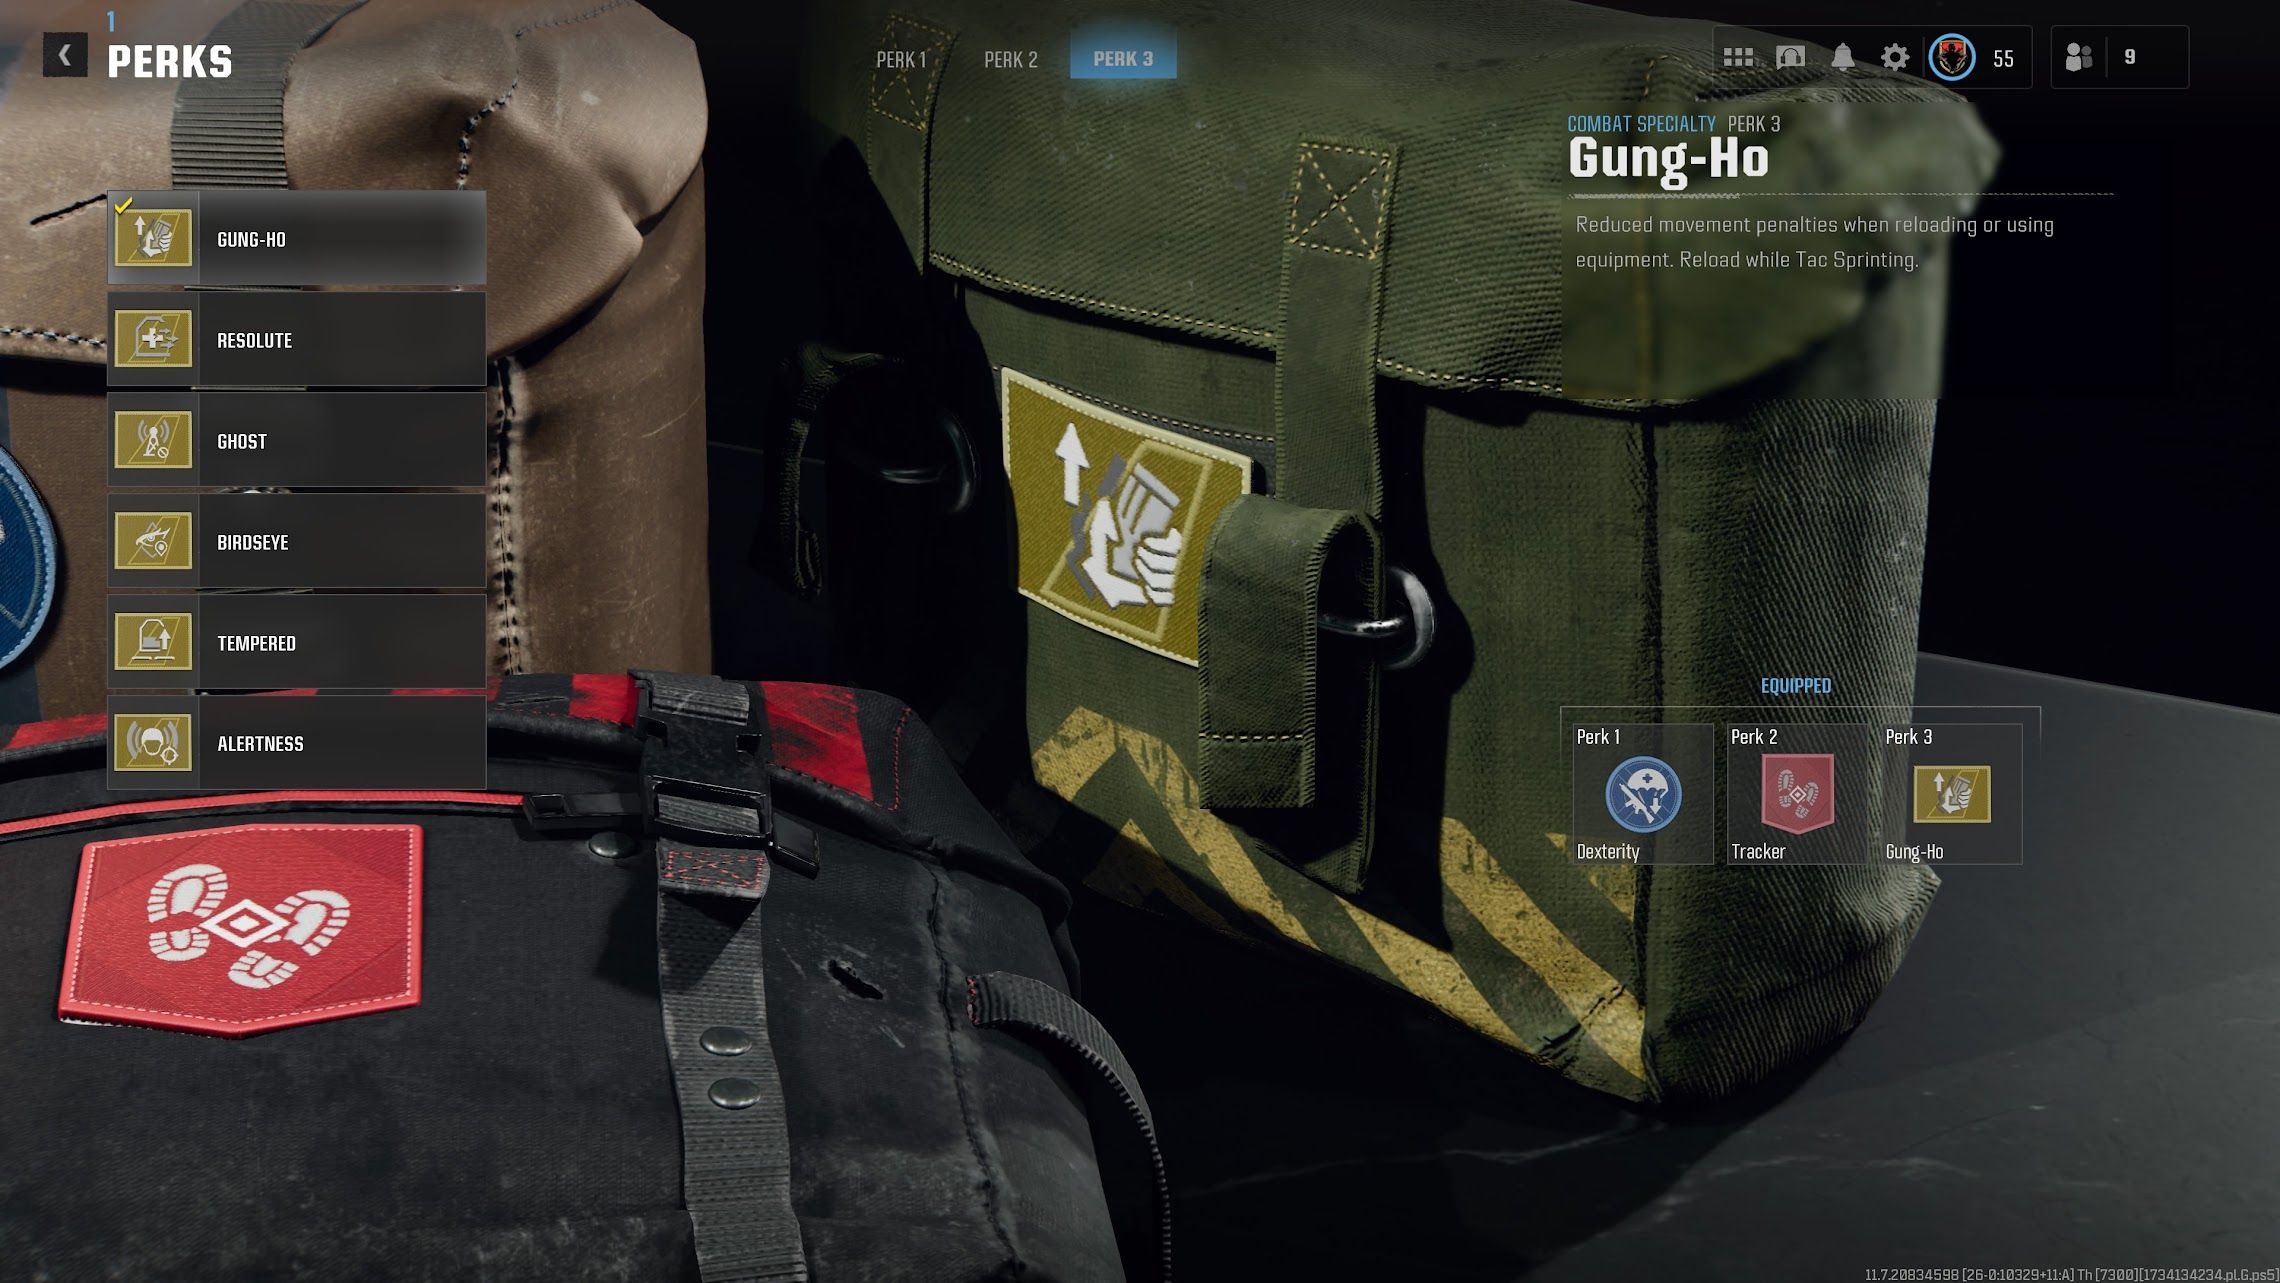
    • Gung-Ho: Enjoy reduced movement speed penalties when reloading or deploying equipment. Reload while tactically sprinting.
    • Ghost: Remain undetectable by enemy radar pings and certain detection devices while moving.

    Utilizing two guns simultaneously means you’ll deplete ammunition quickly, making reload perks essential. The combination of Scavenger and Gung-Ho allows for seamless engagements without losing momentum during critical firefights.

    Best Equipment for an Akimbo Snakeshot Loadout

    While perks and attachments are vital, having the right equipment can significantly boost your effectiveness with the Akimbo Snakeshot loadout. Having lethal or tactical gear can create optimal combat scenarios. Consider the following options:

    • Molotov Cocktail
    • Smoke Grenade
    • Stim
    • Concussion Grenade
    • Flash Bang

    Using smoke grenades or flash bangs can disorient opponents, paving the way for surprise attacks with your Akimbo pistols. Additionally, using items like the Concussion Grenade in confined areas can lead to quick eliminations.

    Remember that some equipment may be exclusive to specific maps, such as the Verdansk map, which features lootable smoke grenades and flash bangs that can bolster your Akimbo Snakeshot strategy.

    Stims can help you recover from damage sustained while utilizing the Akimbo Snakeshot build, as this loadout might leave you vulnerable at times. With its high damage output, the Akimbo Snakeshot acts like a glass cannon, making recovery items invaluable.

    Feel free to explore different combinations of perks and equipment with your Akimbo pistols to find the best synergy in the game. Although the impressive damage of the Akimbo Snakeshot may soon face balancing adjustments, it remains a formidable choice in Season 3 of Call of Duty: Warzone.

    Happy gaming!

  • Ultimate HDR Setup for Call of Duty: Warzone

    Ultimate HDR Setup for Call of Duty: Warzone

    The return of Verdansk in Call of Duty: Warzone has reintroduced some of the most legendary weapons in the game with the Season 3 update, including a powerful new Sniper Rifle that stands out as the most formidable weapon available. Unlike in previous iterations of Warzone, where snipers had the capability to eliminate enemies with a single shot from great distances, the current meta has shifted. Following the integration of Call of Duty: Black Ops 6 with Warzone, many players now prefer assault rifles for long-range engagements.

    The latest addition to the sniper lineup in Warzone and Black Ops 6 is the HDR, a massive rifle that utilizes 12.7×108mm rounds and was notorious in Modern Warfare 2019. Sadly, it lacks the one-shot kill potential it once had, but because other sniper rifles have not been enhanced, the HDR is now the best option for long-range encounters in the game. When equipped with the right attachments, the HDR can effectively control Verdansk’s terrain from its numerous high points.

    Ideal HDR Loadout in Warzone

    Attachments to Elevate the HDR’s Performance

    In Warzone, the HDR can eliminate fully armored opponents with a headshot. It inflicts maximum damage of 360 to the head, which is sufficient to take down foes wearing full armor, while it causes 207 damage to the upper body and limbs, and 180 to the lower body. Although we cannot increase this base damage, we can enhance bullet velocity, allowing for a more straightforward aiming process and minimizing the need to compensate for bullet drop, thereby increasing your chances of landing that decisive headshot.

    Attachment Slot

    Name

    Reason

    Muzzle

    Monolithic Suppressor

    The Monolithic Suppressor is the top muzzle attachment in Warzone and unlockable via the Battle Pass on page 7. This attachment keeps your firing position hidden from enemies and dampens the sound of your shots, in addition to boosting bullet velocity.

    Barrel

    Gain-Twist Barrel

    For a sniper loadout, enhancing bullet velocity is paramount, as the damage range is ample without needing upgrades. The Gain-Twist Barrel provides the most significant boost to bullet velocity without any downsides, making it the ideal choice for the HDR.

    Underbarrel

    Lightweight Bipod

    Aiming down sights with the HDR can lead to significant idle sway. The lightweight bipod greatly minimizes this sway, making it easier to maintain steady aim.

    Stock

    Combat Stock

    The Combat Stock is the best stock attachment for snipers, providing substantial flinch resistance, essential when attempting to engage an enemy that is returning fire, and improving the HDR’s handling attributes.

    Fire Mod

    108MM Overpressured

    This Fire Mod pairs effectively with the Gain-Twist Barrel and Monolithic Suppressor, enhancing the HDR’s bullet velocity, giving it a hit-scan feel in many scenarios.

    When all these attachments are combined, the HDR achieves an impressive bullet velocity of 1207.5 m/s. This means that within the HDR’s effective damage range of 97.8 meters, your aim will be spot-on—no need to consider bullet drop or target movement.

    Related

    Warzone: Challenges and Rewards in the Return to Verdansk

    The original Verdansk map in Call of Duty: Warzone has made a comeback along with a limited-time event offering exclusive rewards for gamers to earn.

    The HDR can only achieve a one-shot kill against a fully armored enemy with a headshot. Its impressive bullet velocity simplifies the process of landing those critical headshots. The enhanced idle sway and flinch resistance also contribute significantly to your shooting accuracy. Given the HDR’s bulkiness and limited effectiveness in close quarters, you should strategically tailor the rest of your class setup to complement it.

    Optimal HDR Class Setup in Warzone

    Top Weapons and Equipment to Pair with the HDR

    When wielding a large sniper rifle in Warzone, it’s essential to have a secondary weapon that excels in close to mid-range encounters. One excellent choice is the GPR 91 assault rifle from Black Ops 6. This rifle boasts exceptional handling characteristics, including rapid sprint speeds and quick aim-down sight times, making it invaluable when facing aggressive adversaries. Alternatively, you can opt for the new CR-56 in a similar role. The selected attachments enhance its handling, curb the rifle’s vertical recoil, and expand the magazine capacity to 60 rounds.

    GPR 91 Sniper Support Loadout

    • Optic: Kepler Microflex
    • Muzzle: Compensator
    • Barrel: Reinforced Barrel
    • Magazine: Extended Mag II
    • Rear Grip: Commando Grip

    As for equipment, smoke grenades provide a reliable escape route when enemies are closing in or when you need to traverse open ground, while Semtex is perfect for dispatching downed opponents who have managed to crawl to cover.

    Related

    Best Kilo 141 Loadout in Warzone

    The Kilo 141 Assault Rifle makes its return to Warzone along with Verdansk. Here are the best attachments for improving its range and accuracy.

    The Veteran Perk is highly recommended for sniper rifle loadouts, as it provides protection from equipment enemies might employ to dislodge you while significantly boosting your flinch resistance. Tracker and Alertness are popular perks in their respective slots in Call of Duty: Warzone, but feel free to customize your perks to match your playing style.

  • Solving Every Contract and How to Complete It in Verdansk Warzone

    Solving Every Contract and How to Complete It in Verdansk Warzone

    The return of Verdansk in Call of Duty: Black Ops 6 Season 3 isn’t just about bringing back the original map; it’s also reviving some beloved weapons, equipment, and key contracts that players have missed.

    As you navigate the map, you’ll discover a total of five contracts to complete. These contracts will reward you with cash, gear, and weapons, all of which are essential for quickly acquiring your loadout. If you’re unsure about the specifics of each contract and how to tackle them, this guide will help you out.

    How to Complete the Scavenger Contract


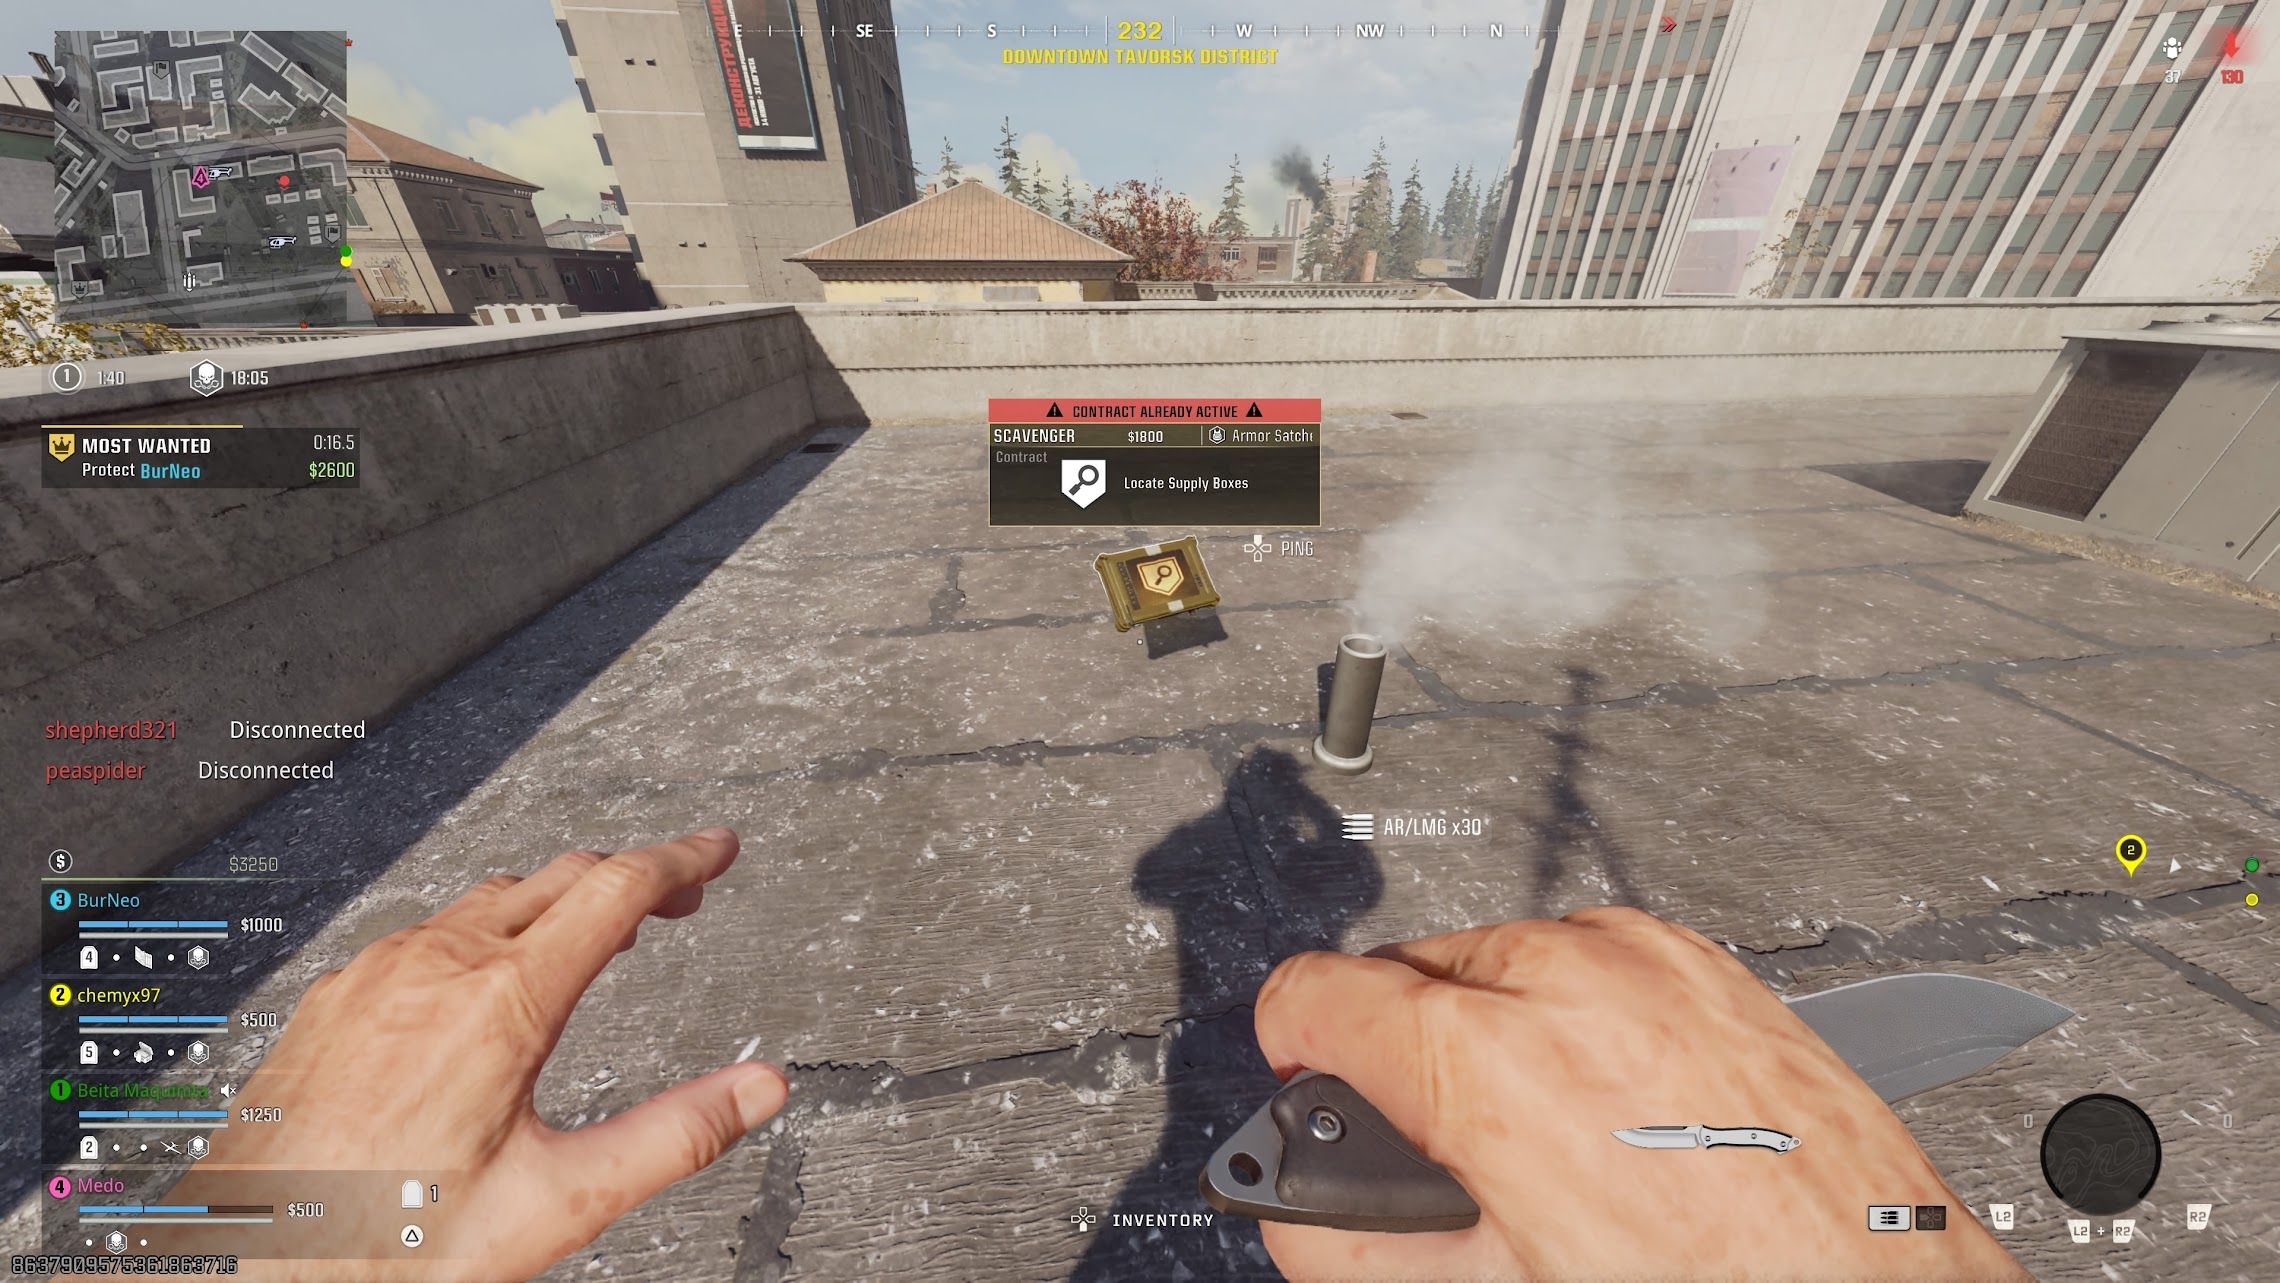
    You might already recognize The Scavenger Contract if you’ve played Warzone before. You can identify it on the map by the magnifying glass icon. Once you pick it up, your task is to find and open three nearby crates.

    Fortunately, you won’t have to search for these crates blindly; they will be marked on your map with a yellow icon.

    This contract is excellent for kickstarting a match since it grants players a substantial amount of cash, ideal for purchasing loadouts or UAVs, and ensures that you receive a guaranteed armor satchel for opening the final crate.

    How to Complete the Recon Contract


    Player standing in front of Recon contract - bo6

    The Recon Contract is marked by a flag icon and requires you to go to the designated area and stay there for a short duration.

    This can be a tricky contract, especially since yellow smoke will signal your presence to all nearby players once you approach the objective, so tread carefully.

    However, completing this contract rewards you with cash, loot, and more importantly, it reveals the next safe zone on your map with a yellow circle.

    TIP 1: Having more players in the area will speed up the completion time.

    TIP 2: You can complete several Recon contracts during a match to anticipate how the safe zone will change.

    How to Complete the Bounty Contract


    Player standing in front of Bounty contract - bo6

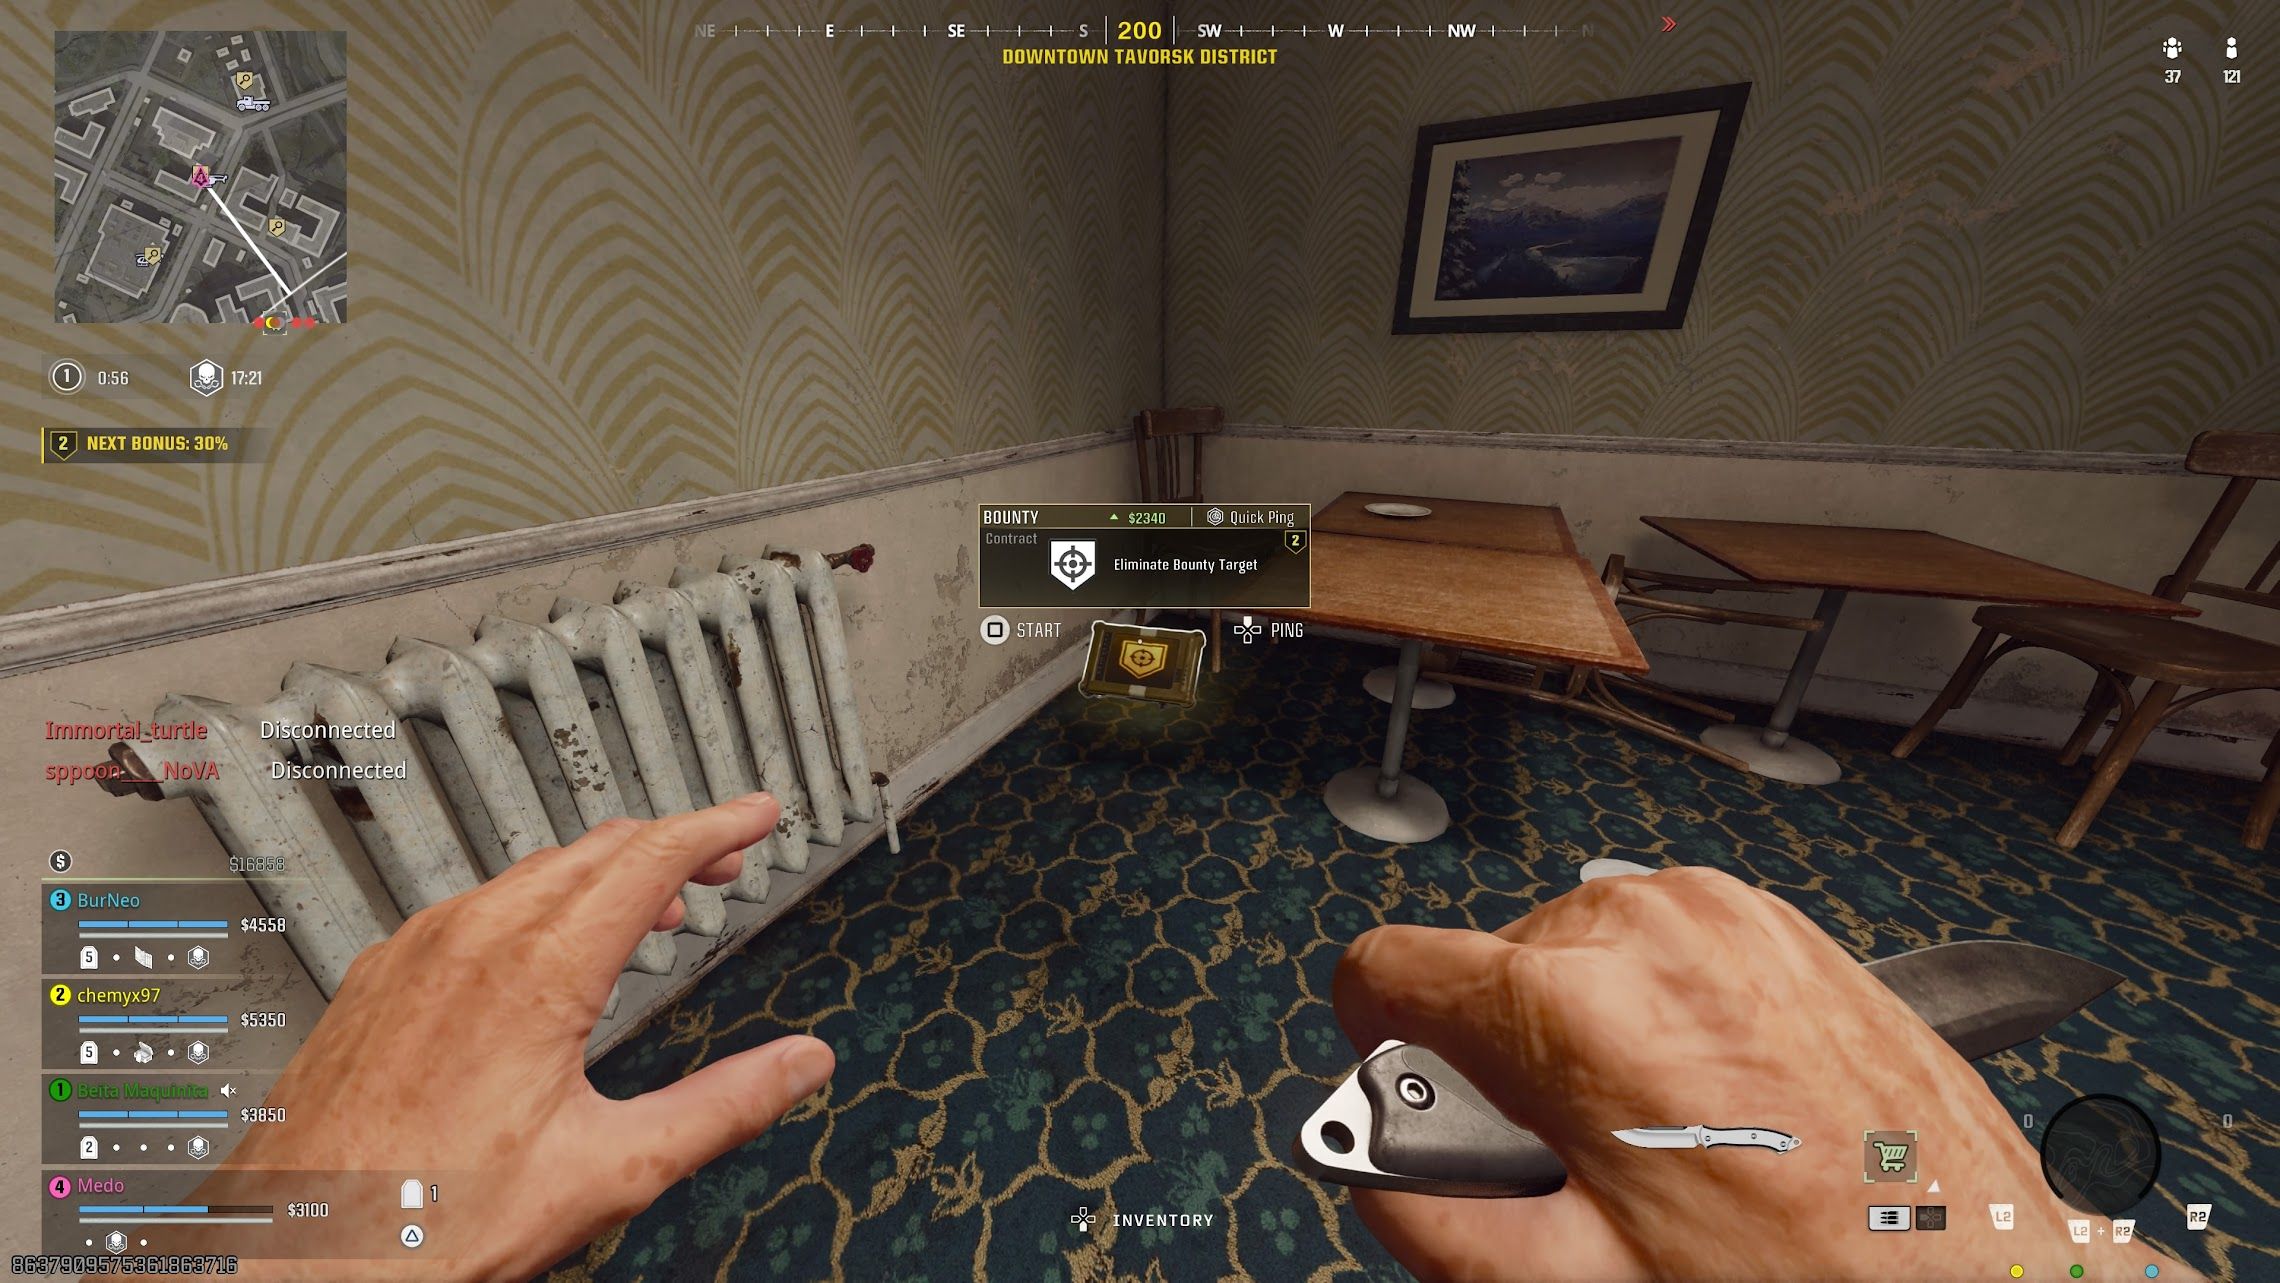
    The Bounty Contract is represented by a hitman icon, and when you activate it, it targets a specific player from an enemy squad that you must hunt down and eliminate. To assist you, a yellow objective area will be marked on your map to help you pinpoint their location.

    However, it’s not as straightforward as it sounds. The target will have an indicator showing how close you are:

    • Yellow: You are far away.
    • Orange: You are close.
    • Red: You are right on top of them.

    Keep in mind that sometimes the target can be far away, which might make it difficult to reach them if you’re well-equipped.

    In some cases, you might not need to take out the target yourself. If another player eliminates the bounty, you will still complete the contract and earn cash for yourself and your teammates.

    How to Complete the Supply Run Contract


    Player standing in front of Supply Run contract - bo6

    The Supply Run Contract, one of the classics from the original Warzone, is recognized by its timer symbol. This contract is among the simplest to complete, especially if you have a vehicle.

    Once you accept it, a random shop will be highlighted on your map, and you must reach it within a limited time frame. Utilizing a vehicle can significantly speed up your travels.

    This contract is perfect for reviving a teammate who failed in the Gulag, allowing you to bring them back for free. Additionally, your teammates will enjoy discounted prices at the store (excluding loadouts).

    Alternatively, if a friend is in the process of redeployment, you can select the contract, and they can drop in on the shop to complete it right away.

    How to Complete the Most Wanted Contract


    Player standing in front of Most Wanted contract - bo6

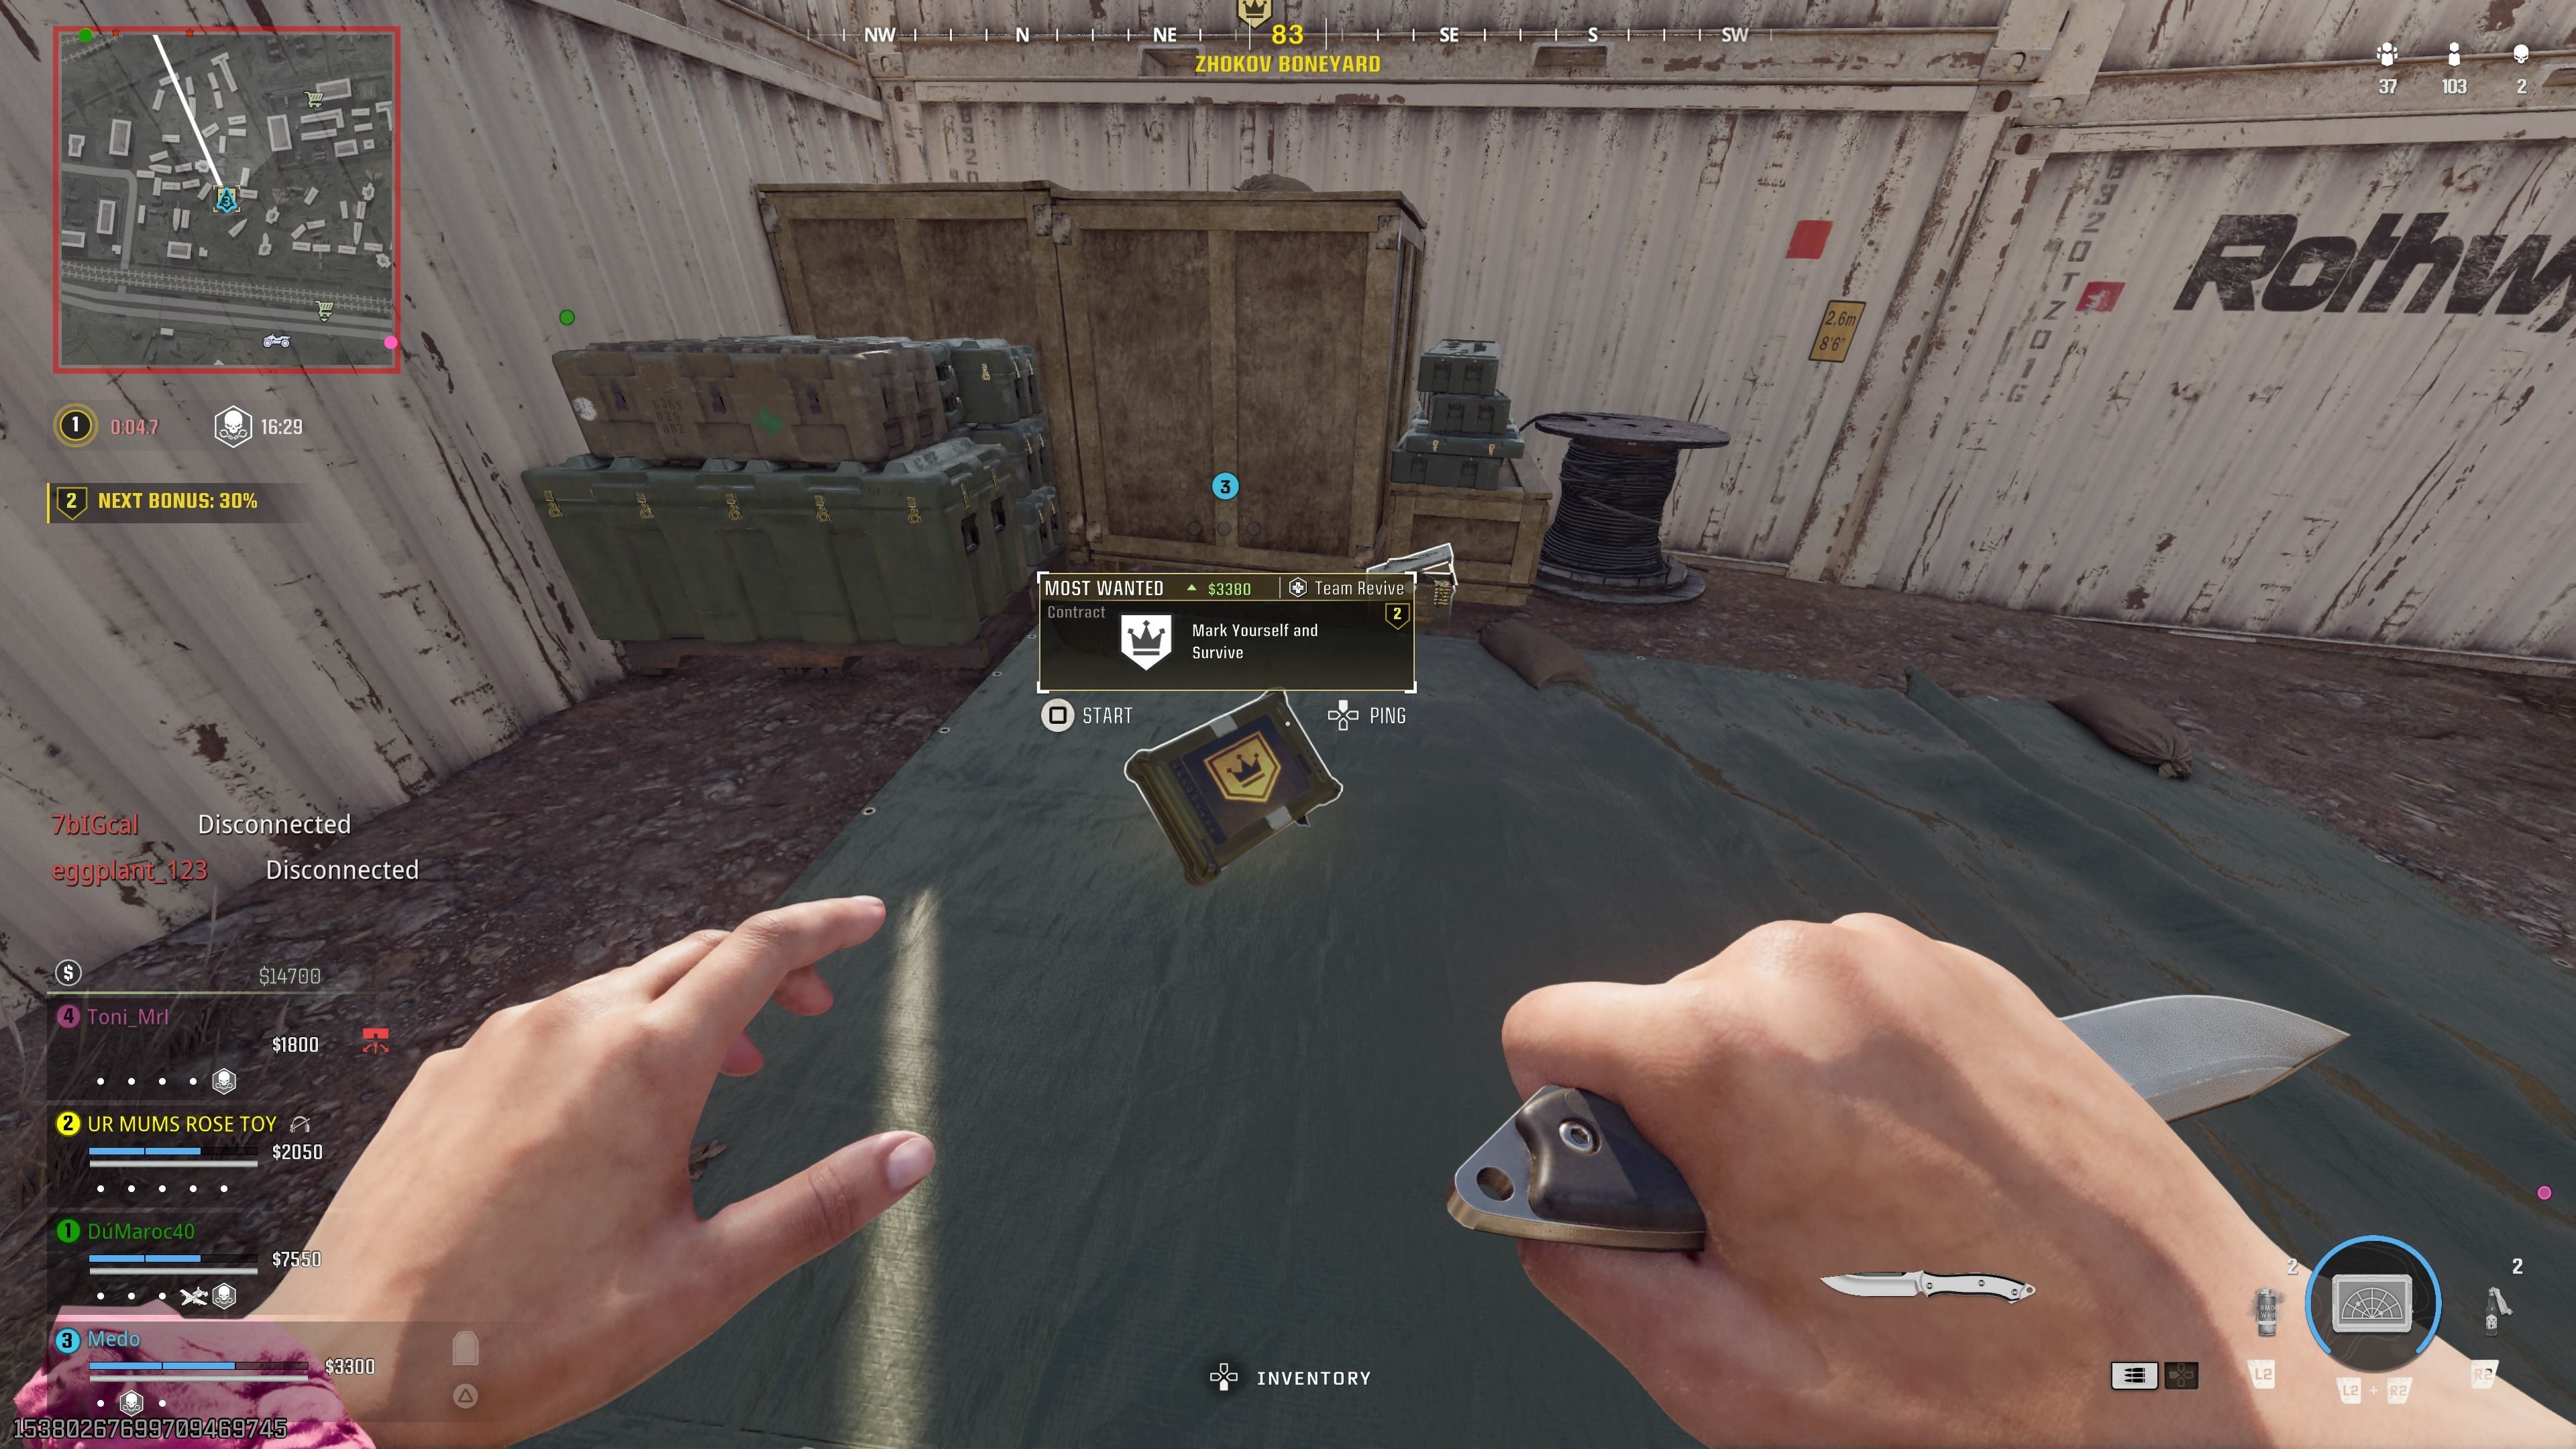
    The Most Wanted contract, identifiable by its crown icon, is a high-risk, high-reward option. This contract is ideal for when your squad is ready to engage in battle or if you find yourself as the last member remaining without enough cash to revive teammates.

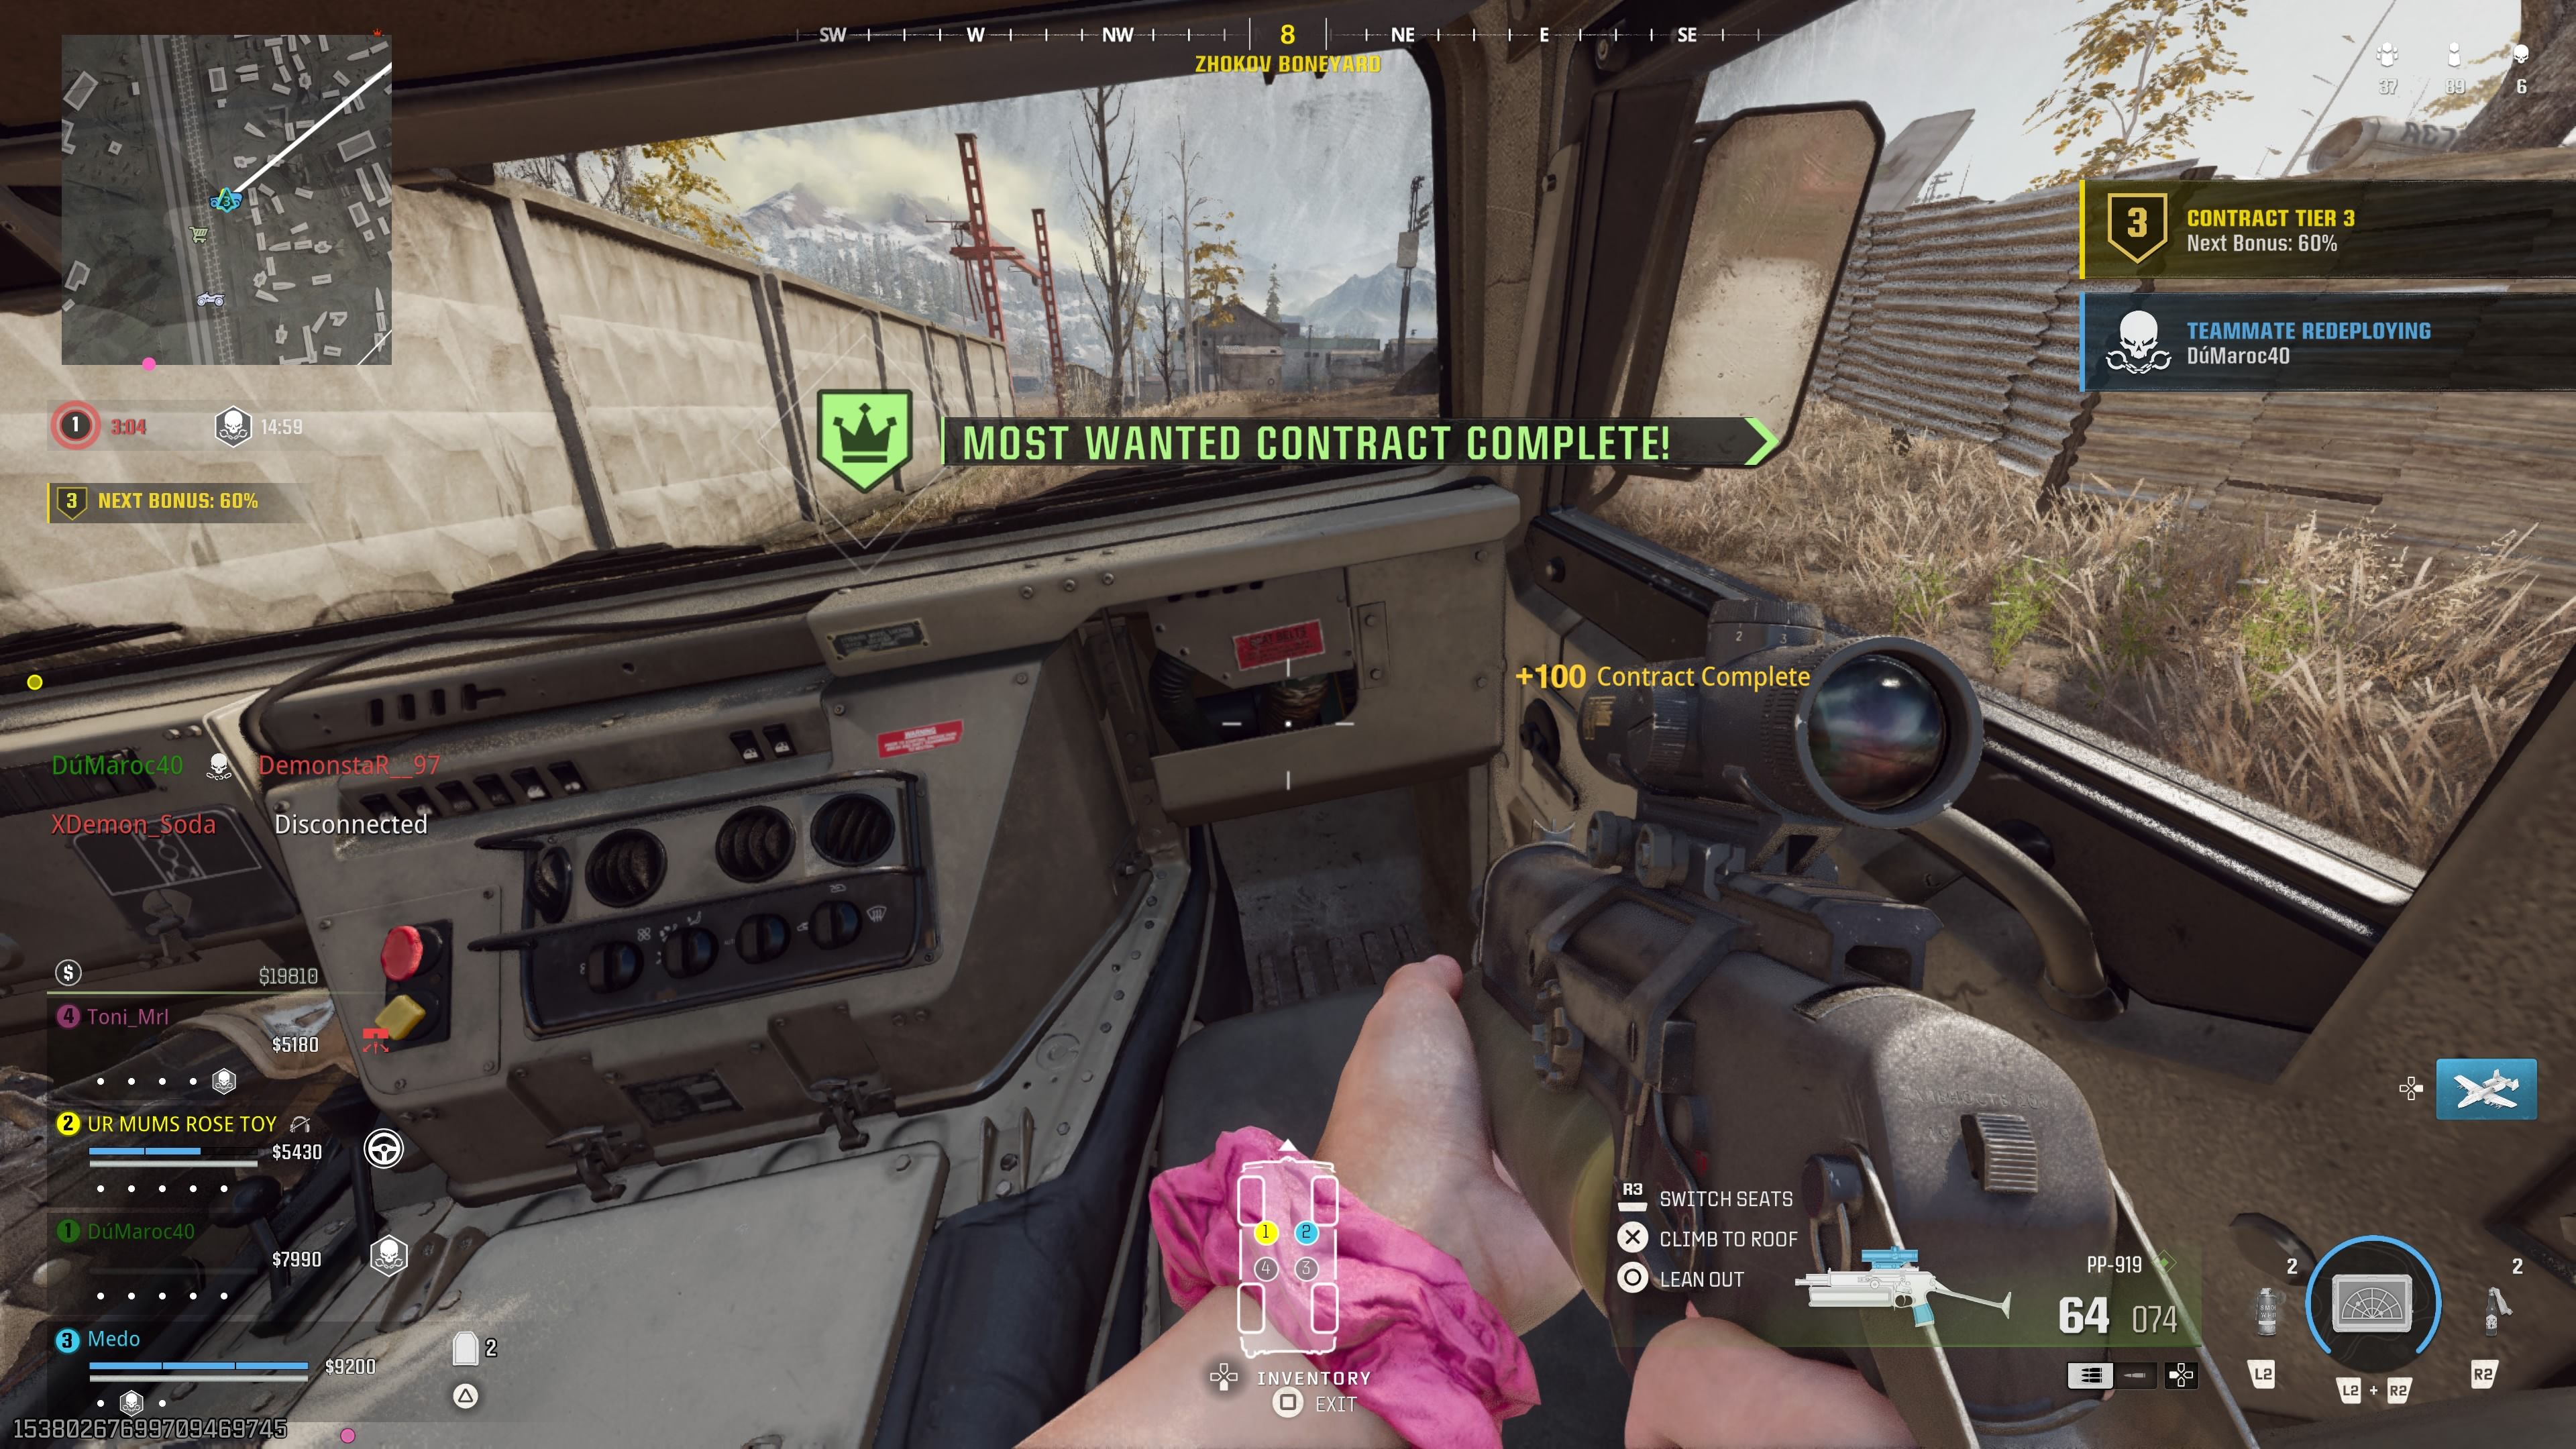
    Successfully completing it can yield a substantial cash reward and the opportunity to revive all of your fallen teammates.

    As the name implies, you become the primary target for everyone in the match. You’ll be displayed on the map with a red crown icon, giving you four minutes to survive. So, if your squad is ready for action, you’ll want to accept this challenge.

    For reviving teammates, it’s best to have a vehicle (like a truck or helicopter) and remain close to the edge of the map or near the gas to reduce your chances of being eliminated by enemies.

    If you get killed, you’ll lose the contract. It’s vital to ensure your teammates protect you, and avoid rushing towards enemies carelessly.

    Understanding the Contract Multiplier Feature


    Contract multiplayer in warzone

    A noteworthy feature is the return of the contract multiplier for successfully completing consecutive contracts. The process works just like before. Every time you finish a contract, you earn a 30 percent cash bonus for the next one you complete, and this continues stacking.

    However, there’s a cap at 150 percent, and this feature is available in both Battle Royale and Resurgence modes.

    This is a great strategy for stacking multiple contracts early in a match, allowing for a faster setup with your loadout and UAVs. The multiplier remains active for the entirety of the game.

  • Top Kilo 141 Loadout for Dominating in Warzone

    Top Kilo 141 Loadout for Dominating in Warzone

    Some of the most memorable weapons from Call of Duty: Warzone are making a comeback as the game marks its fifth anniversary. This celebration includes the return of Verdansk and the launch of Black Ops 6 along with Warzone Season 3. Players can obtain one of these classic weapons by downloading and launching Warzone as part of the Return to Verdansk event, which offers up to 20 rewards to earn.

    The free weapon available is the Kilo 141, an outstanding long-range assault rifle poised to be a staple in the Warzone meta now that Verdansk is back. The updated Kilo 141 closely resembles the version from Modern Warfare and performs at a similar level. For optimal results in the Kilo 141 loadout during Warzone’s return to Verdansk, players should focus on enhancing its long-range damage and controlling its low recoil.

    Best Kilo 141 Loadout in Warzone

    Transform the Kilo 141 into a Long-Range Powerhouse


    The Kilo 141 is a straightforward weapon to use in Warzone. It offers a damage output of 31 at an effective range of about 39.1 meters, allowing you to take down opponents in five to seven shots, depending on their armor. While this may not be the highest damage, the Kilo 141 compensates with its remarkably low recoil, making it easier to consistently land shots. Thus, the best Kilo 141 configuration focuses on extending this effective damage range and enhancing its control.

    Kilo 141 Best Loadout

    Attachment Slot

    Name

    Reason

    Optic

    Kepler Microflex

    Choose your preferred optic; I favor the Kepler Microflex, but the Volzhskiy Reflex is also a strong option. Alternatively, opt for a higher-zoom scope if you have trouble spotting distant enemies.

    Muzzle

    Monolithic Suppressor

    This new attachment, unlockable in Season 3, keeps your shots off the radar while enhancing your damage range and bullet velocity. If it’s unavailable, use a regular suppressor to remain discreet, or consider a compensator for improved recoil control.

    Barrel

    Gain-Twist Barrel

    This barrel increases the Kilo’s bullet velocity, reducing the lead you need when engaging targets at range, aiding in accuracy and consistency.

    Underbarrel

    Vertical Foregrip

    This grip, typically the first one unlocked, significantly reduces horizontal recoil. Since the Kilo has minimal vertical recoil, it’s essential to manage left-to-right bounce effectively.

    Magazine

    Extended Mag II

    This increases the Kilo’s magazine capacity to 60, allowing for 15 more rounds than the Extended Mag I. Although the Extended Mag III offers 80, it hampers handling too much, making the Extended Mag II a balanced choice.

    This loadout emphasizes long-range performance for the Kilo 141. With minimal vertical and horizontal recoil, and a suppressor that greatly reduces visual flash, engaging enemies from a distance becomes much simpler. While the Kilo may have a slower time to kill compared to other assault rifles like the AK-74 or the new Grau conversion kit on the SWAT-556, superior accuracy at range should compensate for that.

    The one area where this Kilo loadout may encounter difficulties is in close-quarters combat. However, since Verdansk features more open spaces compared to Urzikstan, it’s advisable to capitalize on that advantage.

    Best Kilo 141 Class Setup in Warzone

    Pair the Kilo with this SMG for any Combat Situation

    The ideal Kilo 141 class setup incorporates the Overkill wildcard along with an SMG as a secondary to tackle close-range encounters. I recommend the C9 SMG here, as it’s among the top SMGs in Warzone due to its rapid time-to-kill and the capacity for a 50-round magazine while maintaining excellent handling. You can opt for your favorite SMG as well; the Jackal PDW and KSV are also solid picks. Below is the C9 loadout I’ve had the most success with:

    • Muzzle: Compensator
    • Barrel: Reinforced Barrel
    • Underbarrel: Vertical Foregrip
    • Magazine: Extended Mag II
    • Rear Grip: Ergonomic Grip

    For perks, Survivor is a valuable choice as it accelerates health regeneration and enhances ally pickup speed. Tracker pairs well with this long-range-focused loadout, highlighting enemies when they are hit, which aids both you and your squad. I recommend Alertness for the final perk, as you will often be in a stationary position for long-range fights, making it crucial to avoid being flanked. For equipment, the stim shot and throwing knife are popular items in Warzone, helping you sustain longer in fights and swiftly finish off knocked enemies.

  • Discovering Smuggling Tunnels in Call of Duty: Warzone 2

    Discovering Smuggling Tunnels in Call of Duty: Warzone 2

    Call of Duty: Warzone 2 DMZ features many locations for players to discover, whether to locate specific vehicles like the MRAP or to fulfill certain faction missions. Some places can be quite difficult to find, so it’s beneficial to do some research for guidance.

    The Smuggling Tunnels is one such spot that you may find challenging to locate on your own. Furthermore, since there’s a White Lotus faction mission connected to it, knowing its location is essential.

    Finding the Smuggling Tunnels

    The Smuggling Tunnels are located northeast of Zarqwa Hydroelectric and can only be found on the Al-Mazrah map. A tall tower nearby serves as a helpful landmark when navigating toward the location of the Stronghold.

    If you spawn on the southern side of Al-Mazrah, it’s advisable to use a boat to navigate up the river to the hydroelectric plant.

    When you drop into the DMZ, mark the stronghold on your map so you can find it later. Upon reaching the area outside the Smuggling Tunnels Stronghold, there are a few concealed entrances.

    The simplest entrance to locate is on the left side of the Stronghold icon, where you will find a tree leaning over a rocky hollow. The entrance is partially hidden by bushes, but as you get closer, you’ll spot a metal fence and an industrial door leading into the Smuggling Tunnels.

    Unlocking the Smuggling Tunnels

    Access to the tunnels requires a Stronghold Keycard, similar to other Strongholds in the DMZ. However, there isn’t a key specifically for the tunnels, unlike some other areas where individual keys are needed.

    Before heading to the Smuggling Tunnels, it’s important to come fully prepared. It’s advisable to approach this Stronghold with a team, as the tunnels are filled with enemies and the tight spaces can lead to quick ambushes.

    How to Obtain a Stronghold Keycard

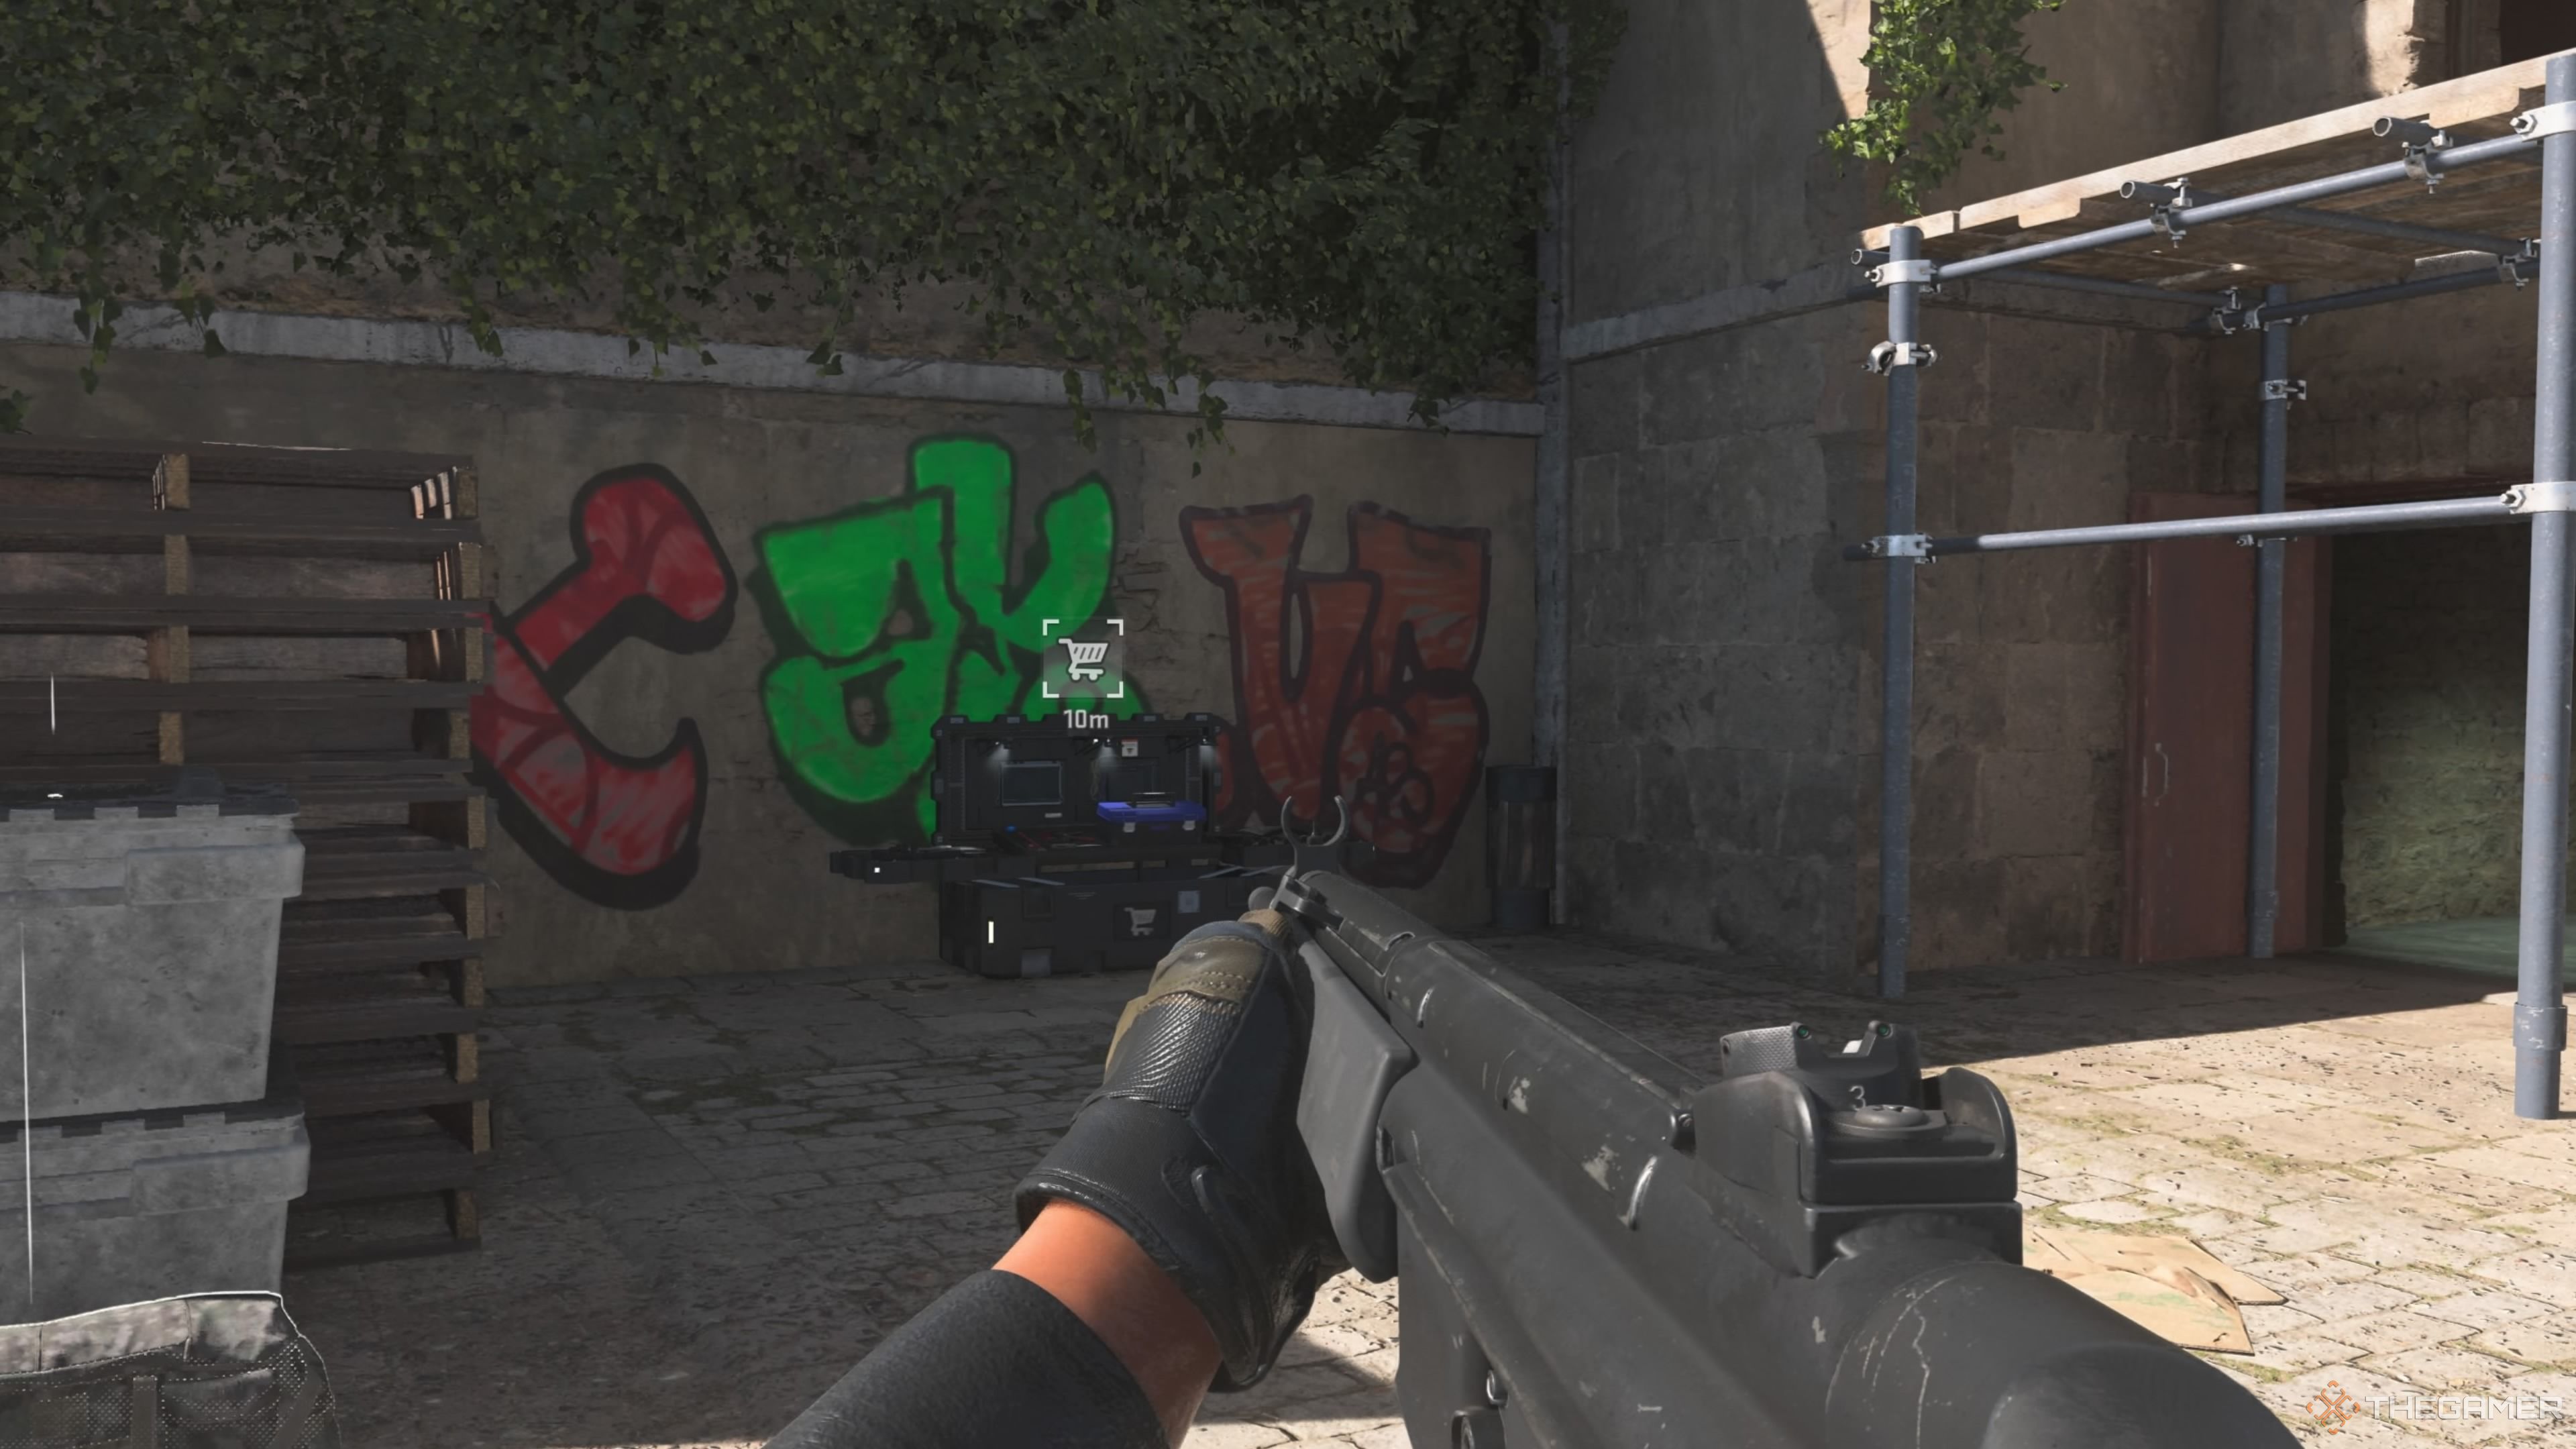
    Image of a buy station in Call of Duty Warzone 2 DMZ showing a player pointing at a station with colorful graffiti on the wall behind.

    To acquire a Stronghold Keycard, you have a few options. One method involves . This approach can be lengthy and is not typically advisable.

    Instead, you can purchase a keycard from a Buy Station for $5,000. While that may seem like a hefty amount, if you’ve been completing contracts and looting items throughout the match, gathering that cash should be manageable. Plus, there’s a faster way to earn significant cash without completing contracts.

    Keep in mind that not every Buy Station will have a Stronghold Keycard available, but by checking multiple stations across the map, you’ll find one that does.

    The train that circles around Al-Mazrah (visible on the map) is an excellent spot for collecting cash early in the game. While looting the train, it’s common to discover over $3,200 in scattered cash. To maximize this tactic, aim for the train immediately after spawning on the map.

    After collecting items, you can sell valuables at a Buy Station or loot cash registers in shops to quickly reach that $5,000 you need for the keycard.

    With the cash in hand, you’ll be ready to access the Smuggling Tunnels much more efficiently than relying on enemies to drop a keycard.

  • Call of Duty: Black Ops 6 and Warzone Unleashed

    Call of Duty: Black Ops 6 and Warzone Unleashed

    As the new season of the Call of Duty League approaches, players can now purchase team-themed skins for the 12 participating teams to use in Call of Duty: Black Ops 6 and Call of Duty: Warzone. While generic League Pack skins have been available for a while, fans can now represent their favorite teams with unique, themed skins.

    These skins will feature on professional players during the 2025 Call of Duty League matches, which begin later this January. These packs are compatible with both Black Ops 6 and Warzone, and players can earn additional rewards for Black Ops 6 by tuning in to the CDL events.

    Release Date for CDL Team Pack Bundles

    Team Pack Bundles Now Available

    Starting January 7, 2025, all Team Pack Bundles will be available for purchase in the CoD stores. You’ll find them easily from the main store in both Black Ops 6 and Warzone. After the launch, you can locate them by scrolling through the store or searching for “Call of Duty League.”

    All 12 teams in the league will have their own CDL Team Pack, including Atlanta FaZe, Boston Breach, Carolina Royal Ravens, Cloud9 New York, LA Guerrillas M8, LA Thieves, Miami Heretics, Minnesota Rokkr, Optic Texas, Vancouver Surge, Toronto Ultra, and Vegas Falcons. Most teams have been actively promoting their packs on social media, and all 12 options are now available for purchase.

    Bundle Price & Content

    Skins, Camo, And Much More

    Each pack is available for individual purchase from the store, allowing you to choose your favorite real-life Call of Duty League team’s gear before diving into the game. Unfortunately, packs cannot be bought using in-game CoD Points again this year; each one is priced at $11.99.

    This year, all items included in the CDL Team Packs are solely cosmetic and provide no competitive advantage in the game.

    With each pack purchase, you’ll receive five items. The pack includes both male and female operator skins wearing their home and away uniforms. Additionally, you’ll get team-specific graffiti camo for the AMES 85 and Jackal PDW, along with team stickers and icons. A Weapon Charm representing your selected team will also be included.

    These packs follow the earlier release of the Squid Game skins that became playable through a recent collaboration. For fans of the Call of Duty League, acquiring these team packs is a fantastic way to show support for your team in Call of Duty: Black Ops 6 and Call of Duty: Warzone.

  • Optimal PC Settings for an Enhanced Gaming Experience

    Optimal PC Settings for an Enhanced Gaming Experience

    Call of Duty: Warzone is an action-packed game that requires players to maintain high performance and consistent FPS. As games have evolved to be more resource-intensive and gaming hardware has become pricier, many gamers struggle to meet these demands. In this fast-paced first-person shooter, quick reflexes and constant movement are essential for survival in Warzone.

    In its role as a competitive multiplayer experience, Warzone accelerates the need for swift reactions and reliable online connectivity, which in turn necessitates powerful hardware. Fortunately, gaming on PC allows you to adjust a variety of graphical settings to enhance the performance of Call of Duty. This guide breaks down the optimal settings for the latest version of Warzone.

    Top Graphics Settings for Warzone on PC

    Display Settings

    The graphics settings in Call of Duty: Warzone can be categorized into Display, Quality, and View. We’ll start with Display settings, which are primarily concerned with the screen configuration where you play Call of Duty. If you’re not using multiple monitors or GPUs, you might not need to tweak these, but for optimal performance, consider the following:

    Display Mode

    Fullscreen Exclusive

    Display Monitor

    Your primary monitor; varies by user

    Display Adapter

    Your GPU; varies by user

    Screen Refresh Rate

    Auto; verify in the “Advanced Display” settings in Windows

    Display Resolution

    Auto; confirm this in the “Advanced Display” settings in Windows

    Aspect Ratio

    Auto (most likely 16:9 unless using a widescreen monitor)

    Display Gamma

    2.2 [SRGB]

    Gamma/Brightness

    Adjust as necessary

    NVIDIA Reflex Low Latency

    On – Boost

    Eco Mode Preset

    Custom

    V-Sync (Gameplay)

    Off

    V-Sync (Menus)

    Off

    Custom Frame Rate Limit

    60

    Reduce Menu Render Resolution

    Optimal

    Pause Game Rendering

    Off

    Reduce Quality When Inactive

    Adjust as needed

    Focused Mode

    Off

    Quality Settings

    Next is the Quality settings menu, which influences how the game is visually rendered. This section contains the most crucial settings for performance, making it the first stop for troubleshooting low FPS or other issues.

    Graphic Preset

    Reset to Recommended, then select Performance

    Render Resolution

    100

    Dynamic Resolution

    Off

    Upscaling/Sharpening

    On; pick your preferred choice

    AMD FSR 3 Frame Generation

    Off

    VRAM Scale Target

    85

    Variable Rate Shading

    Off

    Texture Resolution

    Very Low

    Texture Filter Anisotropic

    Low

    Depth of Field

    Off

    Detail Quality

    Low

    Particle Resolution

    Low

    Bullet Impacts

    Off

    Persistent Effects

    On

    Shader Quality

    Low

    On Demand Texture Streaming

    Optimized; use carefully due to potential performance issues.

    Local Texture Streaming Quality

    Normal or Low

    Shadow Quality

    Very Low

    Screen Space Shadows

    Off

    Occlusion and Screen Space Lighting

    Off

    Screen Space Reflections

    Off

    Static Reflection Quality

    Low

    Tessellation

    Low

    Volumetric Quality

    Low

    Deferred Physics Quality

    Off

    Weather Grid Volumes Quality

    Off

    View Settings

    Lastly, we have the View settings, which control the camera movement during gameplay. Although these settings might not heavily impact overall performance, they can still make a difference in your gameplay experience.

    Motion Reduction Preset

    Off

    Arachnophobia Mode

    On, if you want to avoid seeing spiders, it shouldn’t significantly affect performance.

    Field of View

    90

    ADS Field of View

    Affected

    Weapon Field of View

    Default

    3rd Person Field of View

    90

    Vehicle Field of View

    Default

    World Motion Blur

    Off

    Weapon Motion Blur

    Off

    1st Person Camera Movement

    Default (100%)

    3rd Person Camera Movement

    Default (100%)

    3rd Person ADS Transition

    3rd Person ADS

    Inverted Flashbang

    Adjust as necessary

    How to Increase FPS in Warzone

    Tips for Enhanced Performance

    If you’ve set everything as mentioned and are still facing lag, consider a few additional steps. First, close any unnecessary programs running on your computer, even if they’re minimized. Other applications, like browsers or chat apps, can significantly drain your PC’s processing power, affecting overall performance. Don’t forget to check the System Tray for any running applications.

    If performance is still lacking, press Ctrl+Alt+Del and open the Task Manager. End any unnecessary tasks you won’t utilize while playing Warzone. Focus on tasks under the Apps and Background Processes sections; avoid ending processes you don’t recognize.

    To simplify your next session, check the Startup Apps in the Task Manager (the gauge icon on the sidebar) and disable any programs you don’t want to start up automatically with your PC.

    If all else fails, consult the Task Manager or Microsoft Game Bar (Win+G) to check the performance of your CPU, GPU, RAM, and VRAM. If any component is reaching its maximum capacity and you’re still not satisfied with performance, an upgrade may be necessary. Typically, low FPS indicates the need for an improved CPU or GPU. Follow the recommended hardware section for guidance.

    System Requirements for Warzone

    The following table outlines the minimum and recommended specifications to run Warzone on PC, as listed on the game’s Steam page. You can use comparable components from other brands if you don’t have the exact models mentioned.

    Spec

    Minimum

    Recommended

    OS

    Windows 10 or 11, 64-bit

    Windows 10 or 11, 64-bit

    CPU

    Intel i3-6100, Intel i5-2500K, or AMD Ryzen 3 1200

    Intel i5-6600K, Intel i7-4770, or AMD Ryzen 5 1400

    RAM

    8 GB

    12 GB

    GPU

    NVIDIA GeForce GTX 960 or AMD Radeon RX 470

    NVIDIA GeForce GTX 1060 or AMD Radeon RX 580

    Check your PC’s specifications by searching for System Information in your start menu.

    By adjusting these settings, you can ensure satisfactory performance levels. This way, Call of Duty: Warzone will function well on lower-end PCs and laptops without compromising visual quality.

  • Top Perk Combos to Dominate in Warzone

    Top Perk Combos to Dominate in Warzone

    Whether you’re a seasoned player of Warzone or just starting out, the launch of Black Ops 6 has completely integrated new elements into the game. This includes a variety of weapons, perks, equipment, and other features that enhance the Warzone experience. As you set up your loadout, you’re bound to discover some new perks along with the ones you already know.

    When getting ready for a match, you might wonder which perks will serve you best and what combinations work well together. This guide outlines three perk combinations tailored for different playstyles to help you elevate your gameplay.

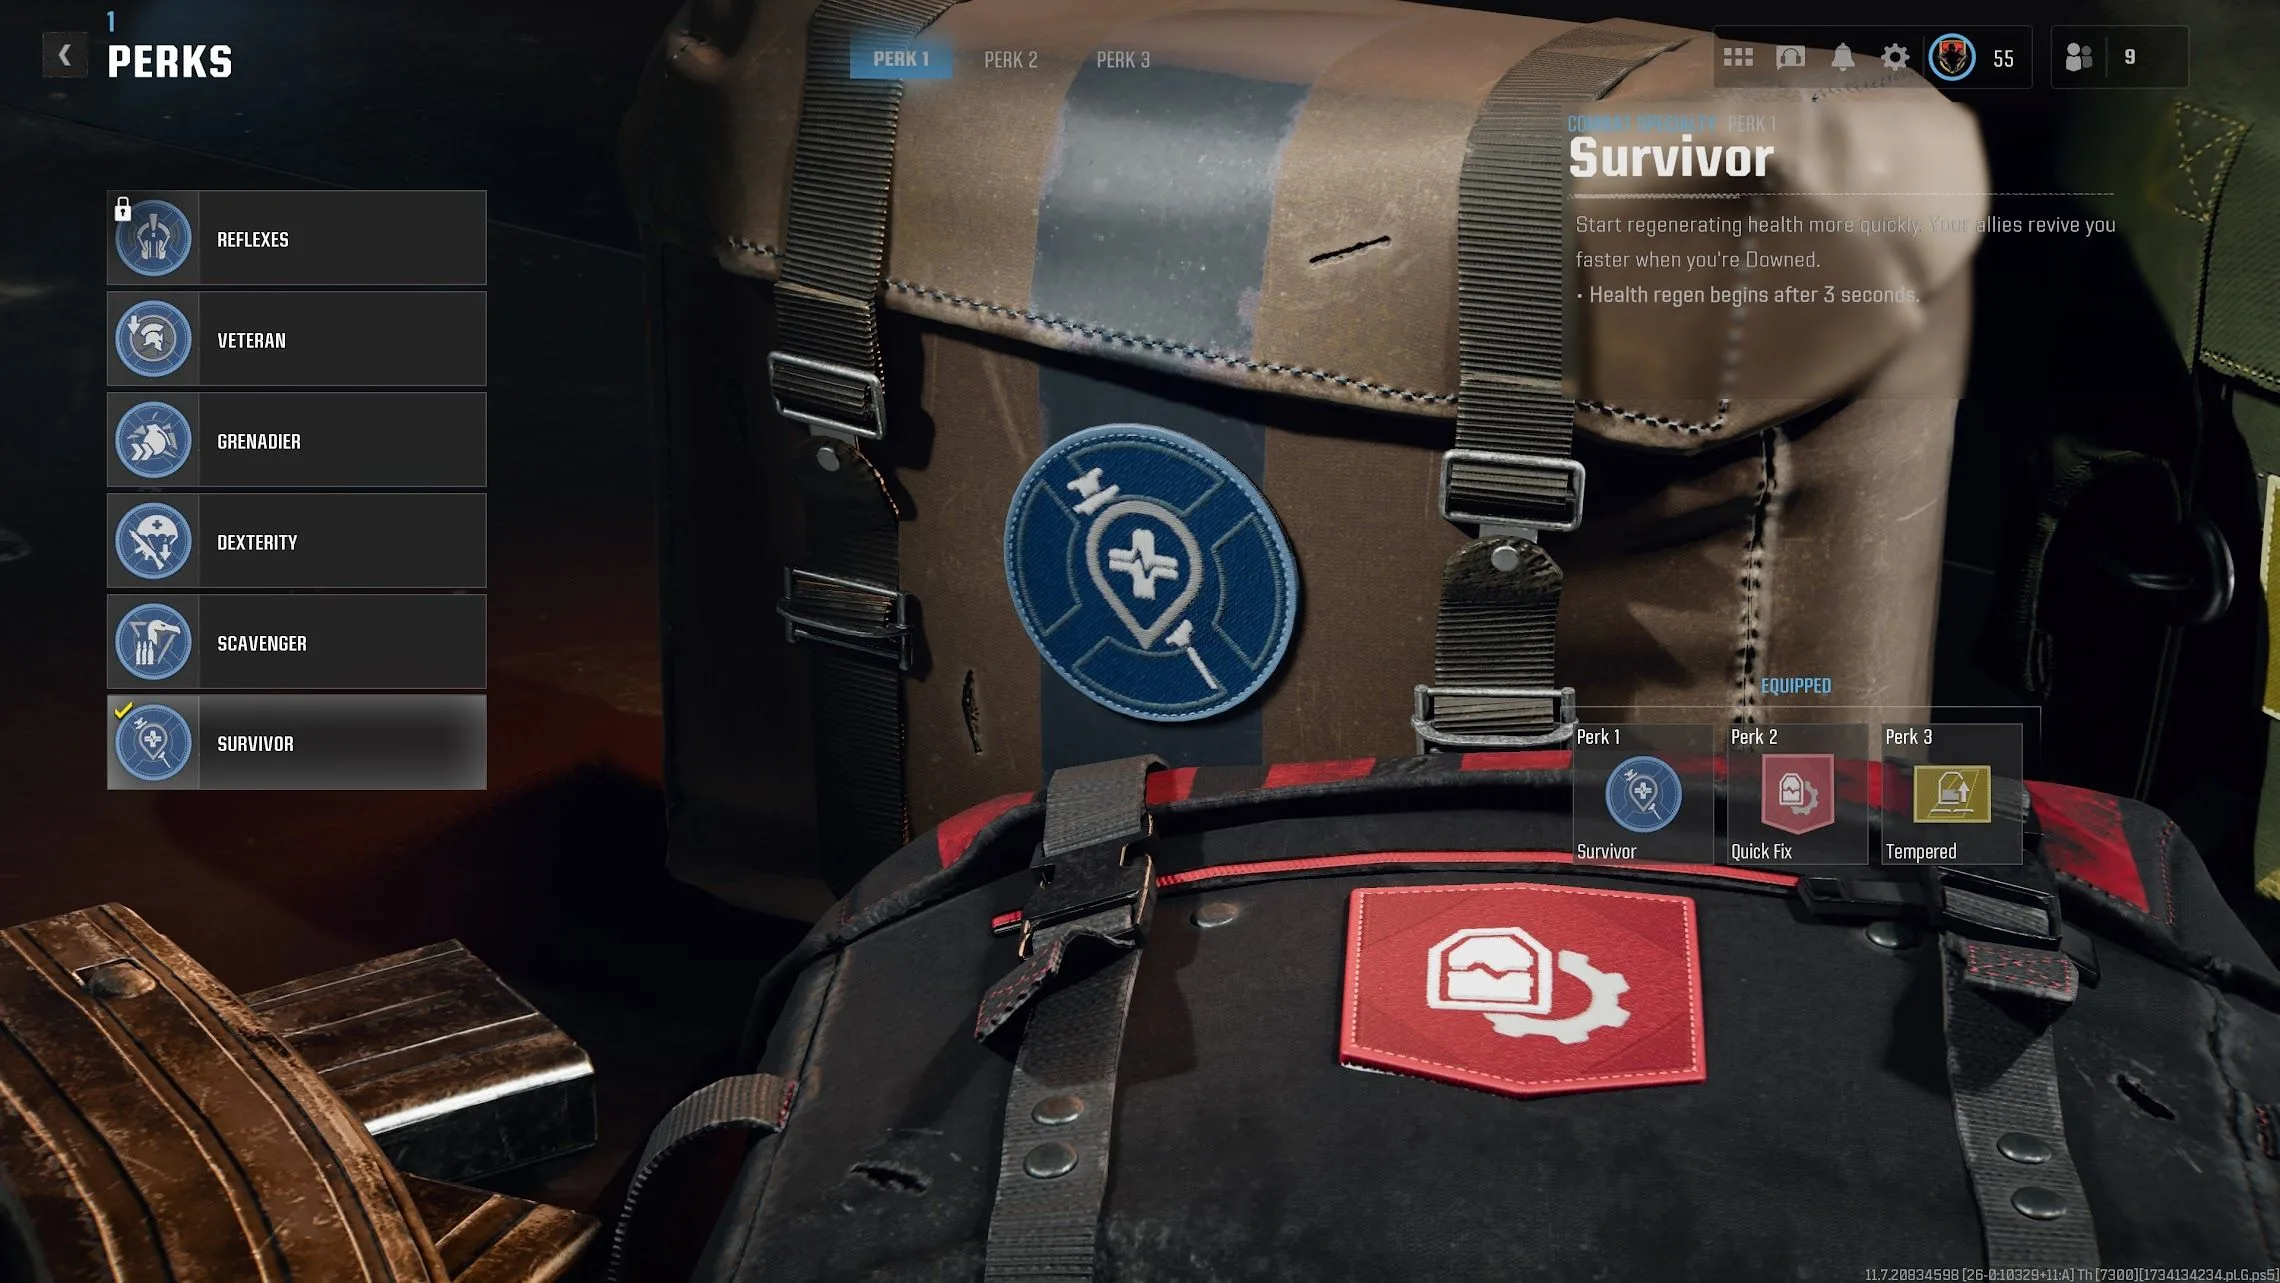
    Survivor, Quick Fix, Tempered


    The pairing of Survivor and Quick Fix is highly effective, as both are designed to help you recover health rapidly. While Survivor boosts health regeneration, Quick Fix activates health recovery with each kill.

    This combination promotes an aggressive playstyle, particularly effective with SMGs like the KSV or Jackal PDW.

    Moreover, you can reload armor plates with one hand, allowing you to fire while doing so if needed.

    Because this is an aggressive perk setup, having a way to quickly add armor plates is vital. Tempered fits this loadout perfectly.

    With only two plates necessary instead of three, coupled with your health regeneration, you can jump back into combat after engagements more quickly.

    Dexterity, Tracker, Gung-Ho


    Dexterity, Tracker, Gung-Ho perks - warzone

    This second combination leans less aggressive and is ideal for long-range engagements, requiring careful positioning before entering gunfights.

    This setup boosts your mobility with both Dexterity and Gung-Ho. Dexterity reduces fall damage and weapon sway when executing jumps, slides, or dives, easing your movement.

    With Gung-Ho, you experience no movement penalties when using equipment or reloading, enhancing your ability to maneuver during battles.

    Incorporating Tracker allows you to automatically spot enemies from afar, making it an excellent match for assault rifles like the GPR 91.

    If enemies close in on you, you can follow their footsteps to gauge their position, giving you a strategic advantage.

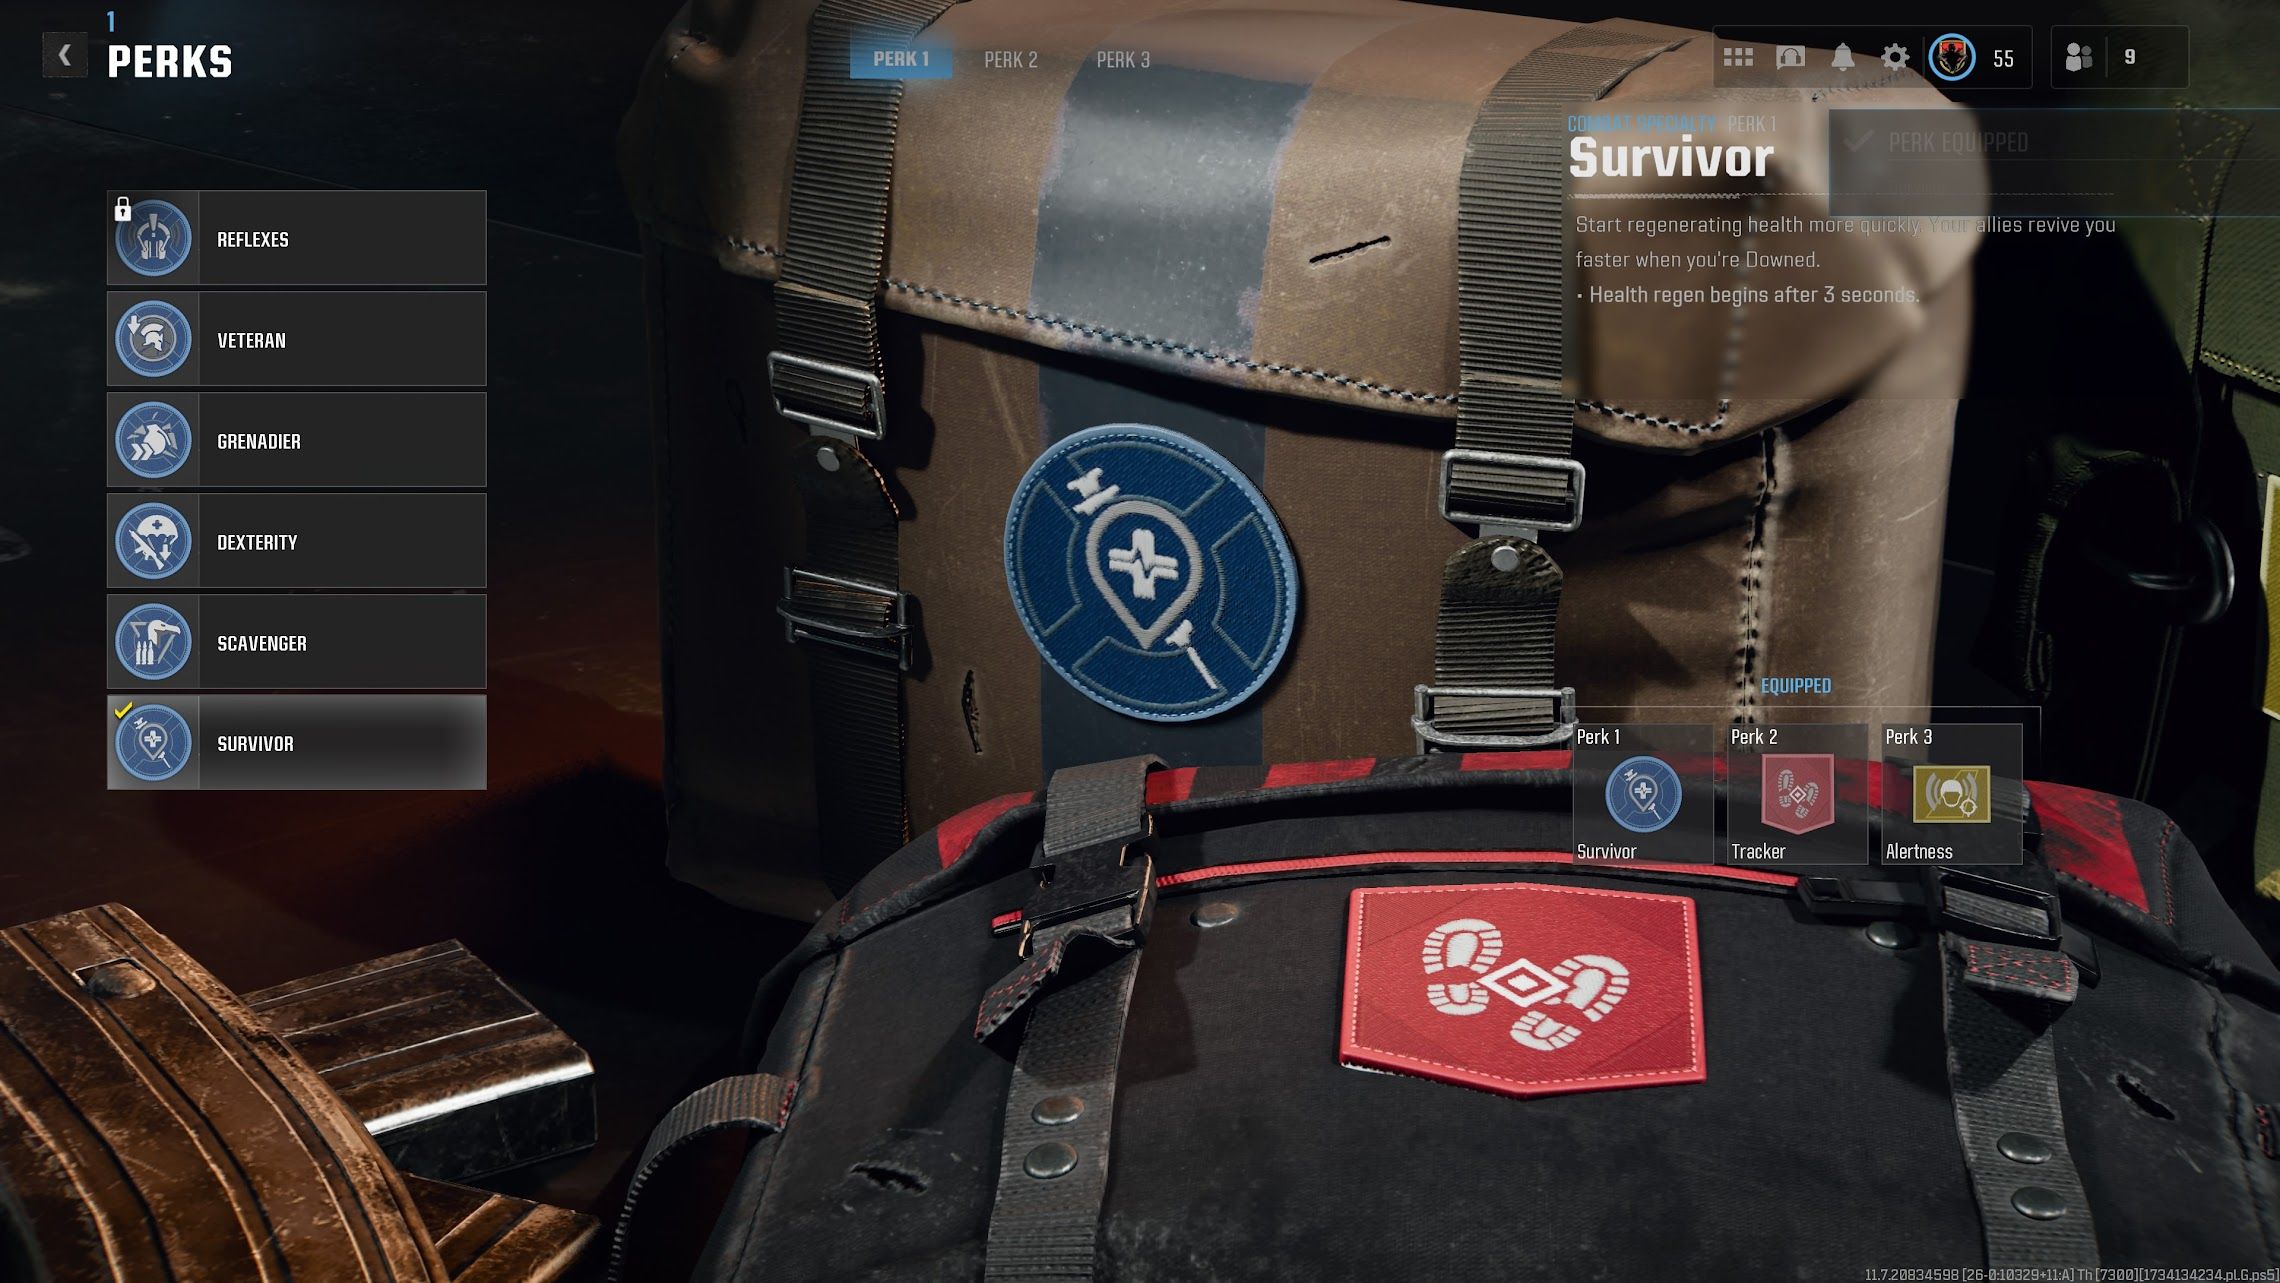
    Survivor, Tracker, Alertness


    Survivor, Tracker, Alertness perks - warzone

    The last combination is well-rounded and ensures you’re ready for anything that comes your way.

    As you will likely engage in numerous firefights, Survivor will help you heal quickly, allowing you to stay in the action longer.

    Tracker is effective for both close-range and long-range confrontations due to its automatic ping feature, allowing you to track enemies at any distance.

    Completing this setup with Alertness keeps you vigilant by notifying you if someone targets you or if an enemy is near, ready to strike.

    This combination keeps you alert and adaptable in various scenarios.

  • Top Urzikstan Loadouts for Ranked Play in Warzone

    Top Urzikstan Loadouts for Ranked Play in Warzone

    After much anticipation, Warzone Ranked Play has officially launched in Urzikstan, and players will need the strongest loadouts to rise through the ranks. Previously available on the Resurgence map, Warzone Ranked Play is now taking the action to the larger map, shaking up the current game meta.

    In an interesting twist, the developers of Call of Duty have introduced several modifications that have transformed the competitive landscape. Notably, weapons from MW2 and MW3 are now restricted, compelling players to rely on the armory from Black Ops 6 to craft their optimal Warzone Ranked Play loadouts.

    Top Long-Range Weapons for Warzone Ranked Play

    XM4


    • Muzzle: Compensator
    • Barrel: Reinforced Barrel
    • Underbarrel: Vertical Foregrip
    • Magazine: Extended Mag II
    • Rear Grip: Ergonomic Grip
    • Optic: Willis 3x or Jason Armory 2x
    • Stock: Buffer Weight Stock
    • Fire Mod: Recoil Springs

    The XM4 is considered one of the most balanced weapons available in Warzone Ranked Play. Its impressive overall stats make it a flexible option for players in Urzikstan. With a manageable recoil pattern, it’s one of the simplest weapons to handle, and the suggested attachments enhance accuracy and recoil control.

    GPR 91

    GPR 91 loadout for Ranked Play

    • Muzzle: Compensator
    • Barrel: Gain-Twist Barrel
    • Underbarrel: Vertical Foregrip
    • Magazine: Extended Mag II
    • Rear Grip: Ergonomic Grip
    • Optic: Willis 3x or Jason Armory 2x
    • Stock: Infiltrator Stock
    • Fire Mod: Recoil Springs

    The GPR 91 has quickly garnered recognition as a premier Assault Rifle in Warzone Ranked Play, especially among top-tier players and streamers. A recent buff to its bullet velocity in Season 1 Reloaded has considerably improved its time-to-kill (TTK) capability.

    While the XM4 might still hold the crown, the GPR 91 is making a strong case. Testing both weapons can help you determine which one suits your style better. Attachments like the Vertical Foregrip and Recoil Springs ensure that you can maintain accuracy and control over recoil. For an Overkill loadout, consider excluding the Infiltrator Stock, Recoil Springs, and Ergonomic Grip.

    XMG

    XMG loadout for Ranked Play

    • Muzzle: Compensator
    • Barrel: Gain-Twist Barrel
    • Underbarrel: Vertical Foregrip
    • Magazine: Extended Mag I
    • Rear Grip: Quickdraw Grip
    • Optic: Willis 3x or Jason Armory 2x
    • Stock: Buffer Weight Stock
    • Fire Mod: 7.62 Nato Overpressured

    Departing from the typical Assault Rifle role, the XMG is establishing itself as a top contender for long-range engagements in Warzone Ranked Play. While it may lack the mobility of Assault Rifles, it compensates with superior firepower.

    The XMG has proven effective for players on Warzone‘s Area 99 map, but it has faced tough competition from some Assault Rifles. Given the expansive nature of Urzikstan’s terrain, you might find the XMG climbing to a new level of relevance.

    This loadout emphasizes long-range capabilities with a combination of the Vertical Foregrip and Compensator for stability, while the 7.62 Nato Overpressured attachment maximizes bullet velocity. For an Overkill configuration, it’s advisable to drop the Extended Mag I, Quickdraw Grip, and Compensator.

    Best Close-Range Weapons for Warzone Ranked Play

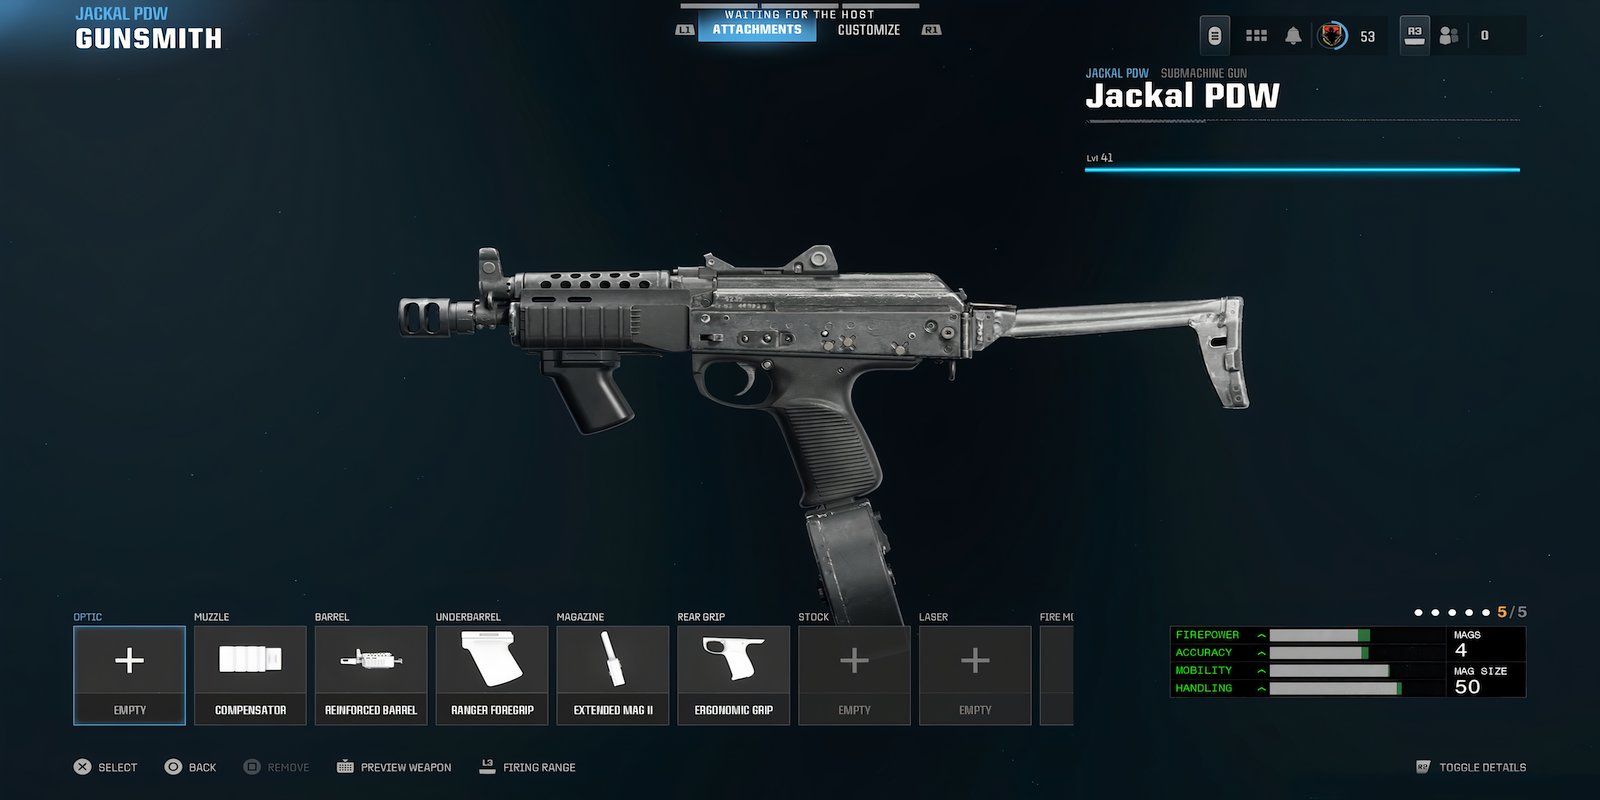
    Jackal PDW

    Jackal PDW loadout for Ranked Play

    • Muzzle: Compensator
    • Barrel: Reinforced Barrel
    • Underbarrel: Ranger Foregrip
    • Magazine: Extended Mag II
    • Rear Grip: Ergonomic Grip

    The Jackal PDW has dominated as the leading SMG in Black Ops 6 since its release, and it excels in the Ranked Play setting as well. Though it might be somewhat challenging to utilize, mastering it will lead to rapid eliminations that other SMGs struggle to match.

    While Urzikstan generally favors long-range confrontations, close-quarters areas are still abundant. The Gain-Twist Barrel increases bullet velocity, while the Ranger Foregrip and Ergonomic Grip improve control and response time.

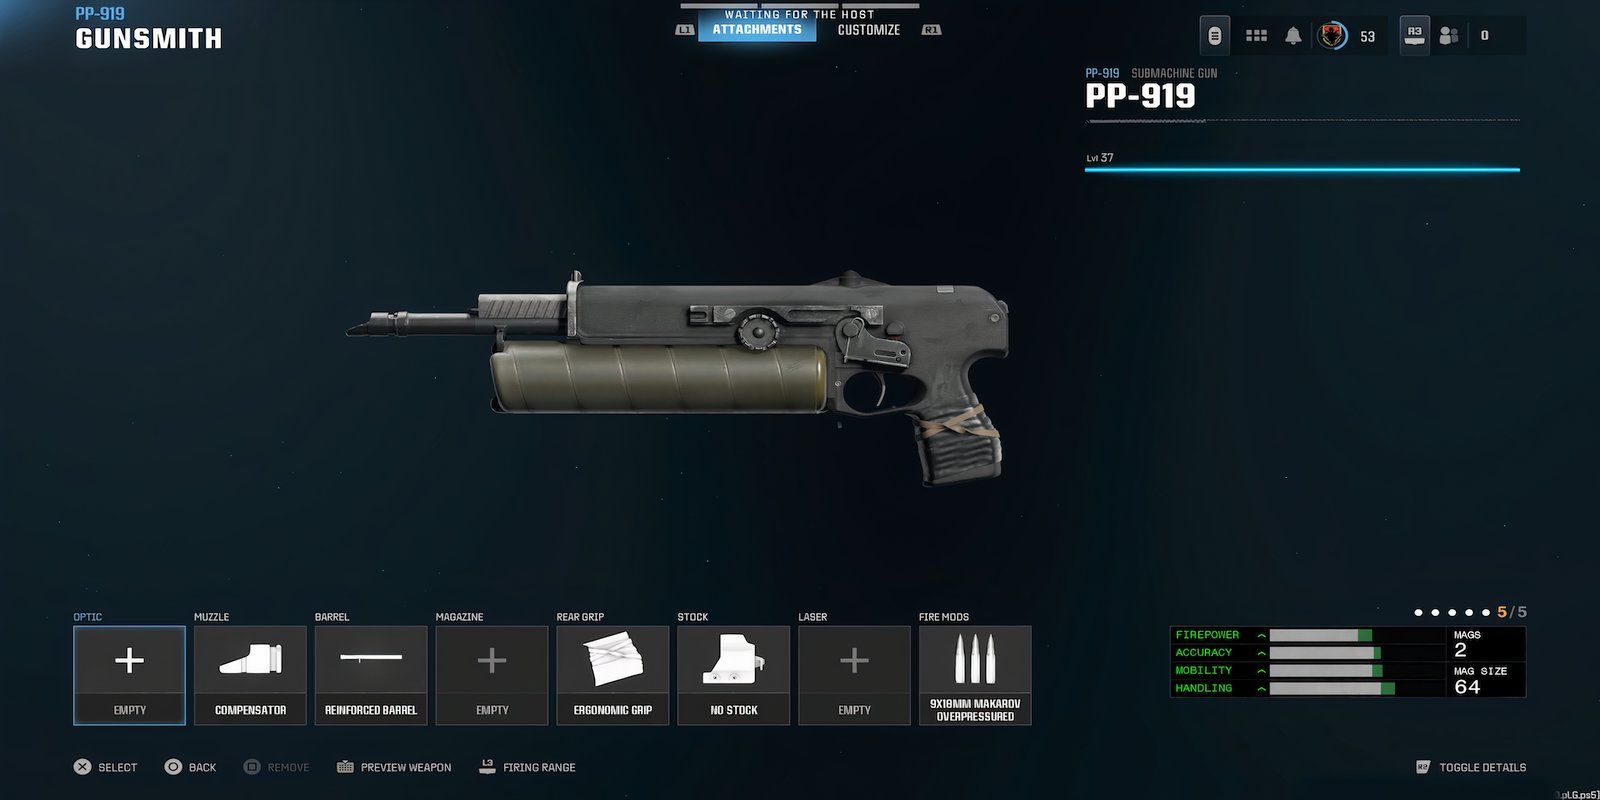
    PP-919

    PP-919 loadout for Ranked Play

    • Muzzle: Compensator
    • Barrel: Reinforced Barrel
    • Rear Grip: Ergonomic Grip
    • Stock: No Stock
    • Fire Mod: 9x18MM Makarov Overpressured

    The PP-919’s standout feature in Warzone Ranked Play is its impressive magazine capacity, allowing players to forgo the need for a Magazine attachment.

    This SMG caters perfectly to agile strategists who rely on fast movements to overwhelm enemies. The No Stock option allows for rapid movement across the battlefield, while the Reinforced Barrel and Compensator give you extended range and control to handle multiple foes at once.

    Warzone’s Best Ranked Play Sniper

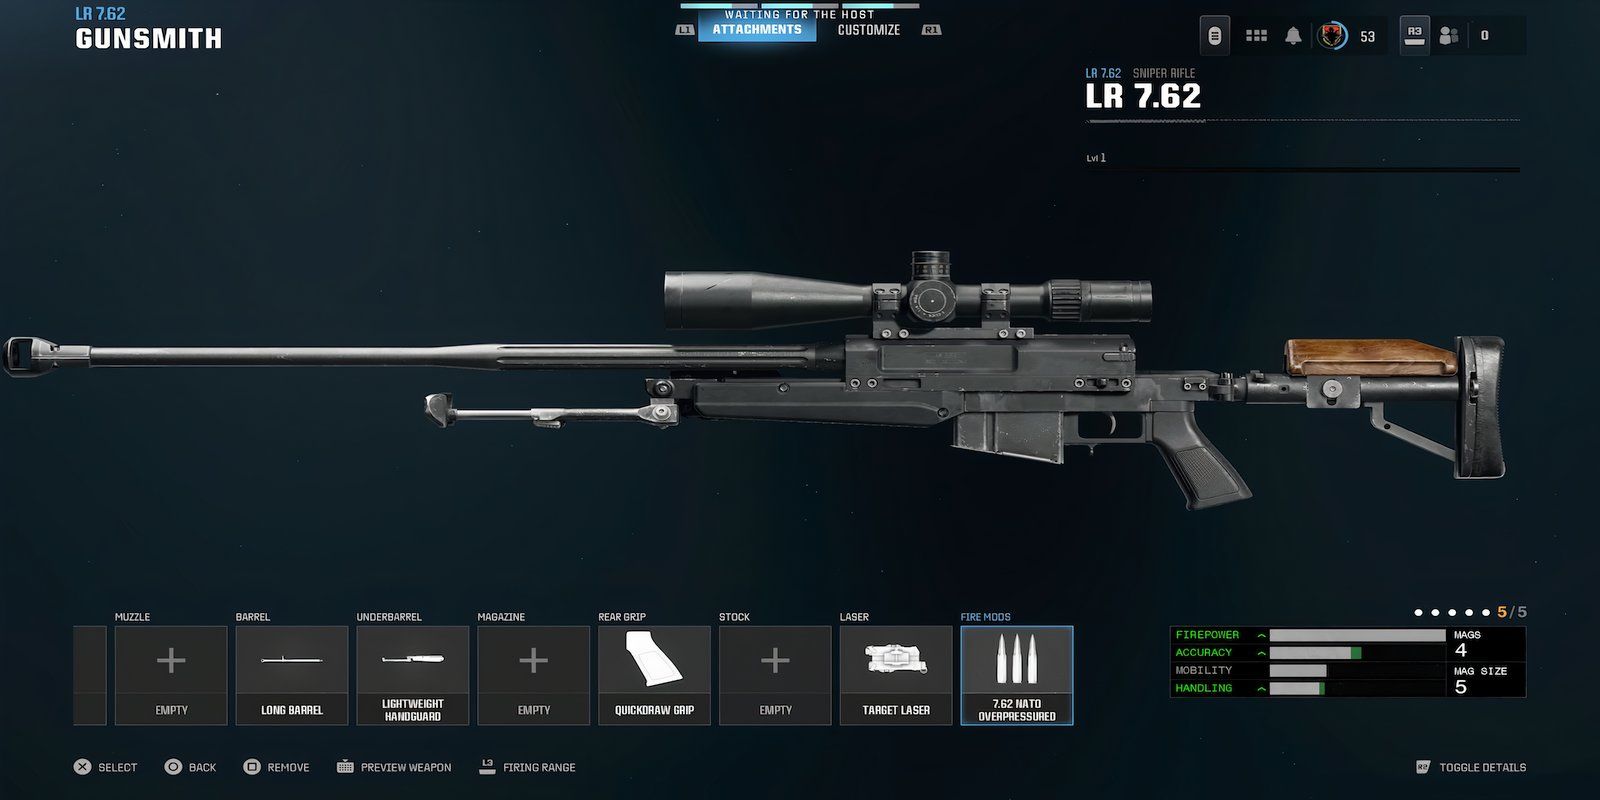
    LR 7.62

    LR 7.62 loadout for Ranked Play

    • Barrel: Long Barrel
    • Underbarrel: Lightweight Handguard
    • Rear Grip: Quickdraw Grip
    • Laser: Target Laser
    • Fire Mod: 7.62 Nato Overpressured

    The LR 7.62 Sniper Rifle equips players to excel in long-range combat throughout Urzikstan. As the top choice among snipers for Black Ops 6, it’s ideal for taking down campers who often occupy elevated positions. A well-aimed headshot can lead to easy kills, allowing for an immediate call for a Precision Airstrike.

    Keep your attachment choices straightforward; this setup is optimized to maximize the rifle’s damage and handling capabilities.

    Top Ranked Play Perks & Equipment

    Choosing The Right Setup Matters

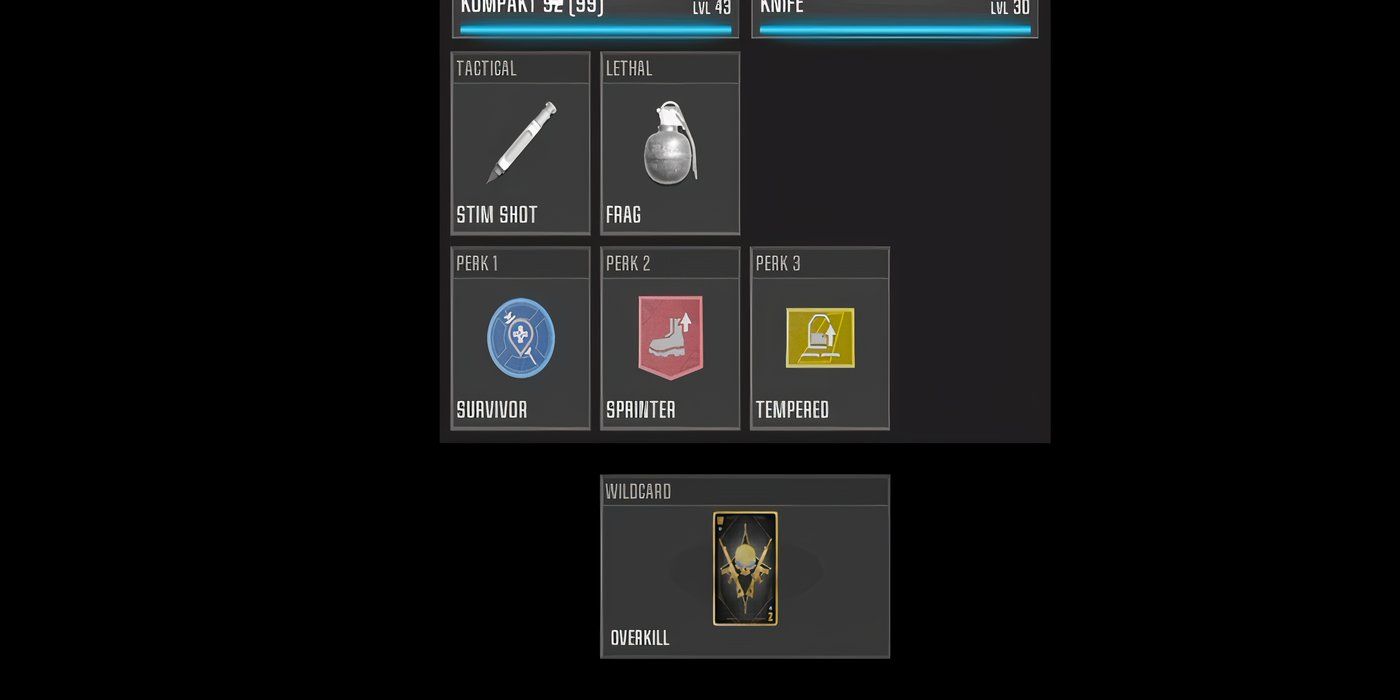
    Best Warzone Ranked Play Perks & Equipment

    • Tactical: Stim Shot
    • Lethal: Frag
    • Perk 1: Survivor
    • Perk 2: Sprinter
    • Perk 3: Tempered
    • Wildcard: Overkill or Gunfighter

    When it comes to perks and equipment, players have a broader selection than with weapon choices, allowing for a mix that best suits individual playstyles.

    The configuration above presents a solid foundation, but feel free to experiment and adjust according to your performance in Ranked Play matches. The combination of Frag grenades and Stim Shots is a reliable duo to enhance survival.

    For perks, Tempered allows you to reach full health with just two plates, while Survivor enables faster health regeneration and Sprinter facilitates unlimited tactical sprinting. This combination significantly boosts your chances of staying alive during intense matches.

    Lastly, the decision between Overkill and Gunfighter depends on the situation. Initially, grabbing your Overkill loadout is recommended, but if a Gunfighter loadout becomes available, switching to it can enhance your versatility.

    Incorporating the best Warzone Ranked Play loadouts is an effective strategy for thriving in this highly competitive battle royale environment. Season 1 will see intense competition as players strive to ascend from Bronze to the top 250 on the leaderboard.

    Source: wzstats, warzoneloadout

  • Unlocking the Maelstrom Shotgun in BO6 & Warzone: A Guide

    Unlocking the Maelstrom Shotgun in BO6 & Warzone: A Guide

    New additions, like the Maelstrom Shotgun, have been introduced in Black Ops 6 and Warzone with the launch of Season 1. What makes the Maelstrom stand out is that it’s a fully automatic shotgun, a feature that sets it apart from other weapons. Don’t miss your chance to unlock this powerful tool this month.

    Taking on the invigorating holiday-themed maps like Nuketown and Area 99 while wielding your shotgun will turn up the heat against your foes. No matter if you enjoy BO6 Multiplayer or the diverse terrains of Warzone, this shotgun is ready to dominate in tight spaces. Here’s how you can unlock it.

    How to Unlock the Maelstrom Shotgun in BO6 and Warzone

    The Full-Auto Maelstrom Delivers a Heavy Blow

    To obtain the Maelstrom Shotgun, you must participate in the Merry Mayhem event, running from December 5 to December 19, in both Black Ops 6 and Warzone. This weapon is the ultimate reward for the event, so you’ll need to progress through the challenges to claim your prize.

    Unlike other unlockable weapons, there’s no specific challenge tied to getting the Maelstrom Shotgun. Instead, you can earn XP by playing Multiplayer, Zombies, or Warzone, which contributes toward the Merry Mayhem event. This is similar to unlocking the Sirin 9mm.

    As you delve into your favorite mode, accumulate XP to fill the event’s progress bar. You can monitor your progress in the Events tab of Black Ops 6 or Warzone.

    Related

    Why Call of Duty Needs a Refresh Instead of a Basic Return with Black Ops 6

    The Call of Duty series is in dire need of a significant refresh and genre shift rather than the simplistic gameplay that Black Ops 6 presents.

    The Maelstrom is the third shotgun available in Black Ops 6, but it’s the only one that fires fully automatically, offering impressive range and handling. Additionally, the Maelstrom comes with various attachments, such as Optic, Muzzle, Barrel, Underbarrel, Magazine, Rear Grip, Stock, Laser, and Fire Mods. While this weapon can unleash a flurry of shots when you hold down the trigger, be careful of its notable recoil; it’s not suited for long-distance targets.

    If you want to quickly level up your shotgun, consider jumping into a Nuketown or Face-Off playlist in Black Ops 6. The shotgun thrives in smaller maps, but activating a Double XP Token can accelerate your progress even more, optimizing your experience with the Maelstrom and its abilities.

    Source: Call of Duty

  • Top AK-74 Setup for Dominating in Warzone

    Top AK-74 Setup for Dominating in Warzone

    With so many weapons available in Warzone, you might be questioning which ones to use. Should you hold on to your MW3 weapons or invest time in leveling up your arsenal in Black Ops 6? The good news is that adjustments have been made to keep weapons from both games relevant and competitive.

    The AK-47 has returned, and if you’re a veteran COD player, you know this assault rifle isn’t the easiest to master, making it less suitable for beginners. However, it can be very rewarding when used by skilled players. To assist you in maximizing your kill count with this AR, we’ve put together a helpful build.

    Top AK-74 Loadout

    AK-74 Build

    Attachment

    Pros And Cons

    Advanced Stats

    Willis 3x (Optic)

    • x3 Magnification
    • -Aim Down Sight Speed
    • -30% Recoil Gun Kick
    • +7% Aim Down Sight Speed

    Muzzle Brake (Muzzle)

    • +First Shot Recoil Control
    • +Kick Reset Speed

    Reinforced Barrel (Barrel)

    • +Damage Range
    • +Bullet Velocity

    Vertical Foregrip (Underbarrel)

    • +Horizontal Recoil Control

    Extended Mag I (Magazine)

    • +Magazine Ammo Capacity
    • -Reload Quickness
    • +17% Reload Quickness
    • +12% Empty Reload Quickness

    Commando Grip (Rear Grip)

    • +Aim Down Sight Speed
    • Sprint to Fire Speed
    • -13% Aim Down Sight Speed
    • -28% Sprint to Fire Speed

    Balanced Stock (Stock)

    • +Strafing Movement Speed
    • +Movement Speed
    • +Hipfire Movement Speed
    • +Aim Walking Movement Speed
    • +10% Movement Speed
    • +15% Crouch Movement Speed
    • +10% Aim Walking Movement Speed

    Recoil Springs (Fire Mods)

    • +Horizontal Recoil Control
    • +Vertical Recoil Control
    • -10% Recoil Gun Kick
    • -10% Horizontal Recoil Control
    • -10% Vertical Recoil Control

    This assault rifle has shown its strength in all phases of Warzone, yet many players avoid it due to its noticeable recoil. That’s why our build concentrates on managing this recoil effectively and enhancing accuracy.

    We begin with the Muzzle Brake to help the weapon recover from recoil faster, making it easier to control. To further diminish recoil, we include the Vertical Foregrip, renowned for its ability to significantly lessen vertical recoil.

    Since the AK-74’s recoil can be daunting, we focus on minimizing it for better accuracy. To achieve this, we use the Recoil Springs Fire Mod to enhance recoil stability.

    However, if you’re confident in your skills, feel free to switch to the 5.45x39mm Overpressured to boost Bullet Velocity.

    The Willis 3x optic is the most suitable choice, as you’ll need some level of magnification. Most engagements with the AK-74 will be at medium to long distances, so ensuring precision is vital.

    The only attachment that boosts the AK-74’s damage and bullet velocity is the Reinforced Barrel. This rifle is already effective at dealing high damage in mid- to long-range battles, so there’s less need to emphasize damage with additional attachments.

    Whenever possible, try to mount the AK-74 when firing from a distance to better control recoil.

    Recommended Loadouts

    Perks

    Perk 1 (Blue)

    Survivor

    Perk 2 (Red)

    Quick Fix

    Perk 3 (Yellow)

    Alertness

    Wildcard

    Gunfighter

    Equipment

    Tactical

    Your choice

    Lethal

    Your choice

    In this AK-47 loadout, you won’t have a dedicated short-range weapon, but don’t worry. The ground loot available in Season One is excellent. You can easily find a high-quality KSV or Jackal PDW and be ready for any close-quarters situations.

    For perks, stick with the classic combo: Survivor and Quick Fix for quicker health recovery, along with Alertness to help you stay vigilant. This setup positions you well for the long-range engagements typical with the AK-47.

    When it comes to equipment choices, it really boils down to personal preference.

  • Ultimate Warzone Hacks: Top Tips and Tricks Revealed!

    Ultimate Warzone Hacks: Top Tips and Tricks Revealed!

    Call of Duty: Warzone has seen numerous updates since its debut, shaped by the release of each new title in the series. These enhancements have revamped weapons, altered movement mechanics, and introduced various gameplay features. With the recent launch of Black Ops 6, which brings new omnidirectional movement options and an array of weapons, it can feel like a lot to handle for players.

    Whether you’re a long-time player, returning after a break, or diving into Warzone for the first time, these strategies will enrich your gaming experience and increase your odds of victory.

    Understand the Game Modes

    Speaking of modes, Resurgence offers a more forgiving experience compared to traditional Battle Royale. In Resurgence, as long as you have a teammate alive, you can redeploy, creating a dynamic where the pressure is lower than in Battle Royale, where your fate hinges on surviving the Gulag or being revived at a buy station.

    This mode is played on a smaller map, resulting in quicker match pacing, which lets you adapt to the gameplay faster. It’s an excellent opportunity to familiarize yourself with new movement mechanics, test out gear, and refine your aiming skills.

    Once you feel comfortable, transitioning to Battle Royale mode will be a different experience. The map is bigger, allowing for more exploration and looting. The action tends to ramp up in later circles, giving you the chance to gather supplies and prepare for intense confrontations.

    Customize Your Settings

    Getting comfortable in Warzone means adjusting your settings to your liking. Sensitivity and dead zone settings have a significant impact on your shooting accuracy, while movement settings can enhance your responsiveness. Experimentation is key; different players have varied preferences for sensitivity, so find what works best for you. If you’re using a controller, settings like Tactical Flipped might be worth trying.

    Movement is central to success in Warzone. Stay agile with settings that promote quick maneuvers, such as enabling Tactical Sprint Assist and customizing your slide/dive behaviors.

    Strategize Your Drop Locations

    Choosing where to land can significantly influence your match. Whether you’re heading to Urkistan, Rebirth Island, or Area 99, selecting an optimal drop zone is vital. Steer clear of high-traffic areas where multiple squads might land simultaneously; instead, drop a little further away. This tactic allows you to gauge the competition and gives you an opportunity to strike after they’ve begun engaging one another.

    On the flip side, if you drop in an isolated area, you’ll have better access to loot, allowing your squad to gear up effectively before engaging others.

    Loadouts and Utilization of UAVs

    Start each match by collecting loot and accumulating cash to buy your loadout. Having a well-prepped loadout is essential, so ensure you maintain a few options, such as ones featuring Overkill and Gunslinger. This setup allows you to grab a strong weapon from the outset.

    If you have extra funds, it’s wise to invest in UAVs. These can give you critical insights into enemy locations and help your team strategize their next move effectively.

    When executing pushes against enemy squads, make sure it’s a coordinated effort. Always take account of your surroundings and the positions revealed by UAVs. It’s better to engage enemies one at a time rather than taking on multiple squads simultaneously.

    Effective Communication

    If you’re playing in a squad, communication is vital. Always convey important information, like enemy locations, by using pings. Pinging ensures that all teammates know the situation, enhancing team coordination.

    Even when you’re down, use pings to inform your team about potential dangers nearby. Any intel you provide can turn the tide of the match.

    Take Breaks When Needed

    Warzone can be a high-pressure experience, often leading to frustration. If you find yourself overwhelmed, take a step back. Whether it’s switching to a different game mode or simply taking a break, ensuring you’re in a good mindset will always help with your performance.

    In the end, remember that gaming is about enjoyment. Winning is great, but don’t lose sight of the fun aspect of the game — it’s just a game.

    With these strategies, players can enhance their skills, better navigate the game’s complexities, and improve their chances of success in Call of Duty: Warzone.