الوسم: Boss Guide

  • How to Find Every Heian Kodama in Nioh 3: Completing and Solving

    How to Find Every Heian Kodama in Nioh 3: Completing and Solving

    Since the original game, Kodama have been the mascots of Nioh. They return in Nioh 3, and they’re more prominent than ever.

    You’ll notice this especially when you reach the game’s second main time period, Heian. There, you’ll find nearly as many Kodama to discover as in the Warring States period.

    What Kodama Are and How to Find Them

    Before exploring Heian Kodama, here’s a quick reminder: Kodama are friendly spirits in Nioh 3. Collecting them grants you Kodama Merit, which can be used to improve certain blessings that boost specific stats.

    Make sure to listen for their distinctive squeaking sound, which is a bubbly, high-pitched noise. You’ll recognize it when you hear it.

    The blessings they give are minor at first, but they stack over time and can help you get through some of the tougher parts of the game. Since Heian increases difficulty compared to the Warring States period, it’s worth hunting down all Kodama before diving into story missions. Let’s get into the details.

    Recommended Order

    We’ll go through the locations in order based on recommended levels, matching the natural progression of your playthrough.


    Every Kamo Village Kodama

    Location Description Image
    Near the Kamo Village Shrine The first Kodama here is just before the shrine. After passing it, go left and you’ll spot the Kodama sitting next to a tree. This one’s easy to find early on.
    Inside Kamo Village The second Kodama is inside the village, a bit past the shrine. Head left into the village and find a hut with nothing inside. The Kodama is outside, sitting in the snow on the left side. Second Kamo Kodama

    Every Funaokayama Kodama

    Location Description Image
    West side of the map The only Kodama here is near the Funaokayama Shrine. From there, turn right, go forward, then stay on the right as you walk through the forest and up the hill to reach a temple on the right. The Kodama sits beside a chest in front of the temple, but you’ll need to clear the Enemy Base first. Funaokayama Kodama

    Every Sagano Kodama

    Location Description Image
    Horiniji Temple Bridge The first Kodama here is early in the area, under the temple bridge. Drop onto the lower level, and the Kodama hides in a corner where a yokai with a hammer appears. Sagano Kodama 1
    Near Horiike of Arashiyama Shrine The second Kodama is right next to the shrine, sitting on top of a rock. Use another rock and a hut to platform yourself up there. Sagano Kodama 2
    Near Matsuo-taisha Shrine The next two Kodama locations are near this shrine. The first is just below the Approach Shrine, hiding in a nook after jumping on a rock. The second is at the approach, past an area with Yokai shooting at you; you’ll need to revisit after clearing it. Sagano Kodama 3 and Sagano Kodama 4
    Well guarding a Yokai The final Sagano Kodama is near a well, just around the corner from the third Kodama. Head toward the well and hit it to reveal the Kodama. Sagano Kodama 5

    Every Nishiichi Kodama

    Location Description Image
    Driftwood Fortress Shrine The only Kodama in Nishiichi is found in a tricky spot. After clearing the enemy base, platform your way to the leaning temple on the second level. The Kodama sits on the second floor. Nishiichi Kodama

    Every Awawa No Tsuji Kodama

    Location Description Image
    Center of the area The single Kodama here is located behind the temple near the middle of the area. Spawn at the Awawa No Tsuji Shrine, walk back toward the temple, and find it behind the building. Awawa No Tsuji Kodama

    Every Hachijo Kodama

    Location Description Image
    Near Nishiichi Shrine The first Hachijo Kodama is near the shrine. Head up the mountain, pass a Yokai rolling a snowball, wall-run using a guardian spirit to reach a temple. The Kodama sits on a small ledge on the left. Hachijo Kodama 1
    Near Anneibo Temple Shrine The second Kodama is near the big guard tower, past an enemy base. Clear it out and look for the Kodama outside. Hachijo Kodama 2
    Rajomon area The third Kodama, the last of Heian, is on the south end of the Yasaka Shrine. Climb to the roof of the temple with ladders, jump down, then head left to reach it on the other side. Hachijo Kodama 3
  • How to Defeat God of Avarice in Where Winds Meet by Completing and Solving

    How to Defeat God of Avarice in Where Winds Meet by Completing and Solving

    As you explore different areas in Where Winds Meet, you’ll often have to face various bosses. Some of these enemies later become regular opponents in the game, but others are special and only appear in story missions. One such boss is the God of Avarice, and you don’t need to do anything special to fight him.

    While progressing through the main story, you’ll reach Kaifeng as the second region. This area has a completely different storyline from Qinghe. The God of Avarice is a key boss in this part of the game. You can fight him once you’re around level 54 and continue with the story.

    ### God of Avarice’s Battle Location

    When you arrive in Kaifeng and interact with the map NPC, you’ll find yourself in a large city filled with many houses. There are two different markers for campaign bosses in this city. The first boss you’ll face here is the Dao Lord, located on the bottom right part of the city. Further along in the story, you’ll undertake the Furnace of Righteousness quest, where you break into a giant furnace shown throughout the mission. At the end of this quest, you’ll face off against the God of Avarice. It’s no surprise that he’s the true villain of this region.

    ### How to Defeat the God of Avarice

    The fight against the God of Avarice is unique, as he has three phases, although the third phase is more about dodging than attacking. He doesn’t use many special moves, so most of his attacks are predictable once you learn his patterns.

    #### Phase One

    In the first phase, the boss mainly uses melee attacks with his single sword. His strikes tend to be slower than expected due to slight delays, so it’s best to wait a bit before blocking to avoid taking damage. Sometimes, he summons a small orb that shoots projectiles at you. These are easy to avoid by sidestepping just before they hit.

    When the boss moves to the middle of the arena and floats in the air, stand as far from the center as possible and then move sideways to dodge both his projectiles and laser attacks. Getting hit by his laser will trigger a cutscene where you’ll lose a lot of health. Since his health is low in this phase, with practice you can quickly reach the second phase.

    #### Phase Two

    In the second phase, the boss wields two weapons and performs new melee attacks. Occasionally, he combines these into a single powerful strike similar to the first phase. The highlight here is his money attack—he spawns large piles of coins on the ground and then slams them for massive damage across the battlefield. This move is usually easy to predict, so be ready to dodge to prevent almost certain death, especially if your gear isn’t upgraded.

    He also performs spinning attacks—one where he spins towards you with his weapon, and another where he throws his weapon. You can deflect these by spamming the block button, although some attacks might be unblockable, indicated by a yellow warning.

    During this phase, you’ll collect money piles for ten Echo Jades each. However, gathering three piles quickly builds a greed bar in the center of your screen. When full, the boss’s shield turns yellow, immobilizing you temporarily. Before defeating him, he will summon a shield made of yellow coins. To break it, either hit him with your bow or deflect his attacks—both options work well.

    #### Phase Three

    The final phase is different because you cannot directly attack the boss. Instead, focus on avoiding his attacks and watching for a shiny red eye on his weapon. When you see this eye, shoot it with your bow to deal one-third of his HP/shield damage. Repeat this process three times to end the fight.

    Most of his attacks in this phase can be deflected, but he also summons golden believers around him. These believers create dangerous zones—you should avoid staying close to them to prevent taking damage. The fight becomes a test of timing and dodging until you succeed in destroying the boss’s eye three times to finish the battle.

  • Elden Ring: How to Defeat the Blackgaol Knight

    Elden Ring: How to Defeat the Blackgaol Knight

    Elden Ring has expanded its universe with the new Shadow of the Erdtree DLC, introducing a variety of fresh content, including a lineup of formidable bosses that test the skills and determination of players.

    Among these new adversaries is the Blackgaol Knight, a nameless warrior who serves as a harsh reminder for players who overreach in their ambitions. Many gamers have found this particular boss to be a significant challenge, highlighting the dangers that come with DLC bosses.

    Luckily, this guide is designed to help players navigate the encounter with the Blackgaol Knight effectively, ensuring they don’t get in over their heads and can ultimately emerge victorious.

    Getting Ready for the Battle

    To stand a chance against the Blackgaol Knight, preparation is key.

    This enemy is located on the western side of Gravesite Plain, visible from the Sites of Grace near the Scorched Ruins, as noted by TheGamer.

    Before venturing into the boss’s area, it’s advisable to gather a few Scardurtree Fragments to boost your stats.

    Additionally, consider utilizing weapons, spells, or other methods that incorporate percentage-based damage effects like Bleed or Black Flame.

    Make sure to check if you can upgrade your weapon as much as possible to maximize the damage you deal to the Blackgaol Knight.

    Bringing along a Wondrous Physick with a damage-negating buff, such as the Opaline Bubbletear, can also prove beneficial, along with some Boiled Prawn for extra support.

    Engaging the Blackgaol Knight

    Once you’re fully prepared, approach the boss for combat. A notable characteristic of this foe, unlike others in the Shadow of the Erdtree DLC, is that he operates without two phases, as explained by OneEsports.

    This allows you to concentrate solely on the boss’s attack patterns without worrying about phase transitions. Throughout the encounter, he primarily wields two weapons: a Crossbow and a Giant Greatsword.

    Be cautious of both standard bolts and the occasional flame bolts he fires from range. When the Blackgaol Knight begins to shoot with his crossbow, move laterally while closing the gap between you and him.

    This maneuver lets you exploit a short window after his attack to land a blow. If you’re feeling bold, you can try to rush in before he shoots.

    When you get close, be prepared for the Blackgaol Knight to unleash a series of swings using his Giant Greatsword, which follows the same four-hit combo pattern typical of Greatswords. If you can execute a Jumping Heavy Attack, you might interrupt his attack string.

    If that’s not an option for you, retreat to dodge and wait until he finishes his combo before rushing back in to deal your damage.

    Keep an eye out for his Dash Slash, where he momentarily pauses before lunging and striking, as warned by GameRant.

    Additional Strategies

    Be aware of the boss’s Blasphemous Blade-like weapon skill, which unleashes a wave of physical damage when he brings his Giant Greatsword down. This is usually followed by a charging slash that you’ll want to avoid at all costs.

    If you’re equipped with a high Guard Boost shield and have ample Stamina, you can block many of the Blackgaol Knight’s attacks. However, this tactic may leave you low on Stamina for counterattacking, so proceed with caution.

  • How to Defeat Bullguard in the Wolf Forest In Black Myth Wukong

    How to Defeat Bullguard in the Wolf Forest In Black Myth Wukong

    Black Myth: Wukong is packed with formidable bosses that can swiftly take down players who aren’t ready for the challenge.

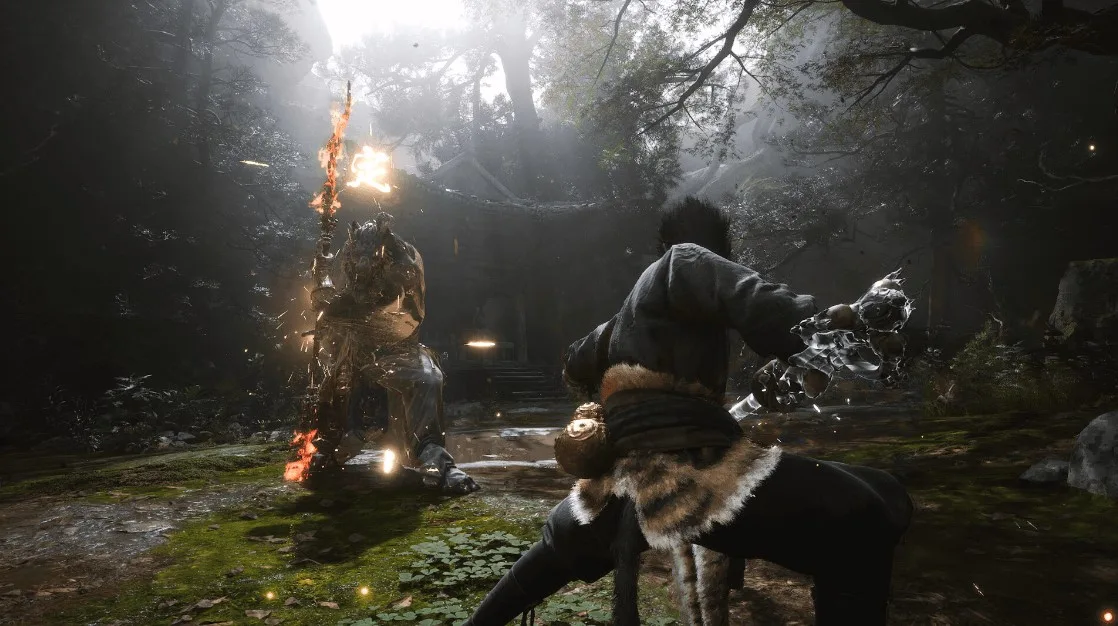
    Among the first foes players will encounter is the Bullguard, located in the Forest of Wolves, just after finishing the prologue. As soon as this boss spots you, it will launch an immediate attack, so staying vigilant while navigating this area is crucial.

    Black Myth: Wukong Bullguard Strategy

    Being an early-game adversary, the Bullguard is generally one of the simpler bosses in Black Myth: Wukong. However, it’s important to remain cautious; a single misstep could make the difference between triumph and defeat.

    This boss exhibits a limited array of attacks, making it fairly simple to evade its moves once you know what to look for.

    Each of its attacks is powerful but comes with long pauses in between, giving you a substantial opportunity to strike back after you dodge its blows, as noted by Esports.

    After inflicting enough damage to reduce the Bullguard’s health to half, you’ll trigger a cutscene, and you’ll then acquire the Immobilize spell, enabling you to freeze the boss during future battles.

    The Bullguard’s attack patterns do not grow more complex, so expect the second phase of the fight to be akin to the first. Just keep delivering damage whenever you can, and this boss will be defeated in short order.

    Perfect Your Dodging Skills

    To reach this boss, start from the “Front Hills” Keeper’s Shrine and follow the path across the bridge. Then, simply continue along the winding path as it bends to the right around a rock, as mentioned by RockPaperShotgun.

    Eventually, you’ll come upon a gate where the Bullguard stands watch. As the first real boss in the game, it’s designed to help players practice their dodging skills, so take this chance to familiarize yourself with the controls.

    Additionally, before engaging the Bullguard, it’s worth noting that if you venture down the left path as you first see the boss, you’ll find a creature hiding near a rock that will scurry away upon noticing you.

    Approaching the rock nearby will allow you to obtain the Skandha of Form, which will prove to be quite beneficial later in Black Myth: Wukong, according to GameRant.