الوسم: Best Cards

  • Completing Your Midgar Mercenary Commander Deck in MTG: Top Cards and Tips

    Completing Your Midgar Mercenary Commander Deck in MTG: Top Cards and Tips

    Exploring Cloud, Midgar Mercenary in Magic: The Gathering

    As one of the most iconic characters in the Final Fantasy series, Cloud Strife appears in various forms within the Magic: The Gathering Final Fantasy set. Each version has its unique color identity and abilities, but there’s something special about focusing on a single color, especially with Cloud, Midgar Mercenary.

    The mono-white version of Cloud emphasizes Equipment and allows you to activate both his and the equipment’s abilities more than once. This can lead to some impressive advantages and make Cloud a formidable force in the game. If you’re eager to go all out, this guide will show you how!

    Sample Decklist

    Commander

    • Cloud, Midgar Mercenary

    Creatures (16)

    • Ardenn, Intrepid Archaeologist
    • Brass Squire
    • Codsworth, Handy Helper
    • Crackdown Construct
    • Danitha Capashen, Paragon
    • Esper Sentinel
    • Foundry Inspector
    • Halvar, God of Battle // Sword of the Realms
    • Knight of the White Orchid
    • Leonin Shikari
    • Lion Sash
    • Puresteel Paladin
    • Silent Arbiter
    • Sram, Senior Artificer
    • Stoneforge Mystic
    • Stonehewer Giant

    Sorceries (9)

    • Brilliant Restoration
    • Divine Reckoning
    • Open the Armory
    • Promise of Loyalty
    • Sevinne’s Reclamation
    • Single Combat
    • Slash the Ranks
    • Steelshaper’s Gift
    • Unfinished Business

    Instants (10)

    • Clever Concealment
    • Cloud’s Limit Break
    • Dispatch
    • Flawless Maneuver
    • Generous Gift
    • Path to Exile
    • Rebuff the Wicked
    • Sejiri Shelter // Sejiri Glacier
    • Swords to Plowshares
    • Teferi’s Protection

    Artifacts (22)

    • Arcane Signet
    • Bloodforged Battle-Axe
    • Brotherhood Regalia
    • Buster Sword
    • Extraplanar Lens
    • Fireshrieker
    • Hammer of Nazahn
    • Leyline Axe
    • Masterwork of Ingenuity
    • Mox Opal
    • Plate Armor
    • Shadowspear
    • Sol Ring
    • Swiftfoot Boots
    • Sword of Feast and Famine
    • Sword of Fire and Ice
    • Sword of Hearth and Home
    • Sword of the Animist
    • The Aetherspark
    • The One Ring
    • Thought Vessel
    • Umezawa’s Jitte

    Enchantments (6)

    • Duelist’s Heritage
    • Forge Anew
    • Land Tax
    • Mantle of the Ancient
    • Sigarda’s Aid
    • Smothering Tithe

    Planeswalkers (1)

    • Ugin, Eye of the Storms

    Lands (35)

    • Ancient Den
    • Bonder’s Enclave
    • Buried Ruin
    • Castle Ardenvale
    • Eiganjo, Seat of the Empire
    • Ishgard, the Holy See // Faith & Grief
    • Monumental Henge
    • Myriad Landscape
    • Reliquary Tower
    • Rogue’s Passage
    • Snow-Covered Plains (23)
    • The Mycosynth Gardens
    • War Room

    This deck is tailored for Bracket 3 (Optimized) and features an incidental infinite combo. Puresteel Paladin lets you equip for free if you possess three artifacts, and Crackdown Construct gains +1/+1 each time you activate an artifact’s ability.

    While you need an Equipment and another artifact to set this up, it’s quite feasible once Crackdown Construct is on the board. Just be sure to communicate this strategy to your table, and be ready to swap out cards if players voice concerns.

    The Commander

    Cloud, Midgar Mercenary is a legendary Human Soldier Mercenary with a 2/1 power and toughness. He requires two white mana to summon and can search for an Equipment card upon entry. His ability to find and use Equipment quickly is superb, especially when you can easily attach it on the next turn.

    His second ability is where he truly shines: as long as he’s equipped, both his abilities and those of his equipment trigger an additional time. This can lead to some rapid advantage accumulation, especially with items like the Sword of Fire and Ice.

    When attached to Cloud, this sword allows you to deal damage to two targets and draw two cards each time he deals combat damage. Given the right conditions, this can make Cloud a serious threat.

    Cloud’s ability isn’t limited to specific triggers, so even those activated by opponents’ actions, like ward, will also trigger twice. This flexibility makes Cloud a versatile solution for various challenges, whether you’re looking to remove threats or ramp up your resources.

    Building the Deck

    Focus on Equipment for Cloud’s deck, crafting a low-cost mono-white Voltron that allows for quick attachments. Since Cloud has low toughness, including ways to safeguard him is essential. Additional attackers can also help reduce dependence on your Commander.

    Cloud’s low mana cost means you’ll have multiple Equipment options to fetch on turn two, giving you a significant edge in the early game.

    The deck’s Equipment-heavy theme does limit creature space. Therefore, it includes several board wipes that leave players with only one creature, maximizing Cloud’s potential.

    Despite the deck’s tight mana curve, ample ramp ensures that Cloud can return consistently and stay aggressive.

    Ramp

    The standard ramp options, like Sol Ring and Arcane Signet, blend well with Cloud’s effective Equipment options. The Sword of the Animist stands out, costing just two mana to cast and equip, letting you search for two basic lands every time Cloud attacks.

    Similarly, Sword of Hearth and Home lets you search for lands whenever Cloud deals combat damage, especially if you can give him double strike, which can net you four lands in one attack.

    The Aetherspark is also highly beneficial in Cloud’s hands, gaining loyalty counters as he inflicts damage. His ability lets it trigger twice, which can significantly amplify its effectiveness.

    Additionally, Land Tax is a fantastic starter spell, ensuring you don’t miss land drops and allowing Cloud to search for Equipment instead. Knight of the White Orchid can also help establish early land advantages.

    Draw

    White has several solid draw options that align well with Cloud’s Equipment theme. Esper Sentinel is a great turn one card and increases your chances of drawing cards as you attach Equipment later.

    Sram, Senior Edificer similarly allows card draws whenever you cast Equipment or Auras. With a good portion of the deck fulfilling these criteria, you’ll often get a card back when you want to play.

    Puresteel Paladin also provides card draws, focusing on Equipment that comes into play, making it an excellent draw engine when paired with Bloodforged Battle-Axe.

    The Bloodforged Battle-Axe can duplicate itself with each instance of combat damage, quickly leading to a scenario where you gain several new Equipment pieces.

    One-On-One Combat

    This deck excels in a one-on-one scenario, largely due to its Voltron theme. Partial board wipes can ensure that most players are left with only a single creature, allowing Cloud to shine.

    Divine Reckoning lets you choose a single survivor among all creatures for just four mana, with flashback to use it later if needed.

    Slash the Ranks wipes out everything except commanders, giving Cloud a potential advantage if opponents have multiple commanders out.

    Single Combat is another powerful option, leaving each player with a single creature or planeswalker of their choice, while clearing everything else from the board.

    Silent Arbiter can help manage the tempo of the game by limiting attacks to a few creatures, allowing you to control the narrative, especially if opponents see each other as bigger threats.

    Overall, crafting a strategy around Cloud, Midgar Mercenary can lead to exciting and dynamic gameplay, giving you plenty of opportunities to engage and outmaneuver your opponents.

  • Completing Gardevoir ex 2025 Post-Rotation Deck: Best Cards & Tips

    Completing Gardevoir ex 2025 Post-Rotation Deck: Best Cards & Tips

    Quick Links

    Gardevoir ex Deck Strategy

    Just like every deck in the Pokemon TCG, Gardevoir ex was affected by the recent post-rotation changes. Some of its essential allies have been removed, and while it may not be at the top of the rankings, it still has considerable potential. Unfortunately, the Journey Together set didn’t add much to the deck, but Gardevoir continues to show her capabilities.

    If you’re searching for a post-rotation deck that offers a unique strategy, Gardevoir ex is definitely one to consider. This guide will highlight the key cards and strategies involved. Let’s jump right in.

    Gardevoir ex Decklist

    Here’s a look at the entire 60-card Gardevoir ex deck. Use the card numbers to help you assemble your own version.

    Card Name Amount Card Type Set Card No
    Ralts 2 Pokemon Scarlet & Violet 084/198
    Kirlia 2 Pokemon Paldean Fates 028/091
    Gardevoir ex 2 Pokemon Paldean Fates 029/091
    Drifloon 3 Pokemon Scarlet & Violet 089/198
    Scream Tail 3 Pokemon Prismatic Evolutions 042/131
    Varoom 1 Pokemon Stellar Crown 108/142
    Revavroom 1 Pokemon Paldean Fates 065/091
    Mew ex 1 Pokemon Pokemon 151 151/165
    Lillie’s Clefairy ex 1 Pokemon Journey Together 056/159
    Artazon 1 Stadium Paldean Fates 076/091
    Lively Stadium 1 Stadium Surging Sparks 180/191
    Bravery Charm 3 Tool Paldea Evolved 173/193
    Ancient Booster Capsule 2 Tool Temporal Forces 140/162
    Hero’s Cape 1 Tool Temporal Forces 152/162
    Rare Candy 2 Item Scarlet & Violet 191/198
    Ultra Ball 2 Item Paldean Fates 091/091
    Buddy-Buddy Poffin 2 Item Prismatic Evolutions 101/131
    Night Stretcher 3 Item Shrouded Fable 061/064
    Nest Ball 2 Item Scarlet & Violet 181/198
    Super Rod 2 Item Paldea Evolved 188/193
    Professor’s Research 4 Supporter Journey Together 155/159
    Arven 2 Supporter Obsidian Flames 186/197
    Tulip 2 Supporter Paradox Rift 181/182
    Boss’s Orders 1 Supporter Paldea Evolved 172/193
    Basic Darkness Energy 3 Energy – –
    Basic Psychic Energy 9 Energy – –

    You can consider swapping some cards in your deck with the following alternatives:

    • Fezandipiti ex: To draw additional cards from your knocked-out Pokémon and target your opponent’s bench.
    • Earthen Vessel: For easier access to Energy.
    • Moonlit Hill: To heal your Pokémon.
    • Brilliant Blender: To discard Psychic Energies for even more power with Gardevoir ex; replace Hero’s Cape if you do.

    What’s Changed In The Deck Since Post-Rotation?

    One significant loss due to the rotation is Kirlia with the Refinement ability, which made it easier to cycle through cards quickly. Another loss is Radiant Greninja, which effectively accelerated the drawing of cards, especially Psychic Energy needed by Gardevoir ex.

    Despite these changes, the deck still operates well with a greater reliance on Trainer cards for cycling. Manaphy, which provided protection for benched Pokémon, was also removed after the rotation. However, the Journey Together set introduced Lillie’s Clefairy, which offers a strong advantage against Dragon-type Pokémon.

    Gardevoir ex Deck Strategy

    Pokémon Cards

    At the heart of your deck lies Gardevoir ex. Its Psychic Embrace ability allows you to attach as many Psychic Energies as you’d like from your discard pile to your Pokémon on your turn. However, using this ability will inflict 20 damage to that Pokémon, and you can’t use it if the damage would lead to a knockout.

    Drifloon takes advantage of this ability with its Balloon Blast attack, dealing 30 damage for each damage counter on it. If Drifloon has 60 damage, that attack can deal a whopping 180 damage.

    Another key player is Scream Tail, which can hit any opponent’s Pokémon for 20 damage for each damage counter on it. For example, with 80 damage on Scream Tail, you will deal 160 damage to an opponent’s target, making it easier to claim Prize cards.

    Munkidori plays a crucial role by allowing you to move up to 30 damage from one of your Pokémon to one of your opponent’s, making Psychic Embrace’s downside into a strategic benefit.

    This deck also includes Revavroom and Mew ex as draw engines. Revavroom allows you to discard a Psychic Energy and draw up to six cards, which can then be reattached with Psychic Embrace. When your hand is low, Mew’s Restart ability helps by letting you draw three cards again. Its Genome Hacking attack also lets you copy your opponent’s active Pokémon’s attack, using it against them. Lillie’s Clefairy ex provides an excellent advantage against Dragon-types, allowing you to deal double damage.

    Stadium Cards

    You have two Stadium cards that offer distinct advantages. Artazon enables quick setup, which is particularly helpful early on. Lively Stadium is crucial for enhancing Drifloon and Scream Tail’s damage output. If neither of those Pokémon is in play, Artazon becomes more beneficial.

    Pokémon Tools

    The objective with Pokémon Tools is to boost the HP of Scream Tail and Drifloon, allowing them to withstand more damage and deliver higher returns. Hero’s Cape grants an extra 100 HP to the Pokémon it’s attached to, keeping them from being easily knocked out, while Bravery Charm provides an additional 50 HP.

    Ancient Booster Energy Capsule is effective for Scream Tail, increasing its HP by 60 and protecting it from Special Conditions.

    Items

    Your deck includes two Rare Candy cards, which allow you to evolve Ralts right into Gardevoir ex without needing Kirlia. Ultra Ball helps you find any Pokémon, though it requires you to discard two cards first, ideally Psychic Energies for synergy with Gardevoir ex.

    Night Stretcher is valuable for retrieving Pokémon, especially given that Psychic Energy can be recovered with Gardevoir ex. Buddy-Buddy Poffin can place two Pokémon with 70 HP or less onto your bench, making it ideal for finding Ralts or Drifloon. Nest Ball allows you to directly put any Pokémon onto your bench, while Super Rod helps recover Pokémon from the discard pile in case Night Stretcher isn’t available.

    Supporters

    Supporters in this deck include four copies of Professor’s Research to quickly draw essential cards. Don’t worry about losing Pokémon to discards—Super Rod and Night Stretcher can recover them. Arven is another crucial Supporter that helps you find specific Item and Tool cards when you need them.

    Boss’s Orders can turn the tide by switching your opponent’s active Pokémon, while Tulip allows you to retrieve Psychic Pokémon from your discard pile, adding to the deck’s overall versatility.

  • Completing Tarkir: Solving Dragonstorm’s Betor for Commander

    Completing Tarkir: Solving Dragonstorm’s Betor for Commander

    Featured in the Magic: The Gathering Abzan Armor preconstructed Commander deck, Betor, Ancestor’s Voice doesn’t perfectly align with that deck and is often one of the first cards to be removed. Fortunately, Betor shines as a strong Commander all on its own outside the preconstructed setup.

    This Abzan (white/black/green) Commander leans into a mix of lifegain and life loss strategies. While Betor offers abilities for both gaining and losing life, triggering the lifegain benefits is much easier. Therefore, the focus of the deck leans more towards accumulating life.

    Decklist


    Commander: Betor, Ancestor’s Voice

    Avacyn’s Pilgrim

    Beledros Witherbloom

    Birds of Paradise

    Celestine, the Living Saint

    Chatterfang, Squirrel General

    Children of Korlis

    Darkstar Augur

    Doom Whisperer

    Elves of Deep Shadow

    Enduring Tenacity

    Envoy of the Ancestors

    Essence Warden

    Heliod, Sun-Crowned

    Kami of Whispered Hopes

    Lathiel, the Bounteous Dawn

    Pitiless Plunderer

    Priest of Fell Rites

    Rhox Faithmender

    Rodolf Duskbringer

    Sakura-Tribe Elder

    Sheoldred, Whispering One

    Soul’s Attendant

    Soul Warden

    Spike Feeder

    Starscape Cleric

    Valgavoth, Terror Eater

    Vilis, Broker of Blood

    Vito, Thorn of the Dusk Rose

    Walking Ballista

    Warren Soultrader

    Willowdusk, Essence Seer

    Buried Alive

    Eerie Ultimatum

    Farseek

    Nature’s Lore

    Rampant Growth

    Reanimate

    Three Visits

    Toxic Deluge

    Will of the Abzan

    Anguished Unmaking

    Beast Within

    Bitter Triumph

    Dismember

    Eladamri’s Call

    Generous Gift

    Path to Exile

    Swords to Plowshares

    Aetherflux Reservoir

    Arcane Signet

    Fellwar Stone

    Sol Ring

    Staff of Completion

    Talisman of Hierarchy

    Talisman of Resilience

    Talisman of Unity

    Whip of Erebos

    Bitterblossom

    Black Market Connections

    Cleric Class

    Greed

    Hollowmurk Siege

    Phyrexian Arena

    Sanguine Bond

    Unspeakable Symbol

    Brushland

    Canopy Vista

    Caves of Koilos

    Command Tower

    Deathcap Glade

    Exotic Orchard

    x5 Forest

    Gavony Township

    Horizon Canopy

    Isolated Chapel

    Llanowar Wastes

    Overgrown Farmland

    x4 Plains

    Sandsteppe Citadel

    Shattered Sanctum

    Sunpetal Grove

    x6 Swamp

    Tainted Field

    Tainted Wood

    Twilight Mire

    Vault of the Archangel

    Woodland Cemetery

    In total, the Betor, Ancestor’s Voice Commander deck comprises 31 creatures, 9 sorceries, 8 instants, 9 artifacts, 8 enchantments, and 34 lands. Many of the cards in this deck facilitate lifegain, while others help induce life loss, ensuring you can always activate both of Betor’s abilities.

    Betor, Ancestor’s Voice

    MTG Betor, Ancestor's Voice card with the art in the background.

    Betor is the central figure of the deck and the focal point around which its strategies revolve. It has the ability to place +1/+1 counters on creatures and bring them back from the graveyard, based on how much life you gain or lose.

    This deck includes several infinite lifegain combos that are relatively simple to achieve, allowing you to place an infinite number of counters on a creature.

    While reanimation is certainly valuable, the ability to add counters to creatures is far more impactful. The best recipient of these counters is Betor itself, as it has lifelink and can build on its lifegain potential. Additionally, this grants you a shot at winning through commander damage once Betor accumulates enough power.

    Unspeakable Symbol

    MTG Unspeakable Symbol card with the art in the background.

    Unspeakable Symbol provides a straightforward way to reduce your life total, enabling you to reanimate anything with Betor, provided you have enough life to spare. Each time you lose life, it also enhances your creatures with +1/+1 counters. Notably, there are no restrictions on how often you can use Unspeakable Symbol as long as you can afford the life cost.

    This card is particularly helpful if you aim to win through commander damage. It allows you to stack counters on Betor, potentially reaching the 18 counters needed to eliminate an opponent in one hit.

    Chatterfang, Squirrel General

    MTG Chatterfang Squirrel General card with the art in the background.

    Although it may not seem like Chatterfang plays a crucial role in the overall strategy, the combos it facilitates make it an essential card. It’s essentially the best way to gain infinite life while clearing your opponents’ creatures from the board.

    Chatterfang requires Pitiless Plunderer to unleash its infinite combo potential. These two creatures working together can provide infinite life and burn damage. Here’s how the combo works:

    Prerequisites: Have Chatterfang, Squirrel General, Pitiless Plunderer, and two other non-Chatterfang Squirrels on the battlefield, along with one black mana available.

    Step 1: Activate Chatterfang using one black mana, sacrificing two Squirrels.

    Step 2: This triggers Pitiless Plunderer, creating two Treasure tokens, while Chatterfang creates two more Squirrel tokens.

    Step 3: Use one of the Treasure tokens to activate Chatterfang again.

    Step 4: Repeat steps 1-4.

    Results: This cycle generates infinite Treasure tokens and triggers that deal infinite toughness loss to all opposing creatures.

    Enduring Tenacity

    MTG Enduring Tenacity

    Enduring Tenacity effectively transforms all your lifegain into damage. This makes it possible to explore a burn strategy alongside other avenues to victory. Given the amount of life you gain while using a Betor deck, Enduring Tenacity can deal substantial damage as the game progresses.

    If a card is exiled, it doesn’t die, so Enduring Tenacity won’t return to the battlefield.

    While there are other cards that offer similar effects, Enduring Tenacity is the sturdiest choice because when it dies, it re-enters the battlefield as an enchantment, meaning your foes must eliminate it twice to truly get rid of it.

    How to Play the Deck

    MTG Hollowmurk Siege card with the art in the background.

    The Betor, Ancestor’s Voice Commander deck combines various strategies into a cohesive whole. It primarily focuses on a lifegain strategy, constantly accumulating life while dealing damage with permanents like Enduring Tenacity, Starscape Cleric, and Sanguine Bond. However, it can also pivot to a Voltron strategy (focusing on a single creature) when Betor has enough counters.

    Lifegain is essential for this deck’s strategy. Cards that easily generate life should be prioritized on the battlefield, such as Soul Warden, Essence Warden, and Cleric Class.

    It’s important to get permanents that draw cards at the cost of life into play as early as possible. This way, you can start losing life to set the stage for Betor’s resurrection abilities. Early game, aim to discard large creatures to manage hand size for reanimation later.

    There are three primary win conditions with the Betor, Ancestor’s Voice Commander deck. First, you can achieve victory through commander damage—once Betor reaches 21 power, it can take out any opponent in a single attack since it has flying, making it easier to land hits. The second way is through direct burn damage—many cards deal damage based on your lifegain, and with substantial life gains, this can be quite potent. Lastly, you can win through combat by distributing +1/+1 counters to turn all your creatures into formidable threats.

    The primary drawback of this deck is its speed; there are many components that need to be on the board to maximize effectiveness. Consequently, it can take time to set up, leaving you vulnerable in the early game. However, with the significant lifegain potential, any early life loss can often be recovered later.

  • Skithiryx: The Blight Dragon Deck Guide – Best Cards & Tips for Completing

    Skithiryx: The Blight Dragon Deck Guide – Best Cards & Tips for Completing

    Skithiryx, the Blight Dragon is a formidable infect commander in Magic: The Gathering​​​​​​. This card stands out due to its legendary nature, making it an excellent choice for a commander deck focused on infect strategy.

    A Skithiryx deck combines the infect mechanic with a Voltron approach (focusing on enhancing one creature with Equipment and Auras for attacks). In this format, a player loses the game if they accumulate ten or more poison counters, which are typically difficult to remove. Skithiryx proves to be a fantastic commander to achieve a swift victory in this way.

    Decklist


    Commander: Skithiryx, the Blight Dragon

    Vraska, Betrayal’s Sting

    Bilious Skulldweller

    Blackcleave Goblin

    Blightbelly Rat

    Blightsteel Colossus

    Contagious Nim

    Core Prowler

    Corpse Cur

    Crypt Ghast

    Flesh-Eater Imp

    Gray Merchant of Asphodel

    Gulping Scraptrap

    Hand of the Praetors

    Ichorclaw Myr

    Ichor Rats

    Leaden Myr

    Magus of the Coffers

    Myr Convert

    Pestilent Syphoner

    Phyrexian Crusader

    Plague Myr

    Plague Stinger

    Reaper of Sheoldred

    Silent Arbiter

    Toxic Nim

    Whispering Specter

    Caress of Phyrexia

    Drown in Ichor

    Infectious Inquiry

    Mutilate

    Phyresis Outbreak

    Toxic Deluge

    Vat Emergence

    Astarion’s Thirst

    Defile

    Grim Affliction

    Howl from Beyond

    Vraska’s Fall

    Whisper of the Dross

    Arcane Signet

    Blackblade Reforged

    Brotherhood Regalia

    Champion’s Helm

    Commander’s Plate

    Contagion Clasp

    Contagion Engine

    Fireshrieker

    Glistening Sphere

    Jet Medallion

    Lashwrithe

    Lightning Greaves

    Mind Stone

    Nightmare Lash

    Prowler’s Helm

    Sol Ring

    Staff of Compleation

    Swiftfoot Boots

    Trailblazer’s Boots

    Whispersilk Cloak

    Necrogen Communion

    Phyrexian Arena

    Shade’s Form

    Snake Cult Initiation

    Unspeakable Symbol

    Buried Ruin

    Castle Locthwain

    Cathedral of War

    Inkmoth Nexus

    Karn’s Bastion

    Minas Morgul, Dark Fortress

    Mirrex

    Myriad Landscape

    Rogue’s Passage

    Shizo, Death’s Storehouse

    20 Swamps

    The Black Gate

    Urza’s Cave

    War Room

    Witch’s Cottage

    This deck features one planeswalker, 26 creatures, seven sorceries, six instants, 20 artifacts, five enchantments, and 34 lands. While focusing on Skithiryx is key, leveraging other creatures and spells can help you secure the final poison counters needed for victory.

    Key Cards

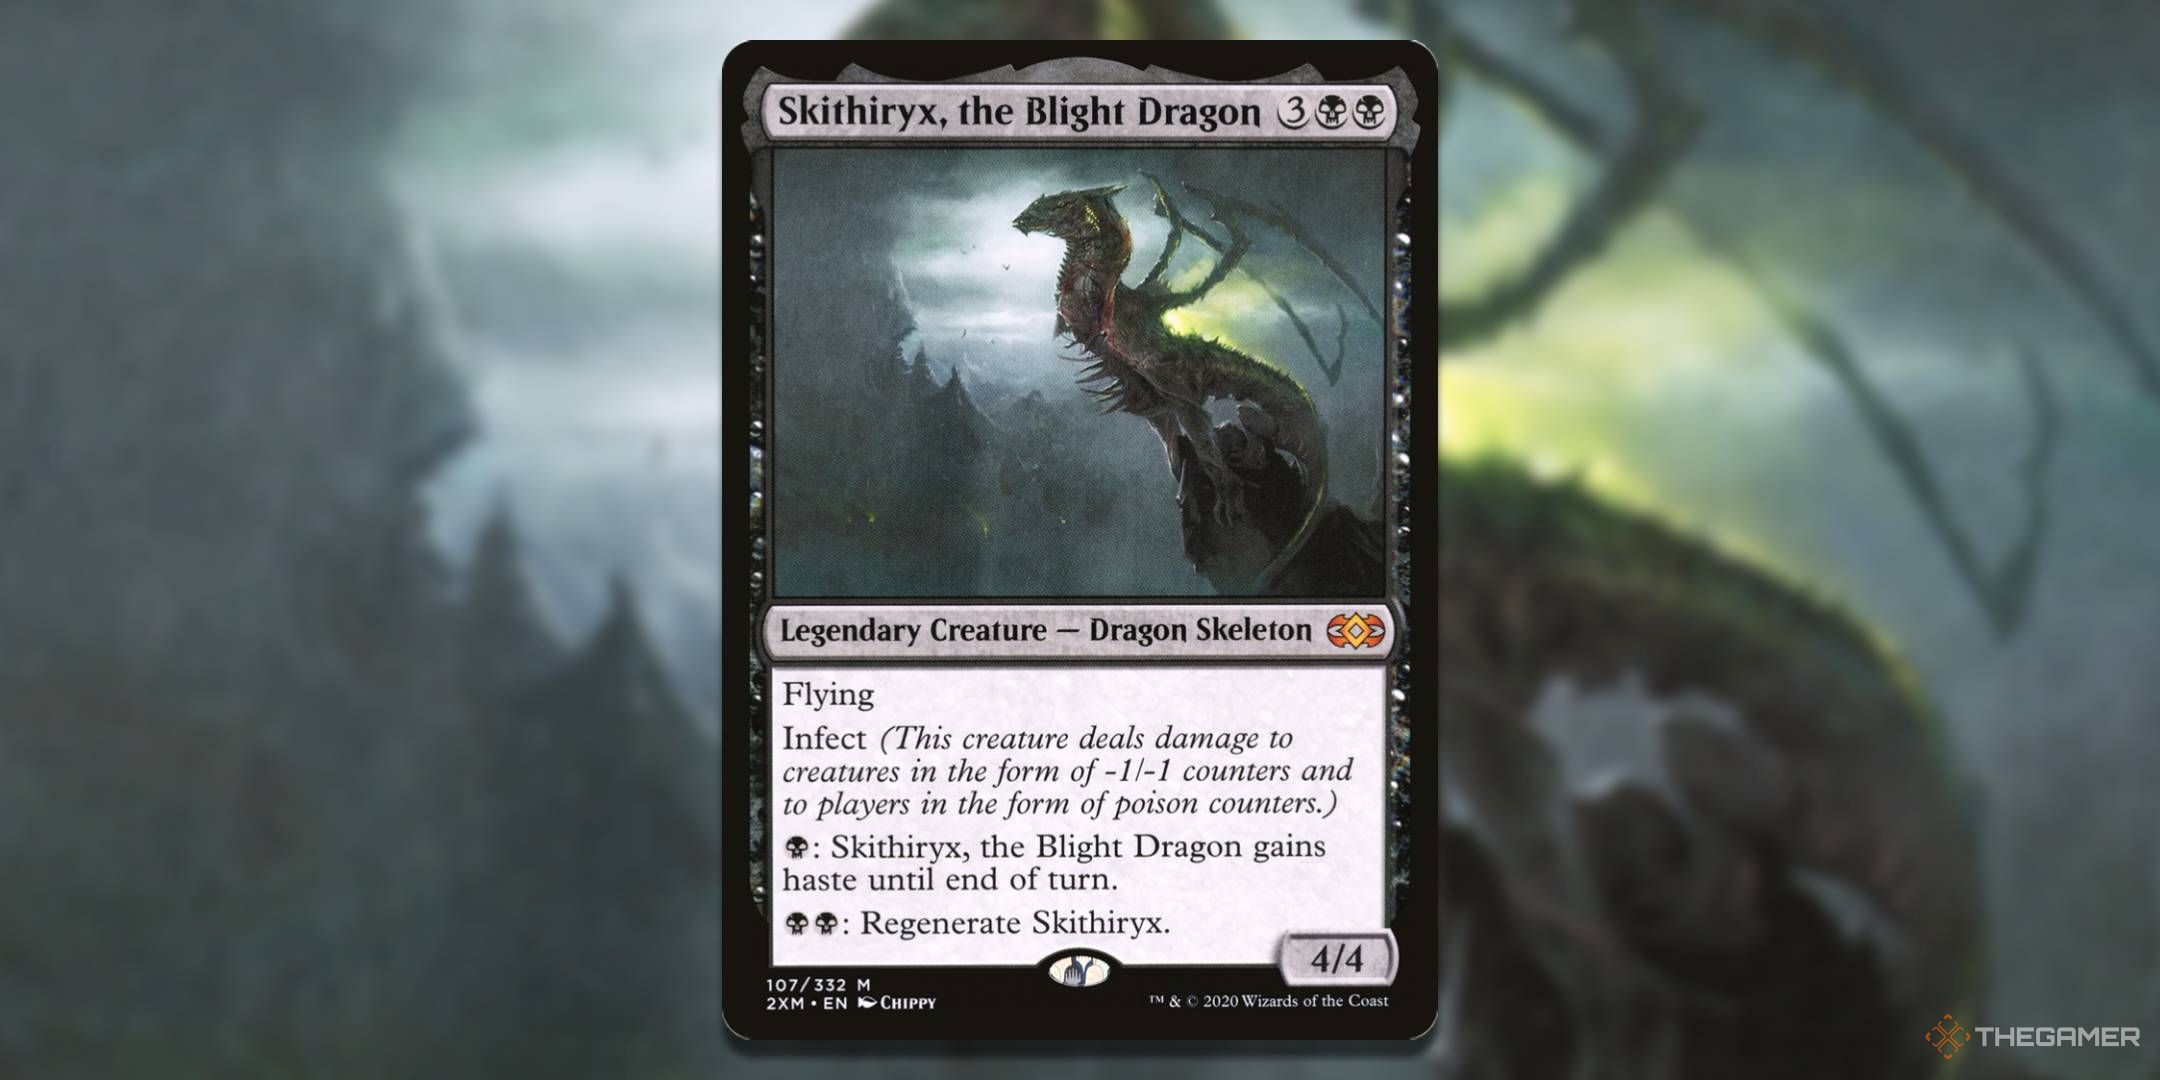
    Skithiryx, The Blight Dragon

    MTG Skithryx, the Blight Dragon card with the art in the background.

    Skithiryx, the Blight Dragon is the primary source of infect in your deck. Its flying ability makes it challenging to block, and various Equipment can render it unblockable. Moreover, Skithiryx’s ability to grant itself haste means you can attack the turn it enters the battlefield, especially if your opponents lack flying or reach creatures.

    While Equipment can provide protection, Skithiryx can regenerate itself, making it tougher for opponents to deal with it using conventional methods. If your opponents lack ways to exile or require you to sacrifice Skithiryx, it will likely remain on the battlefield.

    Regeneration taps a creature instead of destroying it. This can occur even if the creature is tapped, and the protection will still apply.

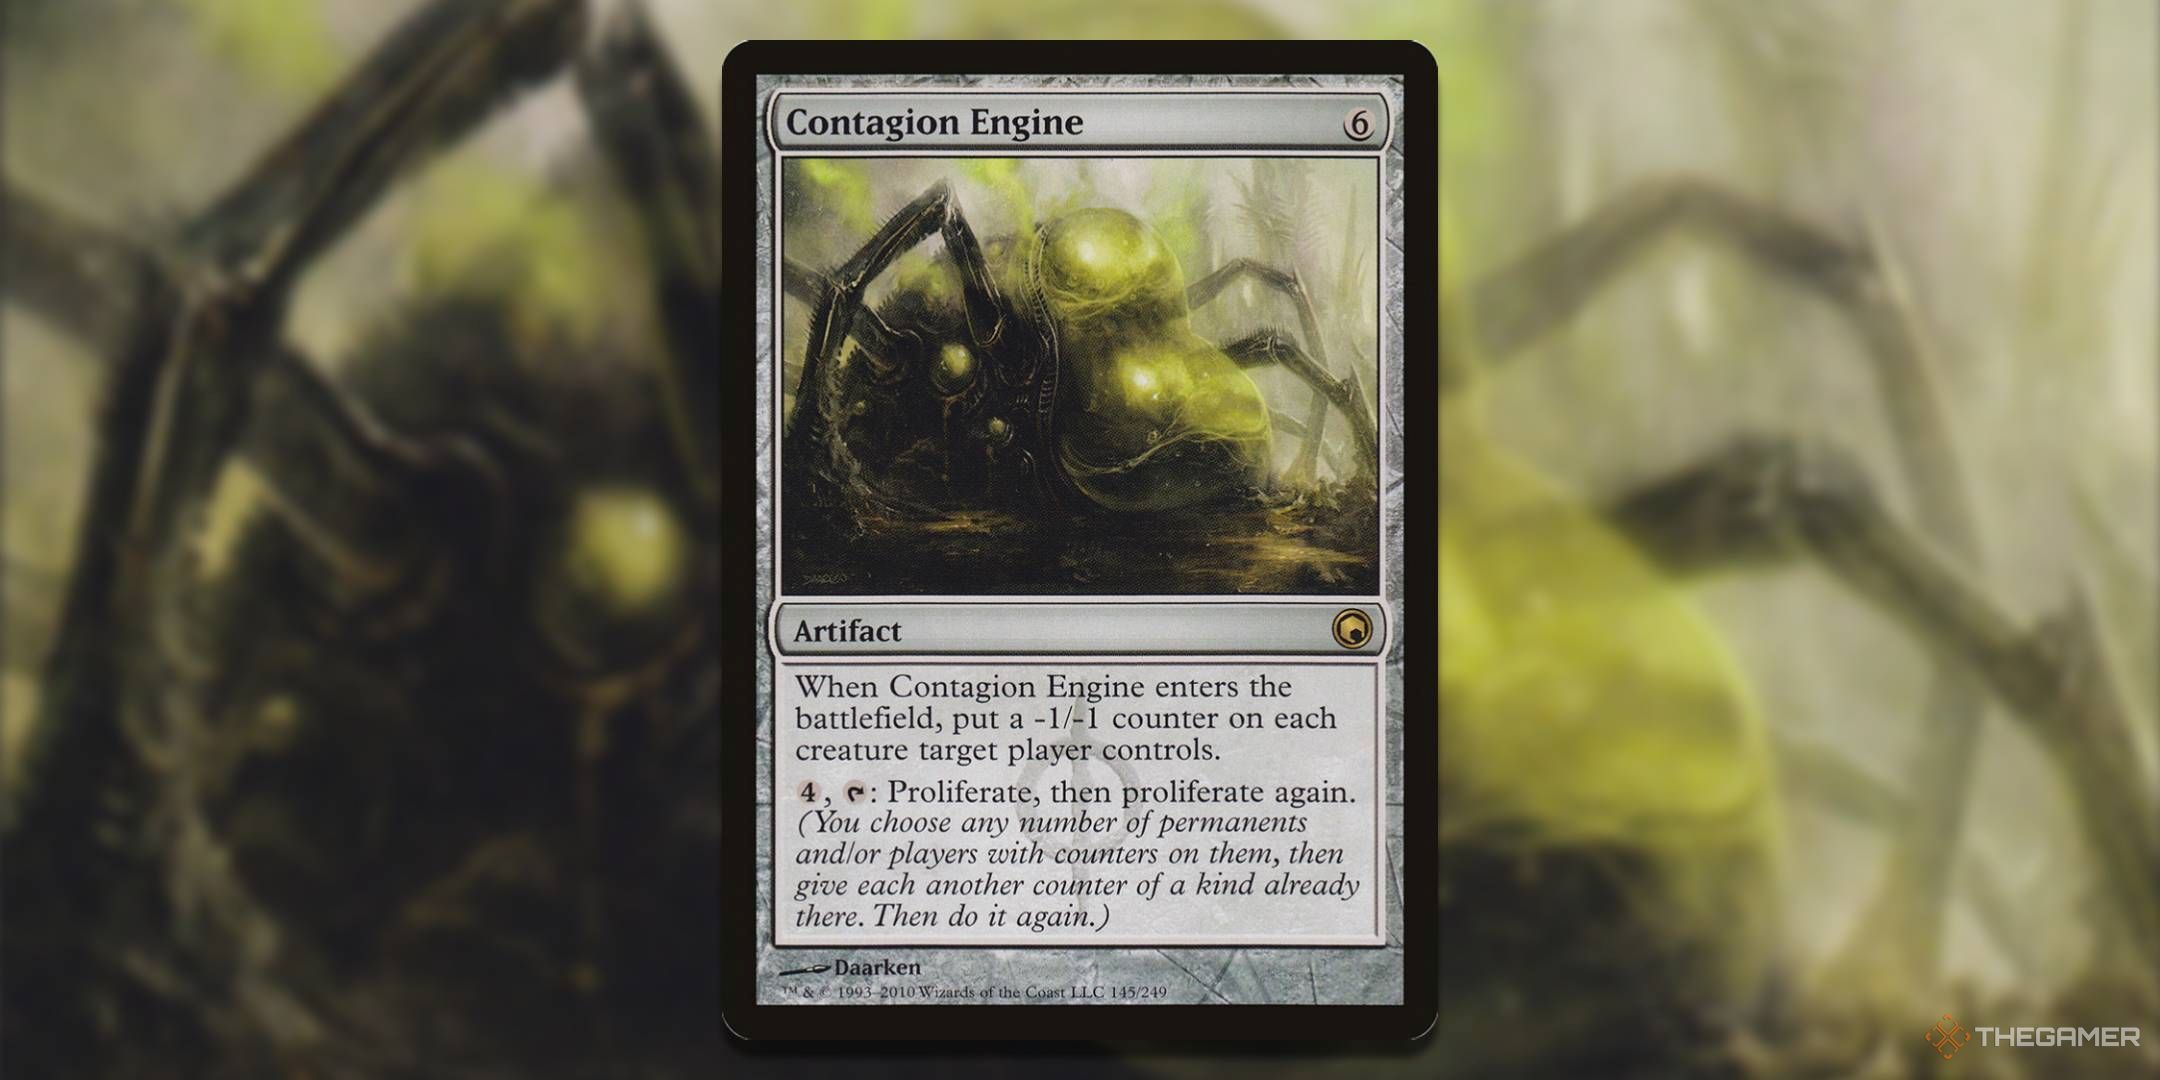
    Contagion Engine

    MTG Contagion Engine card with the art in the background.

    While not the flashiest card, Contagion Engine is incredibly effective. With just four mana, you can proliferate twice, meaning that for each poison counter your opponents have, you add two more.

    This card may be costly to cast, but the payoff is invaluable. In the late game, when your opponents have more established defenses, closing the gap to secure the last few poison counters can become tricky. Double proliferation enables you to efficiently meet your goal.

    Staff of Compleation

    MTG Staff of Compleation card with the art in the background.

    Staff of Compleation allows you to exchange life for various effects, primarily enabling you to proliferate at the cost of three life. Additionally, you can use it as a source of mana or draw a card if necessary, although it’s generally unwise to use it to destroy your own permanents.

    The true strength of the Staff is its late-game utility, particularly when you have excess mana. By investing five mana, you can untap it repeatedly to trigger multiple proliferations in a single turn.

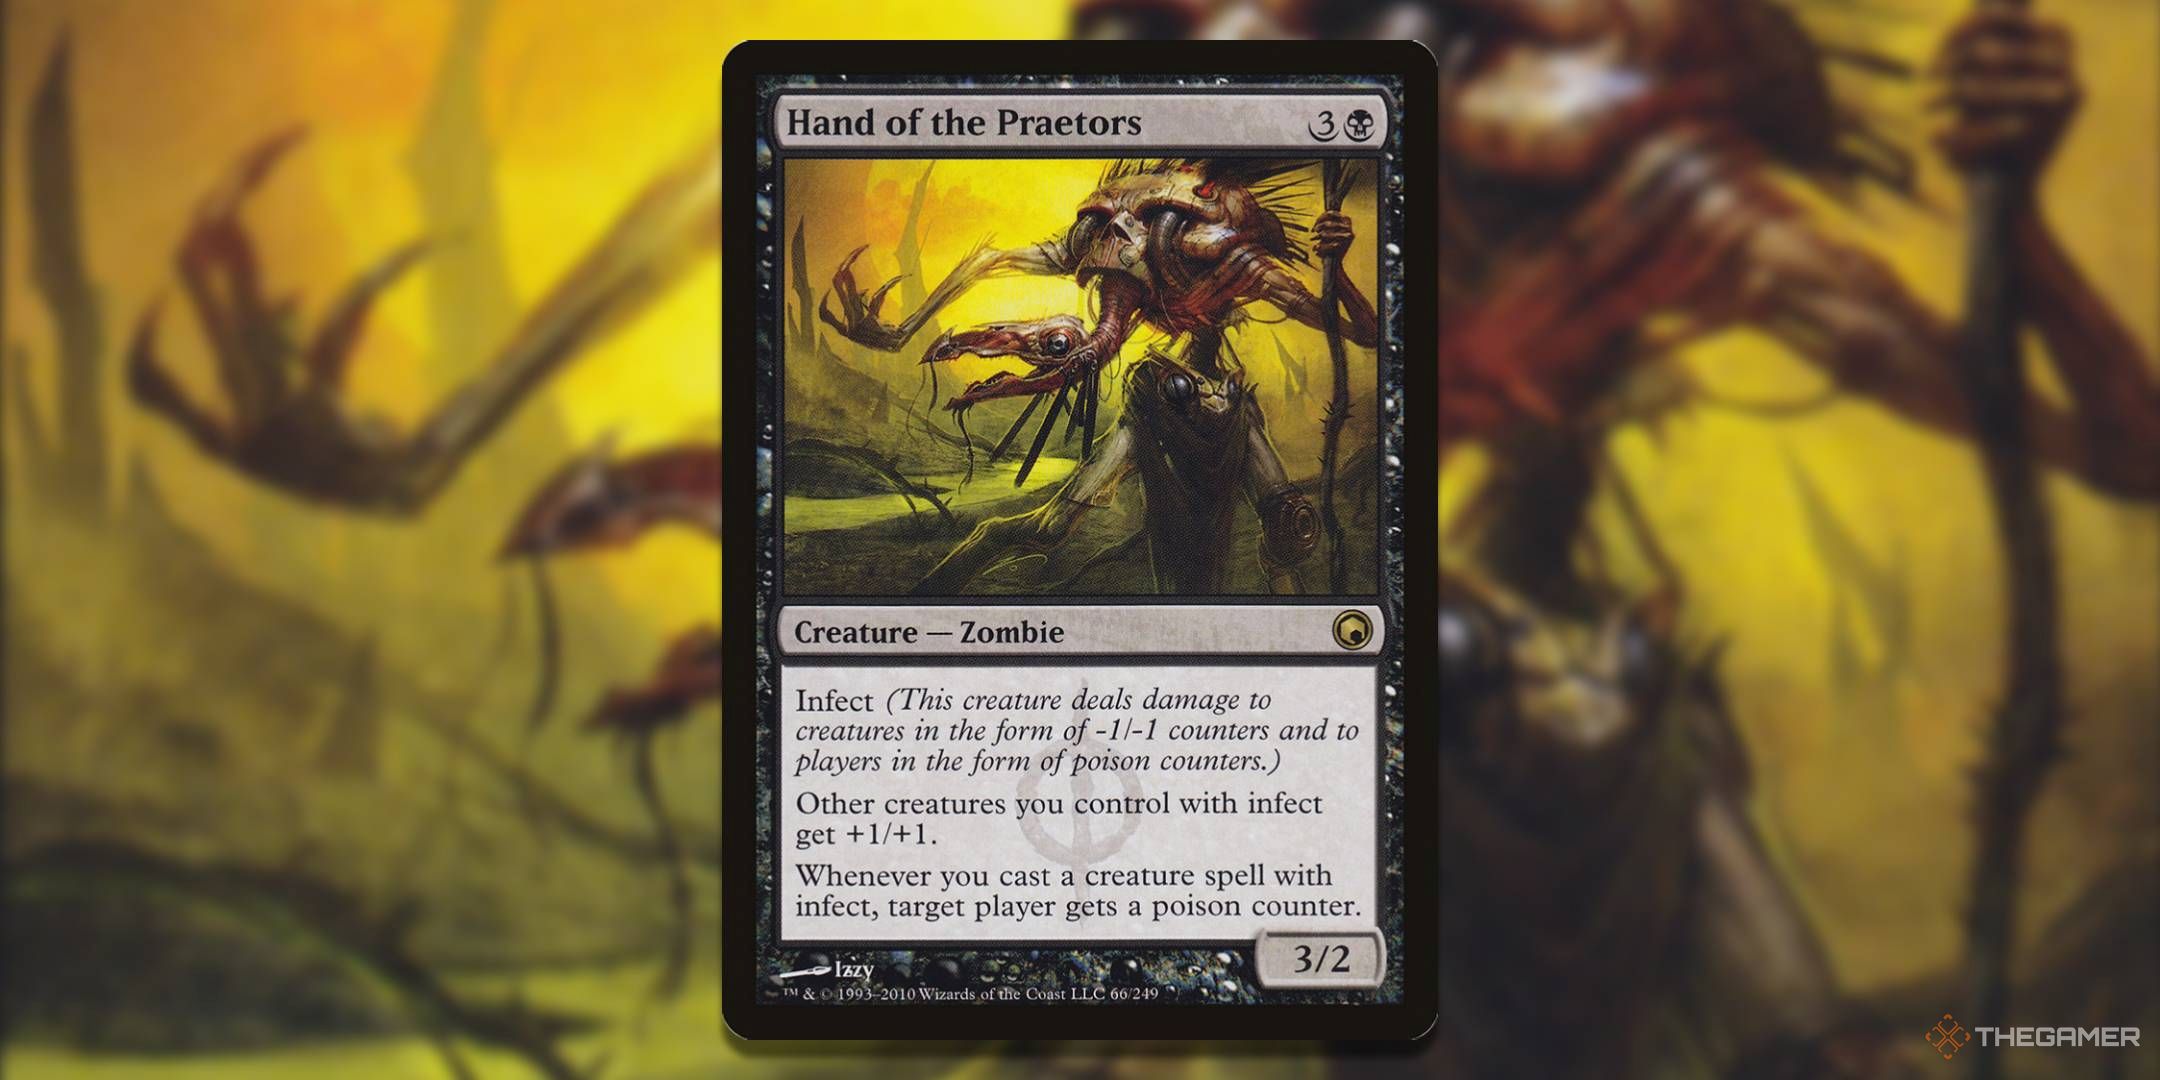
    Hand of the Praetors

    MTG Hand of the Praetors card with the art in the background.

    Hand of the Praetors is a key creature with infest and acts as a lord for your other infect creatures. Since most of the creatures in your deck have infect, this card can turn every creature you play into a source of additional poison counters for your opponents.

    It’s usually beneficial to distribute poison counters evenly among your opponents, making it easier to eliminate them all through proliferate triggers. However, if one opponent poses a greater threat, prioritize getting their poison counter count to ten before focusing on others.

    The stats boost it provides is decent, but its primary drawing point is the capacity to inflict poison counters easily. By applying constant pressure with poison counters, you present a challenge for your opponents to counter.

    How to Play the Deck

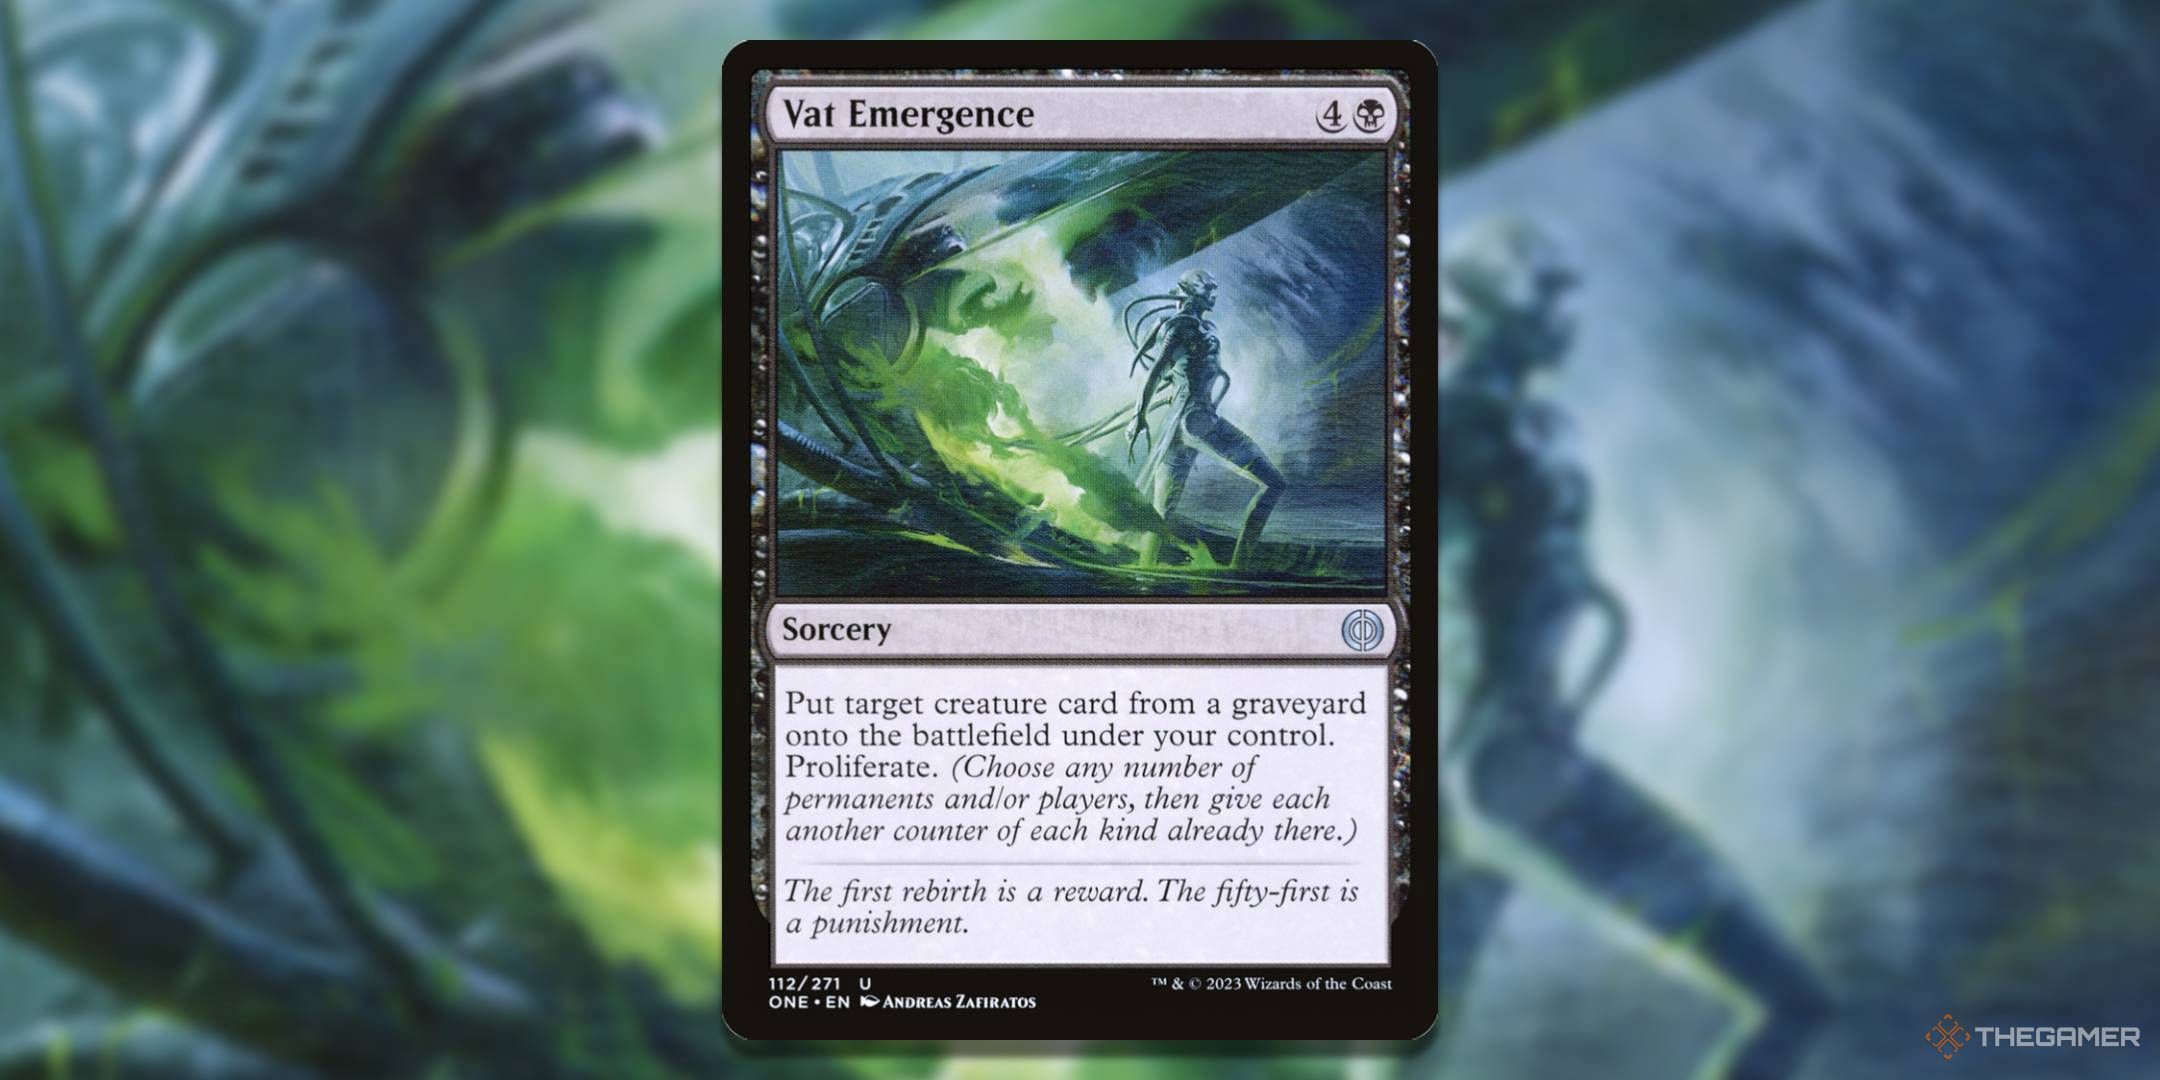
    MTG Vat Emergence card with the art in the background.

    Your strategy with the Skithiryx, the Blight Dragon deck involves rapidly placing as many poison counters on your opponents as possible to reach that crucial count of ten. Your commander, Skithiryx, is the most effective means to generate counters quickly, while proliferate effects help to fill any gaps.

    Being a mono-black deck, you might find yourself lacking in ramp options. However, there are a few mana-generating creatures like Plague Myr and Myr Convert to help you quickly summon Skithiryx. The Jet Medallion also offers cost reductions for your black spells.

    The deck is rich in proliferate effects that can add poison counters to your opponents. It’s important to time these effects carefully, ideally waiting until all your opponents have at least one poison counter to maximize their utility. Permanents that can proliferate, such as Karn’s Bastion and Contagion Clasp/Engine, are particularly valuable since they can be used multiple times.
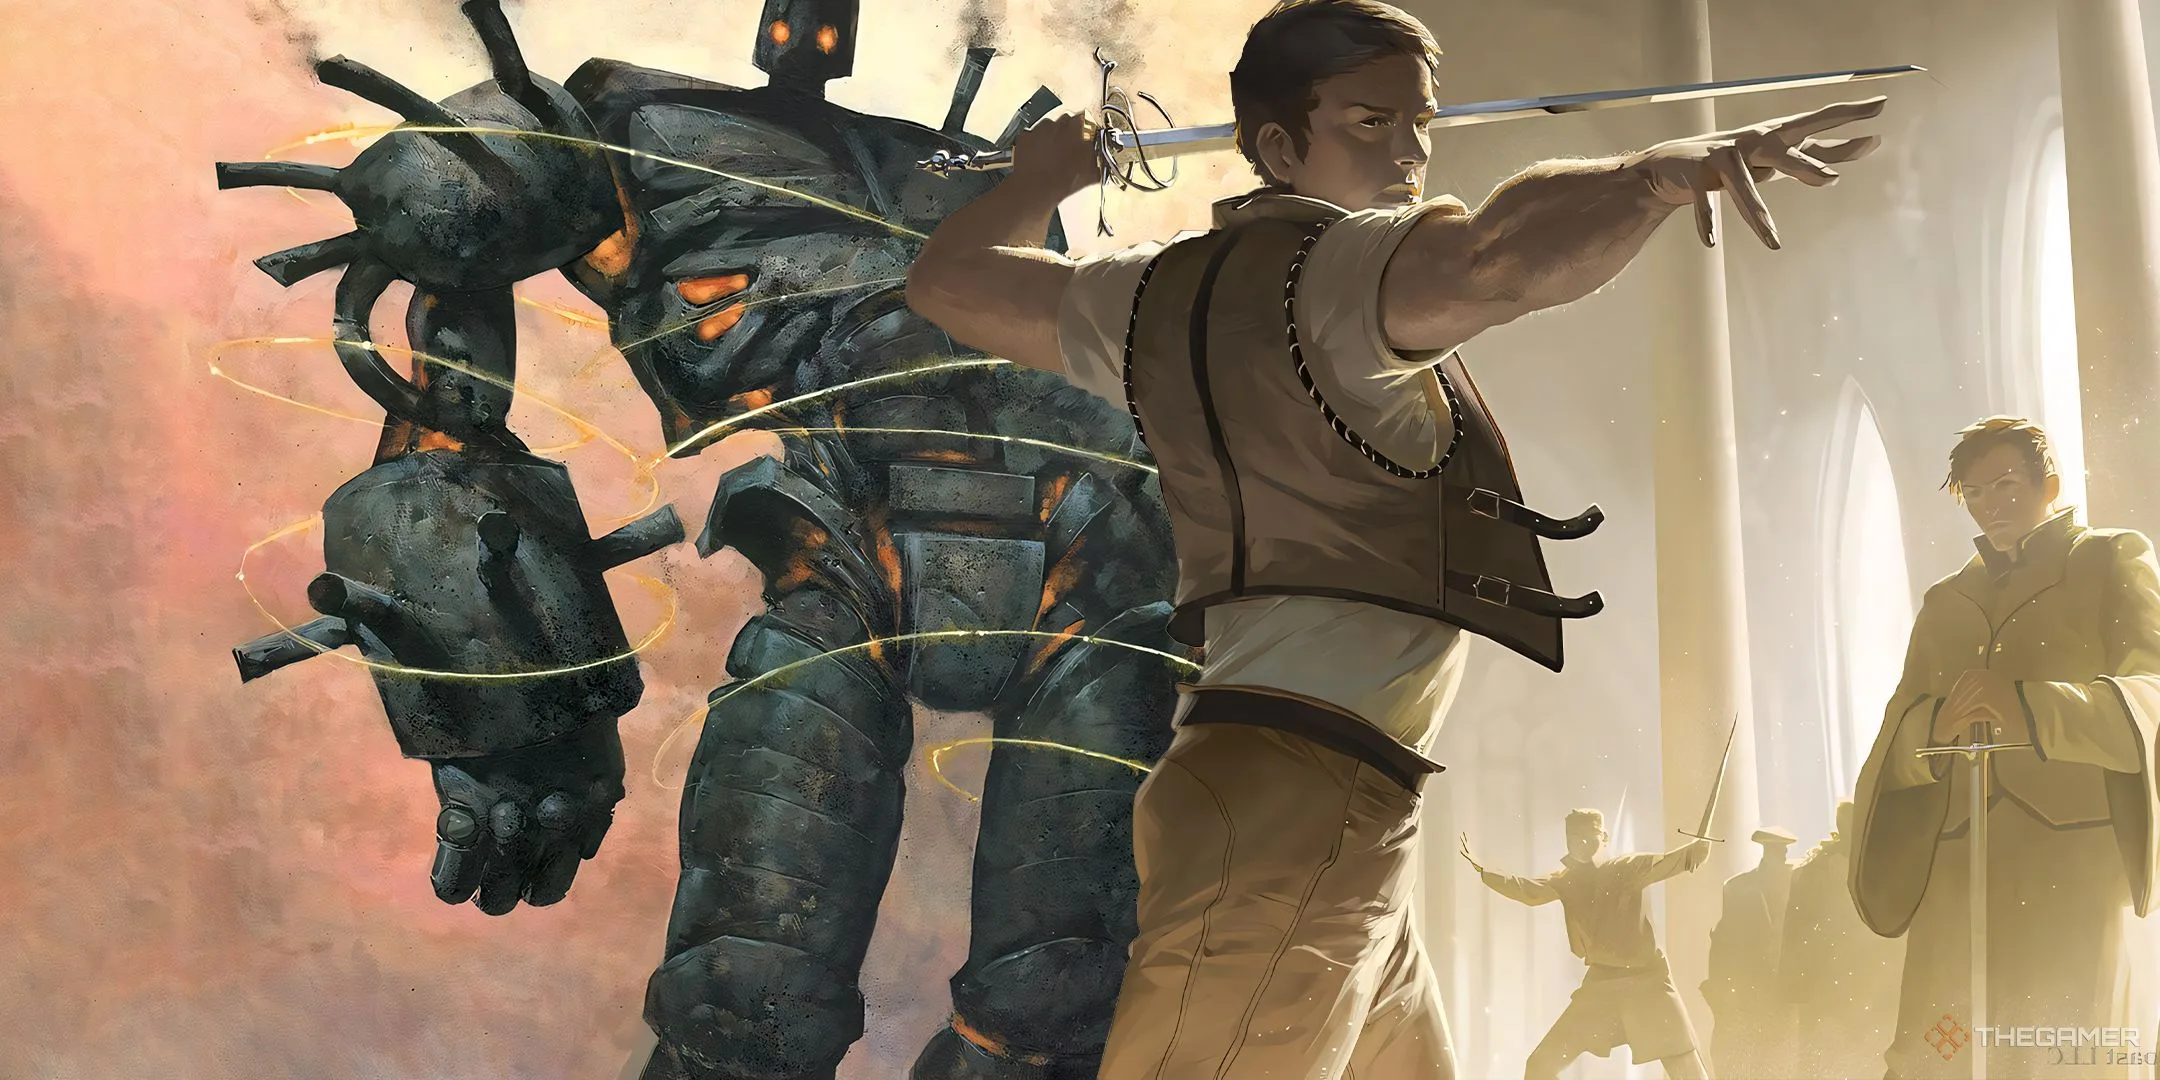
    To take full advantage of Skithiryx, the deck also emphasizes a Voltron strategy. Cards like Whispersilk Cloak, Trailblazer’s Boots, and Brotherhood Regalia help make Skithiryx unblockable, while Unspeakable Symbol, Nightmare Lash, and Lashwrithe offer stat boosts that can potentially secure ten poison counters in just one attack.

    If a card has both infect and a toxic ability, activating either ability will trigger both. For example, if a creature has infect with 4/4 stats and toxic 2, the player receiving damage will receive a total of six poison counters.

    The ultimate goal of this deck is to secure a victory by inflicting ten poison counters on your opponents. As combat damage from creatures with infect translates directly into poison counters, traditional player life totals remain untouched. Therefore, your victory can only come through poison counters, not through conventional combat damage.

    A significant drawback of this deck is its relative speed. Mono-black decks typically face challenges when it comes to ramping, and as soon as you reveal Skithiryx, you’ll likely find yourself a target. Infect decks are notorious for winning swiftly and can often evade interaction, making you a target early on. While cards like Silent Arbiter can help slow down gameplay, you may need to rely on removal spells and board wipes early on to establish your position and begin building your battlefield. The Gray Merchant of Asphodel can also help recover lost life points.

  • Crafting Deretti, Rocketeer Engineer in Commander: Top Cards & Strategy

    Crafting Deretti, Rocketeer Engineer in Commander: Top Cards & Strategy

    Stranded on Avishkar: Daretti’s Journey

    After losing his Spark, Daretti, one of the most renowned Goblins in Magic: The Gathering, found himself stuck on Avishkar. Fortunately, he quickly joined forces with the Goblin Rocketeers, a quirky group that fervently worships the BOOSTGOD! by crafting rocket cars aimed at reaching their deity through sheer speed.

    As co-captain and chief engineer of the Goblin Rocketeers, Daretti feels right at home among fellow Goblin Artificers. Leading a Commander deck, he utilizes artifacts from your graveyard to create a value engine that propels you toward victory.

    Sample Decklist

    Commander
    Commander
    Daretti, Rocketeer Engineer
    Creatures (26) Sorceries (7)
    Academy Manufacturer Blasphemous Act
    Anger Faithless Looting
    Bosh, Iron Golem Pirate’s Pillage
    Canoptek, Scarab Swarm Reforge the Soul
    Feldon of the Third Path Scrap Mastery
    Foundry Inspector Seize the Spoils
    Goblin Engineer Sundering Eruption // Volcanic Fissure
    Goblin Welder
    Goldspan Dragon Instants (7)
    Karn, Legacy Reforged Big Score
    Metalwork Colossus Demand Answers
    Meteor Golem Fling
    Myr Battlesphere Kazuul’s Fury // Kazuul’s Cliffs
    Phyrexian Triniform Seething Song
    Professional Face-Breaker Unexpected Windfall
    Scrap Trawler Untimely Malfunction
    Slobad, Goblin Tinkerer
    Slobad, Iron Goblin
    Solemn Simulacrum
    Steel Hellkite
    Threefold Thunderhulk
    Treasure Nabber
    Triplicate Titan
    Wurmcoil Engine
    Xorn
    Artifacts (21) Enchantments (2)
    Arcane Signet Curse of Opulence
    Cursed Mirror Sneak Attack
    Darksteel Forge
    Embercleave
    Fellwar Stone
    Glittering Stockpile
    Ichor Wellspring
    Lightning Greaves
    Liquimetal Torque
    Mind Stone
    Mox Opal
    Mycosynth Wellspring
    Portal to Phyrexia
    Prized Statue
    Ruby Medallion
    Silver Shroud Costume
    Sol Ring
    Stonespeaker Crystal
    Swiftfoot Boots
    The Reaver Cleaver
    Thought Vessel
    Planeswalkers (1) Lands (35)
    Daretti, Scrap Savant Buried Ruin
    Darksteel Citadel
    Fomori Vault
    Geier Reach Sanitarium
    Great Furnace
    Inventor’s Fair
    Mikokoro, Center of the Sea
    Miren, the Moaning Well
    Mountain (20)
    Myriad Landscape
    Power Depot
    Rogue’s Passage
    Scene of the Crime
    Treasure Vault
    Urza’s Cave
    War Room

    The Commander

    Daretti, once a Planeswalker, is now stranded on Avishkar. This Goblin Artificer needs four colorless and one red mana to summon. His power is determined by the highest mana cost of artifacts you control, which can range from zero to a whopping 16 if you include Draco in your decklist.

    Daretti’s variable power means he can potentially win through combat, but his real strength lies in his second ability: When he enters or attacks, you may sacrifice an artifact to bring back another artifact from your graveyard. This makes it easy to cheat in pricey artifacts and allows you to re-trigger enter and leave effects like those found on Solemn Simulacrum.

    Pairing Daretti with other Goblin Artificers like Goblin Welder and Slobad, Goblin Tinkerer, enhances the value engine, enabling you to flicker powerful artifacts like Wurmcoil Engine and Threefold Thunderhulk effectively.

    How to Build the Deck

    Daretti, Rocketeer Engineer excels at pulling big artifacts from your graveyard, but you’ll need ways to get them there first. This deck leverages the red color’s draw and discard mechanics, setting you up for substantial plays with cards like Myr Battlesphere while searching for crucial mana sources and strategy enhancers.

    To maximize Daretti’s capabilities, include several pricey artifacts in your setup. The goal is not to cast them; instead, having cheap mana rocks will provide perfect sacrificial targets for Daretti.

    Helpful Tip: Utilizing mana rocks alongside Goblin Welder and Goblin Engineer can ensure your mana gains outweigh the costs, putting strong options back into your graveyard.

    To keep the deck functional without its commander, a few backup cards are included. Daretti, Scrap Savant can help dig for cards and replicate the artifact reanimation capability. Goblin Welder and Goblin Engineer also have similar recycling abilities, although the latter is limited to artifacts that cost three mana or less.

    A minor Treasure theme is also woven into the deck, where you can create Treasure tokens to bank for later use when Daretti isn’t attacking or sacrifice them for getting your key artifacts into play.

    Ramp

    While red typically lacks robust ramp options, many artifacts can generate mana and serve as targets for Daretti. A solid mana rock suite, including Sol Ring and Arcane Signet, is essential, but also consider underutilized artifacts.

    Cursed Mirror can come into play as any creature momentarily, which means it can gain its characteristics and trigger enter effects. This can help you pull lands and generate creatures or Treasure for extra damage.

    Glittering Stockpile generates one red mana per turn while accumulating stash counters that can yield significant returns. Daretti can recycle this rock, making its effect reusable.

    Stonespeaker Crystal requires four mana but provides two for each tap. Furthermore, you can sacrifice it to exile graveyards, a worthwhile trade, especially since Daretti and Goblin Welder can make it usable repeatedly.

    Effects that trigger on the entry or exit of a card are powerful and synergize well with your strategy. For example, Solemn Simulacrum supplies a basic land upon entering and a card when it dies, forming an effective loop with Goblin Welder to bring it back again.

    Mycosynth Wellspring functions similarly, fetching a land into your hand upon destruction, making it a premier target for sacrificing with Daretti’s effect. Prized Statue works in the same way but instead provides Treasure, meaning it can cover its own cost when played and sacrificed or reused for more Treasure.

    Treasures might not seem like much, but Treasure Nabber can become wild when your opponents tap their own mana artifacts. You can seize control of their artifacts and then sacrifice them to Daretti, effectively ramping up your game.

    Draw Mechanics

    The deck’s card draw mainly consists of red cards designed for discarding. These let you discard heavier threats, like Triplicate Titan, setting you up for bigger plays while drawing fresh cards.

    Demand Answers allows you to discard one card and immediately draw two for just two mana. Faithless Looting is slightly cheaper, but you have to discard two cards, placing you at a net loss unless you use flashback.

    Additionally, cards like Unexpected Windfall generate Treasure tokens for future mana use or sacrifice fodder. Other draw spells like Pirate’s Pillage and Seize the Spoils have similar effects, allowing for consistent card generation.

    Helpful Tip: Cards like Academy Manufacturer and Xorn can amplify the artifact returns from these spells, while Goldspan Dragon doubles their mana output.

    Since mono-colored decks have limited mana fixing needs, consider including some draw lands to boost your foundation. Geier Reach Sanitarium provides a draw and discard effect while generating colorless mana.

    Mikokoro, Center of the Sea is another legendary land for a little added draw without the shifting costs. For three mana, War Room enables you to draw a card just for you, a worthy trade-off for one life in mono-red.

    Bombs

    Daretti has the power to bring any artifact in your graveyard into play, so filling your deck with big, impactful artifacts is advisable. Including heavy hitters is crucial since Daretti’s power aligns with the mana value of your most significant artifact.

    Metalwork Colossus, the most expensive artifact in the deck, costs 11 generic mana. It can be cheaper with noncreature artifacts in your graveyard, but Daretti’s priority remains on the printed value. Additionally, you can sacrifice other artifacts while it’s in your graveyard, potentially allowing for multiple casts and sacrifices in a single turn.

    Bosh, Iron Golem costs eight mana but has an ability that allows you to sacrifice artifacts for damage equal to their mana value. With plenty of expensive artifacts available, this ability can turn the tide of the game.

    Helpful Tip: If you have both Metalwork Colossus and Bosh in play, you can potentially bring Colossus back to your hand and repeatedly cast and sacrifice it.

    Combustible Gearhulk stands as a formidable 6/6 creature with first strike. Upon entering the battlefield, your opponents face a tough choice: draw three cards or risk being hit with significant damage based on the total mana value of the milled cards, which can reach up to 29.

    Karn, Legacy Reforged matches your highest-cost artifact for power and toughness, starting as a base 5/5. He grows more substantial with any artifacts you have while sucking up mana each upkeep based on the highest mana value.

    Using Daretti and your Goblin Artificers, the Portal to Phyrexia becomes a devastating board wipe that can bypass indestructible creatures and lets you control the best threats from your opponents. If no opponents have useful creatures, it still functions to reanimate your artifacts that align with your graveyard synergies.

    Summoning creatures that can generate additional creatures can give your deck a solid advantage. They can withstand board wipes, and if built around, they can flood the battlefield with vital allies.

    Wurmcoil Engine is a familiar face for players—it’s a 6/6 Wurm that creates two 3/3 Wurm tokens upon death, allowing you to sacrifice it and immediately revive it using one of its offspring.

    Triplicate Titan follows a similar principle, splitting from a 9/9 Golem with flying, vigilance, and trample into three 3/3 Golems, each boasting one of those abilities. Phyrexian Triniform mirrors this strategy but trades its attributes for a one-time encore, allowing a single copy from the graveyard.

    Threefold Thunderhulk adds more layers to your value engine by spawning three 1/1 Gnomes upon entering and attacking.

    The Thunderhulk also operates as a sacrificial outlet, letting you push artifacts like Wurmcoil Engine to your graveyard while expanding your Gnome army for future plays.

  • Mastering Archazia Island: Amethyst/Steel Starter Deck Guide

    Mastering Archazia Island: Amethyst/Steel Starter Deck Guide

    In the Disney Lorcana Archazia’s Island set, dual-ink cards took center stage, but a new keyword also emerged—vanish. Characters with this keyword can strike harder, yet they are more susceptible to being banished unless you happen to be a cunning, deceptive vizier.

    The Amethyst/Steel Starter Deck from Archazia’s Island showcases Jafar alongside his Illusion minions, unleashing chaos throughout the environment. Harness the power of your illusions to slow down your opponents and edge your way to victory with this deck.

    The Amethyst/Steel Starter Deck List

    Disney Lorcana: Archazia’s Island’s Amethyst/Steel Starter Deck

    Characters

    Akela, Wolf Pack Elder (x2)

    Arthur, Wart (x2)

    Fa Zhou, War Hero

    Giant Cobra, Ghostly Serpent (x3)

    Heihei, Rambling Rooster (x3)

    Helga Sinclair, Tough as Nails (x2)

    Iago, Giant Spectral Parrot

    Jafar, Aspiring Ruler (x3)

    Jafar, Newly Crowned

    Kashekim, Ancient Ruler (x2)

    King Hubert, Phillip’s Father (x2)

    Madam Mim, Cheating Spellcaster

    Mufasa, Respected King (x3)

    Pain, Impudent Imp (x2)

    Panic, High-Strung Imp (x2)

    Rajah, Ghostly Tiger (x3)

    Raya, Guidance Seeker

    Razoul, Menacing Guard (x3)

    Royal Guard, Bovine Protector (x2)

    Tanana, Tribal Elder (x2)

    Te Ka, Lava Monster (x2)

    The Carpenter, Dinner Companion (x2)

    Treasure Guardian, Foreboding Sentry (x2)

    Items

    Amethyst Coil (x2)

    Retrosphere (x2)

    Training Dummy (x2)

    Actions

    Double Trouble (x2)

    Magical Maneuvers (x2)

    Restoring the Crown

    Key Cards

    Unlike many other Lorcana starter decks, this one doesn’t heavily focus on a single theme. Instead, it functions as a versatile midrange deck that maintains flexibility. That said, certain key cards should be prioritized.

    Jafar, Newly Crowned

    Jafar, Newly Crowned

    Jafar epitomizes the strategy this deck employs: summon Illusions, challenge opponents, and return them to your hand. He cleverly uses the vanish keyword to turn a potential weakness into a winning advantage.

    Vanish is a keyword introduced in Archazia’s Island. When a character with vanish is targeted by an action, it gets banished. However, if Jafar is in play, you can return it to your hand instead.

    Although this deck doesn’t include many Illusions, the ability to repeatedly call them back makes even a few difficult for your opponent to counter as they continuously return.

    Giant Cobra, Deadly Serpent

    Giant Cobra, Deadly Serpent

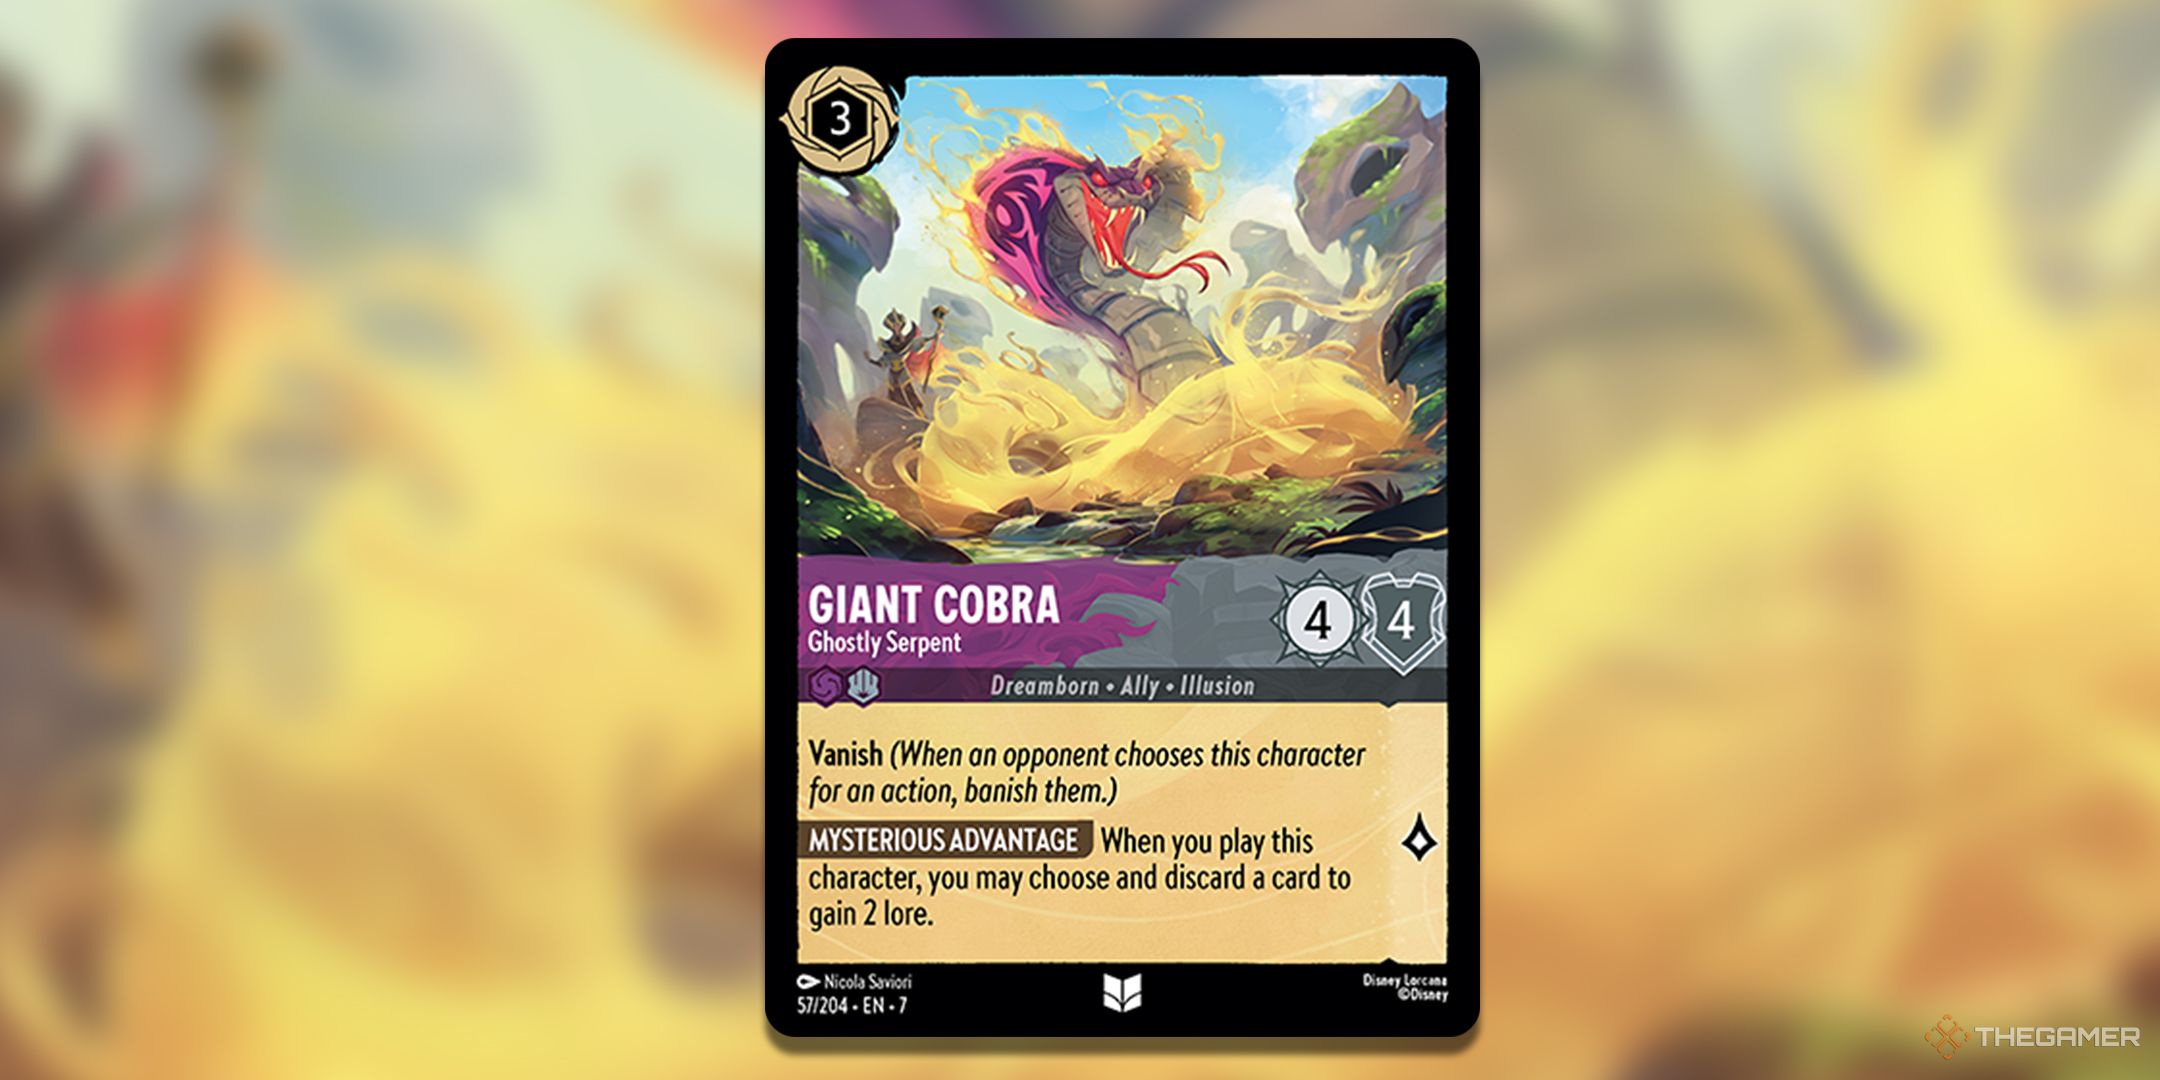
    This Illusion is one you’ll want to keep recurring through Jafar. With a 4/4 for three ink, it’s already a solid deal, and it comes with a powerful entry effect that can be a game-changer if unchecked.

    Illusions share two common characteristics: they possess vanish, and their stats are generally higher than traditional characters at the same cost. This means they can deal heavy damage in challenges but fall easily to targeted actions.

    When Deadly Serpent enters the battlefield, you can discard a card from your hand to gain two lore. While earning lore is beneficial, discarding a card for Retrosphere to recapture later is even more advantageous.

    Fa Zhou, War Hero

    Fa Zhou, War Hero

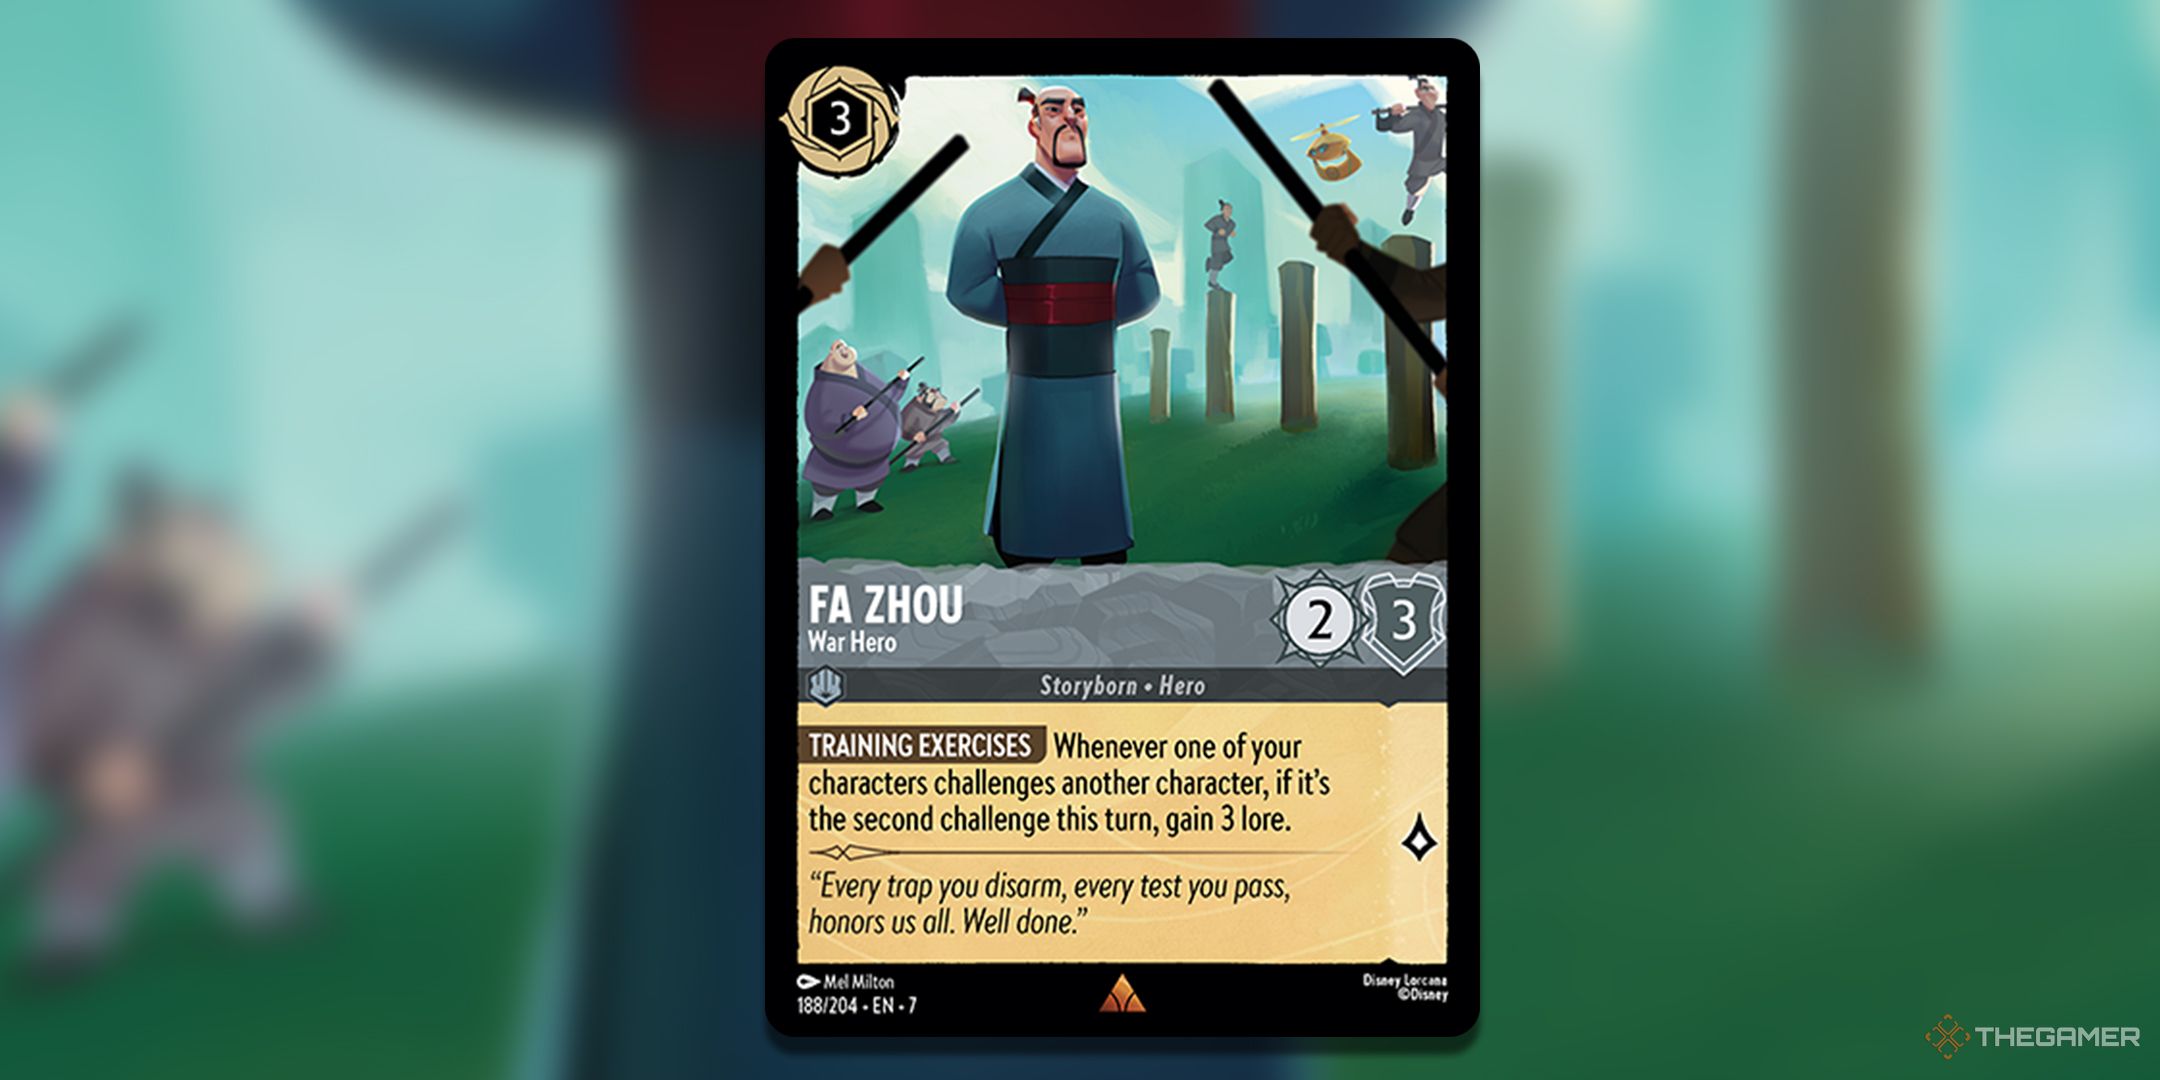
    Fa Zhou fits perfectly into the deck’s challenge-focused theme, addressing a common issue of lore generation. Usually, focusing too much on challenges can leave you behind in lore, but Fa Zhou helps correct that by granting three lore on your second challenge each turn.

    This allows you to aggressively challenge and eliminate major threats without worrying about falling behind. While you’ll still need some dedicated lore-generating cards, being able to challenge more freely enhances your ability to maintain control over the game.

    Magical Maneuvers

    Magical Maneuvers

    This deck enjoys exerting opposing characters as a control mechanism, and Magical Maneuvers enhances this by allowing you to return one of your characters to your hand.

    Much like Jafar, this card allows you to trigger effects from cards like the Giant Cobra. Additionally, it prepares for challenges by rendering your opponent’s key characters vulnerable to attacks. This dual functionality helps bridge the gap within the deck’s strategy.

    Restoring the Crown

    Restoring the Crown

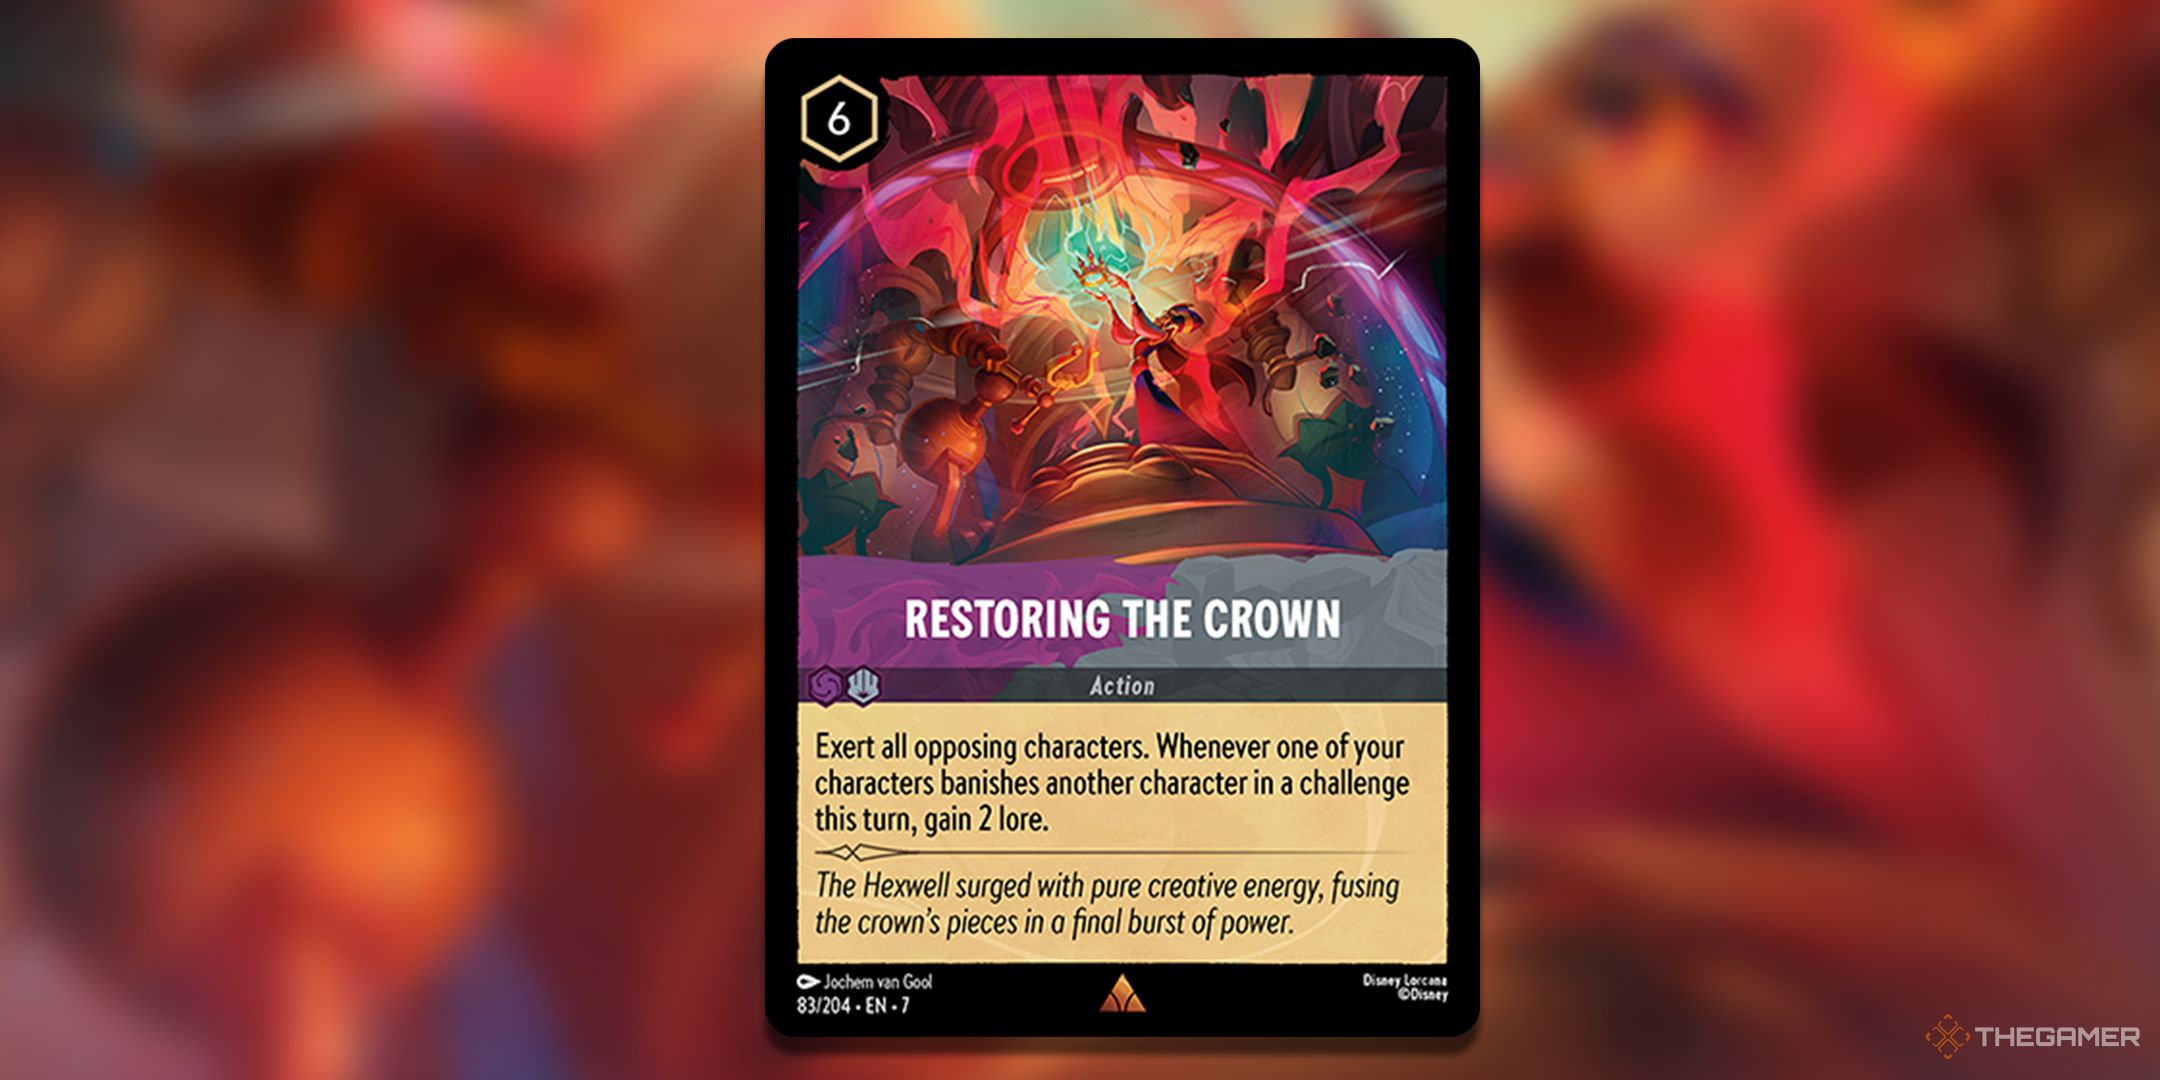
    This deck thrives on a slow, methodical approach, preferring to control the game and secure victories over time. However, as you draw closer to a win, a timely Restoring the Crown can propel you over the finish line.

    By exerting all of your opponent’s characters, they become easy targets for challenges. Importantly, for each of your opponents’ characters you banish, you gain two lore points, allowing you to end the game on a high note while also advancing quickly in lore.

    At a cost of six ink, it’s crucial to be certain you can win with this card before playing it, but with the high stats of your illusions and a strong lineup of challengers, clearing any obstacles should be quite manageable.

    Amethyst/Steel Playstyle

    This deck doesn’t concentrate on a singular theme as much as some other starter decks do. Instead, it focuses on winning through challenges while repeatedly utilizing your illusions.

    Illusions stand as your main threat, boasting superior stats compared to standard characters, and can be easily reused thanks to Jafar’s abilities. However, if you’re unable to keep your opponent under control and they establish dominance, regaining the upper hand can become quite challenging.

    Exerting your opponent’s characters is critical, as it allows you to eliminate their important cards through challenging. Utilize cards like Restoring the Crown and Magical Maneuvers frequently to target major lore generators or other cards that enable your opponents’ strategies before deploying an Illusion to take them down.

    If Fa Zhou is in play, aim to achieve at least two challenges per turn to keep pace with any incidental lore your opponent may be accumulating.

    Maintaining your challengers in good shape is , so employ challengers such as Te Ka and Helga Sinclair, or utilize Amethyst Coil to redirect damage dealt to your creatures back onto your opponents. If you need a quick way to eliminate a character, Double Trouble provides direct damage to take out two targets simultaneously.

    Your Opening Hand and When to Mulligan

    This deck contains only two one-drop characters—both Pain and Heihei are basic cards. Therefore, rather than striving for a turn one play, focus on ensuring you have a few Illusions in hand so you can hit the ground running when you play Jafar. While you want to have Rajah, Ghostly Tiger in hand for the earliest plays, keeping a Giant Cobra is also very beneficial.

    Besides Illusions, you’ll also need interruption cards. Remember that your strategy involves grinding for the win and destabilizing your opponent, making cards like Double Trouble and The Carpenter essential for buying time to lay out your main win conditions.

    Helga Sinclair, Tough as Nails

    Helga Sinclair may not be considered an inkable card, but her worth as a 0/4 who becomes an evasive 3/4 during challenges makes her valuable at just two ink. She complements Training Dummy for a solid defense, effectively becoming a barrier that early-game characters struggle to surpass.

    Weaknesses

    The reality is simple: this deck is slow. It aims to prolong the game through exerting and reintroducing characters while lacking robust lore generation. Therefore, you are playing the long game, making you vulnerable to aggro decks that can surge ahead before you can establish a solid position.

    A further complication is the limited supply of Illusions. The deck contains only seven Illusion cards, while many other cards like Treasure Guardian rely on them. It’s probable that you won’t draw sufficient Illusions for Jafar’s abilities to function effectively, meaning your immediate upgrades should focus on adding more Illusions to replace the many basic characters like Akela and Royal Guard.

    Moreover, Jafar’s abilities only activate if the Illusion is banished using its vanish ability. If an Illusion falls in a challenge and you can’t retrieve it with Retrosphere, the already limited Illusions will dwindle further.

  • Captain Howler: Ultimate Guide to Sea Scourge Commander Deck

    Captain Howler: Ultimate Guide to Sea Scourge Commander Deck

    Captain Howler, Sea Scourge: A Unique Take on Izzet Decks

    Captain Howler, Sea Scourge is a notable creature from the Magic: The Gathering Aetherdrift set. It serves as the central figure in the Izzet (blue/red) strategy, designed to take advantage of discarding cards for various benefits.

    Building a deck around Captain Howler offers a refreshing spin on the typical Izzet approach. Instead of focusing on casting numerous spells, this deck emphasizes the synergy of discarding and drawing cards. Whether you’re a fan of Pirates, Sharks, or simply enjoy the mechanics of discarding cards for value, Captain Howler, Sea Scourge makes an exceptional choice for a commander.

    Sample Decklist

    Commander: Captain Howler, Sea Scourge

    Creature Creature Creature Creature Creature Creature
    Alandra, Sky Dreamer Anger Blighted Agent Brallin, Skyshark Rider Chasm Skulker Containment Construct
    Curator of Mysteries Evie Frye Forgotten Creation Ghostly Pilferer Glint-Horn Buccaneer Homunculus Horde
    Inti, Seneschal of the Sun Invisible Stalker Ivora, Insatiable Heir Jace’s Archivist Kitsa, Otterball Elite Magus of the Bazaar
    Magus of the Wheel Marauding Mako Mary Read and Anne Bonny Merfolk Looter Oliphaunt Overlord of the Floodpits
    Rhet-Tomb Mystic Scrounging Skyray Slither Blade Surly Badgersaur The Locust God Triton Shorestalker
    Wonder Blasphemous Act Burning Inquiry Careful Study Faithless Looting Highway Robbery
    Lorien Revealed Path of the Pyromancer Reforge the Soul Windfall Big Score Chaos Warp
    Countervailing Winds Decaying Time Loop Demand Answers Faithless Salvaging Frantic Search Izzet Charm
    Prismari Command Thrill of Possibility Tolarian Winds Unexpected Windfall You Find the Villain’s Lair Arcane Signet
    Boosted Sloop Currency Converted Izzet Signet Key to the City Monument to Endurance Pip-Boy 3000
    Sol Ring Talisman of Creativity Thought Vessel Drake Haven Ash Barrens Avishkar Raceway
    Blasted Landscape Cascade Bluffs Command Tower Desert of the Fervent Desert of the Mindful Desolate Lighthouse
    Exotic Orchard Fiery Islet Forgotten Cave Geier Reach Sanitarium x7 Island Lonely Sandbar
    x7 Mountain Reliquary Tower Remote Isle Rogue’s Passage Shivan Reef Smoldering Crater
    Stormcarved Coast Sulfur Falls

    This decklist consists of 31 creatures, 10 sorceries, 13 instants, 10 artifacts, 1 enchantment, and 34 lands. The creatures are designed to assist in discarding and drawing cards or reap benefits from these actions.

    Key Cards

    Captain Howler, Sea Scourge

    As the commander, Captain Howler is essential for your strategy. It boasts solid stats and protection through its ward ability, making it both a fierce attacker and reliable blocker. Its low mana cost means you can summon it quickly to utilize its effects effectively.

    Tip: When using multiple discard abilities in one turn, aim to distribute Captain Howler’s effect across several creatures, reducing the risk of losing any one target to removal spells.

    The ideal targets for Captain Howler’s ability are unblockable creatures, allowing you to boost them significantly. Creatures that can consistently deal damage, rather than being easily blocked, will yield the best results.

    Monument to Endurance

    Given the frequency of discards in this deck, Monument to Endurance serves as an invaluable support card. By discarding multiple cards each turn, you can reliably draw cards, generate Treasure tokens, and deal three damage to opponents.

    Tip: Save the damage for the end. Drawing a card is more beneficial in the late game, while generating treasure is typically more valuable early on. Adjust your priorities based on the game state.

    Although Monument’s effects can only be activated once per turn, you can find numerous ways to discard cards during your opponents’ turns, continuously gaining value.

    The Locust God

    The Locust God is not only a powerful card but also enhances your battlefield presence. Many cards in this deck focus on drawing and discarding, allowing each card drawn to create a 1/1 flying token. These tokens serve as elusive attackers, as flying creatures are often harder for opponents to block.

    In addition to its synergy with the deck, The Locust God can return to your hand if it dies, ensuring it remains a resource for your strategy unless exiled.

    Blighted Agent

    Among the options to pump with Captain Howler’s ability, Blighted Agent stands out as the best choice. Its unblockable nature, combined with infect, allows it to potentially eliminate an opponent with a single successful attack if it has enough power.

    Note: Infect creatures do not deal conventional combat damage but instead give poison counters. An opponent loses the game if they accumulate ten poison counters.

    Even if you don’t defeat an opponent outright, Blighted Agent can still apply pressure, paving the way for future victories with more discard outlets.

    Strategies for Playing the Deck

    The Captain Howler, Sea Scourge deck revolves around discarding cards and enhancing the power of your creatures. Focus on creatures like Blighted Agent, Triton Shorestalker, Slither Blade, and Invisible Stalker, as they cannot be blocked and can deal significant damage.

    Many discard options exist, with wheel cards that discard entire hands, such as Windfall and Reforge the Soul, standing out. Since these are often one-time uses, cards that allow continuous discarding—like Mary Read and Anne Bonny—are extremely useful.

    Additionally, generating creature tokens can bolster your board presence, giving you more attackers and blockers. The Locust God, Drake Haven, and Homunculus Horde produce tokens through card drawing, supporting your overall strategy.

    Tip: Izzet decks struggle with natural ramp, so deploy your mana rocks early to ensure you have sufficient mana for your spells.

    Winning through combat is the primary goal of this deck. Captain Howler’s ability can bolster creatures substantially, potentially ending the game in a single aggressive turn, especially against opponents with weak defenses.

    However, there is a significant potential drawback: the deck relies heavily on your commander. Captain Howler’s explosive potential makes it a prime target for removal, so while its ward helps mitigate this, it’s still wise to be prepared for its potential loss. Fortunately, Captain Howler is inexpensive to play, making it less burdensome to cast again.

  • Myojin of Night’s Reach Deck Guide: Top Cards & Strategies

    Myojin of Night’s Reach Deck Guide: Top Cards & Strategies

    The Myojin of Night’s Reach is one of the most enigmatic and impactful creatures in the lore of Magic: The Gathering. Unlike many creatures, she had the rare ability to traverse planes even before planeswalkers were a thing, subtly influencing events in both Kamigawa and Dominaria.

    Originally conceptualized before the Commander format was established, Myojin of Night’s Reach has a unique ability that complicates her inclusion in decks. To effectively use her, careful planning is essential, but with the right deck strategy, she can become a powerful presence in your games.

    Sample Decklist

    Black is an excellent color choice for building a mono-colored deck. It offers a diverse array of tools at manageable costs, granting numerous methods for card draw and opportunities to ramp up your mana efficiently.

    The Myojin thrives when she is played directly from your hand, so the following decklist is designed with various options to help you draw her from the command zone to ensure maximum impact.

    Commander
    Myojin of Night’s Reach
    Creatures (18)
    Blightbelly Rat
    Burglar Rat
    Burnished Hart
    Crypt Ghast
    Dauthi Voidwalker
    Elderfang Disciple
    Fell Specter
    Gray Merchant of Asphodel
    Hypnotic Specter
    Magus of the Coffers
    Miasmic Mummy
    Necrogoyf
    Rotting Rats
    Sangromancer
    Syr Konrad, the Grim
    Tergrid, God of Fright // Tergrid’s Lantern
    Tinybones, Trinket Thief
    Yawgmoth, Thran Physician
    Sorceries (11)
    Blood Money
    Bubbling Muck
    Damnation
    Dark Deal
    Diabolic Tutor
    Drown in Ichor
    Raise Dead
    Sign in Blood
    Syphon Mind
    Torment of Hailfire
    Vat Emergence
    Instants (7)
    Dark Ritual
    Defile
    Go for the Throat
    Infernal Grasp
    Malakir Rebirth // Malakir Mire
    Whisper of the Dross
    Artifacts (17)
    Arcane Signet
    Campfire
    Charcoal Diamond
    Contagion Clasp
    Contagion Engine
    Expedition Map
    Extraplanar Lens
    Geth’s Grimoire
    Jet Medallion
    Lightning Greaves
    Netherborn Altar
    Sol Ring
    Swiftfoot Boots
    That Which Was Taken
    The Rack
    Thran Dynamo
    Wheel of Torture
    Enchantments (9)
    Demonic Vigor
    Leyline of the Void
    Liliana’s Caress
    Megrim
    Phyrexian Arena
    Quest for the Nihil Stone
    Raiders’ Wake
    Shrieking Affliction
    Waste Not
    Planeswalkers (2)
    Davriel, Rogue Shadowmage
    Liliana of the Dark Realms
    Lands (35)
    Bojuka Bog
    Cabal Coffers
    Cabal Stronghold
    Command Beacon
    Geier Reach Sanitarium
    Karn’s Bastion
    Myriad Landscape
    Nykthos, Shrine to Nyx
    Snow-Covered Swamp x24
    Urborg, Tomb of Yawgmoth
    Urza’s Cave
    Witch’s Cottage

    The Commander

    Myojin of Night’s Reach is a 5/2 legendary Spirit creature introduced in Champions of Kamigawa. She requires eight mana to cast—five generic and three black.

    To balance her steep mana cost, Myojin enters the battlefield with a divinity counter, but only if cast from your hand. This design ensures that players cannot exploit graveyard strategies to bring her into play, introducing an interesting challenge when using her as a commander.

    As long as she has a divinity counter, Myojin is indestructible. Additionally, removing the counter allows you to force all opponents to discard their hands.

    While it can be limiting to always play Myojin from your hand, there are ways to transition her from the command zone to your hand in the deck.

    How to Play the Deck

    Although there are stronger attackers within mono-black, Myojin of Night’s Reach excels at making opponents discard their hands when played from your hand.

    To facilitate this, the deck includes mechanisms for transferring her from the command zone, options for adding divinity counters while she’s in play, and proliferate effects to make the discard ability repetitive.

    While empty hands don’t necessarily guarantee a victory, focusing on punishing opponents for discarding or holding no cards can pivot the game in your favor. Building redundancy into your strategies with various discard effects will also mitigate the risk of your opponents countering or eliminating your commander.

    Ramp Strategies

    Mono-black excels at land-based ramp with cards like Cabal Coffers and Cabal Stronghold, generating mana based on the number of Swamps controlled. By including Urborg, Tomb of Yawgmoth, all your lands become Swamps, maximizing your mana production capacity.

    Draw Mechanics

    In order to keep your hand full and maintain strategic options, the deck offers various card-drawing mechanics. Cards such as Tinybones, Trinket Thief offer card draw for each discard action that your opponents take, creating opportunities for significant life drain.

    Discard Effects

    It’s crucial that your strategy includes more methods for forcing opponents to discard than solely relying on Myojin. Several creatures and spells can provide additional discard elements, ensuring your plans remain flexible and effective, even if Myojin is countered or removed.

    This strategic diversity will allow you to exploit your opponents’ weaknesses and leverage your resources to fortify your position in the game. By carefully balancing card draw, ramp, and discard mechanics, you can create a competitive and enjoyable gameplay experience.

  • Zetalpa, Primal Dawn: Ultimate Commander Deck Tips & Strategies

    Zetalpa, Primal Dawn: Ultimate Commander Deck Tips & Strategies

    Zetalpa, Primal Dawn has become somewhat of a running joke in the Magic: The Gathering community. It gets reprinted quite often, and while it boasts strong stats and multiple keywords, it’s been overshadowed by more formidable mono-white commanders. However, thanks to its addition to the Foundations Starter Collection, it stands out as an excellent pick for those just starting to build their first Commander deck.

    As a powerful creature, Zetalpa can be both a fun deck to construct and a real challenge for your opponents to deal with. By focusing on enchantments and equipment, you’ll be putting serious pressure on the table before long.

    Zetalpa, Primal Dawn Commander Decklist

    Zetalpa is classified as a mono-white commander, which means your deck can only feature cards that are either white or colorless.

    Creatures

    • Akroma, Vision of Ixidor
    • Ardenn, Intrepid Archaeologist
    • Burnished Hart
    • Crashing Drawbridge
    • Esper Sentinel
    • Jhoira’s Familiar
    • Keeper of the Accord
    • Kinjalli’s Caller
    • Leonin Abunas
    • Mother of Runes
    • Odric, Lunarch Marshal
    • Puresteel Paladin
    • Silent Arbiter
    • Solemn Simulacrum
    • Sram, Senior Edificer
    • Stoneforge Mystic
    • Stonehewer Giant
    • Sun Titan

    Artifacts

    • Arcane Signet
    • Archaeomancer’s Map
    • Argentum Armor
    • Basilisk Collar
    • Blackblade Reforged
    • Caged Sun
    • Colossus Hammer
    • Commander’s Plate
    • Excalibur, Sword of Eden
    • Inquisitor’s Flail
    • Lightning Greaves
    • Loxodon Warhammer
    • Mask of Avacyn
    • Mirror Shield
    • Nettlecyst
    • Sol Ring
    • Swiftfoot Boots
    • Sword of Feast and Famine
    • Sword of the Animist
    • Thran Dynamo
    • Thran Power Suit
    • Worldslayer

    Enchantments

    • All That Glitters
    • Armored Ascension
    • Ethereal Armor
    • Gauntlets of Light
    • Land Tax
    • Sigarda’s Aid
    • Smothering Tithe
    • Solid Footing

    Instants

    • Dawn’s Truce
    • Disenchant
    • Generous Gift
    • Path to Exile
    • Rebuff the Wicked
    • Reprieve
    • Stroke of Midnight
    • Swords to Plowshares
    • Teferi’s Protection

    Sorceries

    • Austere Command
    • Brilliant Restoration
    • Open the Armory
    • Split Up

    Lands

    • Ancient Den
    • Buried Ruin
    • Castle Ardenvale
    • Command Beacon
    • Eiganjo, Seat of the Empire
    • Emeria, the Sky Ruin
    • Hall of the Bandit Lord
    • Myriad Landscape
    • Nykthos, Shrine to Nyx
    • Plains (x20)
    • Reliquary Tower
    • Rogue’s Passage
    • Serra’s Sanctum
    • Temple of the False God
    • War Room
    • Witch’s Clinic

    The Commander: Zetalpa, Primal Dawn

    Zetalpa is among the most frequently seen white legendary creatures in Magic: The Gathering, with numerous reprints since its first appearance in Rivals of Ixalan. While often regarded as a lesser card compared to better options, Zetalpa can be a formidable force when built effectively.

    Its combination of abilities—flying, double strike, vigilance, indestructible, and trample—makes it a daunting opponent, especially considering its 4/8 stats. To maximize Zetalpa’s effectiveness, a voltron strategy is highly recommended.

    Voltron decks focus on equipping and enchanting a single creature to create a significant threat, as opposed to deploying many smaller creatures. Although typically seen in red and white builds, Zetalpa provides a unique opportunity for a mono-white variation.

    Key Cards

    As a Voltron-focused deck, Zetalpa should utilize a range of equipment and aura enchantments. Having powerful cards that scale nicely with the number of these attachments can yield a substantial advantage.

    • All That Glitters, Ethereal Armor, and Thran Power Suit: These enchantments bolster Zetalpa with +1/+1 for each attached aura or equipment, allowing for significant stat increases.

    • Solid Footing and Gauntlets of Light: These cards enable Zetalpa to deal damage equivalent to its toughness instead of its power, meaning it can hit for eight based on its base toughness. With the right buffs, it can become a lethal threat.

    • Sram, Senior Edificer: While Sram is often a commander for Voltron decks, he provides valuable card draw in this setup, helping maintain your resources.

    • Sun Titan and Brilliant Restoration: These two cards offer exceptional recursion, allowing you to retrieve crucial auras and equipment from your graveyard.

    How To Play Zetalpa, Primal Dawn

    The strategy centers around quickly getting Zetalpa onto the battlefield to maximize the threat of 21 commander damage. While Zetalpa’s high mana cost of eight may pose a challenge, folowing cards like Keeper of the Accord for mana ramp can help accelerate your game plan.

    To maintain your position while Zetalpa is building strength, consider additional creatures and token generators that can serve as distractions for your opponents. Protect Zetalpa’s hexproof by equipping gear like Mirror Shield or Swiftfoot Boots to prevent it from being targeted directly.

    For a more defensive approach, cards like Teferi’s Protection can offer crucial respite against aggressive decks until Zetalpa is ready to swing.

    Once Zetalpa is active, the focus should shift to stacking as many auras and equipment as possible, aiming for 11 power or toughness to ensure lethal damage is dealt. Remember to utilize card advantage tools like Sram and Puresteel Paladin, ensuring that Zetalpa’s presence on the battlefield remains a constant threat.

    This deck also includes Worldslayer, which can eliminate all nonland permanents when Zetalpa connects, leading to an overwhelming advantage if your opponents fail to recover in time. Prior communication with your playgroup is wise before opting for this strategy, considering its controversial nature.

  • Ayli, Eternal Pilgrim Deck Guide: Top Cards & Strategies

    Ayli, Eternal Pilgrim Deck Guide: Top Cards & Strategies

    Ayli, Eternal Pilgrim is a noteworthy commander featured in the Magic: The Gathering Foundations set. Though this card is not new—having first appeared in the 2016 release, Oath of the Gatewatch—it has been reprinted in The List, making it accessible to a fresh wave of players.

    Ayli, Eternal Pilgrim represents a distinctive Orzhov (white/black) commander that allows for a blend of sacrifice and lifegain strategies. Orzhov is particularly well-suited for these approaches, facilitating the creation of a powerful Commander deck under Ayli’s leadership.

    Deck Overview

    The deck incorporates 32 creatures, 4 sorceries, 4 instants, 7 artifacts, 17 enchantments, and 34 lands. Most creatures either provide lifegain or benefit from it, while the enchantments serve as sacrifice outlets and offer control of the battlefield.

    Key Cards

    Ayli, Eternal Pilgrim

    As the key commander, Ayli, Eternal Pilgrim acts as your main source of value. You can consistently sacrifice creatures to trigger lifegain, so long as you have one mana available. In addition to providing lifegain, Ayli can serve as a removal tool if you have at least ten more life than your starting total, which is relatively easy to achieve with this deck.

    What’s advantageous about Ayli is that you don’t need her on the battlefield for the deck to function effectively. The lifegain and sacrifice strategies can operate independently, but having Ayli makes it much easier to maintain control once you accumulate enough life to exile nonland permanents.

    Dictate of Erebos / Grave Pact

    Both Dictate of Erebos and Grave Pact have similar effects, with Grave Pact being a bit less expensive to cast. They enable you to turn every creature sacrificed into a forced sacrifice for your opponents. It doesn’t matter whether the creature you sacrifice is strong or weak; both enchantments will activate upon its death.

    Importantly, they only trigger when a creature you control dies. This means that even if you’re not sacrificing a creature, your opponents will be cautious about attacking, as losing a chump blocker will compel them to sacrifice some of their own creatures.

    Jacked Rabbit

    Jacked Rabbit is incredibly useful in this deck. Its Ravenous ability allows it to enter with plenty of +1/+1 counters, which not only makes it more formidable but also generates 1/1 Rabbit tokens when it enters. These tokens can activate lifegain effects, significantly boosting your life total.

    In dire situations, Jacked Rabbit can be sacrificed to Ayli for lifegain equal to its toughness. If it has a lot of counters, this could translate to a substantial lifegain, helping you recover from low life points or meet the threshold needed for Ayli’s removal effect.

    Elenda’s Hierophant

    Elenda’s Hierophant is a creature you want to get onto the battlefield quickly once your lifegain engine is running. It gradually increases its stats and, with flying, can become a formidable attacker if your opponents lack sufficient blockers.

    Elenda synergizes well with Ayli since the life gained from sacrificing her can be considerable due to her likely high toughness. Additionally, the process creates several 1/1 Vampire tokens that can further trigger lifegain effects and act as future sacrifice fodder.

    Game Strategy

    An Ayli, Eternal Pilgrim deck is all about generating life while controlling the board. Important lifegain cards include Soul Warden, Soul’s Attendant, and Suture Priest. You’ll also want creatures that cause opponents to lose life when yours die, such as Blood Artist and Zulaport Cutthroat.

    Enchantments that create creature tokens are particularly vital, as they trigger lifegain abilities upon entry and provide sacrifice fodder for Ayli. Notable mentions include Bitterblossom and Black Market Connections, which also help with ramp and card draw.

    Many creatures can gain +1/+1 counters when you gain life, making them potent threats while also serving as excellent sacrifice options for additional lifegain. Cards like Ajani’s Pridemate and Voice of the Blessed are notable, but Archangel of Thune stands out, as it can distribute +1/+1 counters to all your creatures.

    The main goal of this deck is to outlast your opponents, achieving an insurmountable life total that protects you from elimination. You can also win through cards like Test of Endurance or Felidar Sovereign, which grant victory based on life thresholds. The combo of Exquisite Blood with any damage-dealing lifegain card can result in infinite damage.

    A drawback of the deck is that it often lacks major threats. While you can generate many tokens, they are usually not intimidating. Thus, opponents may not feel pressured to avoid attacking unless cards like Dictate of Erebos are in play.

    Utilize stalling cards like Authority of the Consuls and Blind Obedience to slow down your opponents and buy time to reach your win conditions.

  • Ultimate Guide to Captain America: First Avenger Commander Deck

    Ultimate Guide to Captain America: First Avenger Commander Deck

    Captain America, First Avenger is one of the standout legendary Hero cards featured in the Magic: The Gathering Marvel x Secret Lair Superdrop. This special set includes five different collections of cards, each highlighting a unique Hero. Each collection contains four reprinted cards with fresh artwork and sometimes renamed, along with a new legendary creature that can be a great centerpiece for your next Commander deck.

    Captain America, First Avenger focuses mainly on Equipment. This card can transform Equipment into damage against opponents and creatures, while also offering ways to bypass equip costs. These features make Captain America a strong choice for players who want to build a Voltron-style deck, where the goal is to enhance a single commander with many Equipment cards.

    Decklist

    The deck built around Captain America includes a total of 21 creatures, six sorceries, six instants, 25 artifacts, six enchantments, and 35 lands. Given its Equipment-centric strategy, many of the creatures and artifacts serve to support Equipment or are, themselves, pieces of Equipment.

    Key Cards

    Captain America, First Avenger

    As the heart of the deck, Captain America, First Avenger can enter the game quickly and begin equipping Equipment right away, thanks to its ability that activates at the beginning of combat.

    For just three mana, you can use your Equipment to deal damage after your attack while it was equipped. With powerful Equipment, this can lead to multiple removals as it targets up to three creatures. If your opponent is low on life, you might even close out the game by reducing their life total to zero.

    Excalibur, Sword of Eden

    One of the best Equipment cards for Captain America is Excalibur, Sword of Eden. Despite its high initial casting cost, the presence of numerous historic permanents can allow you to cast it at a lower cost, or even for free. It has a reasonable equip cost and grants an impressive power boost of ten to Captain America. After it deals damage, you can unequip it, sending 12 damage to any target. This is particularly useful for eliminating threats that could disrupt your plans, and re-equipping it is straightforward afterward.

    Cloudsteel Kirin

    Cloudsteel Kirin may not shine on its own as a creature, but when equipped, it offers tremendous value. Although its reconfigure cost is a bit steep, Captain America can navigate this effectively since it is classified as Equipment.

    When equipped, the Kirin ensures that you cannot lose and your opponents cannot win, which gives you a tactical edge as you chip away at their life totals. Plus, it grants flying, making Captain America harder to block.

    Chandra’s Ignition

    Chandra’s Ignition is exceptional for acting as a one-sided board wipe in many instances. By targeting Captain America, the card deals damage equal to its power to all opposing creatures and players. Generally, since Captain America will have substantial stats bolstered by Equipment, this ability can result in significant damage.

    Chandra’s Ignition enhances the damage dealt by Captain America and can bring down life totals faster than merely attacking.

    The Reaver Cleaver

    When it comes to ordinary stat boosts, The Reaver Cleaver falls short, but its ability to provide trample is notable, especially when combined with other Equipment that elevates stats. The real strength of this card lies in its capacity to generate Treasure tokens equal to the combat damage dealt by the equipped creature.

    However, keep in mind that the damage must come from combat, meaning that damage dealt using Captain America’s ability will not produce any Treasure tokens. Jeskai colors often struggle with ramping up mana, so generating these tokens becomes crucial for boosting your resources, especially since other sources of ramp are limited.

    How to Play the Deck

    The Captain America, First Avenger deck’s main strategy is to equip Captain America with as much Equipment as possible to amplify its stats. The Equipment can be unattached at any time to deal damage to multiple targets, ensuring you always have removal options as long as you have enough mana.

    While Captain America can work around the standard one Equipment attachment limit per turn, other cards help facilitate more Equipment attachments without spending mana. For instance, Forge Anew allows for a free equip activation each turn, Sigarda’s Aid attaches Equipment automatically upon entry, and Blacksmith’s Talent at level two also enables free attachment at the start of combat.

    The deck offers a wealth of search options to maintain consistency. Using cards like Steelshaper’s Gift, Fighter Class, and Open the Armory allows you to quickly gather the needed Equipment based on the game’s state.

    The primary method of winning with this deck is through combat damage, particularly Commander damage, as Captain America can easily reach the 21 damage threshold needed to eliminate opponents. Even if direct Commander damage isn’t an option, high stats and powerful effects can yield substantial damage outputs to end games quickly.

    The main weakness of this deck is its heavy reliance on Equipment. While you can equip on other creatures if needed, without adequate mana, you might find yourself limited in what you can do during your turn, primarily attaching Equipment to creatures without achieving significant impact.