الوسم: beast

  • Beast of Reincarnation Launches to Mixed Reviews

    Beast of Reincarnation Launches to Mixed Reviews

    Digital Phablet – The highly anticipated game from Game Freak, Beast of Reincarnation, has garnered mixed feedback from critics. While many see its great potential, they feel it is let down by mediocre execution.

    This reaction wasn’t entirely unexpected, considering Game Freak’s recent history with its Pokémon releases. Nevertheless, Beast of Reincarnation made a notable impression when it was revealed at an Xbox Showcase in June 2025, thanks to its impressive visuals, engaging gameplay, and outstanding sound design and soundtrack.

    IGN gave it a 6 out of 10, commenting, “This action RPG showcases some promising ideas, but they often get lost amidst the clutter.” The review added that while the game “should feel great in theory,” it ultimately falls short due to its emotionless storyline.


    VGC reviewed the game on a 3/5 scale, noting, “Game Freak’s latest venture is uninspired, yet it offers solid action and combat mechanics.” 

    Other critics pointed out issues such as limited enemy variety, performance hiccups, repetitive levels, and dull dialogue. 

    A player shared on X (formerly Twitter), “Unfortunately, Beast of Reincarnation turned out to be a huge disappointment for me. As a fan of the NieR series and Stellar Blade, I was expecting more than just recycled ideas. The world feels bland and empty; most encounters involve fighting the same types of mobs, and there are only a handful of bosses. I suggest waiting for a significant discount.”

    Those wanting to try the game without paying the full $59.99 can do so through Xbox Game Pass. The game is also available on PC, PlayStation 5, and Xbox Series X/S.

  • Where To Find A Majestic Beast Of Lore In Anno 117 Solving

    Where To Find A Majestic Beast Of Lore In Anno 117 Solving

    As a new leader in Anno 117: Pax Romana, it’s important to make a good impression on your rivals to avoid losing trade opportunities, breaking alliances, or facing attacks. Whenever you get a chance to build a positive relationship with a rival, you should take it.

    A special mission will pop up as you play, giving you a chance to do just that. If you’re wondering how to satisfy the self-made king, Athr Iorgwyn, here’s what you need to know about completing the Beast Of Lore quest in Anno 117: Pax Romana.

    How to Complete the Beast Of Lore Quest

    When the Beast Of Lore quest appears unexpectedly as you build your city on Juliana, you might be unsure of what it means. What does Athr Iorgwyn mean when he asks for a mythical creature? How can you satisfy him if the creature may not even exist? Luckily, the answer is already in your ship or trading post inventory.

    The Brazen Bull is a quest item you find while excavating ruins on Juliana. You come across it when you dig up ruins by chance. These ruins are scattered across the island, mainly to the northeast, near the foot of the mountains by the river.

    Keep in mind:
    You’ll find some valuable items in the ruins you uncover on Juliana. Hold onto them because you might need them later.

    These ruins are among the first you encounter when expanding your settlement. Removing them takes a lot of resources and effort, but once cleared, you get some resources back and the Brazen Bull.

    How to Find and Use the Brazen Bull

    Once you have the Brazen Bull, the next step involves presenting it to the king. Later in the game, as your relationship with Albion’s ruler Athr Iorgwyn improves, he will ask you for “a majestic beast.” Showing him such a magnificent creature will boost your standing.

    To complete the quest, place the Brazen Bull on your ship and sail to Athr Iorgwyn’s lighthouse. When you arrive, select the lighthouse and agree to give him the bull. After doing so, the Brazen Bull will be removed from your inventory, and your relationship with the king will get better.

  • How to Complete the Beaver’s Stick Mission in Dying Light: The Beast

    How to Complete the Beaver’s Stick Mission in Dying Light: The Beast

    Dying Light: The Beast offers a variety of strong weapons, but have you tried the Mysterious Stick? This hidden weapon can only be unlocked by following certain steps involving wood, water, and a secret safe zone tucked inside an underwater cave.

    The Mysterious Stick isn’t something you’ll find just wandering around Castor Woods. If you want to add it to your inventory, follow these steps carefully. Here’s how to get the Mysterious Stick in Dying Light: The Beast.

    How To Find The Mysterious Stick

    The Mysterious Stick is a legendary blunt weapon that deals 538 base damage. It has 160 durability, but once it’s damaged, it can’t be repaired. Use it wisely. This weapon increases damage by 10% against humans and 6% against infected enemies, and it always knocks enemies down. That allows you to easily stomp enemies’ heads once they’re on the ground.

    To unlock this secret weapon, you need to find six wooden sticks near rivers throughout Castor Woods, rebuild a beaver dam, and then explore an underwater cave. Here are the exact steps.

    Stick One Location

    Start by heading to the far left of the Castor Woods map. Along this river, you’ll find the first stick on some rocks by the water and a broken beaver dam. Your goal is to find six sticks and rebuild this dam before discovering the Mysterious Stick.

    Go to the spot shown on the map and pick up the first stick sitting on the rocks above the water. Use your Survivor Sense to help locate them if you’re having trouble.

    Next, move to the location below to find the second stick across the river on the opposite bank. It’s sitting in the water before the river widens, near some trees and a wrecked car.

    The third stick is further downstream, before the overpass. Look near the water’s edge, close to some trees and debris.

    Stick Four Location

    After crossing the overpass at Beaver Creek, just before reaching Old Town, the fourth stick is in the grass by the water’s edge. Find it in this area to continue.

    Stick Five Location

    Head to the shore near the Mentel Asylum, crossing into Old Town. The fifth stick is hidden in the water beside some rocks. Use Survivor Sense for easier spotting.

    Stick Six Location

    The final stick is under a large overpass, sitting beneath some rocks. This completes your collection of sticks needed to rebuild the dam.

    Rebuild The Beaver Dam

    The next morning, return to the first location where you found the beaver dam and the first stick. Carefully place each of the six sticks in the broken dam, which stretches across the water. Walk slowly to find each spot where a stick fits, as some are hard to see. Use Survivor Sense if needed.

    When all sticks are in place, go to a nearby safe zone and sleep until morning. This allows the dam to be repaired, raising the water level. The closest safe spot is the Power Plant.

    Find The Beaver Den

    The morning after, go back to the dam and cross the newly reconstructed bridge of sticks. Dive into the water to the right of the dam and swim down into the underwater cave.

    Inside, explore the rooms. You’ll find a cozy den with a Beaver bed and a family photo on the bedside table. Down the corridor, there’s a larger safe zone with a workbench, stash bag, and a bed. Approach the bed and sleep until morning.

    Pick Up The Mysterious Stick

    The next morning, the Mysterious Stick will be on the workbench inside the safe zone. You can then take it and use it right away. Feel free to make this hidden den your safe spot for nighttime survival if needed.

  • How to Complete The What Lurks Beyond The Pines Side Quest in Dying Light: The Beast

    How to Complete The What Lurks Beyond The Pines Side Quest in Dying Light: The Beast

    In Dying Light: The Beast, side quests help expand the story of Castor Woods and give more details about the characters nearby. One of the first side quests you will find is “What Lurks Beyond The Pines.” During this quest, you will meet Eli, who is in the Town Hall trying to find his father.

    The quest starts at the Town Hall, usually around the time you are working on the Power Gambit part of the main story. Look for an exclamation mark icon in one of the rooms in the Town Hall and talk to Eli. He explains that he’s worried about his father, William, who has dementia and keeps wandering off. Eli thinks William might be somewhere familiar where he would feel safe.

    Next, you are sent to find William at the family cabin in the National Park, southeast of the Town Hall. Follow the marker to the cabin. Clear out any infected nearby before entering. Inside, you will find a map on the table pointing to nearby caves. There is also a Cave Spare Key to take with you. Read the letter near the bed and check the graffiti on the wall, which shows William is having a tough time mentally. It becomes clear that William is struggling from a past event before he moved into the Town Hall with Eli.

    Leave the cabin and climb ledges to reach the top, following the quest marker. You will come to a locked gate, and use the Cave Spare Key to get inside. Continue climbing by using ledges and jumping across to reach the next set of explosives. Be careful of infected and stay high to avoid them. When you reach the third cable, you’ll notice it is broken, so fix it quickly before continuing.

    Follow the blue cable to the final explosive. Carefully crouch, stay quiet, and avoid infected as you track the cable down into the caves. Attach the cable to the explosive once you find it. After connecting all cables, speak to William, who will give you his knife as a gift for Eli. Then, detonate the explosives and escape the caves by jumping into the water. Swim out through a tunnel, crawling through the water to reach safety.

    After escaping, return to the Town Hall and inform Eli about what happened. He will tell you to keep the knife for his father, which rewards you with a free knife, some manual pages, and 10,000 XP for finishing the side quest.

  • How to Use Beast Form and Solve Its Powers in Dying Light: The Beast

    How to Use Beast Form and Solve Its Powers in Dying Light: The Beast

    Most of Dying Light: The Beast will feel familiar if you’ve played the previous games, with parkour movement and intense zombie combat.

    One big new feature in this game is the “Beast” itself. Kyle is somewhere between human and a Volatile, which gives him access to unique and powerful moves.

    How to Enter Beast Mode and What It’s Used For

    You’ll first see Beast mode during the very first mission. Kyle gets surrounded by zombies and transforms. This early moment shows how Beast mode works — it’s triggered when a meter fills up as Kyle takes or deals damage.

    In the beginning, Kyle can’t control Beast mode and automatically transforms when the meter is full. This might be frustrating if you want to save it for later. But as you level up and defeat Chimeras, you’ll upgrade the transformation ability, allowing you to trigger it manually by pressing L3 + R3.

    Once upgraded, you can activate Beast mode earlier, but that reduces its power. When in Beast mode, Kyle uses quick punches that eliminate most enemies in a few hits and moves faster than usual. Activating Beast mode also quickly restores some health, and more benefits can be unlocked as you upgrade your Beast Powers.

    Unlocking Beast Powers

    During the story, a character named Olivia assigns you quests to find and defeat powerful Chimeras, which upgrades your abilities. While the skill tree gives some customization, you’ll end up unlocking all the powers naturally by progressing through the story and defeating Chimeras.

    Most powers are combat-focused, such as heavy hits, knock-back moves, and the ability to pick up heavy objects. There are also special movement skills, like leaping high into the air or turning the grapple hook into a zipline.

    Two of the most important powers control the Beast transformation: one lets you choose when to activate it, and another allows you to access it when the meter is half-full.

    Tips and Tricks for Beast Mode

    Beast mode is fairly straightforward but keeping a few tips in mind can help you maximize it. Remember, the Beast meter resets whenever you rest—so using it at night, especially against Volatiles, is best saved for when you really need it.

    While the flashy special attacks look cool, they drain the meter fast and usually don’t do much more damage than simple attacks. It’s often better to just use quick swipes to keep your meter going, as they tend to take down enemies in one hit anyway. Using special moves for heavy damage isn’t worth the meter cost.

    A key piece of advice is to avoid activating Beast mode early if you have a power that grants control. Activating with a full meter gives you health regeneration, which is vital since taking damage fills the meter, leaving you more vulnerable if you activate it prematurely.

    Another useful tip — once you’ve unlocked the high jump and grapple hook in Beast mode, it’s a great way to get around quickly, especially during climbing sections. Combining these abilities lets Kyle reach almost any place, as long as you’re willing to spend some of your meter.

  • How to Complete a Volatile in Dying Light: The Beast and Solve Its Mysteries

    How to Complete a Volatile in Dying Light: The Beast and Solve Its Mysteries

    Dying Light is known for its parkour, first-person zombie fighting, and the main character, Kyle Crane. However, what really strikes fear are the monsters called Volatiles, who make a return in Dying Light: The Beast.

    Volatiles are the most dangerous zombies you’ll encounter in The Beast. They are just as lethal as in the previous games, capable of killing Crane with a few hits if you’re not careful. They only appear at night, but they roam the world and can detect you if you get too close. Once they spot you, they will chase and hunt you until you find a safe place.

    Most players will want to avoid Volatiles entirely, including staying clear of the night to stay safe. They are extremely powerful. In The Beast, Crane gets a noticeable upgrade, which slightly increases your chances against them, possibly making it somewhat easier to defeat Volatiles. There’s even an achievement for taking one down, so here’s how to do it.

    Before attempting to kill a Volatile, make sure you are as leveled up as possible. It’s best to do this after finishing the campaign, when you should be at least level 13 with all your Beast Powers unlocked. Next, fill your Beast Power meter completely by attacking enemies and taking damage. Since Volatiles only come out at night, and resting resets the meter, the best strategy is to fully charge it and wait until night falls naturally.

    Make sure your meter is full before transforming, since transforming without a full meter won’t restore any health. When night comes, use your Survivor Sense to locate a nearby Volatile, marked with a glowing icon above their head. Approach quietly, avoid attacking multiple enemies at once, and sneak close enough for the kill.

    When you’re close enough, transform into Beast mode and focus on attacking the Volatile with basic strikes. A fully charged meter of punches should be enough to kill it, provided you avoid getting hit too many times yourself. Concentrate on quick, consistent hits rather than heavy or special attacks, which drain your meter faster. With enough quick assaults, the Volatile will eventually be vulnerable to a takedown, earning you the “Apex Predator” achievement and some loot.

    If you get knocked out of Beast mode, remember that Volatiles are weak to UV light. Use your UV flashlight to stun them, then continue attacking. If that doesn’t work, though, you might be out of luck.

  • Where to Find Honey Beasts in Fallout 76: A Complete Guide

    Where to Find Honey Beasts in Fallout 76: A Complete Guide

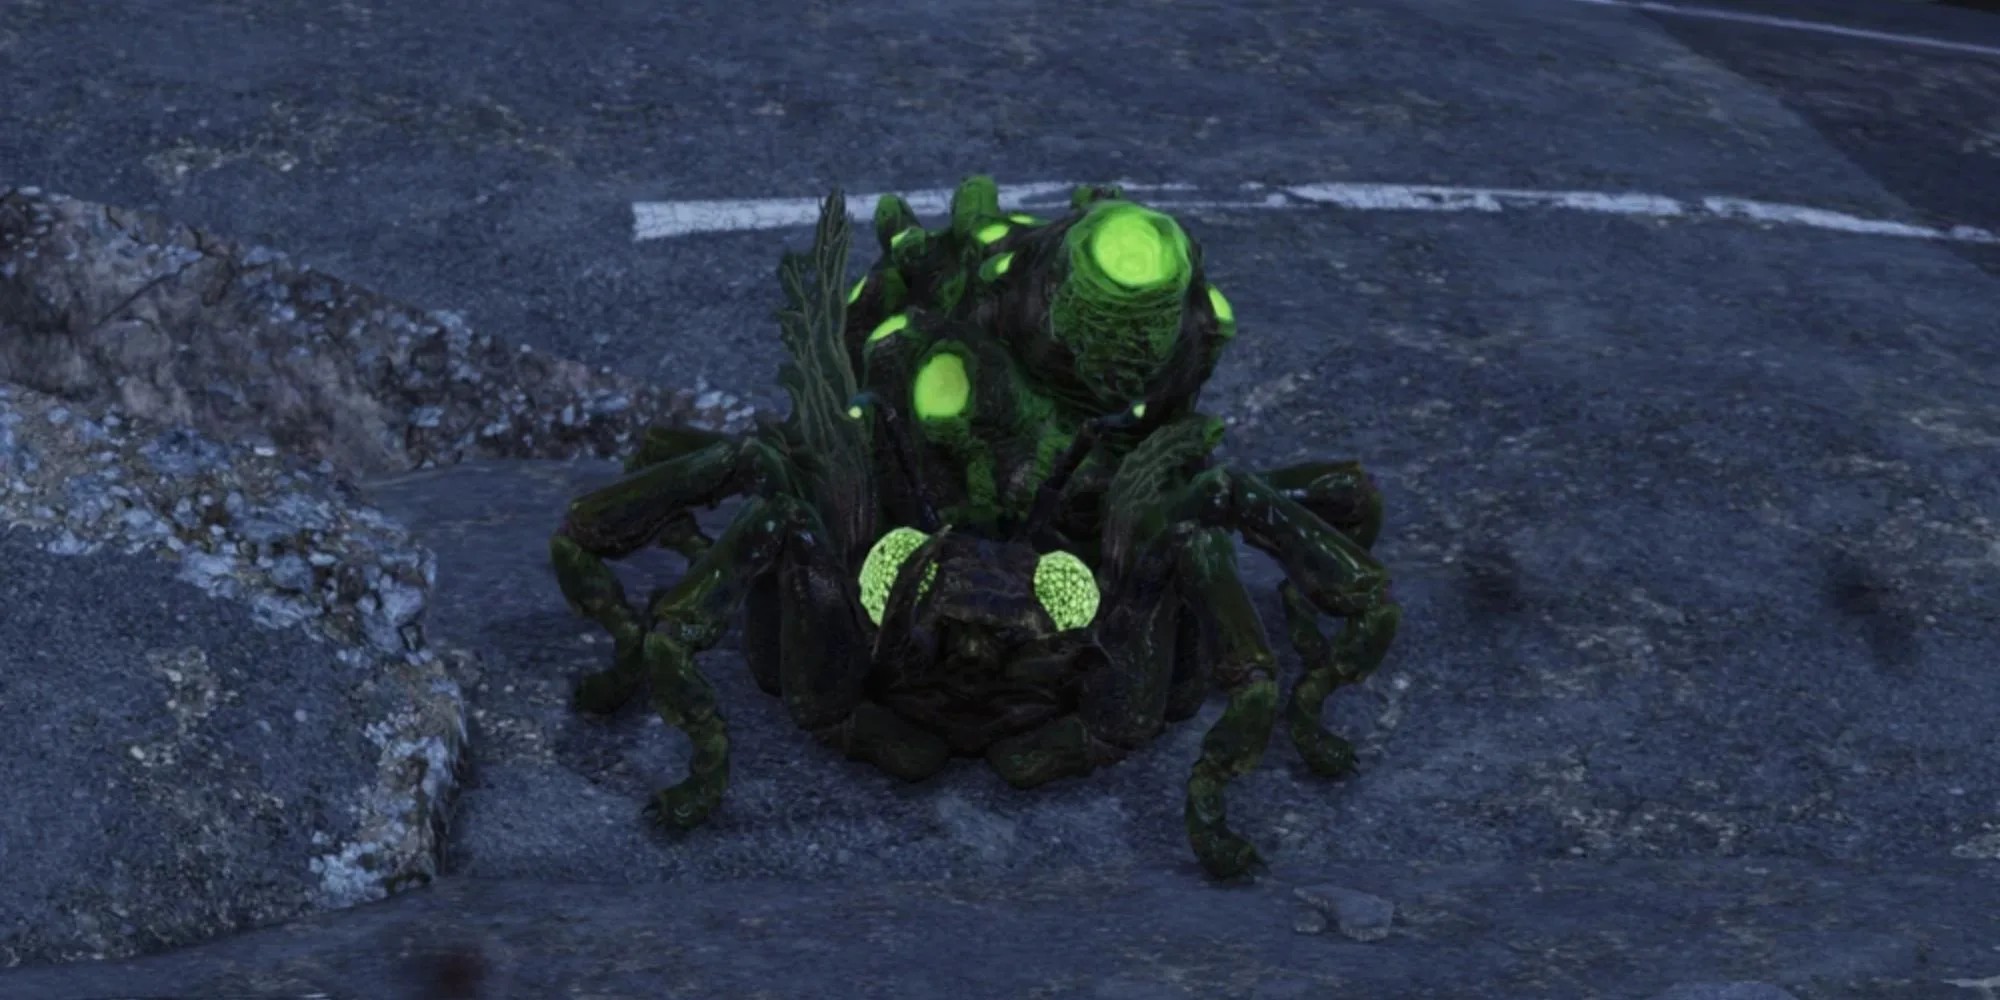
    When venturing through the post-apocalyptic landscape of Fallout 76, you’ll encounter a variety of enemies, and one of the notable ones to be cautious of is the Honey Beast.

    Defeating Honey Beasts not only rewards you with various loot items but also grants a fair amount of experience points. While locating these formidable creatures on the map can be somewhat challenging, they do have several spawn locations. This guide will help you pinpoint all the Honey Beast spots in Fallout 76.

    Updated December 27, 2024: Searching for every Honey Beast location in Fallout 76 can be time-consuming, but we’ve simplified the process for you. We’ll provide detailed information about where to find Honey Beasts and tips to increase your chances of encountering them. Also, consider testing the perk card changes introduced in season 19 during your hunts.

    What Types of Honey Beasts Are There?

    In Fallout 76, you may encounter eleven different variants of Honey Beasts. These include:

    1. Standard Honey Beast
    2. Putrid Honey Beast
    3. Raging Honey Beast
    4. Glowing Honey Beast
    5. Rabid Honey Beast
    6. Frenzied Honey Beast
    7. Poisonous Honey Beast
    8. Giant Honey Beast
    9. Deadly Honey Beast
    10. Scorched Honey Beast
    11. Prime Honey Beast

    Note: The Prime Honey Beast can only appear during the Meat Week’s Prime Cuts event, which is a seasonal event held in the Savage Divide. During this event, expect six Prime Honey Beast spawns.

    Despite their varied forms and characteristics, all Honey Beasts share common loot drops, including:

    • Stimpak
    • Honey
    • Honeycomb
    • Gold Scrap
    • Excess Adhesive
    • Royal Jelly

    Where to Find Honey Beasts

    One of the prime locations for spotting Honey Beasts is directly south of the Middle Mountains Pitstop in the Savage Divide, where you can typically find three Honey Beasts.

    You can also discover another three spawns near Solomon’s Pond.

    Previously, you could find as many as eight Honey Beasts in this area when it was named the Middle Mountains Cabins. However, post-update, it has been rebranded as Once In A Blue Moon and is now home to the Blue Ridge Caravan Company, featuring two vendors, Vera and Clyde, where only three spawns will appear.

    Similarly, check out the Seneca Rocks Visitor Center, as Honey Beasts often appear here alongside Scorched Mobs. Be cautious, as these mobs may defeat the Honey Beasts before you can reach them, so take them out first.

    Additionally, venture into the Treetops to find three more Honey Beasts or explore a cave near Freddy Fear’s House of Scares in the Mire region for another great spawn point.

    If you’re not encountering any spawns or notice fewer than expected, consider switching servers by exiting to the main menu and relaunching in a new world. The chances of finding Honey Beasts in these areas are quite high, making them excellent spots for resource gathering.

    You may also find Honey Beasts in the garden between the Whitespring Resort and Whitespring Golf Club.

    Lastly, look for a dead Honey Beast at the Freak Show, situated east of Huntersville.

    To summarize, the top locations for finding Honey Beasts in Fallout 76 include:

    1. South of the Middle Mountains Pitstop near Solomon’s Pond (Savage Divide)
    2. At the Seneca Rocks Visitor Center
    3. A cave near Freddy Fear’s House of Scares (Mire Region)
    4. Between Whitespring Resort & Golf Club
    5. The Freak Show, east of Huntersville
    6. The Treetops

    Note: Keep in mind that Honey Beasts can also randomly spawn throughout Skyline Valley, particularly near the Shenandoah Visitor Center.

    What Events Spawn Honey Beasts?

    While many Honey Beast locations are fixed, you can also encounter them during specific events:

    Meat Week and Fasnacht Day are seasonal events, and while they don’t occur year-round, the other events tend to happen more frequently.

    Here’s a list of events where you might find Honey Beasts and their associated locations:

    Event Location
    The Irrational Fear North of Raleigh Clay’s Bunker
    Project Paradise Inside the biome lab of Arktos Pharma
    Enclave Event: A Real Blast Random chance to spawn at the Seneca Rocks Visitor Center
    Fasnacht Day (Seasonal) Public event in Helvetia, expect 2-3 spawns
    Scorched Earth Fissure Site Prime, south of Drop Site V9
    Primal Cuts (Seasonal) Occurs every 15 minutes during Meat Week
    Dogwood Die Off Only at Graninger Farm

    With this information, you should be well-equipped to track down the elusive Honey Beasts throughout Fallout 76! Happy hunting!