To obtain one of the most legendary weapons, the IA-Co1W2 Moonlight, also known as the Moonlight Blade, in Armored Core 6, you must reach the conclusion of chapter 4, titled Reach the Coral Convergence. It’s advisable to equip the Songbird Grenade Launcher and Ben Machine Guns for efficient enemy elimination. After you acquire the weapon, it will appear in your inventory only upon defeating the chapter’s boss.
Now, let’s dive into why acquiring this weapon in Armored Core 6 is essential and how to do it.
Location of the Moonlight Blade
At the conclusion of the Reach the Coral Convergence mission, eliminate V6 and Gun 3 before advancing to the next checkpoint. From there, proceed toward the damaged bridge.
You can either drop into the water or stick to the left side and jet over the bridge to reach the opposite shore.
Beneath the bridge, you’ll encounter three Ancient Coral Wheel Machines; use Songbirds to eliminate them, or simply grab the weapon and take off.
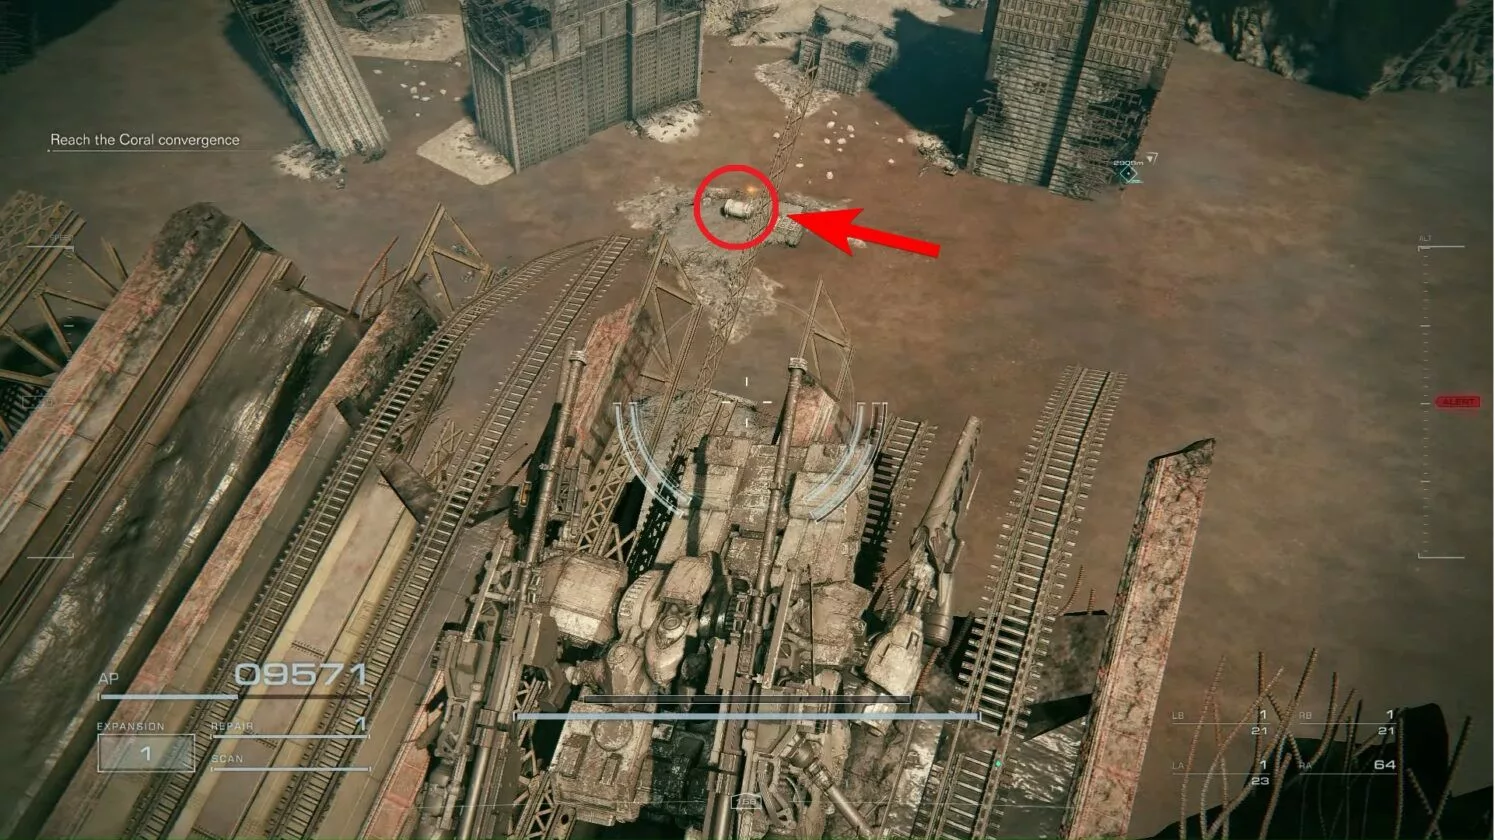
Upon reaching the other side, you will find a box marked with an objective indicator. This contains the Moonlight Blade.
If you’d prefer to avoid the foes guarding the box, fly across the bridge and move directly to its end. Jump off the left edge, and you will land right in front of the chest containing the Moonlight Blade.
Stats and Attack Methods of the Moonlight Blade
The Moonlight Blade is a formidable melee weapon in Armored Core 6 that emits powerful energy waves towards foes. It features a two-hit combo that offers impressive reach while maintaining a shorter distance but providing a wider arc for charged attacks.
A normal strike hits at a maximum distance of 290m.
This two-hit combo can target two nearby enemies simultaneously, permitting you to re-target efficiently. For engaging multiple enemies together, utilize the charged attack; it maxes out at around 220m with a broad width that strikes a larger area.
During a charge, you can cancel the attack at any moment to outsmart your opponent’s dodge and quickly follow up with a faster combo.
As for its specifications, the weapon boasts an attack power of 615 alongside an impact rating of 495. The charged attack of the Moonlight Blade surpasses all other weapons in AC6. Additionally, the Direct Hit Adjustment stat significantly boosts damage against staggered enemies, while the light PA Interference enhances its effectiveness against shields.
Faith is one of the many attributes in Elden Ring. It primarily influences your capability to cast incantations, but various weapons throughout the game also benefit from it, establishing Faith as a viable option for character builds. The goal of a dedicated Faith build is to locate a powerful Faith weapon that enhances your Faith attributes.
This focus is crucial for maximizing damage output during the late stages of the game, as Faith builds often struggle with damage output against the tougher late-game bosses.
10) Halo Scythe
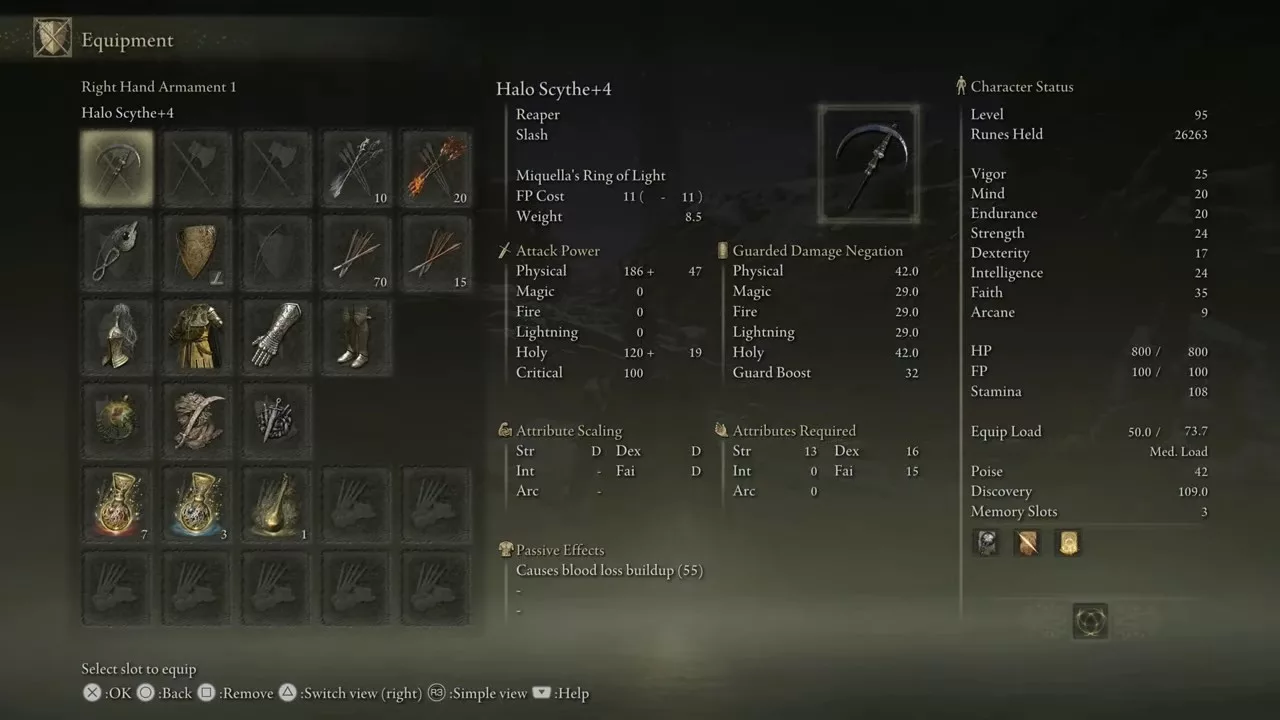
The Halo Scythe is attainable early on in the game, allowing you to develop your Faith build right away in Elden Ring. It is also among the simpler Faith weapons to acquire in the game.
This weapon inflicts Bleed damage, which aids in stacking blood loss on enemies. Its special skill, Miquella’s Ring of Light, releases Rings that pursue enemies at a mid-range distance. It excels against undead opponents due to its Holy Damage and can follow up with additional attacks if you possess enough Focus Points for casting.
Here are the Halo Scythe’s scaling stats:
Strength: 13 (D)
Dexterity: 16 (D)
Faith: 15 (E)
Location: To acquire the Halo Scythe in Elden Ring, you will need to defeat the Clean Rot Knights, which can be found at various locations on the map, with new players likely encountering them in the center of Aoenia Swamp located in Caelid.
9) Magma Blade
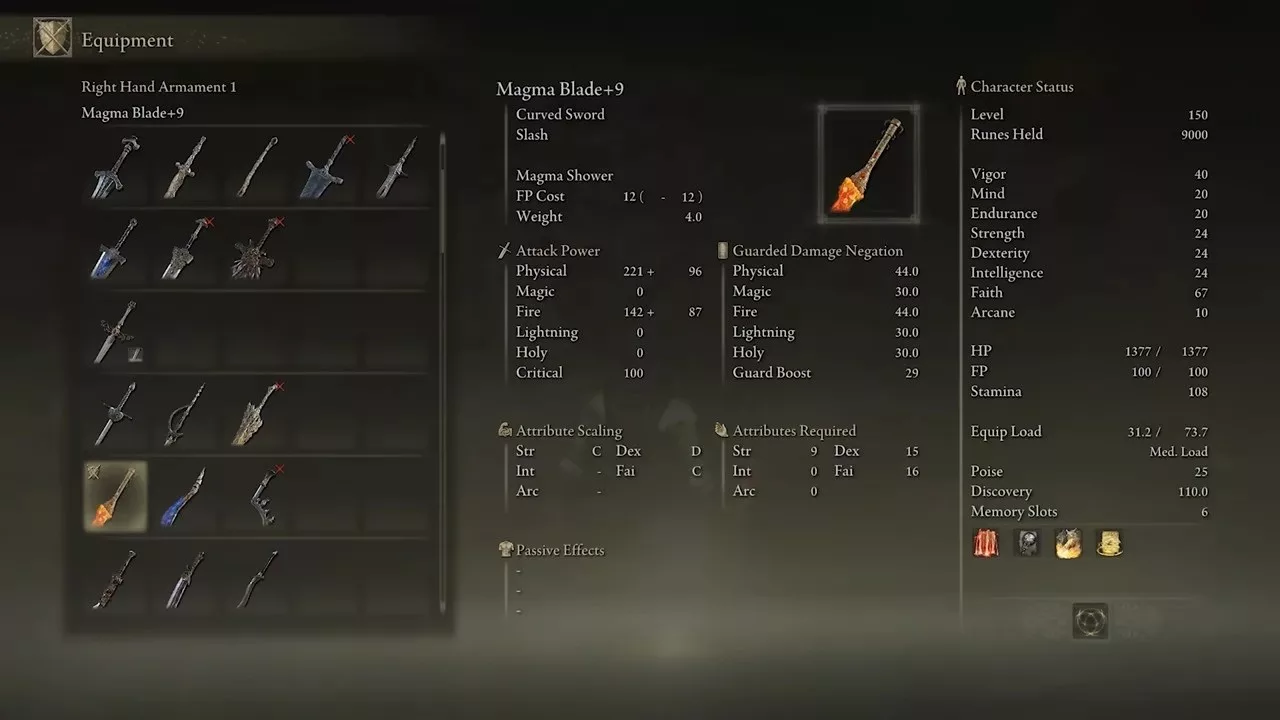
The Magma Blade, as a curved sword, boasts an exceptional attack set that allows for rapid assaults and significant damage per second (DPS). Additionally, as both a fire and physical weapon, the Magma Blade is easily buffed, enabling you to unleash devastating damage with consecutive hits.
Its weapon skill, Magma Shower, enables the user to slash foes while simultaneously showering magma upon them. The Magma Blade can be enhanced with Ashes of War, making it a formidable choice in PvP settings, where you can relentlessly bombard your opponent with attacks.
As for the scaling stats of the Magma Blade:
Strength: 9 (D)
Dexterity: 15 (D)
Faith: 16 (D)
Location: You can obtain this curved sword in Elden Ring by defeating the Man-serpent enemies at the Volcano Manor.
8) Black Knife
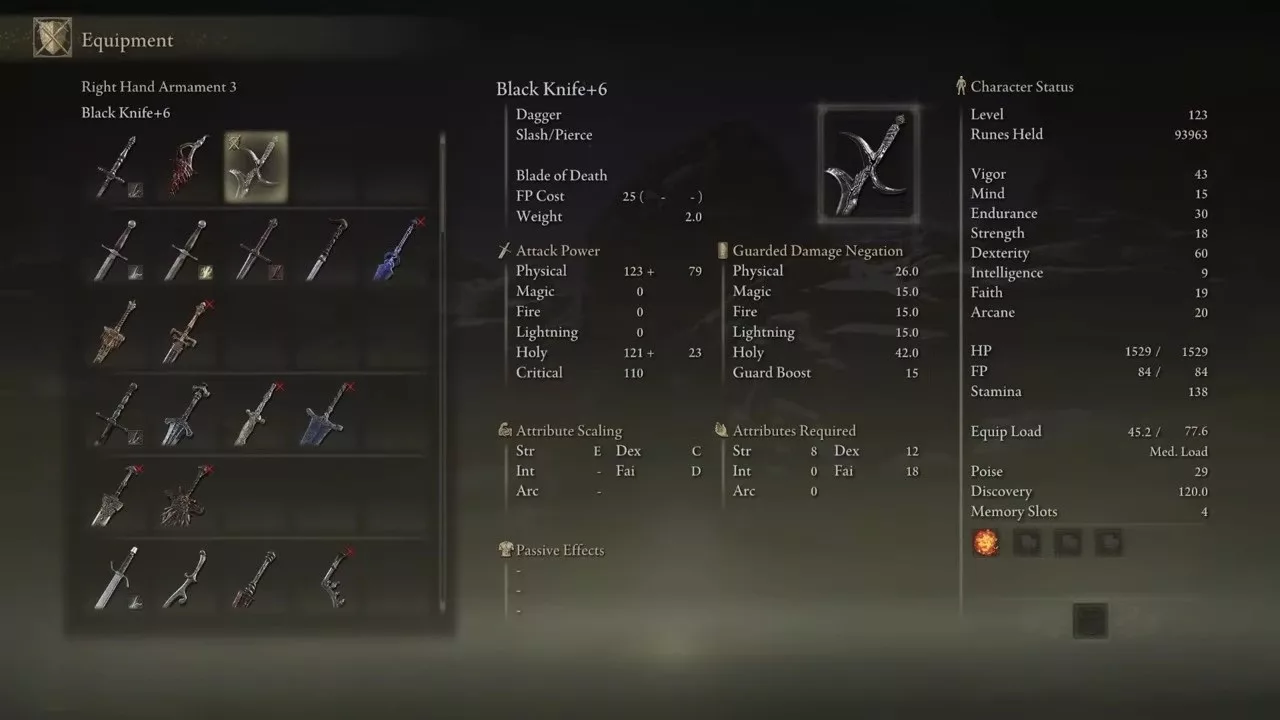
Although it’s a Dagger, the Black Knife stands out as a fantastic option among the best Faith weapons in Elden Ring. It inflicts extra Holy damage on enemies. The unique ability of the Black Knife is Blade of Death, allowing you to project a deadly projectile at your foe, significantly damaging their health.
This Ash of War is among the best in the game, as it introduces a death effect that inflicts damage over time on various enemies.
The scaling stats for the Black Knife are as follows:
Strength: 8 (E)
Dexterity: 12 (D)
Faith: 18 (D)
Location: To obtain this Dagger, you must defeat the Black Knife Assassin, found just outside the Sainted Hero’s Grave located in the Altus Plateau.
7) Envoy’s Longhorn
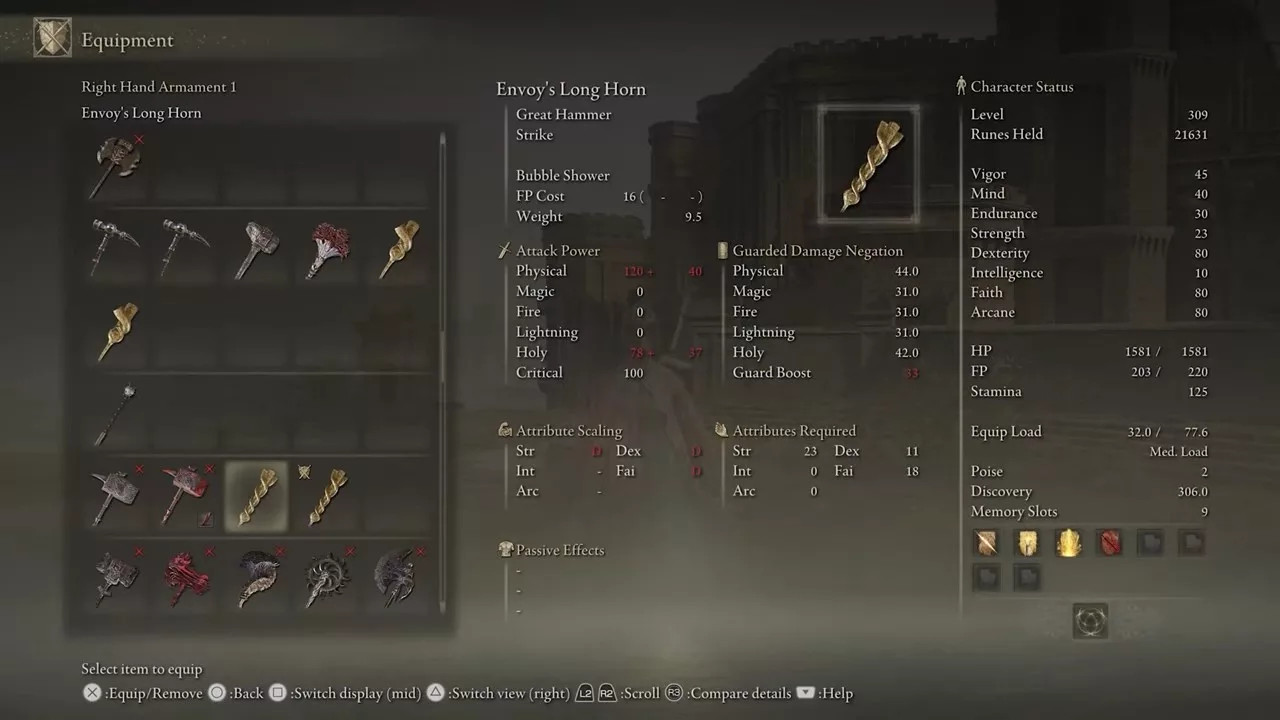
The Envoy’s Longhorn is a colossal weapon that commands respect for its immense damage in Elden Ring. It proves to be a formidable Faith weapon capable of tackling any foe, functioning best for those focusing on Strength and Faith builds.
Its high DPS potential allows you to utilize the Longhorn’s Bubble Shower Ash of War, unleashing a multitude of heat-seeking bubbles that target enemies, inflicting significant damage simultaneously.
Here are the scaling stats for the Envoy’s Longhorn:
Strength: 23 (D)
Dexterity: 11 (D)
Faith: 18 (C)
Location: You can farm this weapon by defeating enemies like the Large Oracle Envoy, commonly found at the East Capital Rampart in Leyndell, the Royal Capital.
6) Magma Wyrm’s Scalesword
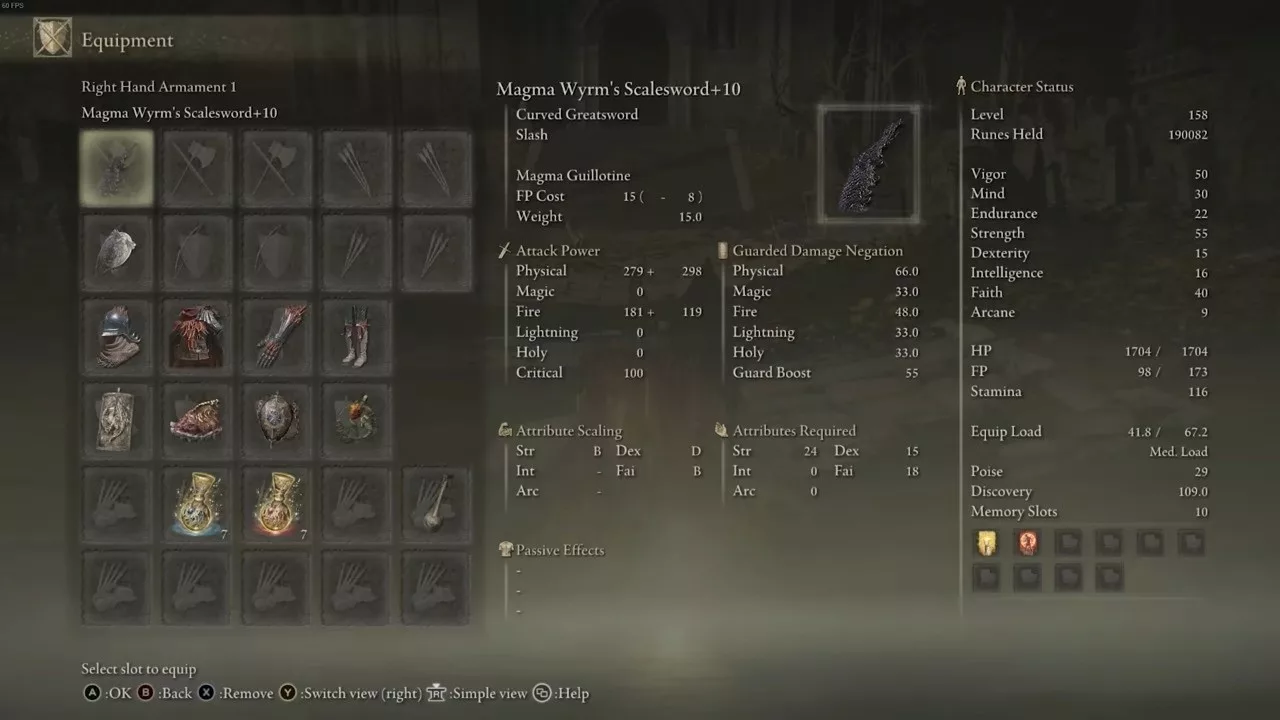
The next weapon is the Magma Wyrm’s Scalesword. This incredible Curved Greatsword delivers tremendous damage, depending on your build. Its Ash of War skill, Magma Guillotine, inflicts significant damage, though it requires careful timing to execute correctly.
The weapon is excellent for exchanging blows with opponents, rewarding timing and skillful execution of its special attack, which allows for follow-ups when you have enough Focus Points (FP).
This weapon is most effective in the mid-game. Its scaling stats are as follows:
Strength: 24 (C)
Dexterity: 15 (D)
Faith: 18 (D)
Location: To acquire this weapon, you need to travel to the Ruin-Strewn Precipice and defeat Magma Wyrm Makar, located directly above the Grand Lift of Dectus.
5) Maliketh’s Black Blade
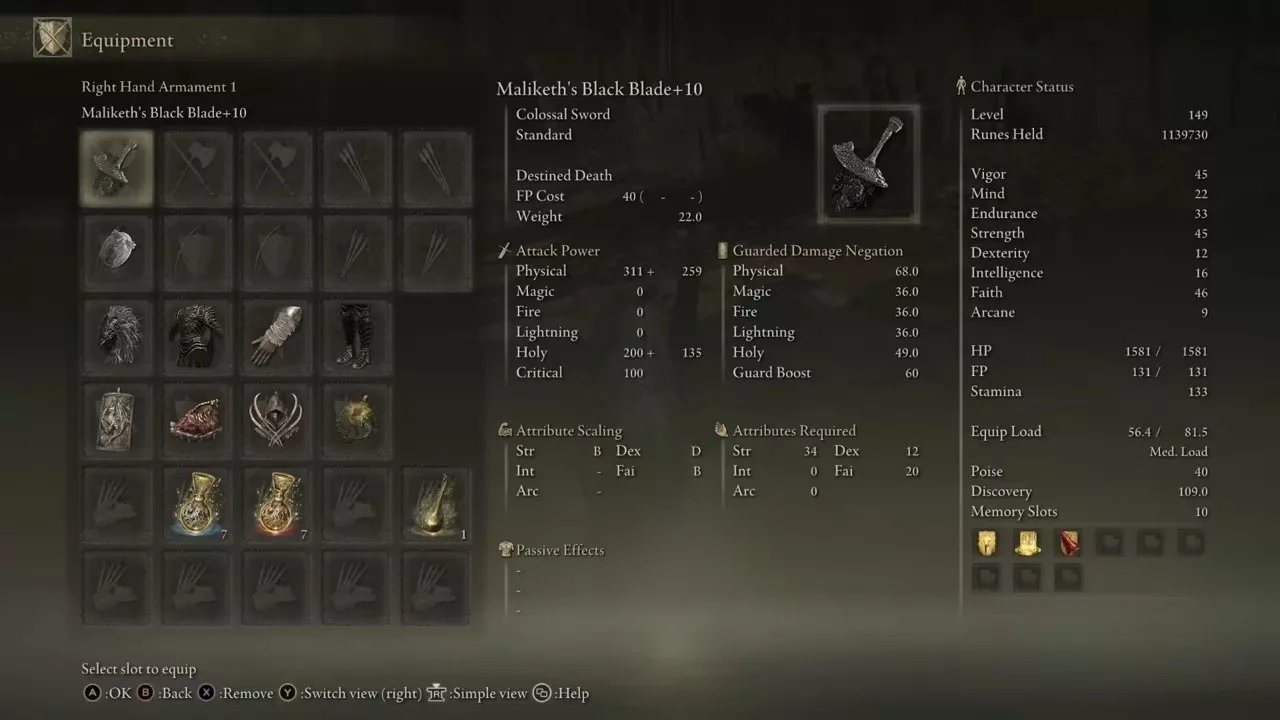
Maliketh’s Black Blade is essential for any Faith build in Elden Ring. It possesses the unique skill, Destined Death, allowing its user to plant the blade in the ground and summon a flurry of blade assaults upon their foes.
The scaling stats for Maliketh’s Black Blade are:
Strength: 34 (C)
Dexterity: 12 (E)
Faith: 20 (D)
Location: To obtain this blade, you must acquire the consumable item Remembrance of the Black Blade by defeating Maliketh, the Black Blade. Afterward, take this item to the Roundtable Hold and exchange it with Enia to receive Maliketh’s Black Blade.
4) Winged Scythe
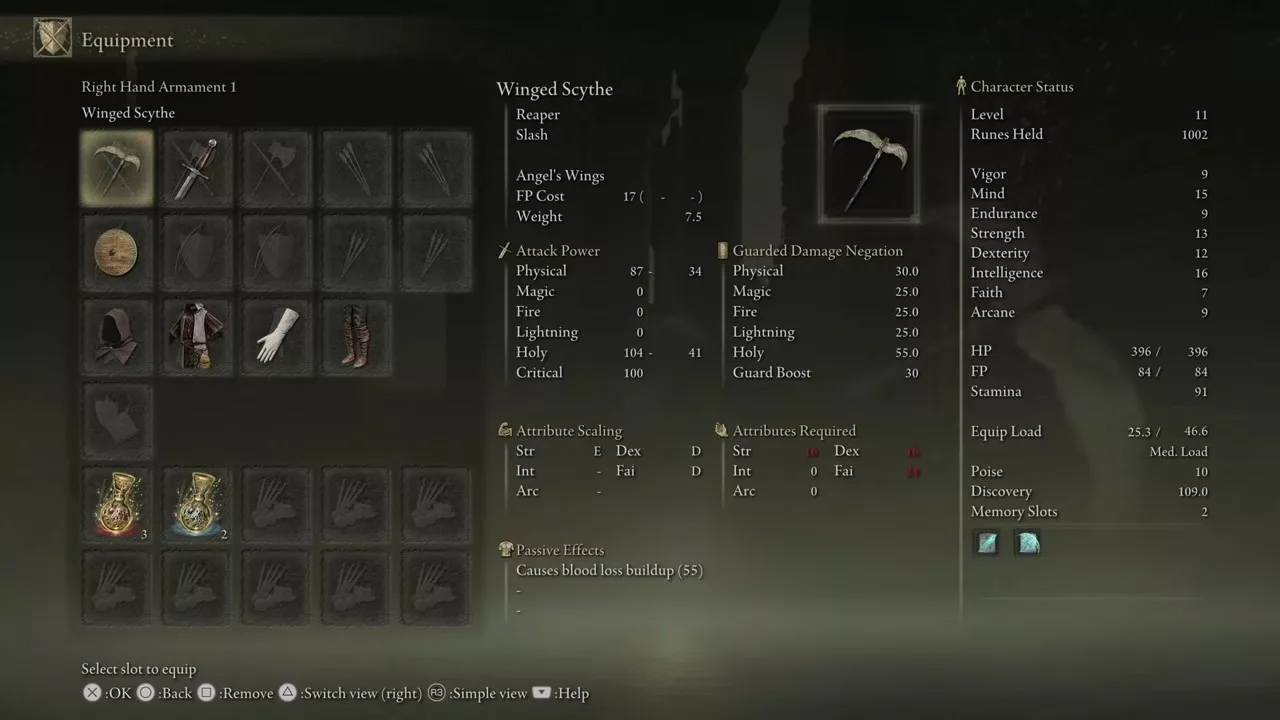
The Winged Scythe is perfect for players who enjoy Power Stancing weapons in Elden Ring, even though its strike speed may be on the slower side.
The unique skill, Angel’s Wings, may take some practice to use effectively, but once mastered, it can deal substantial damage to enemies while also building blood loss.
Here are the scaling stats for the Winged Scythe:
Strength: 16 (E)
Dexterity: 16 (D)
Faith: 24 (D)
Location: To find the Winged Scythe, venture to the Church of Pilgrimage site of Grace. After activating the site, head southwest towards the ruins of Tombsward Village. In those ruins, you’ll discover a tunnel entrance housing the Winged Scythe.
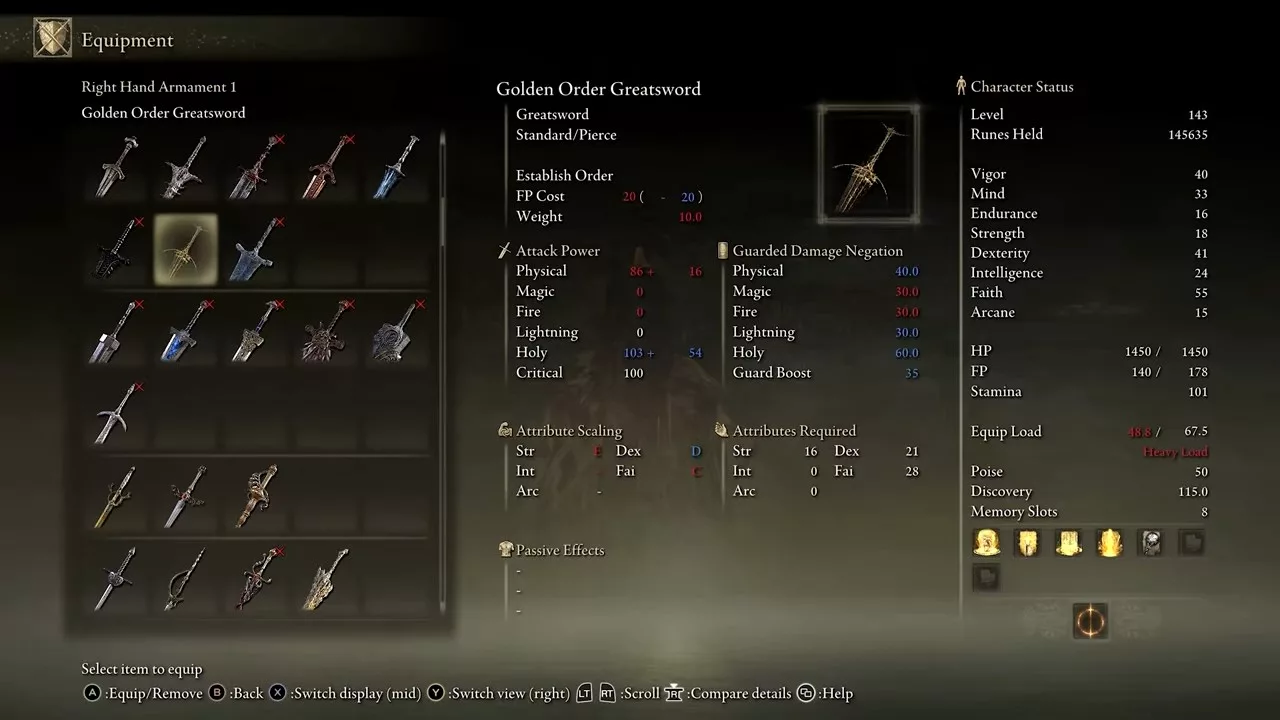
3) Golden Order Greatsword
This weapon belongs to the Greatsword category, and it is versatile enough to inflict substantial Holy damage to enemies at medium range. The unique skill, Establish Order, allows you to release a golden explosion around yourself while simultaneously launching a potent follow-up strike in the form of an arc of Holy light against foes. This sword also deals an additional 20% damage to undead enemies.
Here are the scaling stats for the Golden Order Greatsword:
Strength: 16 (E)
Dexterity: 21 (D)
Faith: 28 (C)
Location: To find the Golden Order Greatsword, you must defeat the Misbegotten Crusader situated at the Cave of the Forlorn.
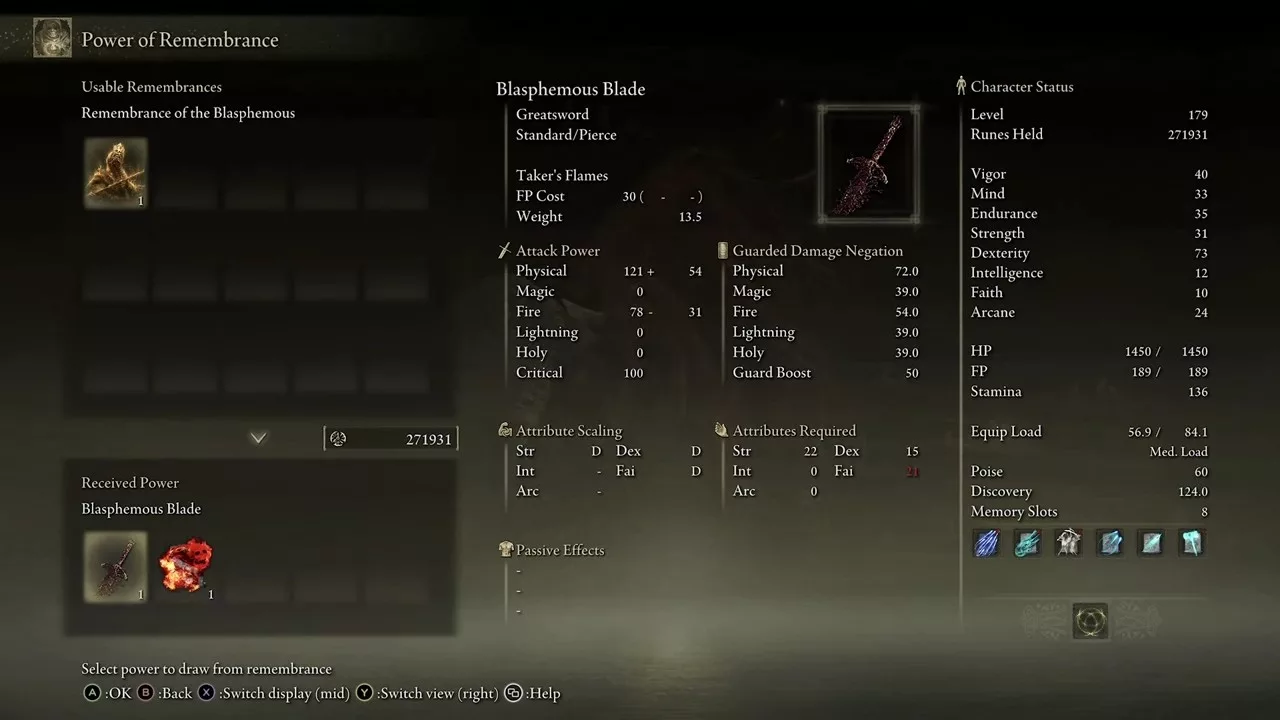
2) Blasphemous Blade
The Blasphemous Blade features a life-steal ability called Taker’s Flames, allowing you to restore health while dealing considerable damage to enemies. Taker’s Flames ignites foes and heals you for every successful attack against the afflicted enemies, providing incredible value.
Moreover, its default Ash of War is fixed, meaning it cannot be altered or enchanted with incantations. Despite this limitation, its Taker’s Flames ability makes it an excellent damage source.
The scaling stats for the Blasphemous Blade are detailed below:
Strength: 22 (D)
Dexterity: 15 (D)
Faith: 21 (D)
Location: To acquire the Blade, you need to obtain the Remembrance of the Blasphemous, a consumable item dropped by Rykard, Lord of Blasphemy. You then trade this item at the Roundtable Hold with Enia to receive the Blasphemous Blade in Elden Ring.
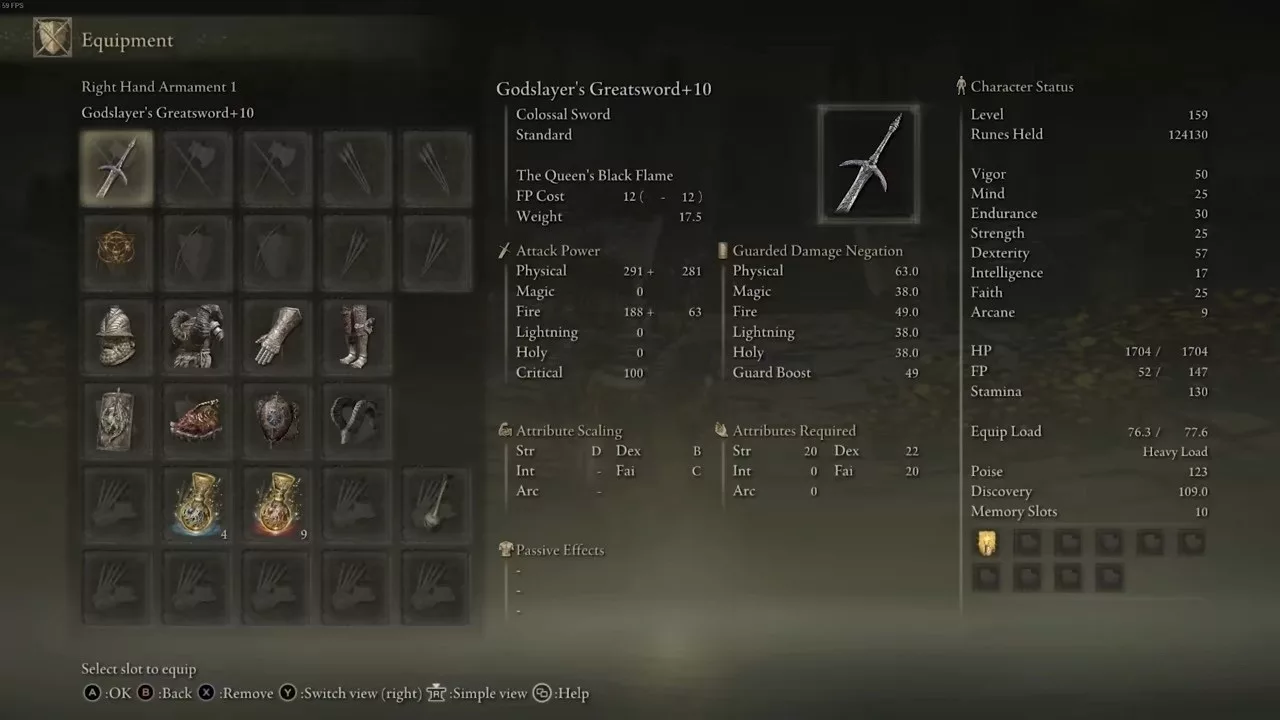
1) Godslayer’s Greatsword
The top Faith weapon on our list is the Godslayer’s Greatsword. As the best Colossal Sword for Faith builds, it offers impressive speed for its size, featuring a unique heavy attack: an uppercut.
Its Ash of War, The Queen’s Black Flame, inflicts enormous damage. Though the special attack takes time to charge, it can deliver formidable damage if timed correctly. You’ll want to carefully time your special moves to unleash their full power.
The Godslayer’s Greatsword serves well in both early and mid-game, scaling effectively with Faith and Dexterity. Its scaling stats include:
Strength: 20 (D)
Dexterity: 22 (D)
Faith: 20 (D)
Location: You can find the Godslayer’s Greatsword in the Divine Tower of Caelid. To obtain this weapon, you must defeat the boss residing in the tower, after which the weapon will be located in a chest within the boss room.
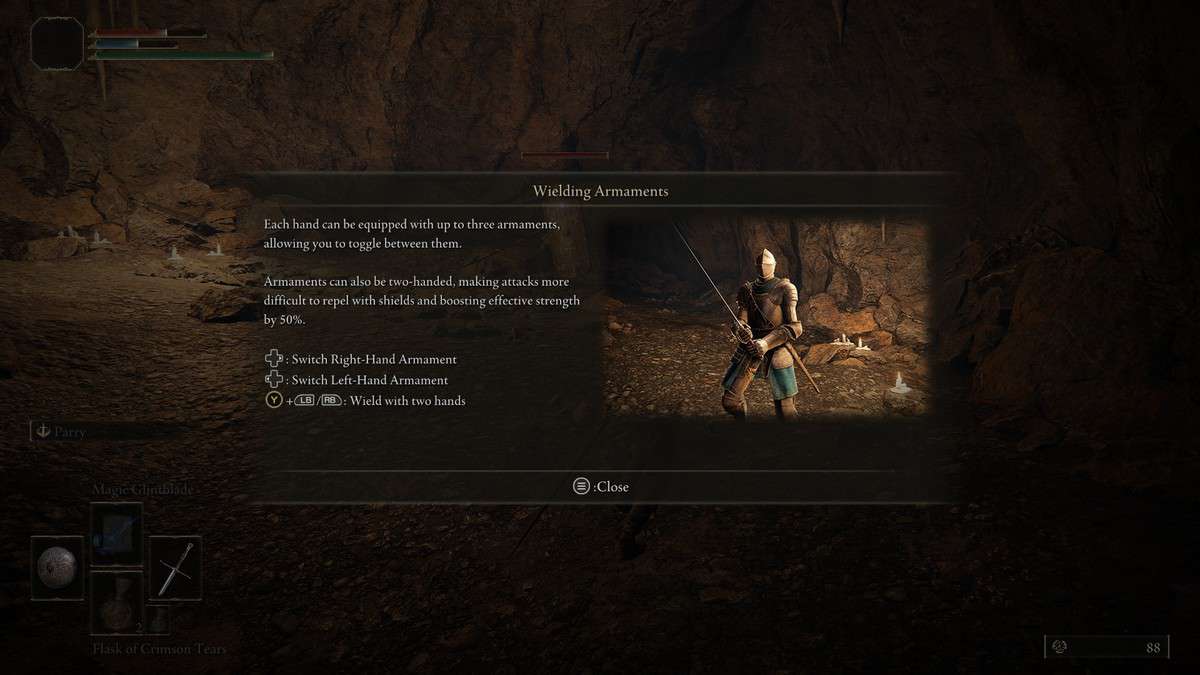
Two-handing and Power Stancing are methods to wield your weapons in Elden Ring. Each option offers a range of possibilities for your character build and playstyle, providing various benefits and drawbacks.
This guide will explain how to Two-hand and Power Stance in Elden Ring. Moreover, we’ll explore the benefits of each configuration. So, without further ado, let’s dive in.
How to Two-Hand Weapons in Elden Ring?
The majority of weapons in Elden Ring can be Two-handed, with the exception of bows and other ranged equipment, which require both hands from the outset.
To Two-hand a weapon in your left hand, hold down Triangle on PlayStation or Yon Xbox. After that, press either L1/LB or L2/LT, and your character will use both hands for the weapon. To Two-hand a weapon in your right hand, simply press Triangle/Y, then press either R1/RB or R2/RB.
For PC users, you need to hold the E key to Two-hand a weapon with a keyboard and mouse. To use your left and right-handed weapons, click the Left and Right mouse buttons, respectively.
How to Power Stance in Elden Ring?
Power Stancing functions similarly to Two-handing, as it enhances your damage output. However, instead of wielding the same weapon in both hands, Power Stancing involves equipping different versions of the same weapon in both your right and left hands.
For instance, if you have one Nagakiba in your left hand and another Nagakiba in your right, you’re effectively Power Stancing. Conversely, if you wield a single Nagakiba with both hands, you are simply Two-handing it.
Power Stancing is commonly referred to as Dual-wielding.
To engage in Power Stancing, you need to procure two copies of the same weapon, access your gear/inventory menu, and equip one in the left-hand slot while placing another in the right-hand slot.
Power Stancing isn’t applicable to all weapons, as some can only be acquired once during a playthrough. To use Power Stance with certain weapons, you may need to enter a New Game Plus (NG+) run.
Two-Handing Weapons vs Power Stancing?
The primary advantage of Two-handing weapons is the ability to handle weapons that have higher strength requirements than your current level. Two-handing grants you an approximate 50 percent boost to your strength, allowing you to wield and utilize the weapon even if your strength isn’t sufficient.
Two-handing weapons offers significant benefits during boss encounters, as it amplifies the damage dealt by light and heavy attacks. On the flip side, Dual-wielding operates as a high-risk, high-reward strategy, which can yield impressive results with the right attack combinations.
However, the downside to Two-handing is the inability to use a shield, which means you’ll have to evade enemy strikes without the extra protection a shield provides.
In contrast, Power Stancing introduces a host of fresh combos for your chosen weapon. This style is often preferred over Two-handing for this reason. Additionally, if you’re using a build that leverages elemental or status effects (like bleed, frost, or poison), equipping two of the same weapon will expedite the build-up of these effects.
This can significantly augment the effectiveness of your builds. Like Two-handing, Power Stancing also eliminates the option to utilize a shield, presenting a noteworthy risk.
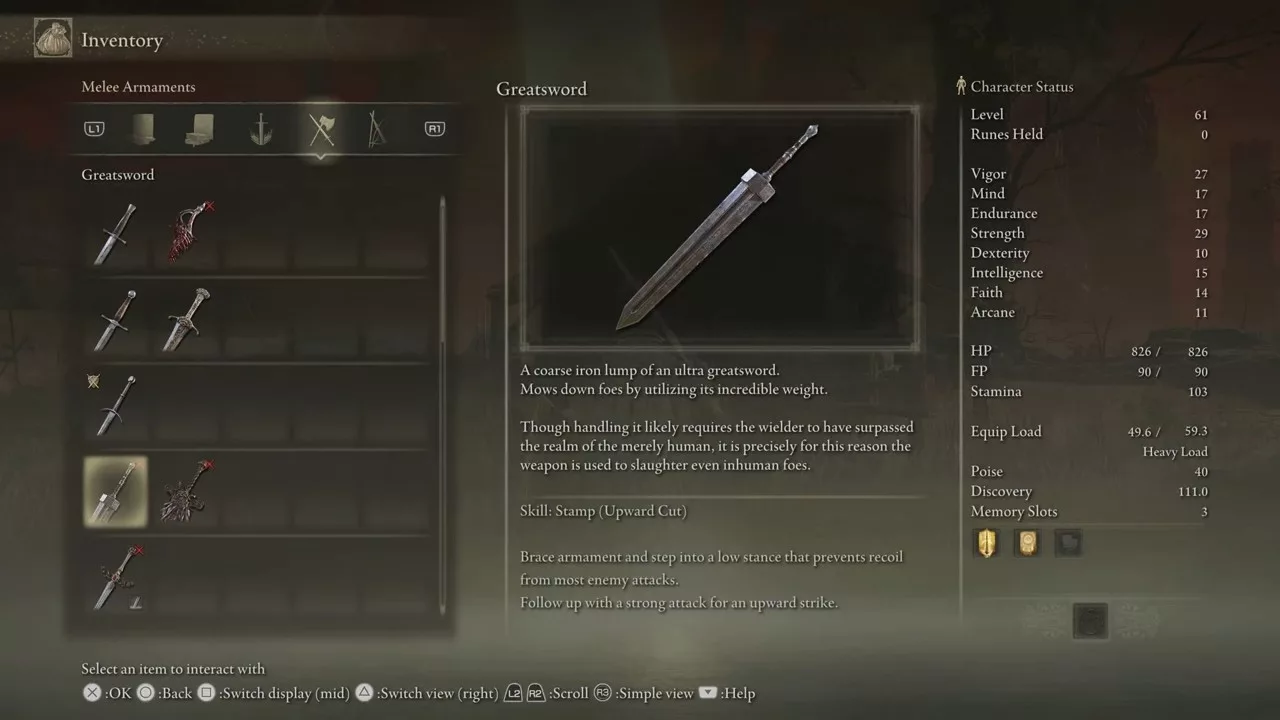
In Elden Ring, players can wield the Guts Sword from the iconic Berserk manga and anime, allowing for an immersive cosplay experience. Officially just referred to as the “Greatsword,” it is classified as a Colossal Weapon, making it ideal for heavier builds.
Its high strength requirement means you should allocate a good number of Runes to utilize it effectively. You can discover this powerful weapon in the Caelid region.
Location of Guts’ Berserk Greatsword in Elden Ring
Guts’ Berserk Greatsword can be found in a wagon situated in the Caelid region of Elden Ring. This area is known to be quite challenging to navigate early in the game.
Follow the northern Caelid Highway and proceed along the path. As you approach the Minor Erdtree, glance to the south to spot a large field populated by numerous giant dogs guarding a solitary wagon.
At the rear of this wagon, you will find a chest containing the Berserk Greatsword (though it’s simply labeled Greatsword in Elden Ring).
You can choose to eliminate all the dogs guarding the wagon or stealthily bypass them to obtain the sword. Engaging the dogs early in the game can prove challenging.
Berserk Greatsword Stats in Elden Ring
The Greatsword is a Colossal Sword that boasts impressive range and utilizes the standard colossal sword moveset. To wield it effectively in one hand, you will need 31 Strength and 12 Dexterity. It begins with a scaling of C in Strength and E in Dexterity.
As a colossal weapon, it ranks among the heaviest in the game, weighing in at 23. The default weapon skill for the Greatsword is Stamp, followed by an Upward Cut. You can customize this weapon skill with any Ash of War, allowing you to modify the affinities for your Greatsword.
This weapon can be upgraded using Smithing Stones and has a total of 25 upgrade levels. Furthermore, it provides decent defense when used for blocking during dual-wielding.
The Guts Berserk Greatsword is particularly effective within Strength-focused builds due to its formidable scaling of 162 physical attack damage, even without enhancements. This feature positions it as one of the most powerful and sought-after greatswords in Elden Ring.
Its staggering potential offers additional benefits, giving players the ability to interrupt enemy attacks and create opportunities for counterattacks. The sword’s greater range also allows players to engage enemies from a distance, offering a tactical advantage over foes wielding shorter-range weapons. The sheer satisfaction derived from its use is something most players will appreciate.
Conversely, this Greatsword does have its drawbacks. Players may find themselves moving slower due to its weight, necessitating careful planning of their build. However, for those fond of greatswords, this weapon can carry you through the majority of the game, particularly if fully upgraded.
It’s also essential to acknowledge that alternatives exist for greatsword enthusiasts in Elden Ring, such as General Radhan’s Greatsword and the Blasphemous Greatsword. Considering dual-wielding Greatswords with jump attacks can also prove effective, be mindful of this while making your choice.
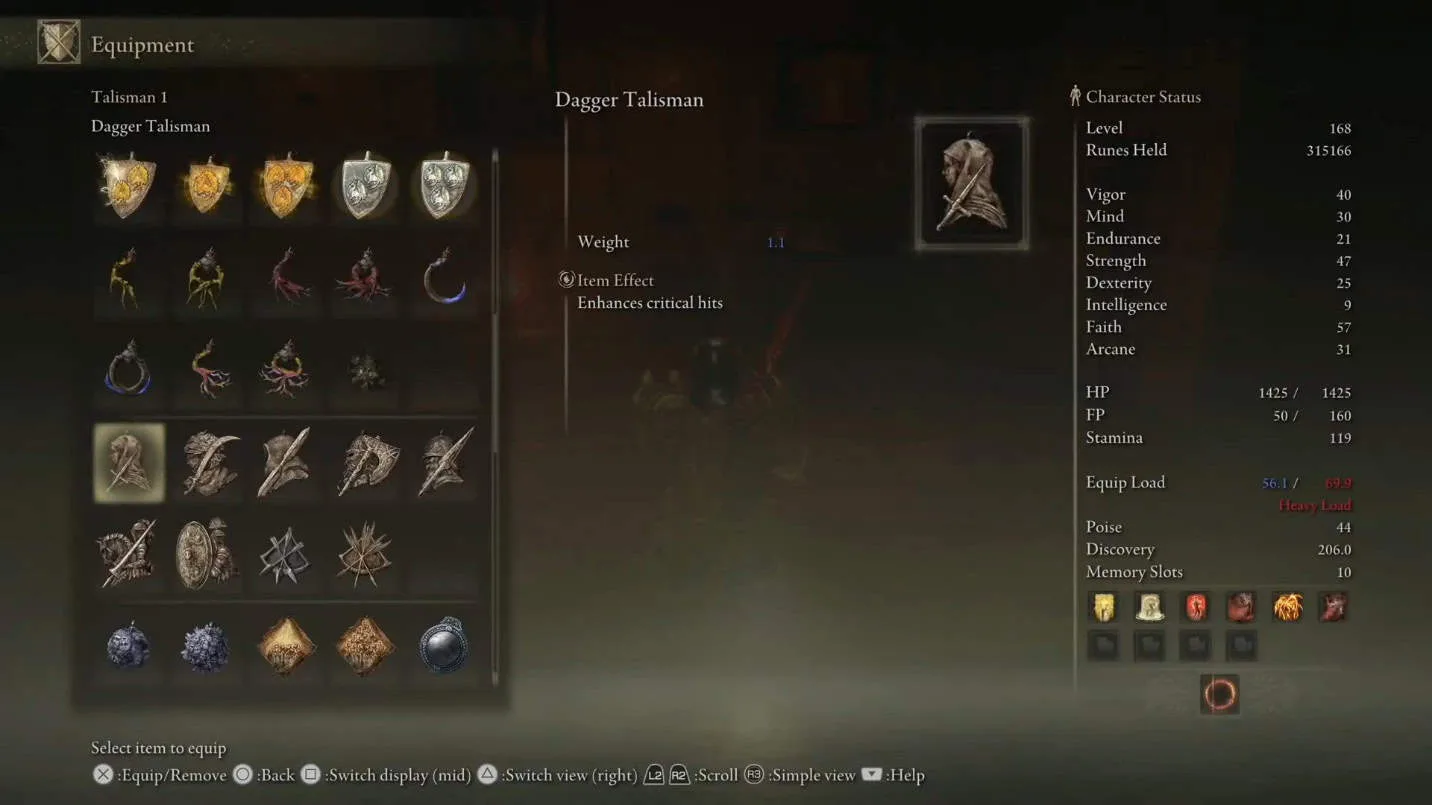
In Elden Ring., the Dagger Talisman stands out as one of the top choices for boosting your critical damage, particularly beneficial for backstab and parry builds. This talisman enhances your overall critical damage, adding extra power to those crucial backstabs and parry responses.
It’s ideal for any Dexterity-focused build, even if backstabbing isn’t your main strategy. You can find it at Volcano Manor later in your journey, but there’s a method to obtain it sooner as well.
Location of the Dagger Talisman in Elden Ring
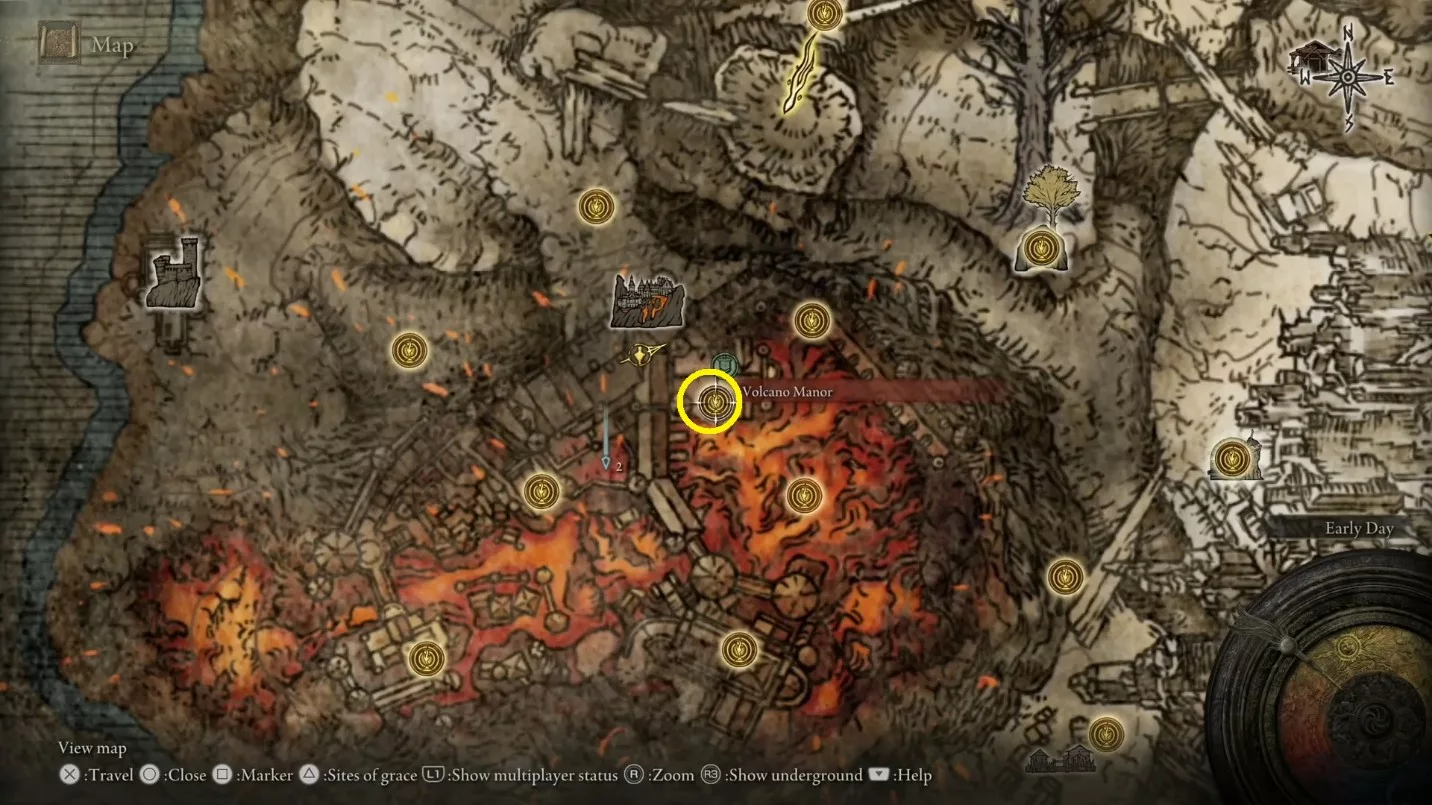
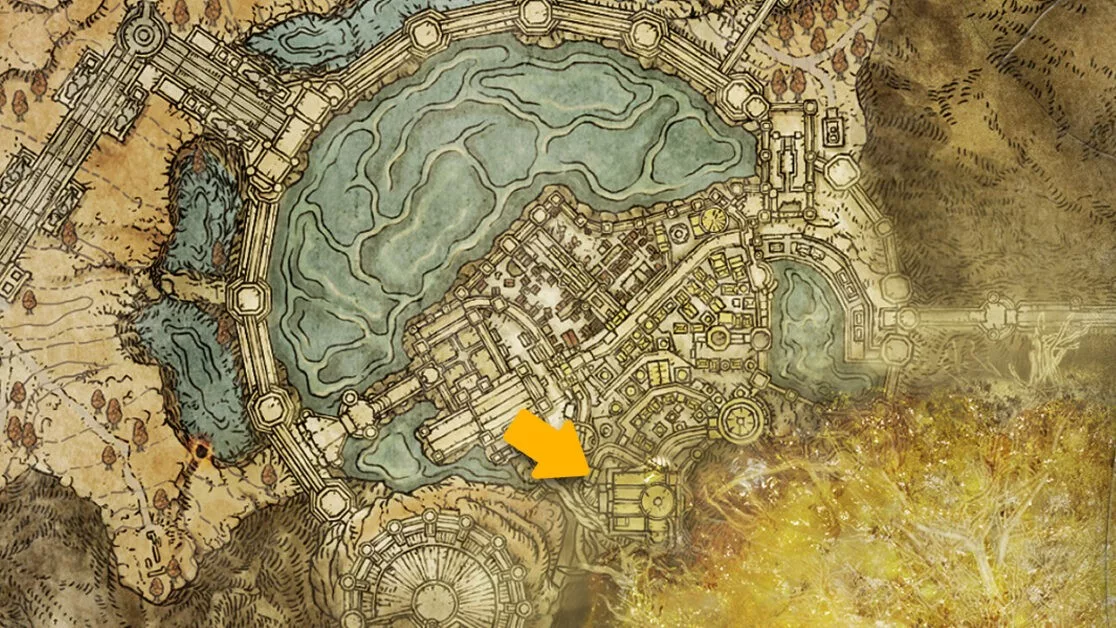
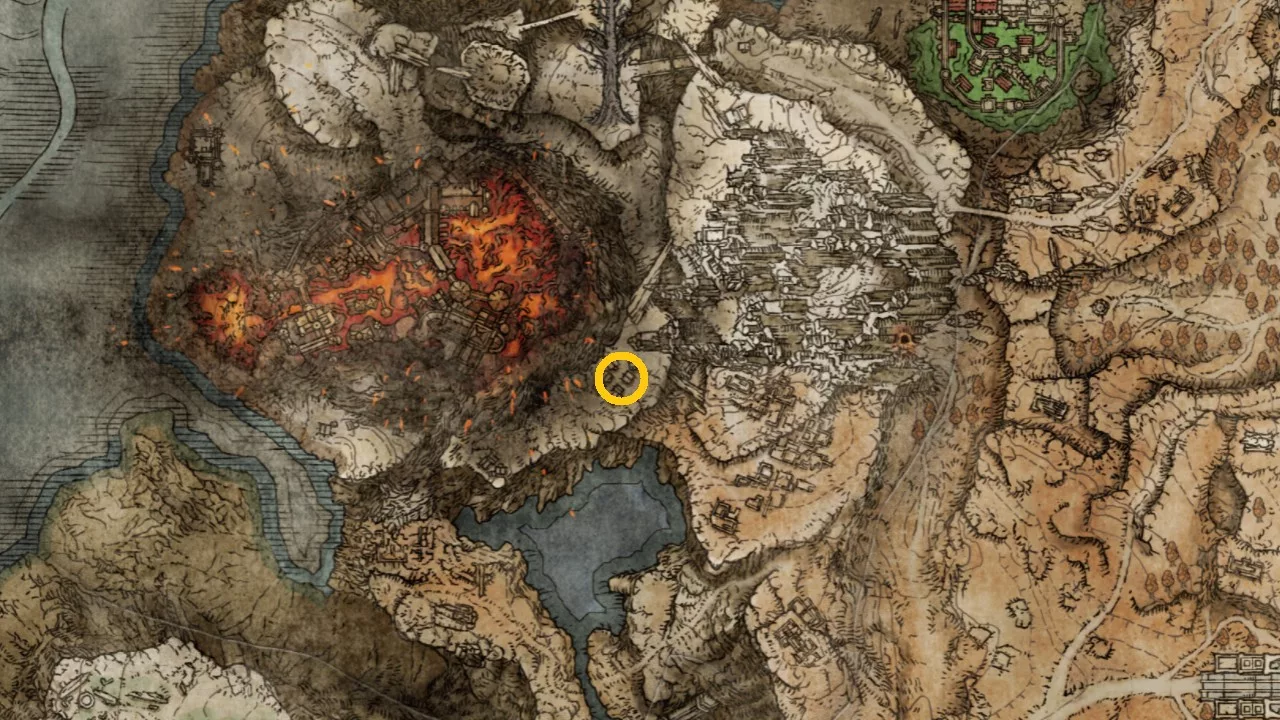
The Dagger Talisman can be located at Volcano Manor in Elden Ring. If you haven’t unlocked this area, you’ll need to complete Rya’s Questline, which will grant you access to Volcano Manor.
Upon entering the manor, take the elevator up and head out onto the balcony. Proceed around the balcony until you spot a platform below to jump down to, which is situated directly northeast.
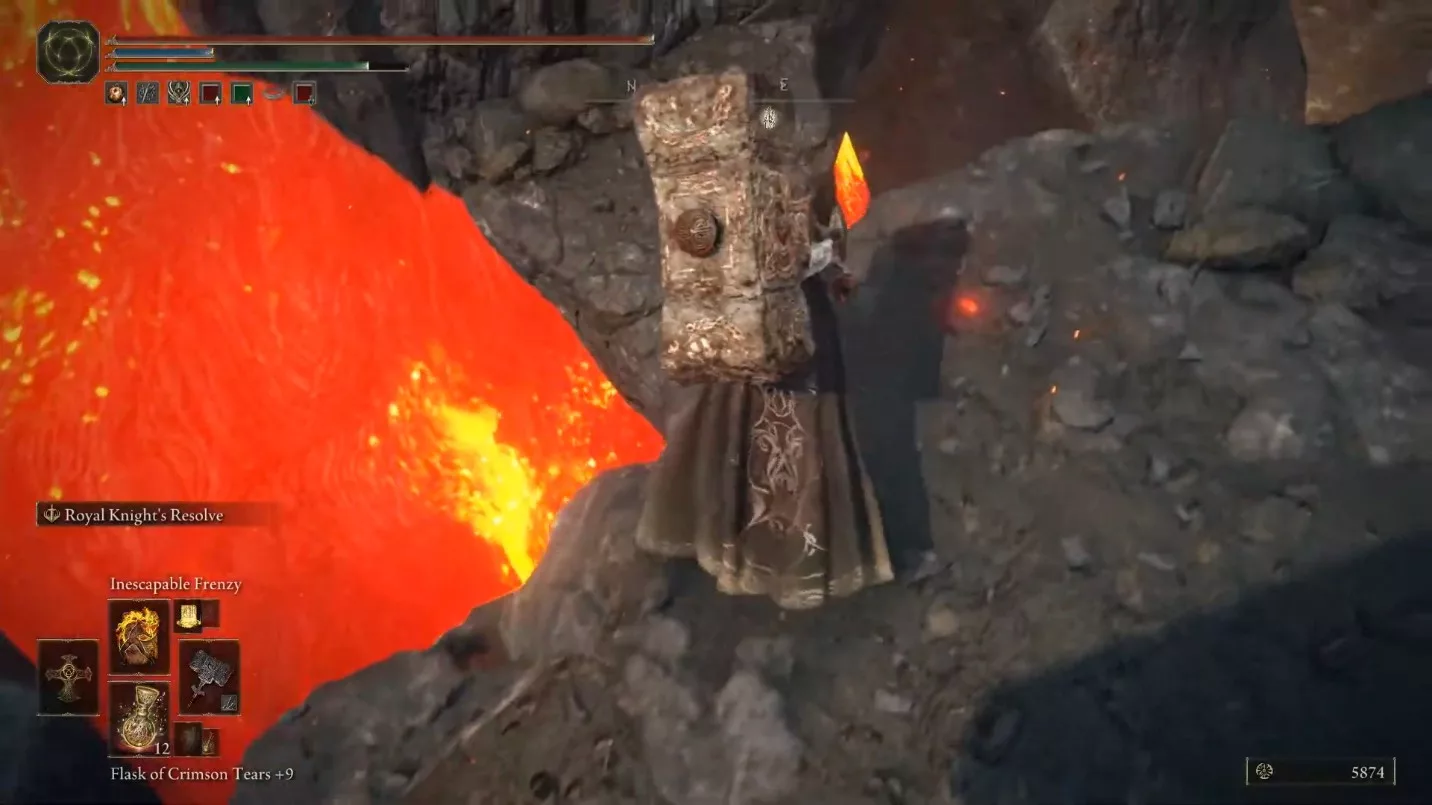
Keep moving along the platform until you encounter some lava snails to your east. Eliminate them to reveal another platform below that you can drop down onto.
Head north until you face a lava pool. From this point, proceed carefully from the west towards the building on your left. Enter through the window on your left side.
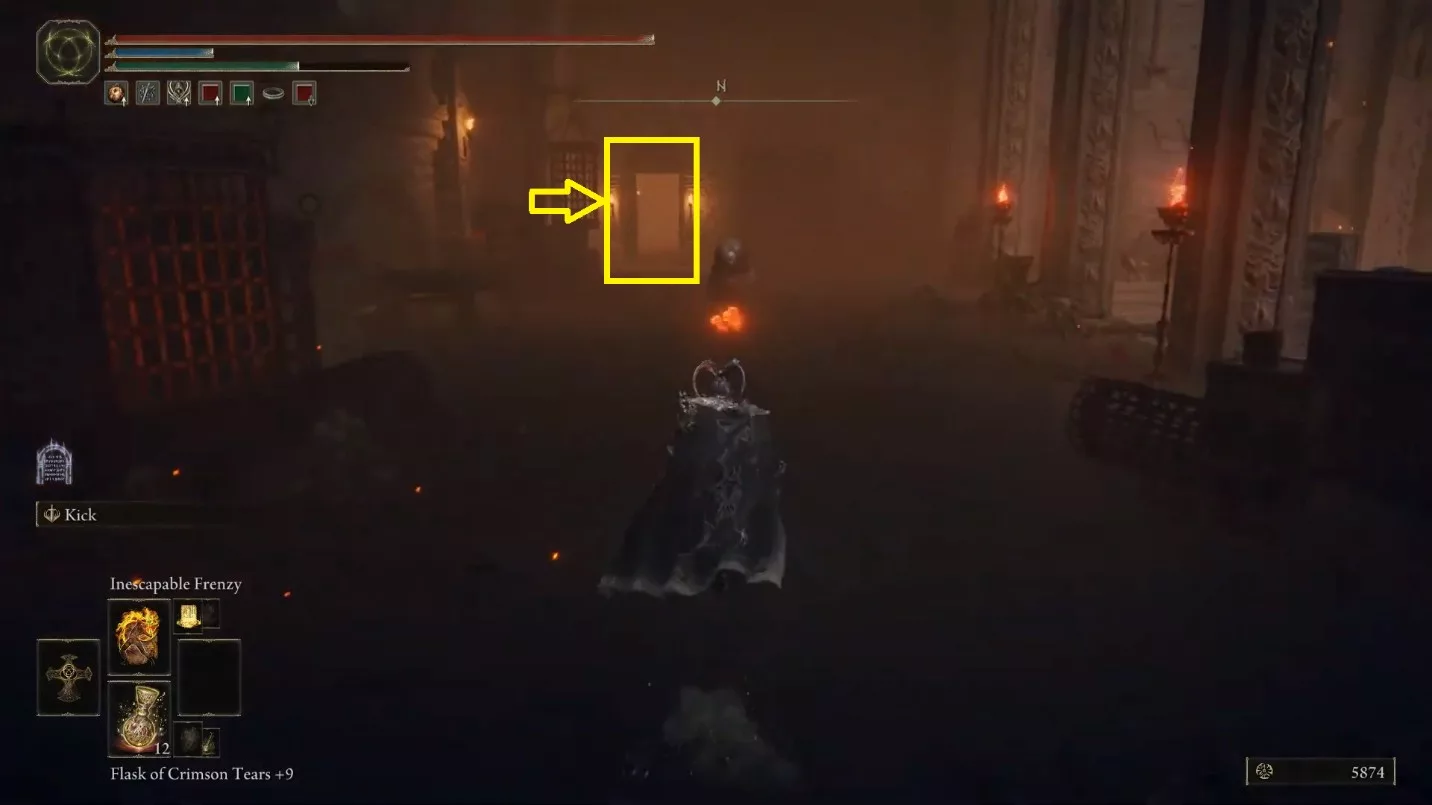
Exit the area, skirt around the snake enemy on the stairs, and step into the room on your left. Go through the opening on the right to continue down the hallway, where you’ll encounter two lava snakes. Enter the door straight across from the second snake.
Push through the door to your right and ascend the stairs to reach the second floor. Traverse the hall and enter through the door where two dragon statues guard the entrance. You’ll arrive in an area filled with hanging cages; move to the right side of the ledge and carefully drop down to the lower platform.
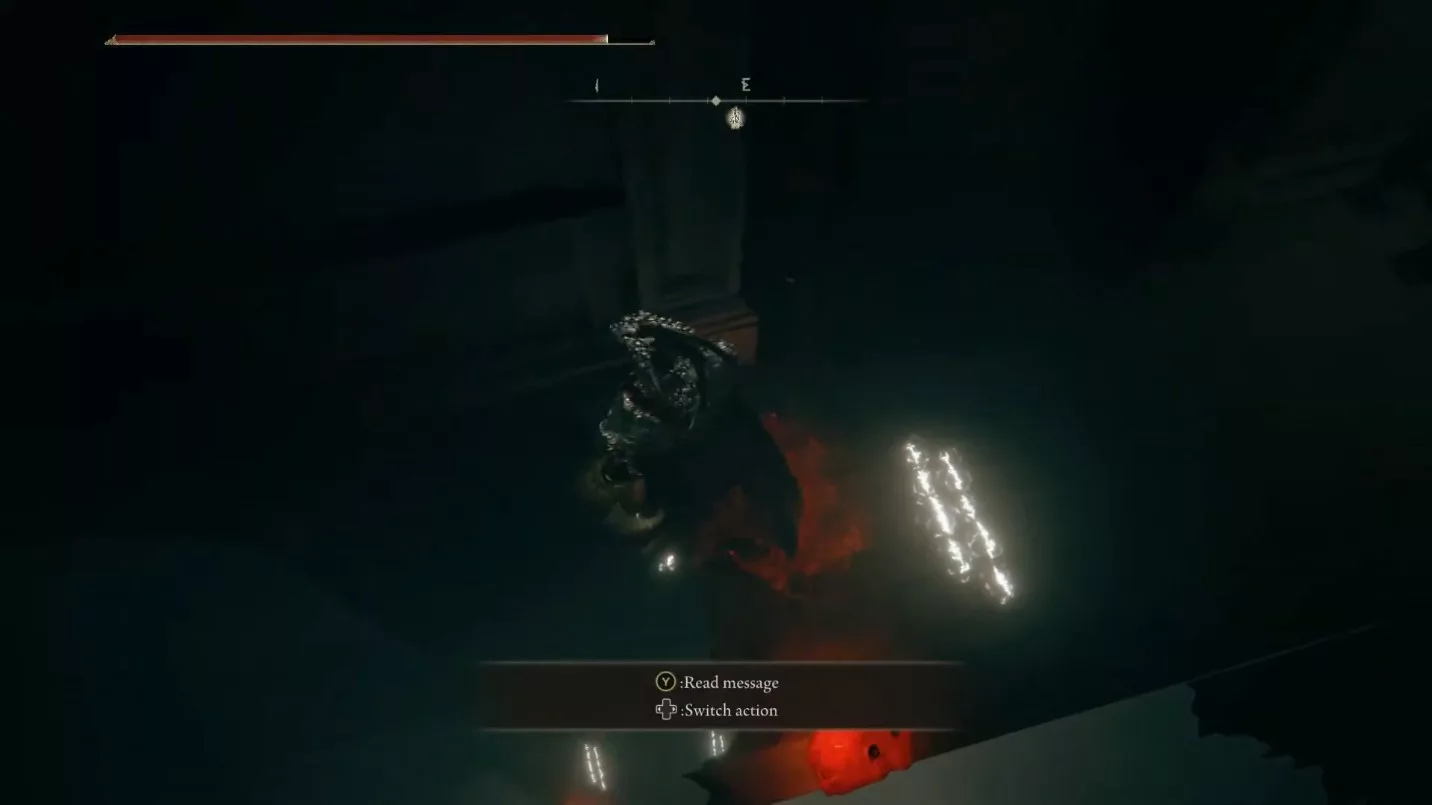
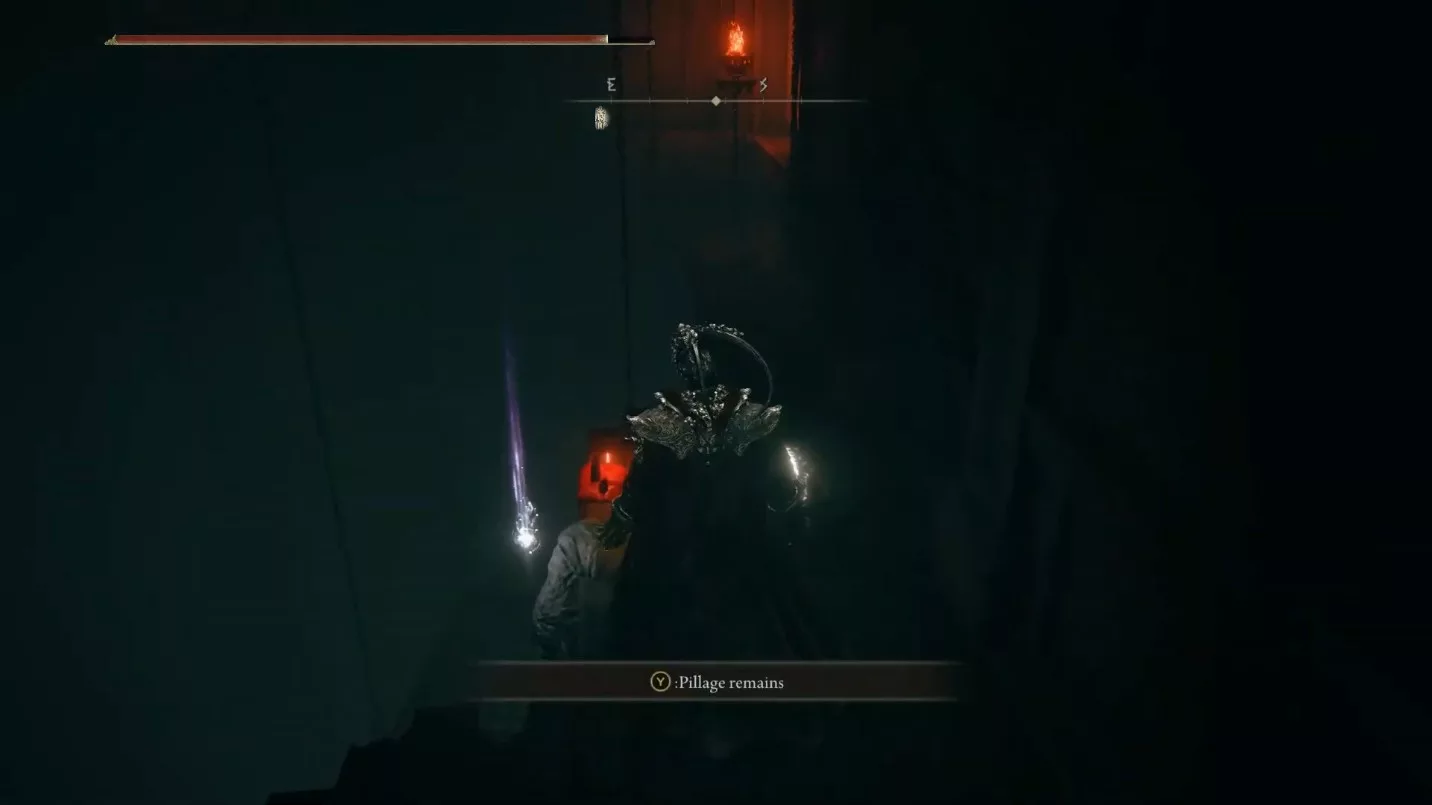
Once inside the room, head up the stairs and defeat the enemy on the upper level. Exit through the opening behind it and move to the right side of the ledge; the Dagger Talisman will be found on a corpse there.
How to Acquire the Dagger Talisman Early
For early access to the talisman, travel to the Schoolhouse Classroom Site of Grace in the Liurnia of the Lakes area. From there, take the water wheel elevator to reach the bottom.
It’s advisable to spend all your runes on upgrades or utilize Sacrificial Twig or Twiggly Crack Tear to safeguard your runes, as you’ll need to intentionally die at the hands of an Abductor Virgin.
Upon death, you’ll be automatically teleported to the inquisition chamber of Volcano Manor. Head south, and you will come to the edge of a cliff.
Jump down and run southeast. You may encounter a Magma Wyrm in this area. Ascend the small wooden stairs and use the cage elevator to rise up.
Repeat the elevator ride, and you’ll face the Godskin Noble boss near the Temple of Eiglay Site of Grace. Don’t enter; instead, move left to cross the bridge, leading you to the entrance of Volcano Manor.
Follow these instructions to obtain the Dagger Talisman without having to complete Rya’s Questline.
Effects of the Dagger Talisman
The Dagger Talisman enhances Critical Damage by 17%, providing a substantial boost with each successful critical hit. This talisman is exceptional for stealth-oriented builds that emphasize backstabbing and parrying.
It’s worth mentioning that the critical damage increase from the Dagger Talisman does not apply to all ranged weapons in Elden Ring, meaning that bow headshots won’t receive a critical damage increase.
The Queen’s Bedchamber is a location in Elden Ring that many players tend to overlook. The challenging boss encounters along the route contribute significantly to the difficulty of reaching the Queen’s Bedchamber.
Depending on which route you choose, the enemies you face will vary. Players will either encounter a version of Godfrey or Sir Gideon Ofnir before reaching the Bedchamber in Elden Ring.
Finding the Queen’s Bedchamber in Elden Ring
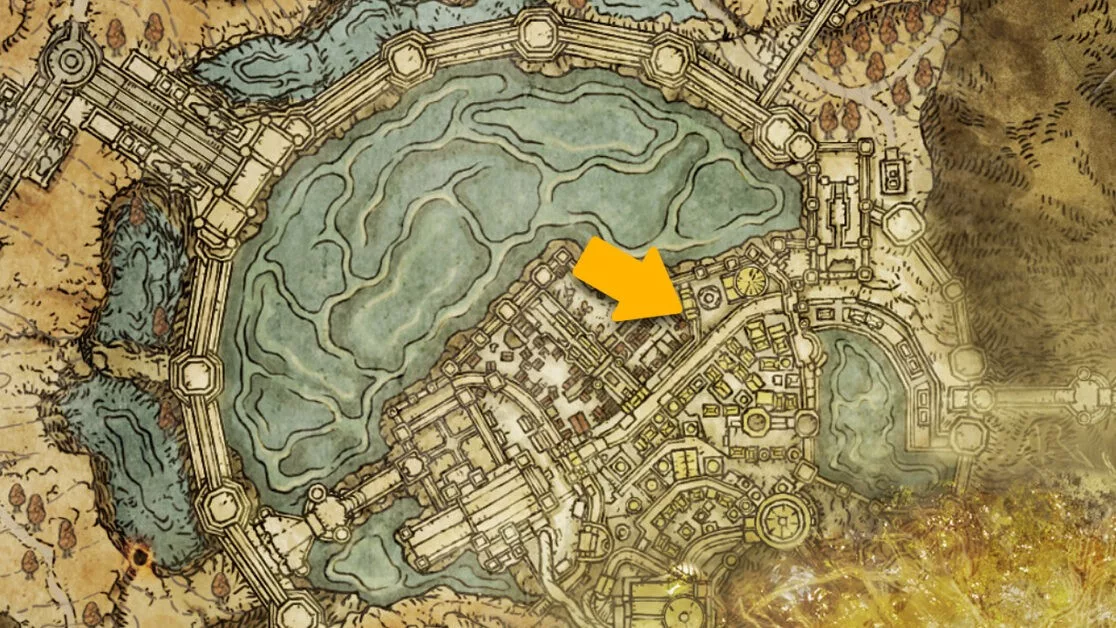
You can find the Queen’s Bedchamber situated within the Leyndell Royal Capital, an area that you might have overlooked during your explorations.
There are no limitations on your return; feel free to come back to the Leyndell Royal Capital and seek out the Queen’s Bedchamber in Elden Ring at your own pace.
1. Approach Via the Avenue Balcony
From the Avenue Balcony, notice a massive grey dragon to your left. Descend the staircase and proceed into the hallway towards the dragon.
Be cautious; there’s an annoying archer guard lurking here. You can either avoid him or sneak close while dodging his arrows to eliminate him quickly.
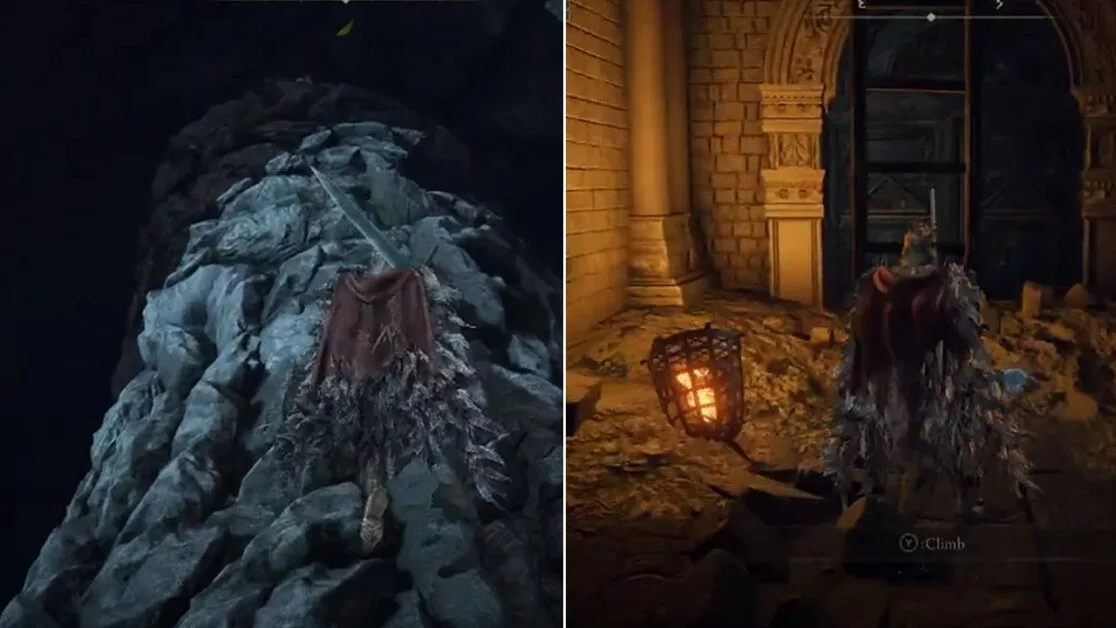
Once you exit the hallway, the dragon’s tail will be visible. Ascend the tail and traverse across it to its wings. Head towards the right wing and spot a broken pathway with a ladder on the right.
Jump onto this pathway; the ladder leads directly to the passage that will take you to the Queen’s Bedchamber in Elden Ring.
Climb the ladder and press forward toward the Queen’s Bedchamber. Continue until you encounter a stairway. There might be enemies along the way, which you can either ignore or choose to engage.
Pursue onward until you spot a large tree branch. Jump onto it and traverse along the branch to arrive at the palace entrance. Here awaits your battle against Godfrey, the first Elden Lord in Elden Ring.
Upon defeating Godfrey, take the path to the right leading to another tree branch. This branch will guide you directly into the bedchamber. Jump onto it to access the balcony. Once there, make your way around to the back to enter the Queen’s Bedchamber in Elden Ring.
Be prepared; upon discovering the Lost Grace in the bedchamber, you’ll be accosted by a Black Knife Assassin. This nimble adversary can be quite a handful, and it may take some time to vanquish this formidable foe in Elden Ring.
2. Approach From Leyndell Ashen Capital
Upon arriving at Leyndell Ashen Capital, you’ll spot a large dragon. Similar to before, approach its tail, climb atop it, and then head to the right wing, where you’ll leap onto the pathway to the left.
Ascend the ladder and proceed as previously described. However, this time, rather than heading toward the large tree branch, you can simply jump to the left side past the broken railing.
Continue up the stairs until you find an elevator leading up to the Queen’s Bedchamber in Elden Ring. But first, you will need to confront Sir Gideon Ofnir, the All-Knowing, before entering.
After defeating him, head towards the right side and follow the large trunk along the same path as before to reach the balcony. From there, take the curved route to navigate your way to the Queen’s Bedchamber in Elden Ring.
Scarlet Rot and Poison are among the most frustrating and lethal status ailments in Elden Ring, and one of the best strategies to eliminate them is by utilizing the Flame Cleanse Me Spell.
You can discover this incantation at the Fire Monk Camp, situated in the Liurnia region. To cast it, you need a minimum of 12 Faith and a Seal equipped. Each use will cost you 14 FP.
Flame, Cleanse Me Location in Elden Ring
You can find the Flame Cleanse Me incantation at the Fire Monk Camp in Elden Ring. Navigate northwest from the Artist’s Shack or southwest from the Eastern Tableland in the Liurnia region.
The Fire Monk Camp is positioned at the southeastern edge of the Church of Vows. Start from the nearest Site of Grace, and once you reach the camp, look for some red tents at this specified location.
Be aware that the enemies in this area will protect the corpse containing the spell you seek, so proceed with caution. There are numerous foes around, so tackle them one at a time to avoid being overwhelmed.
After defeating the enemies, search the camp, and to the right of the fire, you’ll find the Flame Cleanse Me Incantation on a lifeless body. To equip this incantation, you must visit a Site of Grace to memorize your spells.
How to Use Flame, Cleanse Me in Elden Ring?
To use Flame, Cleanse Me in Elden Ring, you will first need 12 Faith. The Finger Seal is the most suitable seal for this incantation. Equip the seal in either hand, and then use that hand to cast the incantation by pressing the appropriate attack button.
This incantation is essential for traversing areas like the Lake of Rot, where a single mistake could result in severe Scarlet Rot buildup.
It’s important to note that using Flame, Cleanse Me will inflict Fire damage on you. The flames enable you to cleanse negative status effects in the game. You might want to acquire some Fire-resistant gear or cast Flame, Protect Me to reduce the Fire damage you take.
Flame, Cleanse Me Not Working
Many players encounter issues where this incantation fails to work even after they’ve acquired it and met all the necessary requirements. The solution is to ensure you have a seal equipped, as it functions like a weapon. The Flame Cleanse Me Incantation will only activate with a seal, not with a staff or any other weapons. Make sure to equip it in either hand and use that hand to cast the incantations for the seal to work correctly.
The Intelligence attribute is crucial for wielding a specific type of magic known as Sorceries in Elden Ring. In contrast to other attributes, it also enhances your defenses against magic attacks. You can improve your Intelligence by spending Runes at any Site of Grace and leveling up.
To further enhance your Intelligence, you will require certain items like the various Glintstone Crowns, Greathood, Godrick’s Great Rune, among others in Elden Ring.
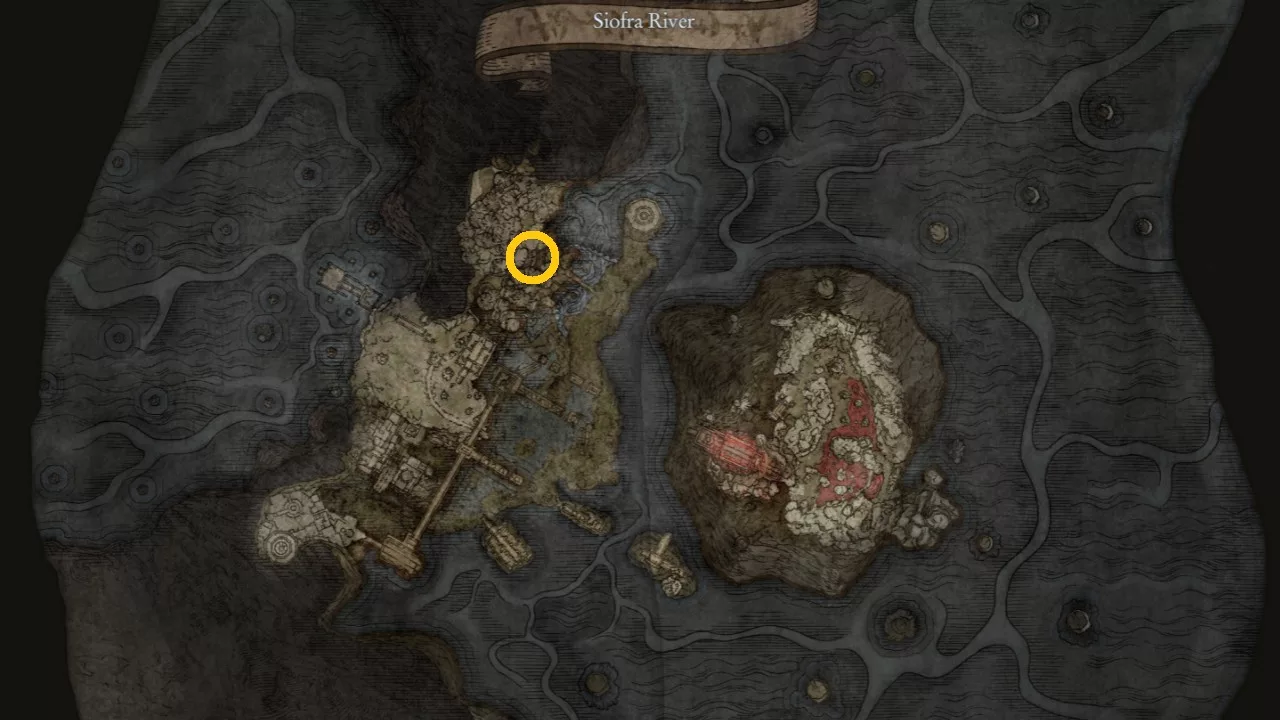
1. Marika’s Scarseal
Location: This item is located in the Siofra River, concealed behind the waterfall near where you defeat the Dragonkin Soldier.
Marika’s Scarseal boosts your Intelligence, Mind, Arcane, and Faith by +3 each. However, equipping this Talisman also increases damage taken by 10%.
2. Marika’s Soreseal
Location: You can find it inside a sealed room in Elphael, Brace of the Haligtree (Legacy Dungeon). To access this area, you need a Stonsword Key.
Marika’s Soreseal is a Talisman that can be quite challenging to obtain compared to others. It enhances Intelligence by +5, while also boosting Faith, Arcane, and Mind by +5 each. However, similar to Marika’s Scarseal, it increases damage taken by 15%, making you more susceptible to harm.
3. Stargazer Heirloom
Location: The Stargazer Heirloom is found on a corpse at the top of the Divine Tower of Liurnia.
Stargazer Heirloom is a Talisman that solely increases your Intelligence, setting it apart from others.
4. Olivinus Glintstone Crown
Location: To acquire this armor piece, travel to Raya Lucaria Academy using the nearest Site of Grace (Schoolhouse Classroom).
Olivinus Glintstone Crown is a helm that belongs to the Raya Lucaria Sorcerer set. Equipping this helm boosts your Intelligence by +3 but reduces your HP by 10%.
5. Karolos Glintstone Crown
Location: To equip this item, you will need to defeat some crabs located in the courtyard of the Raya Lucaria Academy.
Karolos Glintstone Crown is part of the Raya Lucaria Sorcerer armor set. Wearing this helm will enhance your Intelligence by +3 but will reduce your stamina by 9%.
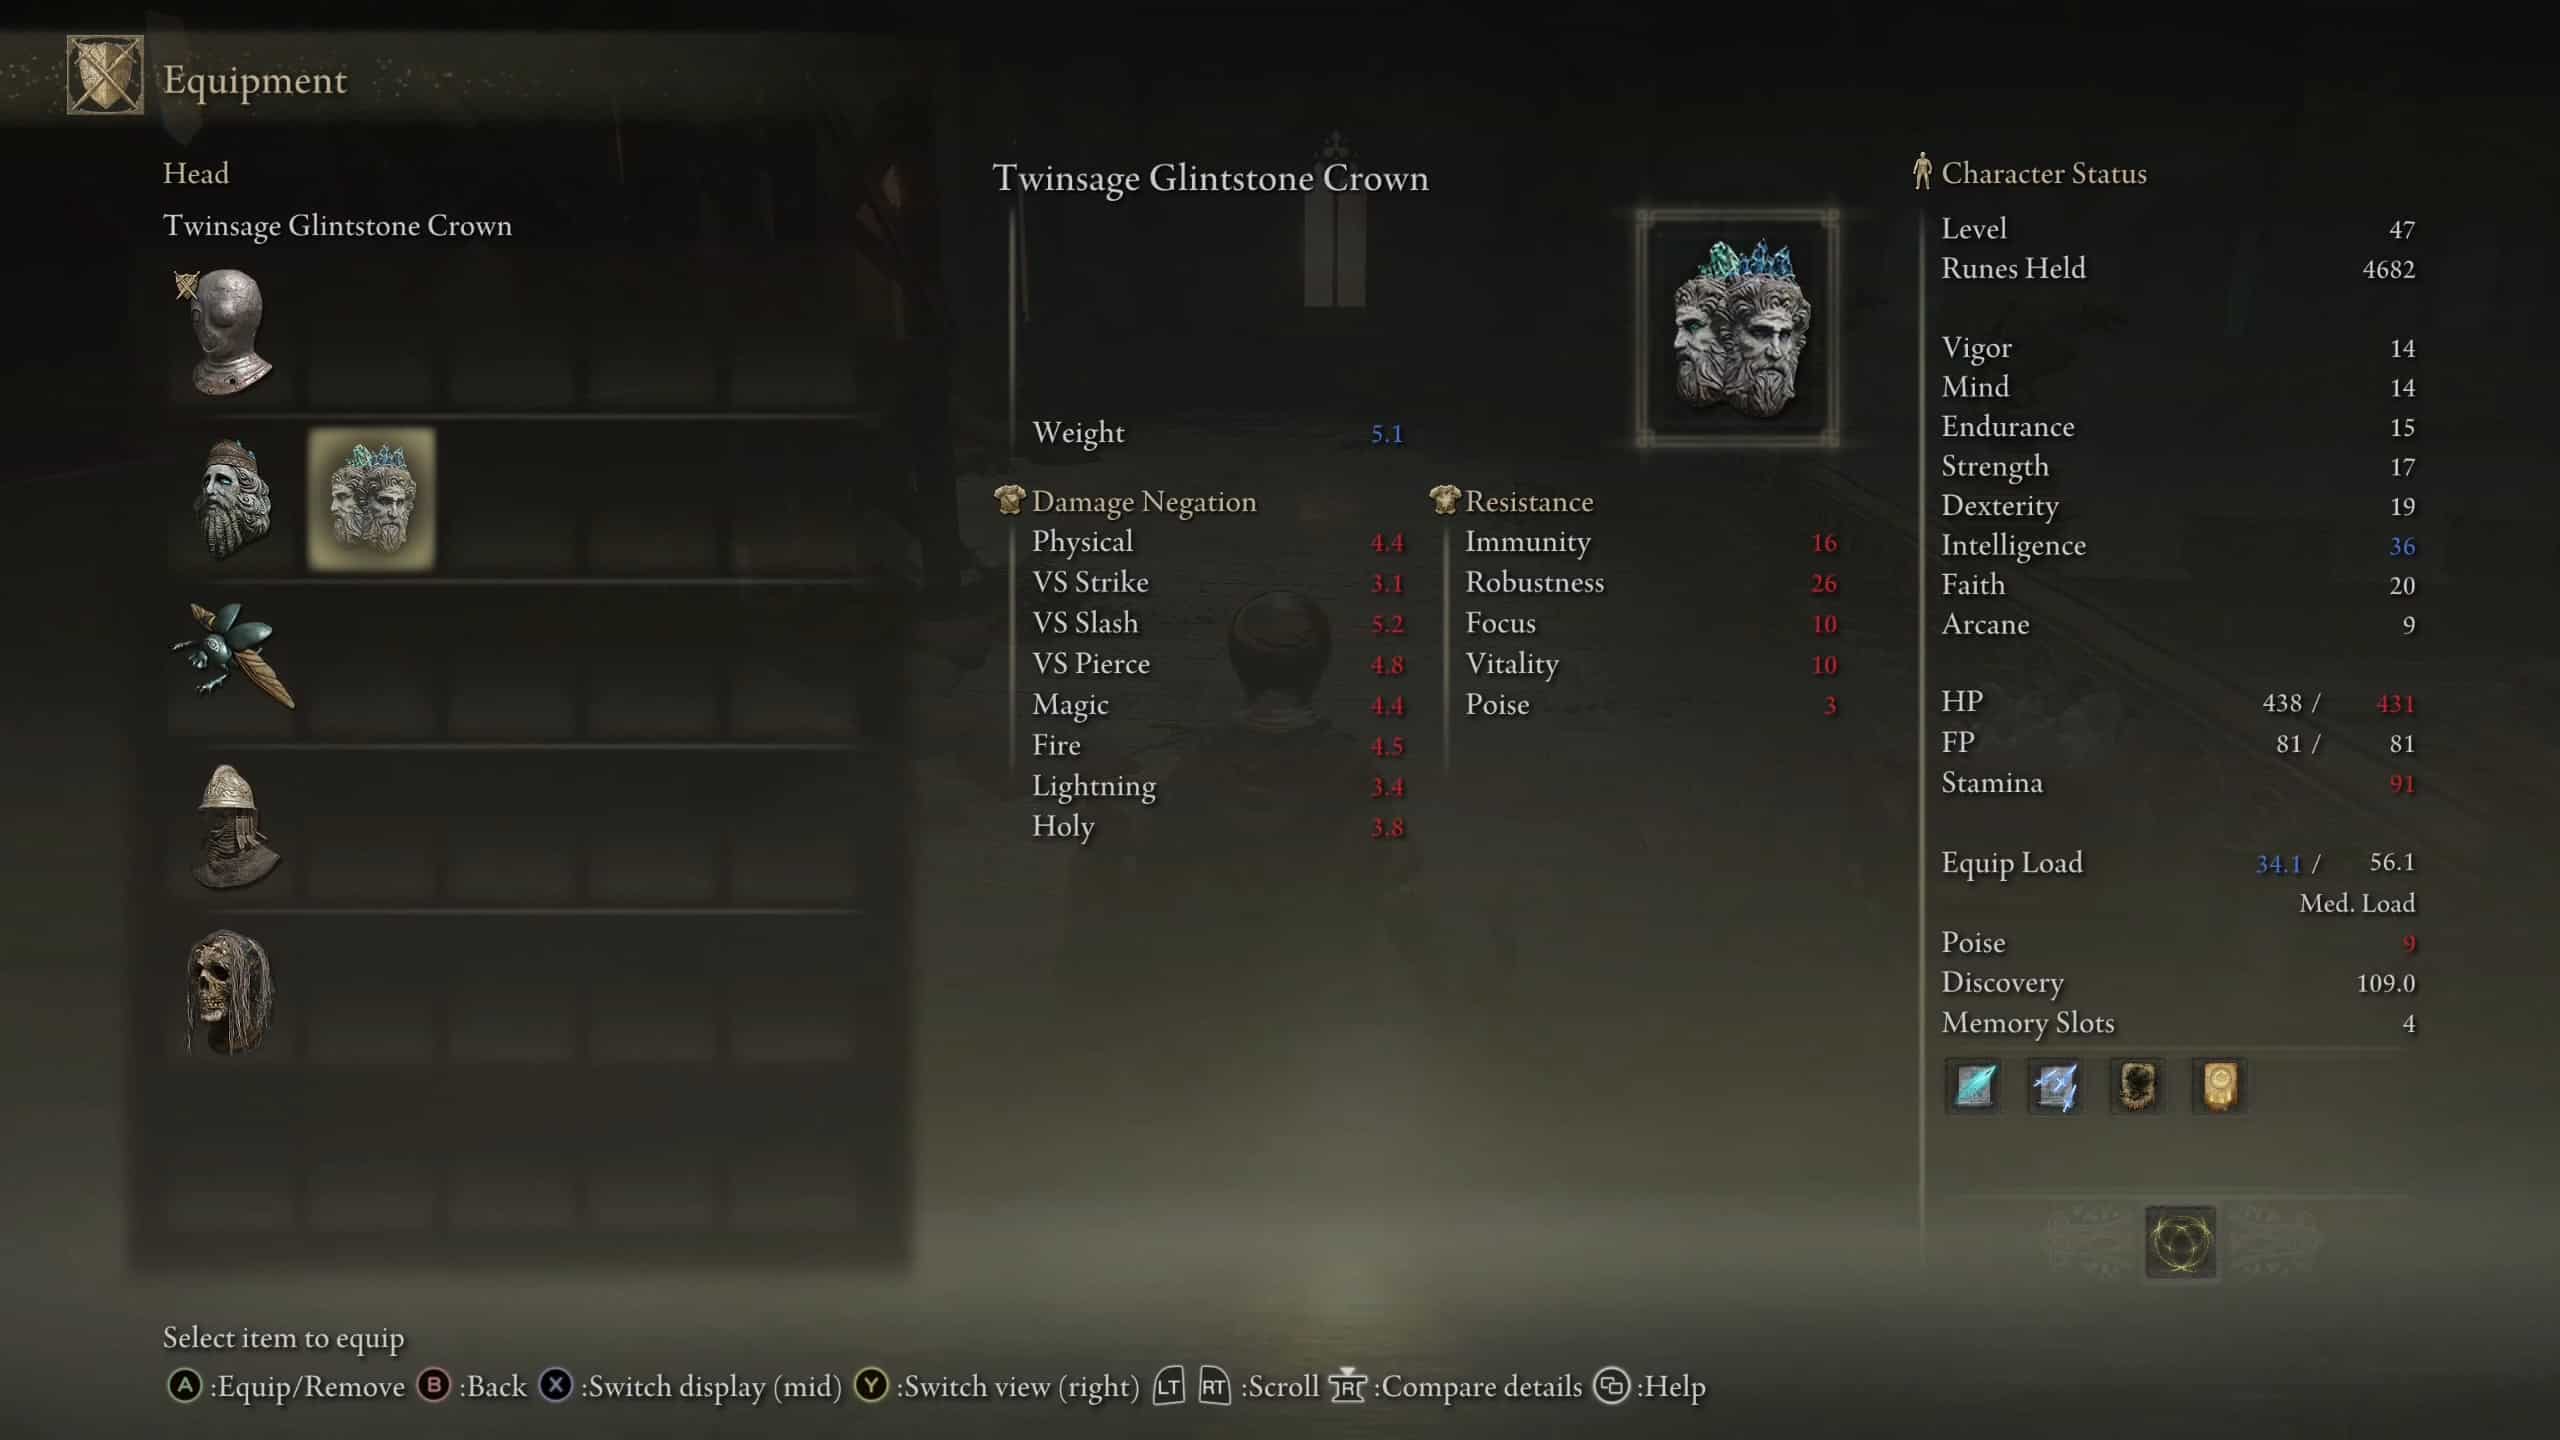
6. Twinsage Glintstone Crown
Location: To obtain this helm, you must defeat a crystal crab situated on the rooftop of the Raya Lucaria Academy and claim it as a drop.
The Twinsage Glintstone Crown is a helm that belongs to the Raya Lucaria Sorcerer armor set. Wearing this helmet enhances your Intelligence by +6, but it also decreases both your stamina and HP by 9% each.
7. Lazuli Glintstone Crown
Location: You can acquire this helmet by defeating a crystal crab within the Raya Lucaria Academy, located in the tower with the wooden floor.
The Lazuli Glintstone Crown is a helm belonging to the Lazuli Sorcerer armor set. Wearing this piece boosts your Intelligence by +3 and also increases your Dexterity by +3. However, this comes at the cost of reducing your HP by 18%.
8. Haima Glintstone Crown
Location: To acquire this helm, travel east of West Windmill Pasture and defeat a battlemage stationed across the bridge. Retrieve the helm from their corpse to enhance your Intelligence.
Haima Glintstone Crown is part of the Battlemage Set Armor set. Wearing this helm will boost your Intelligence and Strength by +2 each, though it reduces your FP by 10%.
9. Hierodas Glintstone Crown
Location: To collect this crown, travel to Mt. Gelmir and search for a corpse located in Hermit Village.
Hierodas Glintstone Crown is a helm that belongs to the Errant Sorcerer Armor set. Equipping this helm raises both Intelligence and Endurance by +2 each, but it reduces your FP by 10%.
10. Witch’s Glintstone Crown
Location: This crown can be obtained as a reward for completing Sellen’s questline, which you will receive at the conclusion of the quest.
The Witch’s Glintstone Crown is another helm from the Raya Lucarian Armor set that can be equipped to enhance your Intelligence. It raises both Intelligence and Arcane stats by +3 each, but it diminishes your stamina by 18%.
11. Queen’s Crescent Crown
Location: This helm can be purchased for 7,000 Runes from Finger Reader (Enia) after defeating Rennala, Queen of the Full Moon.
Queen’s Crescent Crown, part of the Queen of the Full Moon Armor set, increases your Intelligence by +3. Notably, there are no drawbacks associated with wearing this crown.
12. Imp Head (Cat)
Location: This helm can be dropped by Imps in various locations.
The Imp Head is a unique cat-shaped helm that is not part of any set. Wearing this helm grants a +2 boost to your Intelligence, and it has no associated drawbacks.
13. Greathood
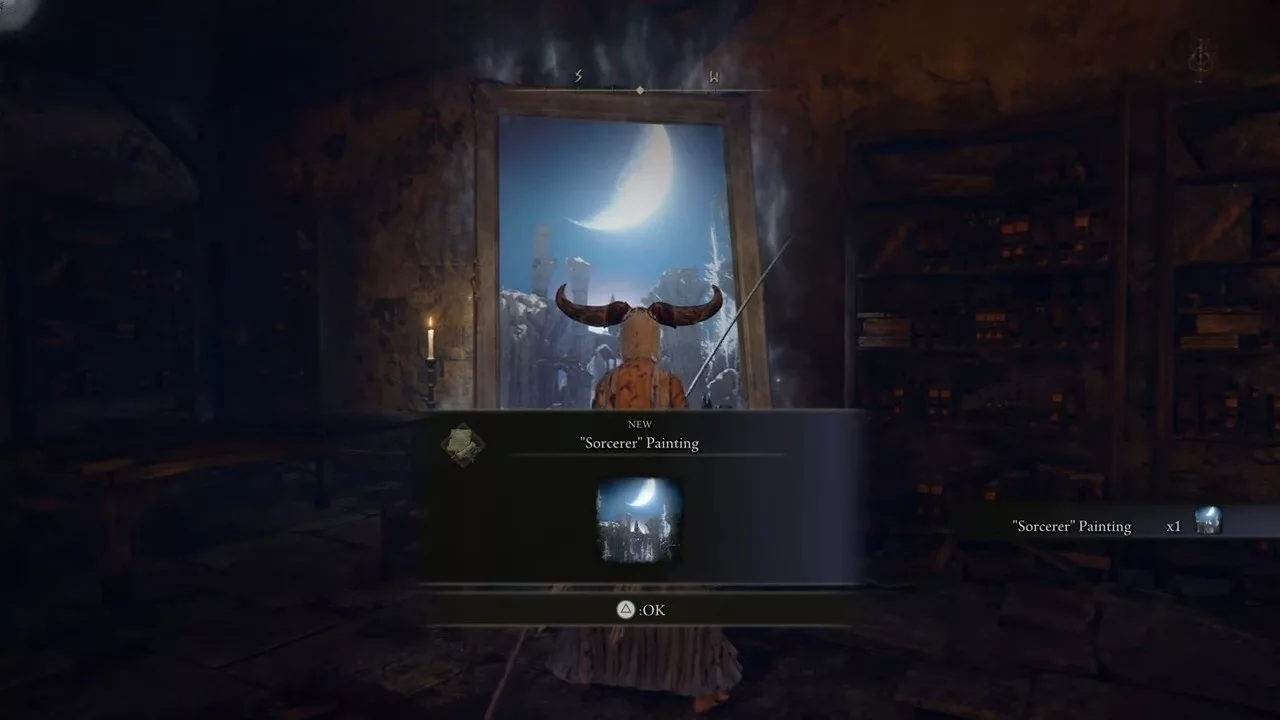
Location: Solving a puzzle in the Sorcerer painting rewards you with the Greathood. Start this puzzle in Castle Sol.
Greathood is another standalone helm designed to boost Intelligence. Equipping it raises both Intelligence and Faith by +2 each while also reducing your HP by 10%.
14. Godrick’s Great Rune
Location: To obtain Godrick’s Great Rune, visit Stormveil Castle and defeat Godrick the Grafted. This boss victory grants you the Great Rune.
Godrick’s Great Rune is one of the most unique items that enhance your attributes overall, not just Intelligence, in Elden Ring. Since it is a special item, it can only be acquired by defeating the boss. Equipping it boosts all attributes by +5 each, with no negative effects.
15. Grafted Blade
Location: To acquire this Greatsword, you must confront and defeat Leonine Misbegotten at Castle Morne.
The Grafted Blade is a Greatsword that can also enhance your Intelligence. With its default skill called Oath of Vengeance, you can temporarily boost all attributes by +5 each for 60 seconds.
16. Intelligence-Knot Crystal Tear
Location: You can find this item by heading to the Road to Manor (Site of Grace) and dropping down from the cliff to face a series of finger creepers to obtain the Crystal Tear.
The Intelligence-knot Crystal Tear is a key item that provides special effects when mixed with the Flask of Wondrous Physick. Combining this Crystal Tear with physick grants a +10 Intelligence boost for a duration of 3 minutes.
The Prince of Death’s Staff is a mid-tier staff in Elden Ring that you can find in Nokron, the Eternal City. Like all staffs, it is used to cast sorceries and spells, but locating it can be quite challenging.
This guide will pinpoint the exact area where you can find The Prince of Death’s Staff in Elden Ring. We will also examine its stats and scaling, as well as how it compares to another staff, the Carian Regal Scepter. Without further ado, let’s dive in.
Location of the Prince of Death Staff in Elden Ring
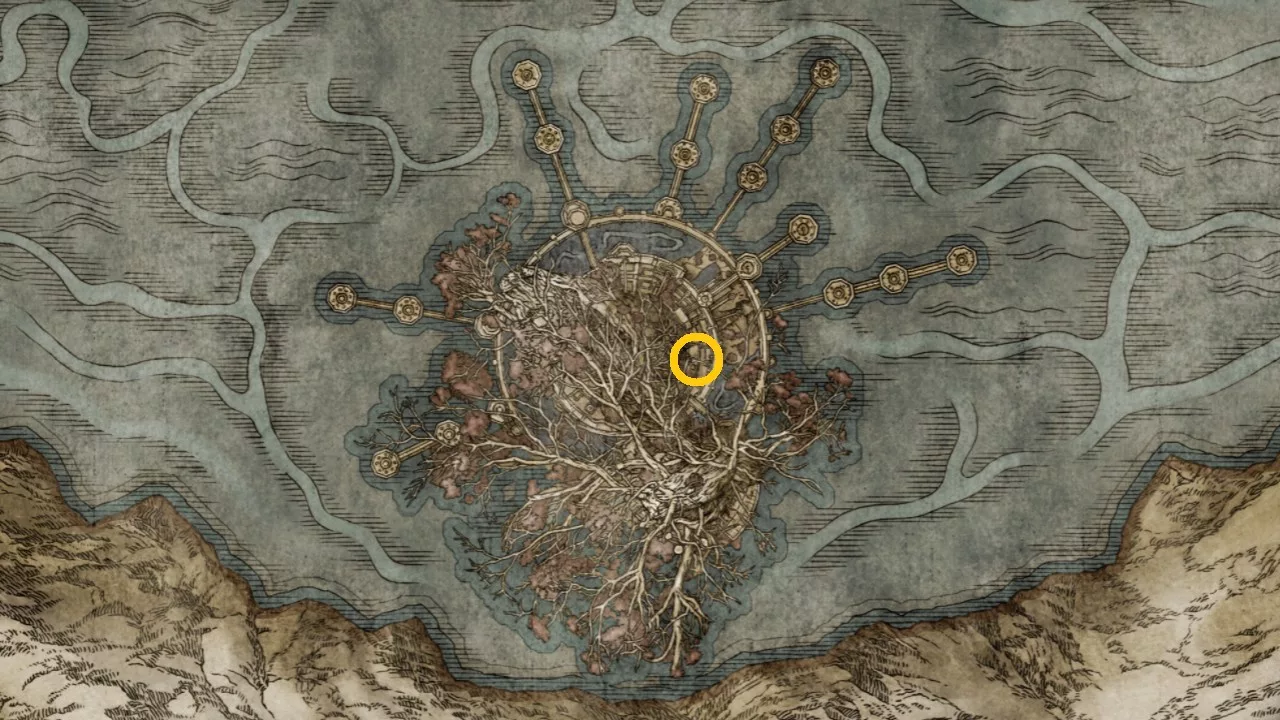
The Prince of Death’s Staff is located atop a tower in The Nameless Eternal City. To access it, you first need to navigate to the Deeproot Depths. The tower can only be reached from the rooftops.
The rooftops are easy to traverse due to their ramp-like layout. You can climb onto any roof, and right after your first interaction, make a left jump down.
Continue moving left until a branch directs you toward the tower. All you have to do is ascend to the top of the tower to claim the Prince of Death’s Staff in Elden Ring. You can access the Deeproot Depths through two methods:
1) Defeat the Valiant Gargoyle
Your first option involves defeating the Valiant Gargoyles at the Siofra Aqueduct Site of Grace in Elden Ring.
Once the gargoyles are dealt with, proceed to the waterfall area behind the boss arena. Here, you’ll find a coffin that transports you directly to the Deeproot Depths. Upon exiting the coffin, you’ll be right next to a Site of Grace for a much-needed rest.
From the Site of Grace known as The Great Waterfall Crest, head forward while keeping to your right. You’ll discover a root extending out from a cliff. Step onto it and drop down to the log below.
Continue straight, veering to the right again, and you’ll come upon an area overrun with large roots. To your right will be a series of roofs forming ramps that lead upward, culminating in another root. Follow it to reach the tower’s summit where the corpse holding the Prince of Death’s Staff lies.
2) Navigate the Frenzied Flame Proscription
You can utilize this method only after defeating the boss Mohg, the Omen.
Go to the Cathedral of the Forsaken Site of Grace. You will need to move a chest that obscures a hidden passage behind it. Proceed through this passage to reach the Frenzied Flame Proscription Site of Grace in Elden Ring.
From this point, roll toward the southeastern wall to unveil another hidden passage that leads to a chest. Loot the chest and move into the wall behind it to unlock a secret pathway that heads toward the Deeproot Depths in Elden Ring.
Follow the instructions above, and you’ll find yourself at the exact location of the Prince of Death Staff in Elden Ring.
Prince of Death Staff Stats
The Prince of Death’s Staff inflicts 25 Physical and 144 Sorcery damage. This weapon also has a critical damage rate of 100.
This staff’s most significant advantage is a 10 point boost to death sorceries, making spells like Ancient Death Rancor or Explosive Ghostflame much more effective when cast.
Utilizing the Prince of Death’s Staff is ideal for sorcery builds that heavily rely on Faith and Ghost Sorceries.
This weapon scales primarily with Intelligence and Faith, but it cannot be infused with an Ash of War, nor does it possess a default skill.
Is the Prince of Death’s Staff superior to the Carian Regal Scepter?
The Prince of Death’s Staff boasts superior sorcery scaling compared to the Carian Regal Scepter in Elden Ring. Consequently, it becomes significantly stronger in the latter stages of the game due to its Faith and Intelligence scaling.
On the flip side, the Carian Regal Scepter allows you to use a unique Ash of War which enhances damage, placing it among the top staves in Elden Ring. Thus, if your focus is on the late-game experience, the Prince of Death’s Staff is the better choice.
However, the Carian Regal Scepter is effective to utilize during the mid-game, especially with its ability to empower full moon sorceries and infused Ash of War.