الوسم: Assassin's Creed

  • تقارير عن رحلة The Hexe من أسينس كور إلى تجربة خطية كلاسيكية

    تقارير عن رحلة The Hexe من أسينس كور إلى تجربة خطية كلاسيكية

    بعد أن أعلنت شركة يوبيسوفت عن لعبة Assassin’s Creed Hexe قبل أربع سنوات، تفاعل اللاعبون وتساءلوا عما إذا كانت مغامرة القرن السادس عشر ستتبع النموذج الكلاسيكي لألعاب تقنيات تقمص الأدوار مثل Shadows أو ستعود إلى الأسلوب الأكثر تنظيمًا والتركيز على المهام الذي اتبعته ألعاب قديمة مثل أخوة وBlack Flag. ولكن، وفقًا لتقارير حديثة، يبدو أن الشركة تتجه نحو الأسلوب التقليدي القديم.

    ووفقًا لموقع MP1ST، فإن لعبة Assassin’s Creed Hexe ستتخلى عن “الانتفاخ الهائل في نمط RPG في الألعاب الأخيرة” لصالح تجربة خطية أكثر تقليدية، وهو خبر سار لمحبي الإصدار الأخير من السلسلة، وهو لعبة Black Flag Resynced، الذي اتبع نسخة حديثة من هيكلة المهام المبنية على التسلسل، مع استبعاد الأقسام التي تدور حول الزمن الحديث.

    وتم الكشف أيضًا عن تفاصيل جديدة حول القصة والشخصيات، حيث تم وصف البطلة، التي يُرمز إليها باسم “بيترا”، بأنها “امرأة قوية العزيمة ومشتعلة بالحماس في منتصف العشرينات من عمرها”. ويُذكر أن والديها، بريجيته وكونراد، يلعبان دورًا مهمًا في سرد القصة، مع توقع أن تكون بريجيته ذات دور رئيسي، خاصة وأنها قد تكون من نسل كلاوديا، أخت إيزيو من لعبة أخوة، مما يربط الرواية بشكل غير مباشر بالماضي العامل على الشخصيات، في حين أن كونراد هو رجل متدين يحمل مهمة صعبة تتضمن “عملًا قذرًا”.

    أما الجزء الأهم في التطورات، فهو أن اللعبة ستنقل عن نمط RPG بشكل ملحوظ، حيث سيقود شخصية تُدعى “آنا” الأقسام المعاصرة، مع احتمالية ربط الخطوط السردية بمؤسسة أبستيرو أو مركز الأنيما، مما يعيد الأجواء إلى ألعاب السلسلة القديمة التي تعتمد على الربط بين المهام الرئيسية والأحداث في العصر الحديث عبر أبستيرو.

    إذا صحّت هذه التقارير، فربما تتجه اللعبة إلى مسار أكثر خطية مع فصول تضع اللاعب في سياق الحلقات الزمنية الحديثة، على غرار الألعاب السابقة، ويُرجح أن تتخذ الشركة هذا الأسلوب في المستقبل للأجزاء الأساسية وإعادة الصياغة.

    أما بالنسبة لمحبي السلسلة الذين يترقبون هذا الإصدار، فمن الحكمة ألا يرفعوا توقعاتهم بشكل كبير، فالشركة تشير إلى أن الإصدار المتوقع سيكون في أواخر عام 2027، ما يعني أن علينا الانتظار طويلًا قبل أن تكشف الشركة رسميًا عن مزيد من التفاصيل، أو حتى إصدار اللعبة نفسها.

  • How to Begin & Complete the Attack on Titan Crossover Quest in Assassin’s Creed Shadows

    How to Begin & Complete the Attack on Titan Crossover Quest in Assassin’s Creed Shadows

    Attack on Titan collaboration has introduced a new questline in Assassin’s Creed Shadows, including a mission connected to the Isu. To access this storyline, you need to locate a specific spot and complete its main quest to earn rewards. The first quest, “Beyond the Wall,” features Naoe and Yasuke drawing from the AoT universe to find a kidnapped Titan-Shifter.

    However, the game doesn’t clearly show how to start this AoT storyline. This step-by-step guide will explain where to go, how to finish the quests, and what rewards you can earn.

    How to Start the Attack on Titan Quest

    When playing Assassin’s Creed Shadows and wanting to begin the Attack on Titan crossover, head to the quest marker for “Beyond the Walls.” It’s located at the central top part of the Yamashiro region, near the road at the border with Omi.

    The quickest way is by fast traveling to Hanazono Castle and heading northeast. You’ll recognize the area when you see dead bodies of Scout Regiment members from AoT, stationed on Paradis Island. After reading a letter from the fallen Eldian captain, it’s revealed that the team was after a defector named Gautwin, who has Titan-Shifter powers.

    Follow the quest marker back to Hanazono Castle, where the AoT storyline begins.

    Note: This questline is only available until December 22. Also, Yasuke must be unlocked as a playable character to access these missions.

    Beyond The Walls Walkthrough

    In the first part, enemies overrun the castle, led by Lord Albrecht, who has taken Gautwin underground. Naoe or Yasuke must storm the castle to rescue the only survivor of the Survey Corps held hostage.

    It’s recommended to use Yasuke for this segment, as he’s better equipped to deal with heavily armored enemies like the Samurai Daisho. Naoe, especially on a first playthrough, may not withstand many hits. Use Yasuke’s strength to eliminate enemies efficiently.

    To acquire a key item, open the red chest near the hostage by defeating the Samurai Daisho. Rewards include the Protector’s Helmet (Legendary gear) and Damage on Parry engraving.

    Helping Ada, the captive, reveals Gautwin was duped by Albrecht into leaving Paradis Island to gain Titan powers. You then switch to Naoe for a stealth infiltration into an underground cavern to find Gautwin and aid Yasuke and Ada.

    Completing this quest grants 1,000 XP, and the next mission, “Descent,” begins immediately.

    Descent Walkthrough

    Through the Cavern:
    Enter the cavern, go prone, and crawl left to find a chest with a Training Corps Emblem Banner for your Hideout. Explode barrels with shuriken to create openings for Yasuke and Ada. Use your grapple and move through crystal-strewn passages, slicing hardened crystal formations with Naoe’s weapons. Climb the crystal walls using grapple points, drop down along clues, and use explosives to reveal paths. Collect gear and open chests containing banners and cosmetics, like the Garrison Banner and Military Police Banner accessories.

    Reach Gautwin:
    Navigate through crystalline platforms and wooden structures by swinging, jumping, and climbing. Carefully perform grapple swings to avoid overshooting. Use tools like shuriken to open doors or trigger explosive barrels to progress. In the final climb, swing on grapple points to reach Gautwin’s location. Use precise timing to land safely.

    Boss Fight with Lord Albrecht:
    Defeat Albrecht’s minions before engaging him directly. Use a Kusarigama for crowd control, then attack Lord Albrecht from the ledge or on the ground. Parry his attacks and weaken his armor with firearms for easier combat.

    Titan-Albrecht Chase:
    After transforming into a Titan, Albrecht becomes incredibly fast. Run through caverns, utilizing your traversal skills—jump, grapple, and dash—to escape. Prioritize evading his attacks, keeping moving to avoid being caught, and avoid stopping to take pictures, as the chase is swift and relentless.

    Once Yasuke escapes, the “Descent” quest concludes, transitioning to “The World Outside.”

    The World Outside Walkthrough

    Deciding Gautwin’s fate involves choosing whether he returns home or goes elsewhere. The recommended ending is for Gautwin to go back and fulfill his oath, as it fits the story best. Yasuke advises Gautwin’s trust in his oath, emphasizing understanding over rebellion. Gautwin admits tiredness from the chase; choosing to return emphasizes his character arc, although some may prefer him to live a different life away from duty.

    Yasuke and Naoe share a final iconic Attack on Titan salute with Ada and Gautwin before parting ways.

    Ending Rewards:
    Completing “The World Outside” grants 3,000 XP, the Cavern Shard (a Legendary katana), and the Reactive Shell engraving. The Cavern Shard visually gives Naoe’s arm, torso, and hair a Titan Hardening appearance, purely cosmetic and without gameplay effects.

  • Completing Assassin’s Creed Shadows: A 100 Million Euro Budget

    Assassin’s Creed Shadows Costs Over 100 Million Euros to Make

    As the expenses for video game development keep increasing, Ubisoft has revealed that the budget for Assassin’s Creed Shadows exceeds 100 million euros.

    Gamers who have finished the game know that many people worked on bringing Assassin’s Creed Shadows to life. The credits roll for a total of two hours, leaving little doubt that the game incurred high costs.

    Any uncertainty about the budget has now been cleared up. In a recent financial call led by Ubisoft CEO Yves Guillemot, it was confirmed that Assassin’s Creed Shadows cost over 100 million euros to produce, though the exact amount was not specified.

    Details from the Financial Call

    The latest earnings call reported by TweakTown revealed that Guillemot stated, “We don’t disclose production costs, it did cost over 100 million euros, we’ll say that.” This suggests we might not get a clearer figure in the future.

    Guillemot explained that high development costs could be linked to significant investments in the game’s engine, along with the extensive credits that have drawn some criticism from fans.

    Interestingly, development and updates for Assassin’s Creed Shadows are still ongoing, which means the total costs could rise beyond the initial “over 100 million” estimate. Recently, Ubisoft added a new “Nightmare Difficulty” mode at no extra charge, despite some company representatives suggesting that in-game purchases could enhance player enjoyment, a point they mentioned during the earnings call.

    Assassin’s Creed Shadows was released in March of this year and is available on PlayStation 5, Xbox Series X/S, and PC, marking the first game in the series to skip the PS4 and Xbox One platforms.

  • Ubisoft CEO Defends Assassin’s Creed Shadows Amid “Woke” Complaints

    Ubisoft CEO Defends Assassin’s Creed Shadows Amid “Woke” Complaints

    When Assassin’s Creed Shadows was announced, it quickly became a target for “anti-woke” critics online. Many racist comments and memes about one character, Yasuke, flooded social media, overshadowing much of the pre-launch discussion.

    Despite this, Assassin’s Creed Shadows launched successfully, attracting millions of players. However, the game’s controversies resurfaced during a Ubisoft shareholders meeting.

    Ubisoft Shareholder Claims The Company Is Promoting A “Leftist Political Agenda”

    You can watch a video of the meeting on the Ubisoft website. After a presentation, a new investor asked an unusual question about the game.

    The shareholder stated, “There’s been a lot of talk about Assassin’s Creed Shadows. Ubisoft has faced criticism for this ‘woke’ trend. Since it takes place in 16th-century Japan and features an African samurai, that’s quite a bold move by Ubisoft. In the game, he can even fall in love with a transgender character. So, is this a sign of openness or is it just pushing a leftist agenda?”

    This led to some laughter from attendees, making it amusing to hear an investor accuse Ubisoft of bending to leftist views, as if any big company would truly do that. It seems words are losing their meaning.

    Ubisoft CEO Yves Guillemot responded, avoiding the controversial words the shareholder used. He explained, “When you play the game, you see that it’s filled with characters that fit well into the story. Our goal was to showcase characters with heroic journeys.”

    He added, “This character really existed, and telling his story has been very successful. That’s why we chose to tell it differently.”

    Clearly, Ubisoft has no regrets. Despite the criticism, Assassin’s Creed Shadows did well with both fans and critics. It launched right after the disappointing release of Star Wars Outlaws, which was also discussed at the shareholders meeting.

    Mix collage of characters from Assassin's Creed Shadows.
    Assassin’s Creed Shadows

    Released
    March 20, 2025

    ESRB
    Mature 17+ // Blood and Gore, Intense Violence, Language

    Developer(s)
    Ubisoft Quebec

    Engine
    AnvilNext

  • Completing the Elder Empathy Quest in Assassin’s Creed Shadows

    Completing the Elder Empathy Quest in Assassin’s Creed Shadows

    In the world of Assassin’s Creed Shadows, players will discover a rich and diverse depiction of 16th-century Japan. This expansive landscape is dotted with numerous villages where the inhabitants live their lives in relative tranquility. However, their peace is often shattered by those with malicious intentions, such as bandits.

    The Elder Empathy side quest focuses on these bandits, teaching them that their wrongful actions will have consequences. Here’s how to kick off the Elder Empathy quest and find and defeat bandits in the Iga region.

    How to Begin Elder Empathy


    You can start the Elder Empathy quest after finishing the story’s prologue and gaining access to free roam. While making your way back to Mibuno in the Iga region, keep an eye out for an elderly woman standing by the roadside as you exit the northwest side of the town. If she’s hard to find, she is located directly south of the Gear Vendor in that part of the settlement.

    Interact with the old lady, who will share her troubles about the bandit threats affecting her and the Iga community. After you offer your assistance, the Elder Empathy quest officially begins. You can track it through the People of Iga Objectives board in the pause menu.

    The quest has three phases, but the main goal is to defeat 100 bandits in Iga. You’ll receive rewards for every milestone: after 25 kills, you earn 500 EXP and 750 Mon; for 50, you get 225 oakwood, 270 silk, and 500 EXP; and upon reaching 100 bandits, you receive 750 EXP along with 300 tamahagane and 300 ironsand.

    Iga Bandit Locations

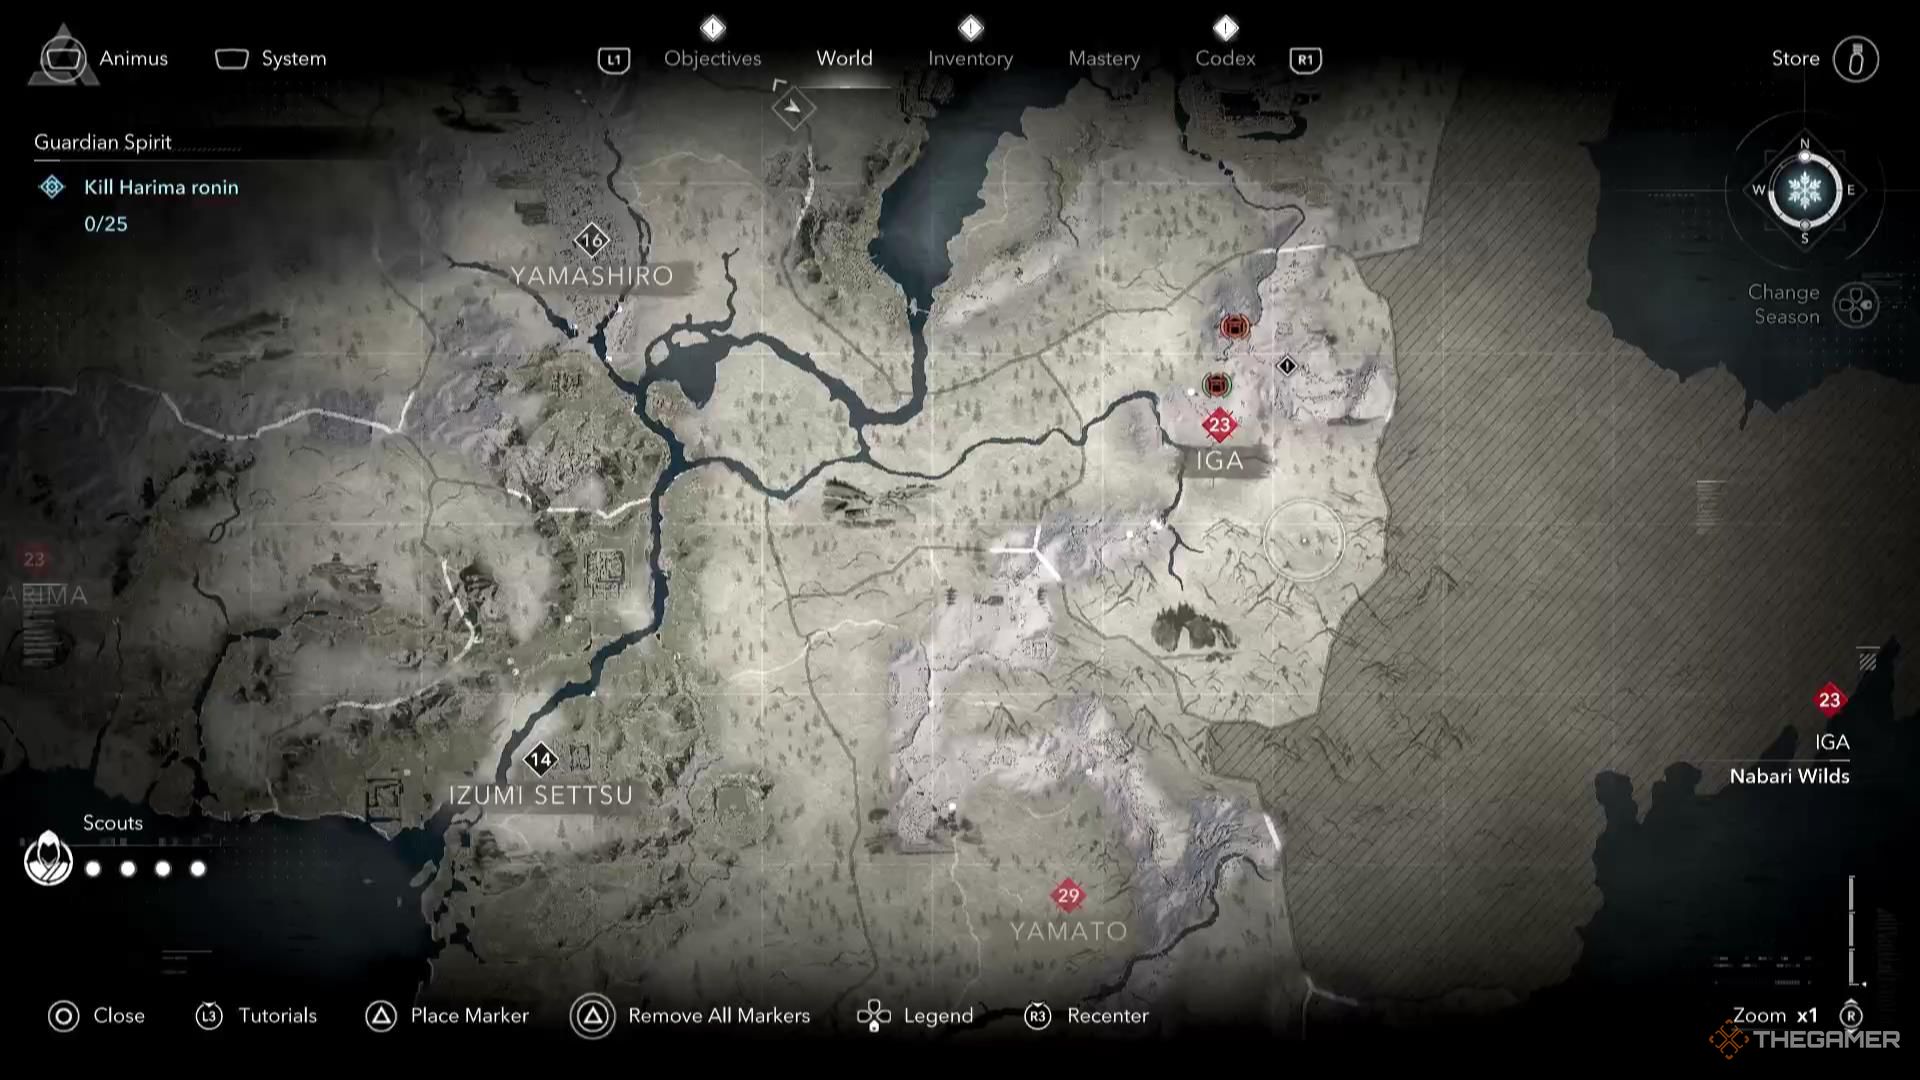
    Map showing the locations of bandits in the Iga region of Assassin's Creed Shadows.

    Iga is the smallest area in AC Shadows, but it still offers plenty of spots where bandits can be found. The best strategy for locating them is to look for enemy territories marked with a red diamond. If you’re having trouble, climbing the viewpoints in the area will reveal points of interest on the Iga map.

    Keep in mind that red diamond markers might indicate areas with enemy soldiers as well, which won’t contribute to your quest progress. Bandits can be recognized by their ragged clothing and lack of armor, and they often gather to drink at all hours.

    Only bandits killed within the Iga region will count towards the progress of this quest, so make sure to remain within its boundaries.

    Four key locations in Iga are known to consistently have bandits. They may travel along the roads, but if you target these four areas, defeat the bandits, and then loop back around, you should be able to meet the 100 kill goal within four to five runs.

    The Chigachi Ruins (1) often contain around six bandits that can be easily dispatched, especially if you play as Naoe and stay out of sight. There are also numerous resources to gather for your hideout, so grab those before moving on.

    The Nabari Lookout (2) typically has a couple of bandits near the viewpoint. As it is a fast-travel point, it’s an efficient spot for farming these enemies. In addition, a bandit camp usually located north of the Nabari Wilds and south of the river (3) contains three or four enemies. While they might be intoxicated from sake, don’t underestimate them; they can be quick to react if they notice you.

    The final bandit location, the Four Devils Lair (4), tends to have at least six bandits within its tunnels. They will disperse throughout the caves, so be sure to explore deeper to eliminate them all. Like the Chigani Ruins, this area also has plenty of resources to scavenge once the bandits are dealt with.

    Finishing Elder Empathy

    Naoe speaking to an elderly lady who assigns the Elder Empathy side quest in Assassin's Creed Shadows.

    Once you’ve taken down 100 bandits in Iga, return to the elderly woman in Mibuno. Tell her about your success, and she will reward you with gold along with 2,000 Mon for your efforts, in addition to all the rewards you’ve already earned.

  • Completing the Art Collector Quest in Assassin’s Creed Shadows

    Completing the Art Collector Quest in Assassin’s Creed Shadows

    When you first arrive in Kyoto during Assassin’s Creed Shadows, you’ll encounter a mission that tasks you with collecting various pieces of art. Although it may seem like an easy task, you could find yourself exploring the vast landscapes of Japan for hours in search of these items.

    To make matters more difficult, the game only informs you that the paintings are located in different castles and doesn’t offer specific directions. If you’re having difficulty locating these paintings or the castles, this guide will help you navigate the entire process.

    How to Begin the Art Collector Quest

    The quest initiation point is in Kyoto, but you must find the exact location of the mission giver to activate the quest. If you are not able to trigger the quest upon your arrival in Kyoto, head to the western side of the city, specifically the western side of Nijo Palace, which is situated directly north of the Kano Painting School.

    You should look for the largest house near the painting school. Inside this building, you’ll meet Kano Eitoku, who will send you on a mission to collect ten paintings scattered across Japan.

    Although you can recover all the paintings without starting the quest, it’s worth trying to find them during your exploration. If you happen to be in a castle, such as the one in Osaka, search the premises thoroughly before moving on.

    If you’re in the right location, Kano Eitoku will provide you with further instructions to locate the ten paintings, which can complicate your search since they reside in specific castles.

    Tips for Finding All the Paintings

    Being in castles does make it convenient to search, but be sure your character is properly leveled and equipped. In Act 1 of Assassin’s Creed Shadows, many of the castles may be significantly above your current level. It might be better to wait until you have leveled up before you attempt to gather these paintings.

    Consider playing as Naoe instead of Yasuke for this quest. Naoe has superior stealth abilities, allowing you to search for the paintings without drawing attention or getting hurt.

    Locations of the Paintings

    1. Nijo Palace Painting
      The first painting can be found near Kano’s Painting School at Nijo Palace. Once inside the palace, make your way to the northern section. The painting is located in a house northeast of the palace’s viewpoint, on the wall of the main room. Remember to deal with the guard in the area before grabbing the painting.

    2. Shoryuji Castle Painting
      Head south of Kyoto to Shoryuji Castle, located east of Ogura Pond. The painting is situated on the eastern side of the castle near the south entrance, in a house. Enter from any side, eliminate the guard in the central section, and the painting will be near some samurai armor.

    3. Takatsuki Castle Painting
      Travel east of the Muggy Lands, south of Yamazaki Castle to reach Takatsuki Castle. The painting is in a house on the eastern side of the castle grounds. Look for the house close to the viewpoint in a compound of buildings. This painting can be found in a smaller room, so make sure to eliminate the guard directly in front of the door.

    4. Osaka Castle Painting
      Move further south into Osaka in Izumi Settsu and head to a structure that’s directly southwest of the castle’s viewpoint. The painting can be found in the house that is furthest from the castle, right behind two guards.

    5. Koriyama Castle Painting
      This castle is located in the northwest section of Yamato, not too far from the viewpoint. Inside the northern area of the castle, head to the third floor where you will find the painting next to a window.

    6. Azuchi Castle Painting
      Head to eastern Omi, east of the Military Harbor in Azuchi. Go to the top northern section of the castle, and the painting will be in a large room located in the middle of the building, displayed on the wall.

    7. Nagahama Castle Painting
      Further north of Azuchi, in Nagahama, travel to the base of the castle and move left until you reach a large room on the first floor. You’ll need to dispatch a few guards before you can obtain this painting.

    8. Nochisenyama Castle
      This castle is located in the northern part of the map, directly south of Obama. The painting can be found in the same building as the viewpoint, two levels below. Entering from the top may help circumvent the formidable enemies below.

    9. Fukuchiyama Castle Painting
      For this painting, go to the center of the castle grounds where a cluster of homes exists. You’ll find it located right in front of the castle, positioned on the southern side of a house you enter.

    10. Himeji Castle Painting
      Finally, head to Himeji Castle in the western part of the map. Find the painting by starting at the eastern side of the castle grounds, moving south until you reach the eastern entrance. Cross over to the house with the last painting, located on the wall in the back left corner of the room.

    Once you’ve collected all ten paintings, return to Kano in Kyoto. Completing this quest will reward you with decorations for your hideout and a healthy dose of experience points.

  • Completing the Guardian Spirit Quest in Assassin’s Creed Shadows

    Completing the Guardian Spirit Quest in Assassin’s Creed Shadows

    In Assassin’s Creed Shadows, the phrase “with great power comes great responsibility” rings true as you channel your abilities to seek revenge against a group of Ronin responsible for unspeakable evil. The game features a vast world teeming with intriguing characters, exemplified by the Guardian Spirit side quest.

    In this quest, you’ll set out to find Ronin warriors scattered across the remote provinces of the AC Shadows universe. This mission is secondary and can be easily overlooked during gameplay. This guide will help you locate the Guardian Spirit side quest and complete its objectives with ease.

    How to Begin the Guardian Spirit Quest

    To initiate the Guardian Spirit quest, you must first finish the story mission titled “The Horseman,” along with the First Act of the game. If you’ve accomplished that, travel west to the Harima region, where you’ll find the quest starting point located inside the Itatehyzou Shrine. There, a young girl weeping in the southeast corner will offer you the quest.

    Upon speaking with her, she reveals that she is an orphan whose mother fell victim to the Ronin. You make a promise to help her avenge her mother by taking down the Ronin, who have resorted to violence in the absence of Oda Obunaga.

    The Guardian Spirit quest is broken into three parts, all listed under the orphan girl in the People of Harima section of your Objectives menu. Defeating five Ronin will earn you 500 EXP and 750 Mon. If you manage to take down ten Ronin, you’ll receive another 500 EXP, as well as 225 oakwood and 270 silk. The final challenge is to eliminate a total of 25 Ronin, which rewards you with 750 EXP, 300 ironsand, and 300 tamahagane.

    Guide to Ronin Locations


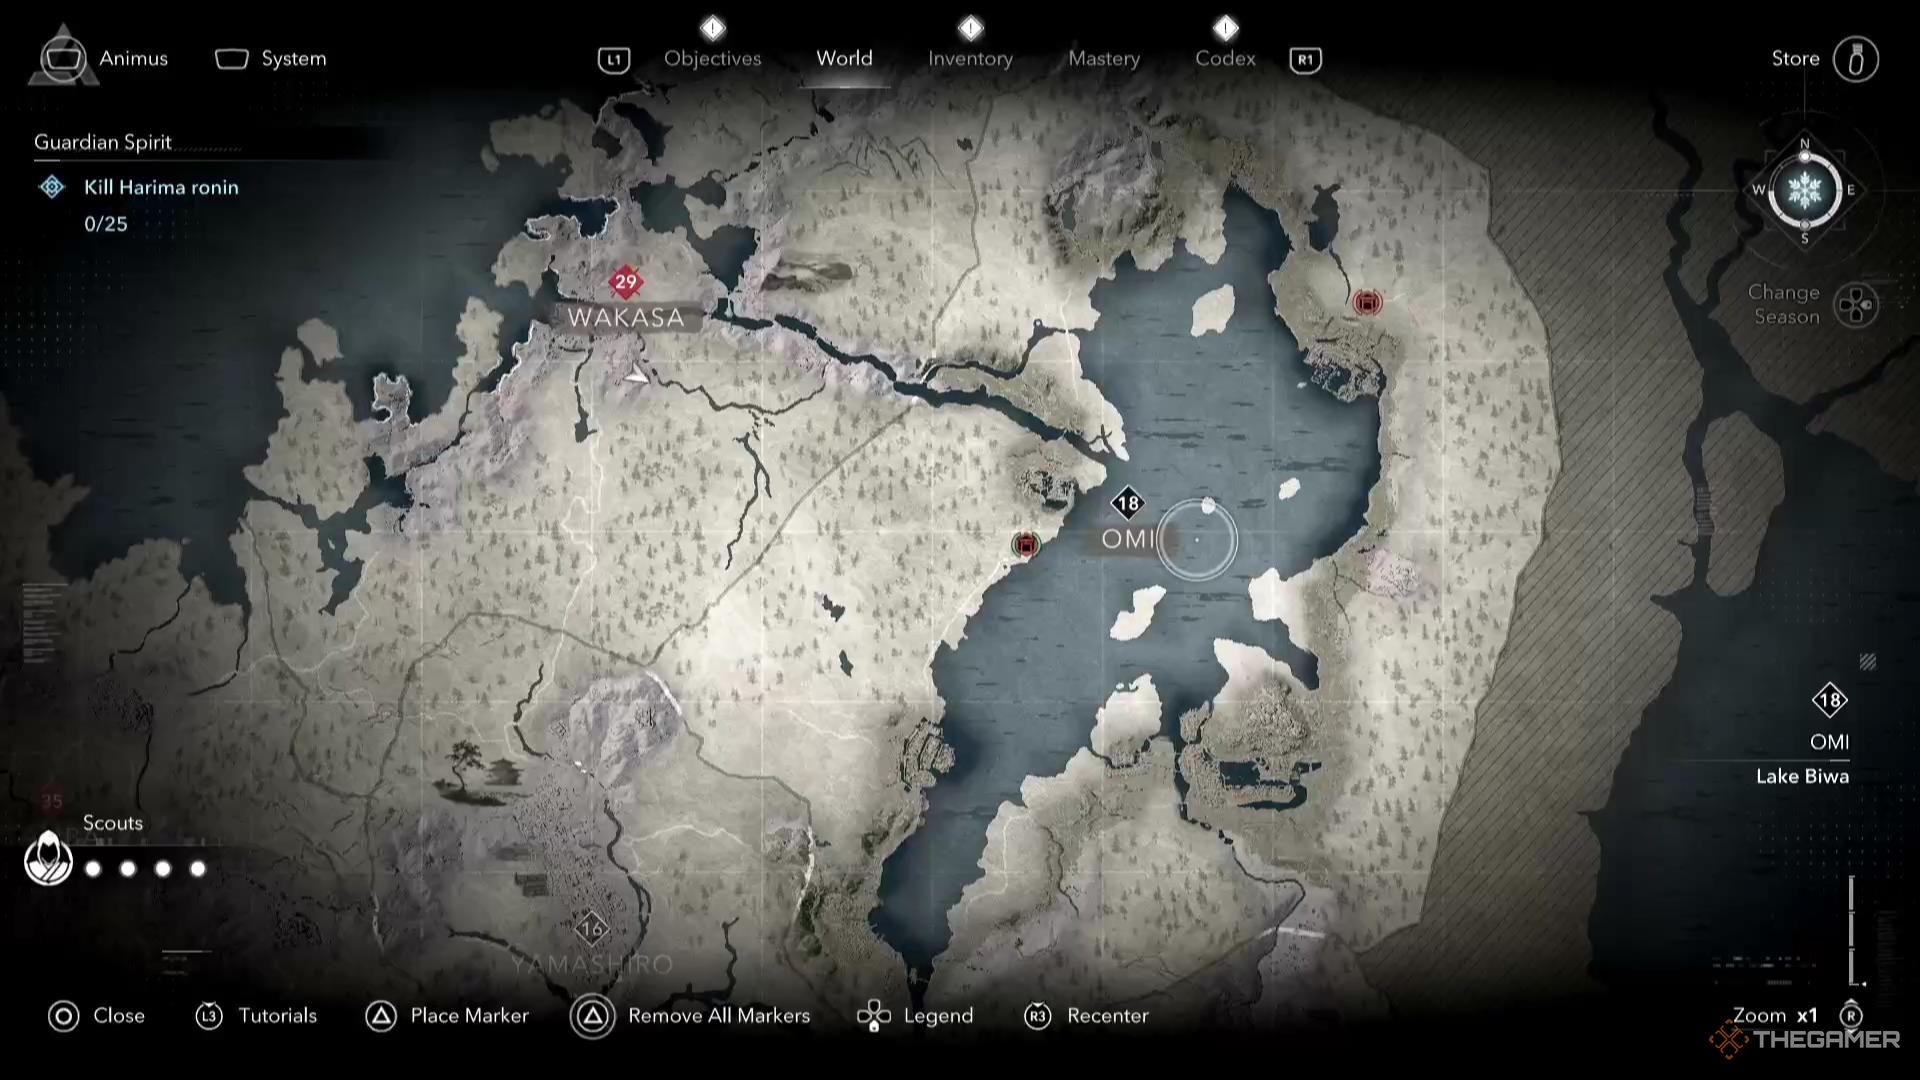
    Map detailing the locations of Ronin in Assassin's Creed Shadows.

    Unlike many quests in AC Shadows, you won’t receive hints for locating the Ronin in the Harima region for this mission. However, reliable spots for Ronin appearances are shown on the map above. Keep in mind that for locations one and three, you might only find one Ronin, if any. While this makes those encounters easier, it will take longer to reach your goal of defeating 25 Ronin. By looping around all three locations, you can allow time for the Ronin to respawn after you’ve eliminated a group.

    Only the Ronin you defeat in the Harima region count toward the total of 25 needed to complete this side quest.

    The Harima location with the highest number of Ronin is undoubtedly Habayama Camp (location two). There, you can typically find five or six Ronin, with some wandering the paths around the camp as well. Taking them on can be challenging, but it significantly speeds up your mission completion.

    Strategies for Defeating Ronin in Combat

    Ronin are among the toughest foes you’ll face in AC Shadows. They have considerable health and inflict devastating damage, making a single hit lethal if your character isn’t sufficiently leveled up or doesn’t have robust armor. A misaligned block or dodge may lead to desynchronization, particularly in groups, which can be frustrating even at lower difficulties.

    If you’re playing as Naoe, elimination through stealth is typically not an option, as the Ronin are often too powerful for that. Your best chance is direct combat, but you can implement a few tactics to ease the challenge.

    First, consider playing as Yasuke, as he’s more likely to withstand a blow and can deal more damage than Naoe. Yasuke has a Mastery Ability which proves useful for taking down Ronin at the Habayama Camp. If you have the War Kick Samurai ability equipped, you can kick Ronin off a cliff and into the woods if they’re positioned in a gap in the walls. The fall damage typically finishes them off and will also grant you the “This is Japan, Actually” trophy/achievement if you haven’t acquired it yet.

    Make sure to save frequently, as you could easily lose progress between confrontations with the Ronin if the game fails to autosave regularly.

    Returning to the Orphan


    Naoe speaking to the orphan who issues the Guardian Spirit quest in Assassin's Creed Shadows.

    Once you have defeated the final 25th Ronin, return to the orphan girl at the Itatehyzou Shrine. Speak with her, and she will express her gratitude for your efforts in defeating the Ronin, rewarding you with gold and 2,000 Mon.

  • Assassin’s Creed Shadows Rated For Nintendo Switch 2

    Assassin’s Creed Shadows Rated For Nintendo Switch 2

    The Pan European Game Information (PEGI) website has recently assigned a rating to Assassin’s Creed Shadows for the Nintendo Switch 2. This is a strong hint that the title may launch on the console around its release date on June 5 or potentially shortly afterward. However, it’s important to remain skeptical, as there’s a chance that a mistake was made on the site, and Ubisoft may not have plans to bring the game to the new system.

    PEGI serves as the European equivalent of the ESRB, tasked with suggesting appropriate age ratings for video games. While the specific listing for Assassin’s Creed Shadows doesn’t specifically mention the Nintendo Switch 2, it does appear under the “Most Searched Games” section of the site.

    While confirmation is still pending, the likelihood of this being an authentic leak seems high. Given that titles like Cyberpunk 2077 have made their way to the Nintendo Switch, age ratings are generally not a major concern. Moreover, Ubisoft has already committed to bringing Star Wars Outlaws to the Switch 2, suggesting it would not be far-fetched for them to consider launching Shadows as well. Nonetheless, even if the game does debut on the Switch 2, it may not be available on day one; Star Wars Outlaws is scheduled for release on September 4th, so it’s plausible that Shadows could be launched later in the year.

    Ubisoft might choose to address the situation surrounding this rating, though it’s not particularly likely. It would certainly be exciting to see Assassin’s Creed Shadows land on the Nintendo Switch 2, following several other titles from the franchise that have appeared on the original Switch, such as the Ezio Collection and Assassin’s Creed III. The new Switch is certainly equipped to handle the game, albeit with some potential compromises on graphics quality.

  • Completing Upgrades for Tools and Ammo in Assassin’s Creed Shadows

    Completing Upgrades for Tools and Ammo in Assassin’s Creed Shadows

    Assassin’s Creed Shadows marks the franchise’s inaugural journey to Japan, introducing fresh elements to the gameplay that fans have never experienced before. Whether you’re assuming the role of Naoe or Yasuke, it’s vital to have strong weapons and tools at your disposal to advance through the narrative of AC Shadows.

    You can discover new weapons in various locations like castles and palaces, but enhancing your tools and ammo is equally important for effectively tackling enemies. Below is a guide on how to upgrade the gear for both Naoe and Yasuke, along with what you need to fully maximize their capabilities.

    In AC Shadows, it’s easy to mix up tools and weapons, but they serve distinct purposes. Weapons, like the katana and tanto, can be found in chests or earned through quests and can be used endlessly by both characters. In contrast, tools, such as kunai and bows, are consumable items.

    Both types of equipment can be upgraded but do so in different ways. Weapons are enhanced at the forge located in the hideout, whereas tools are improved strictly via the Mastery tab in the pause menu. Notably, not all Mastery sections pertain to tools; only Naoe’s Tools section and Yasuke’s Bow and Teppo sections are relevant.

    You can enhance your tools by spending Mastery Points, similar to how you allocate points for Assassin and Kusarigama upgrades. These points accumulate through leveling up, finishing story missions, and defeating higher-level enemies like Samurai Daisho in castles.

    Your play style in AC Shadows will significantly impact which tool upgrades are most beneficial. For example, if you frequently play as Naoe, focusing on her tools like kunai and smoke bombs is often the most effective strategy. Yasuke is generally more weapon-focused, with his Long Katana being his strongest asset.

    Naoe’s kunai excel at eliminating enemies from a distance without detection, while shuriken are handy for stunning foes prior to an assassination. Smoke bombs serve as an escape mechanism during overwhelming combat situations, and if you find yourself running low on tools, increasing your tool capacity is wise.

    You will initially level up rapidly in AC Shadows, but don’t let that give you a false sense of security regarding Mastery Points. As the game progresses, obtaining these points becomes more challenging, so spend them judiciously while planning your upgrade path for both Naoe and Yasuke.

    How to Obtain the ‘In Case Of Trouble’ Trophy/Achievement

    There’s also a silver trophy linked to upgrading your tools. While the trophy’s description might seem straightforward, achieving it requires substantial effort. To unlock the In Case of Trouble trophy, you must fully upgrade Naoe’s Tools Mastery section and Yasuke’s Teppo and Bow sections. Additionally, you need your Knowledge Level to reach the maximum of six to access this feature.

    You can enhance your Knowledge Level by gathering Knowledge Points, which are earned through completing tasks indicated by orange markers on the map. If you’re at Knowledge Rank 6, you will need to spend a total of 70 Mastery Points on Tools, 86 for Bow, and 78 for Teppo, totaling 234 Mastery Points. If you haven’t saved enough, this will require considerable grinding.

    Certain skills can only be unlocked by dismantling organizations on your Objectives board and finishing specific side quests, some of which are shared across different skill sets. Tools specifically need you to complete two out of the following three tasks: the Tournament side quest, destroying the Pirate Alliance, and dismantling the Kurai Eikyou.

    To unlock Teppo, you must defeat both the Pirate Alliance and the Templars. Lastly, regarding the Bow, you need to take down both the Kurai Eikyou and Yokai organizations. Completing these tasks will unlock all the tools and ammo mastery skills.

    Important Note

    To achieve the Platinum trophy, you’ll also need to invest Mastery Points in areas like Naoe’s Shinobi skills in the Art of Ninjutsu. Therefore, you will need to allocate points in various areas to reach 100 percent completion.

  • Completing Every Kashiwara Fort Daisho in Assassin’s Creed Shadows

    Completing Every Kashiwara Fort Daisho in Assassin’s Creed Shadows

    Each castle and fort in Assassin’s Creed Shadows hides a Legendary Chest filled with exceptional weapons or armor that Yasuke and Naoe can add to their gear. If you’re on the lookout for some easy legendary items, start your adventure at Kashiwara Fort in Iga for a quick mission.

    While slicing your way through enemies with Yasuke’s mighty skills can be exhilarating, it might prolong your time in each spot due to the reinforcements. Instead, we’ll show you how to navigate this area stealthily using Naoe’s outstanding stealth techniques and tools.

    Where Is Kashiwara Fort?

    Kashiwara Fort is located in the southwestern part of Iga, to the south of Hijiyama and northwest of the Nabari Wilds.

    The nearest fast travel options are Kashiwara Kakurega to the north and the Nabari Lookout to the south.

    How To Find & Assassinate The Samurai Daisho

    Enter the fort from the northern side close to Kashiwara Village.

    Watch for an entrance surrounded by lush vegetation, typical of the fort’s perimeter. Use the bushes for cover and slip into the fort through the Kashiwara Manor.

    Make your way through the Manor to the eastern part of Kashiwara Fort by crossing over a fallen tree trunk into a broken wall that leads into the fort.

    From the eastern section of Kashiwara Fort, move up and around to the southern side for an elevated vantage point overlooking the fort’s main courtyard, which is filled with guards and the lone Samurai Daisho.

    • Spot the Samurai Daisho in a quiet area at the southernmost edge of the fort, near a patrolling guard.
    • Position yourself on a high perch to monitor their movements.
    • Once the guard moves away, proceed through the broken house and swiftly take out the Samurai Daisho.
    • Make sure to eliminate the larger patrolling guard to avoid attracting attention.

    What Rewards Do You Get From Kashiwara Fort?


    With the Samurai Daisho taken care of, you can now collect the various treasures scattered throughout Kashiwara Fort.

    Side Loot

    There are several additional chests tucked away in the area, including:

    • Additional Loot:

      • Check the first building on the eastern side of Kashiwara Manor for a chest.
      • In the southern courtyard, across from where you eliminated the Daisho, you will find another chest inside a broken house.
      • Over in the northwestern corner of the main courtyard, there’s a chest located next to a wall.

    Legendary Chest


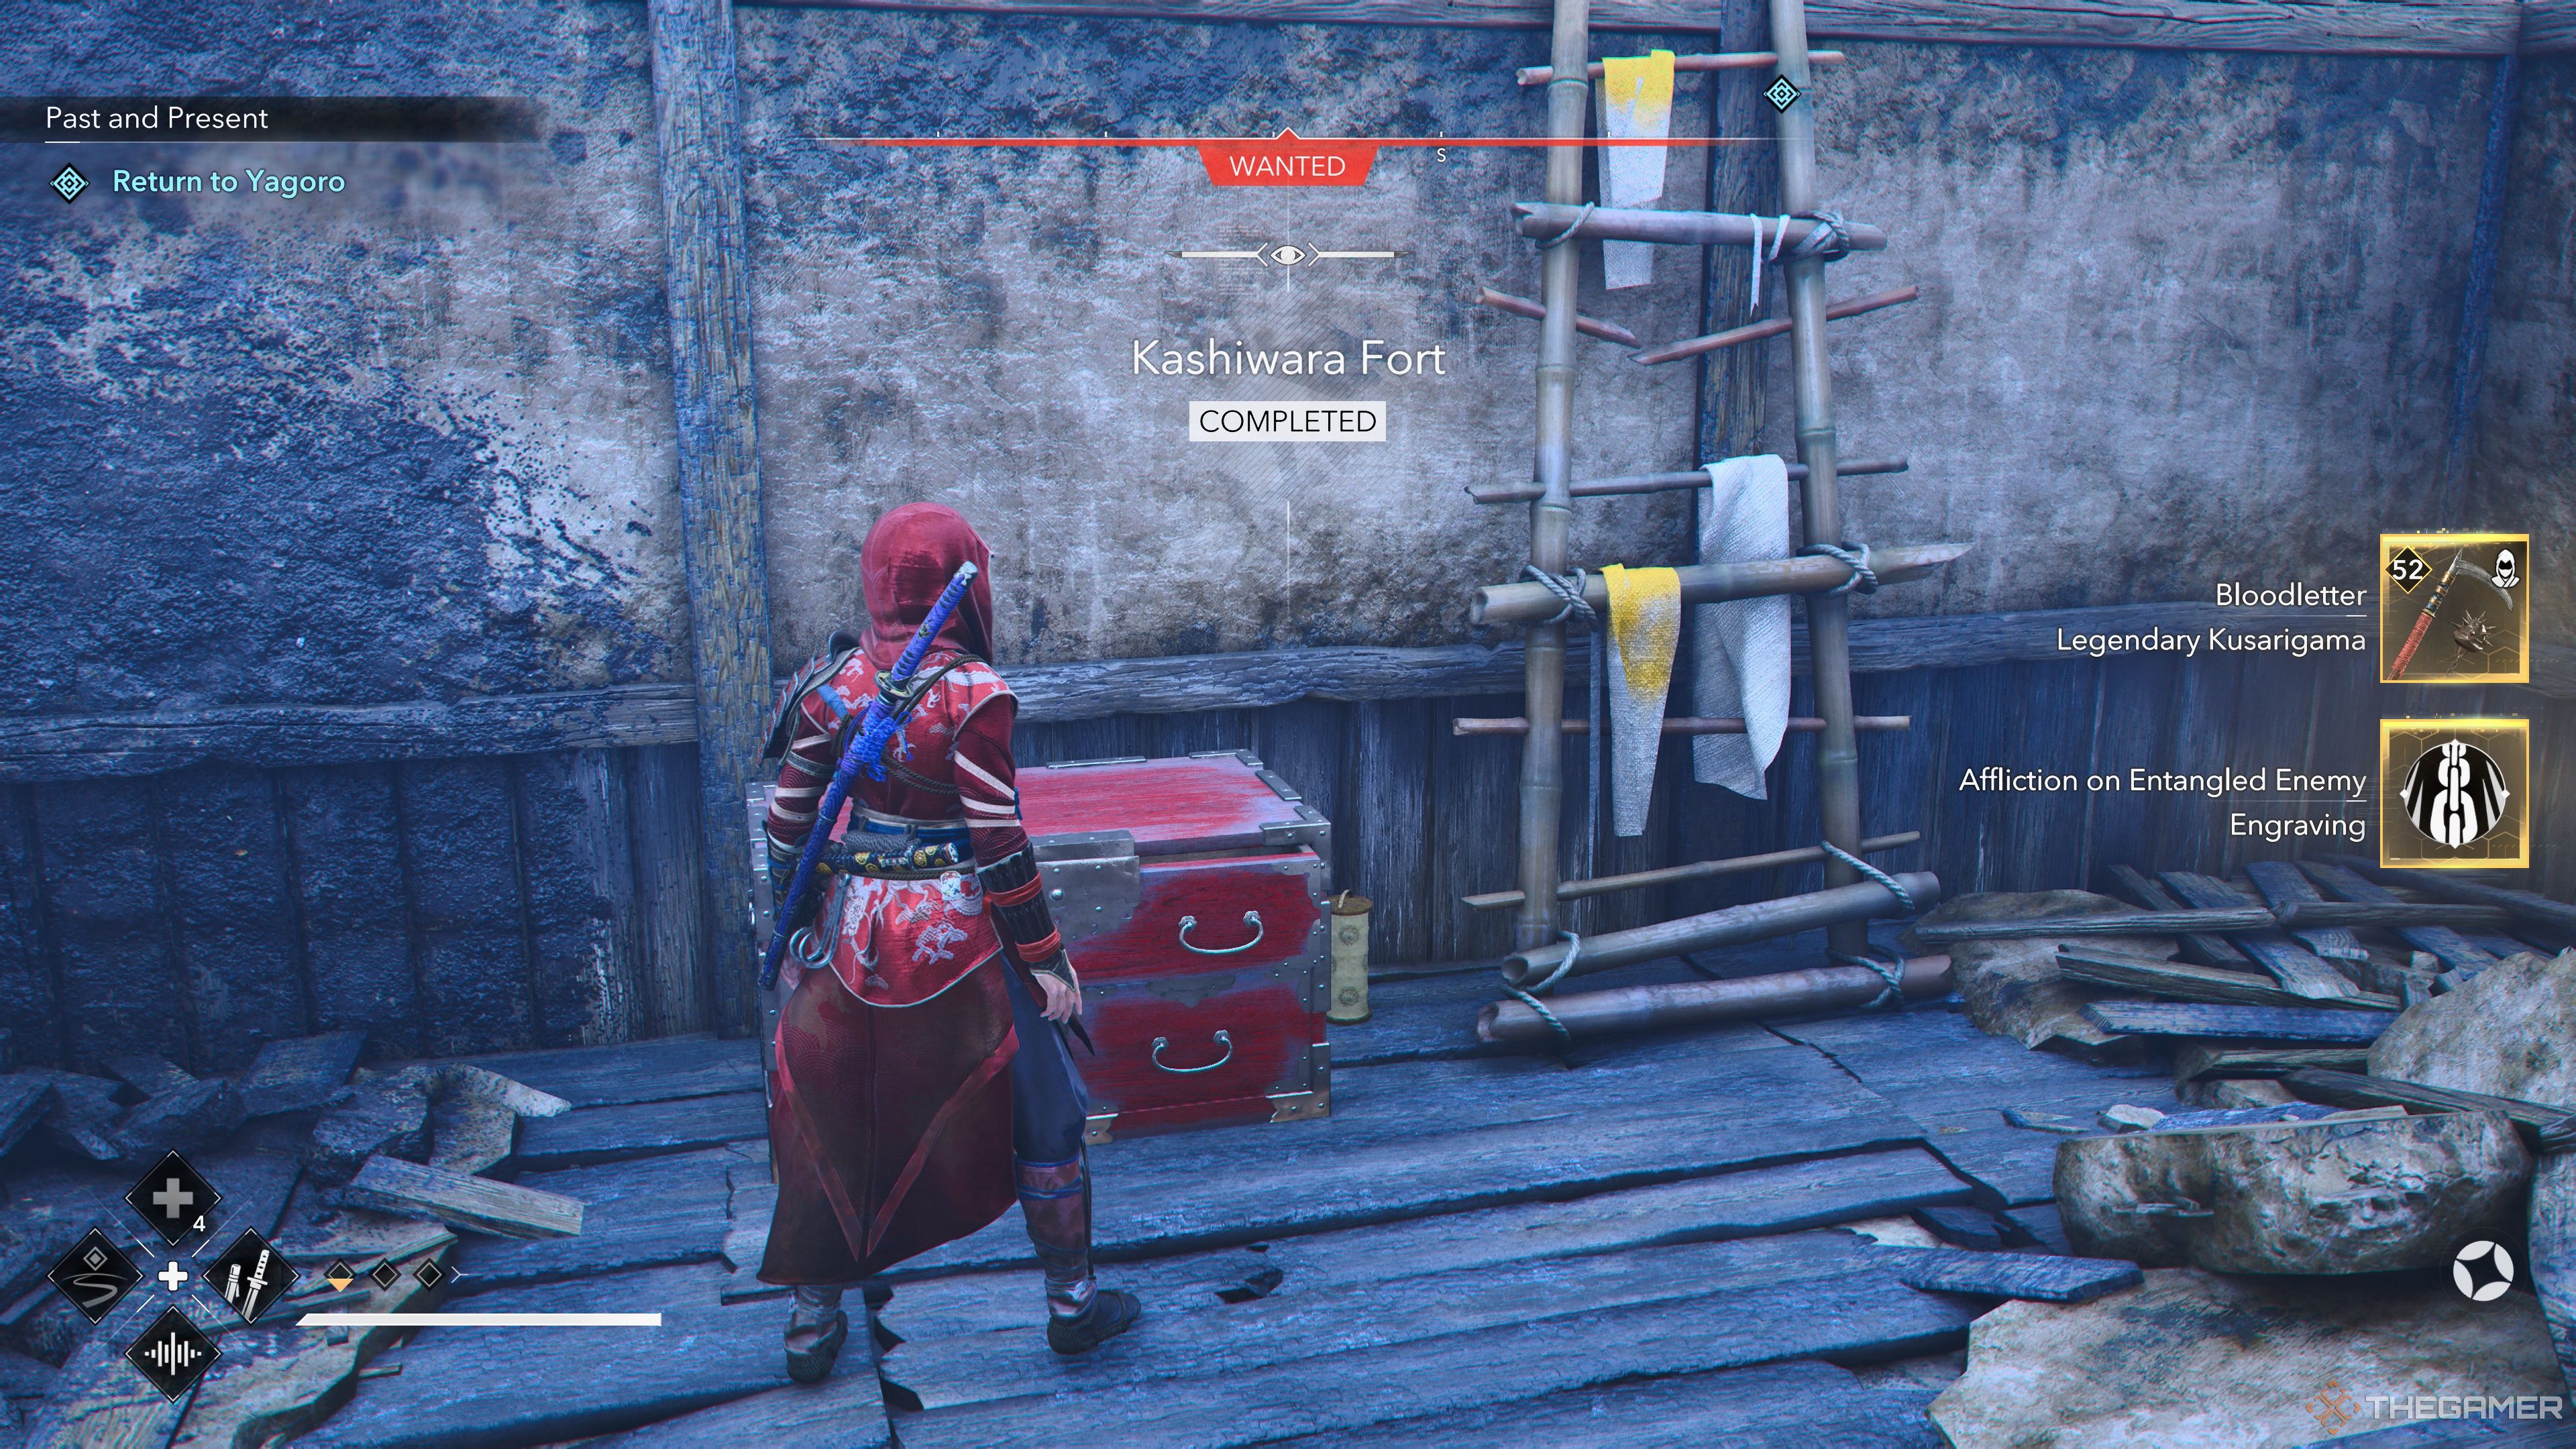
    The Kashiwara Fort Rewards in Assassin's Creed Shadows.

    After taking down the Samurai Daisho, look for the Legendary Chest located in the broken building right next to where he fell.

    Inside, you will discover:

    • 3,000 experience points
    • An Engraving
    • The Bloodletter Legendary Kusarigama for Naoe

    With your rewards secured, you’ve successfully completed your quest at Kashiwara Fort!

  • Completing the Legendary Mount Quest in Assassin’s Creed Shadows

    Completing the Legendary Mount Quest in Assassin’s Creed Shadows

    In Assassin’s Creed: Shadows, the vastness of Japan offers plenty of opportunities for exploration, and having a trusty mount can enhance your adventure. If you find yourself growing weary of your horse’s standard look, don’t worry—there are various mounts for you to discover throughout your journey.

    While you can encounter numerous regular mounts along the way, the Legendary Mount is somewhat hidden and located in an unexpected area. If you’re aiming to add a new mount to your collection, this guide will help you uncover the location of this legendary variant.

    How to Acquire the Namazu Mount


    As of now, there is only one Legendary Mount available in the game, known as the Namazu Mount. You can obtain it early in the game, but make sure to get past the prologue to unlock this opportunity.

    Additionally, if you have a Digital Deluxe or Collector’s Edition or are subscribed to Ubisoft+, you can also access the Sekiryu Beast.

    Keep in mind that Assassin’s Creed: Shadows is a game that receives frequent updates; more Legendary Mounts may be introduced in the future.

    Locating the Namazu Mount


    Okishima's location marked on the map in Assassin's Creed Shadows.

    Finding this mount is pretty straightforward once you know where to look. First, head to Okishima Island on Lake Biwa in Omi. Look northwest of Azuchi to find the largest land mass in the lake; that’s your destination.

    Once you arrive at Okishima, make your way to the western side of the island. You’ll encounter a couple of enemies near a bonfire there, along with a side mission just beyond them.

    After dispatching the enemies, dive into the water right in front of the bonfire. Underwater, turn back towards the island and swim to your left.

    As you navigate along the submerged edge of the island, keep an eye out for a cave entrance. You might need to dive deeper if it’s not immediately visible.

    The cave entrance can be easy to overlook since it’s located in deeper waters. Try visiting the island during the day or adjust the in-game brightness settings to help spot it better.

    When you locate the entrance, swim through it and follow the only available path. This will take you to the chest containing the Namazu Mount. After collecting it, swim back to the surface and you’ll be able to switch to your new mount freely.


    The mount selection menu highlighting the Namazu Mount in Assassin's Creed Shadows

    Lastly, keep in mind that this mount is purely for show. Equipping the Namazu Mount will not alter your gameplay experience.

  • Completing the Hunters of Kyonyo Quest in Assassin’s Creed: Shadows

    Completing the Hunters of Kyonyo Quest in Assassin’s Creed: Shadows

    Assassin’s Creed has always been about taking down targets, and in Assassin’s Creed: Shadows, you’ll find plenty of them. Some of these targets are part of the main storyline, while others give you extra experience points and gear. However, you’ll need to devote a lot of time to grinding, which can sometimes feel repetitive.

    The assassination missions can spice up the grinding experience, especially in the Hunters of Kyonyo Quest. This quest features a variety of components that make it both intriguing and complex. Since the objectives aren’t spelled out, this guide will assist you in navigating through it.

    Unlocking the Hunters of Kyonyo

    You can unlock this quest in Act Three, specifically after reaching Negoroji in northern Kii.

    Once you arrive in town, go to the Fudo-do Temple, which is situated in the eastern side of Negoroji, just past the Monk Quarters.

    This quest can be approached with either Naoe or Yasuke, both of whom have skills suitable for the mission.

    Upon getting to the temple, you’ll encounter Kennyo, standing near a bell in front of the temple. He will inform you that bounty hunters are causing trouble in the area, and you’ll need to deal with them.

    To make matters more pressing, Kennyo’s son is also in danger. You’ll need to slay five bounty hunters in the Kii province. While taking them out might be straightforward, tracking down their locations is the real challenge.

    Locations of the Hunters of Kyonyo

    Some targets are easier to find, as you might receive a clue in the form of a letter that reveals their locations. Others may require more investigation, allowing for a more immersive experience. Below are the details for each assassination.

    Bounty Hunter Target 1 – Inumaru: The Ambusher

    After your conversation with Kennyo, visit the Objective Board for the Hunters of Kyonyo quest, where you’ll see that you need to investigate central Kii.

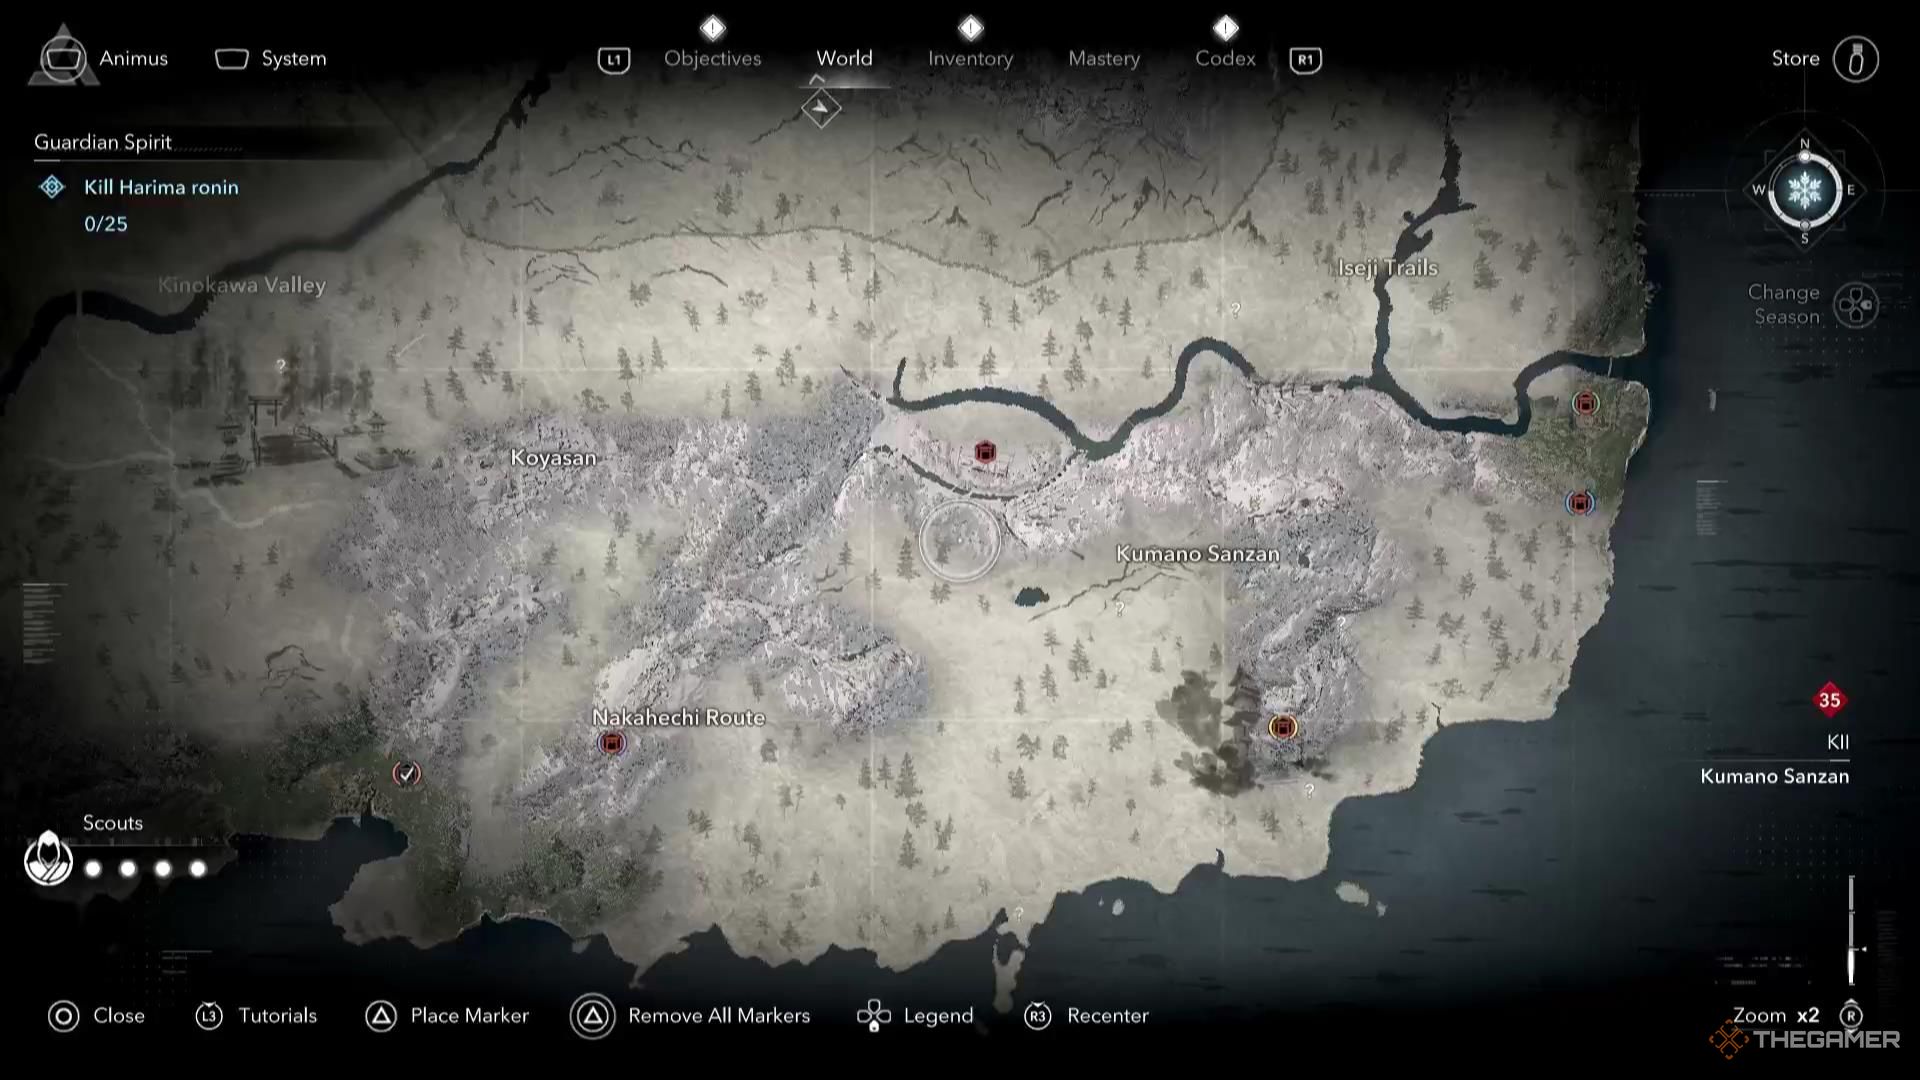
    For Inumaru, your only hint will lead you to southeast Koyasan, near Sazae Oni Shores. There, you will encounter a Ronin. Defeating him will yield a letter that directs you to Yakushi Onsen, which is located east of the Nakahechi Route.

    Inumaru typically wanders alone during the day, making it a prime time to strike.

    Bounty Hunter Target 2 – Kamakichi: The Spy

    Move to western Kii in Saika and locate a house in the northeast of the town. Inside, you’ll need to collect three items: one is on a table by the main door, and the other two are on bed mats directly across from the door.

    Once you have all three items, Kamakichi’s location will be revealed. His whereabouts change based on the time of day: by night, he can be found south of Saika Castle in the Monk Houses, while during the day, he’ll be north of the Monk Houses in the market.

    After taking care of Kamakichi, head to the southwest corner of Saika Temple Grounds (behind Saika Castle) and look for a hole to descend into. Inside, you’ll meet Kyonyo, Kennyo’s son.

    Don’t forget to grab the letters nearby to learn about your next targets.

    Bounty Hunter Target 3 – Shishi-o: The Interrogator

    For Shishi-o, make your way to southeastern Kii in Kumano Sanzan. Head south to Kumano Nachi Taisha Temple, where you’ll find him interrogating NPCs behind the temple, up the stairs in the back right corner.

    Bounty Hunter Target 4 – The Shinobi: Toro

    This quest requires you to play at night, as the NPCs you need to talk to won’t appear during the day. Head to Koyasan in Kii in the northern section of the region. Look for the Ornament Vendor south of Kongobuji Temple.

    After speaking with her, go south past the market until you spot a guard standing near a body. He will instruct you to head to the Monks’ District, west from your current location.

    When you reach the Monks’ District, engage with the monk outside the temple and follow him inside. You must eliminate four light sources in one of the houses to set up an ambush. The Shinobi will then appear; make sure to stealthily pursue him around the temple grounds.

    After you’ve completed your fourth kill, travel to the southwestern part of Iseji Trails, located at the west of Kii, to find Kyonyo in a camp just south of Iseji Trails.

    Upon interacting with Kyonyo, you’ll discover that the head of the Bounty Hunters has taken his father hostage at a nearby fort.

    Bounty Hunter Target 5 – Tsuchi-Gumo: Bounty Leader

    Once you learn that Kennyo is in danger, you and Kyonyo must rescue him. Fortunately, the fort is close by, to the northwest of Kyonyo’s camp, towards Akagi Fort.

    When you arrive, you will once again meet Kyonyo, and together you will strategize your attack, which leads to a dialogue choice:

    • “I’m going alone.”
    • “Let’s go together.”

    Opting to go alone is more challenging, as the fort will be filled with guards. However, choosing to team up with Kyonyo allows his men to engage the first wave of enemies, giving you the chance to sneak in.

    Tip

    It’s best to tackle this mission during daylight since Tsuchi-Gumo’s fort is less guarded then, making the assassination easier.

    Make your way to the upper central section of the fort, where you’ll find Tsuchi-Gumo.

    After defeating him, exit the fort, and you’ll see Kyonyo and Kennyo together at the entrance. Interact with them to complete the quest.
  • Assassin’s Creed Shadows – Scout’s Guide to Completing Challenges

    Assassin’s Creed Shadows – Scout’s Guide

    In "Assassin’s Creed Shadows," scouting is crucial for navigating the game’s world and completing missions effectively. This guide will provide you with tips on how to make the most of your scouting efforts, helping you stay one step ahead of your enemies.

    Understanding Scouts

    Scouts are your eyes in the field. They allow you to gather important information about enemy positions, terrain, and potential routes. Using scouts can help you plan your approach and avoid dangerous situations.

    How to Scout Effectively

    1. Use Your Environment: Always pay attention to the surroundings. Climbing high points or using vantage spots can give you a better perspective on the area.

    2. Be Stealthy: Move quietly and avoid detection. Stay in the shadows, and use cover when approaching enemy camps or watchtowers.

    3. Mark Enemies: When you spot an enemy, mark them to keep track of their movements. This is essential for planning your attacks or avoiding confrontations.

    4. Observe Patrol Patterns: Take the time to watch how enemies move. Understanding their patrol routes will help you find gaps in their defenses.

    5. Utilize Tools: Use your tools and gadgets to your advantage. Drones or other gadgets can help you scout from a distance without putting yourself in danger.

    Planning Your Move

    Once you’ve gathered information, it’s time to create a plan. Decide whether to engage enemies head-on or take a stealthier approach. Sometimes, it’s better to avoid combat and complete objectives quietly.

    Communication with Your Squad

    If you’re playing with a team, make sure to communicate clearly about what you’ve discovered. Effective teamwork can enhance your scouting efforts and lead to successful missions.

    Conclusion

    Mastering the art of scouting in "Assassin’s Creed Shadows" can drastically improve your gameplay experience. By following these tips, you’ll be better equipped to navigate challenges and achieve your goals. Stay alert, plan wisely, and enjoy the adventure!

  • Assassin’s Creed Shadows: Solving the Path of Serenity

    Assassin’s Creed Shadows: Completing the Path of Serenity

    In Assassin’s Creed Shadows, players embark on a thrilling journey through various missions, and one of the most memorable is the Path of Serenity. Here’s a straightforward guide to help you navigate this quest successfully.

    Understanding Your Objectives

    Start by familiarizing yourself with the goals of the Path of Serenity. You’ll need to complete a series of tasks that involve stealth, combat, and problem-solving. Pay close attention to the mission brief, as it will provide critical insights on what you need to accomplish.

    Preparation is Key

    Before delving into the mission, make sure your character is well-equipped. Check your inventory for weapons, tools, and gear that will enhance your stealth abilities. Upgrading your skills, particularly in stealth and detection, can greatly improve your chances of success.

    Stealth Over Combat

    The Path of Serenity often emphasizes a stealthy approach. Move carefully and use the environment to your advantage. Stay in the shadows, and avoid drawing attention to yourself. Utilize distractions, such as throwing objects, to divert enemies while you sneak past or take them down silently.

    Navigating Challenges

    As you progress, you may encounter various obstacles. These could range from locked doors to hostile enemies. For locked areas, look for keys or alternative routes. Sometimes, observing enemy patterns can reveal safe openings to sneak by unnoticed.

    Stay Alert

    Always be aware of your surroundings. Use your map to pinpoint important locations and keep an ear out for enemy conversations that might provide hints. Staying alert will help you avoid ambushes and make informed decisions.

    Final Steps to Completion

    Once you’ve completed the main objectives, check your surroundings for any unexpected tasks or collectibles that you might have missed. Exploring can often reveal additional rewards or insights that enhance the storyline.

    By closely following these tips and immersing yourself in the gameplay, you’ll find that completing the Path of Serenity can be a rewarding experience. Take your time, trust your instincts, and enjoy the journey through the world of Assassin’s Creed Shadows.

  • Completing Every Quest from Matsu in Assassin’s Creed Shadows

    Completing Every Quest from Matsu in Assassin’s Creed Shadows

    Matsu is a significant figure in Naoe’s life, yet her current location remains a mystery. However, upon embarking on the "From the Ashes" quest in Assassin’s Creed Shadows, your objective will be to locate her, setting off a chain of engaging missions.

    Tracking down Matsu can be a bit tricky, particularly if you haven’t activated the guided mode. The Scout system complicates matters, requiring you to spend a lot of resources to utilize them fully. In this guide, we aim to simplify the process of finding Matsu and completing the subsequent quests.

    How to Start the From the Ashes Quest

    You can initiate this quest by heading to the Mibuno Vale marker located in the IGA region. There, you’ll discover that Matsu is indeed alive, updating your quest objective to find her. You can locate her at the Hinotani Shrine, which is situated to the west of the Nabari Wilds in the Iga region.

    You don’t need to rely on your scouts to track her down. Just make your way to the location mentioned, and you’ll find Matsu waiting for you. Once you meet her, engage in conversation to complete the quest and kick off a new mission.

    The Monk’s Wake

    When you find Matsu, she’ll request that you secure her cabin, which will be marked on your map.

    Tip: It’s best to avoid the ronin you encounter along the way, as they can be quite bothersome to deal with.

    Upon reaching the cabin, you will see Yoshiharu under attack by The Valley Yamabushi. Quickly defeat this enemy. You could also sneak up on the Yamabushi for an assassination attempt, although one strike may not be enough to finish him. After you’ve taken care of him, speak with Yoshiharu, and afterward, head back to Matsu to proceed to the next quest.

    Good for What Ails You

    In your conversation with Matsu, she will ask you to retrieve her maggots. These can be found in the Southern Nabari Wilds, south of the Hinotani Shrine, on a trail that leads above the Akame Shi waterfall. Once you collect the maggots, return to Matsu to conclude this quest.

    Shadows and Light

    The final quest, Shadows and Light, presents more of a challenge. After speaking with Matsu, approach Yoshiharu and inform him that his granddaughter is faking her injury. Your task now is to locate three lanterns.

    These lanterns are hidden at Kashiwara Manor in the Iga region, a location known for its hostile environment. Stealth is critical here; avoid the front entrance and instead, look for a climbing spot on the left side to access the interior.

    Inside, there are plenty of bushes for cover, making it easier to carry out assassinations. It’s advisable to take out the larger enemies first, as they can complicate battles. Use L2 to highlight your objectives in the area, and you’ll see three glowing blue dots indicating the lantern’s locations.

    One of the lanterns is in the right cabin, another in the main house, where a rare trinket can also be found, and the last one is in the left cabin.

    Tip: You’ll likely find various other valuable items like Hemp Cloth, Silk, and Crops around. If you’re having difficulty locating them, use L2 to mark them for easier identification.

    After securing all the lanterns and any additional items, return to Yoshiharu to complete the quest.

  • Completing the Quest: Finding All Shrines in Assassin’s Creed Shadows

    Completing the Quest: Finding All Shrines in Assassin’s Creed Shadows

    The universe of Assassin’s Creed Shadows is vast and stunning, filled with numerous activities and discoveries while maintaining its artistic goal of showcasing a lively, colorful Japanese scenery. Whichever way you explore, you’re bound to encounter unique vistas and numerous locations waiting to be discovered.

    Among the many sites you can find in AC: Shadows are shrines. These shrines hold religious significance for the local population and feature striking architecture and beautifully landscaped surroundings. There are 27 shrines to discover in total, and if you aim to collect them all, we can assist you.

    What Are Shrines?

    In AC: Shadows, each shrine includes several prayer spots. Completing a prayer at all these spots rewards you with a Knowledge Point for that shrine. These Knowledge Points are crucial for developing the skills of Naoe and Yasuke, making shrines an important means of keeping both characters sharp.

    Every Shrine In Izumi Settsu


    In the Azumi Settsu region, there are two shrines, located near the western coast. This area is the game’s entry-level region, which makes it easy to navigate and collect the shrines without worrying about your character’s level.

    Shrine

    Location

    Nishinomiya Shrine

    This shrine is west of Amagasaki, and northeast of Akashi.

    Sumiyoshi Shrine

    This shrine is south of Osaka, northeast of Sakai, and southwest of Tennoji Pagoda.

    Every Shrine In Harima

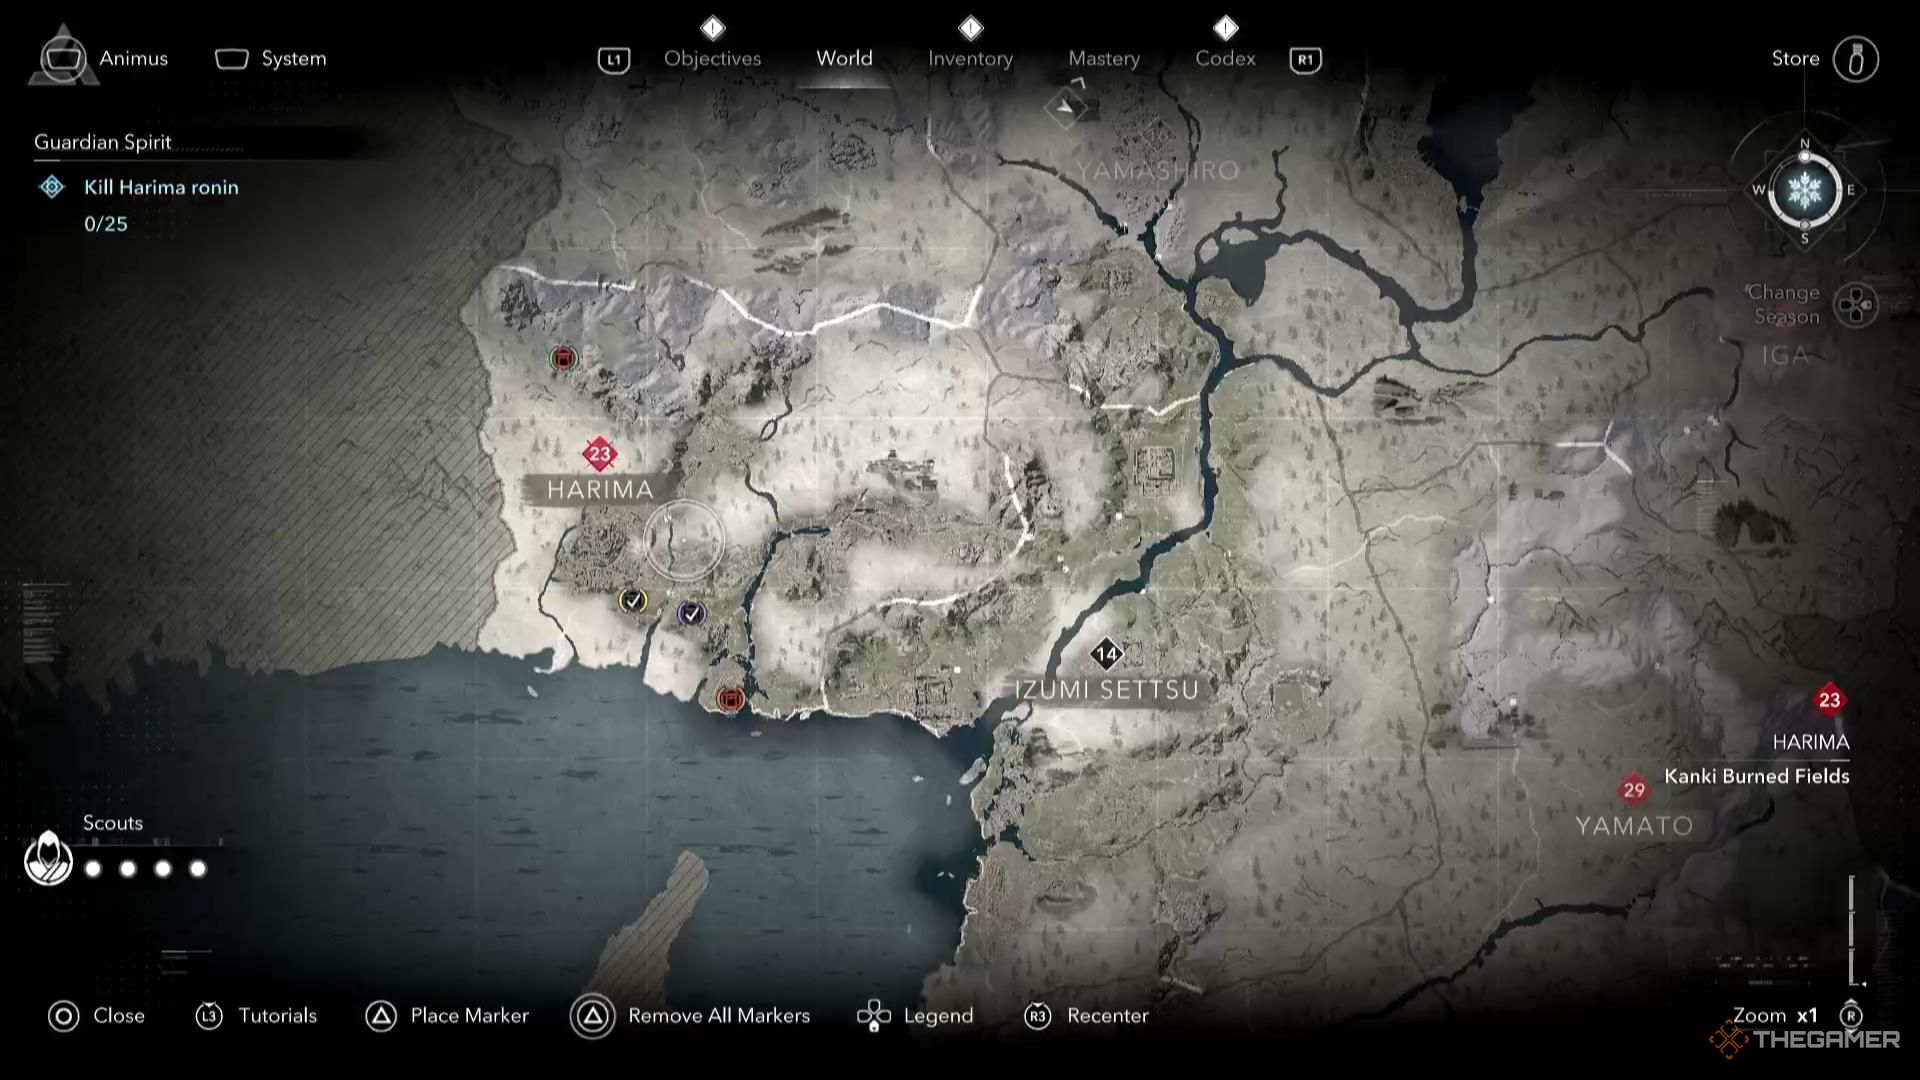
    Every shrine location in Harima in Assassin's Creed Shadows.

    Harima features four shrines, with three situated along the southern coast. The exception is the Kaya Shrine, found on Mount Kasagata. This region has a level of 23, which can pose challenges if you attempt to pass through it at lower levels.

    Shrine

    Location

    Itatehyozu Shrine

    This shrine is southeast of Himeji Castle, and south of both Himeji and the Kanki Burned Fields.

    Ishinohoden Shrine

    This shrine is east and across the bridge from Itatehyozy Shrine, in the middle of a small forest.

    Takasago Shrine

    This shrine is heavily protected, and entering is seen as trespassing. It’s located in the Kakogawa Estate, in the southernmost part of Harima and to the west of Amagasaki.

    Kaya Shrine

    This shrine is on the western side of Mount Kasagata, slightly northwest of Inariyama Watchtower.

    Every Shrine In Yamashiro

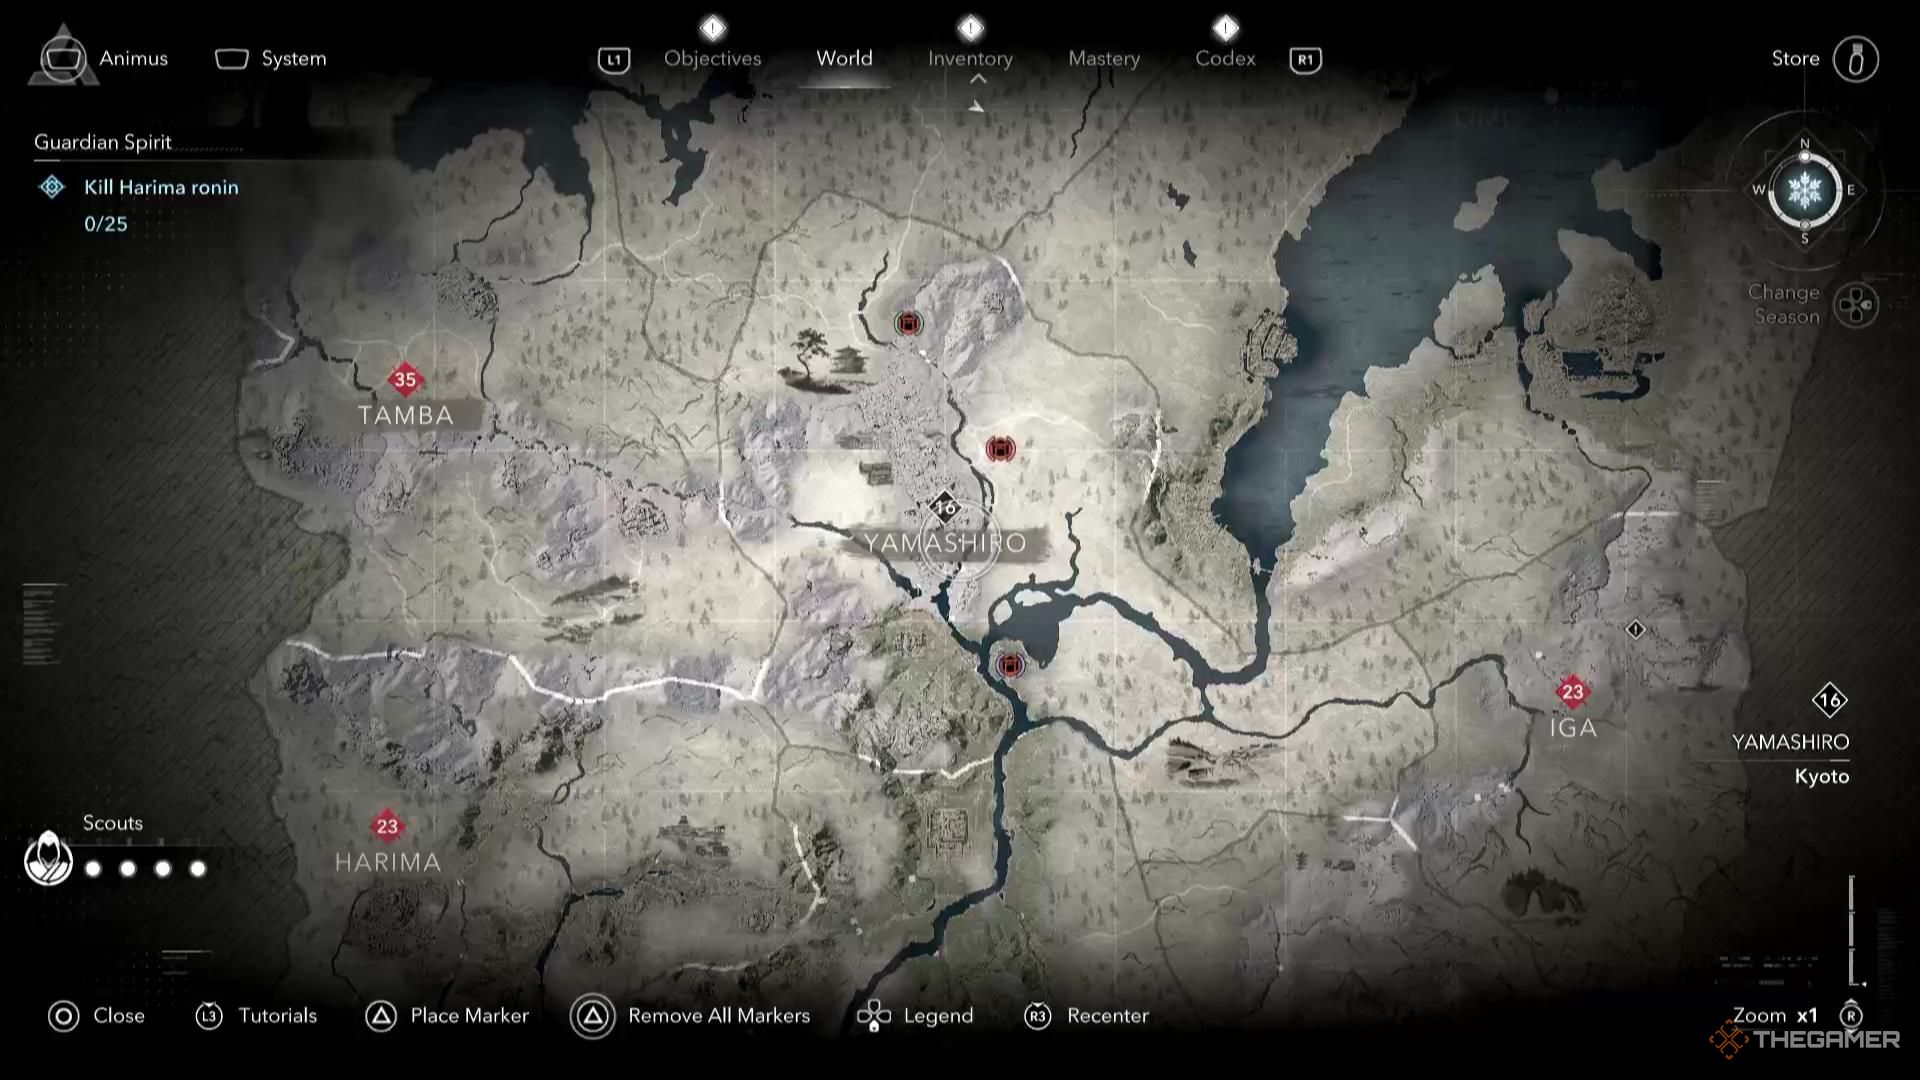
    Every shrine location in Yamashiro in Assassin's Creed Shadows.

    Yamashiro is a lively area with three shrines, all situated on the eastern side of the region. It’s a relatively low-level area, ideal for collecting Knowledge Points early on.

    Shrine

    Location

    Kamagamo Shrine

    This shrine is directly west of the Hanazono Tower viewpoint, and north of Kyoto.

    Gion Shrine

    This shrine sits just east and across the river from Kyoto, and is directly west of the Pagoda of the Hills viewpoint.

    Iwashimizu Hachiman Shrine

    This shrine is located on the west side of the Ogura Pond island, directly across from Oyamazaki Village.

    Every Shrine In Tamba

    Every shrine location in Tamba in Assassin's Creed Shadows.

    In Tamba, there are only two shrines: one in the northwest corner and another on the eastern side. This region is more challenging, so for those wanting to quickly earn Knowledge Points, it’s wise to stay on horseback until you reach the shrines to dodge confrontations.

    Shrine

    Location

    Atago Shrine

    This shrine is directly west of the Arashiyama Cascades viewpoint, and northeast of the Kameyama Tenshu viewpoint.

    Onitake Shrine

    This shrine is slightly south of the Mount Akaiwa viewpoint, and northwest of Fukuchiyama.

    Every Shrine In Wakasa

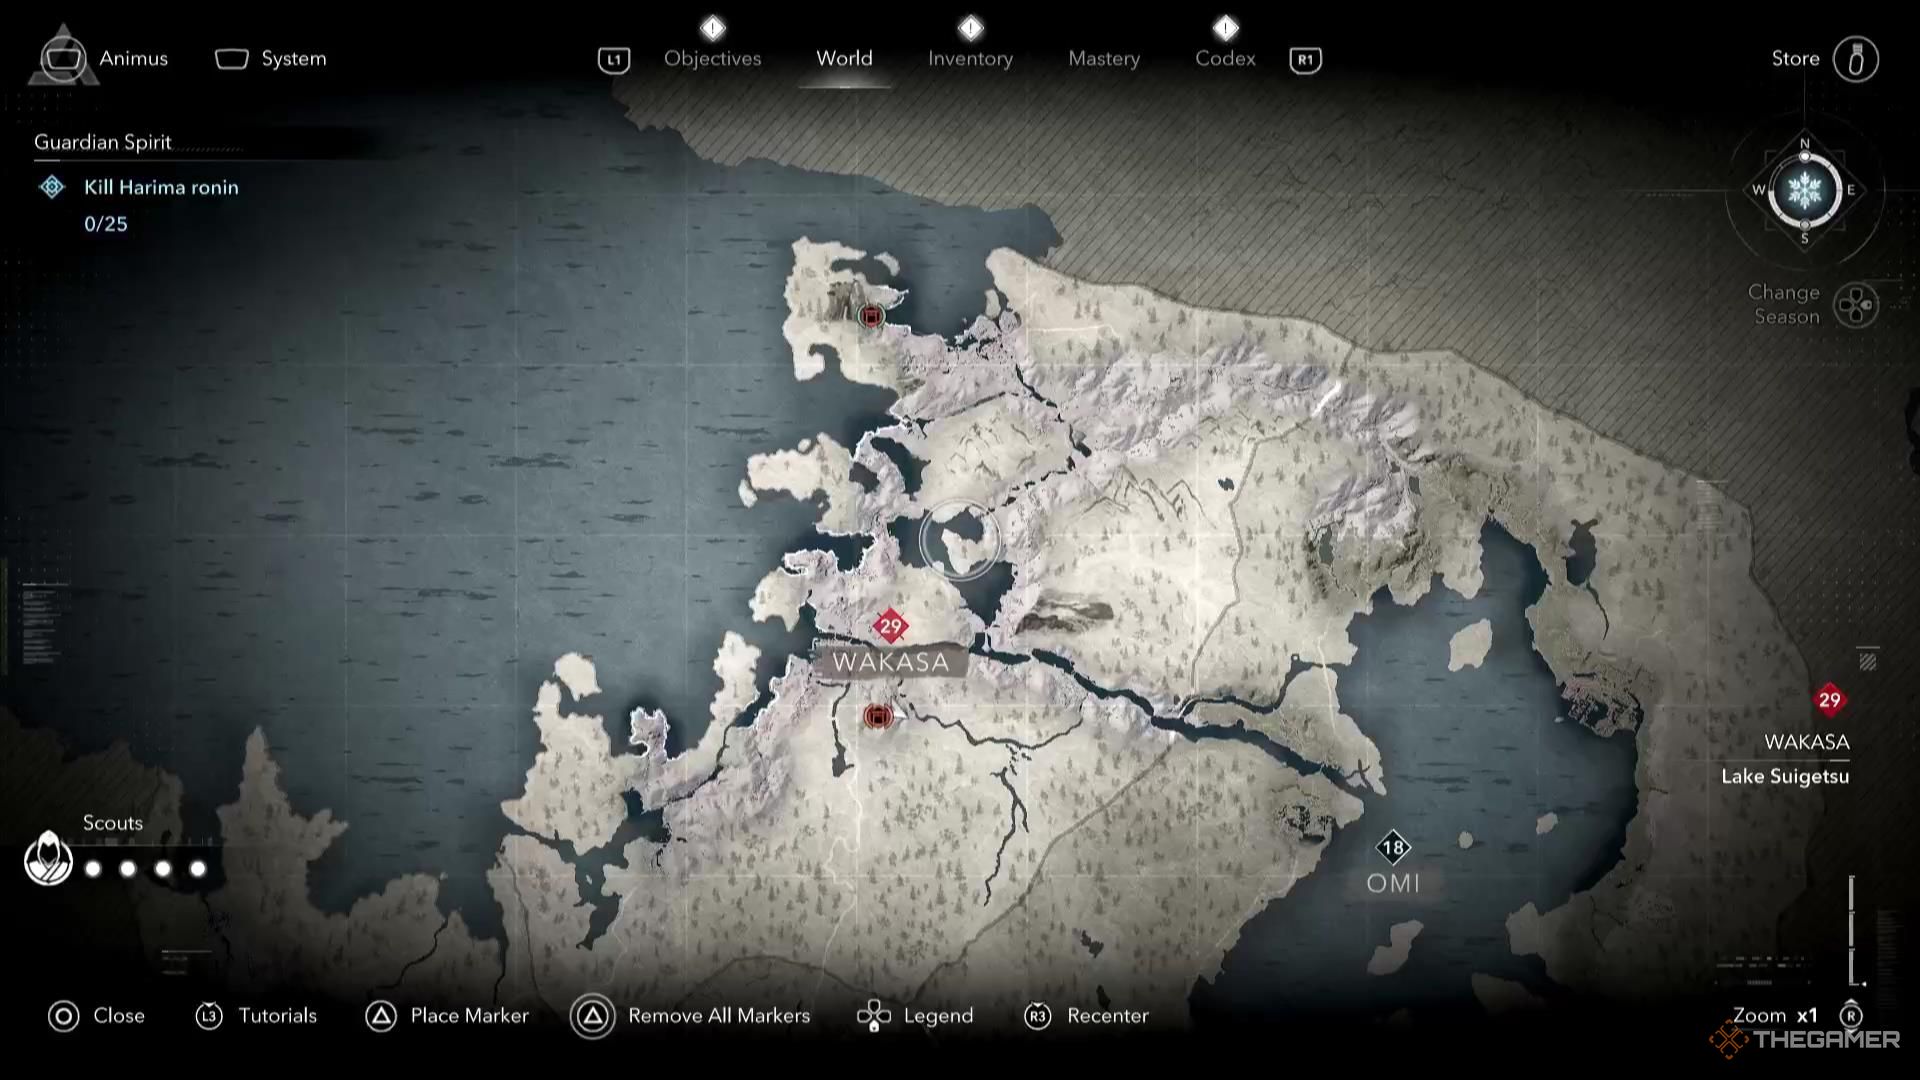
    Every shrine location in Wakasa in Assassin's Creed Shadows.

    The Wakasa region, while expansive, features only two shrines. One is situated in a remote northern peninsula, while the other is nearly at the region’s center. Wakasa is also a higher-level area, so be cautious of the challenging terrain if you choose to explore it at lower levels.

    Given the limited number of shrines, it may be wiser to focus on other, easier locations for early Knowledge Points in the game.

    Shrine

    Location

    Jogu Shrine

    This shrine is located further up the coast from the Sotomo Gate, and southwest of the Tsuruga Port Overlook.

    Wakasahiko Shrine

    This shrine is south of Obama, and north of the Onyu Pass, nestled in between the two rivers in the area.

    Every Shrine In Omi

    Every shrine location in Omi in Assassin's Creed Shadows.

    The Omi region is another vast area that features only a couple of shrines. These shrines lie on opposite sides of Lake Biwa, with one positioned on the western shore and the other on the northeastern side. Despite its size, Omi is considered a medium-level area, mainly because much of it is covered by Lake Biwa.

    It’s fairly simple to dodge fights in this area, and the significant exploration opportunities make it worth visiting, even if your level isn’t quite high enough yet.

    Shrine

    Location

    Shirahige Shrine

    This shrine is on the coast of Lake Biwa, just south of Omizo Castle.

    Nagahama Hachimangu Shrine

    This shrine is north of Nagahama, and just south of the Goshiki Outlands.

    Every Shrine In Iga

    Every shrine location in Iga in Assassin's Creed Shadows.

    Iga is a compact region, but it houses two shrines in its northern area, located close to each other. Iga is considered a medium-level area, so although it might not have many features, these two shrines are conveniently located for a quick visit.

    Shrine

    Location

    Aekuni Shrine

    This shrine is located just north of Ichinomiya, and southwest of Otogi Pass.

    Kasuga Shrine

    This shrine is slightly north of Aekuni Shrine, and to the southeast of the Tejikara Vista viewpoint.

    Every Shrine In Yamato

    Every shrine location in Yamato in Assassin's Creed Shadows.

    The Yamato region features four shrines: one in the south, three clustered in the northern section. As a higher-level area with significant vertical terrain, it shares some similarities with Wakasa. If your priority is to gain Knowledge Points quickly, consider exploring other locations first.

    Shrine

    Location

    Niukawakami Shrine

    This shrine is north of Yoshino, south of the river that separates it from Takatori.

    Omiwa Shrine

    This shrine is directly west and near the Mount Miwa viewpoint, nestled between Takatori and the Nara Heartland.

    Kasugataisha Shrine

    This shrine is north of the Omiwa Shrine, and slightly southeast of the Todaiji Temple.

    Hinode Shrine

    This shrine is quite close to the previously mentioned shrine, and is northeast of the Todaiji Temple.

    Every Shrine In Kii

    Every shrine location in Kii in Assassin's Creed Shadows.

    Kii stands out as the region with the most shrines, boasting six shrines in total. While the western section is devoid of shrines, the first one is found near the center, with the others extending north and south all the way to the eastern coast.

    Kii is a very high-level area with diverse terrain. Those at lower levels should exercise caution, as confrontations can be hazardous. Nevertheless, the abundance of shrines in this region makes it potentially beneficial for earning early Knowledge Points—provided you proceed with care.

    Shrine

    Location

    Tokei Shrine

    This shrine is south of Kayasan, slightly northeast of Tanabe.

    Takahara Kumano Shrine

    This shrine is just south of Takahara Village, situated on elevated land.

    Kumano Hongu Taisha

    This shrine is just south across the bridge from Hongu, located to the east of Koyasan.

    Kumano Nachi Taisha

    This shrine is situated directly south of the Maruyama Shrine viewpoint and just south of the Seigantojo Pagoda.

    Kamikura Shrine

    This shrine is slightly south of Shingu, and directly east of the Maruyama Shrine viewpoint.

    Kumano Hayatama Taisha

    This shrine is located just north of the Kamikura Shrine, south of the Path of the Chosen.

  • Completing the Quest: Solving All Yamabushi Imposters in AC Shadows

    Completing the Quest: Solving All Yamabushi Imposters in AC Shadows

    The Yamabushi Imposters side quest in Assassin’s Creed: Shadows requires you to take down a group of formidable foes. Nine men have masqueraded as traveling mountain monks while carrying out violent acts, and your objective is to eliminate each one of them.

    This mission can be particularly tough because many of these imposters are at a high level and wield Naginatas. You might attempt to learn their fighting styles quickly, but don’t underestimate their skill. In this guide, we’ll show you how to track down and defeat each imposter.

    How to Start the Yamabushi Imposters Quest

    You can begin this quest in Yoshino within the Yamato region during Act 2. Locate Genpaku there, who will instruct you to take out the nine Yamabushi Imposters.

    Once you’ve initiated the quest, make sure to collect the letter found on a body in Kawachi Kaza-ana Cave, located in the Omi region. You might have already encountered Yuki Onna as part of the Yokai quest prior to this.

    If you find yourself under-levelled, it’s advisable to level up to at least level 50 before embarking on this quest. Many of the opponents will present a significant challenge if you can’t eliminate them with a single strike.

    How to Find and Defeat All Yamabushi Imposters

    The River Yamabushi

    Your first target, the River Yamabushi, is located in Yoshino, specifically in Mitarai Valley. He will be practicing, which gives you the opportunity to approach him stealthily and attempt an assassination. With a level of 51, he may be challenging to take out in one hit, but with enough power, it can be done.

    The River Yamabushi uses a Katana, making his moves predictable. Even if you can’t finish him off with the initial strike, you can easily defeat him using straightforward combo attacks. Once he is defeated, you will receive Susanoo’s Torrent, a powerful bow, along with armor-piercing engravings and 700 Data Fragments.

    When your opponent’s weapon glows blue, anticipate a chain of attacks and be sure to parry them. A white light indicates a single attack, allowing you to parry and counter effectively.

    The Clifftop Yamabushi

    Reaching this Yamabushi is quite a task. You must take the Path of Chosen to get to him, located on the Iseji Trails in the Kii region.

    Once you’ve arrived, use stealth again, approach from behind, and attempt an assassination. If you’re unable to eliminate him in one hit, you could find yourself in trouble. Naginata users are formidable foes, so tread carefully.

    Evade his swift attacks that can’t be parried, and take your chance to strike back. In our experience, he didn’t unleash many attacks that could be countered easily.

    Upon defeat, you will earn 320 Mon and Lustrous Pearl, a legendary Naginata.

    The Pathway Yamabushi

    The next target can be found to the south of the Clifftop Yamabushi. Getting to him shouldn’t be too difficult, as you can unlock a fast travel point nearby. He is usually hidden behind a tree, so approach him quietly and try another assassination.

    He wields a Naginata as well, and if you can’t end him in one go, you’re in for a tough fight. Additionally, the Pathway Yamabushi is known for executing chain attacks that are hard to parry. Upon eliminating him, you’ll receive Izanagi’s Reach, an Epic Naginata, and 290 Mon.

    The Forest Yamabushi

    Find the Forest Yamabushi northwest of Saika Castle and southwest of Wakanoura Bay in the Kii region. He will be positioned at the Nyu-Daimyojin Shrine, pretending to be injured. Sneak up behind him for an assassination.

    Don’t underestimate him, as he too is a Naginata user. Even if you manage to chip away some of his health with the initial strike, his follow-up attacks can deal significant damage. Stay patient; you’ll need to dodge or parry his strikes, followed by landing your own combos. Utilizing your skills can help break his attack chains.

    Once defeated, you will gain Izanami’s Salvation, an Epic Naginata, and 320 Mon.

    The Pond Yamabushi

    The next Yamabushi is hiding but can be lured out. Use the Kuji-kiri on Mount Hiei near the Three-Trunked Tree in the Omi region, and he will confront you. He’s a Katana user, so he won’t be tough to handle.

    The Pond Yamabushi primarily performs a series of parryable attacks. However, be cautious; if he parries your strike, he will retaliate with a move that cannot be parried.

    Alternatively, you can push him off the mountain for an instant kill.

    After taking him down, you’ll receive The Monk’s Amendment, an Epic Long Katana, along with a letter disclosing that the Yamabushi was reporting to someone.

    The Mountain Yamabushi

    As mentioned before, collecting the letter in Kawachi Kaza-ana Cave will reveal the location of another Yamabushi on your map.

    Since he is already dead, you won’t need to fight him, although there is another potential opponent nearby, Yuki Onna. There’s no need to engage her, as she is involved in a separate quest.

    The Shadow Yamabushi

    Your next target can be found in Iga, near the Kasuga Shrine at Otogi Pass. He will be around the fast travel point. If you’re at a high enough level, taking him down with a single strike should be manageable. We were able to eliminate him on the first attempt, so you should find it easy as well.

    Upon his defeat, expect to earn Yomi’s Retribution, an Epic Kusarigama, and 260 Mon.

    The Village Yamabushi

    This Yamabushi is located in Mibuno Vale at the Shinobi Training Ground in the Iga region. He will be west of the fast travel point. This particular Yamabushi is stationary, and you will not have the opportunity to assassinate him. Instead, you’ll have a task to investigate the area.

    Highlight the areas of interest by holding L2. There will be three objects to interact with, and doing so will trigger a cutscene. After this scene concludes, you’ll gain the engraving for Damage After Parry.

    The Valley Yamabushi

    The final target is The Valley Yamabushi, found in the Nabari Wilds in the Iga region. Approach him stealthily and attempt an assassination. He is a formidable fighter, swinging a Kanabo with great force. If you can finish him off with the assassination, it will save you a lot of hassle.

    He can throw his weapon at you, making him even more irritating to deal with. Try to limit your attacks to one or two, as he counterattacks rapidly.

    After defeating him, you will receive Mountain Bearer, an Epic Kanabo, and 275 Mon.

    Yamabushi Imposters Reward

    After defeating all the Yamabushi Imposters, return to Genpaku in Mitarai Valley and speak with him. Completing this quest will grant you the Secluded Shinto Shrine, a cosmetic outdoor item.