Tag: armor

  • Top Armor Matrix Upgrades for Completing in Saros

    Top Armor Matrix Upgrades for Completing in Saros

    Saros, developed by the creators of Returnal, is a challenging roguelike shooter that pushes your movement skills and reaction time to the limit. Expect to die repeatedly, but there’s more to improve than just your reflexes. The game features a skill tree with various stat boosts and perks you can unlock to help you progress.

    This skill tree is called the Armor Matrix, and you’ll access it from your hub after reaching a certain point in the story. To upgrade, you’ll need Lucenite and Halcyon, which are scattered across different biomes. In this guide, we’ll cover some of the best Armor Matrix upgrades to prioritize early on in Saros.

    ### Best Armor Matrix Upgrades to Unlock First

    The Alterations tree in Saros is mostly straightforward, with a few branches appearing as you advance. We’ll focus on specific upgrades that are especially useful, but keep in mind you’ll need to unlock certain nodes before you can purchase others.

    | Matrix Upgrade | What It Does | Cost | Why It’s Important |
    |————————-|————————————————————–|—————–|—————————————————————-|
    | Greater Integrity | Increases your maximum armor integrity by +30 | 200 Lucenite | Enemies can quickly drain your health, so boosting armor is vital. Some upgrades may cost Halcyon instead of Lucenite. |
    | Shield Amplifier | Your shield can now trap and absorb power from corrupted projectiles | 1 Halcyon | When faced with Corrupted projectiles that lower your health, this helps you gain some benefit from them. |
    | Second Chance | Revives you once after being knocked out during a run | 2 Halcyon | Saros can be tough. This upgrade, earned after defeating the first boss, extends your chances and survival in runs. Keep in mind, getting up affects your overall run results. |
    | Lucenite Saver | Reduces the amount of Lucenite lost upon death | 1 Halcyon | Since many nodes require Lucenite, saving it makes a big difference for your progression. |
    | Proficiency Enhancement | Boosts Proficiency by 1, unlocking higher-level weapons | 300 Lucenite | Better weapons and higher levels are key to being well-equipped for tough encounters. |
    | Increased Power | Adds +5 to your maximum Power stat | 200 Lucenite | Power influences your weapon damage. Focusing on this increases your offensive capabilities. |
    | Key Storage | Starting a run with a key | 2,000 Lucenite | Helps you open more containers early on, saving time and resources. |
    | Prophet | Gains +1 Resilience, +1 Command, and +1 Drive per Proficiency level | Defeat Prophet | Boost your essential attributes before starting each run by defeating this boss. Enhances your overall performance. |
    | Restoration Upgrade | Makes Aether, your healing item, more effective | 1 Halcyon | Aether heals your health, so boosting its efficacy can prevent big damage setbacks from attacks. |
    | Second Chance Enhancement | Increases the health you recover upon revival | 1 Halcyon | Improves your chances of surviving after being knocked down, especially useful in tough fights. |

    Remember, the upgrades you choose are permanent and cannot be refunded later. It’s a good idea to learn where to farm Halcyon and Lucenite effectively to make the most of these enhancements as you progress through Saros.

  • Where to Find the Helfryn Leather Armor Set and Black Sun Shield in Crimson Desert

    Crimson Desert is an open-world RPG where you play as a mercenary named Kliff, trying to rebuild his clan after a devastating defeat. Most of your time will be spent completing quests, battling bosses, or solving puzzles in the sky. However, there are many items you might miss if you don’t explore thoroughly.

    One of these items is Helfryn Leather armor, found in the capital city of the Demeniss region. Here’s how to find this hidden armor and what each piece offers.

    Black Sun Shield Location

    To find the Black Sun Shield, go to the castle located in the southern part of the city. Look for a long bridge that connects the streets to the main castle. Jump into the water and swim under the archway that’s farthest from the castle. Face the castle and stab your knife into the wall with Left Trigger. Then, perform a Force Push to flip the tricky wall, revealing a small room with a chest that contains the Black Sun Shield.

    The shield is at Refinement Level 4, provides 7 Defense, and grants a Level 2 Movement Speed boost. It also has two Abyss Gear slots equipped with Damage Reduction 1 and Guard Stamina Cost reduction cores.

    Tip: If you find it difficult to find this gear in Demeniss City, consider coming back after completing Chapter 8. By then, the city won’t be hostile, making exploration and item gathering much easier.

    Helfryn Leather Armor Set Location

    Helfryn Leather Boots Location

    To get the boots, head to the main castle on the south side of the city. Outside, look at the main gate leading into the city. To the right of the gate, along the wall, there’s a small hole covered with wooden boards. Break the boards with your weapon and enter the space. Inside, you’ll find a chest containing the Helfryn Leather Boots and a Palmer Pill.

    The boots are at Refinement Level 3, with 15 Attack, 4 Defense, Critical Rate Level 2, and Lightning Resistance 1. They also include two Abyss Gear slots that increase Silver gained by 10% and provide Fire Resistance Level 1.

    Helfryn Leather Chest Piece Location

    For the chest armor, go to the southeastern part of the city. Look for a group of white stone towers, and at ground level, find the front of the taller bell tower (the side with the large crowd of soldiers and civilians). Climb about halfway up on the left side of the tower until you reach a small stone ledge with several short columns.

    Find a spot where the columns form a small rectangle and press Kliff against it. Push the stone wall to reveal a hidden chamber. Inside, find a chest containing the Helfryn Leather Armor.

    This chest piece is at Refinement Level 3, offers 9 Defense, Lightning Resistance 1, and has three Abyss Gear slots. These slots already contain items that boost health regeneration, swim speed, and damage reduction.

    Helfryn Leather Gloves Location

    Next, go north to a guard tower with vines growing on one side. Climb up the vines on the southern side of the tower. Just below the roof, you’ll see a secret flip wall on the left of the vines. Insert your knife into the wall with Left Trigger, then perform a Force Palm strike to flip the wall and access a hidden treasure room. Remember to hold the resist button, or you’ll be thrown off when the wall turns.

    Open the chest inside to get the Helfryn Leather Gloves. They are at Refinement Level 3, featuring 16 Attack, 4 Defense, Lightning Resistance 1, and Critical Rate 1. They also have two Abyss Gear slots, one of which increases the chance to find extra items when pickpocketing and boosts climbing speed.

    Helfryn Leather Cloak Location

    For the cloak, return outside the tower where you found the gloves. Look at the side where you performed the Force Push. Nearby, there’s a U-shaped building with a brown roof. Find a second-floor window just above a stone arch that you can open.

    Climb through the window into the attic, where you will find the Helfryn Leather Cloak in the back right corner. The cloak has 3 Defense and 5 Ice Resistance, making it a good choice for exploring Pailune.

  • Where To Find The Frostcursed Armor Set in Crimson Desert Completing and Solving

    Where To Find The Frostcursed Armor Set in Crimson Desert Completing and Solving

    Exploring Pywel can be dangerous, but Crimson Desert offers hidden weapons and armor to help you survive. While you can buy weapons and armor from merchants, some of the best gear is hidden inside ancient treasure chests.

    The Frostcursed Armor Set is one of the top choices in Crimson Desert. It provides protection from freezing conditions and helps you explore more of the map. You can get this armor early if you’re willing to venture into the risky land of Demeniss.

    What Is The Frostcursed Armor Set?

    The Frostcursed Armor Set consists of five pieces hidden in treasure chests in the northern part of Demeniss. All five pieces are found in the same area, making it easier to collect the entire set. Each piece offers strong defense and unique effects.

    Armor Piece Stat Bonus Special Effects
    Helm 5 Defense Daze Immunity, recovers 0.2 HP/sec
    Cloak 3 Defense Ice Resistance Level 5
    Gloves Ice Resistance Level 1, Damage Reduction
    Boots +10% Contribution EXP, Climbing Fast
    Armor 14 Defense Movement Speed Level 2, Ice Resistance Level 7

    When all pieces are combined, the Frostcursed set grants several significant benefits:

    • Resistance to ice
    • Faster movement and climbing
    • Damage reduction
    • Bonus experience for contribution
    • Health recovery
    • Immunity to dazing effects

    These benefits make the set extremely useful for combat and exploration, making it a well-rounded choice.

    Where To Find The Frostcursed Plate Helm

    The helmet is located at Chattering Rocks in North Demeniss, which is north of Kingshield Mountains and east of Drakesfall Gorge, northeast of the Gate of Truth. Once there, look for a wall next to a small door archway, with the right wall covered in vines. Use the Blinding Flash skill and focus light onto the vines to burn through them. Enter through the hidden door to find the helm.

    Where To Find The Frostcursed Plate Cloak

    The cloak is hidden at the Sanctum of Expiation, west of Chattering Rocks, near the same area as the helmet. Climb up the mountain, then jump over the wall into the sanctum. Be cautious, as there may be tough enemies depending on your storyline progress. Look for a broken floor with archways around it. Burn a hole in the floor using Focus Light, then crawl through the narrow corridor to find the treasure chest with the cloak.

    Where To Find The Frostcursed Plate Gloves

    The gloves are located at Lunar Spirit Grotto, east of the Sanctum of Expiation and Chattering Rocks, northwest of the Denn River, and southwest of Deadfire Mountain. Walk to the bottom of the waterfall near the cliff and use the Stab skill to move through the rushing water into a secret area behind the fall. Follow the path to a hidden chest containing the Frostcursed Plate Gloves.

    Where To Find The Frostcursed Plate Boots

    The boots are found upriver from the gloves, inside Well of Tragedy Grotto. Head northeast toward Deadfire Mountain and look for another waterfall. Carefully navigate the fast-moving river and enter the grotto behind the waterfall. Use Force Palm on the gold-infused rock to reveal the hidden path, then proceed through the tunnel and grab the boots from the chest. Be alert for spikes that can appear during this section; it’s best to teleport out if you’re in danger.

    Where To Find The Frostcursed Plate Armor

    The final piece, the armor, is located at Mistshard Cave, northeast of the Well of Tragedy Grotto and north of Deadfire Mountain. Use a pickaxe to mine the gold ore inside and retrieve the Palmer Pill. To reach the armor, break through the wall by stabbing the right side of a split waterfall into a grotto. Continue into the back of the cave, use Force Palm on the golden rocks to reveal a hidden passage, then carefully navigate into the cave to find the final armor piece.

    Once you’ve collected all five pieces, you will have a full Frostcursed Plate Armor Set — capable of enduring extreme cold while keeping you stylish in your journey.

  • How to Upgrade Your Armor and Weapons in Everwind by Completing and Solving

    How to Upgrade Your Armor and Weapons in Everwind by Completing and Solving

    In any combat game, protecting and arming yourself is crucial. The same applies in Everwind, a delightful indie sandbox survival game that is currently in early access. You’ll be flying through the skies in a world full of mysteries and dangers. To stay safe, you need to find or craft the right gear—whether it’s armor or weapons—using resources from chests, dressers, enemies, or crafting stations on your ship.

    You start on your first island in a randomly generated world, where basic armor and simple weapons help you fend off moderate threats. As you explore further, you’ll need to hunt for new weapons and armor, along with recipes to craft them. These can be looted from containers or obtained by defeating enemies and bosses. The stronger the enemies you fight, the better their loot, often including rare and powerful items.

    To improve your defenses, you can craft and wear better gear as you progress across islands. You’ll also have access to the Upgrade Station, which can be built for your airship and used to enhance your weapons and armor. Upgrading involves applying materials to boost stats, providing additional buffs and protection. It’s wise to keep a steady supply of upgrade materials on your ship, as they are needed for various enhancements and may be required later in special recipes.

    It’s important to regularly repair your gear, preventing it from breaking during quests or battles. Repair stations and kits—either crafted, bought, or found—are used for this purpose. Gear that is broken becomes almost useless, so monitoring your item durability bar (indicated by a color overlay behind icons) is essential. Redder icons mean the items are close to breaking and should be fixed promptly.

    Your armor setup includes up to eight pieces worn on your character. These pieces are categorized into headgear, chest gear, hand gear, legs gear, and associated accessories like necklaces or rings. The most vital pieces are the core armor (on the left in the inventory), typically dropped by enemies or found in chests. Enemy loot can include rare or epic gear, so it’s good to loot every possible source during your travels.

    Weapon options are diverse, ranging from melee to ranged. You can equip one-handed weapons—such as swords, hammers, or hatchets—for a quick and balanced attack style. Two-handed weapons, like long swords or axes, deliver more damage but take longer to charge up. Daggers are faster but less powerful, ideal for quick attacks. Ranged weapons, like bows and arrows, let you attack enemies from a safe distance. Combining ranged and melee tactics is often the best approach, starting with arrows to weaken foes before closing in for melee attacks.

    Progressing further in the Warrior skill tree unlocks the ability to craft and use higher-tier gear. Initial items correspond to “Advanced” tier, requiring you to unlock these in the skill tree before accessing “Master” level equipment. Upgrades for bows, melee weapons, and armor are found at different levels within the tree, each requiring skill points and materials. Paying attention to your upgrade choices helps you focus on your preferred gear type.

    To unlock higher-level gear, you need to traverse the Warrior skill tree, investing points into specific upgrade nodes, including bows, weapons, and armor. Doing so not only grants access to more powerful items but also enhances damage, buffs, and durability. You’ll want to balance these upgrades with other skill trees like Arcanist or Engineer, depending on your preferred combat style.

    In Everwind, weapon choices include a variety of melee and ranged options, each with unique stats and recipes. For melee weapons, options include daggers (like Knapped Edges or Bronze Twins), bludgeons (Pebble Beater, Copper Club), swords (Stone Long Blade, Forged Blade), and axes (Stone Two-Handed Axe, Sparkshaft Axe). Ranged weapons include bows of various types—Branch Bow, Copper Bow—along with different arrow types, such as Copper Arrows.

    Armor and shields also come in many forms, from light headgear like leather helmets to heavier chestplates like bronze or iron. Shields like the Plank Shield and Scrap Steamer Metal Shield provide additional defense. Accessories such as gloves, boots, and rings further customize your character’s protection and abilities, with many crafted from materials looted or gathered during exploration.

    All gear needs maintenance; your tools and armor require regular repairs to prevent breakage in battle. Use Repair Stations and Repair Kits for this purpose. Keep an eye on durability bars—if they turn red or decrease significantly, it’s time to repair or replace the item to stay protected.

    Ultimately, the key to survival in Everwind is managing your gear. Upgrade and repair your equipment regularly, explore thoroughly to find better items, and diversify your weapons to adapt to different foes. With an arsenal of armor and a well-trained skill tree, you’ll be ready to face the challenges that await in the skies.

  • How to Obtain Mistril Weapons and Armor in Fields of Mistria Through Completing and Solving

    How to Obtain Mistril Weapons and Armor in Fields of Mistria Through Completing and Solving

    As you explore the town in Fields of Mistria, there will come a point where your starting tools and armor won’t be enough anymore. As you progress, you’ll need to upgrade your equipment. The lower levels of the mines require better-quality weapons and armor, and we’ll guide you on how to find them.

    Mistril is a very strong material and has a distinctive pink color that’s easy to recognize. You can only find it after breaking the Ruins Seal and entering levels 81 to 99 in the mines.

    You’ll discover mistril ore like any other, with pink nodes protruding from the ground. However, be aware that it doesn’t appear in the pink geodes that produce pink diamonds, even though they look similar.

    Once you gather enough mistril, you can smelt it into ingots at the blacksmith. It takes ten ore to make one ingot, and four ingots are needed to craft weapons, tools, or armor. Here’s what you need to know:

    • Use the dragon statue in the mines to buy skills that make collecting ore easier.
    • Using mistril ingots, you can craft various tools and armor sets.

    All Mistril Tools and Armor

    Mistril Tools

    Name Materials Damage
    Mistril Pickaxe 4 Mistril Ingot 6 Damage
    Mistril Axe 4 Mistril Ingot 6 Damage
    Mistril Hoe 4 Mistril Ingot N/A
    Mistril Watering Can 4 Mistril Ingot N/A
    Mistril Fishing Rod 4 Mistril Ingot N/A
    Mistril Shovel 4 Mistril Ingot N/A
    Mistril Bug Net 4 Mistril Ingot N/A
    Mistril Sword 4 Mistril Ingot 24 Damage

    Mistril Armor

    Name Materials Defense
    Mistril Armor 4 Mistril Ingot 10
    Mistril Helmet 4 Mistril Ingot 10
    Mistril Ring 4 Mistril Ingot 10
    Mistril Boots 4 Mistril Ingot 10
    Mistril Legplates 4 Mistril Ingot 10

    Each piece of Mistril armor you wear will help light up dark levels in the mines! To craft these tools and armor, your smithing skill needs to be level 28, though you can start making Mistril ingots at level 8.

  • How to Get the Marksman Revolver and V1 Armor in Palworld Completing the Quest

    How to Get the Marksman Revolver and V1 Armor in Palworld Completing the Quest

    Palworld lets you hunt and capture many creatures called Pals. These Pals can work with you to build strong bases as you travel across the islands in search of power and answers. There are also special collaboration events that add unique and helpful items to your game.

    One such event is the Ultrakill collaboration. It introduces new weapons and armor inspired by the Ultrakill game, giving you a chance to enjoy fresh content while showing your love for both games. We’ll guide you on how to obtain all the new items and use them in Palworld! Prepare to dress up in style and leverage the coin toss to your advantage.

    ### How to Get V1 Armor and the Marksman Rifle

    To unlock the V1 Armor and the Marksman Rifle, you need to reach level 32 and have three Ancient Technology Points. When you meet these conditions, you can unlock both items. The V1 Armor provides resistance to heat and cold at level one and has the “Blood is Fuel” trait.

    Blood is Fuel means the armor can repair itself during battles. When you deal damage to enemies, you also heal, which keeps you alive as long as you’re attacking. The Marksman Rifle replaces the usual Pal Sphere throw with a coin toss mechanic. Shooting the coin causes a ricochet effect, hitting enemies that are just out of reach.

    Here are the crafting recipes:

    | Equipment | Crafting Recipe |
    |—————————–|———————————————————————————————————-|
    | Ultrakill V1 Armor | Ingot (30), High-Quality Pal Oil (15) |
    | Marksman Revolver | Ingot (60), High-Quality Pal Oil (15), Gold Coin (1), Electric Organ (30) |

    ### How to Get V2 Armor and the Core Eject Shotgun

    To unlock the second set, reach level 56 and accumulate at least five Ancient Technology Points. Once you’ve met these requirements, you’ll unlock the red V2 armor set along with the Core Eject Shotgun.

    The V2 Armor is an upgraded version of the V1, offering level two resistance to heat and cold. It also features wings that emit a little light, helping you navigate the dark areas of the islands. The Core Eject Shotgun replaces Pal Spheres with Cores when equipped. It allows you to launch cores in midair during combat, and when a core hits, it explodes, causing damage over a wide area.

    Here are the recipes for these items:

    | Equipment | Crafting Recipe |
    |——————————|—————————————————————————————————–|
    | Ultrakill V2 Armor | Plasteel (40), Pal Metal Ingot (40), High-Quality Cloth (20) |
    | Core Eject Shotgun | Pal Metal Ingot (80), Plasteel (65), Carbon Fiber (65), Flame Organ (40) |

  • Best Elements for Completing Armor, Shields, and Flesh in Borderlands 4

    Best Elements for Completing Armor, Shields, and Flesh in Borderlands 4

    In many situations, you can simply survive in Borderlands 4 by shooting your enemies with whatever weapons you have. However, once you increase the difficulty or face endgame challenges, you’ll need more than just luck and determination.

    Like previous games, Borderlands 4 allows you to use Shields to protect yourself. The effectiveness of your elemental damage will depend on the defenses your enemies have. If you want to improve your game or need a quick reminder, this guide covers the essentials.

    Elemental Damage and Weaknesses

    Every bullet, explosion, and melee attack in Borderlands 4 deals one or more types of elemental damage. Almost all enemies can take damage from all types, except for the very rare ones immune to specific elements. Depending on the color of an enemy’s health bar, using an element they’re weak against will make it easier to defeat them.

    • A blue health bar means they have an energy shield.
    • A yellow health bar indicates armor or mechanical parts.
    • A red health bar signifies organic flesh.

    Some enemies, especially tougher ones like bosses and badasses, have multiple health bars. The topmost bar is always depleted first, then the next one underneath, and so on.

    Elemental Matchups

    Using the correct damage type against enemies speeds up their defeat, but be cautious — the same applies to your allies.

    Damage Type Color Strong Against Weak Against
    Kinetic White None None
    Incendiary Orange Flesh Armor, Shields
    Cryo Light Blue Armor Shields
    Shock Dark Blue Shields Flesh, Armor
    Corrosion Dark Green Armor Flesh, Shields
    Radiation Light Green Shields Armor

    Kinetic damage is basic and doesn’t have specific strengths or weaknesses. Shock damage works better against shields, while corrosion is more effective against armor. Incendiary damage is especially weak against armor and shields, and corrosion isn’t effective against flesh or shields.

    Status Effects

    Most weapons with an elemental property have a chance to inflict their respective Status Effect on enemies with each hit. Affected targets will continuously take damage of that element’s type until the effect ends. Characters often have skills that boost the effects of specific elements.

    What is Cryo Efficiency?

    Cryo causes enemies to freeze gradually as they take damage. The higher the Cryo Efficiency, the faster an enemy will freeze. When frozen, an enemy cannot move and will take Cryo damage like any other status effect.

    If Cryo Efficiency is 100 or less, you might kill the enemy before they freeze. When it exceeds 100, they will freeze faster as you continue to deal Cryo damage. Avoid dealing incendiary damage to prevent warming enemies and resetting their freezing progress.

    Armor or Energy Shield?

    Your character’s shield can be either yellow (armor) or blue (energy shield). While elemental matchups matter, understanding the differences between these shields can help you choose what suits your playstyle best.

    Energy Shield

    Energy Shields are the classic type. They add a blue health bar that regenerates quickly when you’re not taking damage. Its stats include:

    • Capacity: Total blue hit points.
    • Regen Rate: How many blue points you recover per second.
    • Regen Delay: How long you must wait after damage before the shield begins to regenerate.

    Energy Shields are useful because they recover fast, letting you get back into the fight quickly. Just watch out for shock damage, as it can drain your shield swiftly.

    Armor Shield

    Armor Shields recover more slowly but reduce the damage you take while active. This allows you to stay in combat longer, but once your armor is depleted, you’ll take more real damage.

    Your armor health is divided into segments, usually two, but some shields may have more. When the meter above the health bar fills, one segment instantly restores. Damage doesn’t stop the meter from filling, so your armor replenishes bit by bit regardless of hits.

    Armor shields have:

    • Capacity: Total yellow hit points across all segments.
    • Segments: How many chunks your armor is divided into.
    • Damage Reduction: The percentage of damage mitigated while armor is active.

    Armor is ideal for tanking, especially against rapid-fire or weak attacks that can whittle down your defenses. It can turn devastating strikes into manageable hits, but staying alive still depends on your overall health and positioning.

  • ODST Warbond Gear & Armor in Helldivers 2: Completing & Solving Tips

    ODST Warbond Gear & Armor in Helldivers 2: Completing & Solving Tips

    To celebrate the launch of Helldivers 2 on Xbox, the Halo: ODST Warbond collaboration is now available in-game. This pack includes a title, two player cards, two ODST armor sets, UNSC-themed capes, vehicle patterns, and weapons inspired by Halo 3: ODST.

    This is the first legendary Warbond in the game, costing 1,500 Super Credits. To buy this, you’ll need to spend about $19.99 or £15.99, which equals 2,100 Super Credits. Here’s a clear breakdown of what’s included and whether it’s worth the cost.

    All Halo ODST Items

    Page One

    [Image of the Halo ODST Warbond pack in Helldivers 2]

    | Item | Info | Price |
    | — | — | — |
    | Honoured Heirloom | Player Card | 2 Medals |
    | A-9 Helljumper (Body Armor) | Stats: Armor Rating 100, Speed 500, Stamina Regen 100. Passive: Feet First — makes 50% less noise, increases point-of-interest range by 30%, and grants immunity to leg injuries. | 45 Medals |
    | A-9 Helljumper (Helmet) | Stats: Armor Rating 100, Speed 100, Stamina Regen 100. No extra bonuses. | 30 Medals |
    | Honoured Heirloom | Cape | 8 Medals |
    | Ma5C Assault Rifle | Damage 80, Capacity 32, Recoil 19, Fire Rate 640. Medium armor penetration. | 35 Medals |
    | Mean Green Hellpod Pattern | Hellpod Pattern | 20 Medals |

    Page Two

    [Image of the Halo ODST Warbond pack in Helldivers 2]

    | Item | Info | Price |
    | — | — | — |
    | M7S SMG | Damage 70, Capacity 48, Recoil 8, Fire Rate 872. Light armor penetrating, suppressed. | 50 Medals |
    | Mean Green Shuttle Pattern | Shuttle Pattern | 50 Medals |
    | Eye of the Clandestine | Player Card | 7 Medals |
    | A-35 Recon (Body Armor) | Stats: Armor Rating 100, Speed 500, Stamina 100. Passive: Feet First — reduces noise, increases point-of-interest detection, immunity to leg injuries. | 55 Medals |
    | A-35 Recon (Helmet) | Stats: Armor Rating 100, Speed 100, Stamina 100. No extra bonuses. | 45 Medals |
    | Eye of the Clandestine | Cape | 25 Medals |

    Page Three

    [Image of the Halo ODST Warbond pack in Helldivers 2]

    | Item | Info | Price |
    | — | — | — |
    | Rookie | Title | 20 Medals |
    | M90A Shotgun | Damage 605, Capacity 6, Recoil 83, Fire Rate 80. Light armor penetrating rounds, reload. | 65 Medals |
    | Mean Green Exosuit Pattern | Exosuit Pattern, requires base strategem. | 50 Medals |
    | M6C/SOCOM Pistol | Damage 100, Capacity 12, Recoil 20, Fire Rate 900. Light armor penetrating, suppressed. | 75 Medals |
    | Mean Green Vehicle Pattern | Vehicle Pattern (requires base strategem). | 55 Medals |

    Is This Warbond Worth It?

    Compared to other Warbonds, which tend to be cheaper for similar rewards, the Halo: ODST Warbond offers some solid weapons and armor. If you’re a big Halo fan, it’s definitely worth getting. If not, it’s best to consider whether you have enough Super Credits to spare.

    Note: You can earn Super Credits by completing the free Helldivers Mobilize Warbond, which grants 700 Super Credits. This may help reduce the amount you need to spend out of your own pocket.

  • Top Weapons & Armor for Each Class in Grounded 2: Completing and Solving

    Top Weapons & Armor for Each Class in Grounded 2: Completing and Solving

    Making a build in Grounded 2 is now simpler and more satisfying than in the first game, with four distinct playstyles to explore. You can pick to be a bow-and-arrow expert like a Ranger, or go for a stealthy melee character with the Rogue class.

    If stealth doesn’t suit you, fighters are your close-range or tank options, focusing on taking hits and dealing strong melee damage. If you prefer unique abilities, then the Mage is your choice, wielding staffs and robes to cast powerful ranged spells and inflict effects on enemies.

    What Is The Best Gear For Fighters?

    Fighters are your classic melee or tank characters. They focus on drawing bugs’ attention away from teammates or, solo, on stunning foes with quick attacks. These characters need gear that provides high defense and resistance, while also making their melee hits as damaging as possible.

    Materials needed to craft:

    • 12 Garden Snail Fragments
    • 8 Lingonberry Leather
    • 5 Acid Glands
    • 2 Silk Ropes
    • 2 Garden Snail Eyestalks

    The Garden Snail Armor Set is the top choice for fighters. Each piece provides Fighter Armor and Block Stun effects. Fighter Armor makes enemies focus on you, and Block Stun keeps building up their block meter, making it easier to stun them. Wearing the full set grants a Retaliation bonus that causes your next charged melee attack to release a shockwave for each hit you block, stacking up to five times. This increases both attack speed and damage.

    Additional materials:

    • 2 Praying Mantis Claws
    • 4 Praying Mantis Chunks
    • 3 Lingonberry Leather
    • 2 Spicy Globs
    • 5 EverChar Coal Chunks
    • 4 Wolf Spider Chunks

    The Spicy Coaltana and Mantis Blade are strong options, with the former offering Slashing and Spicy damage, and the latter dealing only Slashing damage.


    What Is The Best Gear For Mages?

    Mages are long-range fighters using staffs, similar to Rangers but with more elemental damage options. Their armor tends to be less durable but offers high resistance.

    Materials needed to craft:

    • 9 Blue Butterfly Chunks
    • 9 Blueberry Leather
    • 8 Blue Butterfly Scales
    • 5 Mint Shards
    • 3 Silk Ropes
    • 2 Blue Butterfly Wings

    The Butterfly Set stands out as the best Mage armor. It provides Mage Armor perks that reduce stamina used by staff attacks and Frosty Focus for boosting Fresh damage. The set’s barrier, Parrier Barrier, reduces damage when blocking, stacking three times, and works with Frosty Focus to increase damage during shield uptime. The Chilly Dodge bonus allows your dodges to emit a chilling gust after each staff finisher.

    Materials needed:

    • 4 Mint Shards
    • 2 Pine Needles
    • 1 Northern Scorpion Stinger

    The Glacial Sting staff is excellent for dealing Fresh damage, which can be frozen with Chill buildup for powerful freezing attacks.


    What Is The Best Gear For Rangers?

    Rangers resemble Mages in resistance but focus on bows, allowing for a variety of elemental and utility arrow effects. They have high resistance but low defenses, so staying at range is key.

    Materials needed:

    • 13 Bee Fuzz
    • 10 Blueberry Leather
    • 7 Silk Ropes
    • 1 Bee Stinger

    The Bee Armor Set offers high resistance at the expense of overall durability. It features the Ranger Armor perk, which boosts damage to enemy weak points, and More Better Draw, extending the perfect draw window. The Apex Pollinator bonus causes fully charged bow shots to release a pollen cloud, slowing enemies.

    Materials needed:

    • 3 Wolf Spider Chunks
    • 3 Silk Ropes
    • 2 Spider Venoms
    • 2 Wolf Spider Fangs

    The Wolf Stringer bow delivers solid stabbing damage with a high critical hit chance. You can craft and switch arrows like Venom or Mint Arrows, offering great flexibility at a safe distance.


    What Is The Best Gear For Rogues?

    Rogues thrive on high-risk, high-reward gameplay, relying heavily on stealth to deliver bursts of damage. Still, they can handle enemies with straightforward strikes too.

    Materials needed:

    • 9 Wolf Spider Chunks
    • 8 Blueberry Leather
    • 7 Silk Ropes
    • 3 Spider Venoms
    • 2 Wolf Spider Fangs

    The Wolf Spider Set provides minimal defense and resistance but packs powerful perks. Rogue Armor increases the crit chance on the final hit of a three-hit combo, and Venomous Dasher lets dual weapons inflict venom buildup on hit. The set’s Deadly Venom bonus can increase venom damage temporarily.

    Materials needed:

    • 4 Wolf Spider Chunks
    • 4 Spider Venoms
    • 2 Wolf Spider Fangs
    • 2 Silk Ropes

    The Wolfsbane Fangs weapon balances damage, speed, and critical hit chance, and features the Venom Attack perk to cause venom buildup and damage over time. This build is highly effective when you utilize stealth to maximize your damage output.

  • How to Customize Your Armor in Wuchang: Fallen Feathers by Completing and Solving

    How to Customize Your Armor in Wuchang: Fallen Feathers by Completing and Solving

    Fashion and Style in Wuchang: Fallen Feathers

    Fashion is an important part of any game inspired by spirits or souls, and Wuchang: Fallen Feathers is no different. Fighting enemies and saving the world feels better when you wear cool, fierce clothing. Even if your character has some messy feathers, you can still look sharp while fighting.

    If you want to look good without sacrificing your combat abilities, there’s a feature called transmog. This lets you change how your armor looks while keeping all its details and stats the same. So, you can stay stylish and still be strong.

    How To Change Your Armor’s Look

    To change what your armor looks like without changing its strength, follow these steps:

    1. Have two armor sets: one with the stats you want, and one with the appearance you like.
    2. Select the armor set you want to keep using.
    3. Use the Alter Appearance option (press F on keyboard or Y/Δ on controller).
    4. Pick the armor piece you want it to look like and confirm your choice.

    This process will not delete any armor; both sets stay in your inventory. It also doesn’t permanently combine the two sets. You can change your armor’s look as many times as you want, free of charge.

    Note: Changing appearance doesn’t affect your armor’s stats or delete your original armor. You can switch back and forth anytime.

    Tips for Beginners on Clothing

    While fashion might seem tempting, it’s better not to spend your resources on clothing just for looks, especially early in the game. Wu Gang, a trader you meet before your first boss, Man-Raider, sells many clothing items.

    Many of these clothes are actually rare drops from common enemies. For example, early-game enemies often drop Golden Bandit gear. It’s usually smarter to wait and get these items from enemies rather than buying them from Wu Gang.

    Keep in mind: Some special clothing items from Tao Qing, another trader, have unique value and cannot be found anywhere else. Check his stock before deciding to buy from Wu Gang.

  • Completing Copper Tools, Armor, and Chests in Minecraft

    Completing Copper Tools, Armor, and Chests in Minecraft

    In Minecraft, tools have remained pretty consistent, especially in the early stages of the game. Players typically progress from wood to stone, then to iron for tools, while armor jumps from leather to iron as well.

    However, the recent copper update has introduced exciting changes. Copper tools now fill the gap between stone and iron tools, and copper armor fits between leather and iron as well. This makes the early game experience significantly different and adds to the excitement of discovering copper in your adventures.

    This new update is currently available in the Minecraft Preview, which you’ll need to download to experience the changes until the official release.

    Copper is a common resource that can be found at elevations above Y-coordinate zero. You typically get more than one copper ore per block, and smelting each ore yields one copper ingot. To mine copper, make sure to use a stone pickaxe; using a wooden one will destroy the ore.

    The crafting method for copper tools mirrors that of other tools, using copper instead of iron or other materials.

    Tool Recipe
    Copper Pickaxe Three Copper Ingots + 2 Sticks
    Copper Sword Two Copper Ingots + 1 Stick
    Copper Shovel One Copper Ingot + 2 Sticks
    Copper Axe Three Copper Ingots + 2 Sticks
    Copper Hoe Two Copper Ingots + 2 Sticks

    Copper pickaxes can’t mine materials like diamonds, but they do work faster and last longer than stone pickaxes. They’re a great option for tasks like digging through a lot of stone without wasting iron or diamonds.

    To create a full set of copper tools, you’ll need a total of 11 copper ingots.

    How to Craft Copper Armor

    Copper armor offers more protection than leather armor but less than iron armor. Since copper is easier to find than iron, crafting a full suit of copper armor is much more accessible.

    However, when you acquire enough iron, most players will likely prefer to use iron armor instead of sticking with copper since armor typically lasts longer than tools.

    Armor Recipe
    Copper Helmet Five Copper Ingots
    Copper Chestplate Eight Copper Ingots
    Copper Leggings Seven Copper Ingots
    Copper Boots Four Copper Ingots

    To make a complete set of copper armor, you will need a total of 24 copper ingots.

    How to Craft a Copper Chest

    A Copper Chest is essential if you plan to use the new Copper Golem in your crafting setup. The Copper Golem collects items from a Copper Chest and distributes them to nearby chests, potentially creating an automatic sorting system.

    There are two methods to create a Copper Chest:

    • Build a Copper Golem by placing a Carved Pumpkin on top of a Copper Block, creating a Copper Golem above a Copper Chest.
    • In a Crafting Table, surround a regular chest with Copper Ingots, requiring eight ingots in total.

    Copper Golems will look for any nearby Copper Chest, and you can also craft a double chest using copper.

  • All Unique Armor Locations in Avowed Revealed

    All Unique Armor Locations in Avowed Revealed

    In Avowed, you’ll quickly notice that combat can be quite punishing. Right from the start, you’ll often find yourself facing several foes, making it tough to evade their attacks. If you rely too much on dodging, you risk running out of stamina and losing your chance to counterattack.

    While your companions can help draw some of the enemies’ attention away, having solid armor is essential for enduring battles without depleting your resources. You’ll find various unique armor pieces across The Living Lands, which are excellent choices for survival.

    Unique Light Armor Locations

    As the name implies, light armor is easier to wear, meaning it doesn’t drain your stamina and essence as heavily. However, this also means it provides less damage resistance against foes.

    One piece of light armor worth mentioning is the Many-Hued Doublet, which you can purchase from Merylin in the Market District of Paradis. This armor reduces damage from Fire, Frost, and Shock while enhancing your health recovery from all sources.

    You can also find the Arcanist’s Gambeson armor in a golden chest at the Yellowband Camp located on the eastern side of Dawnshore. This armor boosts your maximum essence and improves damage from Area of Effect (AoE) attacks.

    Unique Medium Armor Locations

    Medium armor strikes a balance between stamina cost and damage protection. This type of armor offers decent defense while not being overly burdensome. The Stelgaer’s Pride can be obtained by solving the Intimidating Feline Codpiece treasure map in Dawnshore. This armor allows your character to perform a powerful shout when taking heavy damage and boosts stamina regeneration.

    Another valuable medium armor is the Vailian Breastplate, found inside the Vidarro Family Mansion in Fior Mes Iverno. It grants additional damage reduction and improves movement speed.

    Unique Heavy Armor Locations

    For players focused on a tank-like build, heavy armor is the way to go. It provides substantial damage protection, allowing you to withstand fierce attacks. You can acquire the Wayfarer’s Armor at a shop in northern Paradis for 5,000 currency. This armor not only increases your movement speed but also regenerates your health if your health drops below 20 percent.

    Additionally, the powerful Death Knight Armor is located in the Waterfall Cave near Fior Mes Iverno. To reach it, dive into a water pool inside the cave to find a hidden area. This armor offers a significant 30% resistance to Frost accumulation, along with the chance to restore health after taking damage.

    Lastly, the Pauper’s Plate can be discovered near the Wildwood Outskirts party camp. Look for small buildings north of the camp; climbing these will lead you to a golden chest containing the armor. The Pauper’s Plate increases your Constitution by two levels and grants an additional 20% resistance to shock.

    By exploring these locations and equipping the appropriate armor, you’ll be better prepared to handle the fierce battles in Avowed.

  • Understanding Armor Shred Mechanics in Age of Darkness

    Understanding Armor Shred Mechanics in Age of Darkness

    Armor plays a vital role in battles in Age Of Darkness: Final Stand. Not every unit has armor, and some Heroes don’t possess it at all, but armored units make a significant impact in combat. Having armored allies is crucial for holding back the Nightmare Swarm, and knowing how to tackle armored enemies effectively is essential for survival.

    In this guide, we will explain what armor does, what it doesn’t do, and how to make the most of the Armor Shred stat in your battle strategy.

    How Does Armor Work In Age Of Darkness: Final Stand?


    Some units and buildings have an Armor stat that helps reduce damage taken. You can easily recognize an armored unit by the gray shield icon next to its health bar. Lightly-armored units generally have around 10-20 Armor, while more elite units may have close to 50. The strongest units, like the Sentinel or the Nightmare Crusher, boast Armor ratings that can reach into the hundreds.

    The key point to remember about armor is that it’s not the number that counts; as long as it’s above zero, the unit benefits fully from its protective capabilities.

    A unit with any armor will experience a 70% reduction in damage from all sources. This is a significant decrease, so if you can’t quickly and effectively remove an enemy’s armor, taking them down could prove challenging. If you’re facing multiple armored foes during a Death Night or at a Point of Interest, failing to have any Armor Shred will likely result in your defeat.

    What Is Armor Shred?


    A Volatist Training Hall in Age Of Darkness: Final Stand.

    To tackle armored enemies, you’ll need units with the Armor Shred stat, indicated by a shield with a slash through it in their attribute list. Whenever an attacking unit strikes an armored foe, the target’s Armor is reduced by the amount specified by the attacker’s Shred stat. As mentioned, you need to bring the target’s Armor down to zero to see any real impact on their defense.

    It’s important to note that Shred affects Armor but not the damage done to HP; both aspects operate independently.

    You can observe the current Armor status of your allies or enemies by highlighting their portraits; their remaining Armor Points are displayed just above their HP. At a glance, you can determine a unit’s remaining armor by looking at the gray shield next to their health bar; if it’s cracked, they have only half their armor left, and if it’s completely dark, their armor is gone.

    How To Recover Lost Armor

    Unlike HP, Armor doesn’t regenerate when not in combat. If your armored units lose their protective covering (which is common, as most non-Crawler Nightmares possess at least some Shred), bring them close to one of the following buildings for repairs:

    • The Keep
    • Wood Workshop
    • Refined Workshop
    • Siege Factory

    Because these structures are costly to build and maintain, it’s wise to place them near natural choke points. This way, they can repair your units’ armor during sieges and enhance your overall chances of survival without requiring a retreat to the Keep.

    Tips For Dealing With Armored Enemies


    Vizargo and Aurelia stand over the fallen Merek in Age Of Darkness: Final Stand.

    The most effective units for confronting armored enemies are Arbalests, Impalers, and Hunters. They have a high Shred stat and can attack from afar, keeping them safe behind the front lines. Consider so you can direct them to concentrate their fire on Crushers and Spitters when they join the fight. Once an enemy’s armor is depleted, you can bring in the rest of your forces to finish them off.

    Towers can enhance the Armor Shred of ranged units stationed within them. Ballista Towers are typically preferred in the late game, but this bonus is invaluable for taking down Axemen and Spearmen that often lead Crawler patrols during the initial Death Nights.

  • Unlocking the Secrets to Farming High-Rank Armor

    Unlocking the Secrets to Farming High-Rank Armor

    Creating an ideal Destiny 2 build takes dedication and time. You’ll need to gather the right weapons, Exotics, mods, and armor to maximize your effectiveness. Among all these components, acquiring high-stat armor is often the most challenging and luck-based part of the process.

    Armor that boasts good stats, high totals, and appropriate mods can significantly enhance your build. Some players can mod their armor to achieve a stat total of 100, but you need a solid piece to start with. This guide explores what high-stat armor is, how to obtain it, and the top farming methods currently available.

    What Is High-Stat Armor?

    High-stat armor is any armor piece that has a total stat value of 60 or higher. While this is the official in-game definition, many players consider high-stat armor to be pieces with a stat total of 64 or more that exhibit "spiky" stat distributions—where points are concentrated in a few key stats.

    All armor in Destiny 2 (excluding class items) drops with randomized stats, which include the following six categories:

    1. Mobility: Affects strafing speed, initial jump height, and Hunter’s dodge cooldown.
    2. Resilience: Influences damage resistance in PvE, total health, flinch resistance, and Titan’s barricade cooldown.
    3. Recovery: Determines health regeneration delay and Warlock’s Rift cooldown.
    4. Discipline: Governs grenade ability cooldown.
    5. Intellect: Regulates the Super ability cooldown.
    6. Strength: Controls melee ability cooldown.

    When armor drops, each stat will randomly receive points within the range of 48-68 for a total. Some Exotics can go up to a stat total of 70 based on previous expansions, especially those released before Shadowkeep.

    Understanding Armor Stat Distribution

    When armor pieces drop, the game divides the stats into two pools:

    • Pool One: Mobility, Resilience, Recovery
    • Pool Two: Discipline, Intellect, Strength

    The total stat points are distributed approximately equally among these pools. For instance, an armor piece with a total of 60 may have around 30 points in Pool One and 30 points in Pool Two.

    Stats are assigned through stat plugs, which are predetermined sets of values for each pool. Each armor piece rolls with four plugs, two from each stat pool.

    It’s crucial to remember that armor stat rolls are not completely random. You can influence the outcome by engaging in specific activities and using particular Ghost Shell mods.

    If you’re fortunate, an armor drop may include a stat bias, meaning it has a lot of points in certain stats like Resilience or Strength. This is often more important for builds than having high stat totals alone.

    Some general rules to keep in mind about armor drops are:

    1. No stat can roll lower than 2 or higher than 30 (with some exceptions for Exotics made before Shadowkeep).
    2. Stats are distributed roughly in half between the two pools.
    3. Armor sources that encourage specific stat drops will typically have spiky stat plugs, with many Exotics featuring intrinsic stat plugs.

    Obtaining High-Stat Armor Sources

    Each piece of armor you earn carries a small chance of being high-stat. Here are primary sources to acquire high-stat armor, which are defined as having 60+ total stats:

    Source Limit Notes
    Weekly Milestones 1 per milestone per week
    Raids 1 per encounter per week Allows purchases on subsequent clears; specific stat biases available.
    Pit of Heresy (Zulmak) 1 per week Guaranteed to have +16 in two stats.
    Dungeons None Not always high-stat; Master drops Artifice gear for more bonuses.
    Seasonal Engrams (H.E.L.M.) None Moderate chance for spiky stats, compatible with Ghost armorer mods.
    Dares of Eternity (Legendary) None Guarantees +16 in two stats but has a low drop rate.
    Weekly Campaign Missions None Higher difficulties increase chances of high-stat armor dropping.
    The Wellspring (Master) None Must be on Master difficulty for better drop chance.
    Empire Hunts None Must be of Hero difficulty or higher for increased drop rates.
    Trials of Osiris None High-stat armor from Flawless runs and focused trials engrams.
    Master Lost Sectors None

    Using Ghost Armorer Mods

    You can also utilize Ghost Shell mods to promote armor pieces with certain stat biases. If you’re focusing on getting armor with specific distributions, equip relevant Armorer mods in your Ghost Shell prior to engaging in activities.

    An important caveat: If you are farming in an activity that rolls for stats in the same pool as your active Armorer mod, it may not apply.

    Best Practices for High-Stat Armor Farming

    Here are some effective methods to streamline your high-stat armor acquisition:

    1. Pit of Heresy (During Pinnacle Weeks): Considered the best when the dungeon is active. Each time you defeat Zulmak, you are guaranteed a piece of high-stat armor with pre-determined stats.
    2. Focusing Seasonal Engrams: Utilize vendors at the H.E.L.M. for quality seasonal armor with high-stat distributions.
    3. Master Raids: Weekly Master raids drop armor with specific stat biases, significantly improving your chances of getting what you want.
    4. Legendary Lost Sectors: Focus on specific Lost Sectors for high-stat Exotic armor, ensuring a challenge sufficient to cover your needs.
    5. Rahool’s Exotic Focusing: Use this option for targeted farming of specific Exotics.

    Determining Which Stats to Prioritize

    The most important stats vary based on your build and whether you play PvE or PvP. Typically, Resilience is key for PvE, Recovery is essential for PvP, and Discipline is valuable in all modes. Each has unique advantages for different builds.

    Stat Uses
    Mobility Useful for Hunters; others generally avoid it.
    Resilience Key for Titans in PvE to reduce incoming damage.
    Recovery Crucial for Warlocks in PvP for faster health regeneration.
    Discipline Important for builds heavily depending on grenades.
    Intellect Mainly a dump stat, with some exceptions.
    Strength Typically not a focus, as most abilities regenerate adequately.

    By focusing on these specifics, players can maximize their potential in Destiny 2, creating builds that are effective for any situation.

  • Understanding Armor and Bullet Impact Mechanics in Delta Force

    Understanding Armor and Bullet Impact Mechanics in Delta Force

    Quick Links

    In contrast to classic first-person shooter games, extraction shooters offer a more intricate armor and ammunition damage system. The Operations mode in Delta Force reflects this complexity, although it’s somewhat more straightforward than a game like Escape from Tarkov. Understanding which armor to select and which ammunition to use is crucial, as it can greatly influence your effectiveness in combat and your overall survival.

    The gunplay mechanics of Delta Force are not as confusing as in Tarkov but certainly more detailed than what you’d see in a battle royale title like Warzone. Let’s break down the essential elements.

    How Weapon Damage Works

    Several factors contribute to how well your weapon performs against opponents in Delta Force. The primary factor is the base damage of your weapon. Each firearm has a specific damage rating, which varies based on the body part you hit.

    Every soldier starts with a maximum of 100 health points distributed across their body. Damage values differ depending on whether you strike the head, limbs, or torso, among other areas.

    The damage also varies with distance; in close quarters, all weapons deliver maximum damage. However, the effective range can differ significantly between weapon types; for instance, a submachine gun will not reach as far as a battle rifle.

    Note: You won’t deal less than the minimum damage of a weapon at long range, as damage reduction isn’t linear.

    Additionally, each weapon has a base armor damage value that indicates how effectively it can wear down an opponent’s armor with each shot that lands. The type of ammunition used can modify this damage, which we’ll explore soon.

    How Armor Stops Bullets Until It Doesn’t

    Armor is categorized into six levels, with protection increasing as the level rises. When engaged in a firefight, the game compares your armor’s protection level to the enemy’s ammunition. There are three possible outcomes:

    1. Armor and ammo levels are equal: Your armor will absorb some damage but will lose durability, and you’ll still receive some damage to your health.
    2. Armor level exceeds ammo level: The armor fully stops the bullet, sustaining damage instead. You only take health damage once the armor’s durability is depleted.
    3. Armor level is less than ammo level: The ammo bypasses the armor entirely, inflicting full damage to your health.

    Armor can only protect areas it covers — typically the chest, abdomen, and shoulders. It’s important to select armor wisely, as heavier armor can slow your movement and aiming. If agility is vital for your play style, consider lighter armor options.

    How Ammo Affects Armor

    Ammunition is perhaps the most complex aspect of Delta Force’s gameplay, given its numerous variables. The bottom line is that higher-quality ammo offers better performance. This principle applies whether you’re armed with a handgun or a rifle.

    Every type of ammunition has a level, similar to armor, with the added possibility of level zero ammo for budget-conscious players. Essentially, higher-grade ammo provides superior armor penetration.

    It’s important to remember:

    • Ammo meeting armor of the same level does only 75% of its stated base damage.
    • The ammo level serves as a separate multiplier for armor damage, with a level four ammo yielding a 100% multiplier against armor up to level five but dropping to 60% against level six.
    • Certain ammunitions, like 9mm RIP or .45 RIP, may have unexpected penetration capabilities, favoring flesh damage over armor damage, making them ideal against limbs.

    In practice, any ammunition type can potentially compromise any armor, and our observation shows level-four armor can be damaged by lower-tier ammo. Submachine guns excel at this due to their rapid-fire capabilities, although only the armor would take damage in such encounters.

    Always come prepared for raids with armor repair kits; as your armor’s rarity increases, so should the quality of your repair kits. Damaged armor offers little protection. Also, stockpile more ammo than you anticipate needing — an unloaded weapon is as ineffective as compromised armor.

  • How to Upgrade Weapons and Armor in Dragon Age: The Veilguard

    How to Upgrade Weapons and Armor in Dragon Age: The Veilguard

    EA

    What kind of RPG would Dragon Age: The Veilguard be without an abundance of loot? Once you’ve chosen your class, personalized your character, and dived into the adventure, you’ll begin to collect a plethora of armors, weapons, and accessories for your character, Rook. The power of your gear, regardless of its type, hinges on two crucial factors: rarity and level. While you have little influence over the rarity of your items, upgrading them is a task you’ll need to tackle yourself. It takes a fair amount of time before the upgrade option opens up, and knowing where to start is essential, so let’s outline how to enhance your gear in Dragon Age: The Veilguard.

    Upgrading gear in Dragon Age: The Veilguard
    EA

    Upgrading Gear

    We aim to keep this spoiler-free, so we won’t delve into the specifics of what you’ll need to do prior to unlocking upgrades. However, you will first visit a location known as the Lighthouse early in the game. After embarking on your main quest and returning, that’s when the upgrading begins.

    Step 1: Upon returning to the Lighthouse for the second time, exit through the main entrance into the courtyard.

    Step 2: Proceed directly to the fountain located before the stairs, and interact with the new prompt that reads Workshop.

    Tutorial prompt in Dragon Age: The Veilguard
    EA

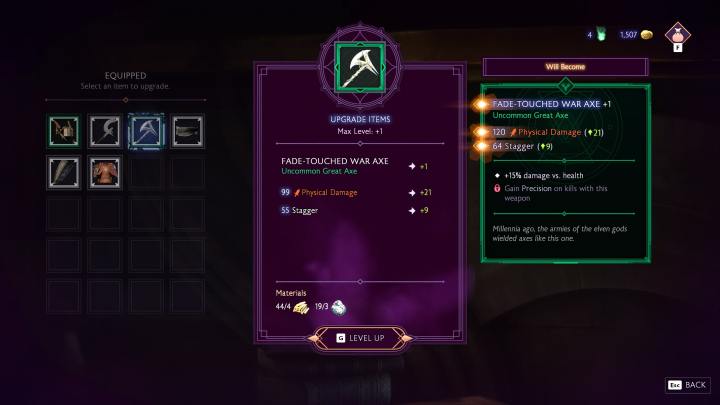
    Step 3: A list of your equipped items will appear on the left side of the screen. Choose the item you wish to upgrade, and the required gold and materials for the upgrade will be displayed along with the expected increase in stats.

    Tutorial prompt in Dragon Age: The Veilguard
    EA

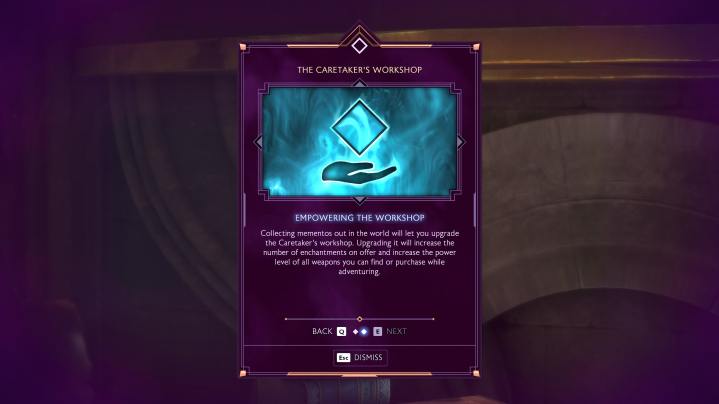
    Step 4: Remember that weapon upgrades depend on the level of the workshop, which you can enhance by finding or purchasing Mementos scattered throughout the game world.

    Step 5: Once you’ve progressed further in the storyline, you’ll gain access to enchantments for your gear and abilities. Applying an enchantment is free of cost, but each enchantment can only be affixed to one piece of gear or ability at any given time.

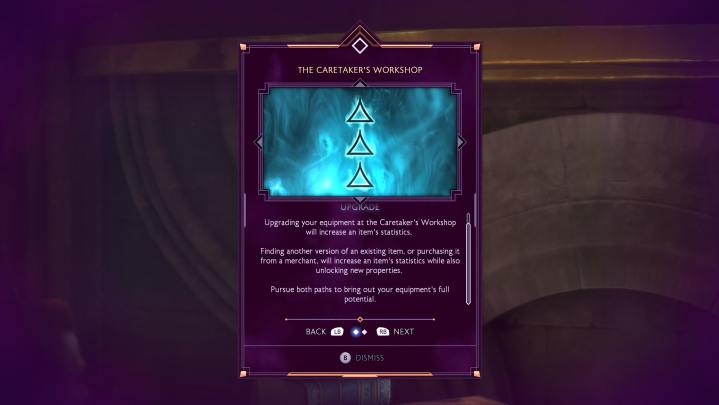
    Enhancing your items at the workshop will increase their stats, denoted by +1, +2, +3, etc. To improve an item’s rarity, you will need to find or buy a duplicate of that item, which will automatically elevate its tier.

    Don’t forget to check the other tabs to enhance the gear of your companions as well, ensuring they can effectively support you in battles!