الوسم: Ancient

  • Solving the Duskwoods Ancient Ruins Pillar Puzzle in Crimson Desert

    Solving the Duskwoods Ancient Ruins Pillar Puzzle in Crimson Desert

    Crimson Desert is a new fantasy role-playing game where you take on the role of Kliff, a mercenary. Your main goal is to rebuild your clan by exploring a large world, rescuing allies, completing quests, fighting bosses, and solving puzzles.

    One of the puzzles is located in the Duskwood Ancient Ruins. It involves raising multiple stone pillars so they all line up at the same height. This can be tricky because you can’t raise all four pillars at the same time. Here’s where to find the puzzle, how to solve it, and what rewards you get.

    How to Solve the Duskwood Stone Pillar Puzzle

    First, go to the northern part of The Witchwoods, to the landmass separated by two big rivers. In the forest, you’ll find ancient ruins with five stone pillars, a small energy pillar in front, and a large stone capstan at the bottom of the stairs.

    Approach the two braziers near the stairs. Draw your bow, then light an arrow on fire and shoot it at both the capstan and the stone pillars to burn away the vines covering them. After clearing the vines, look at the five pillars closely. Notice the notches or segments on each pillar—they will help you measure how much to move them.

    Number the pillars from left to right as 1 through 5. Pillar 1 doesn’t move at all. Your goal is to make pillars 2 through 5 the same height as pillar 1, which is the shortest.

    The capstan has four sides, each with a section where you can insert your sword. Different sides move different groups of pillars, indicated when a pillar glows yellow. To insert your sword, face the capstan and press the Right Bumper + Y on Xbox or Right Bumper + Triangle on PlayStation. This will create a handle that you can use to turn the capstan.

    Next, go to the northern side of the capstan—the side facing the stairs—and stab your sword into it. This action moves only pillars 2, 3, and 4. Raise these so their top segments match the bottom segments of pillar 1, which remains the shortest. When done, the pillars should resemble the photo above.

    Now, remove your sword from the capstan and insert it into the hole in the bottom right corner. This move adjusts only pillars 2 and 5. Raise these so that pillars 1 and 2 are aligned and glowing yellow. This will also bring pillars 3, 4, and 5 into the same height, matching each other, as shown in the reference image.

    Finally, go to the socket facing the stairs and insert your sword again. Rotate it clockwise to lift pillars 3, 4, and 5 until they reach the same height as pillars 1 and 2. When all the pillars glow bright blue and the front energy pillar shines, the puzzle is complete.

    You can then take the Abyss Cresset from the small pillar. This not only makes this spot a fast travel point but also grants you a free Skill Point.

  • How to Solve the Ancient Fort Battery Puzzle in Arc Raiders

    How to Solve the Ancient Fort Battery Puzzle in Arc Raiders

    If you want to improve your gear during a raid in Arc Raiders, head over to The Blue Gate map. This is currently the toughest map available and offers a challenging endgame experience with many ARC enemies and rough terrain. It also includes several small puzzles that reward you with loot once solved.

    One of these puzzles is found at the Ancient Fort. It involves locating three hidden batteries to open a locked cellar door. While it sounds straightforward, finding the batteries can be tricky if you’re unsure where to look. Here’s what you need to know to complete this puzzle quickly and get some good loot.

    Where to Find the Ancient Fort Puzzle

    The puzzle is at the Ancient Fort point on The Blue Gate map. To find it, go to the southeastern part of the map and identify a large stone structure. On the eastern side of this fort, you’ll see a cellar door that’s locked, with three cables extending from it. This door is where the loot is stored, so keep this location in mind while exploring.

    Ancient Fort is fairly remote, so you might not encounter many ARC enemies outside of Wasps, Hornets, and Snitches. Additionally, in the town just northwest of the fort, a Leaper or a Bombadeer can spawn, so keep your distance from those.

    How to Complete the Ancient Fort Puzzle

    To unlock the cellar, you need to find three batteries and carry each to a different electrical box. The batteries are roughly the size of the typical Field Crates and can’t be stored in your inventory. Carrying a battery will slow you down significantly, cause you to holster your weapons, and drain stamina quickly if you try to run with it.

    You will need to bring each battery to its corresponding electrical box, which are always in the same spots:

    • Along the southernmost wall of the fort.
    • On the second floor of the tower inside the fort.
    • On the second floor on the northern side of the fort.

    These electrical boxes are easy to identify because they glow bright blue when you’re near with a battery, and they open at an angle.

    Tip: If you’re having trouble locating a box, follow the cables coming from the cellar.

    All Battery Locations in Ancient Fort

    The batteries are scattered around and inside the fort. Their spawn points are usually marked by a wooden pallet on the ground—this is a good visual cue, although the pallet remains even if no battery spawns there. In total, there are about twelve potential spawn locations for batteries, but only three will be present at a time. Keep a close eye on each location.

    You will find batteries in the following spots:

    • Along the southwestern road that curves around the fort.
    • Inside the ruined house northwest of the fort, just before the town. Usually on top of the generator.
    • In the northern, ruined house between the fort and the town, near the old, collapsed building.
    • Inside the fort, beneath the southern wall, in a room with containers that can be broken.
    • Inside the tower’s second floor on the north side.
    • Behind the rusted, white car southwest of the fort.
    • At the top of the tower in the fort.
    • Inside the house southeast of the fort, on the generator.
    • Inside the destroyed house east of the fort, among satellite dishes.
    • In the ruined building southwest of the fort, near the old vehicle.
    • Inside the fort’s southern room with breachable containers.
    • At the final spawn point directly west of the fort inside a ruined structure.

    Note: Only three batteries will spawn each time, but these locations are consistent, making it easier to check each spot systematically.

    Looting the Basement

    After placing all three batteries in their respective boxes, the cellar door will unlock. Descend the ladder into the basement where you’ll find a weapon case and various electrical and medical items. Keep an eye on the computers; advanced electrical components often spawn there. Be cautious, as the basement has only one entrance, and enemies waiting outside might surprise you. Clear the area before looting to maximize your safety and rewards.

  • Unlocking the Ancient Meteoric Ore Greatsword in Elden Ring

    Unlocking the Ancient Meteoric Ore Greatsword in Elden Ring

    The Ancient Meteoric Ore Greatsword, forged from an arrowhead discovered in the arsenal of an ancient deity, is a remarkable weapon from the old forges of Elden Ring. This massive sword demands significant strength and arcane prowess from the tarnished who dare to wield it effectively.

    Available exclusively in the Shadow of the Erdtree DLC, this guide will walk you through the steps to acquire this colossal weapon and how to construct a powerful Strength build centered around it.

    Where to Find the Ancient Meteoric Ore Greatsword

    You will discover the Ancient Meteoric Ore Greatsword on the second level of the Ruined Forge of the Starfall Past. This dungeon, introduced with the Shadow of the Erdtree DLC, is located in the Scadus Altus region.

    To locate the Ruined Forge of the Starfall Past, begin at the Highroad Cross site of grace. You can reach it by traversing through Castle Ensis.

    Needle Knight Leda is also found here, where you can initiate her questline.

    Head north from the Highroad Cross site of grace until you reach a fork in the path. Take the eastern route, heading south until you come to a clear open area. Continue southwest until you reach the location indicated on the map.

    There’s a small abandoned structure with a tunnel that leads to the Ruined Forge of the Starfall Past. Upon arriving, go down and activate the first lever to open the door.

    Navigate past the lava foes and take a right to find a ladder. Ascend the ladder, carefully avoiding any enemies, and drop down onto a small platform to your left, where you’ll spot another lever.

    Activate the lever to lower another door. Once you pass through the doorway, turn right to find yet another lever. Pull it and hurry back to the lowered door, standing on top of it to be elevated to the previously inaccessible second level.

    Interact with the Forge to claim both the Ancient Dragon Smithing Stone and the Ancient Meteoric Ore Greatsword in Elden Ring.

    Stats and Requirements for the Ancient Meteoric Ore Greatsword

    The Ancient Meteoric Ore Greatsword relies on Strength and Arcane attributes, requiring 30 Strength, 19 Arcane, and 10 Dexterity to use effectively.

    This Greatsword features D scaling for both Strength and Arcane, and E scaling for Dexterity. At its base level, it inflicts 154 physical damage and 46 magical damage.

    You can enhance the Ancient Meteoric Ore Greatsword with Somber Smithing Stones, upgrading it up to +10. At its maximum level, it delivers 377 physical damage and 112 magical damage. This unique weapon skill, White Lightning Charge, prevents the application of Ashes of War or any consumables.

    Optimal Build for the Ancient Meteoric Ore Greatsword

    This build is designed for a fully upgraded Ancient Meteoric Ore Greatsword and a character level of 165+. Since it’s essentially a Strength-based build, distribute your skill points as follows:

    • Vigor: 35
    • Strength: 60
    • Endurance: 30
    • Arcane: 35

    To maximize your damage output, combine this build with relevant incantations using a fully upgraded sacred seal.

    For your secondary weapon, opt for an axe while forgoing shields. Since you’ll be utilizing the weapon skill frequently, ensure your Flask count is evenly distributed. Equip these talismans to enhance your Ancient Meteoric Ore Greatsword build:

    • Shard of Alexander (boosts weapon skill attack power)
    • Two-Handed Sword Talisman (increases attack power when wielding weapons two-handed)
    • Spear Talisman (boosts thrust attack power)
    • Carian Filigreed Crest (lowers FP cost of weapon skills)

    For armor, the Black Knight set is ideal for maximum physical defense.

    Mix these crystal tears in the Flask of Wondrous Physick:

    • Opaline Hardtear (provides extra protection against enemy strikes)
    • Stonebarb Cracked Tear (increases stance damage)

    With this build, you’ll inflict tremendous damage on bosses, combining both physical and stance damage. Initiate battles with the White Lightning Charge skill to quickly close the gap and break the enemy’s stance, allowing for massive early-game damage and potentially tilting the fight in your favor.

  • Discovering Arrowhead Treasures in Avowed: A Hidden Gem

    In Avowed, exploration is key to staying ahead of your foes. The enemies you face don’t level up with you, which means their power remains constant. To keep up, you need to continuously improve your character before tackling new areas.

    This means upgrading your gear or locating better versions of your weapons and armor throughout the game world, which is abundant with treasures. One of the best methods to get powerful items is by finding treasure maps and hunting down their treasures. The catch is that the map only provides an image as a clue and no additional details.

    Ancient Arrowhead Treasure Map Location

    Once you enter Galawain’s Tusks region, which is the fourth available area in the main story, you can quickly get your hands on the Ancient Arrowhead treasure map right when you arrive.

    From your starting point, move slightly north and then head south to find a spot called Writhing Ruins. Before you go in, look to your left to find a ledge to climb. Continue towards the arch entrance and jump to the right side.

    Next, make a second jump to the left, followed by another jump to the right. You’ll notice the path ahead is blocked by spines that you need to clear using fire.

    You can use a Fire spell, Kai’s Firestarter skill, or Magran’s Fury to achieve this.

    This will open a path that leads to a secret cave passage that will take you to a boss fight area.

    If you want to skip the boss and just grab the treasure map, look for a corpse on your left. Approach it swiftly, pick up the map, and then exit the area.

    Ancient Arrowhead Treasure Location

    To find the Ancient Arrowhead treasure, you need to head northeast from your current location until you reach Warden’s Rest.

    Here, you will see a wooden house by the road, along with the Solace Keep building to your right. If you check just to the right of the keep, you’ll find a rocky ledge you can move behind, where a locked chest awaits.

    To unlock it, you’ll need three lockpicks. Inside the chest is the Ancient Arrowhead Treasure, which contains the Scout’s Reach along with some excellent upgrade materials.

  • All Ancient Memory Locations in Avowed Explored

    In Avowed, you’ll find one Ancient Memory per map, each granting vital passive upgrades for your Envoy. These memories are scattered throughout the map, and you’ll need to thoroughly explore to tap into your Godlike abilities and master the battlefield within The Living Lands.

    Every memory provides a ten percent boost to one of your essential stats—be it Health, Essence, Stamina, or Damage. Each memory is tied to a specific upgrade, making it essential to collect them all. Additionally, they reveal important aspects of your backstory and help you piece together your identity and the journey that led you here.

    Where to Locate the Ancient Memory in Dawnshore

    The Ancient Memory in Dawnshore is the simplest to obtain. Just travel to Watcher’s Mirror located to the east of the map. Cross the shallow pond, and you’ll find the memory waiting for you at the edge of the platform.

    This memory is the Remembrance of Kishamal, which boosts your Maximum Health by ten percent.

    In the center of the lake, you can discover a Drawn In Winter, which is among the best early game Ranger weapons. However, be cautious; taking it will trigger a battle with skeletons.

    Where to Locate the Ancient Memory in Emerald Stair

    To unlock the Ancient Memory in Emerald Stair, you must defeat the Steel Garotte. Make your way to their Ranger Tower located south of the Wildwoods, and locate the ladder positioned around the back. Climb it and continue up through more ladders and strategically placed boxes until you reach the summit.

    A few soldiers will challenge you along the way, but they won’t be too numerous. You can also find plenty of weapons and potions as you ascend. Once you reach the top, oversee the Emerald Stair and interact with the memory, which grants you the Remembrance of Enhekala that enhances your Maximum Essence by ten percent.

    Where to Locate the Ancient Memory in Shatterscarp

    Prepare for a tough fight at the Twin Reaches Overlook, where you’ll need to combat numerous xaurips to retrieve the Ancient Memory in Shatterscarp. The area involves extensive platforming, so be ready to jump between columns. While there’s a wooden path to follow, the jumps become challenging, especially when under attack.

    This section houses the Chief Xaurip Grithin Bounty, so expect fierce opposition during your climb. After defeating him and his minions, traverse across the flat peak to a xaurip monument. At the edge of the cliff, you’ll find the memory, which provides the Remembrance of Nimanna, enhancing your Maximum Stamina by ten percent.

    Should you miss the Memory while completing the Bounty, you’ll be safe to claim it now.

    Where to Locate the Ancient Memory in Galawain’s Tusks

    At the southernmost part of the Slumbering Fields, you’ll find the Restless Cavern. Rather than venturing inside, navigate around the elevated path to reach a platform that overlooks the aqueduct, where the Ancient Memory in Galawain’s Tusks is located. Unlike the previous locations, you won’t need to engage in combat to reach this memory, but it does come with its own set of challenges.

    This is primarily because the lake in Slumbering Fields is highly acidic at first. Beginning your adventure here also starts the quest Boundaries of Antiquity. Complete the first part of this quest, and the lake will transform into clean, safe water. In return, you’ll receive the Remembrance of Maru, which grants you ten percent more Attack Damage.

    Where to Locate the Ancient Memory in The Garden

    In The Garden, after encountering Giatta’s parents during the Pulling Back The Veil quest, you’ll arrive at a location known as the Broken Aqueduct. Instead of following the quest marker, go south until you reach a closed gate. Open the gate, and you’ll discover the Ancient Memory of The Garden waiting for you.

    Since this is near the end of the game, you may not have as much time to enjoy this reward. However, it’ll be beneficial as you prepare for the tough battles ahead. This memory unlocks the Remembrance of Sapadal, allowing you to regenerate Health when your levels drop below 50 percent.

    What Do the Ancient Memory Rewards Include?

  • Conquer the Ancient Goop Beast in Lego Horizon Adventures!

    Conquer the Ancient Goop Beast in Lego Horizon Adventures!

    Similar to the main Horizon games, Lego Horizon Adventures features numerous bosses. You’ll encounter recognizable machines like Thunderjaws and Stalkers, but the final boss presents a unique challenge.

    Related

    Lego Horizon Adventures: How to Complete All Community Jobs

    To collect all 100 Gold Bricks in Lego Horizon Adventures, you must finish every Community Job.

    The game concludes with a duel against the Ancient Goop Monster, a swirling mass of fiery goo and machinery. This boss is notably more challenging compared to the others in an otherwise straightforward game. It features unpredictable attacks and a substantial health bar, making it a tough opponent.

    Ancient Goop Monster Attacks


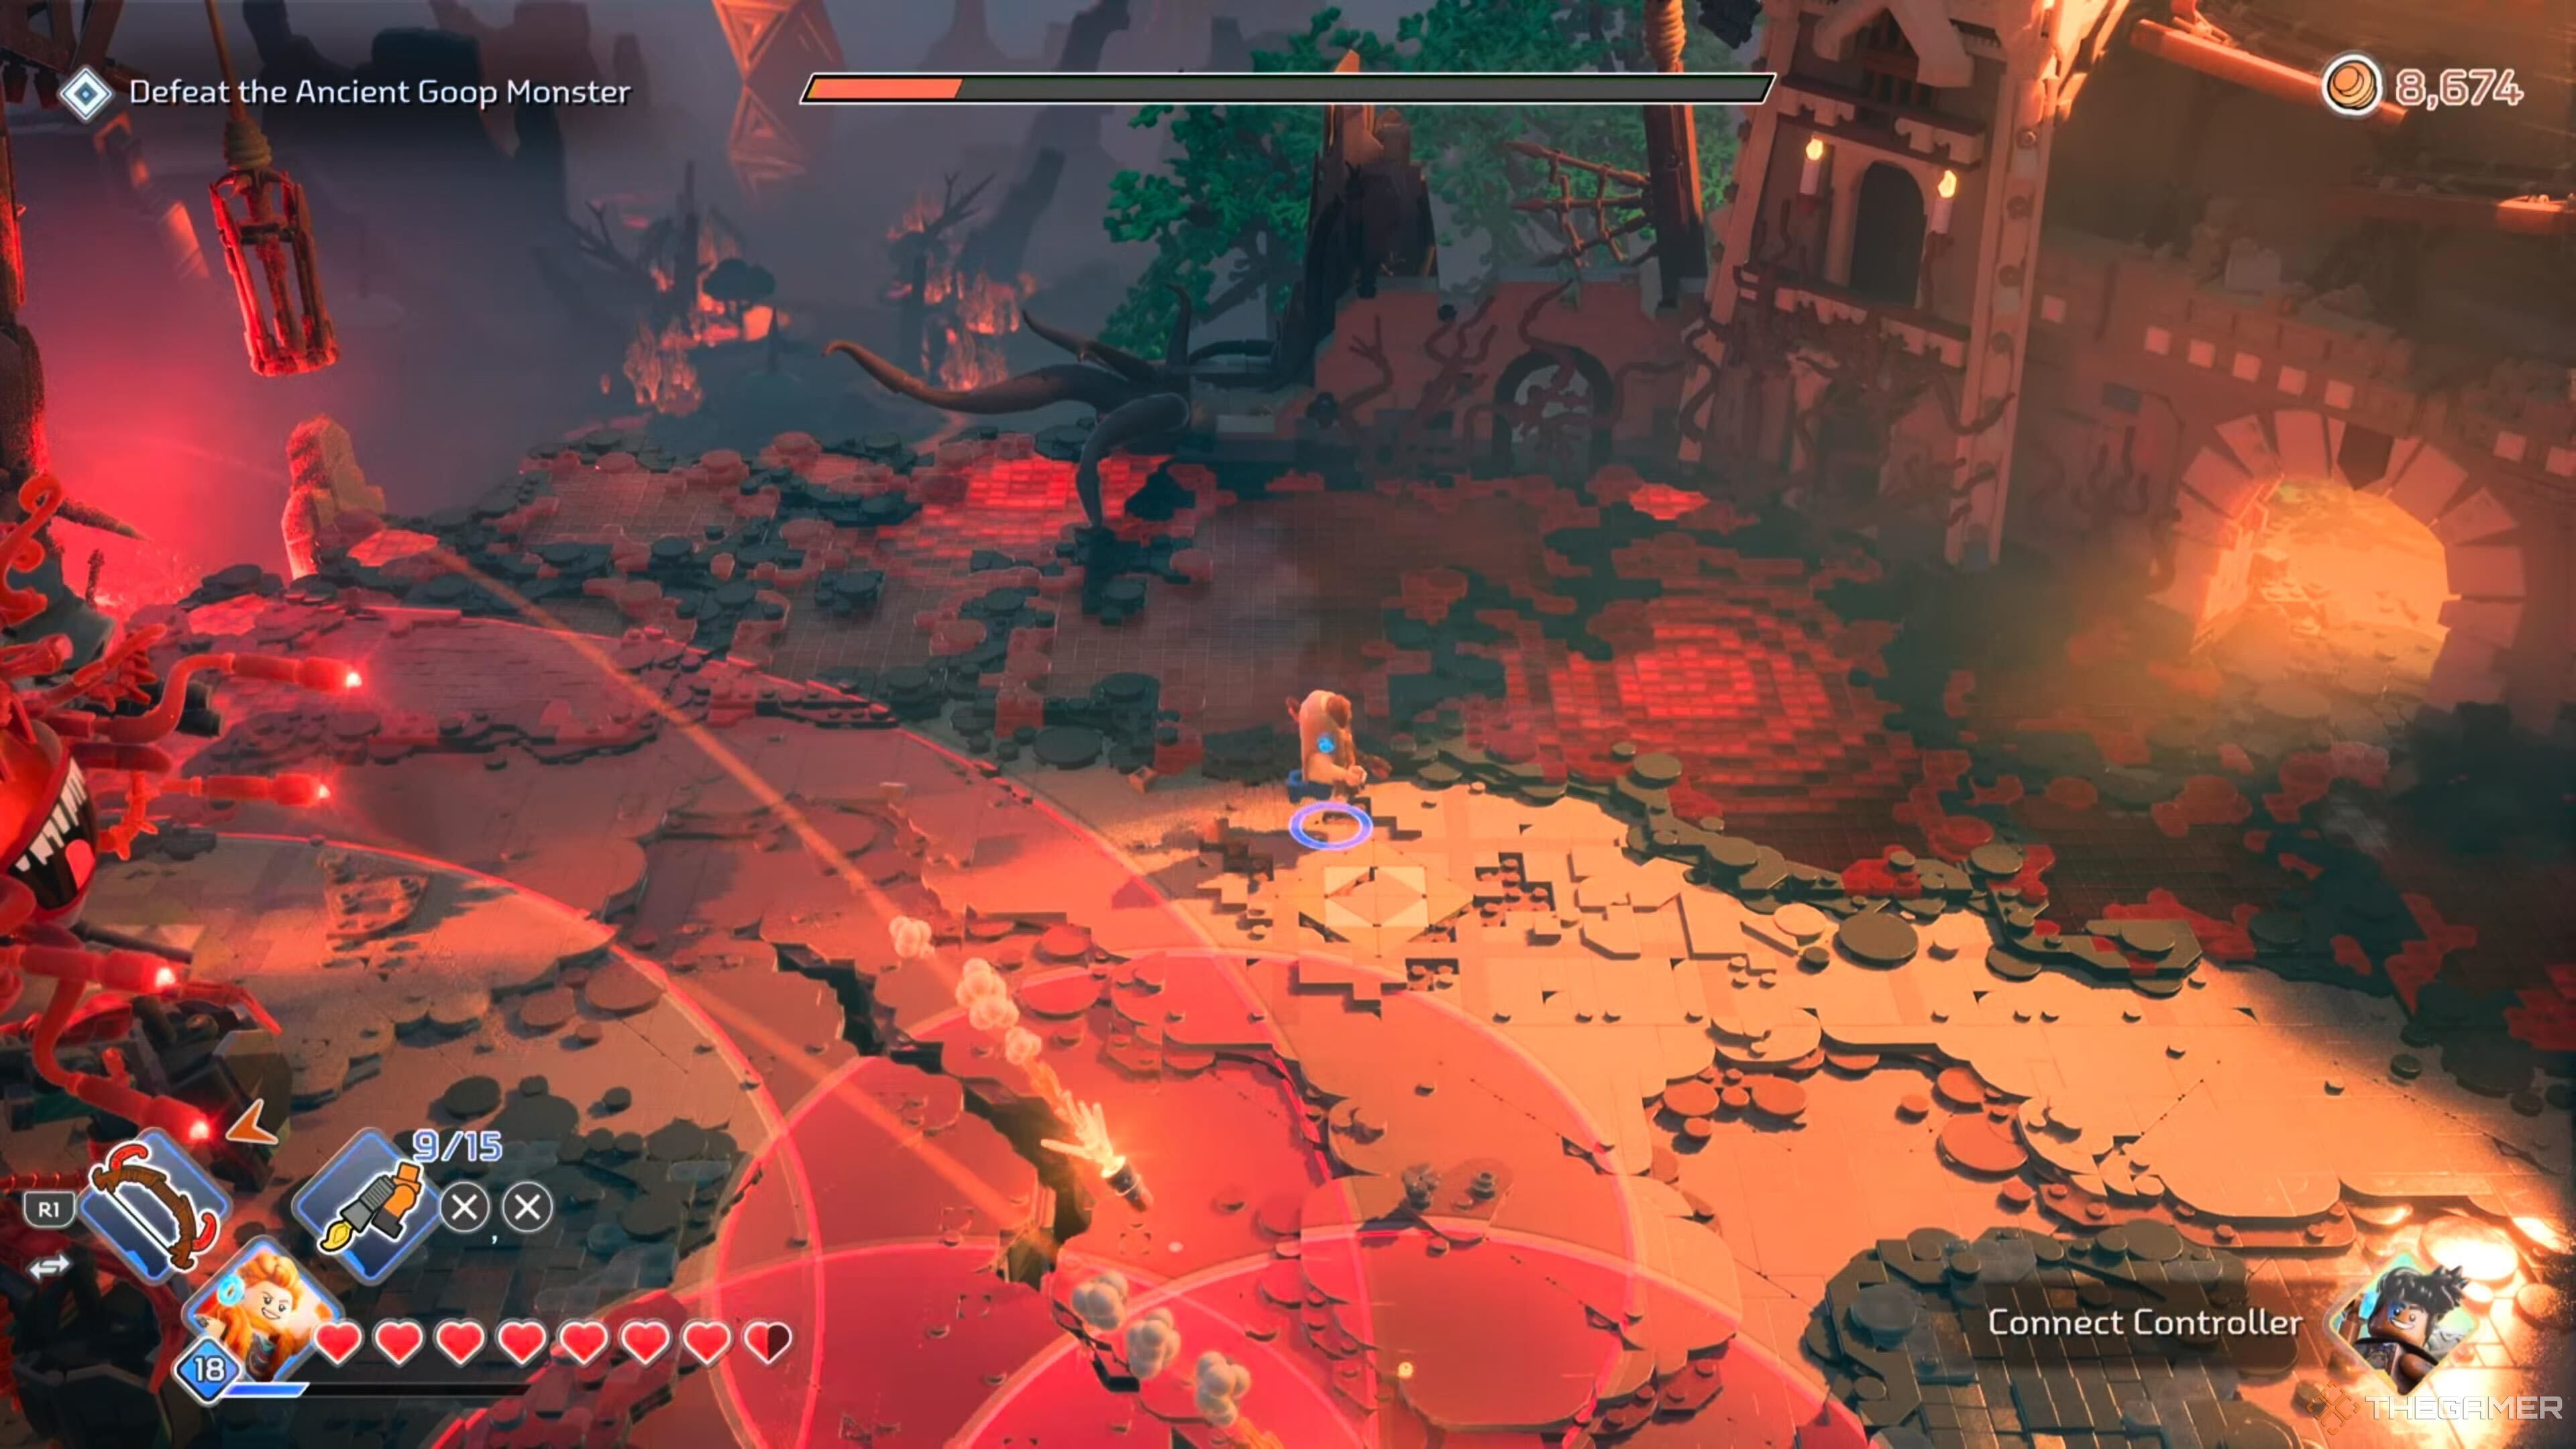
    The Goop Monster's fire attacks in Lego Horizon Adventures.

    Unlike the typical boss fight that involves multiple phases with varied attacks, the Ancient Goop Monster relies on a consistent set of attacks throughout the encounter. It’s crucial to recognize and dodge them effectively. Here are the attacks you need to watch out for:

    Attack

    How to Avoid

    Dual Fire Laser Guns

    A large red circle indicates where the beams of fire will strike. Simply sidestep this area.

    Rocket Barrage

    Three overlapping red circles will mark the ground where rockets will hit. Make sure to move out of these zones.

    Vertical Fire Guns

    After two red lines appear, the monster will shoot two flaming projectiles forward. This attack is easier to dodge compared to the circular one.

    Blight

    The monster calls down toxic blight, which deals damage upon contact.

    Slam Down

    The monster will slam down, creating a shockwave that you need to jump over to avoid taking damage.

    How to Beat the Ancient Goop Monster


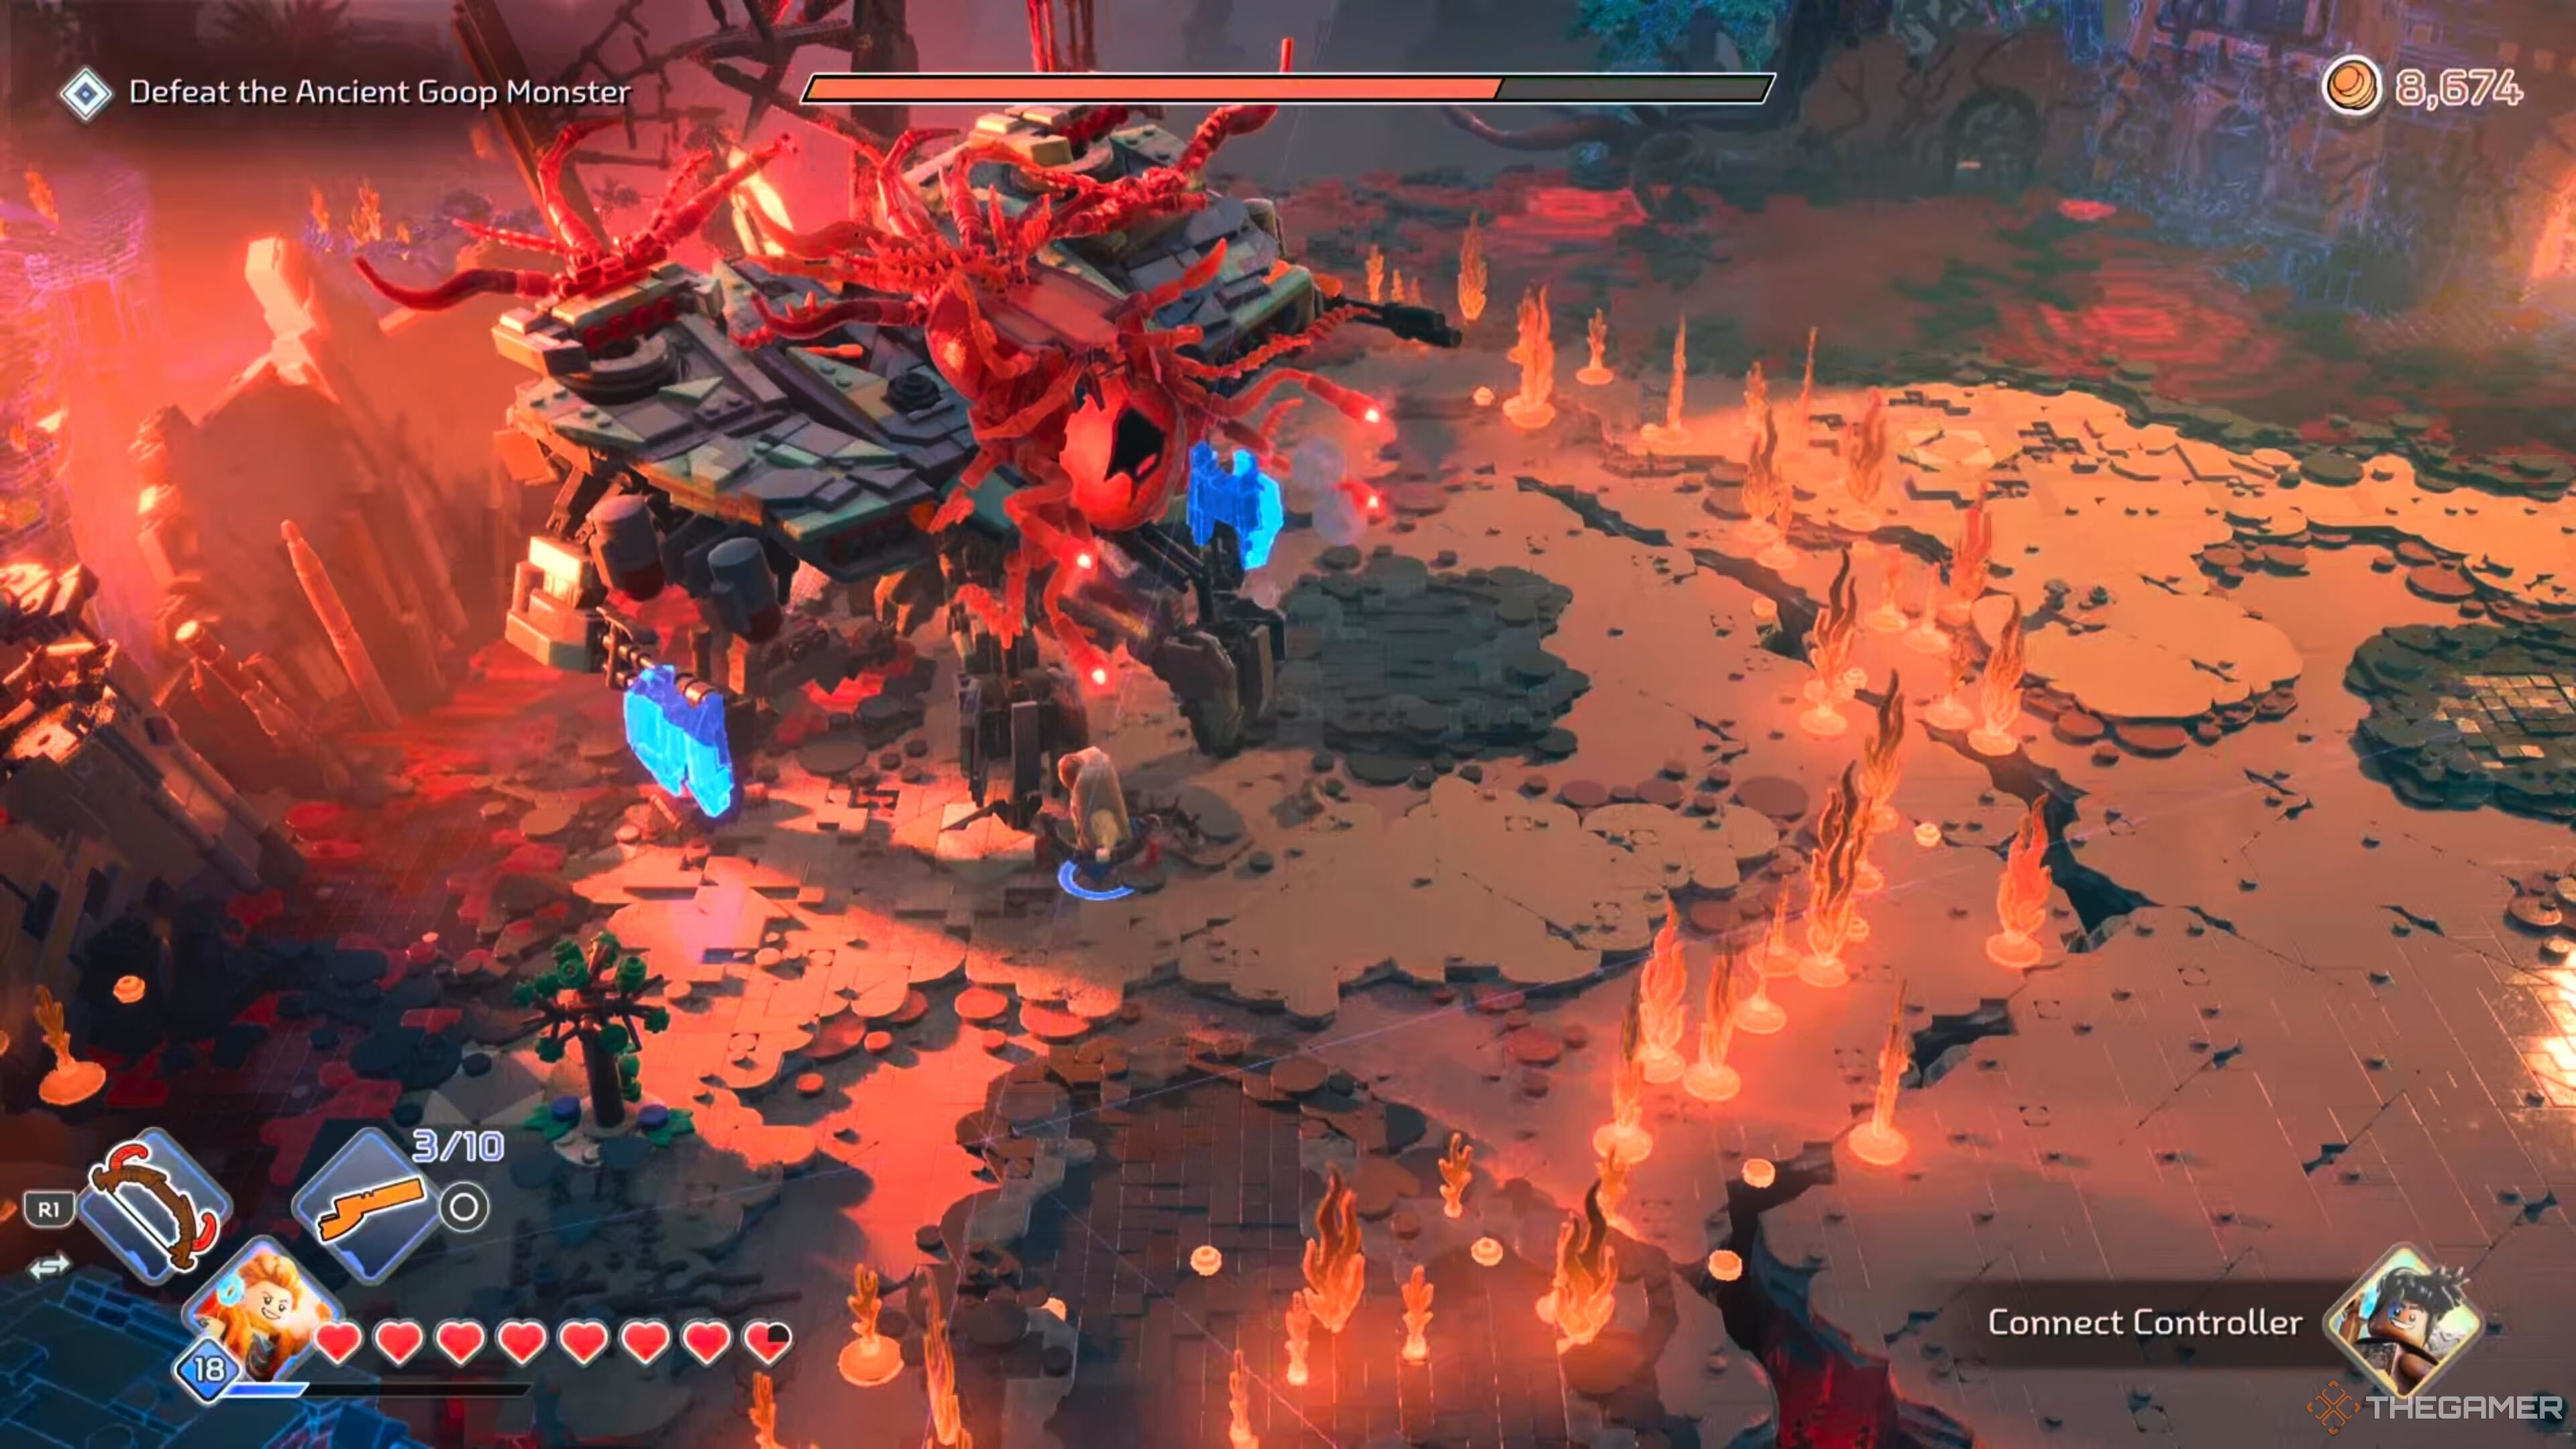
    Attacking the Goop Monster's legs in Lego Horizon Adventures.

    Once you’ve mastered how to dodge the Ancient Goop Monster’s attacks, it’s time to focus on inflicting damage. First, activate your Focus to survey the area at the start of the battle.

    This will reveal that the best approach is to target the joints on each of the monster’s legs. You have limited opportunities to land your attacks, so wait for the legs to glow blue and strike then. After hitting all four legs, the monster will topple, allowing you to deal significant damage while it’s vulnerable. Repeat this process until the battle concludes.

    Additionally, when Blight appears on the ground, make sure to attack it as well. This will also inflict damage on the Ancient Goop Monster.