الوسم: Alchemist

  • Completing Memories: The Alchemist and the Envisioned Land

    Completing Memories: The Alchemist and the Envisioned Land

    Embarking on a journey across an entirely undiscovered continent is a formidable challenge, especially when relying on just one or two central settlements. Thankfully, Atelier Yumia: The Alchemist of Memories & The Envisioned Land provides the capability to establish multiple bases, each fully customizable to reflect your vision.

    These locations offer significant advantages during your adventures, including specialized facilities that enhance your alchemical endeavors. Moreover, you can design charming structures that create a comfortable living space amidst the enchanting hills of Aladiss.

    Unlocking Building and General Guidelines

    The Building feature becomes available during the quest "Survey Prep Work," which introduces you to Yumia’s Atelier. To construct in any suitable area, simply open the command wheel, select the Building option, and choose the items you’d like to create.

    You have the option to craft new furniture either at Workbenches or directly through the Building menu. Regardless of how you create them, all crafted items remain in your inventory until you place them down. Keep in mind that this inventory is distinct from your ingredient storage (which is kept in Containers), so you won’t have to worry about overcrowding with furniture.

    Building can take place at the Atelier, within Building Areas, and at Camping Sites discovered during your explorations. Some areas related to the story also allow for limited construction and placement of items for various quests.

    Instead of using Ingredients, crafting furniture requires Materials. These Materials are automatically collected as you gather Ingredients from the environment. For instance, minerals and stones provide Stone materials, while plants and flowers result in Fibers.

    Tip: There’s no cap on how many Materials you can collect, and they’re automatically stored in a Container nearby. If you’re short on Materials for a build, ensure you have placed a Container in your current location to access your entire Material supply.

    Understanding Construction Costs

    Every piece of furniture or structure requires a Placement Cost, and individual Building Areas or Camping Sites come with their own Cost limits. Premium furniture generally has higher Costs and might not be suitable for Camping Sites, which feature lower Cost limits by default. You can raise these limits by engaging in various activities throughout the game.

    It’s possible to remove all constructions and furniture from an area at once, allowing you to store all items for later use without depleting your resources. However, once furniture is removed, you cannot destroy it to regain the Materials used.

    Building Areas and Camping Sites

    The primary zones for construction are Building Areas and Camping Sites. You unlock these by clearing Manabound Areas or by discovering them during your travels. Some are tied to the storyline and serve as typical sites for constructing actual structures. Both types also act as Fast Travel Points.

    Building Areas are larger zones where you can install any type of structure, furniture, or facility, making them the most versatile location for construction in the game. They can be found across all game regions, and once activated, various NPCs will gather around.

    In contrast, Camping Sites are smaller and come with a lower Cost limit. They unlock when you approach them and often form part of the region’s Pioneering Effort.

    Camping Sites are the only places where you can set up camp using Camping Sets made via Quick Synthesis. Camping restores your characters’ HP and grants combat buffs for a short duration, provided you cook a meal. Additionally, these sites often trigger unique interactions between characters that may be missed otherwise.

    Facilities and Comfort Level

    Building Areas can host Facilities, which enhance Yumia’s access to essential resources for her synthesis tasks. It’s advisable to have a few Facilities, especially if you’re struggling to gather the right materials. The following Facilities are available:

    Facility Name Description Unlocking Method
    Greenhouse Duplicates certain ingredients. Ligneus Pioneering Effort reward.
    Storehouse Stores more items than your Container can. Ligneus Pioneering Effort reward.
    Manufacturing Plant Duplicates specific synthesized items. Auruma Pioneering Effort reward.
    Mana Converter Produces Trait Crystals, Particles, and Energy Prisms. Lacuna Pioneering Effort reward.

    These Facilities can streamline your resource management, but keep in mind that adding them prevents you from earning a Comfort Level in that area unless you tear down the Facility and any other structures.

    Increasing Comfort Level

    The Comfort Level is solely obtained through Free Build mode and is enhanced by the number of items added to a Building Area. Luxurious items grant a higher Comfort Level, and reaching specific thresholds awards you exclusive bonuses. Each Building Area has its own Comfort Level targets and associated rewards.

    Tip: Once you achieve the desired Comfort Levels for a Building Area, feel free to clear all structures and convert the space into a Facility without losing your rewards.

    How to Acquire More Furniture

    Furniture can primarily be obtained by exploring Treasure Troves scattered around Aladiss. Opening these treasures often yields recipes for new furniture items. Simply collecting a recipe lets you craft that new item immediately if you’re in the appropriate crafting zone.

    You can also obtain some recipes by trading with regional Traders unlocked through Pioneering Effort tasks. This includes both Preset recipes and standard Furniture recipes, and once acquired, they cannot be traded for again.

    Completing Personal Quests for key characters can also reward you with unique furniture pieces. These quests are marked on your map with your party members’ icons and unlock after important narrative moments.

    Finally, participating in Pioneering Effort tasks can provide additional furniture recipes, necessary for completing subsequent tasks in the same region. Prepare to craft them as soon as you gain the recipes!

  • The Memory Alchemist and the Dreamed Realm

    The Memory Alchemist and the Dreamed Realm

    In Atelier Yumia: The Alchemist Of Memories & The Envisioned Land, exploring ancient ruins and uncovering hidden treasures is an everyday task for Yumia and her Research Team. However, each discovery often comes with unexpected twists, especially when it leads to new resources that help them tackle perilous areas.

    A great illustration of this is the Shrines of Prayer found throughout the regions, including Auruma. These ancient structures hold intriguing puzzles, and solving them rewards you with valuable upgrades, making them well worth the effort to seek out.

    All Shrine Of Prayer Locations In Auruma


    You can discover a total of 17 Shrines throughout the third region, typically located near Fast Travel points, making them easy to revisit if you happen to miss any. The puzzles at these Shrines tend to be more challenging than those found in earlier regions, and each one offers three unique devices.

    It’s important to note that some areas in Auruma are completely off-limits until you complete specific quests, including a few Shrines. Fortunately, these areas contain only a handful of Shrines, so there’s not too much to worry about. Once you finish the ‘Exhausted Research Team’ quest, you’ll be free to explore.

    Auruma Survey Base

    Enter the tunnel to the north of the Auruma Survey Base and take a left. Follow the path to reach the main device of the Shrine.

    Cliffside Store Ruins

    Located west of the Dead-End Campsite. If you haven’t uncovered this area yet, exit the Survey Base through the west entrance and climb the hills to a higher viewpoint. From there, head east to find the ruins and the Shrine.

    Large Cave

    Jump down to the west of the Lode Fault teleport point in the Geni Settlement to discover the Large Cave area, where the Shrine is located.

    Golden Lake

    Take the Pergra Ost teleport and proceed to Golden Lake. The Shrine is situated on a small island to the south.

    Large Commercial Building

    Right to the east of the building itself. You can also teleport to the nearby Building Area to skip climbing down.

    Eroded Canyon

    Teleport to the Eroded Canyon point and turn left. Continue straight ahead to find a cave that contains the Shrine.

    Ramus Route

    Teleport to either the Building Area or the Ramus Route Ratix, then ascend two flights of stairs to access the Shrine’s location. It can be found inside a small room.

    Sandy Falls Hills

    Take the Northern Area Entrance teleport and head north to the remnants of Tornus Inn; repair the Zipline inside and use it to reach the Shrine.

    Tornus District

    Use the Tornus Road teleport, then proceed straight to the stairs. You’ll spot the Shrine right in front of you.

    Aladissian Military Base

    Right next to the Aladissian Military Base teleport, which is located south of the base.

    Mana Transposing Ward

    To the north of the main teleport in this zone. The Shrine is situated above a small house, but a simple jump will allow you to reach it.

    Residential Area Intersection

    Cross the bridge by the Residential Area Intersection teleport to find the Shrine nestled among some crumbled walls.

    Unpopulated Residential Area

    From the same teleport you used earlier, continue east along the road to Golden Plains – East. The Shrine is along the way, typically guarded by some monsters.

    Golden Plains – East

    From that last Shrine, continue heading east to spot the next one as you enter the Golden Plains.

    The access to the next two Shrines is only granted by advancing through the ‘Exhausted Research Team’ quest.

    Large Alber Settlement

    Once you’ve gained access to the northern part of Auruma, head north from the Narrow Rocky Path teleport and climb the stairs.

    Wygor Quarry

    Further into the northern area, you’ll locate the Wygor Quarry teleport. Keep moving straight ahead and ascend the ruins to activate the Shrine at the summit.

  • The Memory Alchemist and the Dreamed Realm

    The Memory Alchemist and the Dreamed Realm

    When the Research Team reaches the third region of the Aladiss continent in Atelier Yumia: The Alchemist Of Memories & The Envisioned Land, they have already encountered various aspects of this fallen empire. However, this ancient land still has many hidden treasures yet to be discovered.

    The existence of Treasure Troves in Auruma serves as clear evidence of this. These Troves are filled with secrets waiting to be revealed, and with Yumia’s skills in investigation and alchemy, along with a bit of patience, she can uncover them.

    Where to Find All Treasure Troves in Auruma

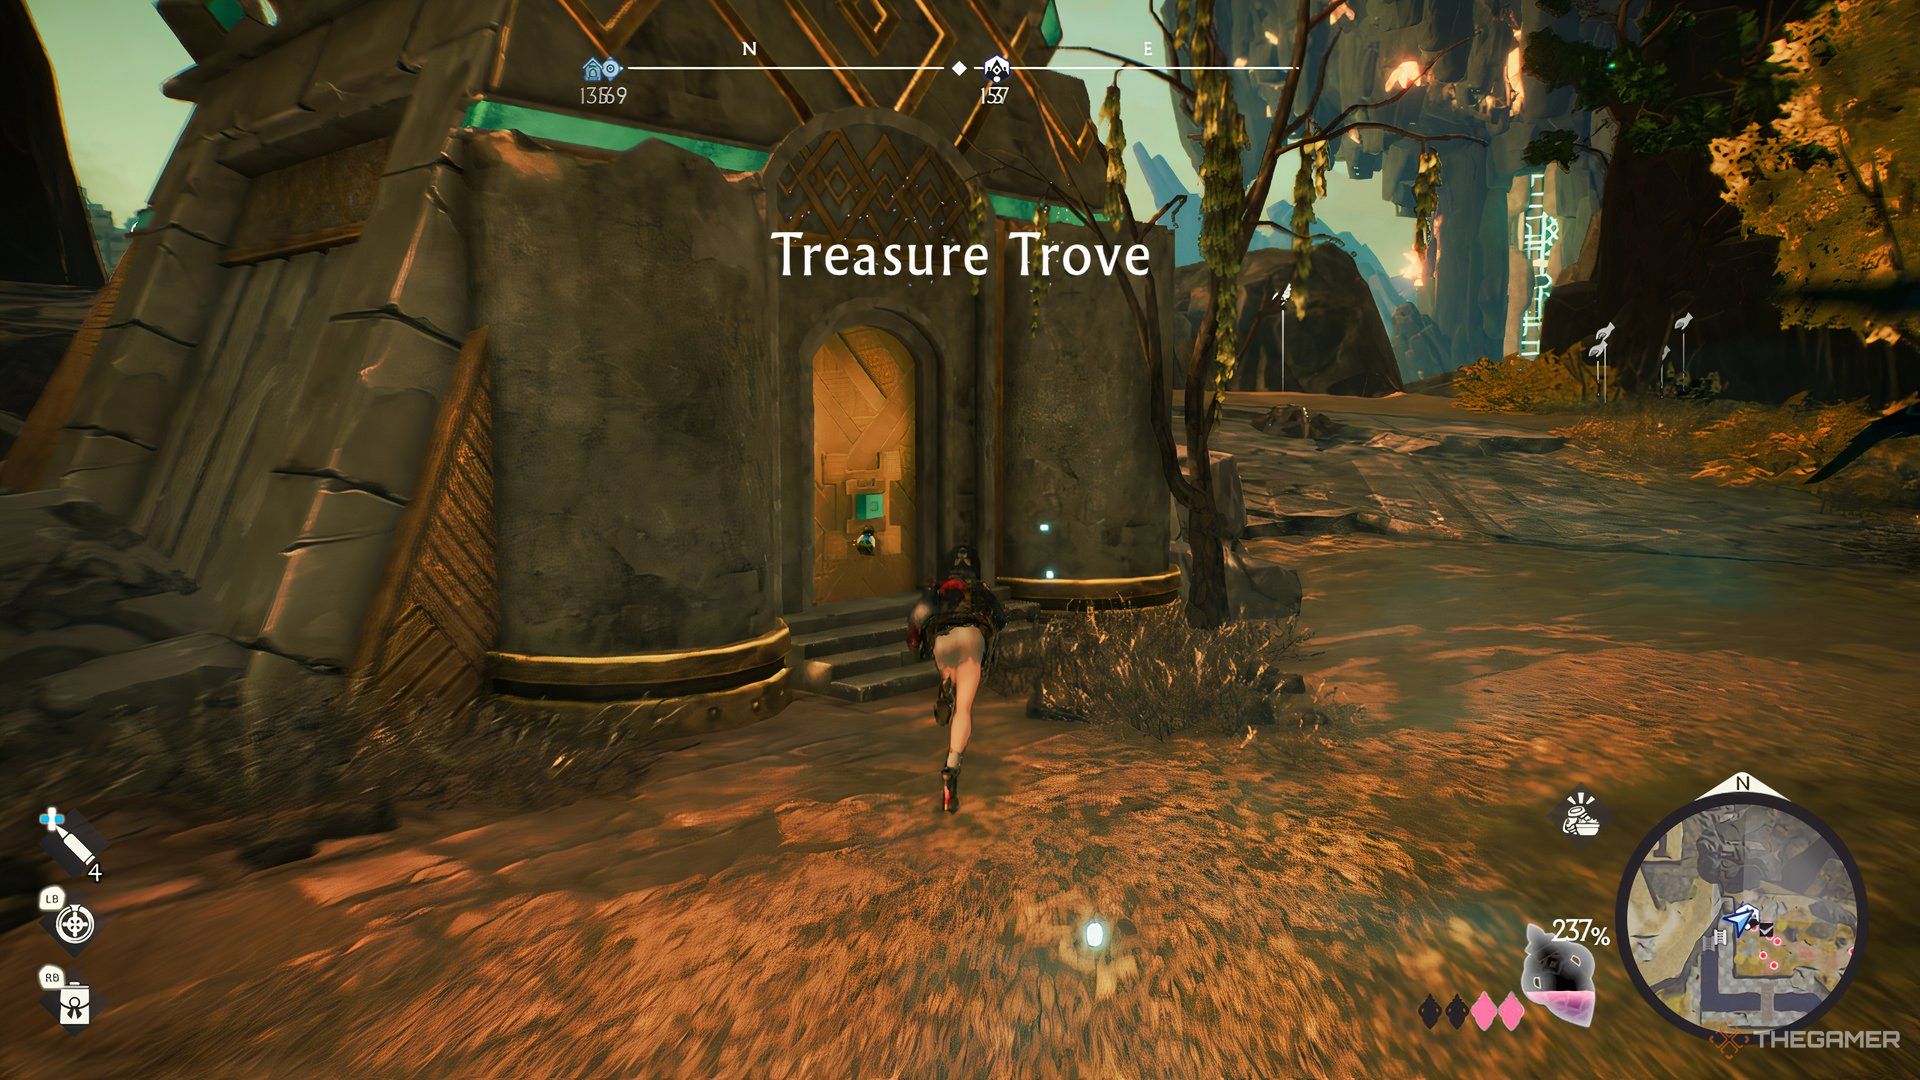
    In total, there are 20 Treasure Troves located in the third region, which is the highest number among all regions. You’ll need a good number of keys to unlock these hidden treasures, as many of them are in less accessible spots. Initially, they show up as an “?” icon until you discover them fully.

    Like in previous regions, some places are blocked until you progress through the storyline. However, you’ll unlock these sealed areas during Auruma’s storyline and not in the following zone, as happened previously.

    Survey Base

    Located on the left side of the Auruma Survey Base, it’s hard to miss.

    Commercial District Center

    Teleport to Lode Fault, then head directly east until you find the Shrine.

    Golden Plains West

    Teleport to Golden Retreat and take the route south. The Trove is surrounded by enemies, so be cautious.

    Ramus Route

    Use the Ramus Via Foothills teleport, then go south where you’ll easily spot the Trove.

    Ramus Route West

    Continue south from the previous Trove until you reach a Cave to your right. Instead of entering, keep going straight until you can climb up the walls. The Trove will be on that elevated area to your right.

    Earthen Fissure

    Teleport to Earthen Fissure and jump down the hole to the west to discover it at the bottom.

    Pergrica Industrial District

    Located by the shores of the District area, southeast from the Central Stranding teleport.

    Golden Lake

    After teleporting to Pergra Ost, move south while staying near the lake, until you spot the Treasure Trove.

    Aladissian Military Base

    From the Aladissian Military Base teleport, move east, then jump down the cliff and walk a bit further to encounter the Trove.

    Pit Road Entrance

    Teleport to Pit Road Entrance and take the path to the right leading upward (the one filled with bat monsters). Once you reach higher ground, head west to find the Trove.

    Eroded Canyon

    Teleport to the Eroded Canyon, then keep going north past the Armored Giants until you find the Trove at the top of the stairs.

    Residential Area Intersection

    From the Residential Area Intersection teleport, cross the bridge and go northwest until you see the Trove. It is often surrounded by foes, so approach with caution.

    Mana Transporting Ward

    Go to the north part of the ward from the Building Area. After crossing the bridge, continue forward, and you will find the stairs on your left. Use those to reach the Trove.

    Golden Lake Outlook West

    Teleport to Golden Lake Outlook, then drop down to a lower level while going west. When you see the “?” icon, head north to find it.

    Golden Lake Outlook South

    It’s located south of the Building Area in Golden Lake Outlook. Be cautious not to fall from the platforms while trying to reach it.

    Sandy Falls Hills

    Right in front of the Quicksand Pond teleport.

    Tornus Inn North

    Travel north from the Northern Area Entrance teleport to find the remains of Tornus Inn. The Trove is right beside it.

    Tornus Inn South

    Directly below the previous Trove, jump down the cliffs right in front of the lake.

    Access to the following Troves requires completing the ‘Exhausted Research Team’ Pioneering Quest, which unlocks after achieving at least 20 percent of the total Pioneering Effort in Auruma. Completing this quest will give you access to the entire northern part of the region.

    This quest serves as the start of a lengthy quest line, and its subsequent steps will be unlocked as you continue to increase your Pioneering Effort and progress through the main storyline.

    Large Alber Settlement East

    Upon reaching the northern area of Auruma, head north from the Narrow Rocky Path teleport and jump from the Shrine of Prayer, then move east. The Treasure Trove can be found on a small cliff at the edge of the map.

    Large Alber Settlement West

    Exit the Large Alber Settlement by taking a left after crossing the bridge, and continue along the path until you spot the Trove.

    How to Acquire Treasure Trove Keys

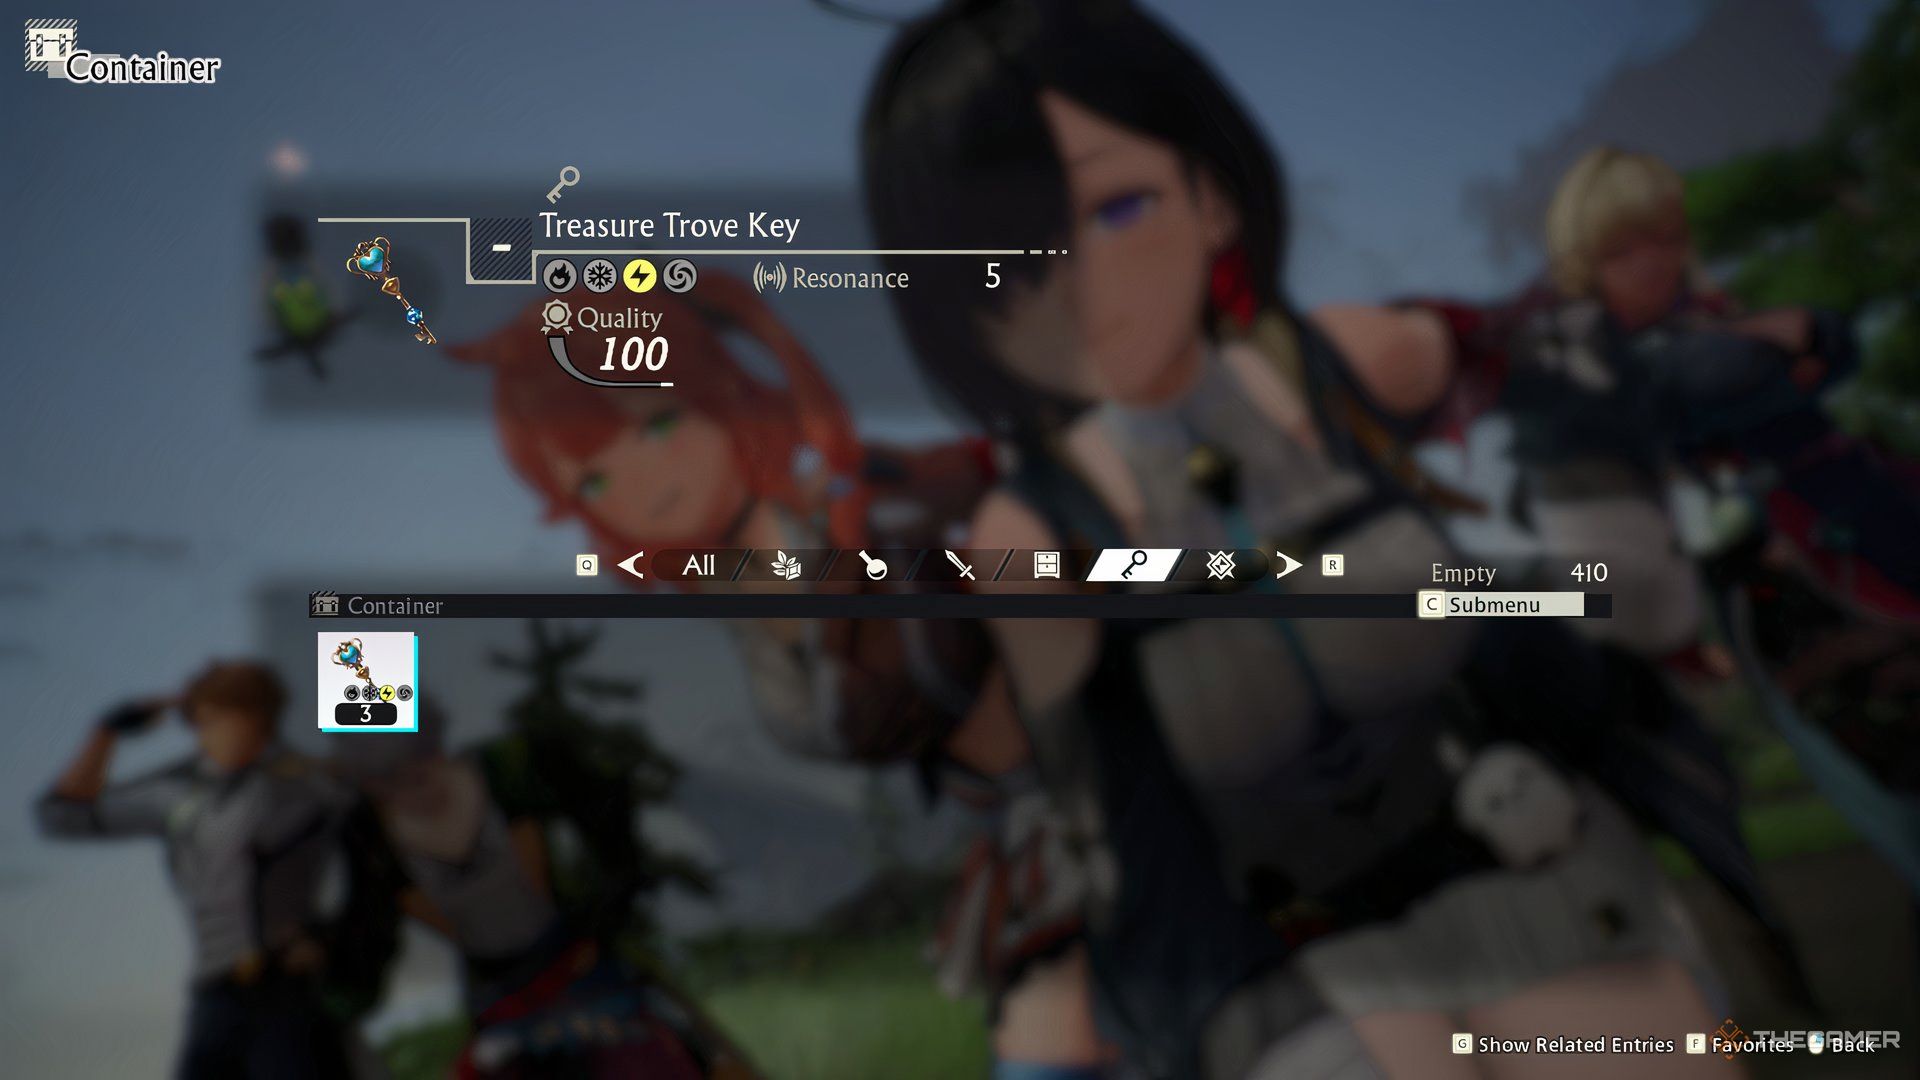
    Treasure Trove Keys in the inventory of Atelier Yumia: The Alchemist Of Memories & The Envisioned Land.

    You can discover Treasure Trove Keys by searching through many chests scattered throughout the game. While they’re often found in essential story locations, some optional Ruins may also house keys. Since you need keys to access Treasure Troves, running low on them will prevent you from obtaining their rewards.

    Any named Ruins are excellent spots to search for keys, so explore these if you haven’t fully cleared them yet. The Long-Range Scan feature from Flammi will significantly simplify the process of locating chests that might contain keys.

  • The Memory Alchemist: A Journey to the Dreamed Realm

    The Memory Alchemist: A Journey to the Dreamed Realm

    As you journey through the ancient ruins scattered across the Aladiss Continent, you might uncover treasures that have long been forgotten by time. In Atelier Yumia: The Alchemist of Memories & The Envisioned Land, discovering these treasures is a key objective that can lead you to valuable riches during your exploration of the area.

    By interacting with Treasure Troves, you can unlock them if you possess the right keys. Fortunately, there are many keys hidden throughout this war-torn continent. If you’re eager to explore, you can go hunting for these treasures yourself, provided you know where to search.

    Treasure Trove Locations in Ligneus


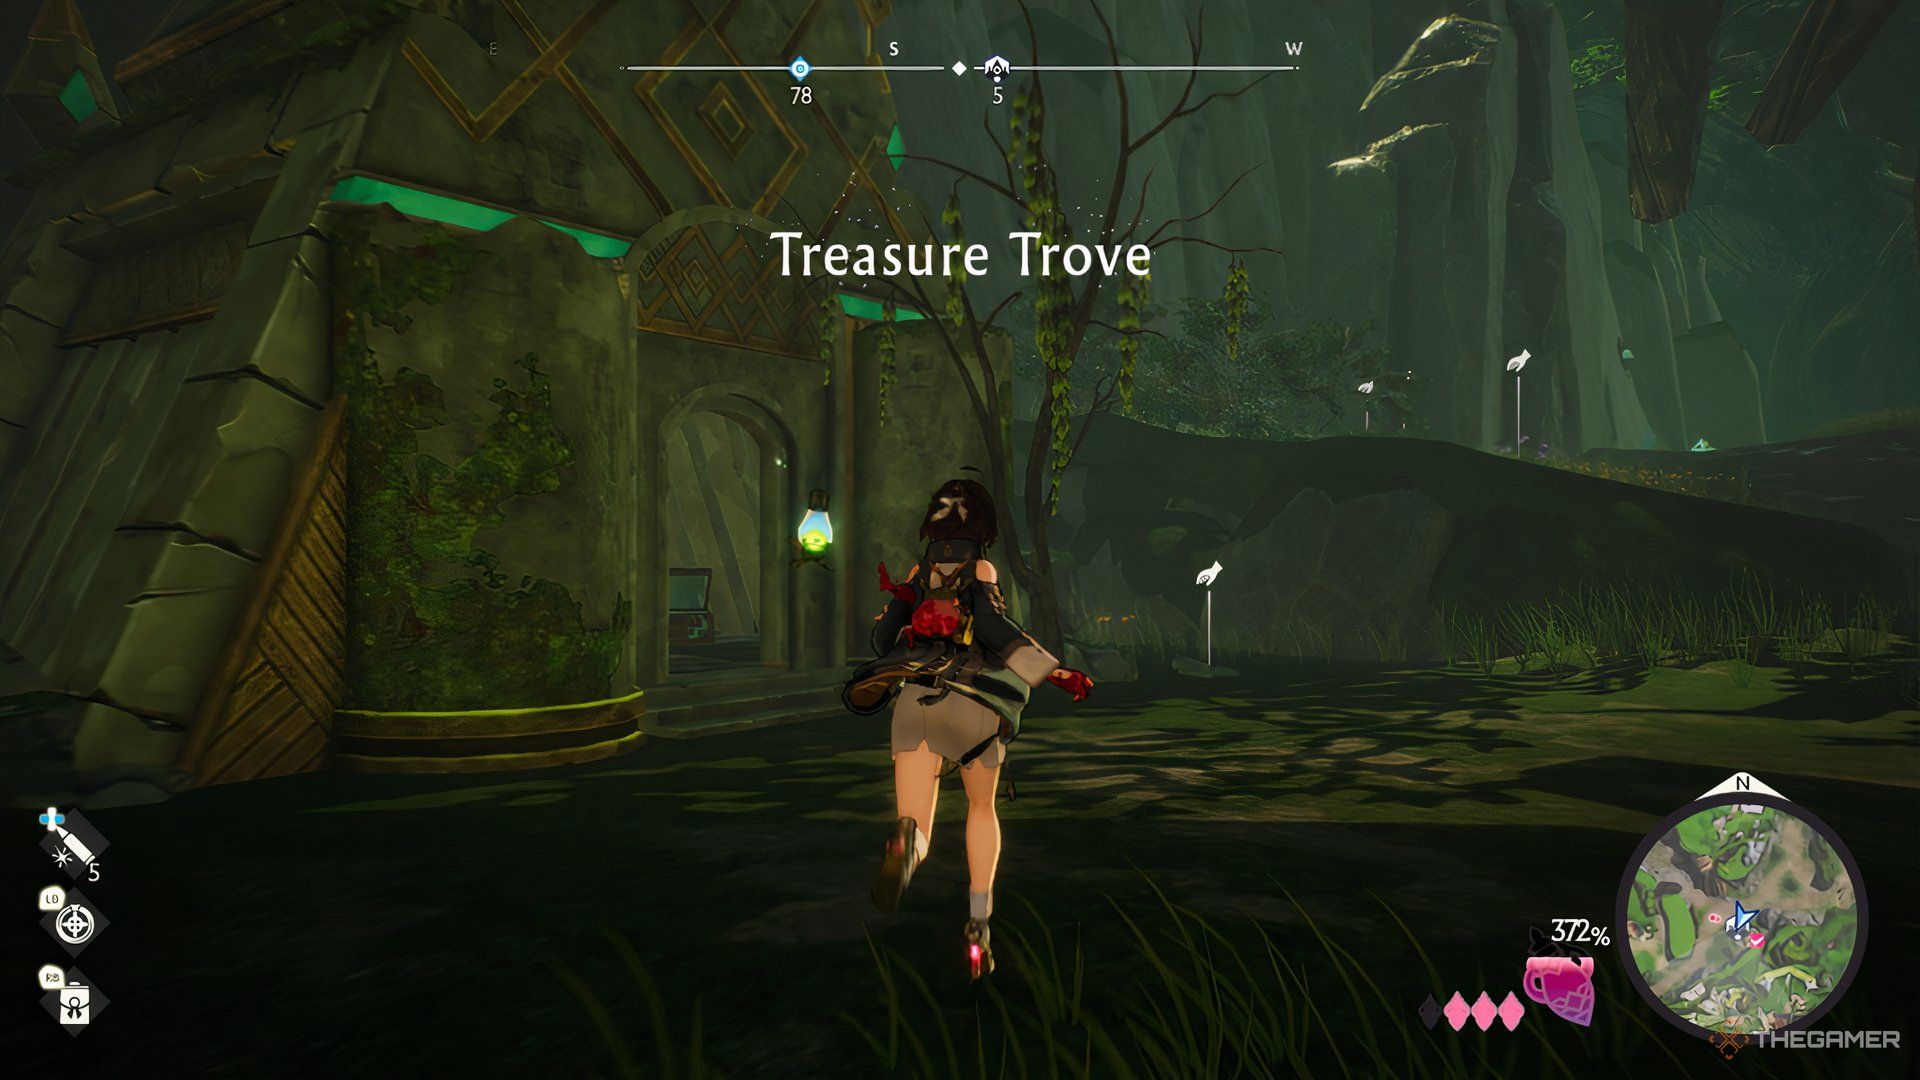
    In the first region of Ligneus, you’ll discover a total of 12 Treasure Troves. These are typically located near Shrines of Prayer, alongside ruins, or may even be guarded by powerful monsters, so stay alert.

    There’s no specific sequence to unlock them, so feel free to tackle the nearest one. Opening a Treasure Trove requires a Treasure Trove Key.

    Note that the last two Treasure Troves in this list won’t be available until you’ve explored a particular part of the Sivash region. The “Village Exploration” quest will guide you to this previously unreachable area in Ligneus.

    Secret Garden

    You can teleport to the Secret Garden and drop down to reach the Trove, or you can travel north from the Ligneus Survey Base and take the Zipline to get there faster.

    Guiding Cape

    From the Secret Garden teleport, head east and climb the cliffs to access it. You won’t be able to reach it from the Campside teleport, so you need to take the longer route.

    Margo Woodlands

    Use the Woodland Gateway teleport and go north until you find the Trove.

    Earthen Veins Grotto

    This one is located right next to the teleport. Travel north, and you’ll spot it amidst the rocks.

    Alber Settlement

    To find it, drop from the Alber Settlement teleport and look on the lower levels of the buildings.

    Great Tree Tendrils (North)

    This trove is just a few steps away from the teleport.

    Great Tree Tendrils (South)

    From the Great Tree Tendrils teleport, follow the river path downstream until you see it.

    Oblie Plateau

    Head north from the Oblie Plateau teleport and use Burst Ammo to break the strong walls that block the Treasure Trove.

    Fallen Tower Entrance

    This one is easily visible right in front of the teleport.

    Eremito Valley

    Travel to Eremito Valley, then follow the river upstream to find the Trove.

    To reach the two remaining Troves located in the southeast section of the map, you’ll need to complete the Village Exploration quest available in Sivash.

    Abandoned Village Center

    Head south from the Abandoned Village Center teleport and take a left as soon as the stairs end.

    Pagus Mountain Trail

    Utilize the Pagus Mountain Trail teleport, then jump down toward the Trove’s location.

    How to Obtain Treasure Trove Keys


    Treasure Trove Keys found in Atelier Yumia: The Alchemist Of Memories & The Envisioned Land.

    You can discover the keys to these ancient Troves by exploring the many ruins across the continent. You’ll often find some in chests located in Manabound areas that you clear during your main quests, but there are also many hidden throughout the unnamed ruins scattered around the map.

    A great location to find some keys is the Dux Lighthouse, where you can locate keys both inside the main structure and the surrounding smaller ruins, usually hidden behind a puzzle. With thorough exploration, you may find yourself with more keys than there are Treasure Troves to open.

    If you find yourself short on keys, consider making a quick trip to any area ruins to see what you’ve overlooked. If you notice there isn’t a pink checkmark beneath a ruin’s icon on the map, it signifies that there’s still something hidden within, and it could be a key.

  • Memory Weaver: Tales from the Imagined Realm

    Memory Weaver: Tales from the Imagined Realm

    Relics are not just trinkets that you can offload to the first untrustworthy merchant you find in a bustling town. They carry significant historical value, and that’s why the Research Team prioritizes them during their mission on the Aladiss Continent. Atelier Yumia: The Alchemist of Memories & The Envisioned Land ensures they receive the attention they deserve.

    These ancient artifacts are pivotal during your explorations, appearing in various forms as you move through different areas. If you find yourself in need of more, rest assured that acquiring extras is quite manageable.

    How to Locate Relics


    Relics can be found in any of the game’s designated Ruins, which are marked on the map with an icon and a white checkmark. Once you’ve discovered all the treasure chests in a Ruin, the checkmark turns pink. Finding Relics is not a requirement for clearing the checkmark, but they will always be present in these locations.

    These relics are often represented by a pile of debris on the ground. However, you can only collect them after conducting a Long-Range Scan with Flammi in the Ruins, following your discovery of the appropriate device. This scan will disclose all chests in the area and label each collectible Relic with an ‘!’ icon on the map.

    Each area contains two distinct types of Relics, which can randomly appear in their respective Ruins. Both types may coexist in the same Ruin. As you delve deeper into Aladiss, the Relics you find tend to be more valuable. Some skills can also enhance their Rarity, just like with other collectibles and resources.

    Once you’ve gathered all Relics from a Ruin, they will respawn after a few in-game days. You can return later to perform another Full Scan and discover them again.

    Where to Utilize Relics


    Yumia in front of a found Relic in Atelier Yumia: The Alchemist Of Memories & The Envisioned Land.

    Relics can be utilized in Synthesis recipes, much like many other materials throughout the game. Generally, they boast higher quality than most commonly found items (especially if you haven’t made significant Skill Tree upgrades) and are excellent for key recipes.

    Additionally, they can be needed for specific side quests. Upon entering a new area, there’s always an NPC offering the Relic Collector quest series, which requires one exclusive Relic from that region. This quest consists of four separate tasks and must be completed sequentially to receive some minor rewards, activating after you have advanced the region to a certain extent.

    Another useful purpose for Relics is in fulfilling Pioneering Effort tasks. Each region will require at least one Relic after you reach a specific milestone, so you’ll need to seek them out if you aim for full completion. This task can be easily accomplished while exploring various Ruins.

    Relics can also be traded with merchants after completing sufficient Pioneering Effort in a region. Due to their rarity and generally high quality, they usually command a good price for trading. However, not all merchants will accept Relics.

  • The Memory Artisan and the Dreamed Realm

    The Memory Artisan and the Dreamed Realm

    An alchemist must truly embody their craft, creating potent materials from resources found in nature. In Atelier Yumia: The Alchemist of Memories & The Envisioned Land, our protagonist showcases this skill and much more during her adventures.

    This is evident through the game’s Synthesis system, allowing players to forge new weapons, items, and more by merging rare ingredients discovered across the Aladiss continent. Initially, this may seem daunting, but synthesizing is more straightforward than it appears.

    Unlocking Synthesis

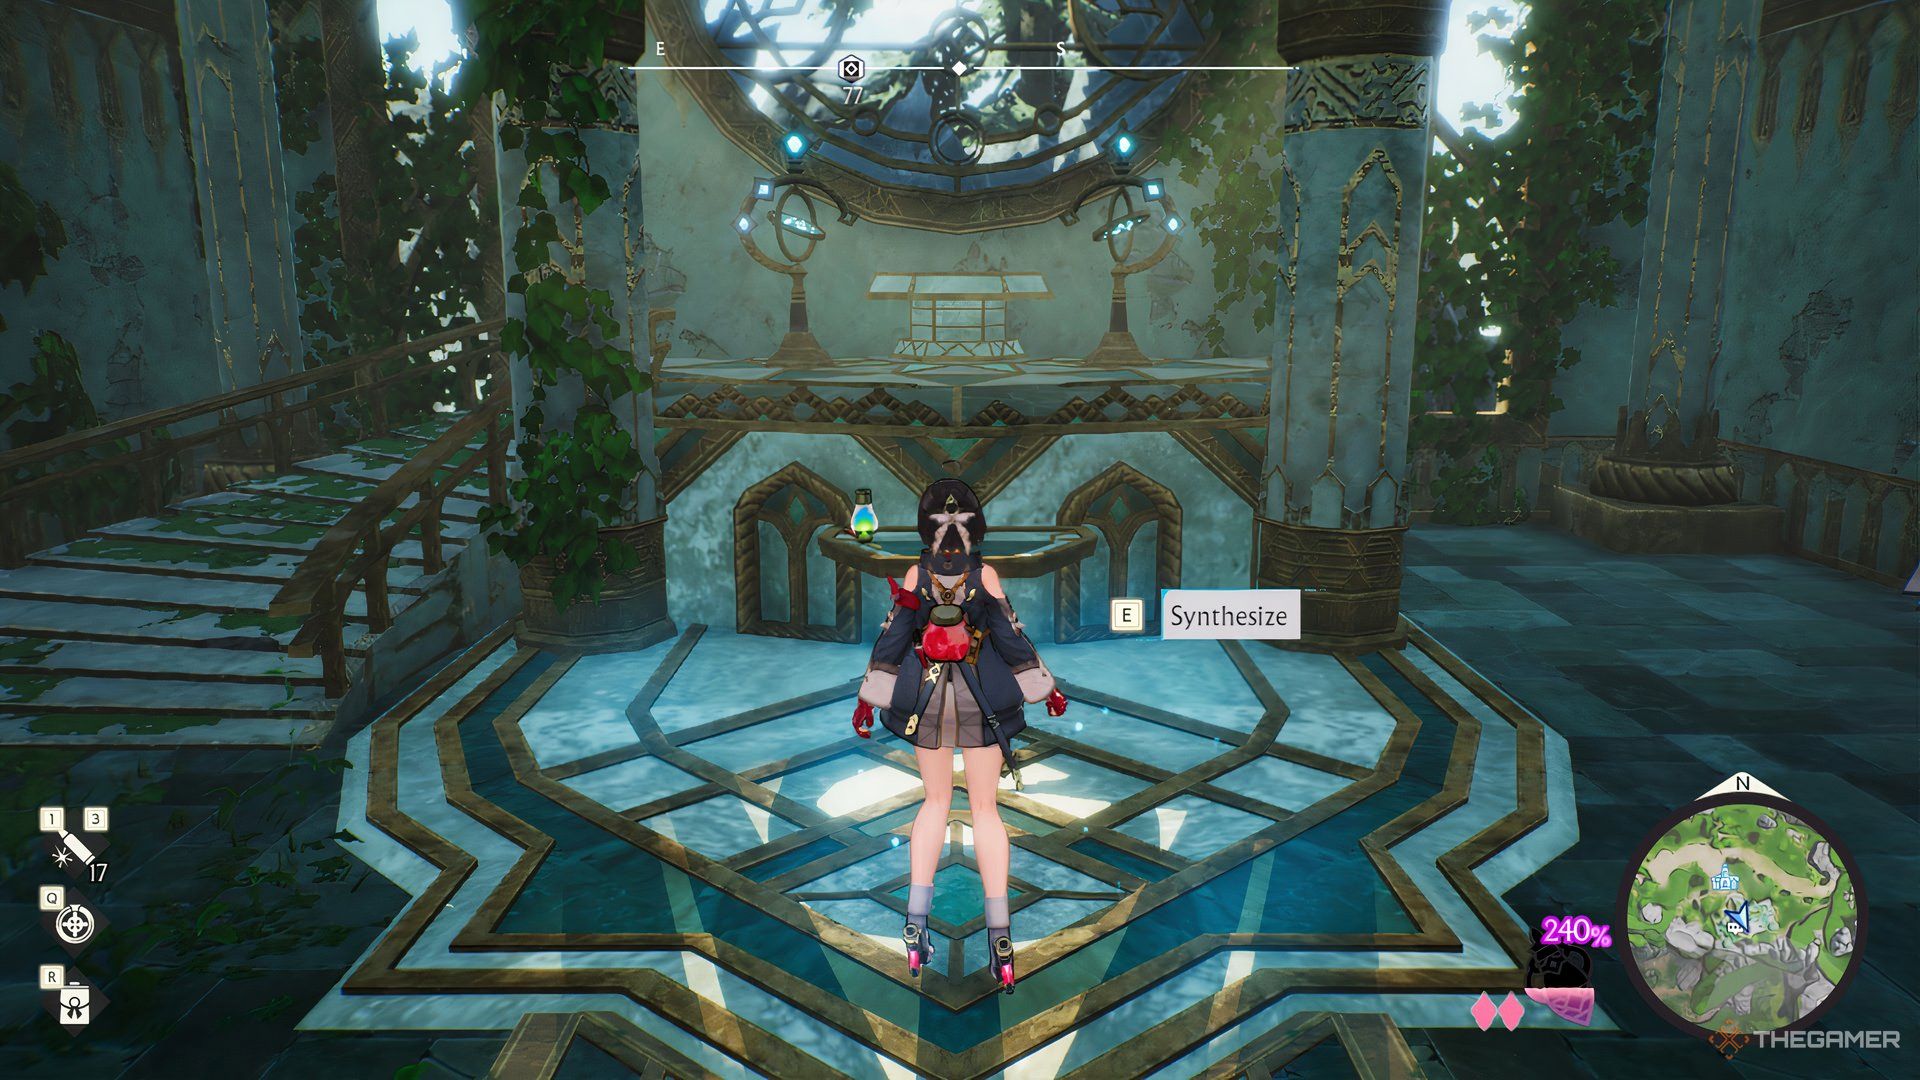
    Synthesis becomes available at the game’s outset once Yumia visits her Atelier during the "Survey Prop Work" quest. To begin, interact with the Altar located at your main base to learn the synthesis process.

    After a brief tutorial session, you can embark on your alchemical journey. Items can only be synthesized next to a Simple Altar, with the Atelier being the only location for this at the start. As you progress, you can place more Altars in newly unlocked Building Areas.

    Keep in mind that using Synthesis consumes your ingredients, so gathering them regularly is crucial. Whenever you enter a location with a Container, your items will be stored there.

    Many recipes allow the creation of items as ingredients for other recipes. Synthetized ingredients usually outperform raw materials. Items also possess elemental properties, and harmonizing these elements during Synthesis can lead to superior results.

    Recipes contain Core Ingredients that are essential; without them, you cannot create the item. While these ingredients are fundamental, incorporating additional items can enhance the outcome.

    Tip: Some Core Ingredients are flexible. For instance, you can use any type of flower to create cloth as it only requires a generic plant.

    Starting with basic recipes, you unlock more as you advance through the game, gaining access to new Synthesis features along the way.

    Understanding Alchemy Cores

    Alchemy Cores are central to the Synthesis process, influencing the potency of your items. They determine the overall quality and can impart special effects or allow for additional enhancements after creation.

    Every Core has a corresponding Core Ingredient, required for any synthesis. Once this is added, you can include other ingredients for a better final result. Some ingredients can even unlock more slots for additional items, enhancing the item’s capacity.

    Cores can be improved with any extra ingredients used, with higher-quality items providing better enhancements. Ingredient slots may be limited by their elemental or type classification. Utilizing compatible elements fosters stronger Resonances, boosting the efficacy of your Cores.

    There are three types of Cores, each affecting different aspects of your item:

    Quality Alchemy Core:

    This affects the final quality of the item. In terms of ingredients, it influences how much quality is retained during synthesis. For equipment, it dictates overall stats.

    Note: You must unlock the Quality Control Skill to upgrade this Core. The quality is initially capped at 100 but can be increased by acquiring more skills.

    Effects Alchemy Core:

    This adds specific effects to the synthesized item. Ingredients with these Effects activate when they are used, carrying over to any equipment created from them.

    Trait Alchemy Core:

    Only applicable to equipment, this Core unlocks additional Trait Slots in the final item. Traits can be attached to any compatible equipment and enhance effects, with each piece of gear able to hold up to three Traits.

    Creating Resonances

    Resonances are essential for robust Synthesis. They can introduce impressive effects to your Cores by including specific, high-quality ingredients, expanding the limit of ingredients used in each synthesis. Certain ingredient slots require specific types or elements, and matching these can further enhance Resonance.

    You might notice some radiant Mana surrounding the Core ingredients. Using select ingredients collects Mana, which is tracked below the Resonance counter. Accumulating a specific amount raises your Resonance level. There are also special forms of Mana, such as Eternal Mana, which persists even after collection, and Condensed Mana, which gives a substantial boost.

    Materials can have unique effects, boosting an item’s final stats or triggering additional Resonances when utilized as ingredients. Crafted items consistently possess these effects, while some high-ranking raw materials may offer them as well.

    While tedious, focusing on crafting stronger ingredients yield far better results. Avoid using raw materials unless you’re making other ingredients, and put in the effort to create superior weapons, armor, or accessories.

    The ‘auto-add ingredients’ option is convenient, but selecting your resources manually can unlock the best outcomes. This is particularly useful for crafting high-quality ingredients.

    Note: You can monitor the number of Resonances activated during Synthesis, along with their effects.

    Utilizing Item Rebuilding

    If you’re unhappy with your item’s performance, Item Rebuilding allows you to enhance its status. This feature can be unlocked in the Skill Tree under Synthesis for 200 Skill Points.

    Similar to regular Synthesis, Item Rebuilding takes place at Altars. You can incorporate new ingredients into items with open slots in their Alchemy Cores, but you can’t overwrite any utilized ingredients. Additionally, some effects, such as specific Resonances, won’t trigger during Item Rebuilding. For optimal strength, it’s often more effective to create a new item entirely.

    Using Synthesis Skills

    You can apply Synthesis Skills before adding ingredients. These Skills bestow special effects, such as enhancements to attack or speed, on your final product. Each Skill costs one to three Orbs, with three available per synthesis. You can incorporate up to three Skills for a single item.

    Unlock Synthesis Skills via the Skill Tree after completing the "Shortcut" quest in the main storyline. Costs are 100 Skill Points, and once unlocked, the Synthesis Skill screen will be readily available each time you create items.

    You can choose to bypass the Skill selection, but this isn’t recommended as they don’t require resources and are helpful for improving results, although not necessary for items relevant to the story.

    As you progress, new Skills become available after clearing additional regions, with greater costs in Skill Points and Orbs but also offering more powerful enhancements to items.

    Engaging in Simple Synthesis

    Simple Synthesis becomes available alongside standard Synthesis, providing a way to craft items using basic materials found throughout the game. It can be accessed via the radial menu. Yumia can produce a range of useful items from basic materials—like bullets, bandages, and smoke bombs—using natural resources.

    New items are introduced as you advance through the game, and you can create as many items as your inventory allows.

    Certain skills can increase the quantity of items produced with each Simple Synthesis, and also raise your inventory capacity.

    Unlocking New Recipes

    You begin with only a few useful recipes, but completing specific tasks can add many more to your collection.

    After unlocking a Recipe, you must use the Recipe Recall Station to learn it fully. This process costs Particles, which you gather throughout your exploration of the Aladiss Continent.

    To successfully unlock recipes, complete the following:

    Story Progression

    Advancing the main plot automatically unlocks new items at the Station for learning. Certain quests necessitate specific items, which trigger their recipes when required. You can use the Bare Minimum option as quality is less significant for these items.

    Finding Materials

    You must locate the appropriate materials on the map to unlock recipes. Once you gather enough for at least one version, you can spend your Particles to access the recipe.

    Once you complete these steps, move to the Recipe Recall Station to acquire your Recipe and continue with your alchemical endeavors. You can also construct additional Stations at your other bases.

    Additionally, more recipes become available as rewards through side quests or Pioneering Efforts; exploration will also yield new crafting opportunities.

    Enhancing Your Recipes

    At the Recipe Recall Station, you can enhance the recipes you’ve unlocked. Adding more Particles after learning a recipe enables you to assign extra effects such as creating additional copies, improving base quality, unlocking further slots/effects, or boosting the Base Resonance Count.

    Each recipe can be upgraded up to Level Ten, though some have a lower cap. Higher levels necessitate high-quality Particles, which are less commonly found.

  • The Memory Alchemist and the Dreamed Realm

    The Memory Alchemist and the Dreamed Realm

    Navigating the Aladiss continent can be quite a challenge. As if the formidable monsters weren’t enough, you’ll also encounter a range of natural barriers in Atelier Yumia: The Alchemist of Memories & The Envisioned Land.

    During your journey, you’ll frequently come across Sturdy Walls. These obstacles vary in size, shape, and color, and are found throughout the regions, preventing you from accessing some of the most valuable treasures. Fortunately, Yumia is always ready for such challenges and has an effective strategy to deal with them.

    How to Break Down Sturdy Walls


    While regular attacks and gunfire won’t faze Sturdy Walls, using Burst Ammo will cause them to explode. This special ammunition can be obtained by completing 100 percent of Pioneering Progress in Ligneus.

    Aiming for this goal requires some dedication, but it’s achievable as soon as you unlock Pioneering Progress. Once you hit the 100 percent milestone, return to the Ligneus Survey Base and chat with Erhard to claim your rewards, which include the Burst Ammo recipe.

    You can create Burst Ammo anywhere using Yumia’s simple synthesis method, just as you would for standard bullets. Keep in mind that different ammo types occupy separate bag slots, so ensure you have enough space.

    To craft Burst Ammo, you’ll need one percent Energy, five Iron, and three Salpeter for each unit. With Burst Ammo equipped, you can tear down those barriers and uncover new areas filled with treasures.

    Upgrades in the Skill Tree can boost the amount of ammunition you receive from crafting. It starts off at three bullets, but this number increases with additional upgrades.

    Besides breaking Sturdy Walls, Burst Ammo can also be useful for solving puzzles or opening new areas. You can use it against aggressive monsters, delivering more damage than regular ammo would.

    Sturdy Walls usually guard hidden treasures, caves, or treasure troves. Therefore, unlocking this ammo comes with significant rewards.

    Boosting Your Pioneering Progress


    The Pioneering Effort quests in Atelier Yumia: The Alchemist of Memories & The Envisioned Land.

    Pioneering Progress is activated once you complete the main story quest titled ‘Managing the Manabound Area 2.’ The subsequent quest, ‘Pioneering the Ligneus Region,’ introduces you to this system and requires you to achieve at least ten percent progress.

    You earn progress by completing specific Pioneering missions, which you can review in the Pause menu under the Pioneering Effort option or directly by talking to Erhard at the Survey Base.

    These missions include synthesizing various items, defeating monsters, utilizing specific combat techniques, or achieving exploration goals (like activating a set number of Shrines of Prayer or discovering Treasure Troves).

    Achieving the maximum level of Pioneering doesn’t mean you need to explore the entire region, but you must complete the full list of Pioneering Efforts to reach 100 percent and obtain the special ammo.

    Make sure to check in with Erhard frequently at the Survey Base. He will reward you for every 10% of progress and unlock new Pioneering quests as well.

    Though reaching a full 100 percent progress isn’t required for the main narrative, you can discover fascinating rewards in other regions for thorough exploration. So, spending time to explore is definitely rewarding.