الوسم: Action RPGs

  • التحكم بأكواد الرنين لالأشكال والملابس

    التحكم بأكواد الرنين لالأشكال والملابس

    رموز Control Resonant يمكن استخدامها للحصول على إطلالات حصرية جديدة لشخصية دايلن، من خلال فتح عناصر تجميلية لا يمكنك الحصول عليها عادةً من خلال إتمام تقدمك في اللعبة. على الرغم من أن هذه الأزياء لن تُغير من قدراتك في معركتك ضد الـ Hiss، إلا أنه من الجميل دائمًا أن تحظى بشيء مجاني، أليس كذلك؟ إليك الآن قائمة الرموز الحالية وكيفية استخدامها في Control Resonant.

    جميع رموز Control Resonant الحالية:
    – EV172-LN211-PL279 — رداء أخصائي MIO
    – [رمز خاص بالنشرة الإخبارية Control] — سماعة رأس قسم الاتصالات ونظارات تصفية بصري

    الرمز الحالي يمكن من خلاله الحصول على الزي التجميلي الخاص برداء أخصائي MIO، والذي يظهر كبند علوي عند تخصيص مظهرك. وصف اللعبة يقول عنه: “رداء تركه أخصائي من وزارة الأهداف غير المادية؛ جهة حكومية صينية مكرّسة لحماية النظام العام عبر اكتشاف واحتواء الظواهر الخارقة للطبيعة.”

    بالإضافة إلى ذلك، يمكن أن تتلقى رمز فريد من نوعه عبر البريد الإلكتروني لصفقة سماعة الرأس وقناع التصفية البصرية، وذلك عند الاشتراك في النشرة الإخبارية عبر الرابط أعلاه. كما تتاح لديك فرصة للفوز في حملة Twitch Drops التي تستمر حتى 13 أكتوبر، حيث يمكنك من خلال مشاهدة بثوث التحكم المتشاركة لمدة أربع ساعات، الحصول على بدلة Sierra، ستر Sierra، وخوذة Sierra.

    كيفية استبدال الرموز:
    للاستفادة من الرموز، افتح قائمة الخيارات من القائمة الرئيسية أو خلال اللعب، ثم توجه إلى تبويب “اللعب”. قم بالتمرير لأسفل وابحث عن زر “إدخال رمز الاسترداد”، واضغط عليه لفتح مربع نص؛ أدخل بعدها رمز الترويج المكون من 15 رقمًا، ليتم استلام مكافأتك.

    أما بالنسبة للرموز التي انتهت صلاحيتها، حتى الآن لا توجد رموز منتهية لأن اللعبة حديثة الإصدار. من الأفضل أن تستغل أي عروض نشطة تظهر لديك بسرعة لتجنب فقدان أي مكافآت.

    وتذكّر، لا يُسمح بنسخ أو إعادة نشر المحتوى إلا بموافقة من الجهة المسؤولة.

  • شرح مفصل لأطراف FBC الرنانة والتحكم فيها

    شرح مفصل لأطراف FBC الرنانة والتحكم فيها

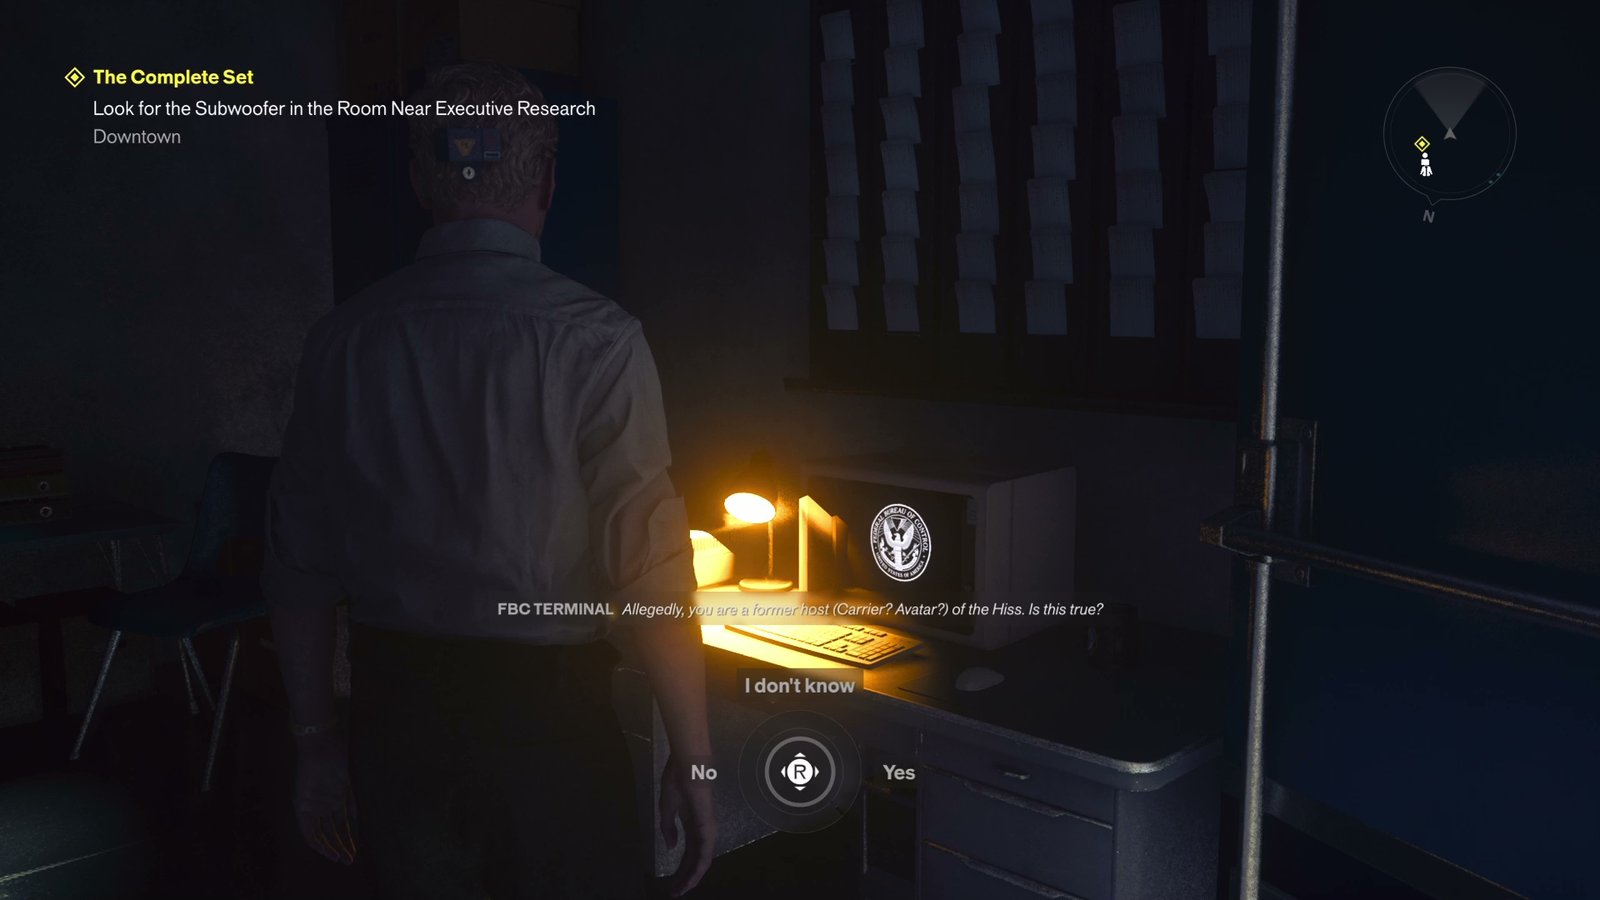
    توابير FBC في لعبة Control Resonant غريبة، فهي واضحة أنها تعرضت للاختراق للسماح لشخص غامض بطرح أسئلة على ديْلن، مع إمكانية الاختيار للإجابة أو عدمها. أثناء تقدمك في اللعب أكثر، ستكتشف توابير FBC إضافية تستفسر عن تفاصيل أكثر عن مكتب الفرع، وجيسي، وديلان، والكائنات الخارقة التي يواجهونها. إذا رغبت بمعرفة المزيد، سأوضح لك الإجابات الصحيحة لهذه التوابير، أو بالأحرى، أوضح أنه لا توجد إجابات صحيحة أصلاً.

    ما هي الإجابات التي ينبغي تقديمها لتوابير FBC في لعبة Control Resonant؟ الحقيقة أنه لا يهم نوع الإجابة التي تقدمها، فالمكافآت ثابتة بغض النظر عن ذلك، باستثناء أن ترفض الإجابة كلية، وهو ما لن يمنحك شيئًا. المكافآت هي:
    – 200 مصدر (Source)
    – صدى ضيف واحد (Guest Echo)
    – شرائح غريبة واحدة (Aberrant Slivers)

    لا توجد أيضًا عواقب طويلة المدى على الإجابات التي تقدمها خلال اللعبة، على الأقل حسب ما لاحظت. هذا الأمر دفع بعض المعجبين إلى التكهن بأن هذا هو تلميح لمزيد من المحتوى في الجزء التالي أو محتوى إضافي قادم في المستقبل.

    أما من يتواصل معك عبر توابير FBC، فهو شخص لم يُكشف هويته بشكل واضح في اللعبة، لكن هناك بعض الأدلة. أثناء استكشافك لمدينة مانهاتن، يمكنك أن تجد ألغازًا تكشف عن غرف مخفية تظهر فيها شبه أن طرفًا غامضًا يختبئ ويتجسس على مكتب Control.

    بعض المعجبين يعتقدون أن هذا الشخص هو “منظمة المباركة” (Blessed Organization)، وهي مجموعة إجرامية ذُكرت بشكل غير مباشر في أجزاء Control و Alan Wake 2، وتعمل تلك الجماعة أو الجهة على استخدام الأسلحة الخارقة والأشياء الخارقة لمصالحها الخاصة. حتى الآن، لم تُذكر بشكل مفصل سوى بشكل عابر، لكن هناك احتمالية أن يكون لهم دور أكبر في أجزاء اللعبة المستقبلية.

  • كيفية حل ألغاز خطوط الكهرباء في Control Resonant

    كيفية حل ألغاز خطوط الكهرباء في Control Resonant

    خطوط الطاقة في مهمة السيطرة الرنين تتطلب منك إعادة توجيه ثلاثة مجموعات من خطوط الطاقة في محطات المحيط، ومحطة المصنع، ومحطة حديقة الشرق لتوفير طاقة كافية لمشروع FBC الذي يعملون عليه. كل محطة تعتبر لغزًا بحد ذاتها، فبعضها معقد ويحتاج إلى تفكير، ويختتم بلغز شديد التعقيد يتطلب حل مشكلة محطة مفقودة قد تشتت الكثيرين. إذا واجهت صعوبة، سأوضح لك حلول جميع ألغاز خطوط الطاقة حسب المواقع لتسهيل المهمة عليك.

    كيفية حل ألغاز خطوط الطاقة في مهمة السيطرة الرنين
    الحل العام لكل ألغاز خطوط الطاقة هو وضع وحدات المعايرة في أماكن محددة ثم تفعيل الجهاز الكبير المسمى بـ”جهاز الضبط”، وفقًا لتعليمات “تعليمات المعايرة” الموجودة في الثلاث مواقع.

    يبدو الأمر بسيطًا، لكن كل موقع في مهمة السيطرة الرنين يضيف طبقات من التعقيد والغموض، مما يصعب المهمة، قبل اختبار نهائي يربك العقل تمامًا. سأشرح لك الحلول بالتفصيل لكل موقع على حدة.

    محطة المحيط – حل اللغز
    هذه هي أول مكان تواجه فيه هذا اللغز، وهو الأسهل، لذا يُعتبر نقطة انطلاق جيدة.

    المطلوب منك هو وضع جميع وحدات المعايرة الثلاث (الأجهزة الصغيرة التي يمكنك التقاطها وحملها) داخل المناطق المربعة المَمْعَرة بالشريط الأصفر. تحديدًا، عليك وضع وحدتين بأقصى مسافة من الجهاز، ووحدة واحدة بالقرب منه قدر المستطاع، كما هو موضح في الملاحظات المكتوبة بالقرب من الجهاز. سنوضح لك الخطوات أدناه:

    1. من على المنصة، توجه جنوبًا وانظر خلف الحائط المكسو بالطين لترى وحدة معايرة واحدة. أحضرها إلى المكان المفتوح للاستخدام السهل.
    2. اصعد درج المنصة إلى الشمال، وابحث عن نهاية مغطاة بالطين وعلامة مربع أصفر، مع وجود وحدة معايرة ثانية.
    3. صعودًا إلى الجانب الجنوبي حيث دخلت، ستجد نواة طاقة بها شحنة، احملها وامشِ على القضبان شمالًا لتجد نواة طاقة أخرى، قم بتشغيلها لفتح باب يتضمن الوحدة الثلاثة.
    4. الآن لديك الوحدات الثلاث، ابدأ بوضع الوحدة الأولى داخل المربع المخصص على المنصة، وأعد الشحنة إلى الأعلى وافتح باب المخزن، وضع الوحدة الثانية في المربع الآخر على المنصة، ثم اذهب إلى أعلى السلالم في الشمال لترى نهاية مغطاة بالغبار وعلامة مربع أصفر، وضع الوحدة الأخيرة هناك.
    5. أخيرًا، قم بتفعيل جهاز الضبط من على المنصة لإتمام اللغز.

    محطة حديقة الشرق – حل اللغز
    أول مكان ستختبر فيه هذا اللغز، وهو بسيط نسبيًا.
    هدفك هو وضع وحدة معايرة على كل من المربعات الصفراء الثلاثة على المنصة، ثم تفعيل الجهاز. تأكد من عدم وجود أنابيب موصولة بالمولد تتسبب في توقف العمل. يمكن للضوء أن يزيد من نمو الطين ويشكل عوائق، لذا ينصح بتنظيم المكان قبل التفعيل.

    محطة المصنع – حل اللغز
    وهو أحد الألغاز الأكثر تعقيدًا، حيث تحتاج إلى وضع وحدتين من المعايرة بين المقاعد على المسار، ووحدة واحدة قرب السلم. بعدها، تفعيل جهاز الضبط ليعمل اللغز بشكل كامل.

    محطة الموقع المفقود – الحل النهائي
    بعد إتمام المهمة في المحطة الأخيرة، ستتلقى نقلك إلى منطقة جديدة خارج نطاق الواقع. بعد مواجهة بعض الأعداء، ستحتاج لاستخدام جهاز ضبط آخر للعودة إلى مينياتر مان هاتن. هنا، يوجد جهازا ضبط على منصتين مختلفتين، وأربعة وحدات معايرة. من المهم أن تضع ثلاث وحدات على خط مستقيم، واحدة في كل مربع أصفر على المنصتين، والآن إشارة إلى أن الطحالب التي تنمو عندما تتعرض للضوء وتقوم بتوصيل الكهرباء يمكن استخدامها لتوصيل الكابلات المكسورة أو تكون عائقًا حسب المكان.

    لحل هذا اللغز، عليك:

    1. تفعيل جهاز الضبط ليتم نقلك إلى المنصة B، ثم صعد السلالم لمحط من خلال كسر الصناديق الكهربائية وفتح البوابة الرابط بين المنصتين دون الحاجة للتنقل.
    2. اصعد وأخذ الشحنة من نواة الطاقة المرتبطة بمصباح يسلط الضوء على الطحالب، وقم بتدمير كتلة الطحالب لفتح بوابة جديدة والتقاء الناجين، مع وحدتي معايرة.
    3. ضع وحدتي المعايرة على المربعات الصفراء المكسونة على المنصة، ثم استخدم جهاز الضبط.
    4. على المنصة B، استخدم الشحنة لإشعال الطحالب وجعلها تنمو، ثم أوقف النمو لاحقًا باستخدام الشحنة على نواة طاقة أخرى، وضع وحدتي المعايرة هنا أيضًا، ثم شغل الجهاز الأخير.

    عند الانتهاء، ستظهر بعض أعداء الطحالب ليتم القضاء عليهم، وعليك بعدها الصعود والتحدث مع الدكتور فلورير لإتمام مهمة خطوط الطاقة، وستحصل على رقاقات “تحكم الرنين” التي تتيح لك فتح أسلحة جديدة.

  • كل قدرات التنقل والقتال في لعبة Control Resonant

    كل قدرات التنقل والقتال في لعبة Control Resonant

    لفتح كل قوة، مهارة، وقدرة في لعبة Control Resonant يحتاج الأمر إلى وقت، ولكنه يستحق العناء. مغامرة دايلان تتطلب جمع العديد من قدرات القتال والتنقل، بدايةً من القفز المزدوج التقليدي، إلى التحكم في الجاذبية، وإشعال نيران متميزة، والسيطرة العقلية، وغيرها من القدرات.

    وفي بعض الأحيان، يُجبر اللاعب على الاختيار بين اثنين أو ثلاثة من القدرات بعد هزيمة أحد الأعداء الرئيسيين، مما يضعه أمام قرار مهم حول القوة الخارقة التي يرغب في اقتنائها معه. يوجد طرق لإعادة هذا الاختيار والقيام بتعديله، لكن ذلك مكلف ويحتاج لأغراض نادرة، لذلك من الأفضل أن تتخذ القرار الصحيح من المرة الأولى.

    وفي الأسفل سأوضح لك كيفية الحصول على جميع القوى والمهارات في اللعبة، بالإضافة إلى تحديد الأفضل منها، حتى تكون على علم بما يناسبك من التعديلات عندما تُعرض عليك خيارات الاختيار.

    بالنسبة لموقع كل قدرة، فهي موزعة على خريطة اللعبة، ومعظم القدرات تعتمد على الترتيب الذي يتم فيها فتحها، مع بعض الاختلافات التي يفرضها أسلوب اللعب والأحداث.

    أهم القدرات التي يجب الحصول عليها أولاً تشمل:

    1. مهارة القفز المزدوج، التي تسمح لك بالتنقل بحرية أكبر بسرعة، بمجرد إكمال مهمة Fault in Downtown.
    2. القدرة القتالية Barrage/Volatile anomaly/Shield التي تُكتسب بعد هزيمة رئيس Resonant في غرب Downtown، وتتيح لك إطلاق قذائف، استدعاء حليف متفجر، أو استخدام درع واقٍ.
    3. القدرة على التعديل في الجاذبية Shift، بعد إتمام مهمة Fault داخل موقف السيارات في غرب منطقة التوغّل، وتساعدك على المشي على الأسطح المختلفة.
    4. هجمة على الأرض Ground Slam أو دفع الأعداء Push، بعد هزيمة Dancer Resonant في مسرح غرب المنطقة، وتتيح لك ضرب الأرض أو دفع الأعداء بعيدًا.
    5. قدرات النار Ignite أو Inferno، بعد القضاء على Deserter Resonant في المصنع المطرّز، وتُمكِّنك من إشعال أسلحتك أو إطلاق موجات نارية قصيرة المدى.
    6. القدرة على التعلق والتسلق Reach، بعد إتمام المهمة في أنفاق الميترو، لتصل بسرعة إلى المناطق والتعلق بالحواف.
    7. قدرة Spore Burst أو Growth، بعد هزيمة Collective Resonant في المنتزه، التي تعتمد على نشر عواصف من الفطر أو استدعاء برج يتصيد الأعداء.
    8. القدرة Spike أو Astral Rebuke، بعد هزيمة Physicist Resonant في البرج، والتي تسمح لك باستدعاء رمح من الأرض أو توجيه ضربة من السماء على الأعداء.
    9. قدرة Command، بعد مواجهة Co-Director Resonant، حيث يمكن تحويل الأعداء إلى حلفاء يقاتلون بجانبك.
    10. أخيراً، بعد انتهاء القصة الأساسية، يمكنك الحصول على رمز Resonant القتالي الإضافي، والذي يمنحك قدرة قتالية إضافية من الاختيارات السابقة دون التضحية بأي منها.

    نوع الترتيب يعتمد على المهمات الدرامية والمتطلبات الأساسية، حيث بعض القدرات ضرورية لتتمكن من مواصلة التقدم، والبعض الآخر يتعلق بالمهمات الجانبية.

    أما عن أفضل قدرات القتال، فهي تعتمد على نوع الأسلوب الذي تفضله، لكن بشكل عام، أرى أن:

    – قدرة Shield (الدرع) مع القدرة على تفعيلها والانفجار بواسطتها، تعتبر من أفضل الخيارات، خاصة عند تركيب التخصص الذي يزيد الضرر الناتج عنها.
    – قدرة Ground Slam تعتبر قوية، لأنها تتسبب في ضرر كبير وتكون فعالة عندما تكون في قمة التهيئة.
    – قدرة Ignite، لأنها تزيد بشكل ضخم من ضرر الأسلحة وتترك أثرًا طويل الأمد على الأعداء.
    – قدرة Spore Burst، لأنها تسمح بتكديس حالات العدوى بسرعة وتسبب ضررًا هائلًا عند انفجارها.
    – قدرة Astral Rebuke، رغم أنها بسيطة وسريعة الاستخدام، فهي مفيدة ضد الأعداء في الأرض فقط.

    وبالطبع، اختيار القدرات الأفضل يعتمد على بناء شخصيتك ونمط لعبك. يمكن تعديل قدراتك لاحقًا من خلال زيارة منطقة الـ Gap والتفاعل مع الجدارية الموجودة، حيث يمكنك إعادة توزيع قدراتك من خلال استخدام أداة Reset Items، وهو خيار مكلف ببعض الموارد، لكنه يعطيك الحرية في تجربة Build مختلف من جديد.

    باختصار، التمركز على القدرات التي تتناسب مع أسلوبك الشخصي يحقق لك أفضل نتيجة في اللعب، ويعطيك قوة أكبر في مواجهة تحديات اللعبة ومستوياتها المتقدمة.

  • بطاقات التحكم الذكية ذات التردد الموجي المتناغم

    بطاقات التحكم الذكية ذات التردد الموجي المتناغم

    يتم تقسيم صلاحية الوصول في لعبة Control Resonant إلى مستويات مختلفة، وكل مستوى يتطلب بطاقة تعريف خاصة به. بعض المستويات متاحة خلال القصة الرئيسية، بينما يمكن العثور على مستويات أخرى كجزء من المهام الجانبية الاختيارية التي تتطلب أن تصعد بمستوى صلاحية معين لتتمكن من التقدم. في الواقع، ربما واجهت العديد من الأبواب التي تتطلب صلاحية أنت لا تمتلكها أثناء التوجيه الأول عند هروبك من المبنى القديم، ولكن مع عودة لاحقة باستخدام بطاقات الهوية، ستتمكن من استكشاف ما وراءها.

    كيفية الحصول على جميع بطاقات صلاحية الوصول في لعبة Control Resonant

    هناك خمس بطاقات صلاحية يمكنك الحصول عليها داخل اللعبة، وكل بطاقة تفتح أبواب مختلفة في أماكن متنوعة.

    – بطاقة الصلاحية من المستوى 1: تُعطى لك داخل المكتب الرئيسي في مركز العمليات كجزء من مهمة “منطقة الاختراق الغربية – سيناريو الرنين”. عادةً تُعطى لك هذه البطاقة تلقائيًا بعد حديثك مع زوي في برج المراقبة للمرة الأولى.
    – بطاقة الصلاحية من المستوى 2: تُعطى بواسطة أريش في مبنى الإخلاء بمنطقة الإخلاء، وذلك كجزء من المهمة الرئيسية “إجراءات الإخلاء”.
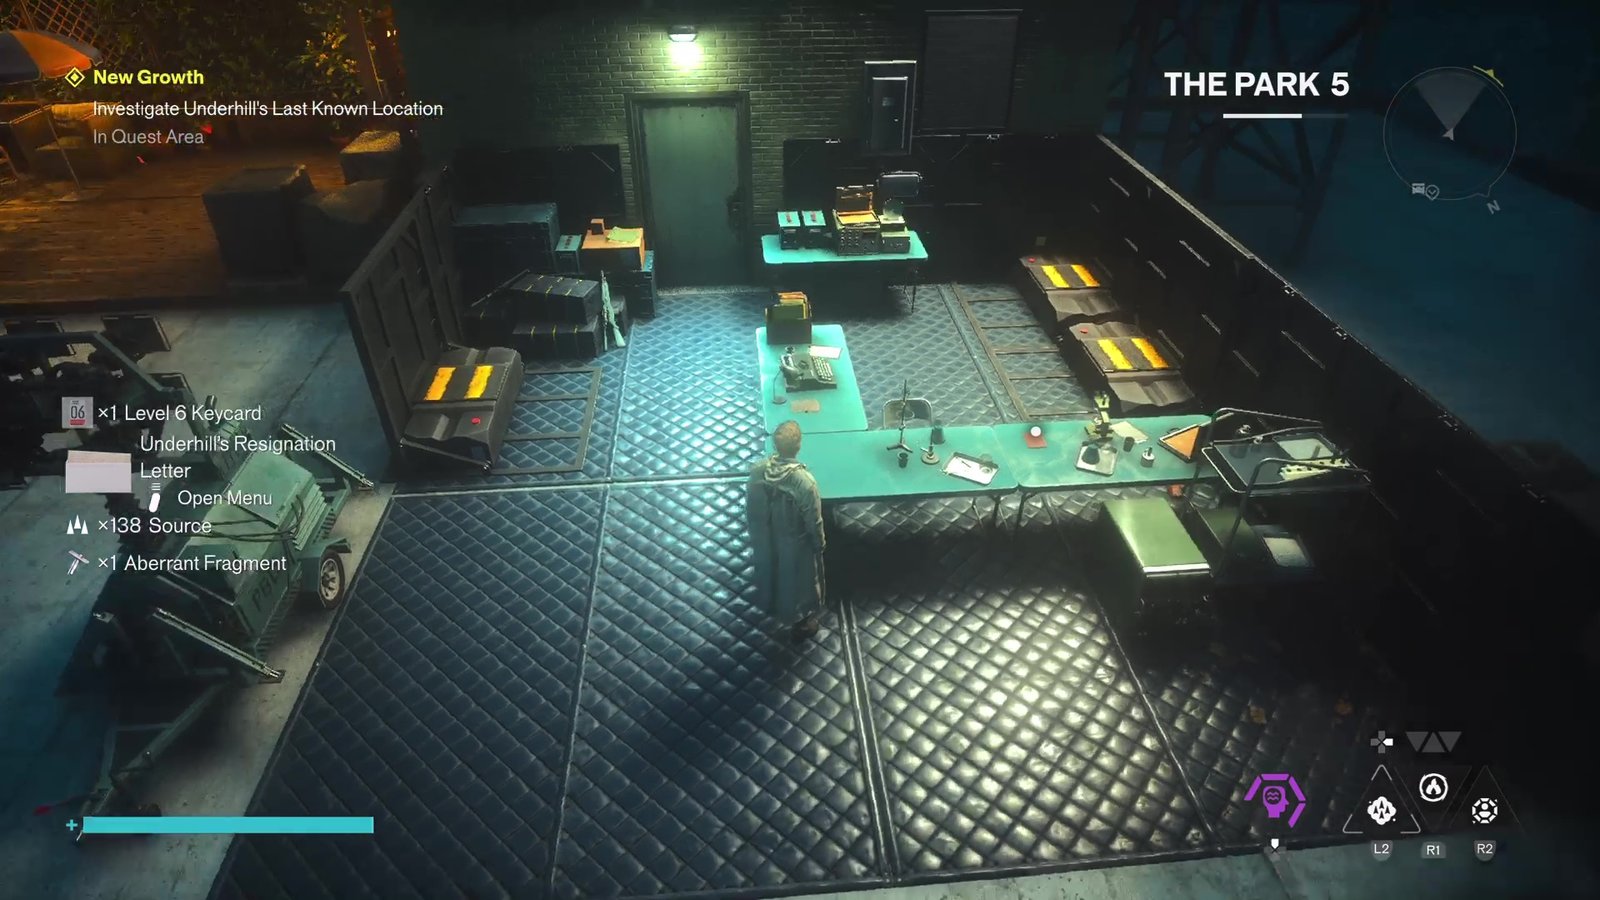
    – بطاقة الصلاحية من المستوى 6: بعد إتمام القصة الرئيسية، تحدث مع زوي في برج المراقبة لتبدأ مهمة جانبية جديدة بعنوان “نمو جديد”. استمر في متابعة المهمة حتى يُطلب منك التحقيق في الموقع الأخير المعروف باسم أندرهيل، عندها ستُوجّه إلى محطة أبحاث في The Park تحتوي على بطاقة المستوى 6.
    – بطاقة محطة البحث المتنقلة: بعد العثور على جثة في مرآب غرب مركز العمليات، ستُعطى مهمة “عبور العتبة”. ستقودك هذه المهمة إلى الموقع الأساسي، حيث يتعين عليك التحقيق في الجثة لأخذ البطاقة من على جسمها.
    – بطاقة غرفة التخزين في المبنى الأقدم: تُحصل عليها من مهمة جانبية بعنوان “المجموعة الكاملة”، والتي تبدأ في متحف الأشياء الغريبة بمنطقة الاختراق الغربية. اتبع مجرى المهمة حتى يتم تسليمك البطاقة من قبل لانجستون بجانب البانوبتيكون كجزء من المهمة.

    هل يمكنك فتح أبواب المستوى 18 في لعبة Control Resonant؟

    طوال اللعبة، ستصادف أحيانًا أبوابًا تتطلب مستوى صلاحية 18. ومع ذلك، لم يُعطَ ديلان بطاقة هوية تتيح له فتح هذه الأبواب. عند فتح أحدها، يكون غالبًا عن طريق شخصية غير قابلة للعب لديها صلاحية خاصة، ويبدو أن بعض الأبواب بمستوى 18 لا تُفتح على الإطلاق.

  • Complete Guide to Elden Ring Stats

    Complete Guide to Elden Ring Stats

    Stats and attributes in Elden Ring are explained here for beginners so you can understand how things like Arcane, Faith, Mind, and the other parts of your character work behind the scenes and what they each offer. You won’t be able to build your character effectively if you don’t know what these stats do, so I’ll go through each one so you know what to focus on as you play through Elden Ring.

    There are eight different stats in the game. Here’s a quick rundown of what each one mainly influences:

    • Vigor: Boosts your total health and certain resistances to negative effects.
    • Mind: Determines your maximum FP (force points), which affects how much magic you can cast before running out of mana.
    • Endurance: Increases your stamina and the amount of equipment you can carry without becoming encumbered.
    • Strength: Affects damage with specific weapons, especially big or heavy ones.
    • Dexterity: Influences damage with quick, light weapons and slightly speeds up casting times.
    • Intelligence: Improves the power of sorcery spells and similar magic types.
    • Faith: Boosts the effectiveness of incantations and support spells, including buffs and healing.
    • Arcane: Impacts the chances of finding certain items, resists some status effects, and increases damage and effectiveness of some strange weapons and spells.

    Vigor

    Vigor, often abbreviated as VIG, controls your health points in Elden Ring. The higher this is, the more damage you can take before dying. This is a key stat for players wanting a tanky, heavily armored build. If you think you’re good at dodging attacks, you might save some points here, but generally it’s wise for most players to invest in VIG over time to prevent getting one-shot in tough fights.

    Mind

    The Mind stat manages your Force Points or FP, which you use for casting spells. Both magic-focused sorceries and support incantations pull from this pool. If you want to be a magic user, you’ll need a high Mind stat. FP is also drained by other actions like summoning Ash spirits or using special weapon skills.

    Endurance

    Endurance determines your stamina bar, influencing how many attacks and dodges you can perform before needing to pause and recover. It also impacts your Equip Load, letting you carry more gear and armor while keeping your movement quick. Sprinting, rolling, blocking, attacking, and using spells cost stamina, so having more endurance helps you stay active longer without getting exhausted.

    Strength

    Strength is both a damage booster for certain weapons and a requirement stat for wielding specific gear. The higher your Strength, the more damage those weapons dish out, and the more capable you are of using heavy-hitting melee weapons effectively. It’s especially important for close-combat builds.

    Dexterity

    Dexterity affects damage with faster weapons and ranged attack devices. It also increases the speed of casting certain spells. Combining Dexterity with speedier weapons can make your character quick and agile, allowing you to attack faster and evade enemies more easily.

    Intelligence

    Mainly used for sorcery spells, Intelligence influences both their damage and the minimum level needed to use certain magic items or spells. If you prefer a magic-focused character that relies on offensive spells, investing in Intelligence will give you more power.

    Faith

    Faith is the stat for incantation magic, which tends to be more supportive (buffs, healing) but also includes attack spells. It acts as a damage boost for certain magic and has a role in meeting item or spell requirements. Have high Faith if you want to rely on support magic or damage-dealing incantations.

    Arcane

    Arcane influences how often you find rare items, some resistances, and the damage of some strange weapons and spells. It also affects your luck with item discovery and can help resist the ‘Death’ curse mechanic, which can build up and kill you if not managed properly. Some spells and weapons also scale with this stat, making it a fun choice for versatile builds.


    Understanding these stats helps you decide what to level up to create the playstyle you want. Whether you plan to be a tank, speedy fighter, or magic user, balancing these attributes is key to success in Elden Ring.

  • Elden Ring: Complete List of All Scadutree Fragment Locations

    Elden Ring: Complete List of All Scadutree Fragment Locations

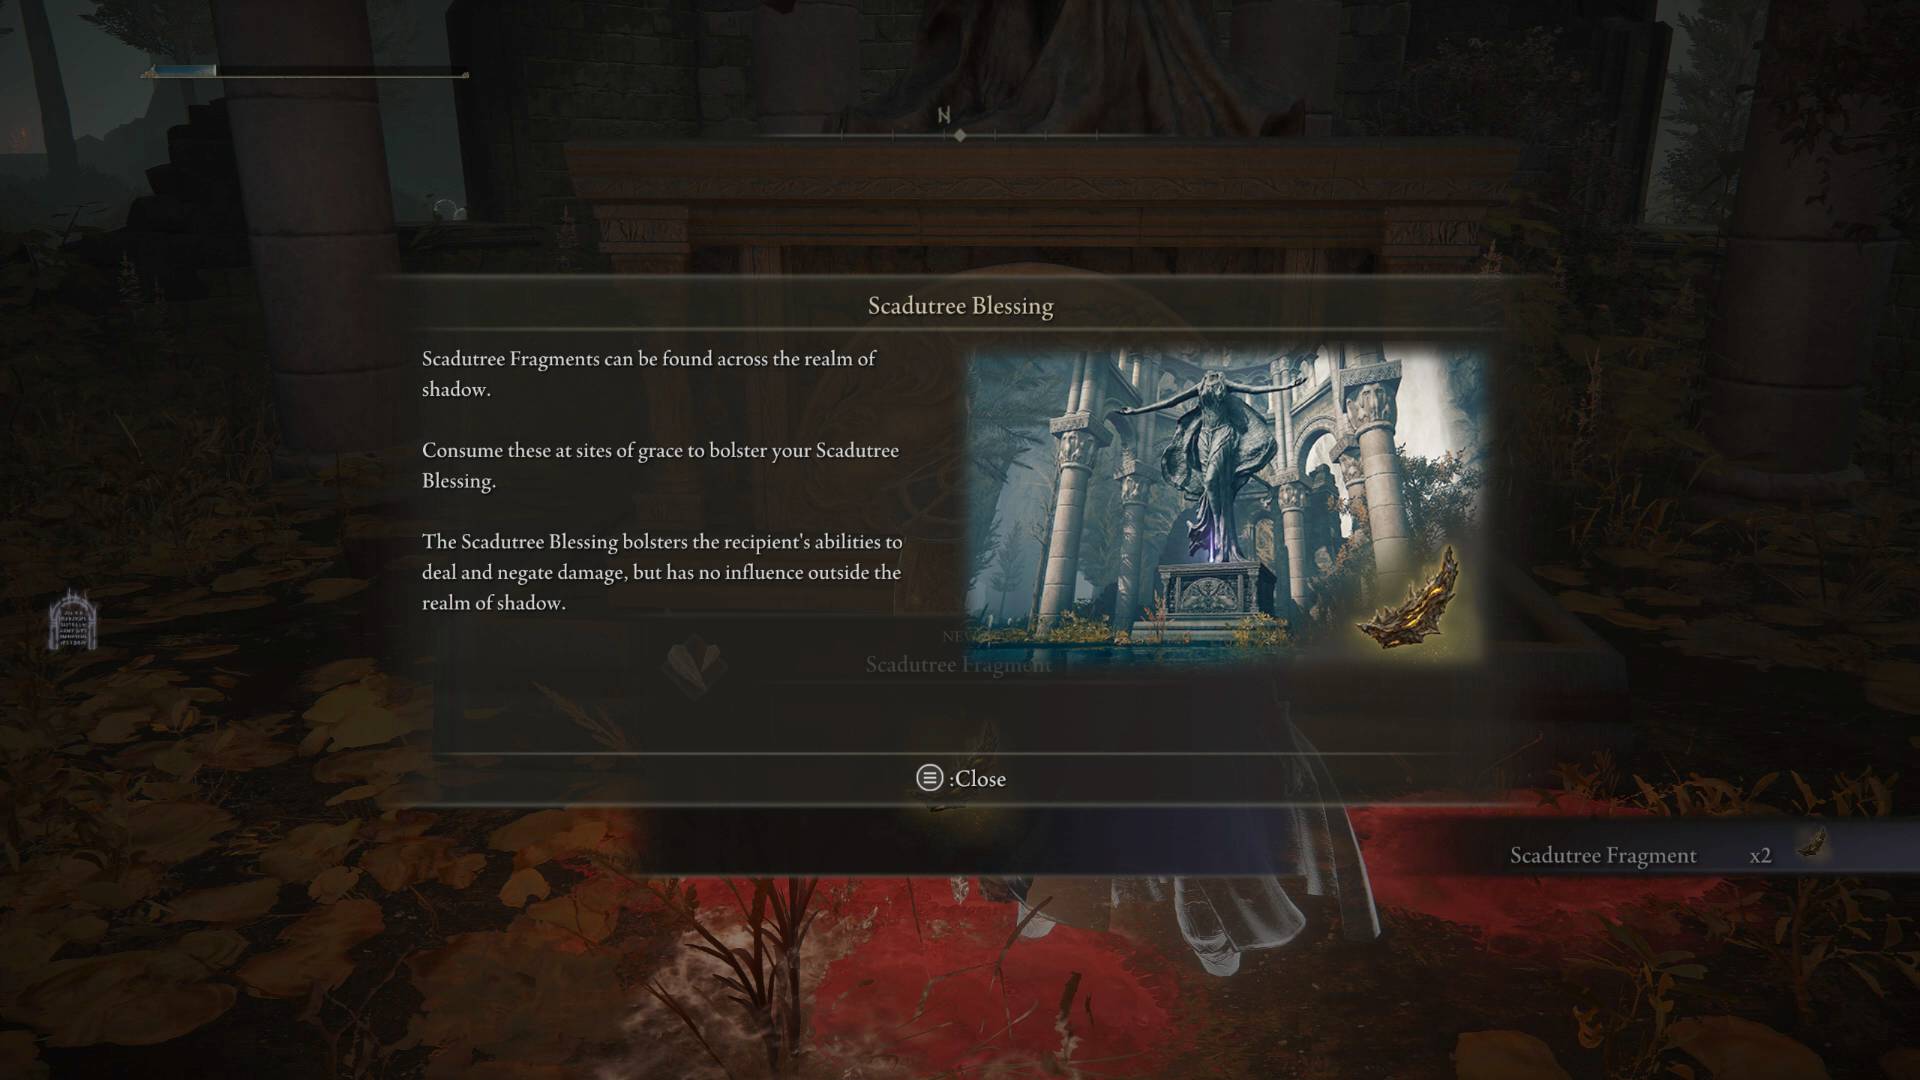
    This guide details the locations of all 50 Scadutree Fragments in the Shadows of the Erdtree expansion for Elden Ring. Players need to gather these Fragments and upgrade their blessing to increase their chances of completing the DLC. The blessing boosts your damage and defense by 2.05 times, regardless of your character’s level. Below are the map locations organized by regions, helping you find every Fragment and upgrade your blessing to its maximum of +20.

    Where to Find Every Scadutree Fragment in Elden Ring: Shadows of the Erdtree

    There are 50 Fragments scattered across the Shadow of the Erdtree world, some on defeated enemies like minibosses, some hidden in key areas, and others rewarded for exploration. Many are found on Miquella’s Crosses spread around the region. Multiple Fragments can even be found in a single spot, such as the Chalice area to the north. Locations are grouped by region for your convenience. If you need help reaching some spots, our guide on navigating all Shadow of the Erdtree areas can assist.


    Gravesite Plain
    The first area in the game with 13 Fragments, including spots like Belurat, Tower Settlement, and Castle Ensis. Some Fragments are only accessible after certain game points, such as returning to Enir-Ilim near the end.
    Key spots include:

    • The Church of Consolation (2 Fragments guarded by a knight)
    • Graveyard areas with shadow enemies and pots (first kill drops a Fragment)
    • Near the Cliffroad Terminus site of grace and other sites like Three-Path Cross and Main Gate Cross
    • Inside rooms with Scorpions and Miquella’s Crosses
    • Next to statues of Marika near Castle Ensis and other key locations

    Scadu Altus
    Reaching this region involves passing Rellana and Castle Ensis, or taking the long way around. It’s the largest area with 16 Fragments, including Shadow Keep.
    Main locations include:

    • The Highroad Cross site after defeating Rellana
    • The Church of the Crusade (two Fragments after defeating Fire Knight Queelign)
    • Along the long road to Shadow Keep, near statues of Marika, Moorth Ruins, and underground caves
    • Areas near bosses like the Golden Hippopotamus and the Commander Gaius encounter also hide Fragments.

    Cerulean Coast
    This is a sizable region with only four Fragments:

    • At the Cerulean Coast site of grace
    • Fissure Cross site
    • Inside a cave guarded by a Demi-Human Chief
    • Dropped by the Undead Hippo in Charon’s Hidden Grave

    Jagged Peak
    Limited to just one Fragment since it’s a more confined area. It’s located on a corpse at the top of a hill where rocks fall after jumping with Torrent.


    Abyssal Woods
    A darker zone with two Fragments:

    • In front of the altar at the Abandoned Church
    • North of the Abyssal Woods grace, on a corpse beside a tree

    Rauh Ancient Ruins
    This beautiful area offers five Fragments:

    • Dropped by the Lesser Golden Hippopotamus near the Viaduct Minor Tower
    • On a corpse hanging off a side in Temple Town Ruins
    • From a shadow enemy carrying a pot among scorpions
    • Located at the East and West sites of grace, by the altar and near the Furnace Golem
    • On a statue in the church district or near the back gate of Shadow Keep after defeating commanders and bosses

    Summary
    Gathering all 50 Fragments allows you to upgrade your Scadutree blessing to level 20, significantly boosting your damage output while reducing damage received. The first ten Fragments can be collected in Gravesite Plain without fighting any bosses, making them a great starting point if you’re finding boss fights challenging. Riding Torrent can help you reach these early Fragments easily.

    By exploring all regions and carefully collecting each Fragment, you significantly improve your chances of conquering the Shadows of the Erdtree expansion. Happy hunting!

  • Mistfall Hunter: Withered Knight Build Strategy

    Mistfall Hunter: Withered Knight Build Strategy

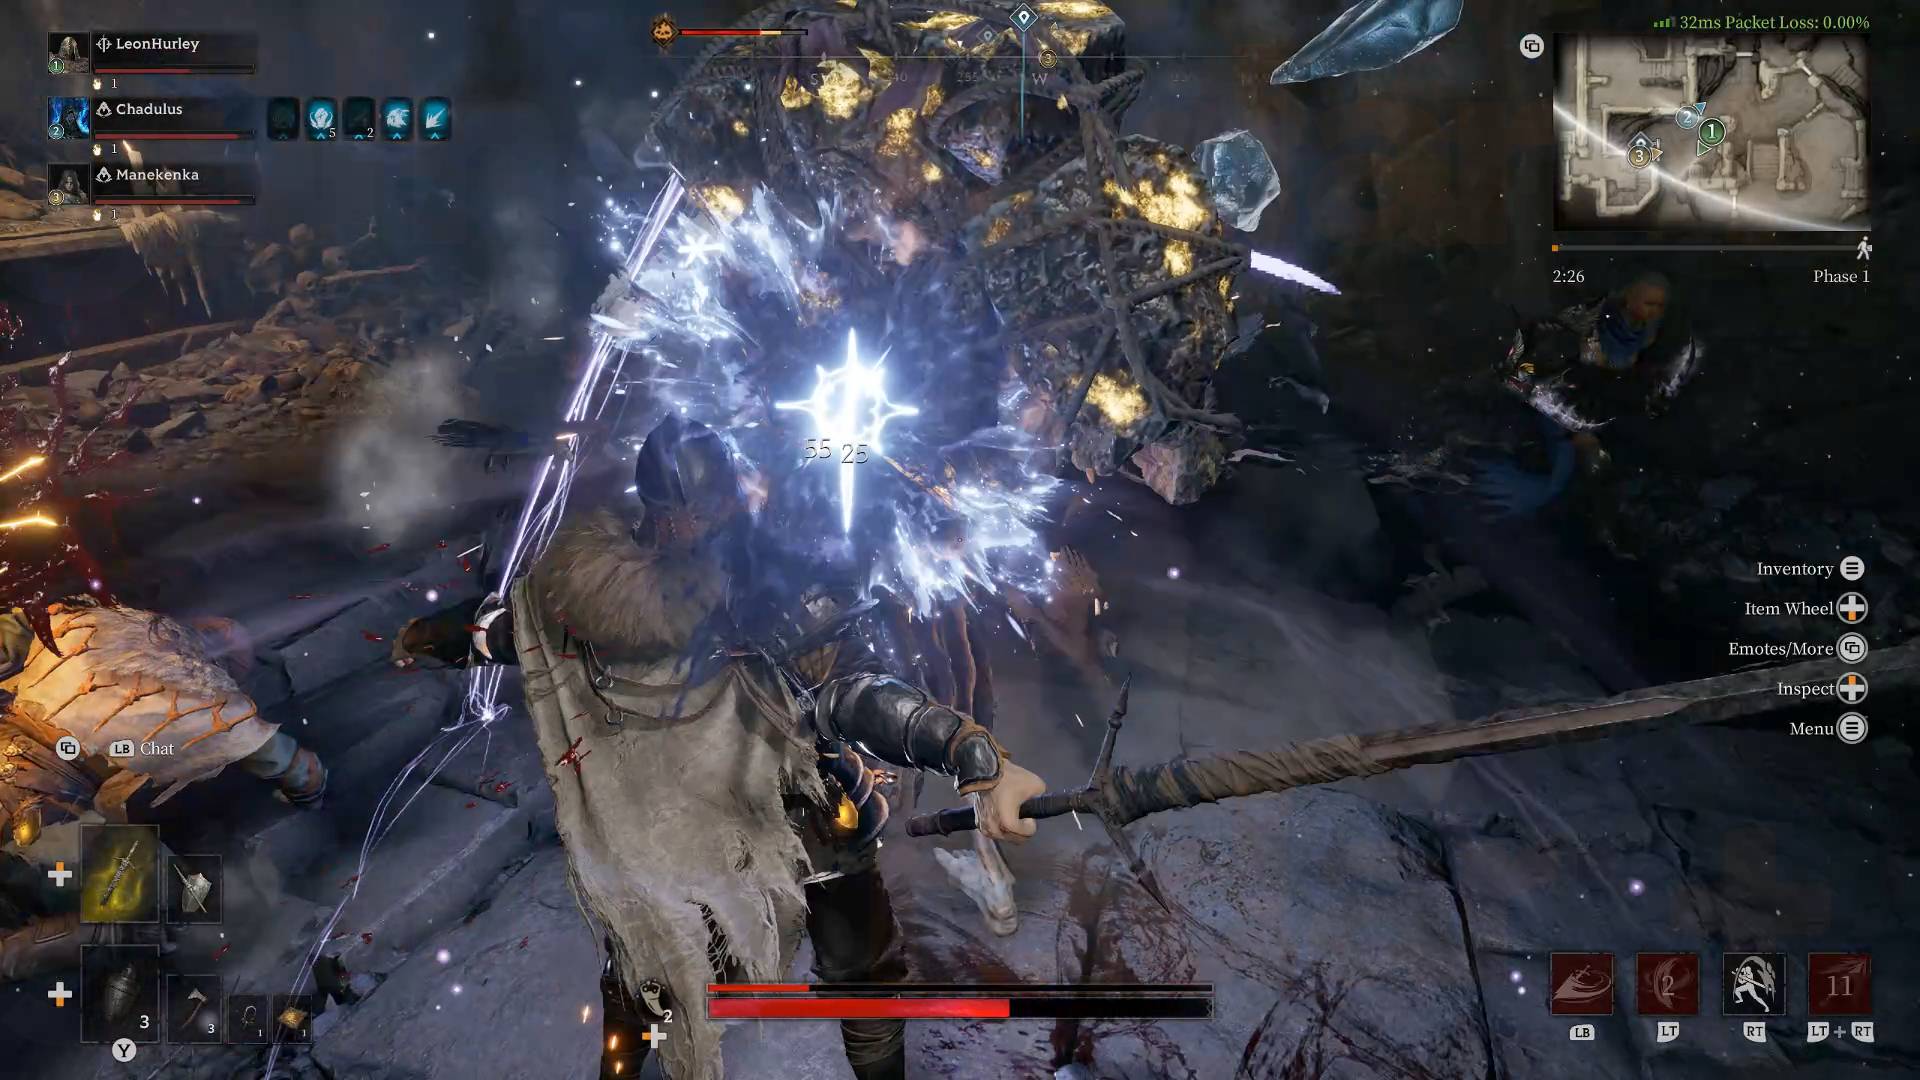
    A strong Withered Knight build takes advantage of this class’s main strength: delivering quick bursts of damage to surprise enemies before they can react. The Withered Knight can be tricky and slow to play, so it’s most effective when focused on eliminating enemies quickly to prevent them from turning the tide. To do this, gear your skills and talents around the Wither ability, which allows you to mark enemies and then finish them off for extra damage. Playing this way requires patience and precision—missing a hit can leave you vulnerable, and despite its appearance as a sturdy tank, this hero can be taken down easily if not careful.

    The core idea is to charge your sword with basic attacks, then use that stored energy to apply a Withered mark and trigger powerful finish moves. Keeping this concept in mind, your entire setup should aim to speed up this process. For this reason, it’s best to focus on a Greatsword as your main weapon. While your secondary weapon—Polearm and Shield—has some uses, especially for teamwork, it generally deals less damage and leans more into defense, which slows down your damage-focused playstyle. Plus, using it can make your attacks easier to miss or leave you open.

    To maximize the Withered Knight’s potential, you’ll want the Greatsword Specialization from the Weapon Talents. This gives you an extra skill with the Greatsword at the expense of one with the Polearm. Here are some key weapon skills to focus on:

    • Radiant Retribution: A quick series of wide slashes that fully charge your sword with Judgment, readying it to apply Wither. Using its enhancement increases how far forward you can strike, making it a great way to start fights and charge your weapon simultaneously.
    • Breakthrough Charge: A two-part attack that begins with a dash, allowing you to close the distance to an enemy rapidly. It’s useful for catching foes off-guard.
    • Parry: Primarily a defensive move, this puts you in a stance that prevents damage for up to five seconds or five hits. After a successful parry, you can follow up with a swipe or dash to apply Wither. However, because it leaves you temporarily defensive, you’ll want to cancel it if the situation changes.

    For your secondary weapon skills, since you’ll be using the Greatsword specialization, you’ll only get one skill for the Polearm and Shield. The best options depend on your playstyle—either an offensive move like Javelin Thrust, which allows you to throw your spear and then dash to the enemy while applying Wither, great for solo play, or a defensive move like Sacred Bulwark, which creates a large barrier to block attacks and provide cover, especially in team fights.

    Regarding talents, focus on those that enhance burst damage and survivability:

    • Greatsword Specialization to swap from Polearm to an additional Greatsword skill.
    • Crime talent to prevent the Withered mark from being consumed when you execute an enemy, allowing continuous burst damage.
    • Bad Karma to extend Wither’s duration and apply debuffs like speed reduction and vulnerability.
    • Radiant Retribution Enhancement – Long Range to increase how far you can attack with Radiant Retribution, giving you added flexibility.

    Other talents like Legacy help regain health during fights, and Dominance offers a moment of immunity to stagger, which is useful if you’re rushing into groups. The Sacred Bulwark talent allows for more mobility while creating defenses when using the Polearm and Shield.

    In terms of gear and effects, prioritize those that boost your Burst Affix—the damage multiplier for executing Wither. Increasing this makes your burst attacks much more powerful. Additional helpful effects include Valour for increased overall attack, Tenacious for higher health, and Aegis for better defense. Managing these options will give you the best chance to deal maximum damage swiftly while remaining protected.

    Focusing on these core skills, talents, and gear will help you master the Withered Knight and turn it into a formidable foe that can quickly disable enemies before they have a chance to fight back.

  • Beast of Reincarnation: Recipes and Cooking Guide

    Beast of Reincarnation: Recipes and Cooking Guide

    In Beast of Reincarnation, Emma can prepare meals that boost stats at the main hub, but the game doesn’t clearly explain how this system works. Players will naturally come across recipes and ingredients as they play, but it’s often unclear how to actually use them or cook meals. In reality, the player isn’t the one cooking — instead, there’s an NPC called Kagura who handles the cooking for you, and I’ll explain how to unlock and use this feature.

    Here’s how to cook and apply recipes in the game:

    1. Find meal recipes throughout the game world or buy them from merchants.
    2. Head back to the Cleanse Walker hub and speak to Kagura, who works next to the weapons upgrade station.
    3. Select the “Cooking Research” option, then pick the recipe you want her to learn.
    4. It takes some time for her to learn. Return later, and she’ll have learned the recipe permanently.
    5. When you choose to rest at the hub, you’ll see a list of recipes Kagura knows — as long as she has the necessary ingredients, you can select one.
    6. After choosing a meal, a short scene plays where Emma, Koo, and Kagura enjoy the meal together.
    7. The next morning, Emma will wake up with increased stats, depending on which meal she ate.
    8. Eating a new meal for the first time provides a bigger boost, encouraging you to try a variety of recipes and keep unlocking new ones.

    It’s important to note that Kagura’s cooked meals give you stat bonuses, whereas the simple rations you carry with you help delay hunger during adventures. Ingredients for cooking can be bought from merchants or grown at the hub in the back room near the shower, where you can cultivate vegetables and raise small animals like chickens. Although these supply lines take time to produce ingredients, it’s helpful to keep these systems active and research meal recipes that require fewer resources, so you can always have good options ready.

    Keep in mind, the game clearly separates the meals Kagura cooks from the hunger-preventing rations. Kagura’s meals will give you bonuses to your stats, while the rations are mainly for hunger management during your journey.

  • Legendary Legacy Codes (Expiring July 2026)

    Legendary Legacy Codes (Expiring July 2026)

    Fabled Legacy codes are a great way to get a quick boost in this RPG dungeon crawler. In the game, you team up with friends to explore deep into dangerous areas, searching for loot and uncovering secrets. To keep progressing, you need to improve your character and gear, while facing tougher enemies along the way.

    Using these codes can help you with that by giving you different in-game currencies. This means more chances to reroll gear, unlock cosmetic items, or enhance your appearance in this Roblox game. If you’re eager for new adventures, here are the current Fabled Legacy codes and how to redeem them.

    Additionally, if you’re looking for rewards usable across your Roblox experiences, check out the latest promo codes available.

    All Fabled Legacy codes currently available:

    • YALDABAOTH – 300 Gems (new!)
    • ADMINTHIRD – 15 minutes of XP, material, and luck boosts (new!)
    • MORECURRENCY – 5,000 Dawnbreak Coins
    • DAWNBREAK – 5,000 Dawnbreak Coins
    • DIVINE – 100 Gems
    • 135KLIKES – 100 Gems
    • NEWYEAR26 – Reward
    • CHRISTMAS25 – Reward

    With these codes, you can add valuable in-game currency like Gems and Dawnbreak Coins to your account. Use these to reroll items or buy cosmetics in the store.

    How to redeem Fabled Legacy codes:

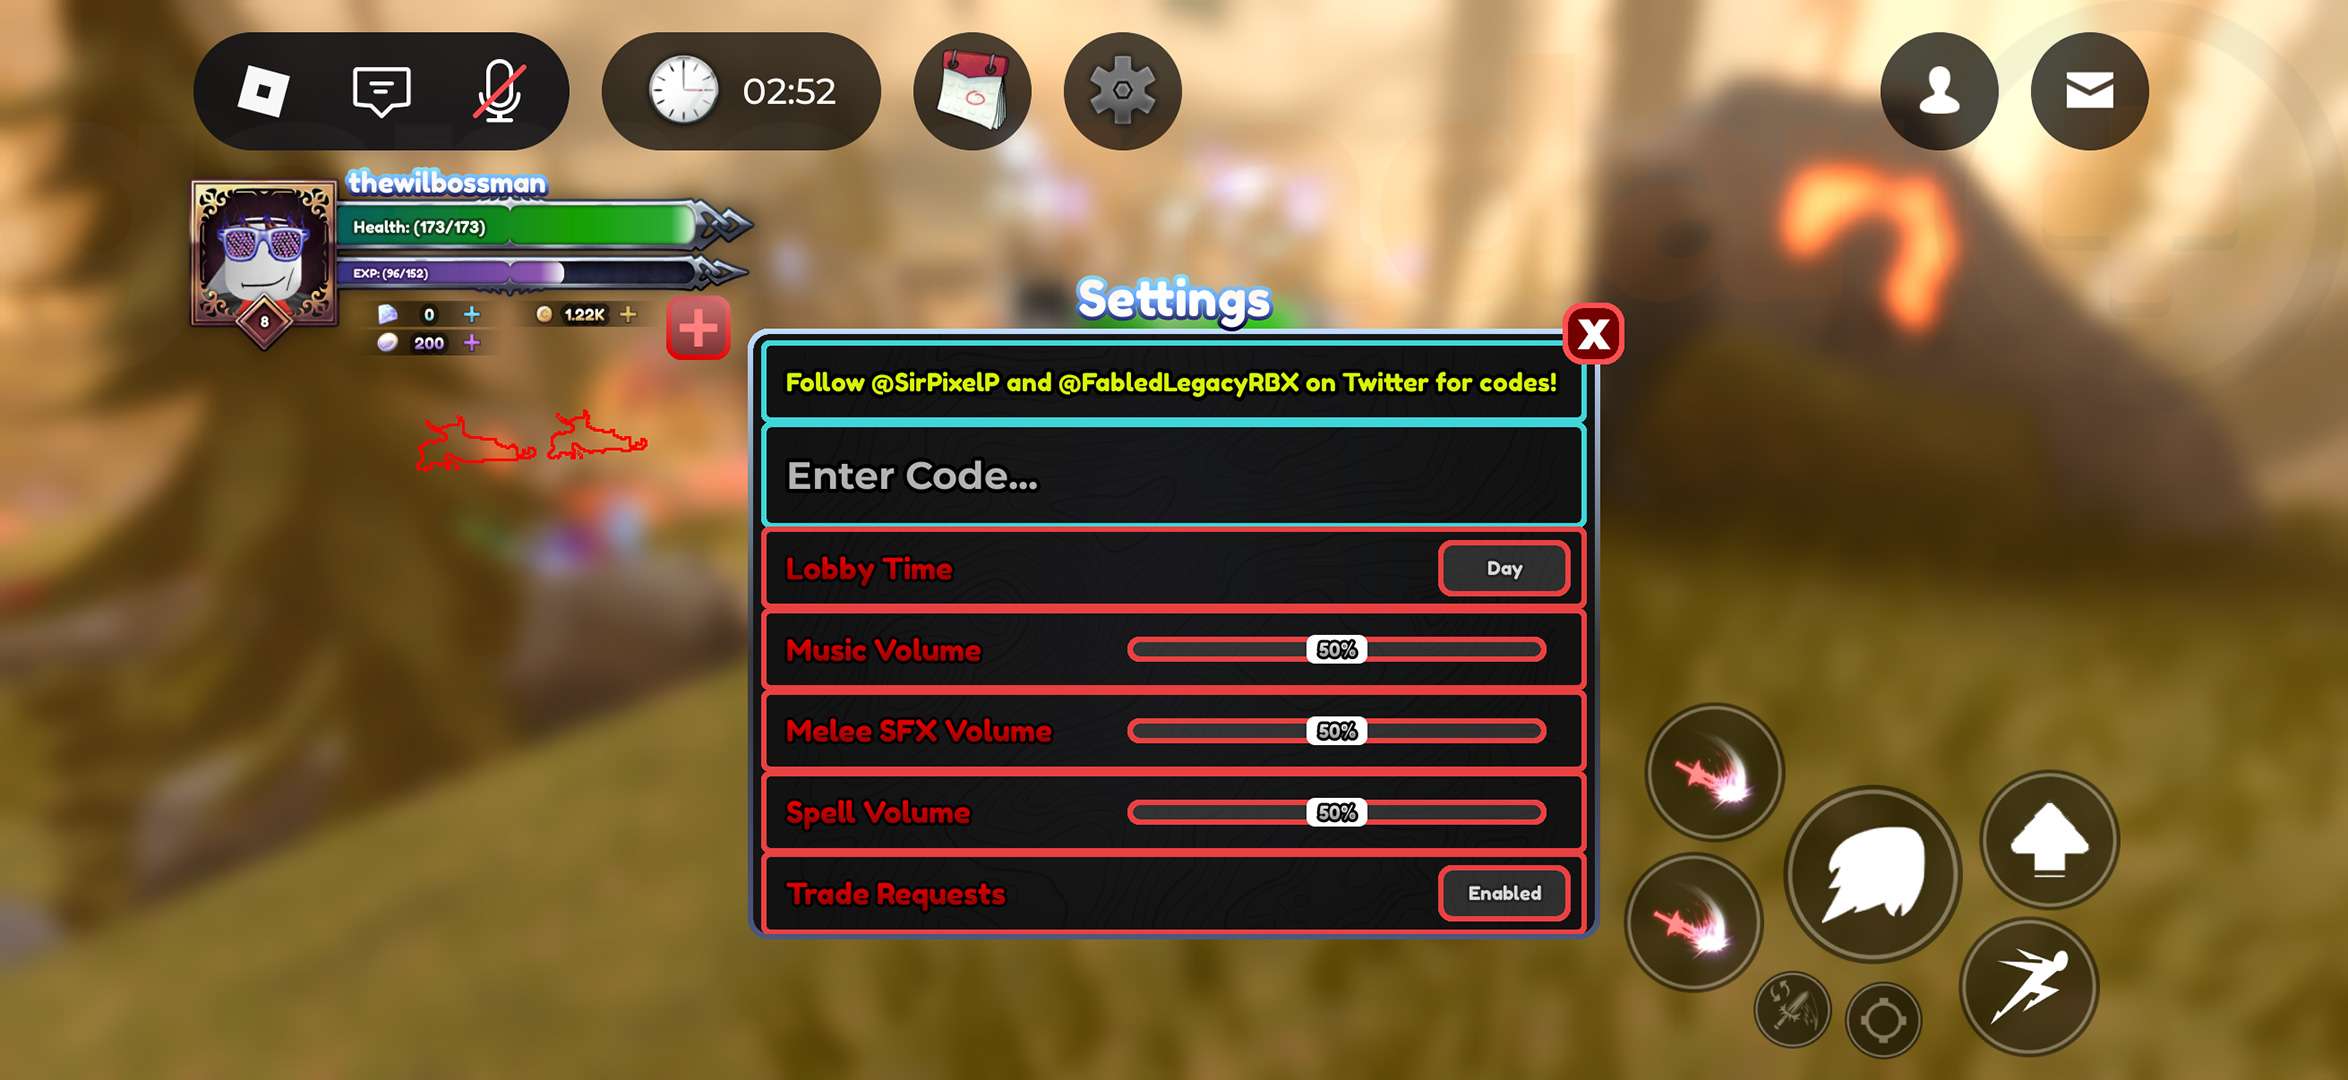
    Before you can redeem codes, you’ll need to finish the first two tutorial dungeons—it’s quick, just a few minutes. Once done, hit the gear icon on the screen to open the Settings menu. At the top, you’ll see a box labeled “Enter Code…” input your code there. Remember, codes are case-sensitive, so type them in all capital letters to ensure they work.

    Expired Fabled Legacy codes:

    Some codes no longer work because they’ve expired. Here are some that have recently been invalidated:

    • THREEYEARS – 500 Gems
    • INCUBATE – 100 Gems
    • CLOVER – 15 minutes boosts
    • 130KLIKES – 100 Gems
    • FREEGEMS – 100 Gems
    • LOVE – 100 Gems
    • NEON – 100 Gems
    • And others like these…

    Many codes have been around for a while, so check this list often for the latest active ones.

  • Respec Guide for Path of Exile 2: Tips & Strategies

    Respec Guide for Path of Exile 2: Tips & Strategies

    In Path of Exile 2, you can reset your large passive skill tree and change your build by using the respec feature. However, unlocking this feature takes several hours into the game and only after you’ve met a special NPC called the Hooded One, who appears at the Clearfell Encampment. If you want to change your Ascendancy points, it’s a bit more complicated. Below, I’ll guide you on how to unlock this shady merchant, respec both passive and Ascendancy skills, and what it will cost — because nothing in this game is free.

    How to Respec Passive Skills in Path of Exile 2
    To respec your passive skills, you need to advance the main story until the Hooded One appears at the Clearfell Encampment. This character lets you reset your points anytime, but each respec costs gold, and the price depends on how many points you’re changing. Be careful not to use this too often or you might run out of gold quickly.

    You’ll need to reach the “Mysterious Shade” quest and defeat the Lachlann of Endless Lament boss to unlock this feature. Most players find this happens somewhere between levels 10 and 15, about 4 to 5 hours into the game after finishing the tutorial and beating the Bloated Miller encounter, depending on your play style and skill level.

    Respeccing Ascendancy Points
    Changing your Ascendancy points isn’t as straightforward as respecing your passive skills. The process was made easier with the Update 0.5.0, but it still requires effort and resources. Here’s what you need to do:

    1. Re-try an Ascendancy Trial with a relevant relic item of any area level, and you’re free to pick any trial:

      • For the Trial of the Sekhemas, you need a Djinn Barya, and completing just the first floor is enough.
      • For the Trial of Chaos, you need an Inscribed Ultimatum and must complete the entire trial.
    2. Talk to the NPC found in the trial’s treasure room and choose the “Change Ascendancy” option. You’ll see all available Ascendancies for your class.

    3. Pick the new Ascendancy you want and click “Change” at the bottom of the screen. You’ll see how much gold it costs based on how many points you’re swapping. You have to pay this fee each time you want to change your Ascendancy.

    4. After paying, you can reassign your new Ascendancy points however you like.

    You can do this multiple times if you’re unsure, but keep in mind each change costs gold, and you’ll need a new relic for each trial attempt, which may be bought or traded. To minimize costs, try spending only a few points on a new Ascendancy initially until you’re sure about your choice.

    In Summary
    Respeccing skills and Ascendancies in Path of Exile 2 involves reaching a specific point in the story, collecting relics, and paying gold to the Hooded One. Planning your build ahead is recommended, but if you really need to change your approach, just follow these steps and remember: it costs gold each time you make a move, so choose wisely.

  • Guides to Discover and Complete Ancient Vows in Path of Exile 2

    Guides to Discover and Complete Ancient Vows in Path of Exile 2

    The Path of Exile 2 Ancient Vows quest in Act 2 can be confusing because its steps aren’t straightforward. However, completing it offers valuable rewards and the chance to find some great loot as you go along. If you’re unsure how to finish the Ancient Vows quest or what to do with the strange clan relics, here’s everything you need to know.

    How to Find the Ancient Vows Quest in Path of Exile 2

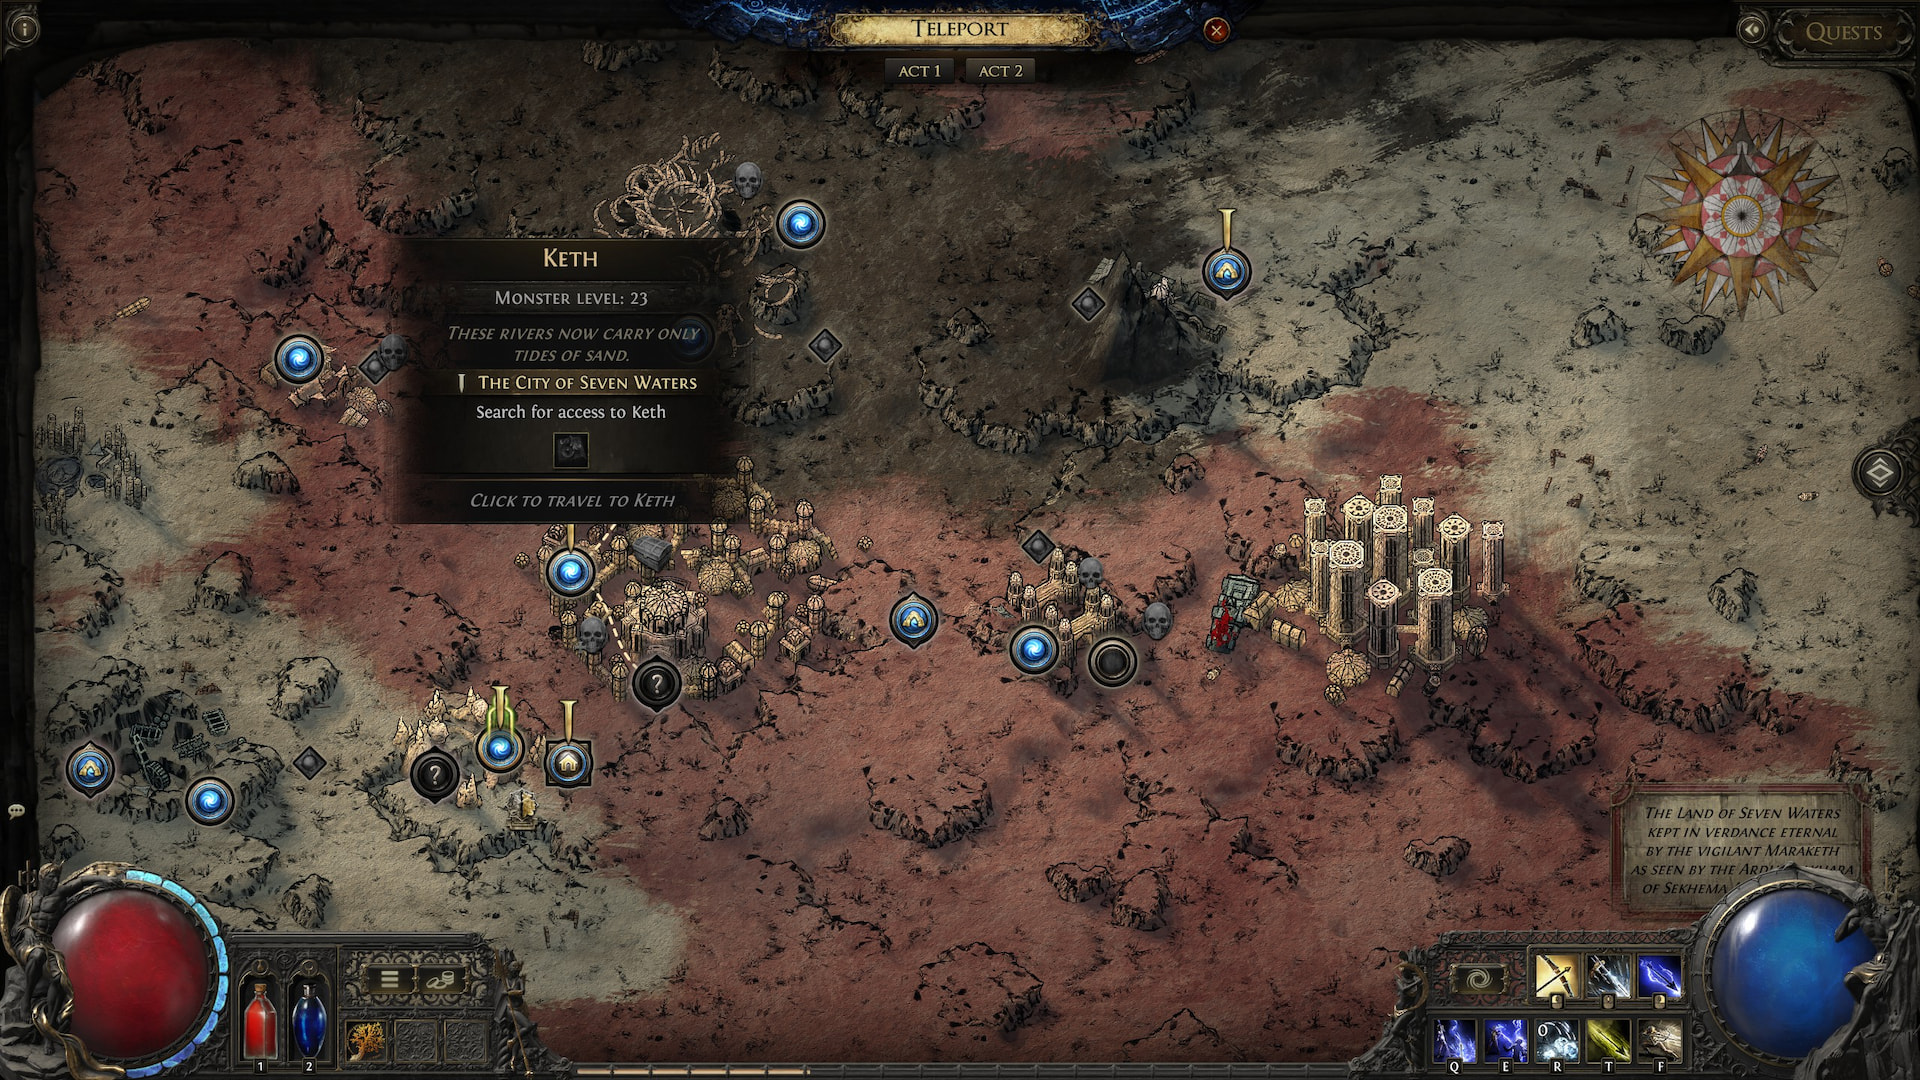
    There isn’t a specific quest giver for Ancient Vows in Path of Exile 2. Instead, you need to start either “The City of Seven Waters” or “A Theft of Ivory.” Head over to Keth or the Bone Pits, located beyond the Mastodon Badlands. While in Keth, you can find the Kabala Clan Relic, and in the Bone Pits, you might spot the Sun Clan Relic. Both relics are necessary to complete the quest, so you can choose which one to chase first. You also have the option to explore the Valley of the Titans, which is an important area for this task.

    For this guide,let’s start with Keth. As you explore, you’ll need to find the Kabala Clan Relic, which doesn’t drop from a boss but from regular monsters. Sometimes, you might have to search the map carefully to find the one enemy that drops it. Eventually, you’ll find it. The Sun Clan Relic can be obtained similarly by fighting through the Bone Pits, located through the Mastodon Badlands. Eventually, an ordinary enemy will drop the Sun Clan Relic.

    How to Complete the Ancient Vows in Path of Exile 2

    Once you have both relics, your next stop is the Valley of the Titans. Explore the area until you find the waypoint. Near the waypoint, there’s an altar with space for the two relics. Place them there, and the quest is finished. During your exploration, you’ll face giant skeletons, enormous bugs, and liches, making the journey quite challenging but rewarding.

    Rewards for Ancient Vows

    Completing this quest offers some pretty good benefits, no matter which Path of Exile 2 class you’re playing or if you’re a collector or just looking to get it done. You’ll receive two permanent buffs, though only one can be active at a time.

    The buffs include:

    • 30% Increased Charm Charges
    • 15% Mana Recovery from Flasks

    To change which buff is active, simply teleport back to the Valley of the Titans waypoint and click on the relic you want to activate.

    Since you’re in Act 2, it’s also a good time to choose your Ascendancy class and further customize your build. There’s a guide available to help you pick the best Path of Exile 2 Ascendancy class suited to your style.


  • Top Avowed Builds You Can’t Miss | GamesRadar+

    Top Avowed Builds You Can’t Miss | GamesRadar+

    Finding the right builds in Avowed can give you a real edge, allowing you to match your playstyle with the game’s skill trees, abilities, and gear. Whether you prefer sneaking, shooting from a distance, fighting up close, or casting spells, there are plenty of options to suit your preferences. Early on, it can be confusing to decide which path to take, so I’ve put together some helpful build ideas based on the Fighter, Ranger, and Wizard trees to guide you.

    The best builds in Avowed combine skills from all three trees, since each offers useful abilities. But when starting out, it’s smarter to focus on just one or two skill trees until you hit level 10 or higher. It’s also wise to stick with a couple of weapon types early on so you don’t spread your resources too thin. As you level up and gather rare gear, remember you can reset and reallocate your skills and attributes to better fit your evolving style.

    Pay close attention to status effects that abilities and items apply. Creating specialized builds around effects like Fire, Frost, or Shock can turn the tide of combat. Want to freeze enemies? Seek out items that build Frost. If you like pounding enemies in melee, choose abilities that Stun or make you uninterruptible. Increasing your critical hit chance or Might can make your hits more devastating. Also, consider your companions—they can boost your strengths or fill in gaps in your setup.

    ### Top Fighter Build in Avowed
    The strongest Fighter build revolves around charges and freezing foes, a style I call the Frost Knight. Equipping a shield and a special ice axe called “Drawn in Winter,” found after collecting an ancient memory in Dawnshore, lets you fight in close while freezing enemies with Frost. Then, use your charge to shatter frozen foes for big damage.

    Here’s what you’ll need:
    – Attributes: Invest in Might, Constitution, Dexterity, and Resolve.
    – Best companions: Giatta and Yatzli.
    – Key gear: The “Drawn in Winter” axe and a sturdy shield.
    – Important abilities:
    – Charge: Primary move to close gaps and stun enemies.
    – Shield Bash: Stuns foes and keeps control of the fight.
    – Barbaric Shout: Use at the start to prevent interruption and freeze enemies quickly.
    – Bleeding Cuts: Adds bleed damage to axes for extra damage.
    – Unbreakable: Reduces stamina costs so you can hold your defenses longer.
    – Clear Out: Finish with this powerful attack to damage multiple foes and add Frost and Bleed effects.

    For magic, focus on:
    – Chill Blades: Freeze enemies at range.
    – Frost spells like Bristling Frost or Blizzard: To slow or freeze groups.
    – Secret of Rime: Helps you freeze enemies more easily.

    And in ranger skills:
    – Finesse: Boosts your axe damage.

    ### Top Ranger Build
    This build is all about stealth and deadly ranged attacks. The key ability here is “Shadowing Beyond,” which makes you invisible while moving, as long as your Essence lasts or until you attack. This creates a stealthy archer style similar to classic games like Skyrim, perfect for sneaking and delivering high damage from afar.

    Here’s what to consider:
    – Attributes: Focus on Might, Dexterity, Perception, and Intelligence.
    – Best companions: Giatta and Kai.
    – Gear: A good bow, appropriate armor, and items like the Ring of Slow Essence for better resource management.
    – Abilities to prioritize:
    – Shadowing Beyond: Go fully invisible and make your attacks deadly.
    – Marksmanship and Critical Strike: Increase your bow’s damage and critical hits.
    – Sniper: Do extra damage to unaware enemies—perfect for stealth.
    – Staggering Shot: Stuns enemies for follow-up attacks.

    For close combat, consider:
    – Devastating Criticals: Improve your melee crits.
    – Evasive moves to dodge tough hits.

    ### Best Wizard Build
    This build focuses on fiery destruction, inspired by classic spellcasters. Using mostly fire spells, you’ll ignite enemies and deal massive area damage from a distance. Think of it as a glass cannon—fragile but deadly.

    Gear and abilities:
    – Attributes: Prioritize Might, Constitution, Perception, and Intelligence.
    – Key items: A good fire spell grimoire, the Arcanist’s Gambeson for extra Essence, and a Ring of Slow Essence.
    – Spell highlights:
    – Fan of Flames and Fireball: Cast powerful fire attacks that set enemies ablaze.
    – Arcane Veil: A shield spell that boosts your defenses.
    – Meteor Shower: Ultra-powerful attack for large groups.
    – Harvest Essence: Regenerate Essence easily during fights.
    – Scion of Flame: Make igniting enemies easier.

    For combat:
    – Constant Recovery helps you heal after hits.
    – Use spells like Arcane Seal to regain Essence and stay in the fight longer.

    No matter which build you choose, experimenting with different abilities and gear can lead to even better setups. Certain totems, like the Totem of Rightful Rulership or the Totem of Defiance, can offer powerful combat buffs. Keep exploring and customizing to make your ideal warrior, ranger, or mage in Avowed.

  • All Winds Meet Codes – February 2026 Updates

    All Winds Meet Codes – February 2026 Updates

    Here is the rewritten version:


    February 9, 2026: We’ve checked for new codes for Where Winds Meet and added fresh promos to our list.

    Since Where Winds Meet is now more popular as a free-to-play open-world action RPG available to players in the West, the demand for codes is increasing. If you’re just starting out in this wuxia game, there are some useful rewards waiting for you, including in-game currency like Echo Jade and Coins to upgrade your gear, along with other helpful items. Below is everything you need to know about the codes in Where Winds Meet and how to redeem them.

    How to redeem Where Winds Meet codes
    Currently, you need to go through the game itself to activate codes, as there isn’t a separate website for redemption. After finishing the tutorial, open the main menu and tap the gear icon to access Settings. Next, select the ‘Other’ tab, and under the ‘Account Info’ section, you will see the ‘Exchange Code’ option. Tap it to bring up the code entry screen, where you can type or copy-paste your code and confirm. After claiming your rewards, remember to check your in-game mailbox to collect them.

    Available Where Winds Meet codes
    Here are some codes that still work and what they offer:

    • GOOSENEWS – 40 Echo Jade, Inner Way Note (New! Chest)
    • DEVLOG2601 – 40 Echo Jade, 20,000 Coins
    • tf33hxjmjc – 10 Echo Jade, 2,000 Coins, Inner Way Note (Chest), Oscillating Jade
    • YYSLSTIB – 10 Echo Jade, 1,000 Coins
    • WWMDEVTALK – 40 Echo Jade, 20,000 Coins
    • WWM251115 – 10 Echo Jade, 5,000 Coins, Goose God Player Nameplate

    There are more codes available now, which grant a good amount of Echo Jade and Coins to help you prepare for your journey. Expect more promos to be released gradually over the coming months, but it’s best to redeem them as soon as you can.

    Expired codes
    Some early codes like WWMGLtiktok, WWMGLyoutube, WWMGO1114, and WWMGO1115 no longer work, as their usage limits have been reached. New promos will replace these over time and be available here for reference only.


    Note: The game’s launch in the West is recent, so new codes may become available as updates roll out. Keep an eye out to grab those rewards quickly to enhance your gameplay.

  • January 2026 Solo Hunters Codes Reveal

    January 2026 Solo Hunters Codes Reveal

    Solo Hunters codes can give you a boost in this action-packed RPG. As you explore different dungeons, you’ll face waves of monsters and bosses. To succeed, you need to strengthen your character by improving both your sword and magic skills, preparing for tougher battles ahead.

    The codes you claim offer plenty of Gems to use in the game, along with chances to reroll your class or reset your stats. Instead of a regular menu, you’ll need to find a specific NPC in the Roblox game to receive these rewards. Below are the current Solo Hunters codes and instructions on how to redeem them.

    If you want rewards you can use across multiple games, check out our latest Roblox promo codes.

    All Solo Hunters Codes

    You can redeem these codes with the designated NPC:

    • 40KCCUTHANKS66 – Class Reroll (new!)
    • TOTHEMOON – 200 Gems
    • 35KCCUTHANKS33 – 200 Gems
    • LOVETOBRAZIL – 200 Gems
    • WWWW – 200 Gems
    • 30KCCU – 200 Gems
    • CLASSREROLL – Class Reroll
    • RESETMYSTATS – Reset your stats
    • THANKSFORTHELIKESGUYS – Rewards
    • RELEASE – Class Reroll

    How to Redeem Solo Hunters Codes

    To use these codes, start by completing the tutorial and reaching the Overground area. Once there, go to the map (press M on PC; on mobile, head south to the docks where you’ll see a large crane).

    When you arrive at the docks near the crane, find the blue NPC wearing a red hat and tossing an apple. Interact with this NPC to open the Codes menu. Enter the code into the text box — codes are not case-sensitive, so spelling matters more than letter case. After typing in the code, click “Redeem” to claim your rewards.

    Expired Codes

    Currently, there are no expired Solo Hunters codes. Be sure to use any active codes quickly, as they may become unavailable over time.

    Enjoy your in-game rewards and good luck on your adventures!

  • Boost Your Power in Arknights Endfield: Top Tips

    Boost Your Power in Arknights Endfield: Top Tips

    In Arknights: Endfield, you need to make sure your base has enough power to keep everything running smoothly. This game combines factory management with open-world exploration, so powering your machines is just as important as exploring. Basic machines don’t need much power, but as you add more complex equipment, you’ll quickly reach your power limit. Luckily, there are simple ways to increase your total power in the game.

    The main method to boost your power is by building Thermal Banks. These small devices convert Originium Ore and other materials into energy for your base. To unlock Thermal Banks, you have to progress through the main story until you complete a mission called Paving the Way. This allows you to access the second set of AIC upgrades, and then you can spend a Basic AIC Index to unlock the Power I technology. Once available, you can start building Thermal Banks.

    You can place Thermal Banks anywhere in your base or outposts like normal factories. Just remember they need to be next to an Electric Pylon to function. After placing one, connect it to a supply line to keep it filled with Originium Ore. You can dedicate an entire AIC output port to fuel these banks or use a Splitter to draw from other sources of originium.

    Early on, Originium Ore is fine, but for better efficiency, you’ll want to switch to Batteries. These are more expensive to produce and trade for with outposts, but they give you much more energy—one LC Valley Battery produces over four times the power of Originium Ore. Make sure to craft enough LC Valley Batteries, and if possible, unlock SC and HC Valley Batteries for even greater output.

    To make batteries, set up a Packaging Unit to combine Originium Powder and Amethyst Parts into LC Valley Batteries. Since you’re gathering plenty of these ingredients by this stage, put them to good use! Using Batteries instead of Originium Ore means your power lasts longer and your base runs more efficiently.

    Don’t forget to place Thermal Banks at each of your outposts as well. Since early in the game space is limited, spread your factories across different outposts. For instance, dedicate one entirely to Battery production, freeing up room for other tools and machines in different locations.

    Keeping your base powered is crucial for progressing smoothly. With these tips, you’ll be able to maximize your power output and keep everything running without trouble.

  • Top Arknights Endfield Team Compositions for Success

    Top Arknights Endfield Team Compositions for Success

    Building the right teams in Arknights Endfield is key to beating every challenge, whether you’re rushing through the story or tackling tough endgame fights. Unlike some gacha games where a decent team might get the job done, in Endfield, putting together a weak squad can make battles almost impossible to win.

    Think of your main fighters and support characters more like tools that work together. Support characters set up conditions, and your main damage dealer “triggers” these setups to deal big damage. So, teamwork matters way more than just buffing one hero — without the right combo, they’ll barely do any damage.

    To make things easier, here’s a list of top teams for each element—Heat, Cryo, Electric, and Physical—so you can save time studying every character’s kit. Now, let’s dive into the best teams for each element.

    Best Heat Team in Endfield
    The core of this team is:

    • Laevatain (main damage)
    • Antal
    • Ardelia
    • Wulfgard or Akekuri

    Laevatain is your top damage character, so she’s essential. The others support her by healing or boosting her heat infliction, which is what your team relies on. Wulfgard builds heat damage, while Akekuri helps with SP recharge—pick based on your needs. As new characters come out, watch for others who can cause heat build-up, which could change the ideal lineup.

    Best Cryo Team in Endfield
    Main characters include:

    • Last Rite
    • Xaihi
    • Perlica
    • Ardelia

    Xaihi is great for Cryo infliction and healing, working well with Last Rite. Ardelia boosts damage and keeps the team healthy, while Perlica increases damage with Arts Susceptibility. If you don’t have Xaihi, Snowshine or Fluorite are solid substitutes. Remember, this team excels at single enemies rather than groups.

    Best Electric Team in Endfield
    The standout lineup features:

    • Avywenna (main damage, but tricky to use)
    • Antal
    • Perlica
    • Arclight

    Avywenna hits hard but needs precise positioning to get the most out of her Thunderlances. Antal boosts electric damage susceptibility, Perlica boosts damage further, and Arclight amplifies her ultimate. Keep an eye on future six-star electric heroes to replace Avywenna as your best DPS.

    Best Physical Team in Endfield
    This team includes:

    • Endadministrator
    • Chen Qianyu
    • Ardelia
    • Pogranichnik or Lifeng

    You get Endadministrator, Chen Qianyu, and Ardelia for free, making this a great choice for free-to-play players. Endadministrator becomes a powerful DPS after stacking Vulnerability, while Chen applies Vulnerable stacks, Pogranichnik restores SP and boosts attack, and Lifengus Susceptibility. You can swap in Ember if needed, but note that getting Pogranichnik or Lifeng from banners is luck-based.

    Most Budget-Friendly Free Team
    For free players, this setup works:

    • Da Pan (main DPS)
    • Endadministrator
    • Chen Qianyu
    • Ardelia

    Switching Da Pan into a Crush damage dealer after enemies have vulnerable stacks makes this team strong without spending. If you pull Pogranichnik, Lifeng, or Ember, you can swap them in for an even better lineup. This team leverages free heroes, making your journey smoother early on.

    Remember, in future, keep an eye out for characters who can inflict Cryo, boost team buffs, reduce enemy defenses, or improve Arts Susceptibility. The meta evolves, and new characters can change the optimal team composition.

    By choosing the right heroes for your element and understanding how they work together, you’ll clear content faster and more easily. Good luck building your dream team!