BitLocker stands out as a vital feature in Windows that plays a significant role in safeguarding your data. While the comprehensive version of BitLocker is exclusive to Windows 11 Pro, a trimmed-down version is accessible on Windows 11 Home. This is a key factor that makes Windows 11 Pro a preferable choice over Home for many users.
If you haven’t yet activated BitLocker on your system, regardless of whether you’re using Windows 11 Pro or Home, now is the perfect time to do so. Below, you’ll find everything you need to know about BitLocker and how to set it up effortlessly.
Understanding BitLocker
BitLocker is Microsoft’s built-in disk encryption tool designed to enhance the security of data on Windows 11 systems. When you enable BitLocker, it encrypts all files stored on your internal hard drive.
Typically, Windows machines utilize a Trusted Platform Module (TPM) to securely store the decryption key. When you log in and validate your identity, the TPM releases this key, allowing you to use your computer as usual. Additionally, the TPM checks the system for any unauthorized modifications prior to releasing your decryption credentials.
This encrypted storage means that stolen laptops become far less valuable to thieves since they cannot access any files without your login information. Even if someone manages to extract the hard drive from your laptop, they would be met with scrambled data without the decryption key.
The Importance of BitLocker on Your PC
By utilizing BitLocker, you ensure that only you—and anyone with whom you’ve shared your recovery key—can access your computer’s files. This level of protection is paramount for businesses that need to keep sensitive information confidential. However, it’s equally beneficial for personal users, particularly those who own laptops, as it safeguards against unauthorized access in the event your device is lost or stolen.
With the full version of BitLocker, you gain several advantages: no need to sign in with a Microsoft account, flexible recovery key storage options, and broader application across various devices—none of which are available on the Windows 11 Home edition’s limited BitLocker version.
BitLocker Drive Encryption vs. Windows Device Encryption
As previously indicated, BitLocker comes in two formats. The first is the complete BitLocker experience, known as BitLocker Drive Encryption, which is a primary reason many opt for upgrading to Windows 11 Professional.
On the other hand, we have Windows Device Encryption, which employs similar technology for a more straightforward encryption process, albeit under certain conditions.
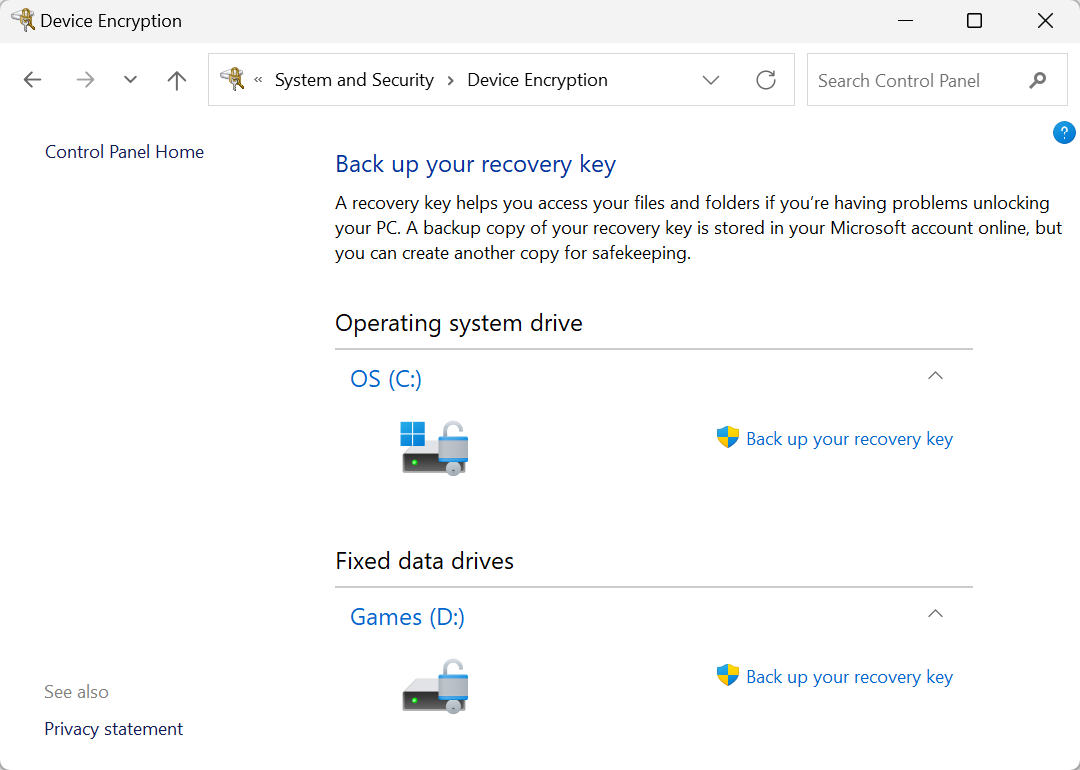
Device Encryption operates seamlessly. If you’re using a contemporary Windows 11 device and sign in using a Microsoft account, Windows 11 automatically activates Device Encryption. This protects your hard drive while securing the recovery key in your Microsoft account. This encryption is automatically unlocked when you log in, and if you lose access to your system, retrieving your recovery key online reinstates your file access.
Conversely, BitLocker Drive Encryption offers enhanced flexibility and power. It allows encryption without the need for a Microsoft account sign-in and enables you to manage the recovery key as you see fit. Furthermore, it allows encryption of other drives, including removable USB devices, through a feature called BitLocker To Go, along with additional customizable options for encryption settings.
For the average user, Device Encryption is quite effective and provides sufficient protection for many Windows 11 Home machines. The combination of a Microsoft account with automatic recovery key storage ensures you won’t inadvertently lose access to your files; you can retrieve the key online even if you’ve misplaced it.
Limitations of Windows Device Encryption
However, it’s important to note that some older Windows 11 devices may not support Device Encryption, as it largely depends on how manufacturers set up their PCs initially.
To verify if your Windows 11 device supports Device Encryption, access the Settings app, navigate to Privacy & security, and click on Device encryption:
If this option is absent, your computer does not support it, and you may consider upgrading to Windows 11 Professional for full access to BitLocker features.
Requirements for Using BitLocker
For the most robust BitLocker experience in Windows 11, you’ll require Windows 11 Professional or one of the other specialized editions (like Enterprise, Education, or Workstation). Windows 11 Home lacks this powerful feature.
On a technical level, BitLocker necessitates a computer with at least TPM 1.2 hardware. Fortunately, given that TPM 2.0 is a prerequisite for Windows 11 itself, all Windows 11-compatible machines should meet this requirement.
Microsoft also specifies a few lesser-known requirements, such as needing two partitions on your hard drive—one of which is a small system partition essential for booting Windows prior to accessing the main drive. Luckily, Windows 11 automatically sets up these partitions during installation, so you won’t need to worry about them.
If you’re using Windows 11 Home and wish to leverage BitLocker fully, consult our guide on upgrading to Windows 11 Pro without performing a complete OS reinstall.
Considerations Before Using BitLocker
Utilizing BitLocker can complicate data recovery situations. Should your PC fail, and you need to access the hard drive via another computer, you won’t be able to view its contents until you enter the BitLocker recovery key. Depending on your encryption type, this might be stored in the cloud with your Microsoft account or kept securely elsewhere, as in the case of BitLocker Drive Encryption.
This is also crucial for maintaining your data’s security; without the recovery key, unauthorized parties cannot access your files.
It’s vital to keep your BitLocker recovery key safe. Should you experience issues with accessing your PC and your recovery key is missing, your files could be lost permanently. Therefore, it’s advised to maintain backups of important files.

Moreover, while BitLocker enhances security, it may impact your device’s performance. Some assertions claim that “BitLocker slows SSD performance by up to 45%,” but these figures stem from a specific benchmark under certain configurations—actual performance effects will vary based on your hardware setup, workload, and specific BitLocker settings.
If you utilize a desktop setup aimed at optimal performance, consider whether the slight trade-off in speed is worth it for security. However, for laptop users, especially those working or handling sensitive information, any negligible slowdowns may be a minor inconvenience compared to the security benefits of protecting your data from theft. Most modern laptops are equipped to handle the additional overhead without noticeable impact on productivity.
Activating BitLocker on a Windows 11 PC
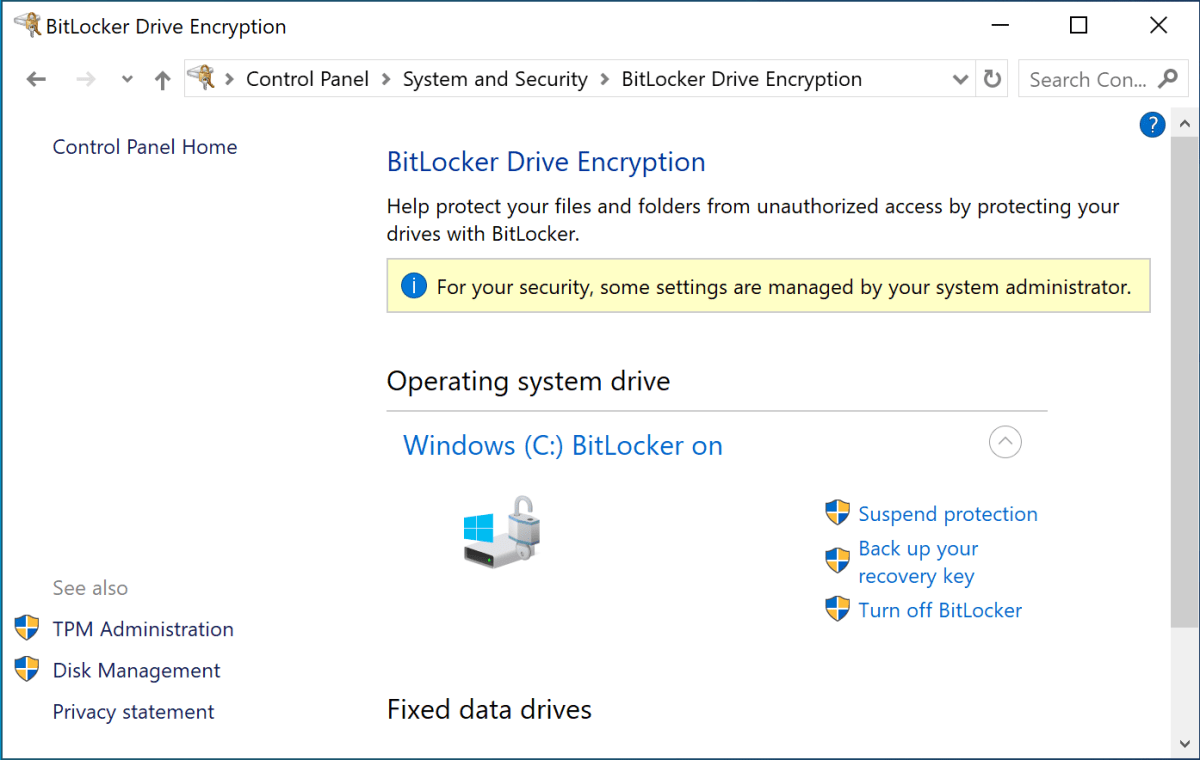
To enable BitLocker Drive Encryption on your Windows 11 machine, first ensure you’ve upgraded to Windows 11 Professional. Then, navigate to the classic Control Panel and search for “BitLocker” to access the relevant settings where you can enable or disable BitLocker on your drives:

For Device Encryption, it should generally activate automatically if your account is a Microsoft account. To double-check its status, head to the settings page, ensure it’s toggled to On, and verify that you’re signed in with a Microsoft account rather than a local one.
Final Thoughts on BitLocker
When using BitLocker, it’s crucial to monitor your recovery key. Losing this key can result in permanent access loss to your files. For many users, it’s advisable to associate the recovery key with your Microsoft account unless you have alternative secure storage plans.
If you don’t opt for Microsoft’s cloud storage for your recovery key, consider securely printing it out and storing it in a safe location. Regular file backups—whether in the cloud or on physical devices—are also a smart practice to ensure your data remains accessible.


