Bluetooth technology is an excellent way to link various devices to your computer or laptop, such as game controllers, wireless speakers, and headphones. While most computers typically have Bluetooth activated by default, some might need you to switch it on manually. This applies to both Windows 11 and Windows 10; though the steps are quite similar, there are some key differences.
How to Activate Bluetooth in Windows 11
Enabling Bluetooth in Windows 11 can be accomplished in a few simple steps using the Settings menu.
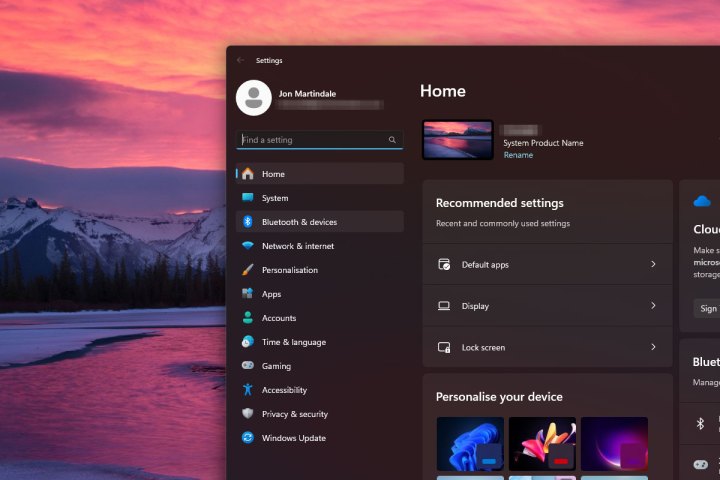
Step 1: Open the Windows Settings by pressing Windows key + I. You could also type Settings in the Windows search box and select it from the results.
Step 2: In the left sidebar, click on Bluetooth and devices.
Step 3: Toggle the Bluetooth option on the right to On to enable Bluetooth functionality.
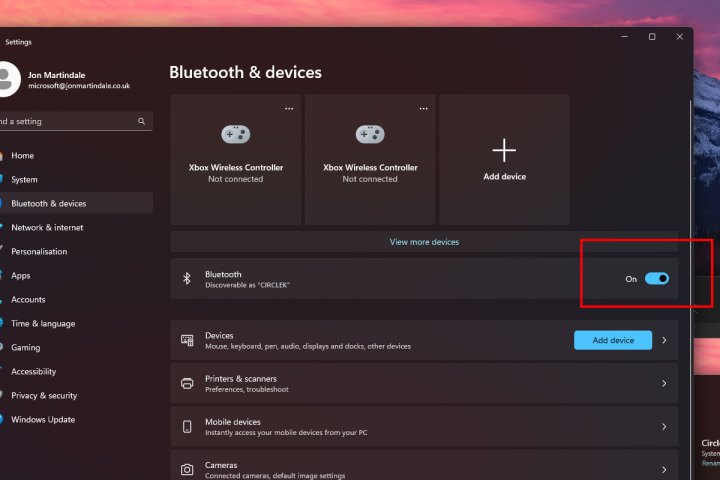
Step 4: To pair a new Bluetooth device with your computer, click on Add a device within the Bluetooth settings. Follow the prompts to connect your desired device.
How to Activate Bluetooth in Windows 10
Enabling Bluetooth in Windows 10 is similar to the process in Windows 11 but appears slightly different.
Step 1: Open the Action Center, represented by a speech bubble icon located on the right side of the Windows 10 taskbar.
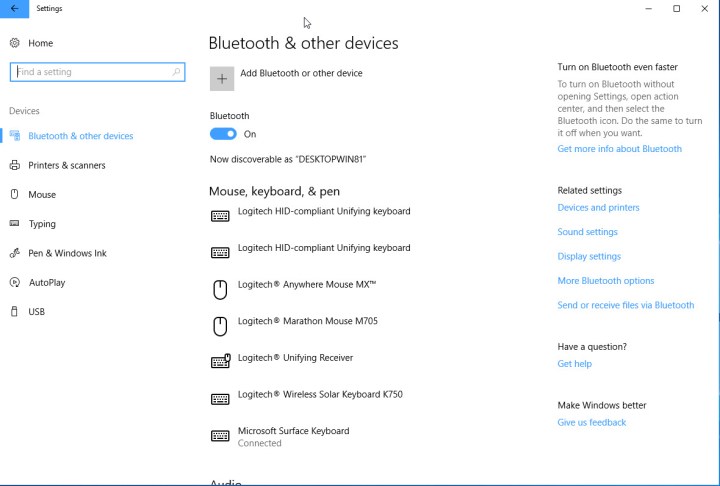
Step 2: Click on All Settings. Then navigate to Devices and select Bluetooth & Other Devices from the left-hand side.
Step 3: In the Bluetooth section of the Settings menu, toggle the Bluetooth switch to the On position. After activating Bluetooth, you have the option to select Add Bluetooth or Other Device. A pop-up window will appear; select Bluetooth, and Windows 10 will begin scanning for nearby Bluetooth devices.
Note: Ensure your Bluetooth device is set to pairing mode for a successful connection.
Looking to discover more tips and tricks for using Windows? Check out various ways to enhance your experience.


