You’ve taken the necessary steps to secure your router and ensured that all your devices have robust internet access. Now that your connectivity issues are behind you, why not leverage your devices for more than just browsing the web?
Explore other articles in this series:
File Sharing
One of the easiest ways to maximize your network’s potential is by enabling file sharing between your devices. It used to be straightforward, but with the evolution of technology, you can now forget about carrying USB drives or external hard disks.
However, with the updates in Windows 10 and 11, Microsoft has made file sharing a bit more complex. The introduction of Microsoft accounts and features like Windows Hello means that using the SMB protocol for file sharing requires accounts with usernames and passwords—a setup that many users don’t have anymore.
Nevertheless, you can still create a functional file-sharing system among multiple computers without needing any third-party software, especially useful if you have devices with varying operating systems.
Foundry
The file-sharing options were once easily accessible through the Control Panel, but they have now transitioned to Settings > Network & Internet > Advanced Network Settings > Advanced Sharing Settings.
To activate file sharing, expand the Private Network section and toggle on File and Printer Sharing. At the same time, you can leave file sharing deactivated for Public Networks such as those found at cafes or libraries.
As Windows defaults to designating all networks as public, make sure to adjust your Ethernet or Wi-Fi setting to Private Network accordingly.
Don’t forget that connecting will require you to create a local account with a password. While Microsoft’s account policies can feel cumbersome, setting up a local account solely for file sharing can provide a straightforward solution. Navigate to Settings > Accounts > Other Users to do this while ensuring you opt for the default account rather than an administrator one.
When logged in, you will default to accessing the home folder of the account you’re using. To access additional folders, right-click on the desired folder within Explorer, choose Properties, go to the Sharing tab, and click Share. From the dropdown, select the local account you set up for this sharing purpose and click Add.

Foundry
There’s one more hurdle you might face: Windows built-in firewall might obstruct your connections, even when it should automatically allow them for enabled features like file sharing. If you experience issues, follow these steps:
- Open Windows Security.
- Select Firewall & Network Protection and proceed to Advanced Settings.
- Go to Inbound Rules > Ports > Protocol and Ports, then click New Rule in the top right corner.
- Choose Protocol and Ports, input 445 next to Specific Local Ports, and select TCP.
- Click Next, select Allow the Connection, and on the following screen, check Private only, giving the rule a memorable name.
Printer Sharing
If you have a printer connected to a computer in your home, you can set it up for sharing, enabling it to print from other devices on your network. To share a printer using Windows 10 or 11, follow these steps:

Foundry
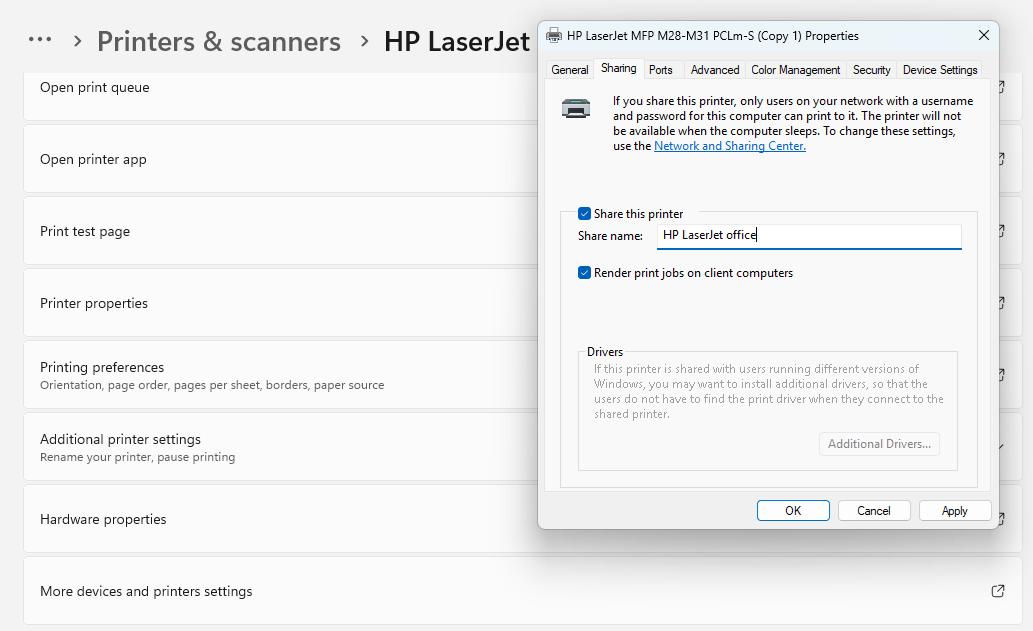
Start by opening Settings, then navigate to Bluetooth & Devices > Printers & Scanners. Find the printer you wish to share, click on it, and then select Printer Properties. In the new window, go to the Sharing tab and check the box for Share this printer. Feel free to rename it to something more memorable—perhaps specifying the brand and the room it’s located in, like in the example of a Brother printer in the basement, to make identification easier on the network.

Foundry
To connect a shared printer from another device, return to Settings > Bluetooth & Devices > Printers & Scanners and click on Add a Device. The shared printer should now be visible, and you can click Add Device next to it. For other operating systems, the process may differ; for instance, on a Mac, it can be found in System Preferences > Printers and Scanners.

Foundry
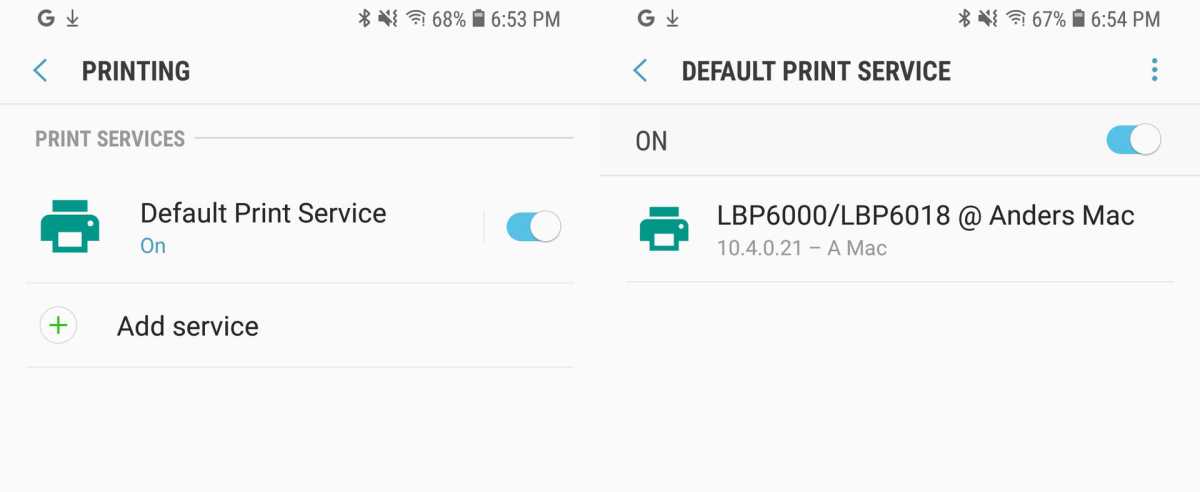
For Android devices, the printer can typically be added under Settings > Connected Devices > Connection Options > Printing. Just select the default service (if there isn’t one, you’ll need to add that first) and then choose the network printer you’d like to connect to.
As for iOS devices, the process is a bit more involved since it lacks built-in support for regular network printers. If your printer is not compatible with Apple’s AirPrint feature, consider setting up an AirPrint server on your computer to bridge that gap.
Considering a NAS Device
If you find yourself with a plethora of devices in your home and need a centralized virtual space for backups or shared files, a Network-Attached Storage (NAS) device may be a worthwhile investment. Essentially, it’s a compact server that comes equipped with multiple hard drives and a custom operating system.
Synology is among the most recognized names in the NAS market, known for its user-friendly operating system that supports numerous add-ons allowing it to function as more than just storage. Other reputable manufacturers include Asustor, Qnap, and Terramaster.
Typically, a NAS accommodates two to four hard drives, and the intention is to set them up in a RAID configuration to maintain redundancy. This means if one of your drives fails, your data is still safe while you replace the defective unit.
With a four-drive setup, you can opt for RAID 5. If all four drives are of equal size (which they should be), around 75% of the total space will be usable while safeguarding your data against a single drive failure—though it’s crucial to act swiftly and replace the failed drive.
It’s essential to note that while RAID provides enhanced data security, it does not serve as a comprehensive backup solution. For critical files, consider acquiring a separate, substantial external hard drive for backing up your NAS.
Three Functionalities of a NAS
1. File Server
It may seem obvious, yet having a constantly available NAS serves as a valuable storage hub for various files. This is particularly useful in an age where many computers come equipped with smaller, swifter SSDs for internal storage. For instance, you can use your NAS as a repository for archiving photos and videos from cameras.
2. Backup Server
How many copies of your invaluable data do you currently maintain? You might be familiar with the 3-2-1 backup rule, which suggests keeping at least three copies of your data across two different types of storage devices, with at least one copy stored remotely. A NAS device simplifies and secures the backup process for all your household computers, as well as mobile devices and tablets.
The most straightforward method to achieve this is through backup software like Arq Backup or Duplicati. If your NAS supports distinct user accounts, you can create a unique account for each family member within the backup software, preferably connecting through SFTP or, if unavailable, via SMB.

Synology
3. Private Cloud
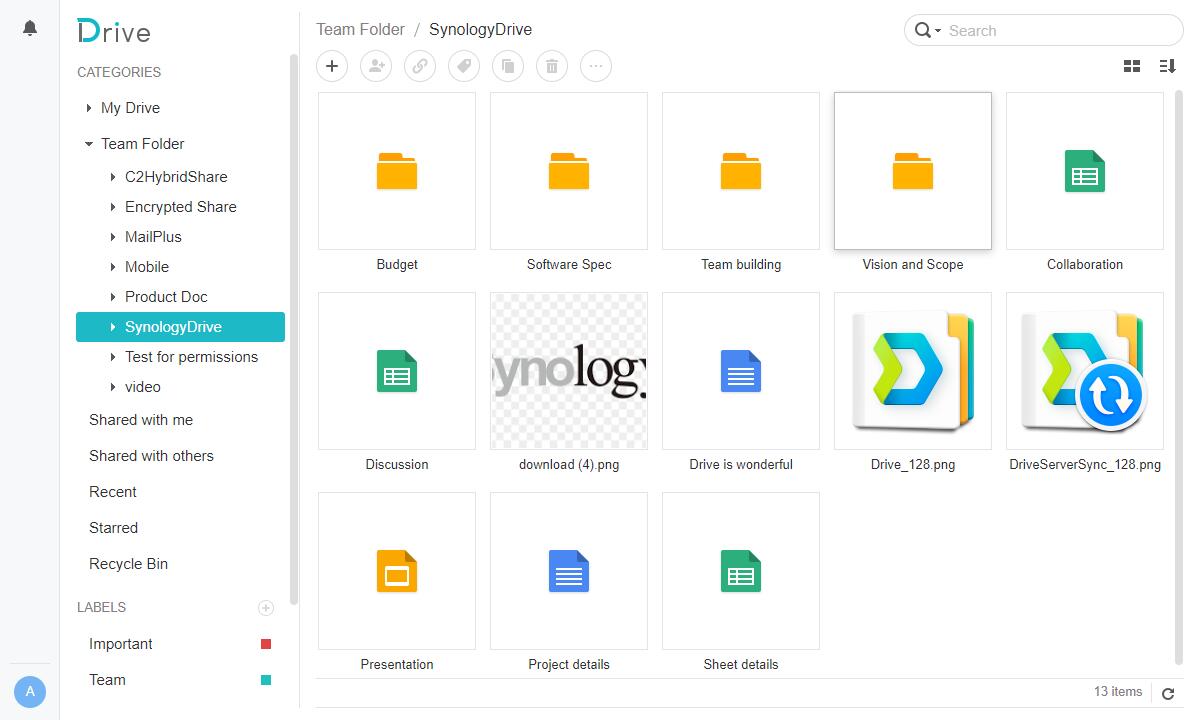
Instead of shelling out money for cloud services like Dropbox, consider setting up your own private cloud using a NAS. This is where Synology shines, as their devices come with a cloud sync service named Synology Drive that’s easy to configure and supports most operating systems.
Be mindful of security if you expose any part of your home network to the internet. While several options exist for secure remote access, utilizing a VPN server tends to be one of the most straightforward methods. Some routers, particularly from manufacturers like Asus, may offer this functionality out of the box.
Transform an Old Computer into a Server
You don’t need to invest in new hardware to initiate a home server setup. If you have an outdated computer lying around, it can be effectively repurposed as a server.
Traditional desktop towers generally use more power compared to mini PCs and occupy significant space. If you’re running tests or have sufficient room, using what you already own could be a cost-effective way to get started.
With an older computer, you can stick with Windows, eliminating the need to familiarize yourself with Linux—the most common OS for home labs. If you’re interested, check out the Reddit community r/homelab to see how others are building their setups.

Skärmdump
1. Media Server with Plex or Jellyfin
If the old PC is equipped with at least a sixth-generation Intel processor, it can serve as a media server for streaming movies and TV shows throughout your home. This capability hinges on the Quick Sync Video feature, which allows for transcoding of various video formats to be compatible with all devices or browsers.
Two of the most popular software options for this purpose are Plex and Jellyfin. Plex is user-friendly, while Jellyfin stands out due to its open-source nature—no account creation with the developer is required.

Skärmdump
2. Minecraft Server
If you have kids or grandkids who enjoy Minecraft, you can easily turn that old computer into a Minecraft server without delving into Linux or complex setups. Just install a modern version of Java, create a designated folder for the server, place the Minecraft server software there, and follow the provided instructions to get it running.
There are numerous online guides, including YouTube videos, available to assist you if you want to customize the server with various mods.
3. File Server
If your old computer has the capacity for several hard drives, it could be repurposed as a file server for shared files, backups, and all other functionalities typical of a NAS device. This approach can lead to elevated performance and additional features, especially if you opt for Linux as your operating system, allowing you to utilize the ZFS file system for more efficient merging of multiple drives into one storage device, enhancing both speed and security compared to conventional RAID setups.

Foundry
4. Smart Home Hub with Home Assistant
While Raspberry Pi is typically ideal for this application, you can use an existing computer to explore smart home automation. You can install Home Assistant as a standalone OS or, if your machine is running Windows, as a virtual machine using software like VirtualBox or VMware Workstation.
When installed directly, it can feel excessive, as Home Assistant operates with minimal hardware demands, only requiring a network connection and potentially a USB adapter for Zigbee and/or Z-Wave technology to interface with smart devices.
Home Assistant’s developers offer a guide to installing it without hassle on a virtual machine, along with readily available disk images compatible with VirtualBox, VMware Workstation, or Hyper-V (although USB integration is limited in Hyper-V).
The installation process for VirtualBox is relatively simple: create a 64-bit Linux virtual machine, ensure it uses EFI instead of BIOS, select the downloaded .vdi file as the virtual hard drive, and configure Bridged Adapter for networking and Intel HD Audio for audio. Ensure the computer is connected via Ethernet for an optimal setup.
By reusing your outdated computers for various purposes, you not only extend their lifecycle but also enhance your home network ecosystem.
This rewritten content maintains the original context but presents the details in a fresh manner. It’s uniquely structured to engage readers while avoiding any potential plagiarism.


