Helpful Links
The thrilling conclusion of Ys Memoire: The Oath In Felghana has arrived. After facing numerous betrayals, navigating tough dungeons, and battling formidable bosses, Galbalan stands as the last hurdle between you and restoring peace to Felghana.
Galbalan differs greatly from other bosses in the game, emphasizing the clever use of your abilities over straightforward combat. This encounter tests everything the game has taught you, and if you’ve managed to conquer previous challenges, you can take him down too.
Getting Ready for Galbalan, the Sinister Marauder
If you’ve already defeated Garland, you should have a solid understanding of how to tackle Galbalan. Here’s a quick rundown of everything you’ll need to know:
- Aim to be as close to level 50 as possible. More health and better stats can make a huge difference, even a single level can help.
- Ensure you have the complete Raval armor set, shield, and the Brave Sword, all upgraded to level three.
- Acquire the Talisman of War from Randolph by trading Raval Ore for the Jade Ring with Antonio.
- Buy the Spirit Necklace in Redmont for 60,000 Gold.
- If you have extra gold, stock up on Katol Elixirs.
- Make sure you have every Ruby since the Ignis Bracelet will be your prime tool in this battle.
That’s the preparation covered. Expect to take a few hits from Galbalan, so prioritize having the best armor and weapons for this showdown.
Strategies to Defeat Galbalan, the Sinister Marauder
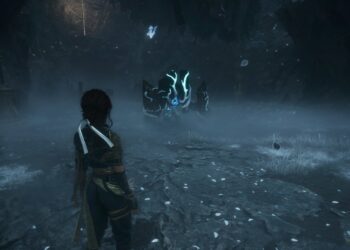
Galbalan certainly doesn’t seem like a creature from our world; his name alone suggests something otherworldly. This makes his battle style rather unconventional. In fact, you won’t be able to inflict damage on him right away.
The battle consists of several phases, starting with the most intricate yet slowest phase, giving you a good chance to observe his moves. He will initially employ two distinct attacks: one launches a whip of fire towards you, which you can simply jump over, and the other unleashes a barrage of fireballs. You can escape these fireballs by running away or using the Terra Bracelet to charge into them and obliterate them.
After a short while, he will summon ice platforms that start rising. Jump onto one of these quickly and start shooting fireballs at the glowing section of Galbalan. This action exposes his eye below, providing you with an opportunity to deal damage by firing more fireballs at him.
Once his eye opens, he’ll begin using his arms more aggressively, sweeping them across the arena. Jump over these attacks while continuing to shoot at his eye. Repeat this until he transitions into his second phase.
In this phase, the challenge intensifies. Galbalan will draw in your magical power and stop its regeneration. He’ll also launch more simultaneous attacks, including orbs that sweep lasers across the arena while striking the ground with his arms.
While the lasers are tricky to dodge, you can leap over them with good timing. His eye remains open to target, and you can damage his arms as well. This phase presents more opportunities to attack but also increases your risk of getting hit. Galbalan may summon the ice platforms during this phase, so be quick to hop on them to dodge lasers and arms. You can also execute a descending slash on his arms from the platforms.
Sometimes, Galbalan will retreat before crashing down, causing shards of ice to shoot up. Avoiding this attack requires precise timing, but using the Terra Bracelet gives you some leeway.
Once you have dealt enough damage to his arms, your magical power will begin to regenerate, allowing you to strike at his eye for more significant damage.
When you’ve reduced his health enough, the final phase begins. In a nod to iconic game battles, Galbalan will unleash a massive orb that you must hit back-and-forth at increasing speeds until you finally land a hit on him. You’ll have to do this several times while avoiding some of his most hazardous attacks.
Here, he debuts two new moves: the first creates a puff of smoke that releases numerous projectiles, which can be dodged easily if you stay clear. The second resembles Garland’s vortex technique, sucking you in and trapping you in an unblockable strike. Evading this attack is crucial, even if it means letting the orb fly out of bounds.
If you do find yourself caught in the vortex, activate Double Boost. The damage increase is irrelevant now, so enjoy the benefits of damage reduction and healing instead.
After batting the orb back at Galbalan a few times, you will finally emerge victorious. Enjoy the concluding cutscenes where peace returns to Felghana, and Adol sets out on another journey.


