The return of Verdansk in Call of Duty: Black Ops 6 Season 3 isn’t just about bringing back the original map; it’s also reviving some beloved weapons, equipment, and key contracts that players have missed.
As you navigate the map, you’ll discover a total of five contracts to complete. These contracts will reward you with cash, gear, and weapons, all of which are essential for quickly acquiring your loadout. If you’re unsure about the specifics of each contract and how to tackle them, this guide will help you out.
How to Complete the Scavenger Contract
You might already recognize The Scavenger Contract if you’ve played Warzone before. You can identify it on the map by the magnifying glass icon. Once you pick it up, your task is to find and open three nearby crates.
Fortunately, you won’t have to search for these crates blindly; they will be marked on your map with a yellow icon.
This contract is excellent for kickstarting a match since it grants players a substantial amount of cash, ideal for purchasing loadouts or UAVs, and ensures that you receive a guaranteed armor satchel for opening the final crate.
How to Complete the Recon Contract

The Recon Contract is marked by a flag icon and requires you to go to the designated area and stay there for a short duration.
This can be a tricky contract, especially since yellow smoke will signal your presence to all nearby players once you approach the objective, so tread carefully.
However, completing this contract rewards you with cash, loot, and more importantly, it reveals the next safe zone on your map with a yellow circle.
TIP 1: Having more players in the area will speed up the completion time.
TIP 2: You can complete several Recon contracts during a match to anticipate how the safe zone will change.
How to Complete the Bounty Contract

The Bounty Contract is represented by a hitman icon, and when you activate it, it targets a specific player from an enemy squad that you must hunt down and eliminate. To assist you, a yellow objective area will be marked on your map to help you pinpoint their location.
However, it’s not as straightforward as it sounds. The target will have an indicator showing how close you are:
- Yellow: You are far away.
- Orange: You are close.
- Red: You are right on top of them.
Keep in mind that sometimes the target can be far away, which might make it difficult to reach them if you’re well-equipped.
In some cases, you might not need to take out the target yourself. If another player eliminates the bounty, you will still complete the contract and earn cash for yourself and your teammates.
How to Complete the Supply Run Contract
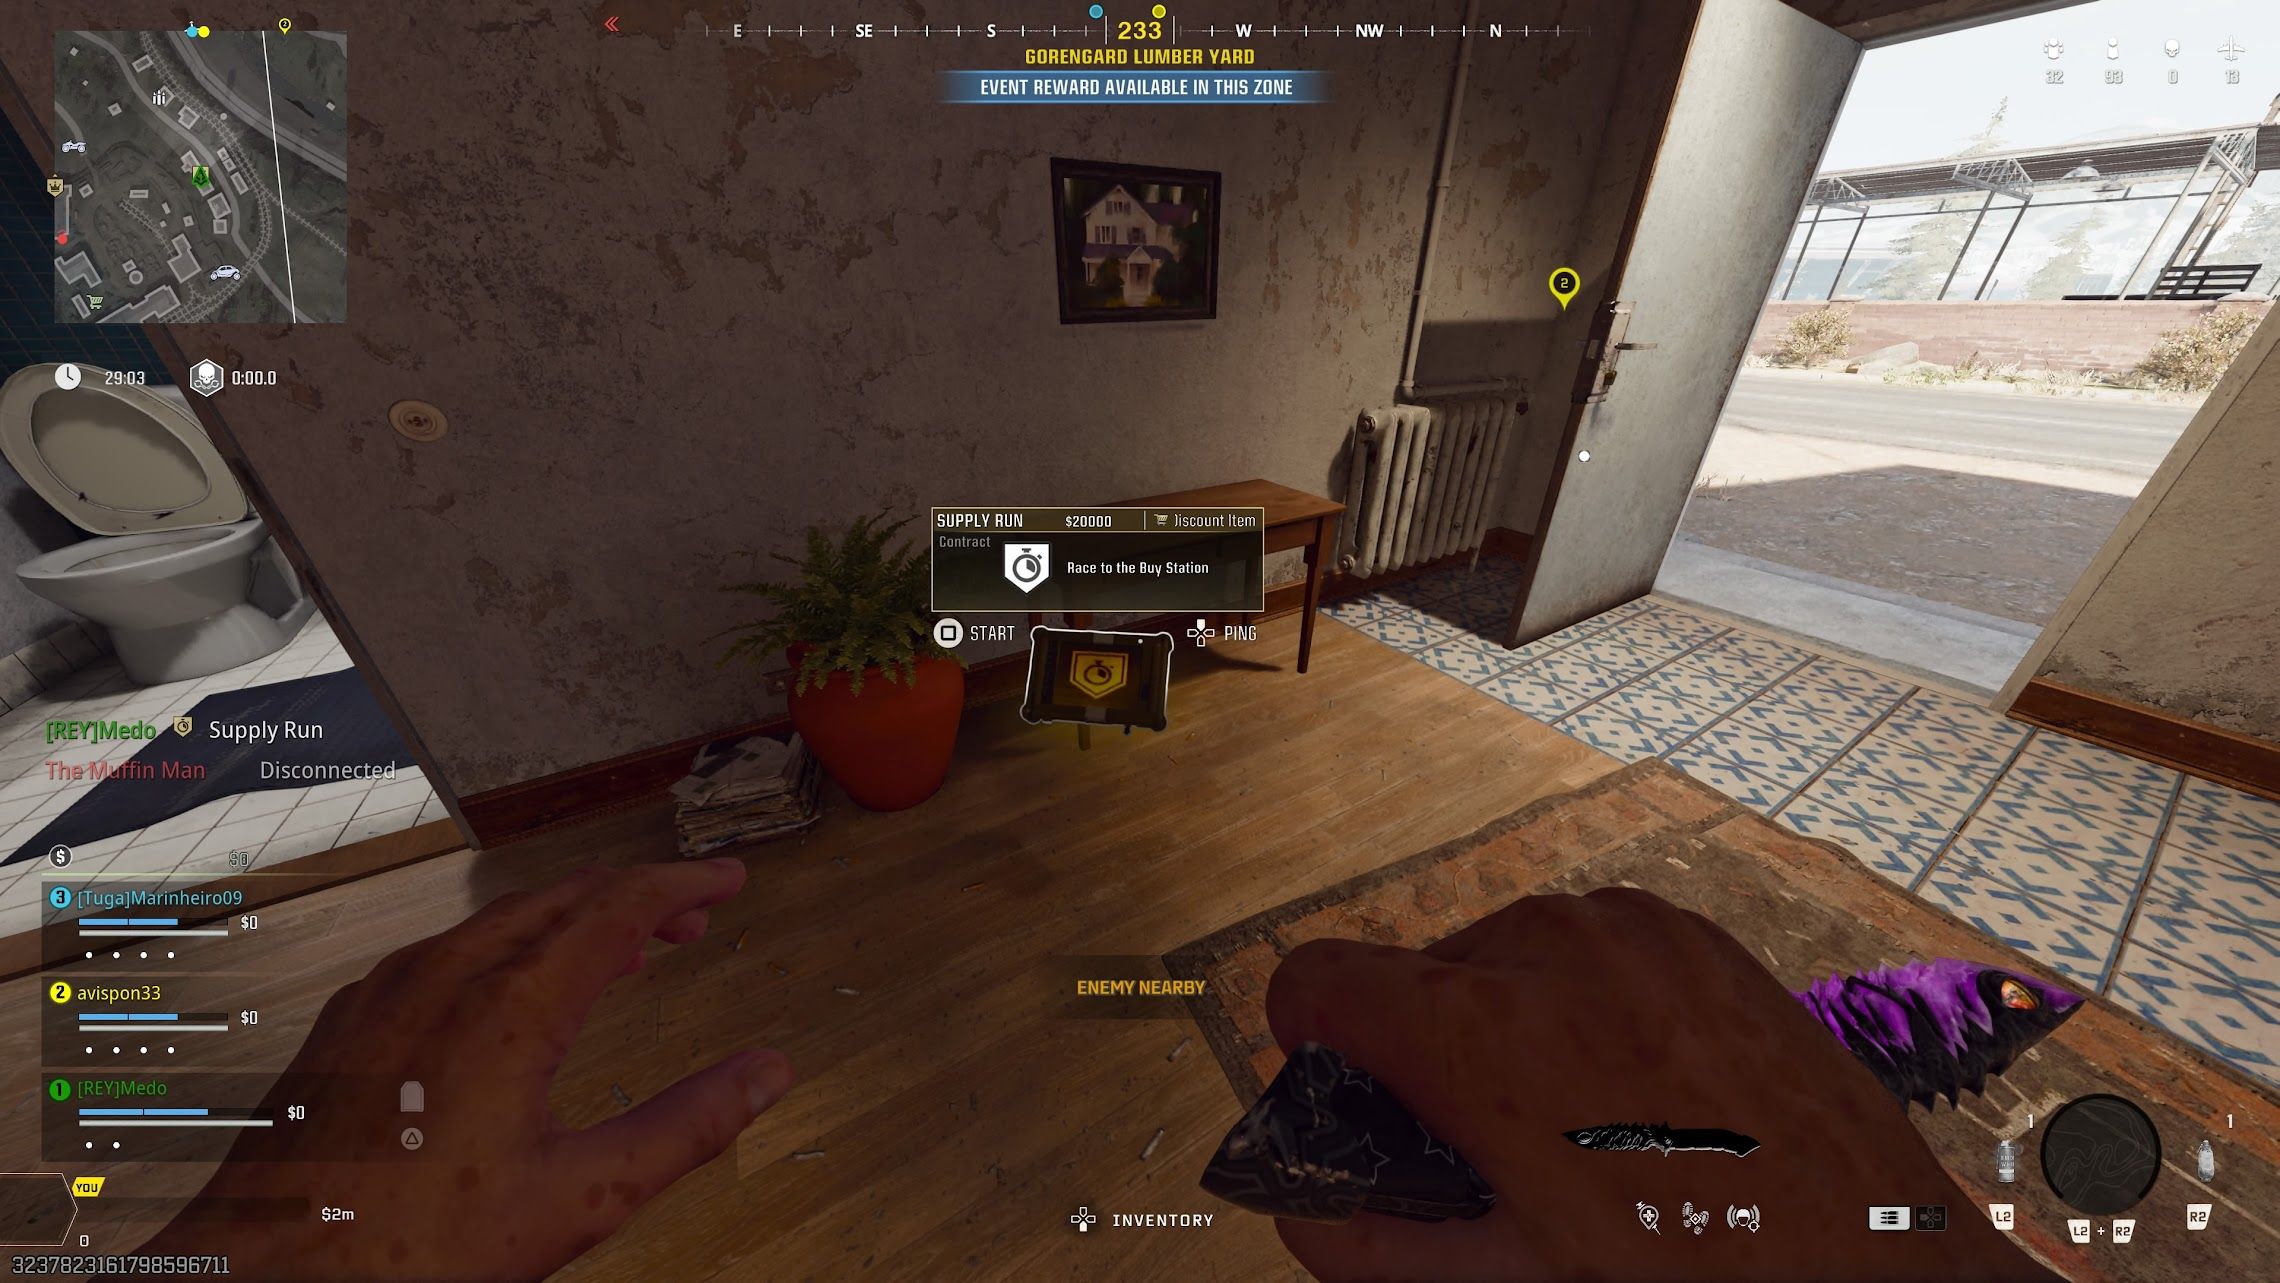
The Supply Run Contract, one of the classics from the original Warzone, is recognized by its timer symbol. This contract is among the simplest to complete, especially if you have a vehicle.
Once you accept it, a random shop will be highlighted on your map, and you must reach it within a limited time frame. Utilizing a vehicle can significantly speed up your travels.
This contract is perfect for reviving a teammate who failed in the Gulag, allowing you to bring them back for free. Additionally, your teammates will enjoy discounted prices at the store (excluding loadouts).
Alternatively, if a friend is in the process of redeployment, you can select the contract, and they can drop in on the shop to complete it right away.
How to Complete the Most Wanted Contract

The Most Wanted contract, identifiable by its crown icon, is a high-risk, high-reward option. This contract is ideal for when your squad is ready to engage in battle or if you find yourself as the last member remaining without enough cash to revive teammates.
Successfully completing it can yield a substantial cash reward and the opportunity to revive all of your fallen teammates.
As the name implies, you become the primary target for everyone in the match. You’ll be displayed on the map with a red crown icon, giving you four minutes to survive. So, if your squad is ready for action, you’ll want to accept this challenge.
For reviving teammates, it’s best to have a vehicle (like a truck or helicopter) and remain close to the edge of the map or near the gas to reduce your chances of being eliminated by enemies.
If you get killed, you’ll lose the contract. It’s vital to ensure your teammates protect you, and avoid rushing towards enemies carelessly.
Understanding the Contract Multiplier Feature

A noteworthy feature is the return of the contract multiplier for successfully completing consecutive contracts. The process works just like before. Every time you finish a contract, you earn a 30 percent cash bonus for the next one you complete, and this continues stacking.
However, there’s a cap at 150 percent, and this feature is available in both Battle Royale and Resurgence modes.
This is a great strategy for stacking multiple contracts early in a match, allowing for a faster setup with your loadout and UAVs. The multiplier remains active for the entirety of the game.