
In the last segment of the Stone of Madness campaign, titled "The Gate of Saint Jerome," you encountered Brother Pedro, a quirky character with an unusual obsession with chickens. He assigned you the task of locating three brown chickens but subsequently lashed out at the guards. True to his word, he rewarded you with the emblem of Santa Ana.
Now, in this chapter, your mission is to delve deeper into the monastery to find the missing emblem. During your journey, expect to meet enigmatic figures, experience eerie occurrences, and uncover a heartbreaking narrative. The atmosphere darkens as events unfold—are you prepared for what’s to come?
Finding the Crack in the Wall
Your first challenge in this chapter is to reach the inmate courtyards, situated south of the spot where Brother Pedro confronted the guards in the last chapter. You have two options for getting there:
- With Leonora, exit through the cellar door in the cells and drop a rope to climb down.
- Alternatively, descend the stairs, pick up a plank with Eduardo, and place it to bridge your way to the southern inmate courtyards.
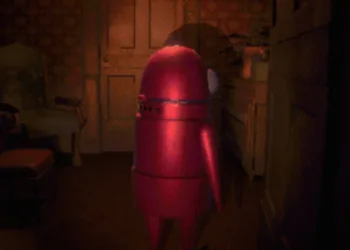
Once you’re in the courtyards, you’ll encounter Grimore. Keep your distance, as getting too close will affect your sanity. Climb the ladder located to the north and unlock the cellar door to open a shortcut. In the northwest corner, you’ll observe some inmates circling a column, leading into a cutscene.
On the wooden platform above, look for a crack where Brother Pedro tossed the emblem. Ascend the stairs south of where Grimore is situated, and head toward the wooden platform with a chest. Right next to it, you will find an iron gate. Use Eduardo or Leonora to open it, granting you access to Panecillo.
On the left side of Panecillo, press the button on the wall to clear the obstruction on the staircase leading down. Bring Alfredo here, ensuring he wears the priest outfit. Use his Investigate skill to trace the tracks and ascend the ledge. A button will appear above, and a hole will open below for Amelia to traverse.
Send Amelia through the hole and press the button above. This action will unlock the iron gate blocking access to the inmates moving around the northwest column. With a doctor among the inmates, you can safely explore and climb the wooden platform.
Once you’re on top, interact with the eerie blue eyes in the crack. This will introduce you to the Shadow, also known as Maria, updating your objectives.
Where to Find Shadow’s Gifts
The Shadow will request that you locate two gifts: a music box and earrings. After gathering these items, you’ll need to return to Shadow.
Finding the Earrings
The earrings can be found in the refectory. In the northern section of the dining hall, look for a rose window adorned with mosaics above. You can reach it with Leonora by either climbing the vines outside or using an already positioned ladder inside the building.
Additionally, to see the wooden platform appear in front of the mosaic window, you must press the button in the area where the soldiers are playing cards on the upper floor.
Once you’re set, break the window with Eduardo or Leonora, causing the earrings to tumble down along with shards of glass. Then, with Alfredo dressed as a priest, retrieve the earrings from below.
Finding the Music Box
To locate the music box, head to the Cells area and approach the western cells marked with a gargoyle. Your character will notice that the music box is broken. If the door remains locked, use Eduardo or Leonora to unlock it while distracting the guards outside. After acquiring the broken music box, make your way to the Inmate Courtyards.
Head to Panecillo in the southwestern section of the area where you previously pressed the button with Amelia. You’ll need to purchase Music Box Parts for 150 coins. If you’re short on funds, sell some valuables at night using Leonora’s Black Market skill before returning to Panecillo.
Once you obtain the parts, wait until nighttime and use Eduardo to repair the music box. Eduardo will also require 20 units of Wood for the repair. If you lack enough wood, search the area or buy some from Panecillo.
Returning the Gifts
Now, travel to The Great Wall area, where Shadow will be waiting for you in the dark section beneath the wall. A cutscene will guide you to your destination. Use either Eduardo or Amelia to enter Shadow’s area.
To conserve resources, have Amelia crawl through the hole outside the wall to reach Shadow. Keep in mind, Shadow only appears after sunset. Hand over the gifts to Shadow to complete this task.
Confronting Mother Superior
Your next goal is to face Mother Superior. She is located in the Cells area, moving about the central hub where the inmates gather. What happens next is entirely up to you. Remember, Shadow is waiting in the basement of the building where Brother Pedro confronted the guards previously.
To access this area, retrace your steps to Brother Pedro’s location in the last chapter and activate the switch on the roof. Then, enter through the iron gates on the right side of the map and locate the key to Shadow’s area.
If you opt to eliminate Mother Superior, you’ll need to be patient for the ideal moment and take out the guards stationed nearby first. Once she is taken care of, you must bring her to Shadow. However, be aware that there are many guards in your path, making this method quite challenging.
An alternative strategy is to dress Alfredo in the priest outfit and have him converse with Shadow. Wait for sunset, and then ask Shadow to forgive her sins. Following this, enter Mother Superior’s office, which is near Panecillo.
If you haven’t already obtained the key, it’s located in the Inmate Courtyards, where the inmates are circling a pillar. The key is suspended above the pillar, but obtaining it will likely require dealing with the guards first, so be prepared for that.
Once you have the key, enter Mother Superior’s office and handle the guard inside. Proceed to the second floor of the office, unlock the door with a lockpick or crowbar, and you will find the Evidence of Immurement beneath one of the floor stones in Mother Superior’s office.
Return to The Cells and present this evidence to her. Doing so will prompt Mother Superior to mention the Old Storehouse. Return to Panecillo’s location and press the button on the wall next to him; this will remove the iron barriers leading to the Old Storehouse beneath the garden. Then, distract the guard in front of the Old Storehouse and unlock the door using a lockpick or crowbar.
After unlocking the storehouse, have Eduardo break through the wall using a crowbar, leading you to the Immurement Cell. Inside, you’ll find the corpse with Baby’s Toy. Wait until midnight, then present this toy to Shadow. In either scenario, Shadow will vanish, leaving behind an engraving. Interact with it to accomplish your objective and wrap up this chapter.


