
Our Helldivers 2 tips and tricks are designed for both newcomers and experienced players eager to dive into enemy territory after stepping out of their drop pods. While Helldivers 2 continues to evolve, some fundamental strategies and advice for combat remain timeless regardless of the galaxy’s current state. With that in mind, here are our top ten tips for diving into Helldivers 2 — straightforward and validated by the authority of accuracy.
1. Reloading Discards Ammo
You’ve probably faced this reality already, but it’s crucial to remember: any remaining ammo in your magazine is lost when you reload. This realistic mechanic might take some getting used to, especially if you tend to reload frequently. Before hitting the reload button, ensure you’ve fired as many rounds as possible. Some weapons, like the Railgun, Senator Revolver, and Punisher shotgun, allow for single-shot reloading, which circumvents this issue.
2. Teamwork is Key
Considering the tough missions, going solo in Helldivers 2 isn’t recommended. Collaborating with your teammates is essential — friendly fire is always enabled. Stick together, communicate your status, and coordinate your Stratagems. Use spare support weapon Stratagems to share firepower, inform teammates about air and orbital strikes to prevent friendly casualties, and use health stims to keep your allies alive while optimizing your backpack weapons for maximum damage.
3. Sync Up with Your Squad’s Builds and Stratagems
Beyond cooperating during missions, you should also coordinate your weapons, Stratagems, and boosts. Helldivers 2 doesn’t strictly follow a class system, so it’s smart to adopt roles similar to those in squad-based shooters. For instance, designate a heavy with anti-armor weapons and robust armor, a technician to deploy sentries, or a support role focused on supplying and protecting teammates.
You can benefit from doubling or tripling the same offensive Stratagem against a strong boss, but balancing your options is key. Missions involve different objectives, requiring a mix of high-damage devices, area-control sentries, and supportive gear to ensure success.
4. Utilize Your Stratagems
Since every player can call in at least four Stratagems, keeping track during intense battles can be complicated. However, making it a habit to use them effectively can significantly change your combat experience. Choose Stratagems that suit your playstyle and are impactful. It’s beneficial for everyone to bring at least one support weapon Stratagem, activating it right after landing for an immediate boost in firepower.
5. Customize Your Weapon Settings
Many weapons in Helldivers 2 come with additional features you can adjust. By holding the reload button (Square on PlayStation), you can toggle settings like fire modes and flashlights. Basic guns like the Liberator assault rifle and Defender SMG can have their firing modes changed, while support weapons can also be fine-tuned for different effects, such as the variable rates of fire or the explosive potential of the Railgun.
6. Stance Affects Accuracy
Your weapon’s accuracy hinges on how your Helldiver is positioned. Moving while standing significantly reduces accuracy, while crouching or lying prone offers the best aim. Yet, it’s crucial not to stay still against an impending swarm; the appropriate approach depends on the scenario. Close-quarters fighting might require hip-firing with an SMG, which trades accuracy for mobility, allowing you to dodge damage while engaging multiple foes.
7. Beware of Enemy Resistances
The two primary enemy factions in Helldivers 2 — Terminids and Automatons — differ greatly regarding vulnerabilities to specific damage types. Fire is effective against the insect-like Terminids, while energy and laser weapons are ideal for taking down the mechanical Automatons.
Be mindful of your enemy’s armor, as heavily armored units from both factions can be challenging to eliminate without the right firepower. Check Stratagem and weapon descriptions in your ship management or Armory to determine their armor penetration effectiveness.
8. Monitor the Minimap for Ambushes
Access the minimap at any point to mark locations and spot approaching enemies. This tool is invaluable during operations like Extractions, where threats can emerge from all directions. Familiarize yourself with glancing at the map for a better situational awareness in combat.
9. Take on Side Objectives
Higher difficulty missions usually feature at least one side objective, marked in blue on your map, with more potentially hidden. Completing these tasks not only nets you extra XP and Requisition Slips (barring any glitches) but can also provide advantages for the mission. For instance, capturing a Radar Tower reveals a complete map view, while SEAF Artillery offers artillery strikes in line with your loaded ammunition.
10. Mix Missions for Ship Upgrades
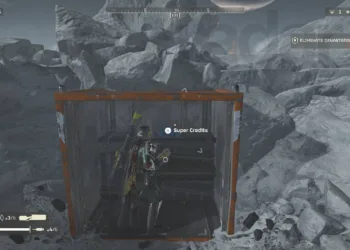
While progressing to challenging missions is important, returning to easier ones is equally vital. The difficulty level impacts the types of special Samples available, but since you’ll need many common Samples for upgrades, it’s wise to periodically revisit easier missions to maintain your stockpile.


