The Gate of Saint Jerome campaign in The Stone of Madness kicks off with you delivering the Stone of Madness to Panecillo. Panecillo is quite an eccentric figure, yet he hands you a key. As you try to determine what this key unlocks, you stumble across a series of engravings.
These engravings tell the story of an engineer who once lived in this area, detailing his escape attempts and sharing his experiences. Could this engineer be Panecillo or someone close to him? Regardless of the truths you uncover, your main goal is to escape this strange environment.
Finding Tia Del Nido
The first step in the Gate of Saint Jerome campaign is to hand the Stone of Madness to Panecillo. He will give you a uniquely designed key. You start the journey in a place called ‘Cells’ with your teammates, Eduardo and Alfredo. Begin by heading north to where Agnes is sitting. Nearby, you’ll also find an Oil Lamp, essential for Alfredo’s investigative abilities.
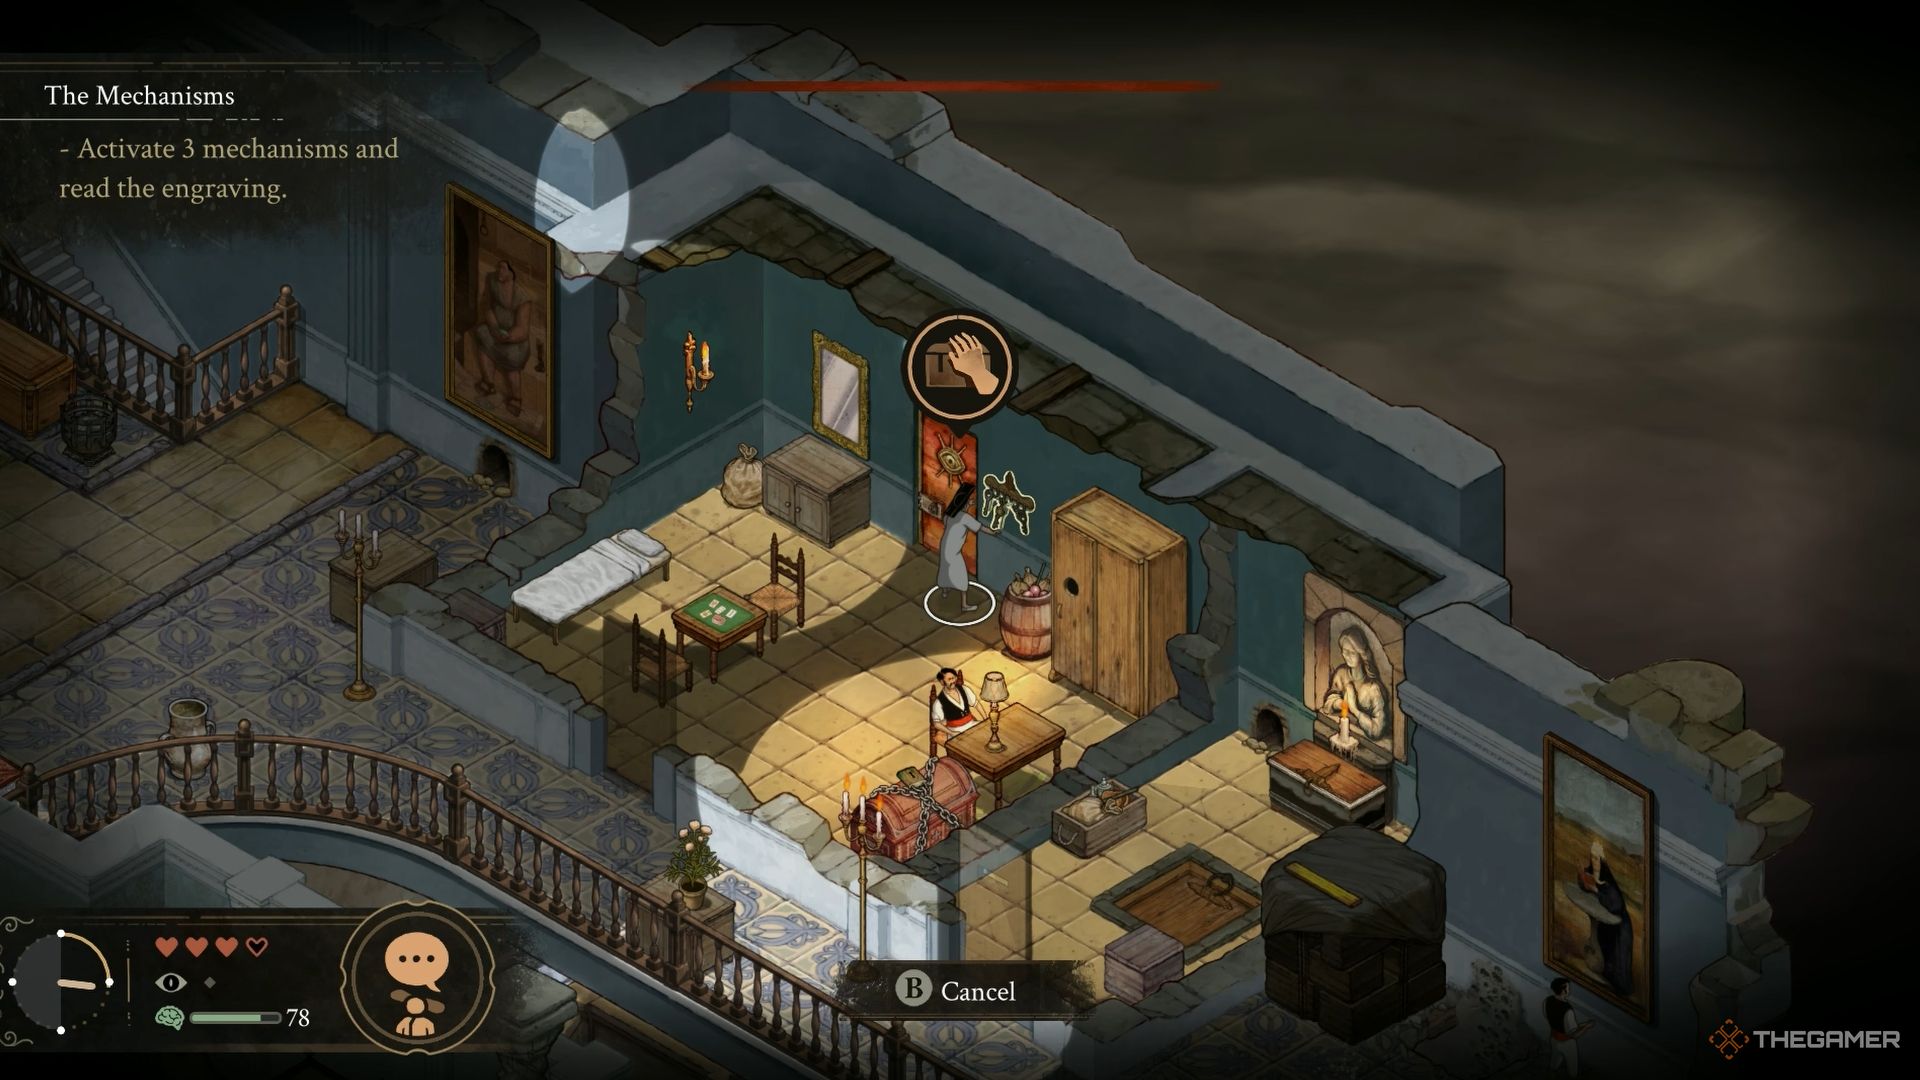
When you talk to Agnes, she will request you to fetch her glasses, which are located just outside her sitting area, to the right of the iron fence. If you follow the footprints near where Agnes was sitting using Alfredo’s investigation skill, you will find a room that contains a key hidden behind a painting.
This key is known as the Garden Key, which you can then use to retrieve Agnes’ glasses. After collecting the glasses, your character will need to hide behind some hanging laundry as someone approaches. Next, head north from your current spot. Use the key given by Panecillo to unlock the stable, leading you to your next encounter with Tia del Nido.
Locating the First Engraving
If you haven’t yet done so, take Eduardo to Tia del Nido and have him move a large crate in the stable. Then, with Alfredo, follow the golden trails in the stable using his investigative skill. By checking the area where the crate was located, Alfredo will uncover a crack in the door. Behind it lies an engraving that you should read with Alfredo.
Once you’ve examined the first engraving, Agnes will arrive, and you can return her glasses. This concludes your day, but make sure to gather any supplies before wrapping it up, as a challenging campaign awaits you.
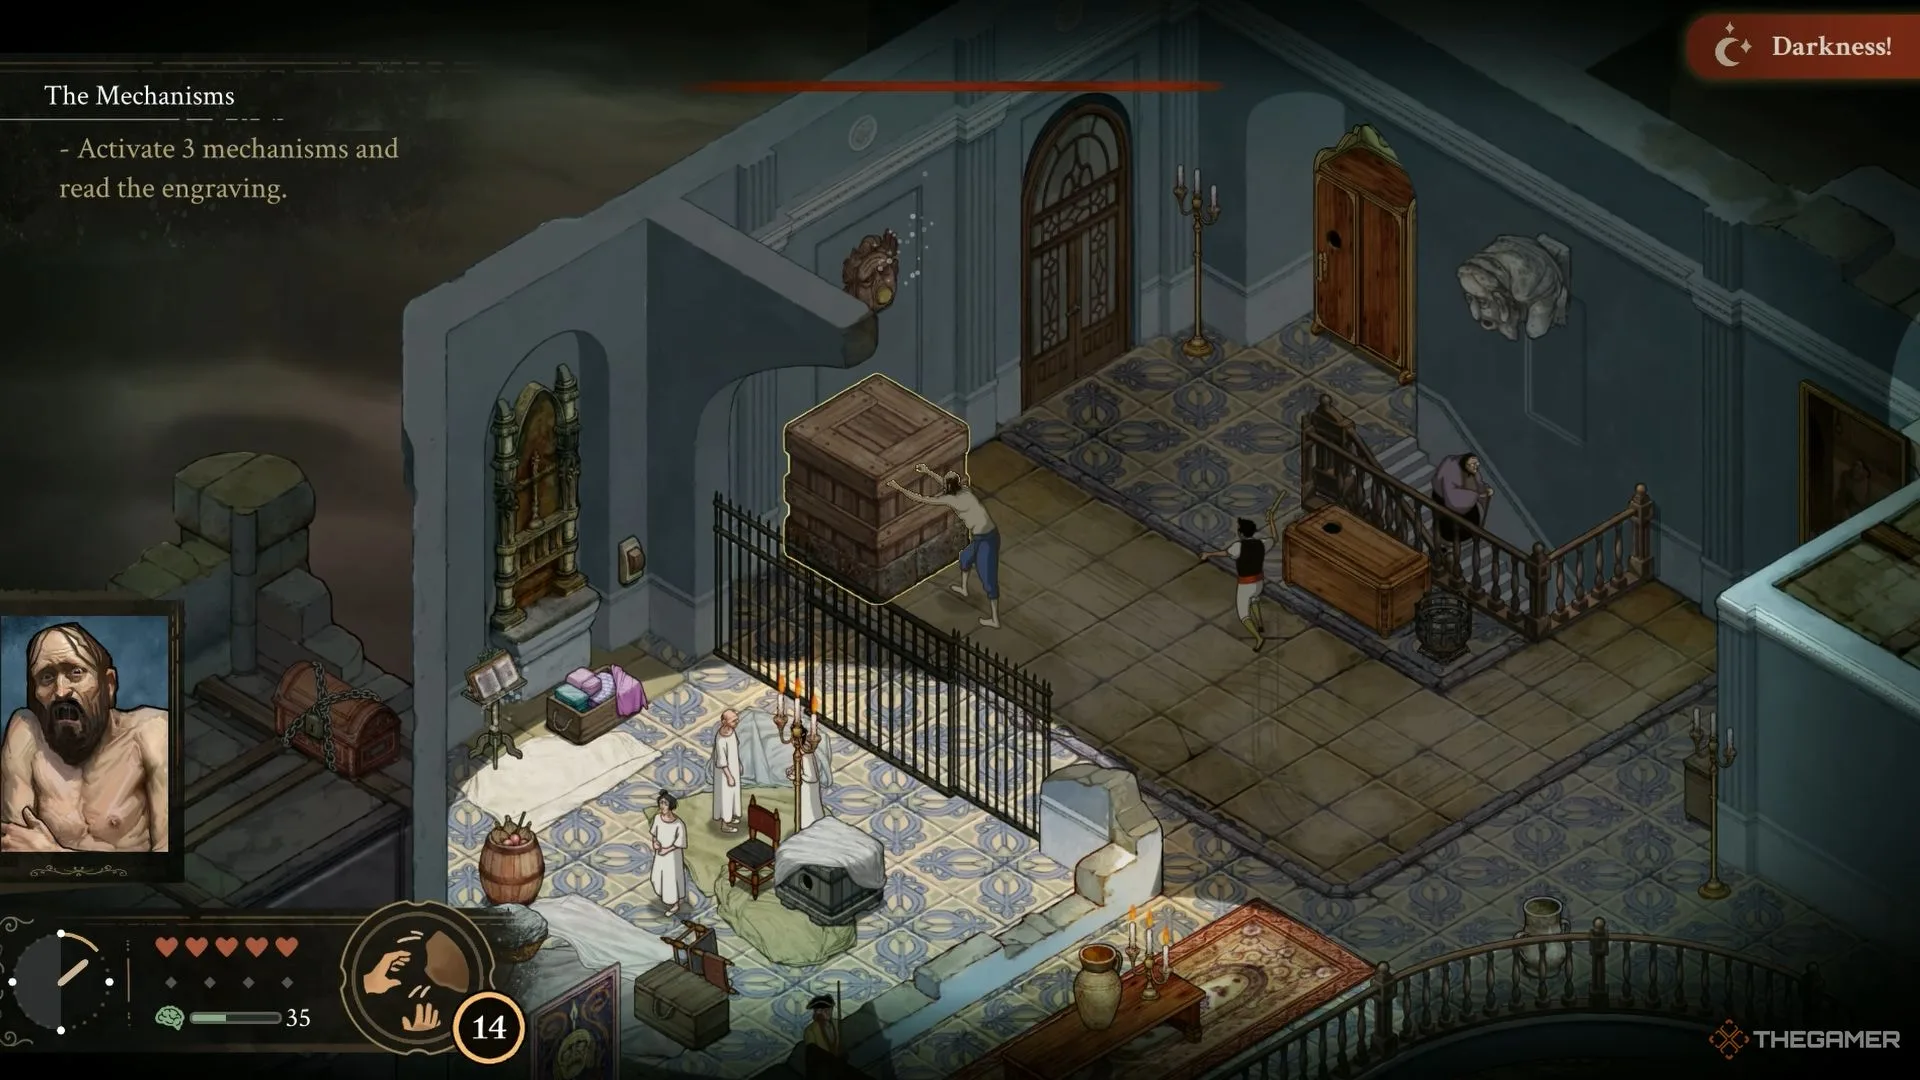
Finding the Three Mechanisms
The next day, you need to activate three mechanisms to discover another engraving. Start by going to the second floor via the stairs located south of the Martyr statue. Check the cabinet with the candles to find an old crowbar. Hand this crowbar over to Eduardo. Then, use Eduardo to open the Scroll Archive door while Alfredo distracts the guards with his Sermon skill.
In the room with the monk, steal the key hanging on the wall to obtain the Apothecary Key. You can then use this key on the second floor to unlock a room where you can interact with the statue next to a large wardrobe. You still have two mechanisms to activate.
If you head north and go up the stairs, a cutscene about the Pianist will be triggered. Afterward, you’ll notice another mechanism on the wall, but beware: guards are patrolling this area. Utilize Agnes’s Evil Eye skill to distract them, and have Eduardo push a large crate toward this wall mechanism.
The Doctor will visit this location in the evening, which could work to your advantage.
In a mirrored area to the west on this floor, you will find the Luxury Cell Key and the Cell Tower Key. The Cell Tower, located on the western side of the map, leads you to the third floor, but be cautious—the area is guarded. Use Agnes’s Evil Eye skill to incapacitate the guard.
Additionally, there is a cellar door in the easternmost room on the second floor; be sure to unlock it if you want a shortcut.
Directly across from the room where you found the Luxury Cell Key and Cell Tower Key is a room guarded by an armed soldier—a room belonging to the Pianist. Tread carefully to avoid detection. Next to the Pianist’s bed lies the final mechanism. Interacting with it will cause a new engraving to appear on the upper floor of the Cell Tower.
If you trace the footprints in the Pianist’s room using Alfredo’s investigation skill, you can discover a door that leads to the inmates’ cell outside. Check the basket in front of the statue in this area to find Priest Robes, which are crucial for Alfredo’s key skill. You’ll also discover an egg in the inmates’ cell.

Next, head to the Cell Tower. With Alfredo leading the way, follow the trails on this floor to find a crack in the wall where a magnifying glass awaits. This item enhances Alfredo’s investigation speed. Again, use Agnes’s Evil Eye skill on the guard, close the window with Agnes, illuminate Alfredo’s oil lamp from below, and have him read the engraving on the wall.
After reading, Amelia will approach, and the day will end automatically, unlocking her as a character.
Locating the Final Engraving
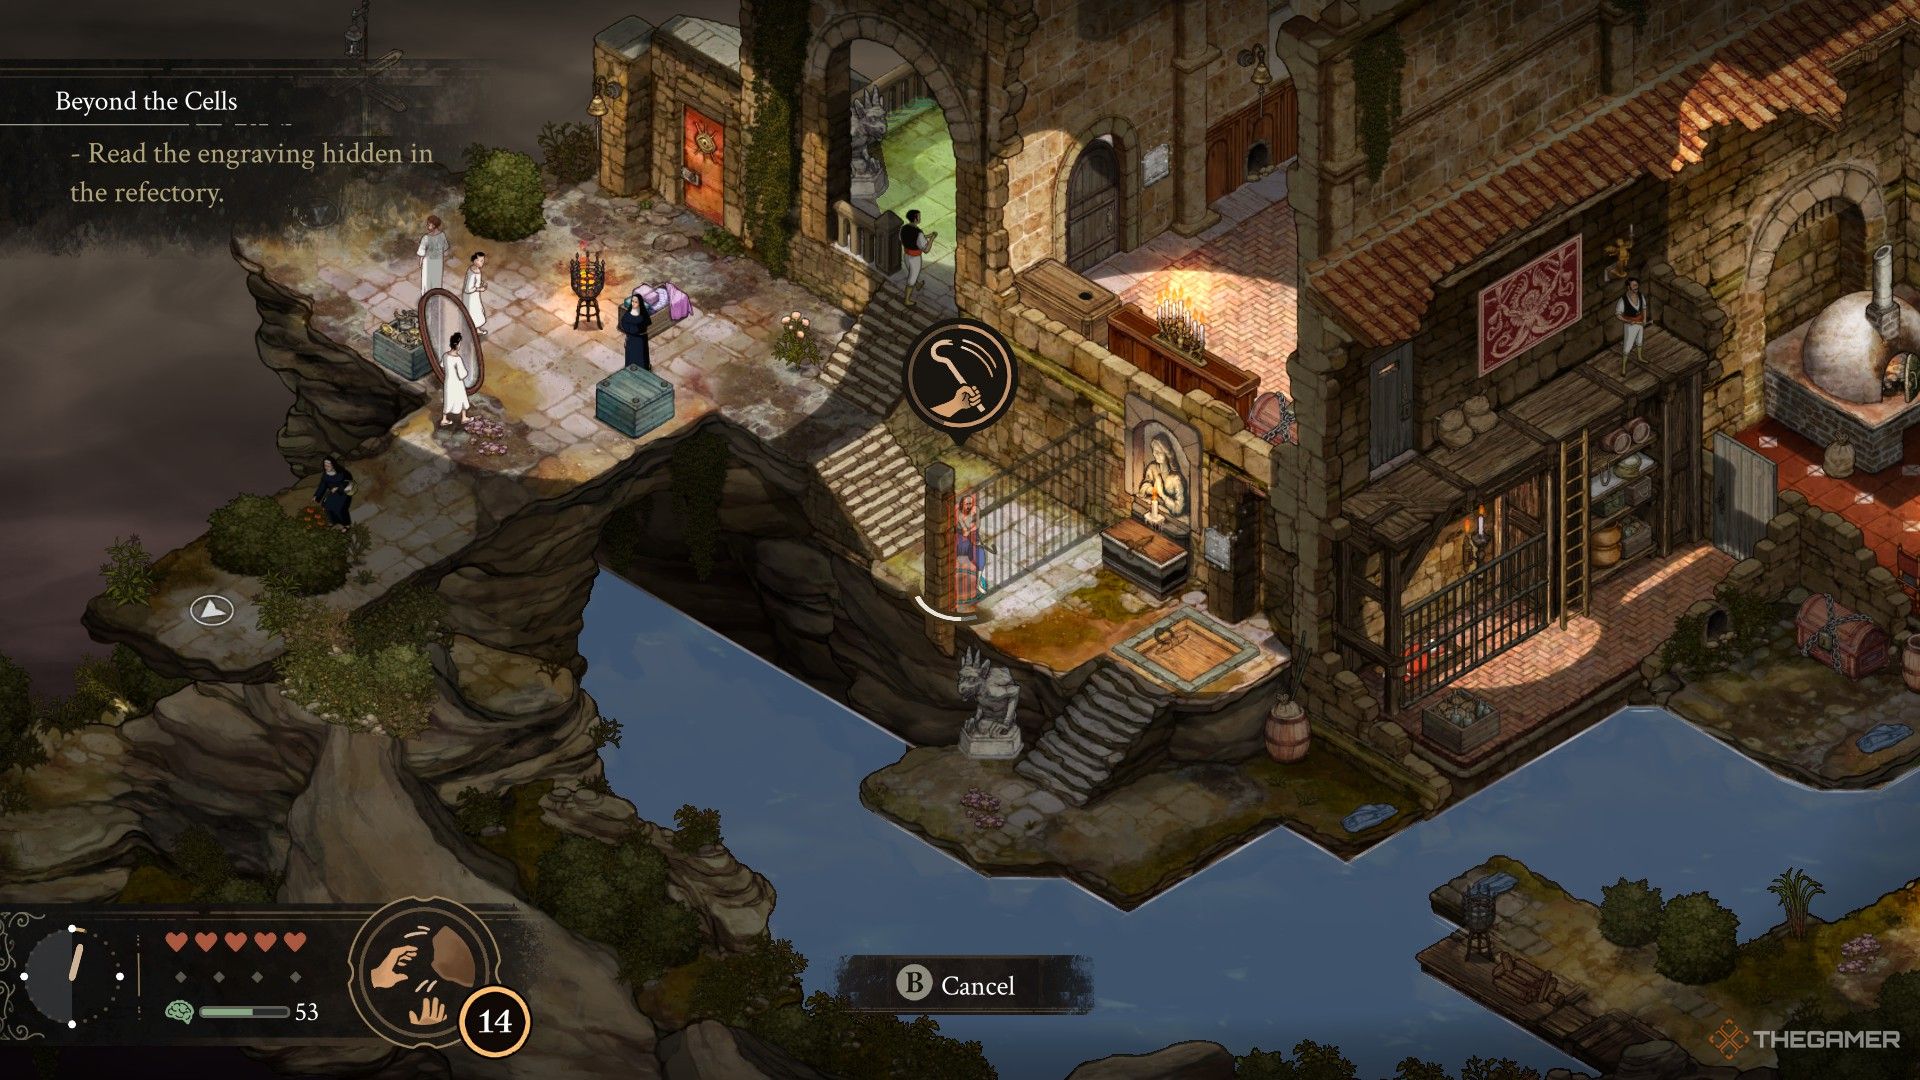
You can now access the Refectory located in the western part of the Cells, close to the large door near where you discovered the first mechanism. Begin your exploration by unlocking the cellar door at the entrance—use a crowbar with Eduardo. Your top priority in this new area is to rescue Leonora. Wait until nightfall and enter the dining hall with Eduardo.
Don’t forget, there’s an egg hidden inside the locked chest to the south of the dining hall.
Use the crowbar to pry open the door above Leonora’s holding room. Then, apply Agnes’s Evil Eye skill on the guard stationed outside and lure him away. After incapacitating the guard, head down to free Leonora. You will need to ignite the angel statue on the wooden platform above her cell, where the guard used to be standing, in order to unlock the bars trapped around her.
Next, take Eduardo to the River Bank cellar door you just unlocked. Grab one of the planks outside the dining hall and carry it to reach Tia del Nido. If you offer her two eggs, she will disclose that the engraving is concealed beneath a red rug. Read it with either Leonora or Alfredo to wrap up the first chapter.
If you don’t have any eggs, go to the northernmost part of the dining hall. You can easily access it by dressing Alfredo in priest robes. Afterward, retrieve the Kitchen Key from the upper left section. Follow the tracks on the second floor of the kitchen and descend to the lower level.
In the final clues, a book will reveal that the last engraving is hidden under the red rug on the left side of the dining area.


