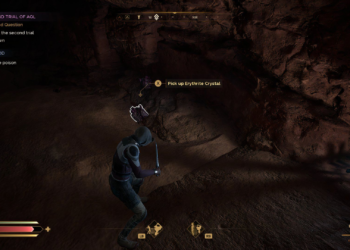
In Sniper Elite: Resistance, your firearm is your most vital asset. While it serves as your defense against the Nazis and helps thwart the Kleine Blume initiative, it’s essential to keep it in top shape by discovering various upgrades throughout the levels.
By unlocking workbenches, you’ll gain access to enhancements for your rifle, SMG, and pistol. These modifications can make your weapons quieter, increase their damage, lower recoil, or even enhance their firing rate. To create your optimal loadout, ensure you locate all three workbenches during each mission in the campaign.
Navigating the Map
This guide refers to directions as up, down, left, and right rather than north, south, west, and east. This approach is necessary because the map isn’t aligned to geographical north, unlike the minimap in the corner of the screen.
Behind Enemy Lines
In your first mission, Behind Enemy Lines, there is only one workbench, conveniently located directly in the mission’s main route.
Pistol Workbench
After pressurizing the dam, enter the barn and break down the wooden planks to your left.
This workbench is the sole one found in this mission.
Dead Drop
The pistol workbench in Dead Drop can be one of the hardest to locate in the game because the entrances to its tunnel can be very easily overlooked. Fortunately, the other two workbenches are easier to find.
Pistol Workbench
Head towards the northeastern section of the city. From the walls, you will see a tunnel leading underground. Enter the tunnel and unlock the gate to reach the workbench.
SMG Workbench
To find the SMG workbench, pick the lock on the gate located in the inner courtyard of a large castle. This courtyard can be accessed from both the main courtyard and a quieter garden area, offering a stealthy entry.
Rifle Workbench
Look behind the building in the bottom left corner of the map for stairs that lead to the first floor. Dispatch or sneak past the soldier and Gestapo agent, then unlock the gate that leads to the workbench.
Sonderzuge Sabotage
In Sonderzuge Sabotage, the workbenches are relatively easy to access despite the map’s intimidating size. Start by grabbing the SMG workbench, then move across the larger bridge to collect the pistol bench, and finally head to the wharf for the rifle bench.
Pistol Workbench
Located in a smaller building with a green roof and green interior walls within the train station. Unlock the gate and go upstairs.
SMG Workbench
On the south side of the river, enter through the lit blue door where a Gestapo officer and a soldier are present.
Rifle Workbench
At the wharf on the opposite side of the river, near the Claude La Ronde Kill List objective, you’ll find a well-lit brick building that houses the rifle workbench.
Collision Course
Unfortunately, the workbench you accessed at the dam in the previous mission, Behind Enemy Lines, has been removed. In Collision Course, you will find three new workbenches in different locations.
Pistol Workbench
Upon entering the abandoned village, climb the vines to reach the top floor of the resistance building and enter through the open window.
SMG Workbench
In the train station, unlock the gate and descend the ladder, which is found on the right wall of the large room.
Rifle Workbench
Devil’s Cauldron
The Devil’s Cauldron map presents navigation challenges with its multiple levels and large cliffs. Accessing all three workbenches is quite difficult, especially since one is very close to the main objective of the mission.
Pistol Workbench
Inside the Kleine Blume production facility, this workbench is located behind a locked door. You can either obtain the Factory Armoury Key from a nearby officer or use a satchel charge to access it.
There’s also an air vent in the adjacent room that leads into the workbench area if you can crawl through.
SMG Workbench
From your starting point, continue up the road and take the first right to find a path leading to a tunnel. The workbench is just through the door directly ahead of you.
Rifle Workbench
You’ll find the rifle workbench by picking the lock on a door in the church, then heading down the stairs. Remember to look for the propaganda poster on the church’s exterior wall.
Assault On Fort Rouge
To secure all three workbenches in Assault On Fort Rouge, you’ll need to progress through most of the mission, with the rifle bench located near the finish.
Pistol Workbench
On the grounds of the church by the town hall, look for a large brick shed. Unlock the door to find the workbench inside.
There is an optional objective in the church, so take care of that while you’re there.
SMG Workbench
In the central-right area of the city, navigate through the bombed-out structures to find stairs leading underground. You might need to blow the door open with a satchel charge or pry the planks loose, depending on your chosen entrance.
Rifle Workbench
Within the fort, there is access to the underground Kleine Blume storage facility. Explore a side corridor off the main warehouse, where you can either blow open the door or unlock it with a key from a nearby officer.
Lock, Stock, And Barrels
All three workbenches in Lock, Stock, And Barrels can be found without entering the mansion if you start at the Western Farmhouse and move clockwise around the map.
Pistol Workbench
Just beside the V1 rocket launch site is a bunker with a green ladder. Climb it and go through the door to access the workbench.
SMG Workbench
In the brick barn on the far right of the map, next to the Western Farmhouse starting area, climb the ladder to find the SMG workbench.
Rifle Workbench
In the bottom right corner of the map, ascend the vines on the watermill building and enter through the window. This area also features a Propaganda mission poster.
End Of The Line
The final mission, End Of The Line, is among the most extensive in the game. Thankfully, its workbenches are positioned in a relatively straight line, allowing you to reach each one as you advance through the mission.
It’s worth noting that the actual final mission, All Or Nothing, has no workbenches.
Pistol Workbench
In the more rural lower half of the map, discover an abandoned resistance facility. Climb the vines and shimmy across to reach the top floor, then descend the ladder into the barn for the workbench.
SMG Workbench
In the upper left part of the map, there’s a medium-sized warehouse with internal walkways. Climb up and follow the path to find the workbench at the end of a long room.
Rifle Workbench
Inside the large train station in the map’s center, proceed to the second floor and either unlock or blow open the door located in the right corner.


