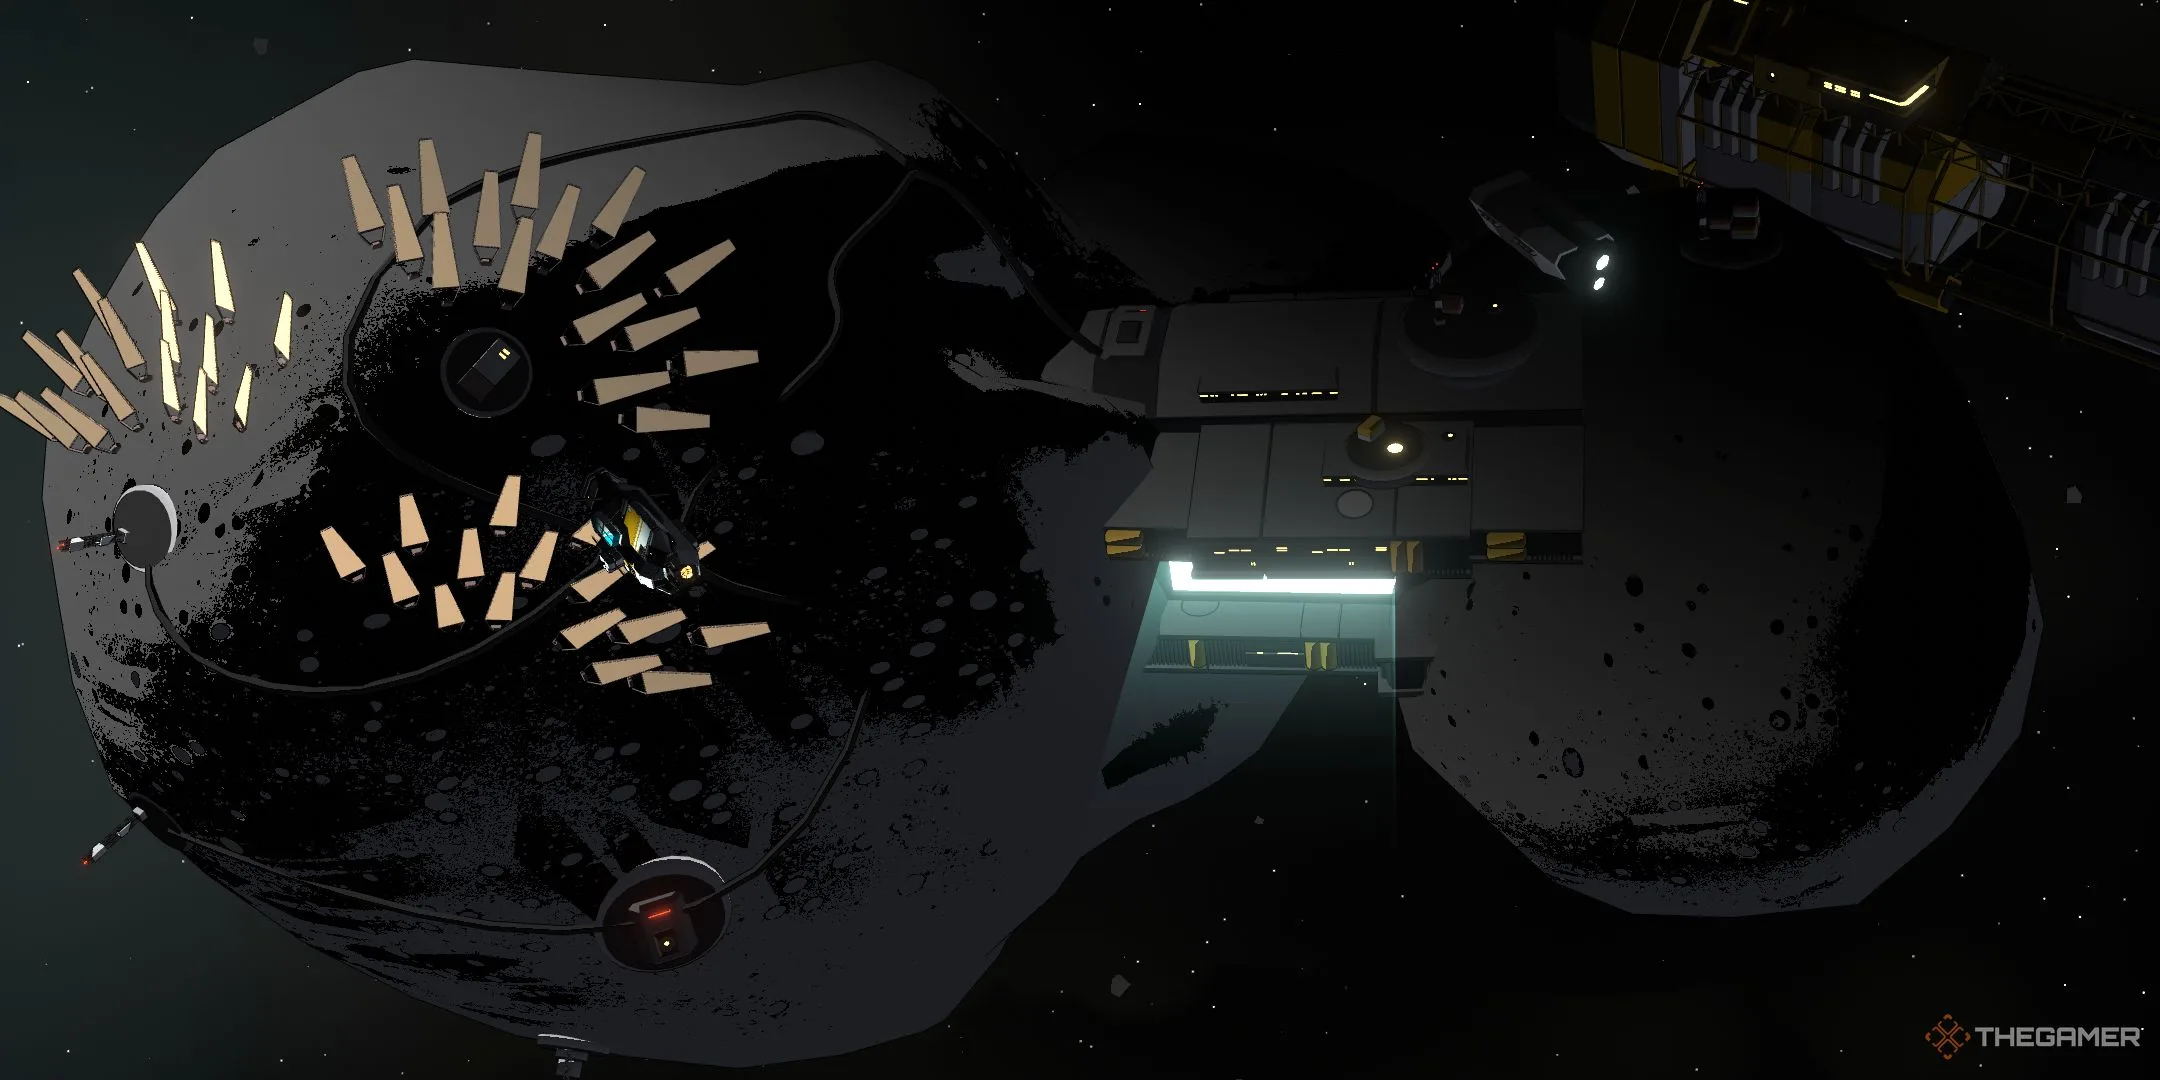
Holm’s Rock is one of the vibrant space stations in Citizen Sleeper 2: Starward Vector. It provides the standard facilities, plus some unique features specific to its massive rock structure. This is your first chance to utilize the Solheim Data sticks you’ve likely gathered, transforming them into valuable Rare Components.
While you’re at Holm’s Rock, you can also get the coordinates for a Solheim Bunker, which is tied to another contract. This guide will walk you through what to expect at the Holm’s Rock space station and the related Solheim Bunker contract.
Holm Terminus
To access all that Holm’s Rock has to offer, you’ll need to complete Holm’s Terminus’s objective: "No Place Like Holm." Keep in mind that most items at Holm’s Rock are expensive. It’s best to only buy what you truly need and to hold onto your Engine Components unless you really need extra cash.
Here’s a summary of your options at Holm’s Terminus:
| Location | Options | Type/Cost | Risk Level |
|---|---|---|---|
| Holm’s Terminus | Barter With Locals | Engage | Risky |
| Explore The Tunnels | Endure | Risky | |
| Lotic Freighter | Buy Fuel | 6 Cryo | – |
| Fill Fuel | 60 Cryo | – | |
| Help Offload Freight | Endure | Risky | |
| Senna’s Rest | Buy Supplies | 20 Cryo | – |
| Fill Supplies | 100 Cryo | – | |
| Sell Engine Components | 35 Cryo | – | |
| Buy A Meal | 15 Cryo | – | |
| Suncatchers | Debug Array Systems | Interface | Risky |
| Fix Broken Arrays | Endure | Risky | |
| Unseal The Bay | Unlock Neovend Printer | 3 Solheim Data | – |
Unseal The Bay
Once you finish the “No Place Like Holm” objective, you can access the Unseal The Bay area. To enter, you’ll need to enter three Solheim Data pieces. Doing so grants you access to a Neovend printer, which can create Rare Components for only two pieces of Solheim Data each. Unfortunately, you can only operate the printer six times before it becomes unusable.
Solheim Bunker Contract
After spending a bit of time at Holm’s Rock, your crew member Juni will inform you about a nearby Solheim Bunker. Upon her guidance, you will gain access to the Solheim Bunker Contract. It’s a good idea to have Juli as a crew member, and consider adding either Juni or Yu-Jin to fill the last spot; both are effective, so choose the one that complements your sleeper’s skills best.
When you reach the bunker, your first task is to get past the sealed entrance. If you have Yu-Jin or Bliss with you, this should be straightforward. Juni can easily handle the Access The Spire section. After that, the Warden will appear, and you’ll need to keep track of their Stress levels, which increase with each cycle you spend there.
You’ll have access to two areas: the Ring Facility and the Bunker Core. It’s best to clear the Bunker Core first. Once you finish the Bunker Cache objective and obtain the core, you can move on to searching the Ring Facility for hidden treasures.
Completing the Solheim Souvenir objective will reward you with a model of your rig, which will become relevant for future gameplay. Plus, finishing the Solheim Tech objective nets you two Rare Components.
Here’s a summary of the tasks within the Solheim Bunker:
| Location | Options | Type/Cost | Risk Level |
|---|---|---|---|
| Sealed Entry | Cut The Seal | Engineer | Risky |
| Force The Hatch | Endure | Danger | |
| Access Spire | Hack Doorway | Interface | Risky |
| Ring Facility | Explore Hab Units | Intuit | Risky |
| Search Storage | Endure | Risky | |
| Bunker Core | Extract Hardware | Engineer | Danger |
| Scrape Cache | Interface | Risky |
Explore Holm’s Rock and the Solheim Bunker to make the most out of your adventures in Citizen Sleeper 2!


