Quick Links
Phog, a downloadable content character from the original Japanese version of Xenoblade Chronicles X, made a free appearance in the West and is now available in the Definitive Edition. While the Switch version adds plenty of new features, Phog remains true to his character—thoughtful yet a bit forgetful.
This guide will help you navigate Phog’s recruitment mission, titled ‘Foggy Dilemma.’ You’ll find out how to begin, where to complete the necessary tasks, and learn more about your new companion. Let’s get started!
How to Start ‘Foggy Dilemma’
To begin the ‘Foggy Dilemma’, you must first complete Chapter 4’s main story mission, ‘The Ganglion Menace’. However, there’s a unique twist to this affair.
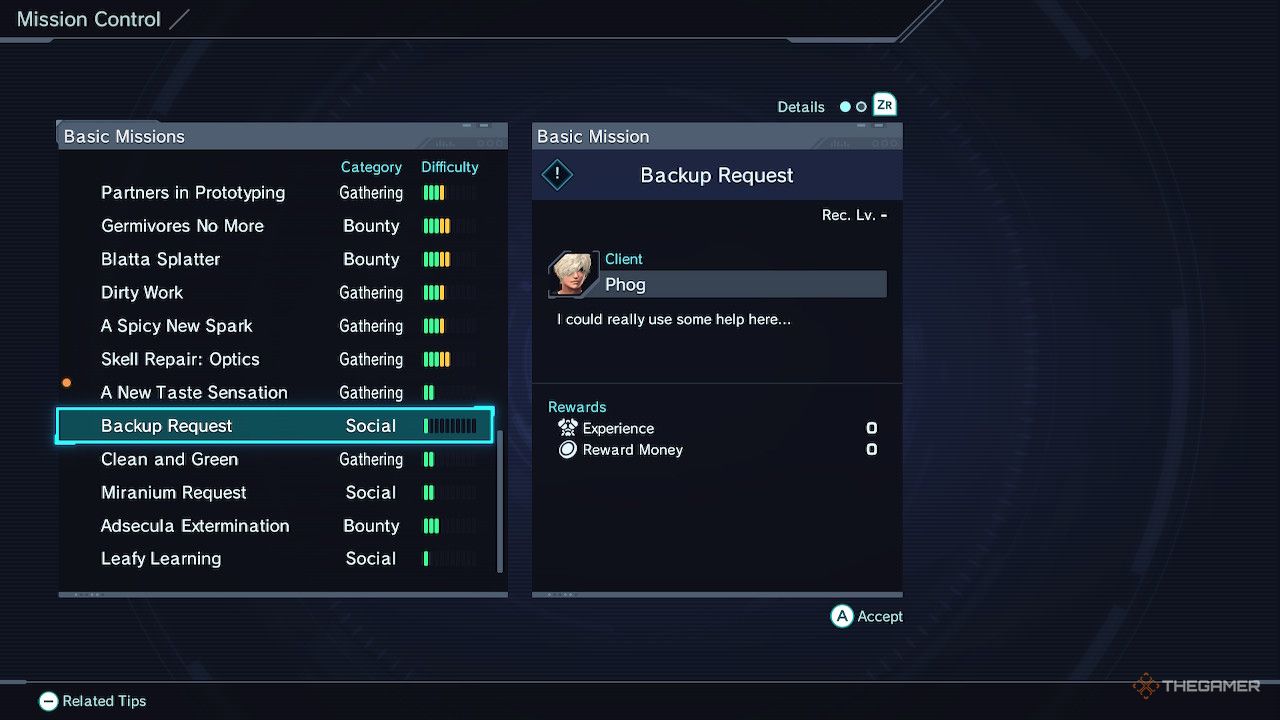
You’ll need to start with the mission titled ‘Backup Request’. This Basic Mission can be found at Mission Control in the BLADE Concourse of New Los Angeles. Be sure to accept this brief quest as it will lead you to Phog.
Many players have encountered issues getting ‘Backup Request’ to appear at Mission Control. First, check that you don’t have the maximum limit of 30 Basic Missions active at once, as that could block it from popping up. Make sure you’ve finished Chapter 4, and if it still doesn’t show, try completing a few other quests, return, and keep trying.
You will find Phog near the Water Purification Plant in the Residential District. Talk to him and enjoy your dialogue choices, as they don’t affect the quest’s outcome. It’s all just for fun!
Forget-Me-Not
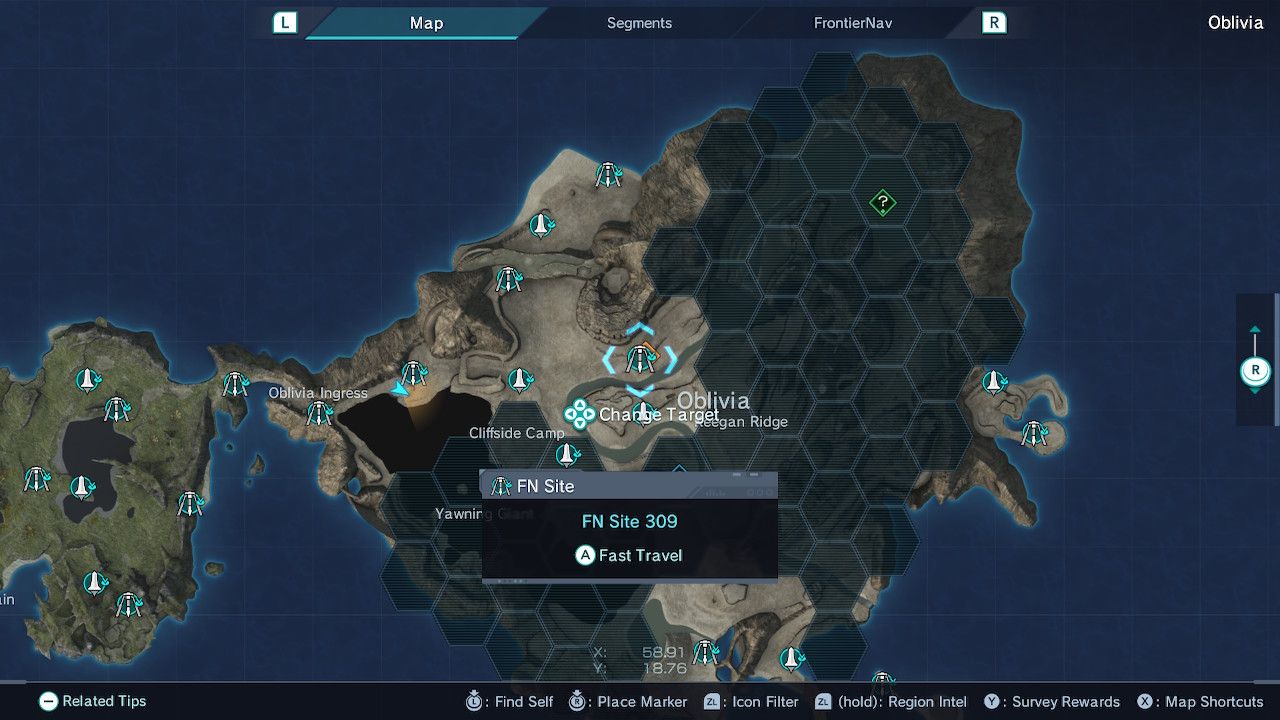
Phog requires your assistance in investigating some faulty data probes located in Oblivia. Your first stop is near FN Site 309, situated in the heart of Oblivia. If you have explored this area previously, you can fast travel there.
While ‘Foggy Dilemma’ features straightforward objectives, be aware that there are some strong creatures nearby. The level 27 beast near your initial location, Lake Falsaxam, can be quite challenging, especially if you’re under-leveled, so make sure to avoid it if you’re much lower in level.
After the cutscene at the lake, follow the quest marker for several hundred meters. You’ll arrive at Aaroy Plain shortly. After another brief scene, return to your original location, where you’ll find that Phog has surprisingly forgotten the entire trip!
You’ll head back to the second location afterward, but as seasoned players of Xenoblade Chronicles X advise newcomers, approach the objective during the night. You will face a battle soon, and there’s a level 65 Tyrant that tends to wander into the area during the day.
Completing the Mission

The Prone you will face aren’t too challenging, but their mech, called a Qmoeva Divider, can be a tougher opponent.
Despite being level 14 (and you may not be much higher), it can absorb a number of standard attacks. Use debuffs to weaken it if possible and keep an eye on your team’s health.
Once you’ve dealt with the enemies, ‘Foggy Dilemma’ will be marked as complete, and Phog will officially join your team! Phog is classified as a Winged Viper. However, from our perspective, he’s not the strongest member to have in your party. While he can hold his own, he’s basically a more limited version of Elma, who also comes with the added benefit of being just a bit cooler.
If you choose to bring him along, make sure to utilize his abilities like Shadow Runner, Hundred Shells, Electric Surge, and Primer Arts, while upgrading Background Noise and Master Edge for Skills. Or you might want to experiment with different approaches—Phog has worked reasonably well for us with this essential setup.