In the last chapter of The Stone of Madness, Brother Guillermo revealed that the Inquisitor was performing horrible experiments on individuals—surgically altering their brains while searching for the Stone of Madness. Outraged by these cruel actions, the group resolved to put an end to these appalling practices.
This led you to the monastery’s Wine Cellar, where the group systematically destroyed the tables used for these heinous experiments to foil the Inquisitor’s plans. Just as you were about to rejoice in your victory, Sister Elvira brought alarming news: the Abbot has been poisoned. In this chapter, let’s determine whether you can eradicate this corruption for good.
Accessing the Library
Your primary goal in this chapter is to enter the Library. Start your journey in the Cloister area. In the northeast corner of the Cloister, you will find a room with a green door that you need to open. This room is situated to the right of the one where Brother Guillermo inspected the mirror in the initial chapter.
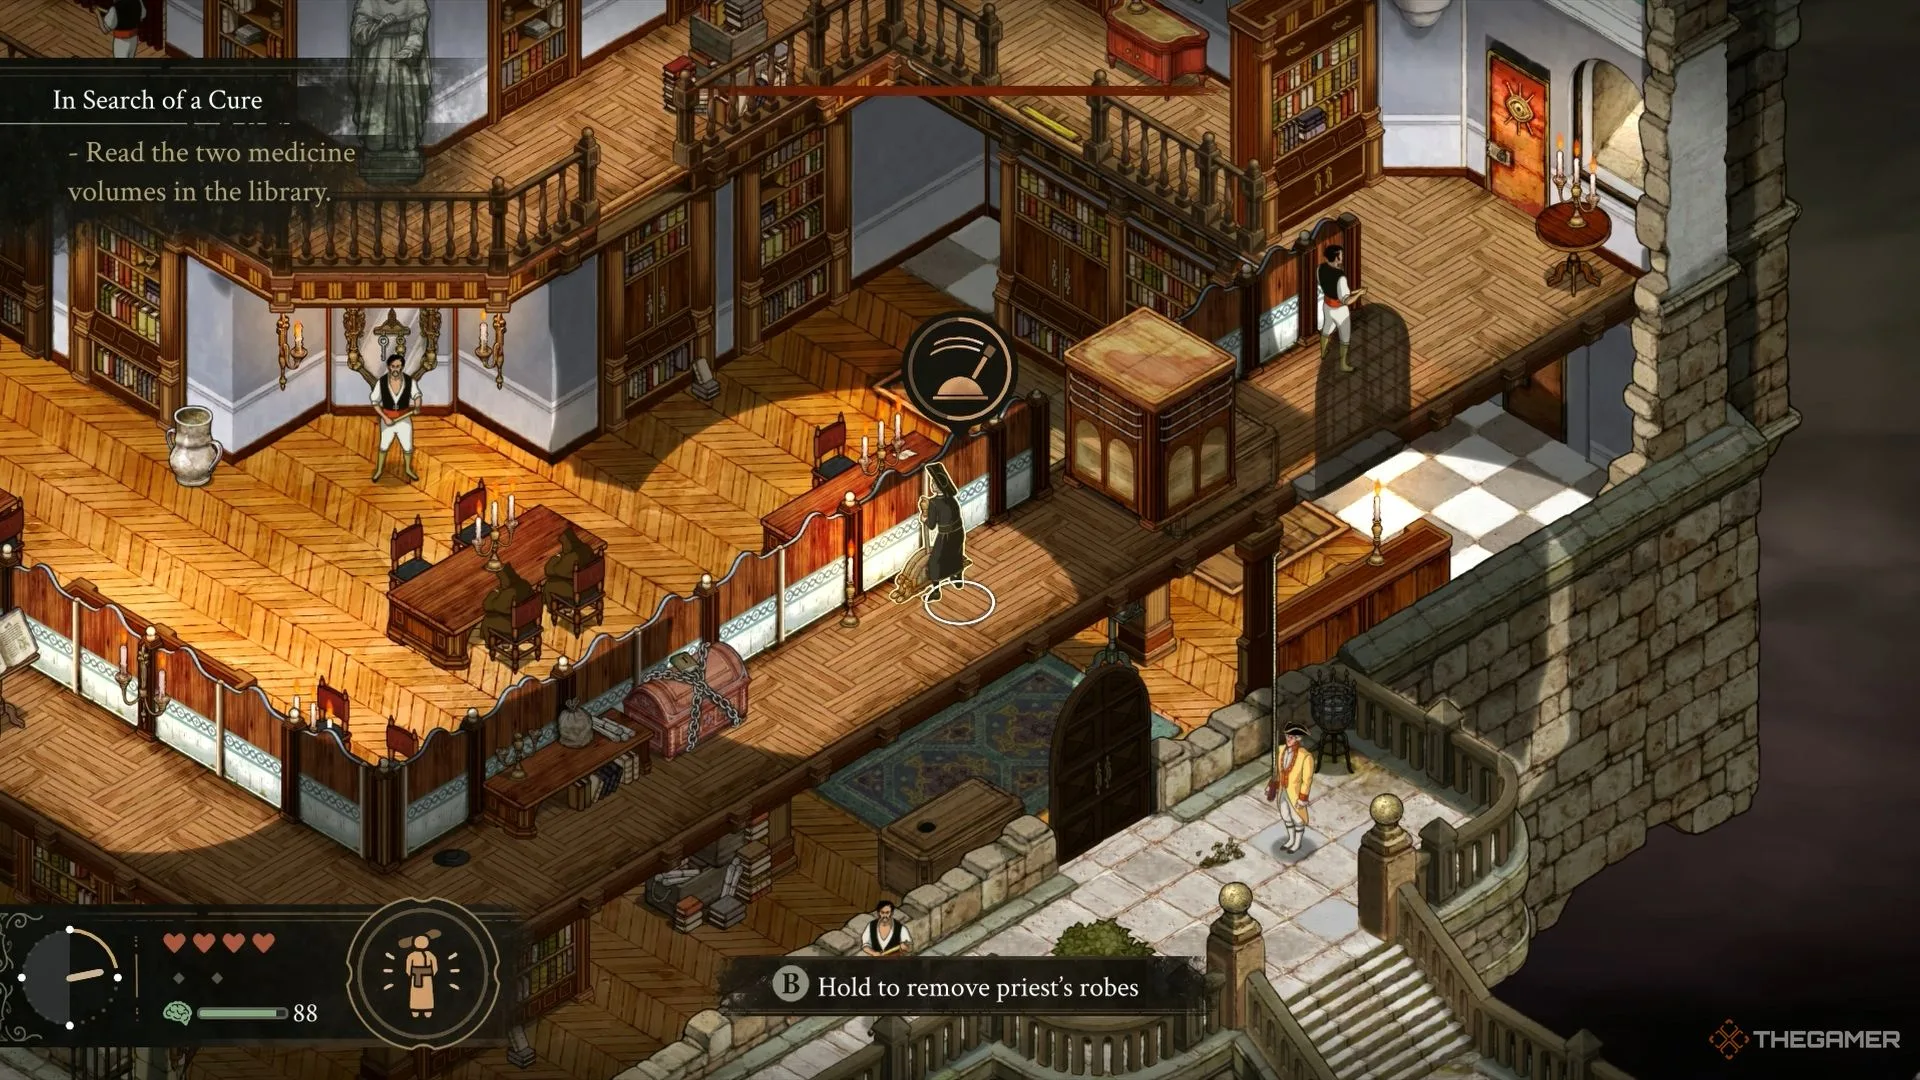
To avoid detection by the monks, have Alfredo don the priest robes. Then, use the other door in the area to access the Library. Upon entering the Library, you’ll encounter a doctor dressed in green. Typically, this area is off-limits, but staying close to the doctor will activate the ‘Protection of the Doctor’ effect, turning it into a safe zone.
This means you need to stay near the doctor while completing your task. If Alfredo is wearing the priest robes, you can wander freely without relying on the doctor’s protection.
Finding the First Large Volume
On the first floor, your objective is to shatter the mirror. Utilize Leonora for this task. Wait until the doctor is on the first floor, then quickly break the mirror and hide Leonora. Use Alfredo to retrieve the key hidden behind the shattered glass. This key will grant access to the chapel area on the west side of the Library, near the staircase leading to the second floor.
You’ll also discover a cellar door in this location, making future visits easier. Next, take down the guard who patrols near the stairs to the second floor. Either knock him out or eliminate him using Leonora, and then drag his body to the small section with red curtains. Open the iron-barred door adjacent to the stairs, then deal with the guard behind those bars.
Descend the ladder, and without attracting the soldier’s attention, activate the switch. This will create two shortcuts leading to the soldier’s room: one from the cellar door area and another from the main Library hall. Lastly, read the volume found in the soldier’s room to advance your objective.
Locating the Second Large Volume
To find the second volume, exit the Library’s first floor. Look up near the armed guard outside to identify a spot where you can throw a rope. Climb up using the rope, and then use a lockpick or crowbar to open the balcony door above. Next, have Alfredo ascend to the second floor via the rope.
For added safety, make sure Alfredo is dressed in the priest robes while you explore the upper level.
You can also access the second floor from within the Library by moving a large wooden crate on the first floor with Eduardo, though this method carries more risk.
Once on the second floor, read the volume found in the southernmost part. Use the switch here to create a bridge that acts as a shortcut to the opposite side of the second floor. After this, you won’t have any tasks pending except to advance to the next day. For the following day, your first task will involve gathering several materials, which include:
- Two Mandrakes
- Two Gold Teeth
- Five Medicines
Obtaining Two Gold Teeth
The first Gold Tooth can be found in the Nuns’ Garden, just east of the Laundry area. Here, you’ll notice a corpse at the top of the tower near the barn where you previously saw Brother Guillermo. However, the Nuns’ Garden presents challenges since Mother Superior is actively patrolling the area.
To avoid detection, enter the Nuns’ Garden from the Wine Cellar (Latrines). This way, you can access the upper level of the tower without being seen and find the first Gold Tooth.
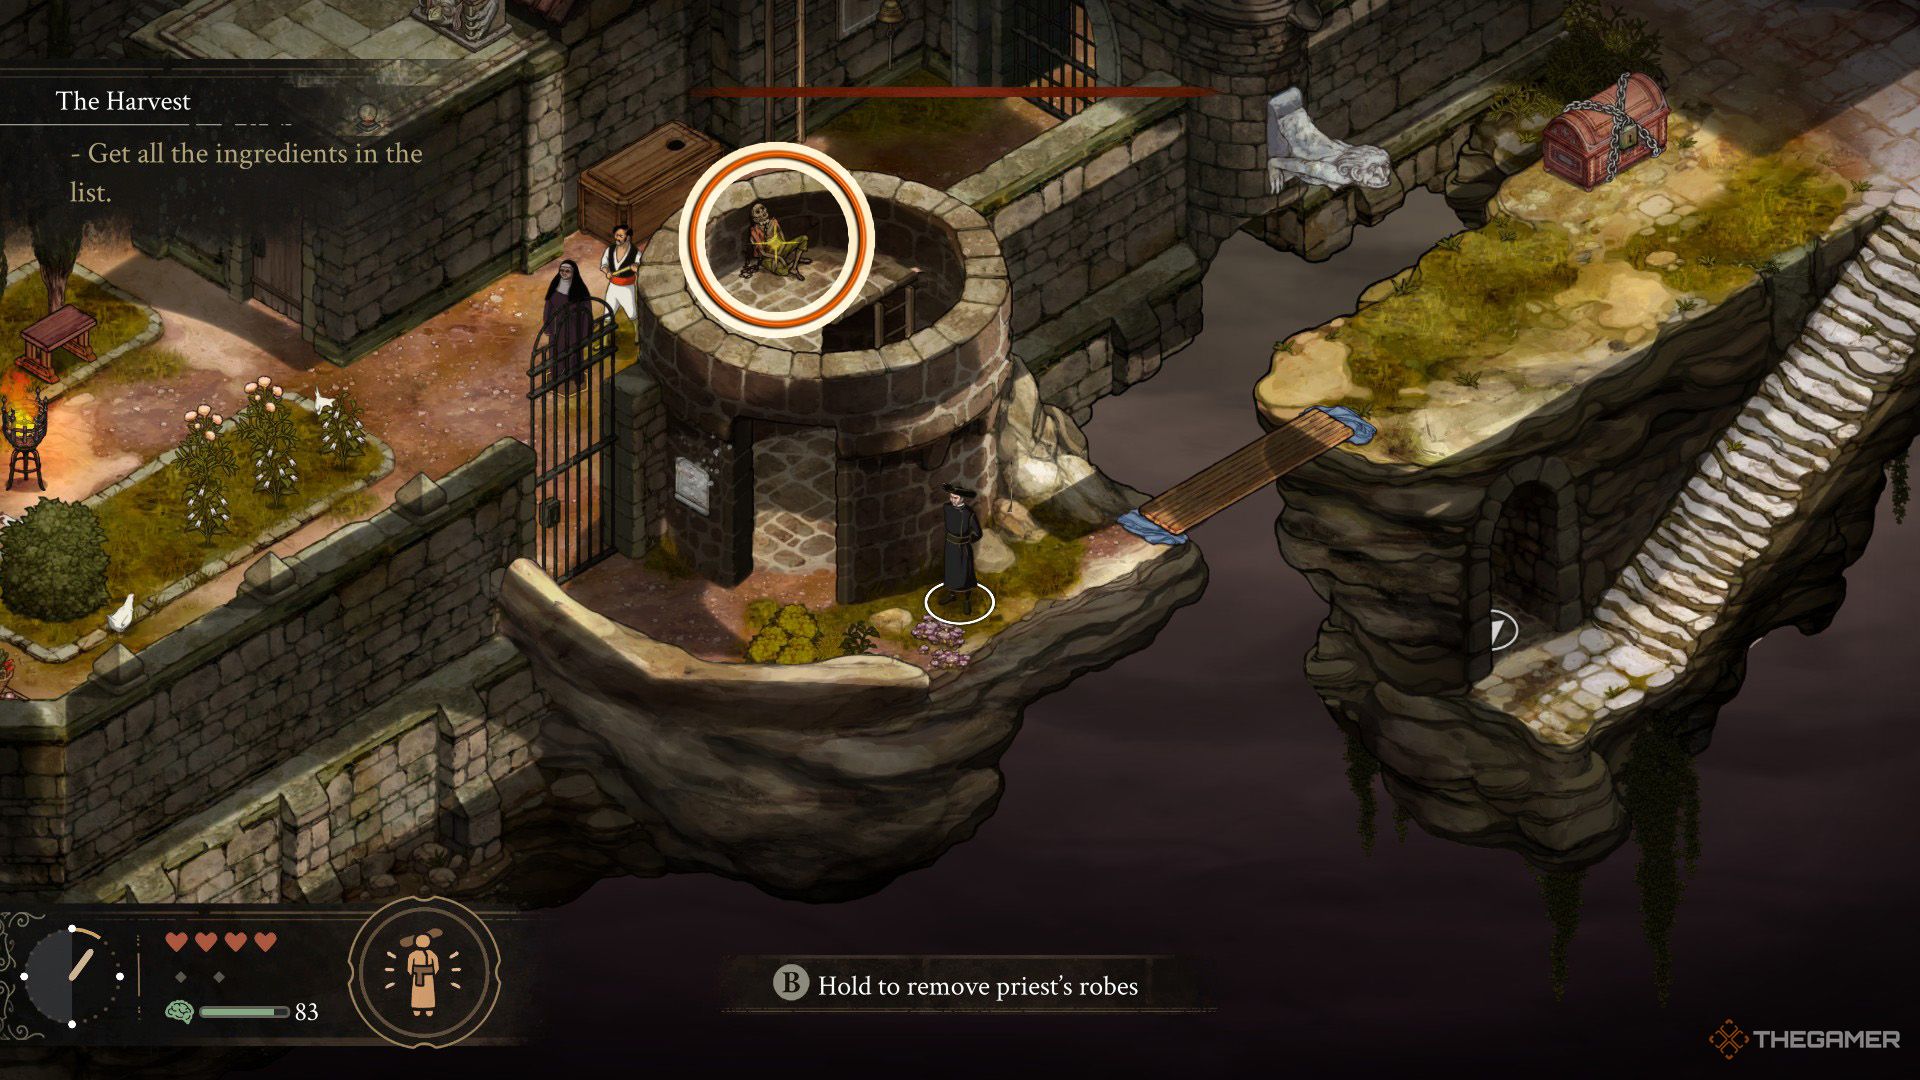
The second Gold Tooth is situated in the area above the Wine Cellar, just south of where the guard is stationed. You’ll notice an iron gate there, which triggers a cutscene. Have Amelia sneak through the iron bars to activate the switch that opens the gate.
After that, bring Eduardo to this area and push the wooden crate towards the hanging cage that contains a skeleton. If any inmates obstruct your path, use Leonora to knock them out with a plank and drag them away.
Collecting Two Mandrakes
To find the first Mandrake, head over to the Cloister and descend the right staircase in the southern section. There, you will see a statue of a woman holding a vase on her head. Use Eduardo to move the statue to the opposite side of the room.
It would be wise to subdue or eliminate the nearby guard to make this process easier.
Once the statue is repositioned, use Leonora to throw a rope to the higher section nearby. Climb up and examine the vase atop the statue’s head to collect the first Mandrake.
The second Mandrake can be found near the entrance of the Wine Cellar, where you will also meet the Doctor. As you approach, a cutscene will reveal the Mandrake’s position. While near the Doctor, you are still under his protection. Your first task is to eliminate the two guards around him. Then, have Eduardo move the large crate southward.
Once it’s in place, get Agnes to climb onto the crate. Since the guards may interrupt your plans, it’s advisable to deal with them first. After Agnes is on the crate, push it over the spikes and use a sickle to gather the Mandrake. If you lack a sickle, Panecillo, situated near the Nuns’ Garden, will provide you with one for free.
Also, to craft five Medicines, use Agnes’ Witches Cauldron skill at night. After you’ve gathered all your materials, wait for nightfall to proceed.
How to Access the Laboratory and Create the Medicine
The next day, start by talking to the Doctor located on the second floor of the Cloister. He’s situated in the room near the red-carpeted area, but you’ll need to unlock the door with either Eduardo or Leonora. Be careful of the Inquisitor and the armed guard on patrol during this operation. When you enter the room, ensure Alfredo is in his priest robes.
The Doctor will instruct you to find the laboratory keys, which are hidden in the Cloister’s garden. Check the weeds near the locked chest to locate the key. After that, head to the library, where chickens will have taken over the place. Go up the stairs by the cellar door and take out the guard there.
Speak with Tia del Nido; she will divulge the laboratory’s location in exchange for an egg. She’ll also inform you that the secret door to the laboratory can only be unlocked using the Inquisitor’s ring, which one of her chickens has swallowed.
To retrieve the Inquisitor’s Ring, throw a rope with Leonora to the area above the cellar door inside the library, and then climb up with Amelia. Crawl through the gap to reach the space above Tia del Nido. Proceed carefully and use Amelia’s Pickpocketing skill to steal the ring from the chicken.
Reaching the laboratory is simple. Go to the entrance of the Wine Cellar and head south to find it. A cutscene will reveal its location once you’re within the Wine Cellar. Just be careful of Mother Superior, who will be close to the entrance. The easiest way to distract her is to have Amelia throw chocolate, giving you the opportunity to slip into the laboratory.
Enter the laboratory with either Alfredo or Agnes. Be cautious of the guard inside, and create the medicine without being caught.
How to Administer Medicine to the Abbot
Your next task is to deliver the medicine to the Abbot, who is located in the red-carpeted area on the second floor of the Cloister. You can use Eduardo to place a plank as a shortcut to reach this area. Alternatively, bring Leonora to the room across from the red carpet, where the prisoners and the doctor were previously met. Eliminate the guard in this area.
Wait for the Inquisitor to move out of the way from the red carpet, and then unlock the iron-barred door leading to that area. Quickly enter the Abbot’s room and administer the medicine. This will provide him some relief, and he will outline the next steps in the strategy to stop the Inquisitor. With this, the chapter comes to a close.


