Sword Art Online: Fractured Daydream is not just fun because of its plot but also because of its gameplay mechanics. Whether you’re a veteran of the Sword Art Online anime or a newcomer, the game draws you in nicely. With nearly 20 characters available, you have plenty of options to find one that suits how you like to play.
Once you finish the main story, the cooperative mode, where you join forces with other players to tackle powerful bosses, is equally entertaining. New players might find the tutorial section a bit overwhelming with all the information, so here are some tips to help you kick things off smoothly.
Aim for the Highest Score
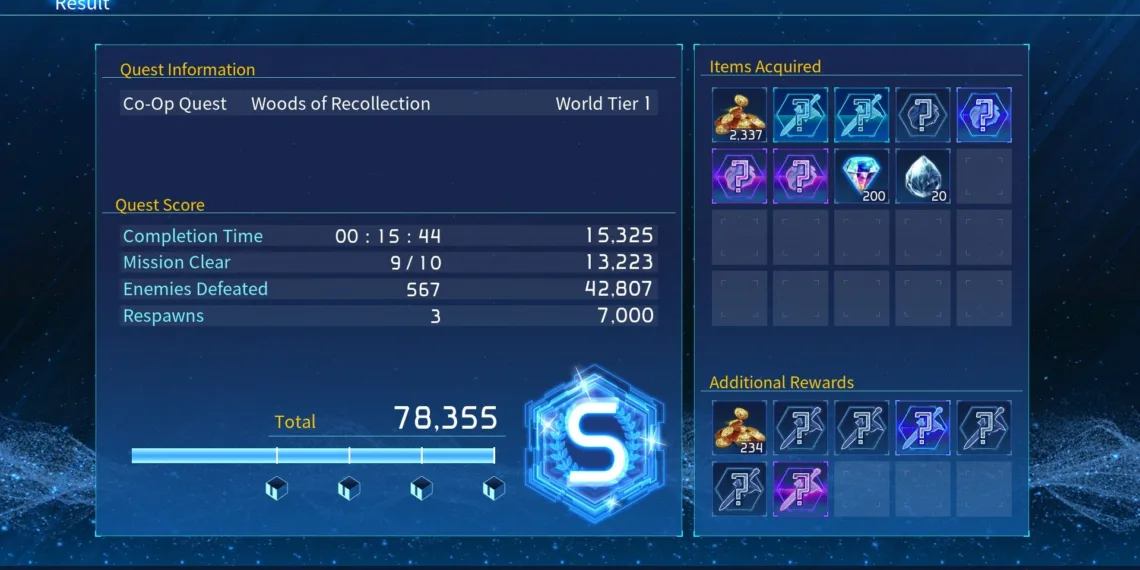
The game features five chapters, each offering a different number of quests. To earn an S rank in a chapter, you need to exceed a score of 50,000. Striving for the top score not only helps you achieve the S rank but also encourages you to explore the chapter’s map thoroughly and gather useful items.
To boost your score significantly, engage every enemy on the map, defeat Named Enemies, and complete Console challenges. It’s advisable to focus on these tasks before reaching the main objective of a quest, as finishing the last objective will complete the quest in about 20 seconds. Try to gather around 20,000 points before moving on to the final task.
Additionally, completing a quest without dying gives you an extra 10,000 points. To avoid death, make good use of your Healing Crystals, grab Healing Spheres from chests, and, if possible, include a support character in your team who can heal you. Be sure to explore the entire map and defeat all enemy groups.
Note: Tossing enemies into bottomless pits does not count as defeating them, so you won’t earn points this way.
If a quest involves protecting a character or object with a health bar, make sure they take minimal damage, as this affects your score. Remember that dying and respawning will cost you rewards, so prioritize staying alive during the quest.
Essential Survival Tips
In Story Mode, it’s essential to sharpen your Guard and Dodge skills. As you face stronger bosses, their attacks become more dangerous with larger areas of effect. Guarding is effective in reducing damage and is straightforward to execute.
However, dodging and positioning your character wisely is just as crucial, especially when controlling fragile characters that should maintain distance from bosses. Successful dodges can even offer minor healing, making it worth practicing.
Another way to recover health is by reviving fallen allies. Characters typically stay down for a bit before respawning; if you revive them, a health sphere will appear, which not only aids your teammate but also restores your own health.
Heal Strategically by Opening Chests
Chests in the game come in three types: bronze, silver, and gold, each recognizable by its appearance. All chests drop healing spheres, regardless of their tier, so targeting them is a handy way to restore your health if you’re out of Healing Crystals.
To easily spot chests, set the Mini-Map Display Area to ‘Far.’ This adjustment also helps you find Remnants, Data Cubes, and Consoles more easily.
If your HP is already full, avoid picking up healing spheres from chests. Instead, switch to a party member with lower HP to claim the sphere. Don’t overlook silver and gold chests; they contain better mods and useful items. This strategy ensures efficient healing while maximizing your rewards.
Elemental Advantage and Weaknesses in Combat
In this game, consider elements seriously. To maximize damage against enemies—especially bosses—using elemental advantages is crucial. Your regular attacks and advanced skills might deal elemental damage, but not all of them will align with an element.
The damage from your normal attacks depends on your weapon. To check the elemental damage of your advanced skills, look in the ‘Display Character Info’ section. Additionally, specific enemy types have weaknesses to certain elements:
| Element | Weak Against |
|---|---|
| Wind | Flying enemies, such as Evil Glancers |
| Fire | Beast and plant enemies like Blood Wolves |
| Water | Reptilian enemies like Lizardmen |
| Electric | Mechanical foes like Automatons |
| Light | Demonic enemies like Delinquents |
| Dark | Angelic enemies like Guardians |
Not every monster or boss will follow these weaknesses. In Co-op quests, it’s smart to check the bosses’ weaknesses and resistances before selecting your character.
To deal more damage, aim for the enemies’ weak points. When you hit a weak spot, the word "Weak" will pop up on your screen, so keep attacking until you’ve fully exploited it.
Unlock the Potential of Gauge Bars
Some characters have a gauge bar that can enhance their effectiveness in battles. Once the bar fills up, activating it boosts the character’s capabilities. For example, Kirito heals over time and reduces these skills’ cooldowns.
Each character’s gauge works uniquely. Heathcliff offers damage reduction and reflects physical damage to himself and allies when activated. Meanwhile, the Administrator accumulates a ‘Life’ counter by dealing damage, using it to unleash a powerful energy beam.
Mastering the gauge bar system is vital to maximizing each character’s potential.
Maximize Break Gauge and Counter Opportunities
Another critical mechanic to understand is the Break Gauge, which is the blue bar under the boss’s health. When it reaches 100%, the boss will be knocked down, creating a chance for you to strike. In these instances, prioritize fast attacks and advanced skills rather than slower moves.
The quicker you hit the enemy, the harder it is to deplete this bar, where slower skills may allow the enemy to recover.
When bosses perform dangerous attacks, ‘Counter Chance’ will appear on the screen. At this moment, move away from the boss and step into the yellow and white circles. Seizing this opportunity to interrupt the attack will deal damage and fill the Break Gauge.
Master Item Mechanics for Efficient Gameplay
Item mechanics in the game can appear intricate at first. To keep from becoming overwhelmed by items you collect in Story Mode, utilize the ‘Optimize Equipment’ option to ensure your character equips the highest-ranked items available.
Any unnecessary items can be broken down for Upgrade Materials and Col. However, take care not to dismantle items with great passive stats, especially for the Co-op portion of the game. You can use Effect Spheres to transfer effects from unwanted items to those you plan to use.
With Col, the in-game currency, you can craft items. Just remember that crafted items will match your Player Rank level, meaning they won’t be overly powerful if your level is low.
As you reach challenging Co-op stages, it becomes beneficial to craft items using Col. In Story Mode, completing high-ranking quests generally grants sufficient items. Also, ensure your items are aligned with your Player Rank, as characters with low-level gear may find the game increasingly difficult.
From Story Mode to Co-Op Challenges
Items you gather in Story Mode will suffice if you score well, as that mode isn’t designed to be extremely challenging. Think of Story Mode as the gate to Co-op, where the real difficulties, like Extreme Boss Raids, arise. By the end of Story Mode, your player level is likely to reach 20, prepping you for Co-op quests.
In the lobby, join any Aid Requests you come across. These requests can enhance your item collection and boost your Player Rank. As you dive into Co-op quests, keep in mind the Awakening Level System starts you at level one, so level up by defeating enemies before facing bosses.
Once you complete Tier One Co-op quests, you will unlock the first Co-op boss fight. This boss is the best way to earn EXP until Tier Three quests, as it is easily defeated, making it a great way to level your character and Player Rank.


