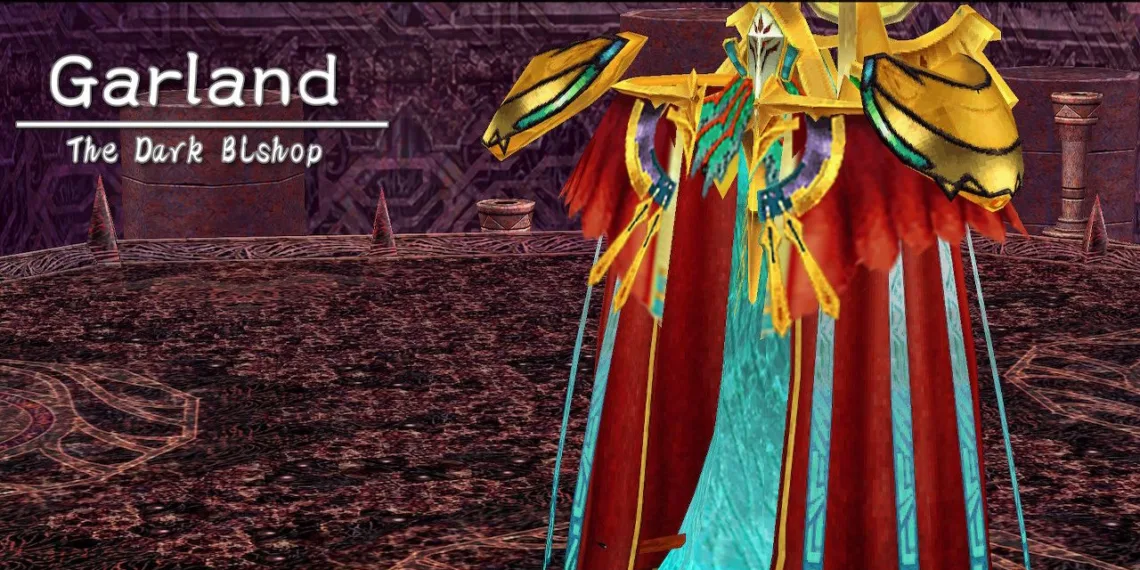
While Galbalan is the main antagonist in Ys Memoire: The Oath In Felghana, the emotional weight of a personal betrayal also plays a significant role. The revelation of Bishop Nikolas as one of Galbalan’s followers during the Clock Tower scene is truly heartbreaking, and now he stands as the final obstacle between you and his master.
This time around, you must defeat Bishop Nikolas Garland. He presents a different challenge from your first encounter, but he is definitely beatable. Let’s put his beliefs to the test.
Preparing for Dark Bishop Garland
When facing Garland, aim to be around level 45-50. The higher your level, the better your chances. While Garland isn’t as tough as Chester, he can still inflict considerable damage, making it helpful to have increased HP and Strength.
The Talisman of War is a must-have item because of its advantages. You can acquire this by maxing out your Raval Ore trade with Antonio and then giving the Jade Ring to Randolph. This will extend your Boost Mode, significantly aiding both your offense and healing capabilities.
Additionally, obtain the Brave Sword during the story, as it’s essential for breaking Garland’s shield in battle. Make sure it’s fully upgraded before attempting the fight.
If you’re finding the battle particularly tough, consider purchasing the Spirit Necklace in Redmont for 60,000 Gold. This item can revive you with full health upon death, but it will be consumed afterward. It’s a significant expenditure, so only use it if absolutely necessary; otherwise, save it for your encounter with Galbalan.
Defeating Dark Bishop Garland
As the battle begins, Garland will transform into a larger version of himself and activate a shield. The good news is that you can break the shield with a single strike from the Brave Sword.
Once the shield is down, go on the offensive. Garland will likely retaliate with lightning bolts; try to dodge them, but prioritize dealing damage since the bolts won’t cause severe harm.
After a short while, he’ll generate a gust of wind that can push you away to restore his shield. Just repeat the process. While his shield is active, he may summon his scythe when you get too close. If he swings it low, jump over it before attacking. If he swings it high, stay on the ground to avoid it.
Utilizing fireballs is an effective strategy as well, allowing you to maintain damage while evading his stronger attacks.
Garland will also perform a sword swing that’s fairly easy to dodge, and he’ll summon light orbs that will follow you. Just keep moving, and they’ll eventually fade away.
You can also dash into the orbs using the Terra Bracelet to destroy them and take no damage.
As his health decreases, Garland will execute a new attack where he charges at you like a rocket, with the camera adjusting to help you track his movements. He’ll dash around the arena three or four times; just step aside each time. Jumping increases your chances of being hit.
Eventually, he’ll unleash his most deadly attack. Garland will remain stationary and generate a vortex aimed at pulling you toward him. If you get caught, he’ll follow up with an unblockable combo that can be devastating. When this happens, run as far away as possible, and utilize the Terra Bracelet to add extra distance. Avoid jumping, as it could pull you closer.
If you do get drawn in, activate your Boost to reduce the damage you take and give yourself a slight healing boost with Double Boost.
This covers all of Garland’s attacks. However, you can’t fully deplete his HP. When it reaches one HP, he’ll enter a supernova state, trying to pull you in for a sacrificial explosion. Use the same tactics as with previous vortex attacks to maintain your distance. If you’re low on health, this can easily wipe you out.
If you avoid the explosion, Garland will be defeated, leading to a brief cutscene where he expresses regret before you can proceed to battle Galbalan. Just remember to save your game first!


